
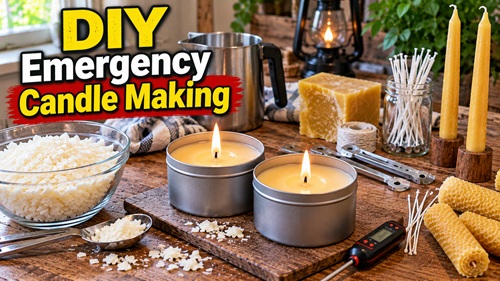
A Practical Guide to Making, Testing and Storing Homemade Candles
Making candles at home is one of those older skills that’s still worth knowing, even if you already have flashlights, rechargeable lanterns and other emergency lighting. Candles don’t need batteries or electricity, and the basic materials can be stored for future use. They also have limitations, especially the risk of fire, so battery-powered lighting should remain your first choice during an outage. But learning how to make a dependable candle gives you another option and helps you understand something that most people simply purchase without thinking much about how it works.
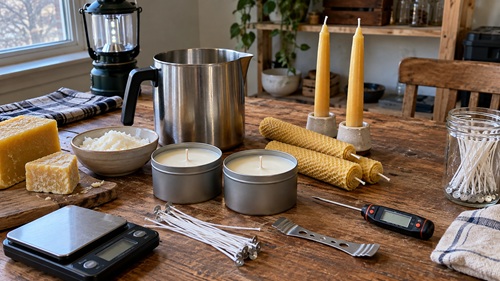
The process isn’t especially complicated, but there’s more to it than melting wax and putting a piece of string in the middle. The wax, wick and container all affect how the finished candle burns. A wick that’s too small may produce a weak flame and leave a tunnel through the center of the wax. One that’s too large may burn too hot, create excessive smoke or overheat the container. Even the way the wax cools can affect the finished candle. These are things you can learn through a few small projects without buying a lot of specialized equipment.
For emergency use, plain candles make the most sense. Fragrance oils, decorative materials and elaborate shapes aren’t necessary when the purpose is providing light. They also introduce additional variables that can make it harder to determine why a candle burns well or poorly. The first goal should be to produce two simple candles using the same materials, test them under controlled conditions and see whether you can repeat the results. Once you’ve learned that process, making other types of candles becomes much easier.
Choosing Wax, Wicks and Containers That Work Together
A container candle is a good place to begin because the wax remains inside a suitable vessel as it burns. You don’t need a mold, and you don’t have to worry about removing the finished candle from its container. The important part is choosing a vessel specifically manufactured for candle use. Ordinary drinking glasses, decorative jars and random household containers aren’t automatically safe simply because they’re made of glass or ceramic. Uneven heating can cause unsuitable containers to crack, particularly when the flame burns lower into the wax.
For your first batch, choose two identical candle-making containers. Using the same size and shape makes it easier to compare the results later. A small candle tin or a candle-rated glass container with an internal diameter of roughly 6 to 7 centimeters is a manageable starting point. The exact dimensions aren’t critical, but you need to know the diameter because it affects which wick you’ll use.
Soy container wax is a reasonable choice for beginners. It’s widely available and sold in formulations intended specifically for poured candles. Beeswax and paraffin can also be used, although the formulations and handling requirements differ. If you choose beeswax, make sure the wax is suitable for the type of candle you’re making. Some waxes are better suited to freestanding candles than containers, and the supplier’s instructions should guide your selection.
The wick deserves just as much attention as the wax. A candle wick works by drawing melted wax toward the flame, where the wax provides fuel for combustion. Modern candle wicks are manufactured in different sizes and constructions because the amount of fuel they deliver needs to match the candle’s diameter and wax formulation. A wick that works well in a narrow beeswax taper may behave very differently in a wide soy container candle.
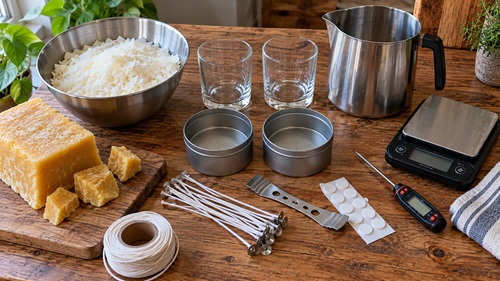
Measure the inside diameter of your container and check the wick manufacturer’s sizing recommendations for your particular wax. Don’t choose a wick based only on how thick it looks. Wick size designations vary between manufacturers, and a wick that appears larger isn’t necessarily the correct choice. For this first project, purchase pre-tabbed wicks recommended for your wax and container combination. The metal tab helps secure the wick to the bottom of the container and keeps it positioned while the wax is poured.
You’ll also need a digital scale, thermometer, heat-resistant pouring pitcher, saucepan for a water bath, wick adhesive and a wick-centering tool. These are relatively simple supplies, and most can be reused for future batches. A pouring pitcher with a spout makes it easier to transfer melted wax without spilling, while a thermometer helps you follow the wax manufacturer’s temperature recommendations instead of guessing.
A Complete Beginner Project: Making Two Emergency Container Candles
For this example, we’ll make two small, plain container candles using approximately 300 grams of soy container wax. Each candle will contain about 150 grams of wax, although the exact amount must be confirmed against the capacity of the containers you select. Use two identical containers specifically rated for candle making, two compatible pre-tabbed wicks and the basic equipment described above. Leave out fragrance and coloring so you can concentrate on the wax, wick and burning performance.
Begin by measuring the internal diameter of each container and confirming the wick recommendation. If the wax supplier provides a wick-sizing chart, use the recommendation for your wax formulation and container diameter. If several wick sizes are suggested, choose an appropriate starting size for testing rather than assuming one will automatically work. Record the wax name, wick designation and container dimensions in a notebook. If the finished candle burns well, you’ll want those details when making another batch.
Next, determine how much wax the containers will hold. If the manufacturer provides a recommended wax fill weight, use that figure. Otherwise, measure the intended fill volume using water, then convert that volume to an estimated wax weight using the wax supplier’s density or fill-weight guidance. Don’t assume that a container holding 150 milliliters of water will hold exactly 150 grams of wax. Wax is generally less dense than water, and the amount required varies by formulation. For this example, we’ll assume you’ve confirmed that each container requires approximately 150 grams of wax.
Weigh out 300 grams of wax, plus a small additional allowance if needed for wax that remains in the pouring pitcher. The extra amount should be modest; there’s no reason to melt a large surplus when you’re making only two candles. Write down the actual weight you use so your next batch can be measured consistently.
Prepare a stable work surface where the candles can remain undisturbed while cooling. Use a heat-resistant protective covering and keep paper, cloth, packaging and other combustible materials away from the heating area. Wear closed shoes and clothing that protects your skin from hot wax. Keep children and pets away from the work area, and have an appropriate fire extinguisher accessible. Hot wax can cause serious burns, and overheated wax can ignite.
Clean and thoroughly dry the containers, checking for cracks, chips or other damage. Attach the metal wick tab to the center of each container using an adhesive intended for candle making. Press it firmly into place and make sure it remains secure. The wick should stand upright, with a centering bar across the top of the container to keep it from leaning while the wax is poured and cooled. A wick positioned too close to the side can cause uneven heating and create a safety problem later.
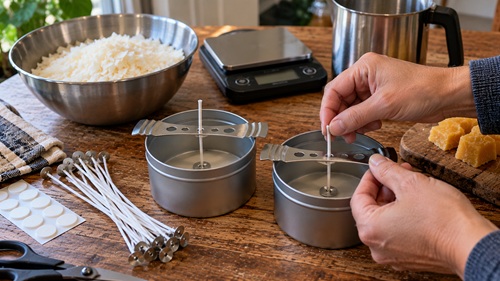
Place the measured wax into your heat-resistant pouring pitcher and set the pitcher securely in a saucepan containing water, creating a controlled water bath. Heat the water gently and allow the wax to melt gradually. Don’t place the wax directly over a burner or open flame, and don’t allow water to splash into the wax. Use your thermometer to monitor the wax temperature and follow the supplier’s melting and pouring recommendations. Different soy wax formulations can require different temperatures, so a single universal setting wouldn’t be appropriate.
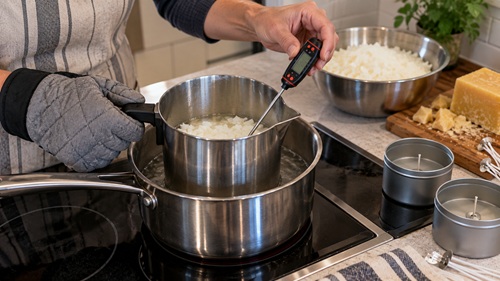
Once the wax has melted and reached the recommended pouring temperature, carefully remove the pitcher from the heat using suitable protection. Pour slowly into the prepared containers, leaving the headspace specified for the container and wax system. Avoid pouring directly against the wick or moving the container unnecessarily. Check that the wick remains centered before leaving the candles to cool.
Allow the candles to cool naturally on a stable, level surface away from drafts. Don’t place them in a refrigerator or freezer to speed up the process. Rapid cooling can cause uneven surfaces, cracks or separation between the wax and container. Depending on the wax formulation, you may notice a shallow depression forming around the wick as the candle solidifies. Minor surface imperfections aren’t necessarily a problem, but deep cracks, damaged containers or unusual separation should be investigated before the candle is burned.
Once the wax has fully hardened, remove the centering tool and trim the wick to approximately 6 millimeters, or one-quarter inch. Follow the wax manufacturer’s recommended curing period before conducting your first burn test. Some formulations benefit from additional time after pouring, and testing too early may not accurately represent how the finished candle will perform.
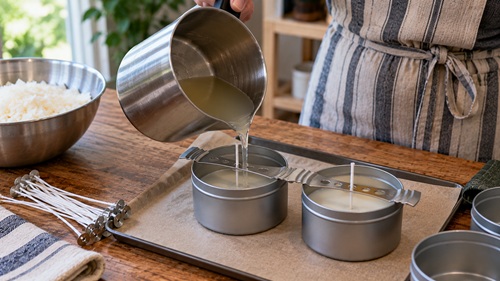
At this point, you’ve made two homemade container candles. They may look ready to use, but don’t add them to your emergency supplies yet. They still need to be tested for flame stability, soot production, wax consumption and container heating. A candle that looks perfectly good on the workbench can behave quite differently after it’s been burning for a while.
What Does It Actually Cost to Make Your Own Candles?
One question worth considering is whether homemade candles save money compared with buying them. The answer depends on how much wax and equipment you purchase, the type of containers you use and how many candles you make. A small batch of two candles may cost more per candle than buying commercially manufactured emergency candles, particularly if you’re purchasing all the equipment for the first time.
For a realistic example, consider the following illustrative Canadian-dollar budget. These are planning figures, not verified current retail prices, and actual costs will vary by supplier and quantity purchased.
|
Material or equipment |
Estimated cost (CAD) |
|---|---|
| 300 g soy container wax | $5–$9 |
| Two compatible pre-tabbed wicks | $1–$3 |
| Two candle-rated containers | $6–$12 |
| Wick adhesive and minor consumables | $1–$3 |
| Consumable batch cost | $13–$27 |
| Reusable pouring pitcher | $15–$25 |
| Thermometer | $10–$20 |
| Digital scale | $15–$30 |
If your two candles cost $20 in consumable materials, that’s approximately $10 per candle before accounting for reusable equipment, shipping, electricity or your time. Making larger batches may reduce the cost per candle, particularly when wax and wicks are purchased in bulk. Reusing suitable candle-making containers may also reduce material costs, provided they’re undamaged and remain appropriate for the candle design.
The reusable equipment changes the economics considerably. If you spend $50 on a pitcher, thermometer and scale, those costs are spread across every batch you make. Producing only two candles makes the initial investment relatively expensive. Producing fifty candles over time distributes the equipment cost much more widely.
But cost isn’t the only reason to learn the skill. Making candles teaches you how to work with wax, select suitable wicks, control temperatures and evaluate burning performance. You also gain the ability to produce candles using stored candle-making materials rather than depending entirely on finished products. For someone interested in self-reliance, that knowledge has value even when the homemade candles aren’t cheaper.
There’s also a practical limitation to consider. If your main objective is emergency lighting, commercially manufactured LED lanterns and rechargeable lights will usually provide better illumination with less fire risk. Candle making is worth learning as an additional skill, but it shouldn’t replace safer lighting equipment simply because the materials are inexpensive or available.
Testing Your Homemade Candles Before Depending on Them
Once your two container candles have cooled and completed the wax manufacturer’s recommended curing period, it’s time to find out how well they actually burn. This is where you’ll learn whether the wick, wax and container work properly together. A candle can look perfectly good after pouring, with a smooth surface and neatly centered wick, but that doesn’t tell you whether it will produce excessive soot, develop a deep tunnel or overheat its container. Those problems often appear only after the candle has been burning for a while.
Choose a stable, noncombustible surface where you can keep the candle in sight throughout the test. Keep it at least 30 centimeters (12 inches) away from anything that can burn, including curtains, paper, furniture and other supplies. Avoid areas with strong drafts, since moving air can make the flame flicker and burn unevenly. Keep children and pets away from the testing area, and make sure you have an appropriate way to extinguish the flame. Never conduct a burn test while you’re sleeping, leaving the house or occupied with something that prevents you from watching the candle.
Before lighting it, weigh the complete candle and container together and record the result. Write down the wax formulation, wick size, container diameter and amount of wax used. Trim the wick to approximately 6 millimeters, or one-quarter inch, and check that no loose wick trimmings or other debris remain on the wax surface. If the container has developed cracks, chips or other damage, don’t use it. A damaged container may fail when exposed to heat.
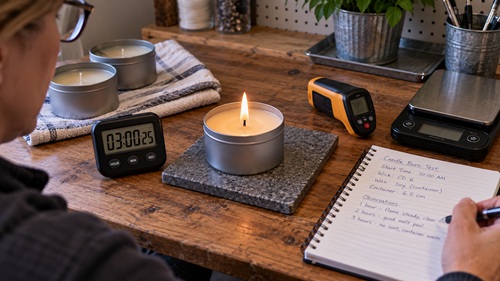
Light the candle and observe what happens during the first several minutes. The flame should settle into a reasonably stable burn, and a small pool of melted wax should begin forming around the wick. As the candle continues burning, that pool will generally become wider. How quickly it spreads depends on the wax, wick and container diameter. Some candle makers expect the melted wax to reach the edges of the container during the first burn, but this isn’t a universal requirement. Certain wax formulations develop a wider melt pool as the candle burns lower into the container.
Watch the flame as well as the wax. A flame that becomes unusually tall, produces heavy soot or repeatedly flares may indicate an oversized wick, excessive wick length or another problem with the candle design. A flame that remains very small or struggles to stay lit may indicate an undersized wick or a mismatch between the wick and wax. If the candle begins behaving unsafely, extinguish it and allow everything to cool before investigating. Don’t attempt to correct a burning candle by moving the wick, pouring out melted wax or adding materials to the container.
Container temperature is another important part of the test. Glass and metal candle containers can become hot enough to cause burns, even when the candle is operating normally. Excessive heating may indicate an unsuitable wick or container. If you have an appropriate surface-temperature thermometer, record temperatures at consistent locations during the test. Compare the results with the component supplier’s testing guidance. A container that becomes dangerously hot, cracks or shows signs of failure should not be used again.
Don’t assume that one successful burn means the candle is ready for emergency storage. As the wax level drops, the distance between the flame and the container changes. Heat may accumulate differently near the bottom, and a candle that behaved well during its first burn can develop problems later. Allow the candle to cool completely between tests, trim the wick before relighting and observe its performance through successive burn cycles.
Follow the wax, wick and container suppliers’ guidance for test duration and safe end-of-use limits. If you don’t have enough information to establish those limits, don’t assume the candle can be burned until all the wax is gone. Stop using the candle before the remaining wax reaches an unsafe depth, and don’t continue testing a design that shows signs of excessive heating or container damage.
A useful experiment is to make another small batch using the same wax and containers but a different wick size within the supplier’s recommended range. Test the candles under comparable conditions and record what changes. You may find that one wick produces a steadier flame, less soot or more even wax consumption. Changing one variable at a time makes it easier to understand what caused the difference.
Measuring Candle Burn Time and Planning Emergency Lighting
For emergency preparedness, knowing how long a candle actually burns is more useful than simply counting how many candles you have stored. Two candles that look almost identical can have different burn times because of their wax formulation, wick size and construction. A larger flame may produce more light but consume wax more quickly, while a smaller flame may last longer without providing enough illumination for the tasks you need to perform.
You can begin estimating burn time by measuring how much wax is consumed during a controlled test. Suppose one of your finished candles contains 150 grams of wax. Weigh the complete candle and container before lighting it, then conduct a supervised burn for a period permitted by the component supplier’s guidance. For this example, assume the candle burns safely for three hours. After extinguishing it and allowing it to cool completely, weigh it again.
If the complete candle and container now weigh 18 grams less than before the test, approximately 18 grams of wax were consumed. Dividing 18 grams by three hours gives an average consumption rate of 6 grams per hour. At that rate, the original 150 grams of wax would theoretically provide 25 hours of burning.
That calculation is useful, but it doesn’t mean you should label the candle as a 25-hour emergency light. The burn rate may change as the candle burns lower, and some wax must remain unused at the bottom of the container for safety. The calculation gives you an estimate that needs to be checked against the results of repeated testing.
|
Measurement |
Example result |
|---|---|
| Starting wax weight | 150 g |
| Test duration | 3 hours |
| Wax consumed | 18 g |
| Average consumption | 6 g/hour |
| Theoretical burn time | 25 hours |
| Verified usable burn time | Determined by further testing |
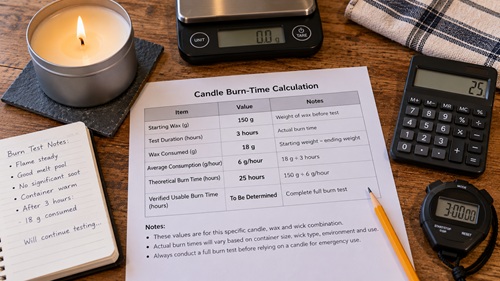
Continue recording the duration and wax consumption during subsequent supervised burns. Stop when the candle reaches its safe end-of-use point or shows any unsafe behaviour. Add up the actual hours it burned safely. That total is more useful for planning than the theoretical calculation alone.
Suppose your candle eventually provides 20 hours of verified usable light. If you want four hours of candlelight each evening during a ten-day power outage, you’ll need 40 hours of lighting. Two candles with 20 hours of usable burn time each would theoretically cover that schedule, assuming you’re using one candle at a time. If you need several candles burning simultaneously to illuminate a room, your supply will be consumed much faster.
There’s another limitation worth testing. A candle can burn for many hours without producing enough light for detailed work. Place your candle in a safe location and try reading a printed emergency instruction sheet from a reasonable distance. Compare that with the light produced by a battery-powered lantern. Don’t move the candle closer to paper, clothing or other combustible materials just to improve visibility.
You may discover that one candle provides enough light to locate nearby objects but isn’t particularly useful for preparing food, reading instructions or moving safely through a dark house. That’s worth knowing before an outage. Burn time matters, but so does the amount of usable light you receive.
Comparing Homemade Candles With LED Emergency Lighting
One of the reasons candle making is worth learning is that it gives you another way to produce light without relying on a charged battery. But that doesn’t automatically make candles the best emergency lighting option. In most household situations, LED lanterns and flashlights are safer, brighter and easier to use.
A homemade candle provides a small area of light around an exposed flame. It must remain on a stable surface, away from combustible materials, and someone needs to supervise it while it’s burning. You can’t safely leave it operating while everyone sleeps, and carrying it around a cluttered home introduces additional risks.
An LED lantern doesn’t produce an exposed flame and can often illuminate a larger area more evenly. Rechargeable models can be powered from suitable battery banks, solar charging systems or other backup electricity sources. Battery-powered models also allow you to keep replacement batteries in storage. Their actual operating time depends on the battery capacity and brightness setting, so those figures should be tested rather than assumed.
For example, imagine a household experiencing a three-day winter power outage. A battery-powered lantern might be used to illuminate the kitchen during meal preparation, while a flashlight provides safer lighting when moving between rooms. A homemade candle could provide supplementary light at a supervised table, but it shouldn’t replace the lantern for cooking, navigating stairs or attending to someone who needs medical assistance.
The same applies to nighttime lighting. A candle must be extinguished before sleeping, while an appropriate battery-powered night light or lantern may provide a safer option for someone who needs to get up during the night. This is particularly important in homes with children, pets or people who may have difficulty moving safely in darkness.
A practical way to compare your equipment is to choose three common tasks: reading a printed document, preparing a simple meal and locating emergency supplies. Test the lighting provided by your candle and LED lantern under safe conditions. Record which source provides enough light, how easy it is to position and whether it can be used without creating additional hazards.
You’ll probably find that the lantern is more useful for most tasks. That doesn’t make the candle-making skill unnecessary. It simply helps you understand where candles fit within a larger emergency lighting plan.
Making Rolled Beeswax Candles Without Melting Wax
Once you’ve learned how to make and test a basic container candle, rolled beeswax candles are worth trying. They require very little equipment and don’t involve handling molten wax. They’re also a good way to understand how candle thickness, wick position and wax firmness affect the finished product.
You’ll need beeswax sheets manufactured for candle making, compatible candle wicks, a ruler, scissors and a clean work surface. Beeswax sheets often have a honeycomb texture and are flexible enough to roll when they’re at a suitable room temperature. If the sheets have been stored somewhere cold, allow them to warm naturally before working with them. Cold beeswax can crack when bent, while excessively warm sheets may become soft and difficult to handle.
Start by deciding how tall and thick you want the finished candle to be. The height is determined by the dimension of the sheet running alongside the wick, while the thickness depends on how much wax is rolled around it. For your first attempt, choose a modest size that will fit securely into a suitable candle holder. Don’t make an unusually thick candle simply because you have a large sheet of wax available. The wick still needs to be matched to the finished diameter and wax type.
Lay the sheet flat and place the wick along one edge, leaving enough wick extending above the top to trim it after rolling. Press the wax gently around the wick so it remains in position, then begin rolling the sheet into a tight cylinder. Try to keep the ends even and the wick centered as you work. If the sheet begins cracking, stop and allow it to warm slightly rather than forcing it. Continue rolling until the candle reaches the intended diameter, then press the outer edge gently against the body of the candle to help it remain closed.
Check that the finished candle is straight and that the wick runs through its center. Trim the exposed wick to approximately 6 millimeters. The candle should fit securely into a noncombustible holder capable of containing melted wax. If the base is uneven, correct it while the wax is still workable rather than trying to balance the candle in an unsuitable holder.
Some people decorate rolled beeswax candles with dried flowers, herbs, ribbons or other materials. Those decorations may look attractive, but they shouldn’t be attached to candles intended to be burned. Dried plant material, paper and fabric can ignite or interfere with the flame. For emergency use, leave the candle plain and concentrate on making it burn reliably.
Rolled beeswax candles don’t require the same cooling and curing process as poured container candles, but they still need to be tested. Place the finished candle in a suitable holder and observe it during a controlled burn. Watch for excessive dripping, an unstable flame, uneven melting or the outer wax layers separating. A candle that burns poorly may need a different wick size, tighter rolling or a change in diameter.
If you want to compare different designs, make two candles using the same beeswax sheets and wick type but different finished diameters within the wick supplier’s recommended range. Record how they burn and how much wax they consume. This gives you a practical understanding of why candle dimensions and wick selection matter.
Making Traditional Hand-Dipped Candles
Hand-dipped candles take more time than rolled or poured candles, but the process is useful to learn because it demonstrates how wax can be built up gradually around a wick. Instead of filling a container or rolling a sheet, you repeatedly dip a prepared wick into melted wax, allowing each coating to firm before adding another. Over many dips, the wax builds into a tapered candle.
Beeswax is commonly used for this method because it produces a relatively firm candle that can retain its shape at ordinary room temperatures. You’ll need beeswax intended for candle making, appropriately sized taper wicks, a deep heat-resistant dipping vessel, a controlled water bath, a thermometer and a suitable rack for hanging the candles while they cool. The dipping vessel needs to be deep enough for the intended candle length and stable enough that it cannot easily tip. Hot wax presents a serious burn and fire hazard, so this is a project for a controlled workspace rather than an improvised setup near children or pets.
A convenient way to prepare the wick is to cut a length sufficient for two candles connected by a loop at the top. The loop allows the pair to hang over a suitable support while cooling. Measure the intended candle length and leave enough additional wick for handling and trimming. Use the wick manufacturer’s recommendations for the wax and finished taper diameter rather than assuming ordinary cotton string will work.
Melt the beeswax gently in the dipping vessel using the water-bath method, monitoring the temperature according to the wax supplier’s instructions. Don’t place the wax directly over an open flame or allow the water bath to boil so vigorously that water can splash into the wax. Once the wax reaches a suitable working temperature, lower the prepared wick vertically into the melted wax and withdraw it smoothly. The first coating will be thin, so don’t expect the wick to resemble a candle immediately.
Allow the wax coating to cool and become firm before dipping again. Each dip adds another layer. If you dip too quickly, the previous layer may still be soft and can become distorted. If the wax is excessively hot, it may melt away some of the material deposited during earlier dips. Maintaining a consistent temperature and allowing adequate cooling time will produce more even results.
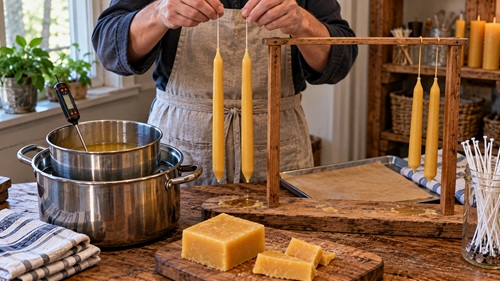
As the candle becomes thicker, keep an eye on its shape. If the wax builds unevenly, check whether you’re dipping vertically and withdrawing the candle at a consistent speed. Don’t attempt to straighten a hot candle by pulling or bending it aggressively. Let it cool enough to handle safely before making minor adjustments.
Continue until the taper reaches a suitable diameter for the wick and the candle holder you intend to use. This may require many dips, depending on the wax temperature, cooling conditions and desired thickness. The process is slower than pouring candles, but it requires relatively simple equipment once you’ve established a safe working arrangement.
Hang the finished tapers where they can cool completely without touching one another or nearby objects. Once they’re firm, trim the wicks and check that each candle fits securely into an appropriate holder. Don’t force a taper into a holder that’s too small or rely on an unstable arrangement to keep it upright.
Before storing the candles, test them under controlled conditions. Watch for excessive dripping, unstable flames, uneven burning or other problems. Record how long they burn and whether the wax remains contained by the holder. Freestanding candles require particular attention because melted wax can drip beyond the candle itself, so always use a suitable noncombustible holder and protective surface.
The useful part of learning this method isn’t simply producing an old-fashioned candle. You begin to understand how temperature, cooling time, wick selection and repeated wax application affect the finished product. Those lessons carry over into other candle-making methods as well.
Troubleshooting Homemade Candles and Improving Their Performance
Once you’ve made a few candles, you’ll probably notice that they don’t all burn the same way. One may produce a steady flame and consume wax evenly, while another leaves a deep hole through the centre or deposits black soot around the container. Sometimes the problem is obvious within the first hour. Other times, it doesn’t appear until the candle has burned down considerably. This is why keeping records of your materials and burn tests is worthwhile. Without those notes, it’s easy to forget which wick worked with which wax or what you changed between batches.
One of the more common problems is tunneling, where the flame burns down through the center while leaving a thick wall of unmelted wax around the outside. An undersized wick may be responsible because it doesn’t produce enough heat to melt the wax across the intended area. However, the wax formulation, container diameter and length of the burn also affect how the melt pool develops. Some container candles gradually consume wax left along the sides during later burns, so a narrow melt pool during the first test doesn’t automatically mean the candle has failed.
If tunneling continues through repeated tests, check the wick manufacturer’s recommendations for your wax and container diameter. You may need to test another wick size, but don’t immediately jump to the largest available. An oversized wick can create excessive heat and introduce more serious problems. Make another candle using the same wax and container, changing only the wick size, then compare the results under similar testing conditions. This will tell you much more than trying to repair a poorly burning candle while it’s lit.
Excessive smoke is another problem that needs attention. A candle may produce some smoke when first lit or extinguished, but continuous dark smoke or heavy soot deposits suggest something isn’t working properly. The wick may be too long, too large or poorly matched to the wax. Drafts can also cause the flame to flicker and burn unevenly. Extinguish the candle, let it cool completely and check that the wick is trimmed to approximately 6 millimeters. If the problem continues during another supervised test, stop using that design and investigate the wick and wax combination.
A weak flame presents a different problem. If the flame remains very small, struggles to stay lit or becomes submerged in melted wax, the wick may not be drawing enough fuel. This can happen when the wick is too small or incompatible with the wax formulation. Don’t attempt to fix the problem by pouring hot wax out of the container or digging around the burning wick. Allow the candle to cool, review the manufacturer’s recommendations and make adjustments during the next batch.
You may also notice a dark carbon deposit forming at the tip of the wick. Candle makers sometimes call this mushrooming because the buildup can resemble a small mushroom. A little carbon formation can occur during burning, but excessive buildup may contribute to soot and an unstable flame. Make sure the wick is trimmed correctly before each burn. If the problem continues, review the wick size and wax formulation rather than assuming that frequent trimming will solve everything.
Cracking and uneven surfaces are often associated with cooling conditions or wax shrinkage. As melted wax solidifies, it contracts, and some formulations are more prone to surface imperfections than others. A shallow depression around the wick may be mostly cosmetic, but deep cracks, large air pockets or separation around the wick deserve closer examination. If the container itself cracks, discard it from candle use. Even a small crack can become dangerous when the glass is heated.
If your candles regularly develop surface defects, review the pouring temperature and cooling conditions recommended by the wax manufacturer. Avoid placing freshly poured candles in cold drafts or moving them before they’ve solidified. Don’t use a refrigerator or freezer to force rapid cooling. The goal is to let the wax cool under reasonably consistent conditions so you can identify whether changes in the process affect the finished result.
Quick Candle-Making Troubleshooting Reference
This table is intended as a practical reference when reviewing your burn-test notes. It identifies common symptoms and possible causes, but it doesn’t replace the component manufacturer’s instructions or appropriate safety testing.
|
Problem |
Possible cause |
What to check |
|---|---|---|
| Candle tunnels down the center | Undersized wick, wax formulation or burn conditions | Compare repeated burn tests and review wick sizing |
| Excessive soot or smoke | Oversized or long wick, drafts or incompatible formulation | Stop the test; check wick length, sizing and airflow |
| Weak or extinguishing flame | Undersized or flooded wick | Review wick compatibility and wax formulation |
| Large carbon buildup on wick | Wick size or incomplete combustion | Trim when cool and review wick selection |
| Uneven or cracked wax surface | Cooling conditions or wax shrinkage | Check pouring temperature and cooling process |
| Cracked container | Unsuitable or damaged container, thermal stress | Stop using the container |
| Excessive container heating | Wick or container incompatibility | Extinguish immediately and discontinue that design |
| Excessive dripping from a taper | Wick, wax or candle geometry | Review design and use a suitable drip-catching holder |
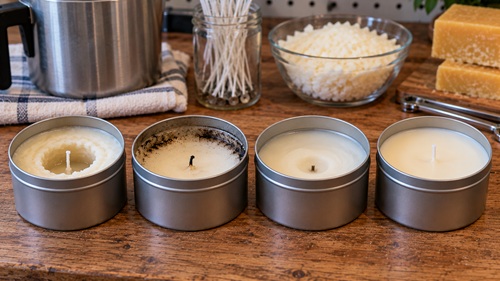
When you encounter a problem, write down exactly what happened and when it occurred. For example, record that a candle began producing soot after two hours rather than simply writing that it smoked. Note the wick size, wax formulation, container dimensions and any unusual conditions such as drafts. Those details will help you identify patterns as you make additional batches.
Try to change only one major variable at a time. If you change the wax, wick, container and pouring temperature together, you won’t know which adjustment made the difference. A few carefully documented tests will teach you more than producing a large number of candles without recording how they perform.
Storing Homemade Candles for Emergency Use
Once you’ve developed a candle design that performs consistently through appropriate testing, you can begin setting aside a small supply for emergencies. Storage conditions matter because wax can soften, deform or become damaged depending on temperature and handling. A candle that burned well when it was made may not perform the same way after being stored in a hot shed or subjected to repeated temperature changes.
Choose a cool, dry location away from direct sunlight, fuel, solvents and other hazardous materials. Container candles should remain upright, while rolled and dipped candles should be protected from bending or breaking. If you’re using glass containers, avoid stacking heavy equipment on top of them or storing them where they could be knocked against other objects. Simple protective dividers can help prevent damage during storage.
Label each batch with the date it was made, the wax formulation, wick designation and usable burn time established during testing. If you’ve experimented with several designs, this information will help you identify which candles performed well. Keep untested candles separate from those you’ve approved for emergency storage. A candle shouldn’t be considered dependable simply because it looks good or has been sitting on a shelf for several months.
Store suitable candle holders and ignition supplies where they can be located when needed. A long-reach lighter can be useful for lighting container candles, while a candle snuffer provides a controlled way to extinguish the flame. Keep matches and lighters secured away from children. Make sure freestanding candles have stable, noncombustible holders capable of containing melted wax, and that container candles are placed on suitable heat-resistant surfaces.
Before relying on stored candles, inspect them for damage. Check glass containers for cracks or chips, examine exposed wicks and look for signs that the wax has softened or shifted. If a candle has been exposed to extreme temperatures or its condition is uncertain, don’t assume it will perform exactly as it did during the original test. Reevaluate it under controlled conditions or replace it.
The limitations of candlelight are especially important during emergencies. A candle produces an exposed flame, heat and combustion products. It should never be left burning unattended, used while people are sleeping or placed near curtains, bedding, paper, fuel or other combustible materials. Keep candles at least 30 centimetres (12 inches) from anything that can burn, with additional clearance wherever the candle design or surroundings require it. Place them on stable surfaces where they cannot be knocked over by children, pets or people moving around in darkness.
Never use candles as an improvised heating system. A few candles produce only a small amount of heat compared with a proper heater, and attempts to concentrate that heat using flowerpots, metal containers or other homemade arrangements can create serious fire and burn hazards. If your home cannot maintain safe temperatures during an outage, use an approved backup heating system or arrange relocation to a properly heated location.
For most emergency lighting needs, flashlights and battery-powered lanterns remain the better choice. They can be carried safely, provide more useful illumination and don’t require an exposed flame. Homemade candles are best treated as a supervised backup rather than your primary lighting system.
Testing Your Candle-Making Skills
Making a candle is one thing. Being able to make another one that performs the same way is a better indication that you’ve learned the process. A useful skills test should show whether you can select compatible materials, measure them accurately, control the melting process, position the wick and evaluate the finished candle without guessing.
Start by making two identical container candles using the same wax, wick and container. Record the amount of wax used, the temperatures during melting and pouring, and the curing time. Once the candles are ready, conduct separate supervised burn tests under comparable conditions. Observe whether the flames remain stable, whether the wax melts consistently and whether either candle produces excessive soot or unusual container heating.
If the candles behave differently, review what happened during preparation. Perhaps one wick wasn’t properly centered, one container cooled in a draft or the wax was poured at a different temperature. You may not always identify the exact cause, but keeping records will help you narrow down the possibilities.
Next, try making a rolled beeswax candle. This tests a different skill because you’re working with solid wax rather than pouring melted wax into a container. Pay attention to the firmness of the sheet, the position of the wick and how tightly the wax is rolled. After making the candle, test it in a suitable holder and compare its performance with your container candles. Note whether it drips, how evenly it burns and how much usable light it provides.
If you’ve become comfortable handling hot wax, you can also try making a traditional dipped taper. This requires more patience and consistent temperature control because each layer must firm before the next is applied. The finished candle should be straight, fit securely in its holder and burn without excessive dripping or an unstable flame.
A useful part of the exercise is measuring wax consumption. Weigh a candle before and after a controlled burn, calculate its average consumption rate and compare the theoretical burn-time estimate with the actual usable hours recorded during later tests. This helps explain why candle size alone doesn’t tell you how long a candle will last.
You should also test whether the light produced is actually useful. Place a finished candle in a safe location and try reading a printed emergency instruction sheet from a reasonable distance. Compare the result with a battery-powered lantern. If the candle doesn’t provide enough light, don’t move it closer to combustible materials. Use the safer lighting option instead.
When you’ve completed these exercises, review your notes and determine which designs performed consistently. If you can reproduce a candle with similar results, explain why you selected its materials and recognize unsafe burning behaviour, you’ve developed a useful basic skill. If the results are inconsistent, continue practicing with small batches rather than producing large quantities for storage.
Preparedness Action Plan
Begin with one simple candle-making project rather than trying to learn every method at once. Choose a container wax, compatible wick and candle-rated container, then make two identical candles using the procedures described earlier. Record the materials, measurements, temperatures and curing time so you can repeat the process. Leave out fragrances, dyes and decorative materials during your first attempts. Keeping the design simple makes it easier to understand what affects the finished candle.
After the candles have cured, conduct supervised burn tests and record the results. Watch for excessive soot, unstable flames, uneven melting and unusual container heating. If a candle behaves poorly, stop using it and determine what needs to change. Make another small batch with one carefully selected adjustment rather than trying to correct several things at once. Continue until you have a design that performs consistently through the required tests.
Once you’ve produced a satisfactory container candle, try making a rolled beeswax candle. Compare the time, equipment and effort required for each method. The rolled candle avoids the need to melt wax, while the container candle allows you to work with a wider range of suitable wax formulations. If you’re interested in traditional skills, you can later experiment with hand-dipped tapers using an appropriate setup.
When you’ve developed a candle design that performs consistently, estimate its usable burn time and determine how many candles would be required for your intended emergency lighting schedule. Don’t base your calculations entirely on candle size or theoretical wax consumption. Use the actual results of your tests and maintain a reasonable reserve. Keep battery-powered lighting available as your primary option.
Before storing the finished candles, inspect them for damage, label the batches and place them in a cool, dry location. Store suitable holders and ignition equipment safely, and make sure other capable household members understand the rules for using candles during an outage. Review the supply periodically, particularly if the candles have been exposed to unusual temperatures or rough handling.
For a practical weekend exercise, make two container candles and one rolled beeswax candle. Record how long each takes to produce, what equipment is required and which steps are most difficult. After appropriate curing, conduct supervised burn tests over several sessions rather than trying to complete everything in one day. Compare the results and identify at least one improvement you could make to your process. The goal isn’t to produce a large number of candles. It’s to learn how to make a few dependable ones and understand their limitations.
Skills Learned
By completing this candle-making lesson, readers should understand how different candle waxes behave and why the wax formulation must be matched to the candle design. They should be able to select suitable containers and wicks, measure materials accurately and use a controlled water bath to melt wax safely. They should also understand how wick placement, pouring temperature and cooling conditions can affect the finished candle.
Readers should be able to make a basic container candle, assemble a rolled beeswax candle and understand the process used to produce traditional hand-dipped tapers. They should know how to recognize common candle-making problems such as tunneling, excessive soot, unstable flames, poor wick performance and cracking, and how to investigate those problems without creating additional hazards.
The burn-testing exercises teach how to observe candle performance, measure wax consumption and estimate usable burn time. Readers should understand why theoretical burn-time calculations need to be checked against actual results and why a candle that looks good isn’t necessarily safe or dependable.
The lesson also develops practical knowledge of storing candles, selecting suitable holders, preventing fire hazards and deciding when candles are appropriate for emergency lighting. Most importantly, readers should understand that homemade candles are a backup lighting option and that battery-powered lighting remains the safer choice for most household emergencies.
Learning to make candles won’t replace the need for good emergency lighting equipment, but it does provide another useful skill. With suitable materials, careful testing and a little practice, it’s possible to make simple candles at home and understand what they can – and cannot – contribute to your preparedness.
© Prepping Communities. This content is for informational purposes only and not professional advice. Use at your own risk.
Terms | Privacy | Guidelines