
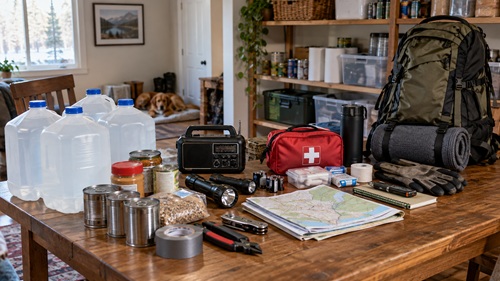
Most preppers eventually accumulate a fair amount of equipment. Food storage, water filters, generators, emergency radios, camping supplies, first aid kits and probably a few things we bought because they seemed useful at the time. There’s nothing wrong with having those supplies. They’re an important part of being prepared. But there’s a big difference between owning equipment and knowing how to depend on it when something goes wrong.
A generator might work perfectly when you test it in the driveway, but what happens when you can’t get more fuel? Your water filter might remove bacteria and parasites but do nothing about chemical contamination. You might have months of food stored away, but that won’t help much if a wildfire forces you to leave home. Even a well-thought-out evacuation plan can fall apart when the highway closes or the person who normally drives isn’t available.
Before spending more money on supplies, it’s worth finding out how much you can actually do with what you already have. That means testing equipment, understanding its limitations and figuring out what you’ll do when something doesn’t work. Some of the biggest weaknesses in our preparedness have very little to do with how much we’ve spent.
Managing Water When Your Normal Supply Is Gone
Water is one of the first things to deal with during an emergency. We use it constantly for drinking, preparing food, washing, cleaning and sanitation, often without giving much thought to how much we’re using. When the taps stop working, those everyday activities become much more difficult. Having water stored away is a good start, but you also need to know how long it will last, whether it’s safe and where you’ll get more if the interruption continues.
Start by calculating your household’s basic requirements. Four liters per person per day is a useful minimum planning allowance for drinking and basic food preparation, although actual needs can be higher depending on temperature, physical activity, health conditions and other circumstances. Water for hygiene and sanitation needs to be calculated separately. A family of four using four liters each requires 16 liters every day. If you have 80 liters of safe drinking water stored, that’s enough for approximately five days at that allowance.
Now consider a longer interruption. Suppose your family of four needs to manage without municipal water for ten days. At 16 liters per day, you’ll need at least 160 liters for drinking and basic food preparation. Eight 20-litre containers would provide that amount, but they wouldn’t leave much for washing dishes, personal hygiene or unexpected needs. If you have the space to store another 80 liters, that gives you additional flexibility, although the amount you actually need should be based on your household’s circumstances.
Rather than simply counting containers, keep track of how much water remains. If you begin with 160 liters and use exactly 16 liters each day, you’ll have 112 liters remaining after three days, 80 liters after five days and 48 liters after seven days. By the end of day ten, the supply will be exhausted.
| Day |
Water remaining |
|---|---|
| Starting supply | 160 liters |
| After day 3 | 112 liters |
| After day 5 | 80 liters |
| After day 7 | 48 liters |
| After day 10 | 0 liters |
Those figures assume nothing goes wrong. Now imagine discovering on day three that one of your 20-litre containers has leaked. You’ve lost more than a day’s minimum supply. If your household is already using more than expected because of hot weather or additional cleaning requirements, the shortage could become serious much sooner.
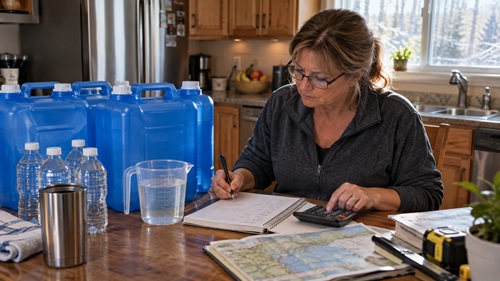
This is one reason I prefer the idea of storing water in several manageable containers rather than depending entirely on one large tank. If one container leaks or becomes contaminated, you haven’t necessarily lost everything. Smaller containers may also be easier to transport if you need to leave home. Large tanks still have their place, particularly for households with substantial storage requirements, but they should be part of a system that accounts for possible failures.
You also need to decide when to start replenishing your supply. Waiting until the last container is nearly empty doesn’t leave much room for unexpected problems. If you have a ten-day reserve, you might establish a point at which you’ll begin arranging additional water once the remaining supply drops to five days. The appropriate point depends on how reliable your replacement source is and how long collection, treatment or delivery might take.
Finding Out How Much Water You Actually Use
A useful exercise is to spend one day operating your household using only a measured quantity of stored drinking water. Don’t shut off essential services or restrict anyone’s necessary hydration. Instead, set aside measured containers for drinking and food preparation, and record how much is used throughout the day. Keep a separate record of water used for basic cleaning and hygiene.
You may discover that preparing meals requires more water than expected, particularly if you rely heavily on dried beans, rice or other foods that need soaking and cooking. Washing dishes can also consume a surprising amount of water if you continue using your normal routine. If your household includes infants, older adults or someone with medical needs, those requirements should be accounted for separately.
At the end of the day, compare your actual consumption with the amount you originally planned to store. If your family used 20 liters for drinking and food preparation instead of 16, a 160-litre reserve would last eight days rather than ten. That difference matters when you’re planning for an extended interruption.
Repeat the exercise during warmer weather or after a day involving more physical activity. Water requirements can change considerably, and a storage plan that works during a cool weekend may not be adequate during a summer heatwave.
Keeping Drinking Water Safe and Finding Another Source
One of the easiest mistakes to make during a water shortage is treating every available source as though it can be used for the same purposes. Drinking water, rainwater and untreated surface water shouldn’t automatically be considered interchangeable.
If you have 100 litters of safe drinking water and another 100 liters collected from rain barrels, keep those supplies separate. Rainwater may be useful for toilet flushing or certain cleaning tasks, but it shouldn’t be assumed safe for drinking or food preparation. Clearly label containers containing non-potable water and store them separately from drinking-water supplies. Use containers intended for potable water when storing water for drinking, and never reuse containers that previously held fuel, pesticides or other hazardous chemicals.
During an extended outage, sanitation can become a problem of its own. Toilet flushing may require several liters at a time, and ordinary laundry or bathing routines can consume far more water than most people realize. If your drinking-water supply is limited, consider appropriate emergency sanitation arrangements rather than using potable water to maintain normal household routines. Also remember that flooding, sewer backups or septic-system damage may make flushing unsafe even when water is available.
Finding another water source takes more thought than simply identifying a nearby creek or lake. Water flowing through agricultural areas may contain fertilizers, pesticides or animal waste. Water near industrial sites, mining operations or roads may contain chemical pollutants. Even a clear mountain stream can carry disease-causing microorganisms. The fact that water looks clean, smells normal or comes from a remote location doesn’t mean it’s safe to drink.
Before an emergency, identify possible alternative sources on a local map. These might include lakes, streams, wells, community water distribution facilities or rainwater collection systems. Then determine whether those sources are actually accessible throughout the year. A creek that flows reliably in spring may be nearly dry by late summer. A lake that appears accessible on a map may be surrounded by steep terrain or private property. Snow, ice and road closures can make collection difficult during winter.
Check what activities occur upstream and whether flooding could introduce sewage, fuel or other contaminants. If you cannot reasonably assess the contamination risks, don’t assume that an ordinary camping filter or boiling will make the water safe.
Private wells need their own backup arrangements. If your well pump depends on electricity, find out how it would operate during an extended outage. A well containing plenty of water won’t help much if you have no safe way to bring that water to the surface. Flooding can also contaminate wells, and affected systems may require inspection, disinfection and water testing before being returned to service.
The practical question isn’t simply whether water exists nearby. It’s whether you can obtain it legally and safely, transport it, treat it appropriately and store it without introducing new contamination.
Treating, Storing and Transporting Water
Water-treatment equipment varies considerably, and understanding those differences is an important preparedness skill. Some portable filters are designed to remove sediment, bacteria and protozoa, while others also address viruses. Certain filters improve taste or reduce specific chemical contaminants, but that doesn’t mean they can remove every hazardous substance.
Take your filter out of storage and read the manufacturer’s specifications. Find out which contaminants it is tested or certified to remove, how much water it can treat and whether replacement cartridges are required. Check hoses, seals, connections and filter elements for damage. If the filter needs cleaning, priming or backflushing, practice those procedures according to the manufacturer’s instructions.
Some filters can be damaged if water remains inside them and freezes. If your filter has been exposed to freezing temperatures after use, check the manufacturer’s guidance before trusting it again. Damage to internal filter elements isn’t always visible from the outside.
When biological contamination is the concern, boiling is one of the more dependable emergency treatment methods. If the water is cloudy, allow suspended material to settle and carefully pour the clearer water through a clean cloth or coffee filter to remove some visible particles. This step does not disinfect the water. Bring the water to a rolling boil for one minute, or three minutes at elevations above approximately 2,000 meters. Allow it to cool naturally in a clean, covered container.
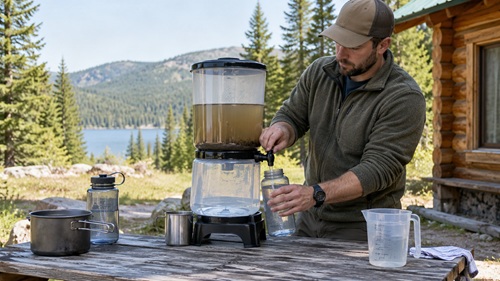
Boiling kills common disease-causing microorganisms, but it does not remove many chemical contaminants. If water may contain fuel, pesticides, industrial chemicals or other hazardous pollutants, use another safe source unless you have a treatment system specifically verified for those contaminants. Boiling can actually increase the concentration of some dissolved substances as water evaporates.
Chemical disinfection can provide another option when boiling isn’t practical. Unscented household bleach containing an appropriate concentration of sodium hypochlorite may be used for emergency water disinfection, but the correct amount depends on the product’s concentration and the condition of the water. Follow current public health instructions for the specific product rather than relying on a universal number of drops. Never assume that scented, splashless or multipurpose cleaning bleach is suitable for drinking-water treatment. Chemical disinfection also has limitations, particularly against certain parasites, and it won’t make chemically contaminated water safe.
Once water has been treated, keeping it safe becomes just as important as treating it correctly. Store it in clean, food-grade containers with secure lids. Avoid dipping cups or hands directly into the stored supply. A container with a clean spigot can make dispensing water easier while reducing the chance of contamination. Label containers with the filling date, inspect them periodically and store them away from chemicals, fuel and locations where freezing or excessive heat could cause damage.
Transporting water is another part of the process that deserves testing. A 20-litre container weighs approximately 20 kilograms before accounting for the container itself. If your collection point is 500 meters away, every round trip requires travelling about one kilometer. That may not sound like much, but add uneven ground, snow, heat and the weight of the containers, and the work can become tiring.
Try moving a realistic amount of clean water over a safe distance using the equipment you intend to rely on. Smaller containers, a wagon or a suitable hand cart may be more practical than carrying large containers by hand. If your route crosses steep or uneven terrain, make sure the equipment is suitable for those conditions. A cart that works well on pavement may be almost useless on a rocky trail or in deep snow.
Before considering your water preparations complete, test the entire process. Calculate how much your household needs, inspect the stored supply, identify a dependable replacement source, confirm that your treatment equipment is suitable and determine how you’ll transport additional water. Have another capable household member demonstrate the process so it doesn’t depend entirely on one person.
A water plan that works only while the taps are running or while one particular piece of equipment is available still has weaknesses worth correcting.
Knowing When to Stay and When to Leave
One of the harder decisions during an emergency is knowing whether to remain at home or evacuate. Most preppers have invested considerable time and money into making their homes more self-sufficient, so leaving those supplies behind isn’t something anyone wants to do. But staying home isn’t always the safest option. An approaching wildfire, rising floodwater, structural damage or the loss of essential services can make a property unsafe regardless of how well stocked it is. On the other hand, leaving during a severe winter storm can expose you to hazards that might have been avoided by remaining at home. The important thing is to understand what makes each option safer rather than deciding ahead of time that you’ll always bug in or always bug out.
Start by identifying the emergencies most likely to affect your particular location. If you live in a wildfire-prone area, examine nearby vegetation, access roads, evacuation bottlenecks and how quickly a fire could threaten your community. If flooding is a concern, identify low-lying roads, bridges and areas that have flooded previously. For winter storms, consider whether your home can maintain safe temperatures without electricity and how long your backup heating arrangements could realistically operate. Write down the conditions that would make staying home dangerous, along with those that would allow you to remain safely. This gives you something more useful than a general plan to leave when things get bad.
A household with two vehicles and several capable adults may be able to evacuate relatively quickly. Someone caring for an elderly parent, a person with mobility limitations or several animals may need considerably more time. That’s why evacuation planning should begin with the people who will actually be travelling, not simply the distance to the nearest highway. Work out how long it takes to gather medications, important documents, emergency bags, pets and any necessary medical equipment. Then practice loading everything into your vehicle. You may discover that what you thought was a fifteen-minute departure actually takes forty-five minutes or longer.
Establishing evacuation triggers before an emergency can help reduce uncertainty. An evacuation trigger is a condition that tells you it’s time to prepare to leave or to leave immediately. For a wildfire, these might include an official evacuation alert, worsening local fire conditions, deteriorating air quality affecting a vulnerable household member or the possibility that your only access road could be closed. For flooding, rising water near an access road or official warnings about expected river levels might prompt early preparations. These triggers should supplement, never replace, official instructions. Follow evacuation orders promptly, and leave immediately if you’re in direct danger.
It’s useful to separate preparing to leave from actually departing. An evacuation alert may be the point at which you load nonessential supplies, confirm accommodation, check fuel and make sure everyone can leave quickly. An evacuation order means it’s time to go according to the instructions provided. If conditions become immediately dangerous before an order is issued, don’t wait for an official announcement. Conversely, if emergency authorities direct residents to shelter in place because travel is hazardous, don’t assume leaving is automatically safer.
Consider a family living outside a small community surrounded by forest. A wildfire is burning several kilometers away, and the wind is expected to strengthen later in the afternoon. The family has two dogs, an elderly relative and one main road leading out of the area. Even if the fire isn’t immediately threatening the house, they need to consider how long evacuation would take, whether smoke could affect the elderly relative and whether road access could deteriorate. Preparing early gives them more options. Waiting until flames are visible from the property may leave very little time to respond safely.
You can practice this decision-making without waiting for an actual emergency. Choose a realistic local hazard and write down three developments that would cause you to prepare for departure, followed by the conditions that would require immediate evacuation. Discuss those decisions with everyone in the household. If one person wants to leave early while another prefers to stay, work through the disagreement now. A plan that depends on everyone reaching an agreement during a rapidly developing emergency may not work very well.
Evaluating Evacuation Routes Before You Need Them
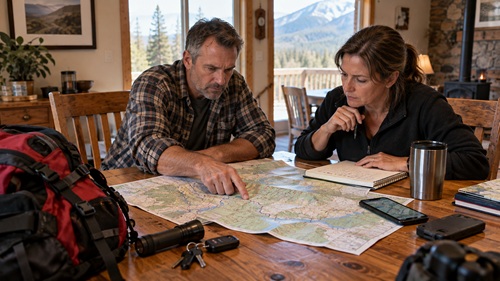
Many people identify the quickest highway out of their community and consider their evacuation planning complete. The problem is that the shortest route isn’t necessarily the safest, and a road that works perfectly during normal conditions may become unusable during a disaster. Bridges can close, highways can become congested, landslides can block mountain roads and wildfires can affect several routes at once. A useful evacuation plan considers what could make each road dangerous and whether another route would actually provide a meaningful alternative.
Start with a current road map and identify your primary route to a safe destination. Follow the entire route rather than looking only at the first few kilometers. Mark bridges, narrow valleys, steep grades, major intersections and areas with limited opportunities to turn around. If you live in a rural area, pay particular attention to roads that depend on a single bridge or pass through terrain vulnerable to flooding, rockfalls or wildfire. A route with several potential closure points may be less dependable than one that is slightly longer but has better infrastructure and more opportunities to change direction.
Now identify an alternative route, where one exists. Don’t assume it’s suitable simply because your navigation application shows a continuous road. Some secondary roads are unpaved, seasonally maintained, gated or intended primarily for industrial and forestry traffic. Others may be impassable after heavy rain or snow. Check the road classification, maintenance arrangements and whether your vehicle is suitable for the conditions. If you’re unfamiliar with the route, consider driving it during normal weather when it’s legally accessible and safe, so you know what to expect.
Suppose your community has two possible evacuation routes. Route A follows a paved highway through a river valley and normally takes forty minutes to reach the next major town. Route B follows a smaller road over higher terrain and normally takes about seventy minutes. Under ordinary conditions, Route A would probably be preferable because it’s shorter, better maintained and easier to travel. But during a flood, the highway might be vulnerable at several low-lying sections or bridges. Route B could become a useful alternative if authorities confirm that it remains open and safe.
Now change the emergency to a wildfire. The smaller road over higher terrain passes through dense forest, has limited shoulders and offers few places to turn around. The paved highway follows a wider corridor with better access for emergency vehicles. In that situation, Route A might be the safer choice, even though both roads remain technically open. The point isn’t that one type of road is always better. It’s that the hazard changes which features matter.
Apply the same exercise to your own location. Compare your routes based on the hazards they cross, road conditions, available services, possible closure points and whether they lead away from the danger. Record the advantages and limitations of each route on your map. During a real emergency, use current official road and hazard information rather than assuming the route you previously selected is still safe. Never drive around barricades or enter a closed road because an offline map suggests it connects to your destination.
Download offline maps onto your phone and keep a paper map in your vehicle. Learn how to locate your position and identify major roads without relying entirely on GPS navigation. Mobile networks can become overloaded or unavailable, and a navigation application may continue suggesting roads that have recently closed. Regions have their own official systems, and it’s worth identifying them before you need them.
Your evacuation destination needs just as much planning. Choose somewhere you could realistically stay, such as a relative’s home, suitable accommodation or an emergency reception center. Then identify a second destination outside the likely affected area. A wildfire, flood or major storm may affect several neighboring communities, so moving only a short distance doesn’t always solve the problem. If you have pets or someone requiring medical care, confirm that your intended destination can accommodate those needs.
Fuel deserves attention as well. If your vehicle is nearly empty when an evacuation order arrives, you may have to depend on a gas station that’s already crowded, closed or without electricity. Maintaining a reasonable amount of fuel in your vehicle during periods of elevated risk can reduce that dependency. If you store additional fuel, use approved containers and follow fire-safety requirements. Never store gasoline in living areas or carry unsecured fuel containers inside the passenger compartment.
Finally, work out what happens if your primary vehicle isn’t available. Could another household member drive? Is there a trusted neighbor who could assist? Does your local emergency management organization provide transportation assistance for residents who cannot evacuate independently? Find out how those arrangements work before an emergency. If you have medical or mobility needs, contact the appropriate local services in advance rather than assuming assistance will automatically arrive.
Testing Your Evacuation Plan
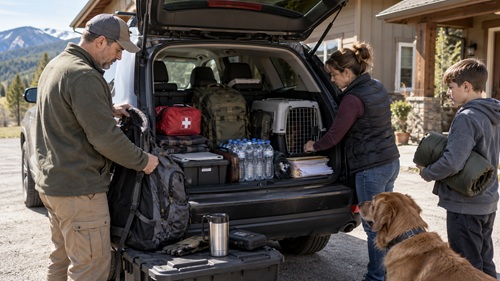
Set aside an afternoon to practice the departure process. Tell everyone in the household that you’re conducting an evacuation exercise, then begin gathering the items you would need to leave. Include medications, identification, important documents, suitable clothing, emergency supplies, pet necessities and any equipment required by vulnerable household members. Time how long it takes to locate everything, load the vehicle and get everyone ready.
Pay attention to what slows you down. Perhaps important documents are scattered around the house, a pet carrier is buried in storage or your emergency bags are heavier than expected. Maybe the vehicle doesn’t have enough room for everything you intended to take. These are problems you can correct before a real evacuation. Keep essential items together where practical, and make sure more than one capable household member understands the departure process.
You don’t need to conduct a full drive every time you practice, but it’s worth checking your planned routes periodically under normal conditions. Roads change, construction projects begin and access restrictions can be introduced. Review your evacuation plan at least once or twice a year and whenever significant changes occur in your household or local area.
A useful additional test is to repeat the departure exercise with the person who normally organizes everything acting only as an observer. See whether the other household members can locate the supplies, identify the destination and explain which route they would use. If they can’t, the problem may be unclear instructions or a plan that depends too heavily on one person. Correct those weaknesses and repeat the exercise.
Staying Warm When the Power Goes Out
A prolonged power outage during cold weather can become a serious problem even for households with substantial food and water supplies. Once the heating system stops working, indoor temperatures begin dropping. How quickly that happens depends on outdoor conditions, insulation, air leakage, the building’s construction and how much heat was already stored inside. A well-insulated home may remain reasonably comfortable for some time, while an older or poorly insulated building can become cold much more quickly.
Start by identifying which rooms in your home would be easiest to keep warm if your primary heating system failed. Smaller rooms with fewer exterior walls and windows may lose heat more slowly, although the best choice depends on the building. If you have an approved backup heating system, consider which spaces it can safely heat. Avoid selecting a room that would require blocking ventilation, obstructing exits or operating equipment in a manner the manufacturer doesn’t permit.
When the power goes out, reduce unnecessary heat loss where it’s safe to do so. Close doors to unused rooms, draw curtains over windows and use appropriate draft-stopping materials around areas where cold air enters. Don’t seal required ventilation openings or interfere with combustion-air supplies. If sunlight is available during the day, opening curtains on sunny windows can provide some passive warming. Close them again when the sun moves away to reduce heat loss through the glass.
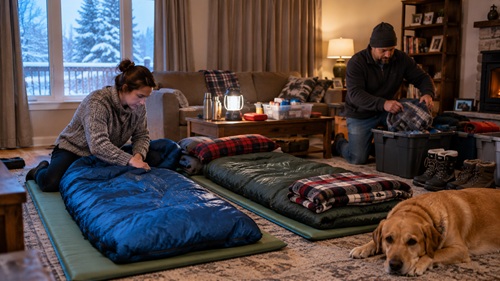
Keeping people warm is often easier than trying to heat an entire house. Dress in several layers of dry clothing, including warm socks and a hat when appropriate. Use insulated sleeping bags and blankets, and make sure bedding is separated from cold floors by a mattress, sleeping pad or another suitable insulating layer. If several people are sharing a room, arrange sleeping areas so everyone has adequate space, ventilation and access to exits. Don’t create enclosed sleeping spaces around fuel-burning heaters or block airflow needed for safe operation.
Pay particular attention to moisture. Damp clothing and bedding can make people lose heat much faster, especially in cold conditions. Change out of wet clothing promptly and keep spare dry garments available. If someone has been working outdoors in snow or rain, don’t assume they’ll warm up simply by sitting under a blanket while still wearing damp clothing. Getting dry and moving into a properly sheltered environment are important first steps.
If you rely on a wood stove, have the chimney and appliance inspected and maintained according to applicable requirements. Keep suitable firewood dry and accessible, and make sure the people responsible for operating the stove understand how to use it safely. If you use another approved backup heater, follow its installation, ventilation and operating instructions. Never improvise indoor heating with a barbecue, charcoal burner, outdoor camping stove or a fuel-burning appliance not approved for indoor use. Carbon monoxide can accumulate without any noticeable smell, and exposure can be fatal. Working carbon monoxide alarms are essential wherever combustion equipment could create a risk.
It’s also important to recognize when a home is no longer safe to occupy. If indoor temperatures continue dropping and you cannot maintain adequate warmth, particularly for infants, older adults or people with medical conditions, relocation may be necessary. Don’t wait until someone becomes severely cold or confused before considering a properly heated shelter.
Hypothermia occurs when the body’s core temperature falls dangerously low. Early signs can include shivering, clumsiness, fatigue and difficulty concentrating. As the condition worsens, a person may become confused, lose coordination or stop shivering despite remaining dangerously cold. These are serious warning signs. Move the person to shelter, remove wet clothing, insulate them from cold surfaces and seek emergency medical assistance. Handle someone with suspected severe hypothermia gently, and don’t attempt rapid reheating with direct intense heat.
During a winter outage, check on vulnerable household members regularly rather than assuming everyone will complain when they’re cold. Older adults and people with certain health conditions may not recognize or communicate cold stress as readily. Keep necessary medications accessible and maintain adequate food and fluids. A person who is already exhausted, hungry or dehydrated may have more difficulty coping with cold conditions.
You can practice your cold-weather arrangements without deliberately exposing anyone to dangerous temperatures. Choose a safe day, gather the clothing, blankets, sleeping bags and other equipment you would use during an outage, and set up the room you intend to occupy. Check whether everyone has enough insulation, whether sleeping arrangements are practical and whether essential supplies can be reached without repeatedly opening doors to colder areas. This is also a good opportunity to test emergency lighting and make sure exits remain clear.
Managing Heat During Summer Power Outages
Hot weather creates a different set of problems. Without electricity, air conditioning and mechanical ventilation may stop working, allowing indoor temperatures to rise. In some buildings, especially upper-floor apartments and poorly ventilated homes, indoor heat can become dangerous even after outdoor temperatures begin dropping.
Begin by identifying the coolest available areas of your home and how you can reduce solar heating. Close blinds or curtains on windows receiving direct sunlight, particularly during the hottest part of the day. Use natural ventilation when outdoor air is cooler than indoor air and when opening windows is safe. During extreme heat, opening windows when the outside air is hotter may make indoor conditions worse, so pay attention to actual temperatures rather than assuming ventilation always helps.
Reduce unnecessary physical activity during the hottest hours. Jobs such as hauling water, moving heavy supplies or clearing debris may need to be scheduled for early morning or evening when conditions are cooler. Wear lightweight, breathable clothing, use shade and drink enough safe water to replace normal losses. People working hard in hot conditions may need additional fluids and electrolytes, but requirements vary, especially for those with medical conditions or fluid restrictions.
Learn to recognize the difference between heat exhaustion and heatstroke. Heat exhaustion can cause heavy sweating, weakness, dizziness, nausea and headache. Move the person to a cooler location, loosen unnecessary clothing and begin cooling them. Heatstroke is a medical emergency and may involve confusion, collapse, seizures or dangerously high body temperature. Call emergency services and begin rapid cooling while waiting for help. Don’t assume that giving someone water will correct severe heat illness.
If your home becomes dangerously hot and you cannot cool it adequately, identify a safer location such as an official cooling centre, a suitable public building or another home with functioning cooling. This should be part of your preparedness planning in the same way that a heated shelter is part of winter planning.
A useful exercise is to identify where your household would go if indoor temperatures became unsafe. Find out how local cooling centres are announced, whether transportation would be available and what you would need to bring. If someone in your household has a medical condition that makes heat exposure particularly dangerous, discuss an appropriate emergency plan with their healthcare provider before hot weather arrives.
Managing Food, Cooking Fuel and Physical Energy
Refrigerated perishable foods that have been above 4°C (40°F) for more than two hours generally need to be discarded. Don’t rely on smell or taste to determine whether food is safe. Some harmful bacteria can multiply without producing noticeable changes in appearance or odor. If you’re uncertain how long food has been above a safe temperature, the safer choice is to discard it rather than risk foodborne illness during an emergency when medical assistance may be difficult to obtain.
A refrigerator or freezer thermometer is a useful piece of equipment because it allows you to monitor temperatures instead of guessing. During an outage, keep refrigerator and freezer doors closed as much as possible. Every time you open them, warm air enters and reduces the amount of time food can remain safely chilled. If you have advance warning of a possible outage, freezing containers of water can help maintain freezer temperatures longer. Leave enough room for expansion so the containers don’t rupture. You can also group frozen foods together to help them retain cold temperatures.
If an extended outage appears likely, determine which foods need attention first. Refrigerated perishables generally require attention before shelf-stable foods, provided they are still safe to eat. Frozen foods may remain usable longer if the freezer stays closed. Food that still contains ice crystals or has remained at 4°C (40°F) or below may generally be cooked or refrozen, although quality may suffer. Follow established food safety guidance for individual foods rather than assuming everything in the freezer is safe simply because it still feels cold.
This is a good reason to maintain an inventory of refrigerated, frozen and shelf-stable food. During a prolonged outage, you shouldn’t have to repeatedly open storage areas to figure out what you have available. A simple written inventory can help you identify which foods should be used first and which can remain in storage. If you have a large freezer, organizing food by type and recording its location can also reduce the amount of time the door needs to remain open.
Emergency meals should be planned around the resources you’ll actually have available. For example, canned fish, beans, vegetables, fruit, nut butters and other ready-to-eat foods can provide useful nutrition without extensive cooking, depending on the product. Some canned foods can be eaten directly from the container after opening, while others may be more appealing when heated. If cooking fuel is limited, having several meals that require little or no preparation can make a considerable difference.
When choosing emergency foods, consider the dietary needs of everyone in your household. Food allergies, diabetes, kidney disease, swallowing difficulties and other health conditions can affect what someone can safely eat. Children and older adults may also have different nutritional requirements. A food supply that looks adequate on paper may be much less useful if household members cannot safely consume a substantial portion of it.
Reducing Physical Work Before It Becomes a Problem
You can reduce unnecessary energy expenditure by organizing your work. Instead of making several trips to retrieve equipment, gather what you need before starting a task. If you’re moving supplies, use a suitable cart or hand truck rather than carrying heavy loads individually. Store frequently used items where they’re easy to reach, and avoid placing essential supplies behind stacks of heavy containers. These improvements may seem minor during normal life, but they become more important when you’re tired and performing unfamiliar physical work.
Water transportation is a good example. If your household needs 16 litres of drinking and cooking water each day and the collection point is 500 metres away, a round trip requires travelling approximately one kilometre. If you’re also collecting water for sanitation, the amount of work increases. A wagon or suitable cart may allow you to transport several containers at once, reducing the number of trips. But the route must be safe for the equipment you’re using. A wheeled cart that works well on pavement may be nearly useless on a steep, rocky trail or in deep snow.
The same thinking applies to firewood. If you rely on a wood stove for emergency heating, consider where your firewood is stored and how you’ll retrieve it during severe weather. Moving large quantities of wood through deep snow or across icy ground can be physically demanding and increase the risk of falls. Keeping an appropriate supply in a dry, accessible outdoor storage area near the house may reduce that work. Maintain required clearances from the building, heating appliances and ignition sources, and don’t create fire or pest hazards by storing excessive amounts indoors.
Another common problem is lifting and moving supplies that were stored without much thought about how they’d be accessed later. A large container of emergency food may be easy to place on a shelf when you’re healthy and well rested, but difficult to retrieve if you’re injured or exhausted. Heavy supplies should be stored at appropriate heights, and containers should be sized so the people expected to use them can handle them safely. If someone in your household has limited mobility or strength, organize essential supplies so they don’t need to climb ladders or move heavy boxes.
Rest should be treated as part of your preparedness plan rather than something you do only after every job is finished. Exhaustion affects judgment, coordination and reaction time, increasing the risk of falls, injuries and mistakes with equipment. If several capable adults are available, divide demanding tasks and allow time for recovery. During prolonged emergencies, maintaining the ability to work safely over several days is often more important than completing every task as quickly as possible.
If you exhaust yourself hauling water, cutting firewood or clearing debris on the first day, you may have very little energy left for the following days. Work needs to be organized around what is necessary, how physically demanding it is and how much time you have available. Tasks involving immediate safety, drinking water, shelter and medical needs should take priority. Jobs that can safely wait should be left until you have the time and energy to handle them properly.
Food and water intake also need to match the work being performed. Someone working outdoors in hot weather may lose considerable amounts of water through sweating, while a person performing heavy work in cold conditions can become dehydrated without noticing as much thirst. Make drinking water accessible during physical tasks and take regular breaks. If someone becomes dizzy, unusually weak, confused or unable to continue working safely, stop the activity and assess whether medical attention is needed. Don’t assume that pushing through exhaustion is a sign of good preparedness.
Sleep can become difficult during emergencies, particularly when people are worried about property damage, evacuation or family members. If several adults are available, share responsibilities so everyone has an opportunity to rest. Avoid assigning one person every demanding job simply because they’re the most experienced or physically capable. If someone is responsible for monitoring important equipment or emergency information, arrange reasonable handovers rather than expecting them to remain awake indefinitely.
There’s also a practical difference between being physically fit and being accustomed to the specific work an emergency might require. Someone who exercises regularly may still struggle to carry awkward water containers over uneven ground or split firewood for several hours. The movements, equipment and conditions are different. Before an emergency, practice the tasks you expect to perform using safe loads and reasonable distances. Learn proper lifting techniques, use mechanical assistance where possible and recognize when a task requires another person or specialized equipment.
Testing Your Food and Energy Management Plan
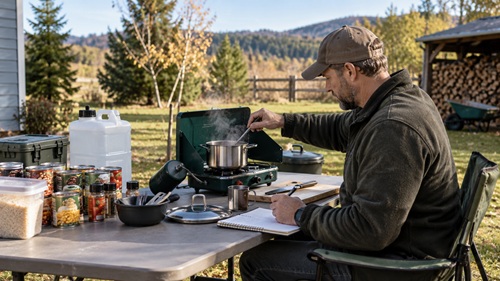
One useful exercise is to spend a day preparing meals using only your emergency cooking arrangements. Choose foods from your existing storage and prepare breakfast, lunch and dinner without relying on your normal kitchen appliances. Use backup cooking equipment only in locations where it can be operated safely, following the manufacturer’s instructions. Never bring outdoor camping stoves, charcoal burners or barbecues indoors.
Measure how much drinking water, cooking water and fuel you use throughout the day. Record how long meals take to prepare and whether you have enough suitable utensils, cookware and cleaning supplies. If a meal requires considerably more fuel than expected, consider whether another preparation method or a different stored food would be more practical. This exercise may reveal that your food supply is adequate but your cooking fuel isn’t, or that your planned meals require more water than you’ve allowed for.
During the same exercise, test how easily you can access and move essential supplies. Retrieve a realistic quantity of stored water, food and equipment using the methods you would normally rely on. Don’t deliberately exhaust yourself or attempt unsafe lifting. The purpose is to find out whether your storage arrangements make sense and whether simple changes could reduce unnecessary work.
You can also simulate the loss of refrigeration without actually allowing food to spoil. Review the contents of your refrigerator and freezer, then identify which items would require attention first during an outage. Use an appliance thermometer to understand normal operating temperatures and review the food safety limits that would apply if electricity were unavailable. Decide which foods you could safely prepare immediately, which might be moved to another reliable cold-storage location and which would need to be discarded if temperatures became unsafe.
When you’ve finished, compare what happened with what you expected. Did preparing meals take longer than planned? Did you use more water or fuel? Were supplies difficult to reach? Did one person end up doing most of the work because nobody else knew how to operate the equipment? Record those problems and make changes before repeating the exercise.
A household may have enough stored food for several months, but that doesn’t automatically mean it has enough cooking fuel, safe water, suitable equipment or physical endurance to make full use of those supplies. Testing the entire process gives you a much better understanding of how long your household could realistically maintain essential activities during an extended emergency.
Protecting Your Supplies Without Isolating Yourself
Most preppers spend considerable time building up their emergency supplies, but protecting those supplies involves more than keeping them behind locked doors. Food, water, fuel, generators, tools and other equipment can be lost or damaged through poor storage, theft, fire, flooding or something as simple as a leaking roof. You might have enough emergency food to last several months, but if it’s stored in a damp basement where flooding is possible, much of that preparation could be lost in a single afternoon.
Start by examining where your supplies are kept and what could affect them. Look for water pipes running above storage shelves, signs of moisture, pest activity, excessive temperatures and containers that aren’t properly sealed. Heavy supplies should be stored on sturdy shelving, with heavier items positioned where they can be retrieved without unsafe lifting. Avoid keeping everything in one location if that location is vulnerable to a particular hazard. For example, storing all your food, water and emergency equipment in a basement that has flooded previously creates a risk that one incident could damage several critical supplies at once.
Security also involves deciding how much information about your preparedness you make publicly available. There’s nothing wrong with sharing useful ideas, photographs of equipment or examples of how you’ve organized supplies. That’s one of the ways people learn from one another. But consider whether those photographs reveal your address, the layout of your home, where valuable equipment is stored or how much food and fuel you have available. You can demonstrate how to organize emergency supplies without showing strangers exactly where everything is kept.
During an extended power outage, ordinary household activities may become more noticeable. A generator running in an otherwise quiet neighborhood can be heard from some distance away, and outdoor lighting may stand out when surrounding homes are dark. This doesn’t mean you should try to remain invisible or assume everyone nearby is a threat. Most disasters involve considerable cooperation between neighbors. It does mean being sensible about unnecessary exposure of valuable resources and understanding how your activities affect the people around you.
Safety must always come first. Never move a generator into a garage, shed or enclosed space to reduce noise or visibility. Generators must operate outdoors, well away from doors, windows and ventilation openings, following the manufacturer’s clearance requirements. Carbon monoxide can accumulate without any noticeable smell and can be fatal. If generator noise is a concern, consider safer placement that still meets all exhaust and fire-safety requirements, rather than improvising an enclosure that could trap exhaust or cause overheating.
Conducting a Practical 20-Minute Household Security Assessment
You can learn quite a bit about your household’s security without purchasing anything. Set aside twenty minutes during daylight and walk around your property with a notebook. Begin at the main entrance and check the condition of exterior doors, locks, hinges and windows. Look for damaged latches, loose hardware or areas that aren’t properly secured. Make sure designated emergency exits can still be opened from the inside without searching for keys or moving stored supplies. A security improvement that prevents someone from escaping during a fire creates a much more serious problem than the one it was intended to solve.
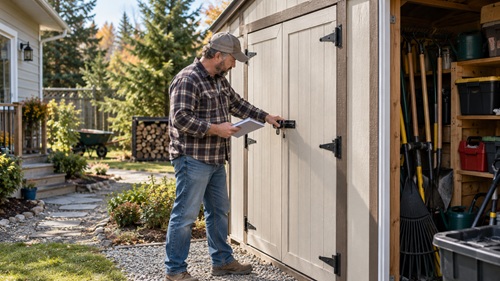
Next, examine sheds, garages and outdoor storage areas. Check whether expensive tools, generators, fuel containers or other valuable equipment are unnecessarily visible from public areas. Make sure doors and storage cabinets close properly and that equipment is protected from weather and unauthorized access. Fuel, propane cylinders and other hazardous materials must be stored in suitable locations according to applicable safety requirements. Don’t move them into living areas or unsafe enclosed spaces simply to keep them out of sight.
Spend a few minutes looking at your emergency supplies from the perspective of someone who doesn’t know where anything is stored. Could another household member find the first aid kit, drinking water, emergency radio or flashlight without your help? Are supplies clearly labelled, or would someone have to open several containers to find what they need? Check that heavy boxes haven’t been stacked in front of windows, doors, electrical panels or other areas that may need to be accessed quickly.
Then examine your exterior lighting and walkways. Test the lights near entrances and identify which ones would remain available during a power outage. Check for loose steps, uneven surfaces, obstacles or other conditions that could cause falls in darkness. Battery-powered lighting may be useful near entrances or along essential walkways, but it should be positioned so people can move safely without consuming unnecessary power.
Finish by reviewing what information about your property and supplies is publicly available. Look at photographs you’ve shared online and check whether they reveal recognizable landmarks, street numbers, access points or storage locations. If you’ve shared more than you intended, review your privacy settings and remove unnecessary details where possible. Keep in mind that removing a photograph doesn’t guarantee that copies haven’t already been saved or shared elsewhere.
When you’ve finished the assessment, write down the three problems that would have the greatest consequences. A damaged exterior door, blocked emergency exit or unsafe fuel-storage arrangement deserves attention before minor improvements. Correct those problems and repeat the inspection to make sure the changes actually worked. You may discover that reorganizing supplies, repairing a latch or moving equipment to a safer location improves your preparedness without requiring another major purchase.
Building Useful Relationships Before an Emergency
Self-reliance is an important part of preparedness, but there’s a limit to what one household can realistically accomplish. You might have excellent food storage but no way to repair a damaged vehicle. Another household may have medical training but limited transportation. Someone else may understand local roads, water systems or emergency communications. Knowing dependable people with different skills can provide options that no single stockpile can replace.
Start with a few neighbors or friends you already trust. You don’t need to organize a formal preparedness group or disclose everything you own. A simple conversation about local emergencies is enough to begin. Ask whether they’ve experienced extended power outages, flooding, wildfires or other disruptions in the area. People who have lived in a community for many years often know about road closures, drainage problems, seasonal weather and other local conditions that aren’t obvious from a map.
Once you’ve established some common interests, discuss how you might help one another during an emergency. Perhaps one neighbor has a vehicle suitable for transporting someone with limited mobility, while another has first aid training. Someone may own a chainsaw and have experience clearing fallen trees, although work involving damaged trees, power lines or unstable structures should be left to qualified personnel. The idea is to identify useful capabilities without assuming everyone will always be available or willing to take on dangerous responsibilities.
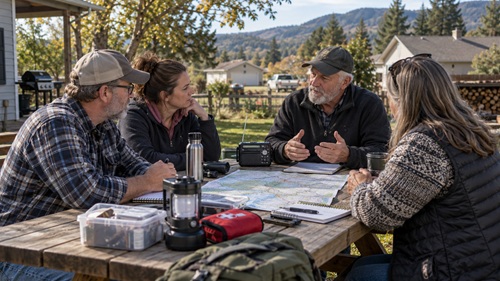
Communications are worth discussing before they’re needed. If mobile phones and internet services become unavailable, how would you contact one another? You might agree on a regular check-in time, a nearby meeting place or another practical method of communication. If you’re using radios, make sure the equipment is compatible, the users understand how to operate it and any licensing requirements are followed. Test the arrangement under normal conditions rather than assuming it will work during an emergency.
Consider how your group would check on people who might need assistance. Older residents, people living alone and households with medical or mobility challenges may require additional support during a prolonged outage or evacuation. Any arrangements should be voluntary and respect people’s privacy. It’s better to ask someone what help they might need than to make assumptions about their abilities.
Community cooperation also requires reasonable boundaries. Helping a neighbor doesn’t mean putting your own household in danger or giving away supplies you cannot replace. If someone asks for assistance, consider what you can safely provide, whether another resource is available and whether emergency services should be involved. Sometimes sharing information, making a phone call or helping someone contact an official assistance program is more useful than giving them equipment.
A useful exercise is to identify three people outside your household who could potentially help with different problems. One might be able to assist with transportation, another with communications and another with checking on vulnerable residents. Contact them before an emergency and discuss whether they’re comfortable with those arrangements. Don’t simply write their names into your emergency plan and assume they’ll be available.
The same exercise should include what you could reasonably offer in return. Perhaps you can help someone understand emergency water storage, share local road information or assist with preparing an evacuation plan. The strongest arrangements are those where people understand what they can contribute, what they may need and where their limitations are.
Making Decisions When Information Is Incomplete
One of the more difficult parts of a real emergency is making decisions when several problems happen at once. People naturally focus on whatever seems most urgent, but the most noticeable problem isn’t always the most dangerous. A generator that won’t start may attract everyone’s attention while the household’s drinking water is running low or someone is becoming dangerously cold. Learning to separate immediate threats from problems that can wait is a skill worth practicing.
A useful approach is to establish what is happening, identify any immediate danger, determine which resources are available and consider the consequences of acting or waiting. This doesn’t need to become a complicated procedure. The important thing is to avoid spending valuable time solving a less serious problem while something more important is being overlooked.
Imagine your community has been without electricity for three days. Your generator has stopped working, the refrigerator is warming up and your household has only 40 litres of safe drinking water remaining. There are four people in the home, and you’ve been planning around a minimum allowance of four litres per person per day. That means your remaining water will last approximately two and a half days at the planned rate, assuming no additional losses or requirements.
Before taking the generator apart, check whether anyone depends on electricity for essential medical equipment or medication storage. If so, restoring an appropriate power source or relocating may be urgent. If nobody has an immediate electrical medical need, assess the indoor temperature, drinking-water supply and food safety situation. The generator may still need attention, but you now have a clearer understanding of which problems could become dangerous first.
The refrigerator also needs to be assessed rather than ignored. If food has been held above safe refrigeration temperatures for too long, it may need to be discarded. Don’t assume the generator can be repaired quickly enough to save it. Use an appliance thermometer and established food safety guidance to determine which foods remain safe. At the same time, calculate when your drinking water will need replenishing and whether you have a dependable source available.
Once immediate hazards have been addressed, decide whether repairing the generator is worth the time and effort. If you have adequate lighting, safe food and water, and no essential electrical medical requirements, the repair may be less urgent than it initially appeared. If repairs require parts you don’t have or skills beyond your experience, spending the entire day trying to fix it may accomplish very little. You may be better off arranging another safe water source, moving essential supplies or preparing to relocate if necessary.
Reliable information is part of that process. Keep a battery-powered or hand-crank radio available, know where official local emergency information is published and avoid relying entirely on unverified social media reports. When communications are limited, distinguish between what you know, what you’ve heard and what you’re assuming. A reported road closure may affect your evacuation plans, but travelling onto an unfamiliar secondary road without checking conditions could create another problem.
There are times when immediate action is necessary. A building fire, rapidly rising floodwater or an official evacuation order isn’t something to debate indefinitely. In less urgent circumstances, however, taking a few minutes to understand what’s happening can prevent a much larger mistake. The challenge is learning to recognize the difference.
Practicing Decisions Under Pressure
Choose a realistic emergency scenario and have everyone in the household work through it together. Suppose a severe winter storm has knocked out electricity across your community. Roads are icy, mobile service is unreliable and the temperature inside your home is slowly dropping. You have emergency food, stored water, warm clothing and a portable generator, but the generator won’t start. A neighbor tells you that the main highway may be closed, although you haven’t confirmed the information.
Begin by identifying what you know for certain. The electricity is out, the generator isn’t working and the indoor temperature is dropping. You don’t yet know how long the outage will last or whether the highway is actually closed. Check official emergency information using your radio or another available communication method. Assess whether the home can remain safely occupied without heating and whether anyone has medical needs that make the situation more urgent.
Next, consider your available options. Can you maintain safe body temperatures using suitable clothing, bedding and approved backup heating? Do you have enough food and water to remain at home while conditions are monitored? Is there a properly heated shelter or another safe destination available if the house becomes too cold? If travel is dangerous, remaining home may be preferable while adequate shelter is available. If the indoor temperature becomes unsafe and you cannot restore suitable heating, relocation may become necessary.
Now introduce another problem. Suppose someone in the household begins showing signs of hypothermia. That changes the priorities immediately. The person needs appropriate warming measures and emergency medical assistance, and the household may no longer have the option of simply waiting for electricity to return. The exercise demonstrates why emergency plans must be flexible. A decision that was reasonable an hour earlier may no longer be appropriate after conditions change.
Have different household members explain how they would handle the situation. You may discover that one person notices a risk others overlooked or knows about an available resource. Encourage discussion, but make sure everyone understands that some situations require immediate action rather than lengthy debate.
Afterward, compare the decisions with your existing emergency plans. Did anyone know where to find official road information? Could everyone locate the emergency radio? Did someone recognize that indoor temperatures might become dangerous before the food supply became a concern? Write down anything that caused confusion and determine what needs to change.
Knowing When to Act and When to Wait
Patience is useful during emergencies, but it shouldn’t be confused with doing nothing. Sometimes waiting provides time to gather reliable information, conserve resources or avoid unnecessary exposure to danger. Other times, delaying a decision can make the situation much worse. The skill lies in recognizing which circumstances allow time for assessment and which require immediate action.
Consider a report that a nearby highway has closed because of severe weather. If you’re safe at home and have adequate supplies, there’s usually little reason to rush onto unfamiliar secondary roads without confirming conditions. You can monitor official information and wait for a safer opportunity to travel. But if an approaching wildfire threatens your property or emergency authorities order an evacuation, waiting for more information may put you at greater risk.
Another example involves equipment failure. If your emergency radio stops working, you might spend a few minutes checking the batteries, connections and operating instructions. If your primary heating system fails during extreme cold, however, you need to assess the indoor temperature and available alternatives immediately. Troubleshooting the equipment may be useful, but it shouldn’t prevent you from taking steps to keep everyone safe.
One way to practice this skill is to ask yourself what will happen if you delay a particular action. Will someone be exposed to immediate danger? Will a critical resource run out? Could the problem become significantly harder to solve? If the consequences of waiting are serious, act promptly. If the situation is stable and you have adequate resources, a short assessment may help you avoid unnecessary mistakes.
You can make this part of your household exercises by introducing new information after everyone has already made a decision. Perhaps the road they intended to use has closed, the water source they were counting on has become contaminated or the person responsible for operating essential equipment is unavailable. Ask whether the original plan still makes sense. If not, have everyone explain what they would change and why.
The purpose isn’t to create a rigid set of rules for every emergency. It’s to become more comfortable making decisions based on actual conditions rather than reacting automatically to fear, frustration or incomplete information.
Making Sure Your Household Doesn’t Depend on One Person
In many households, one person ends up handling most of the preparedness planning. They maintain the generator, organize the food storage, manage the emergency supplies and know where everything is kept. That arrangement may work well during normal life, but it creates a serious weakness if that person is away, injured or unable to help when an emergency occurs.
Start by identifying the essential tasks that only one person currently knows how to perform. These might include operating backup power equipment, accessing stored drinking water, using communications equipment, locating important documents or understanding the evacuation plan. Write down the tasks and determine which other capable household members could reasonably learn them. You don’t need everyone to become an expert, but at least one other person should understand how to manage the most important functions.
For equipment involving electrical systems, fuel, combustion or other hazards, proper training is important. Don’t expect someone to operate unfamiliar equipment simply because instructions are available. If your household uses a solar power system, battery storage, a transfer switch or another complex installation, identify which controls may be operated by household members and which require a qualified technician. Keep the manufacturer’s instructions accessible and arrange demonstrations or training where appropriate.
Written instructions can make a considerable difference. Keep a waterproof folder containing important phone numbers, evacuation destinations, medication information and operating instructions for essential equipment. If certain equipment is used infrequently, attach a laminated instruction sheet nearby. Include enough detail for someone unfamiliar with the system to understand what they’re permitted to do safely, but avoid encouraging repairs or procedures that require specialized knowledge.
The same principle applies to information stored electronically. If all your emergency contacts, insurance documents, maps and important records are accessible only through a phone or cloud account, consider what happens when the device fails or the internet is unavailable. Keep essential information available offline, using paper copies or appropriately secured local storage. Protect sensitive personal information from unauthorized access while ensuring authorized household members can retrieve it when necessary.
Testing Whether Someone Else Can Follow the Plan
Choose a day when everyone is available and ask the person who normally manages preparedness to observe rather than provide instructions. Have another capable household member locate the emergency radio, find the drinking-water supplies, identify the evacuation route and explain how essential equipment would be used. Don’t allow the usual person to provide hints unless safety requires it.
Pay attention to where the exercise breaks down. Perhaps the emergency radio is easy to find, but nobody knows how to change frequencies or locate local broadcasts. Maybe the water containers are accessible, but nobody knows which ones contain drinking water. Someone might understand the evacuation destination but not know where important documents are stored.
These problems are usually easier to correct than buying more equipment. Label containers, reorganize supplies, improve written instructions and provide practice where needed. Then repeat the exercise to see whether the changes worked.
You can also test what happens when a particular system isn’t available. If your family normally relies on GPS navigation, have someone identify your evacuation destination using a paper map. If you depend on electronic records, see whether essential information can be located without internet access. If your household uses an electric well pump, determine whether anyone understands the approved backup arrangements.
Don’t assume that every task can be performed manually or without specialized equipment. Some systems simply cannot be operated safely when their normal power or controls are unavailable. In those cases, the backup plan may involve obtaining professional assistance, using another resource or relocating to somewhere essential services are available.
A Practical Household Decision-Making Exercise
To bring these skills together, choose an afternoon and give your household a simulated emergency involving several problems. For example, imagine that a major storm has caused a prolonged power outage, your generator has failed and local roads may be closed. You have enough food for several weeks, but only five days of drinking water. One household member is away, and another needs medication that must be kept within a specific temperature range.
Have everyone identify the immediate priorities without relying on the person who normally manages preparedness. They should consider medical needs first, including how the medication can be maintained at its required temperature. They should then assess the safety of the home, available drinking water, communications and whether remaining at home is practical. If the medication cannot be stored safely, the household may need to contact a pharmacist, healthcare provider or another appropriate service rather than improvising a storage method.
Next, ask everyone to explain what information they would need before making a decision. Is the highway actually closed? Is there an official emergency shelter operating nearby? Can the medication be safely transported? How long is the power expected to remain unavailable? What happens if the drinking-water supply runs out before services return? Have household members locate the information using the resources they would actually have available during an outage, including emergency radios, printed contact information and offline maps.
Give everyone a few minutes to identify the immediate problems, then ask them to explain what they would do during the next hour. The person responsible for medications might need to contact a pharmacist or healthcare provider to determine safe storage or replacement options. Another household member could check official emergency information and road conditions, while someone else calculates the remaining drinking-water supply and checks whether additional safe water is available. Assign responsibilities according to people’s abilities rather than assuming the same person must handle everything.
Once those decisions have been made, introduce another problem. Suppose the person who normally drives the household vehicle cannot return home, or the road leading to your preferred evacuation destination has been closed. Ask everyone to reconsider the original plan. Can another capable household member drive? Is alternative transportation available? Would remaining at home still be safe, or is there another suitable destination? If anyone requires medical or mobility assistance, determine how that need would be addressed without depending on an arrangement that hasn’t been confirmed.
You can make the exercise more realistic by limiting the information available. Instead of allowing everyone to search the internet, have them use the emergency radio, paper maps, printed instructions and contact information you’ve already prepared. Don’t actually disconnect essential services or interfere with medication storage. The purpose is to see whether your household can find information and make decisions without relying on conveniences that might be unavailable during a real emergency.
Pay attention to how people communicate. Does everyone understand which problems are most urgent? Are two people working on the same task while something important is being overlooked? Does someone hesitate because they don’t know whether they’re allowed to make a decision? These are the kinds of problems that may not appear during an ordinary equipment test but can become important when several things go wrong at once.
Record the answers and compare them with your existing plans. If nobody knows where to find official road information or how to handle the medication requirements, those are weaknesses that need attention. If the household can identify the immediate dangers, locate essential supplies and make reasonable decisions without relying on one person, that’s a useful indication that your preparedness skills are improving.
Repeat the exercise later with different problems. You might simulate a contaminated water supply, an evacuation order arriving while someone is away from home, or a winter storm that prevents you from reaching your usual backup location. Each situation should require household members to identify the immediate danger, determine what resources are available and decide what needs to happen first. Keep the scenarios realistic and introduce only one or two unexpected complications at a time so you can clearly identify where the plan succeeds or fails.
When the exercise is finished, discuss what happened. Don’t just ask whether everyone completed their assigned tasks. Find out which decisions were difficult, what information was missing and whether anyone discovered a problem with equipment or supplies. Perhaps your emergency contacts are stored only on a phone, your paper maps are outdated or nobody knows how to locate the nearest emergency reception centre. Write down the specific problem and what needs to change.
For each problem, determine whether it resulted from missing equipment, insufficient knowledge, unclear instructions or an unrealistic assumption. The solution depends on the cause. If nobody could find the emergency radio, reorganizing your storage might solve the problem. If the radio was available but nobody knew how to operate it, the household needs practice. If the radio couldn’t receive the broadcasts you expected, you may need another dependable information source.
After making corrections, repeat the part of the exercise that failed. There’s little value in writing down a problem and assuming it’s fixed simply because you’ve purchased something or changed your plan. Have someone demonstrate that the correction actually works. If the original problem was obtaining emergency information without internet access, another household member should now be able to demonstrate how to do that using your backup arrangements.
Over time, these exercises will reveal which parts of your preparedness are dependable and which still rely on assumptions. You may discover that your family can manage a power outage quite well but struggles with evacuation planning, or that everyone knows where the water is stored but only one person understands how to treat additional water safely. Those discoveries give you something specific to work on instead of simply adding more supplies.
A household that can recognize immediate danger, locate essential resources, communicate clearly and adjust when the original plan fails is in a much better position than one that depends entirely on equipment and instructions nobody has practiced using.
Practical Survival Skills-Testing Checklist
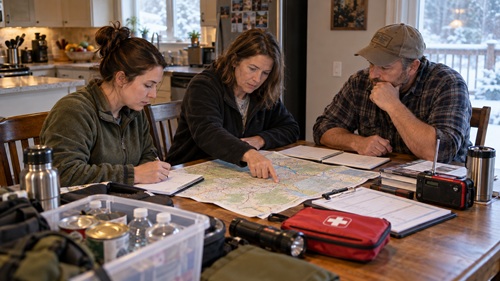
There’s a difference between understanding a preparedness skill and being able to perform it when something goes wrong. You might know that your water filter removes certain contaminants, but have you actually assembled it, operated it and checked whether it still works? You may have an evacuation route marked on a map, but have you checked whether another household member can follow it without using the internet? These are the kinds of things worth finding out before an emergency.
The following checklist brings together the skills covered in this guide. It isn’t intended to measure how much equipment you own. It’s meant to help you determine what you can actually do, where your preparations are dependable and where you still need practice. Some tasks can be demonstrated directly, while others are better tested through a safe simulation or by explaining the correct procedure. There’s no reason to expose yourself to contaminated water, dangerous temperatures or hazardous equipment simply to prove you can handle an emergency.
Work through the checklist over several weekends rather than trying to complete everything at once. Have other capable household members participate, especially in areas where one person normally handles all the planning. Record your results and make corrections before repeating any failed tests.
Water Collection, Treatment and Storage
Your skills assessment
Choose a rating for each skill as you test it.
Show gaps
0/63
Assessed
—
Score
0
Skills to improve
Water Collection, Treatment and Storage
Calculate your household’s daily drinking and cooking water requirements and determine how many days your stored supply will last.
0 1 2
Demonstrate how to track daily water consumption and calculate the remaining supply during a ten-day outage.
0 1 2
Identify a potential alternative water source and assess its accessibility, seasonal reliability and contamination risks.
0 1 2
Inspect, assemble and operate your water filter according to the manufacturer’s instructions.
0 1 2
Explain which contaminants your filter removes and which it cannot reliably remove.
0 1 2
Explain or safely demonstrate an appropriate method of disinfecting microbiologically contaminated water.
0 1 2
Explain why boiling or ordinary filtration may not make chemically contaminated water safe.
0 1 2
Inspect drinking-water containers for leaks, damage, cleanliness and appropriate storage.
0 1 2
Demonstrate how potable and non-potable water are kept separate.
0 1 2
Safely transport a realistic quantity of water using your intended containers or equipment.
0 1 2
Complete a one-day stored-water exercise and compare actual consumption with your planned allowance.
0 1 2
Emergency Heating, Cooking and Power
Prepare a complete meal without using your normal kitchen appliances, using a safe backup method.
0 1 2
Measure the fuel and water required to prepare several emergency meals.
0 1 2
Identify stored foods that can be eaten safely without cooking.
0 1 2
Safely start, operate and shut down your generator according to its instructions, if you own one.
0 1 2
Identify safe generator placement and explain the dangers of carbon monoxide.
0 1 2
Identify essential electrical devices and estimate their power requirements.
0 1 2
Demonstrate how to provide essential lighting and communications power if your primary backup source fails.
0 1 2
Set up a safe cold-weather sleeping arrangement using available clothing, bedding and insulation.
0 1 2
Explain how to reduce heat loss from a room without blocking ventilation or emergency exits.
0 1 2
Recognize signs of hypothermia, heat exhaustion and heatstroke and know when to seek emergency medical assistance.
0 1 2
Identify a safe relocation destination if indoor temperatures become dangerous.
0 1 2
Evacuation and Navigation
Identify the local hazards most likely to require evacuation.
0 1 2
Explain which conditions would cause your household to prepare to leave and which require immediate action.
0 1 2
Identify a primary evacuation destination and a realistic alternative.
0 1 2
Assess your primary evacuation route for bridges, narrow roads, flood-prone areas and other possible closure points.
0 1 2
Evaluate an alternative route and determine whether it is suitable for your vehicle and the hazard involved.
0 1 2
Demonstrate how to use offline maps and navigate with a paper map.
0 1 2
Locate official emergency alerts, evacuation instructions and road-condition reports for your region.
0 1 2
Gather essential documents, medications, clothing and emergency supplies within a realistic departure time.
0 1 2
Confirm that emergency bags can be carried or transported by their intended users.
0 1 2
Explain how pets or household members requiring assistance would be evacuated.
0 1 2
Identify alternative transportation if your primary vehicle or driver is unavailable.
0 1 2
Food Management and Physical Endurance
Calculate approximately how long your stored food would last based on household requirements.
0 1 2
Identify foods requiring substantial cooking water or fuel and determine whether your backup arrangements can support them.
0 1 2
Explain how increased physical activity may affect calorie and water requirements.
0 1 2
Identify which refrigerated and frozen foods require attention first during a prolonged outage.
0 1 2
Explain how appliance temperatures and food safety guidance determine whether perishable food remains safe.
0 1 2
Organize essential supplies so they can be retrieved without unnecessary lifting or searching.
0 1 2
Move a realistic load of supplies safely using suitable equipment.
0 1 2
Identify physically demanding emergency tasks and practical ways to reduce unnecessary work.
0 1 2
Develop a workable arrangement for sharing demanding tasks and allowing adequate rest.
0 1 2
Recognize warning signs of dehydration, exhaustion and heat-related illness.
0 1 2
Household Security and Community Cooperation
Complete a twenty-minute household security inspection covering doors, windows, storage areas and emergency exits.
0 1 2
Identify valuable supplies or equipment that are unnecessarily visible or poorly secured.
0 1 2
Confirm that fuel, propane and other hazardous materials are stored appropriately.
0 1 2
Inspect exterior lighting, walkways and emergency access points for safety problems.
0 1 2
Review publicly shared information that may reveal sensitive details about your supplies or property.
0 1 2
Demonstrate how to use emergency lighting while conserving battery power.
0 1 2
Identify trusted neighbors or community contacts who may be able to provide practical assistance.
0 1 2
Establish a reasonable method of checking on vulnerable neighbors during an emergency.
0 1 2
Identify how to communicate with trusted contacts if mobile phones and internet services fail.
0 1 2
Explain what assistance your household could safely provide without compromising its own essential needs.
0 1 2
Decision-Making and Household Readiness
Work through a simulated 72-hour power outage and identify immediate household safety priorities.
0 1 2
Explain how to respond if your primary drinking-water supply becomes unsafe or unavailable.
0 1 2
Determine what to do if your generator or another essential system fails.
0 1 2
Demonstrate how to distinguish confirmed emergency information from rumors or unverified reports.
0 1 2
Practice deciding whether to remain at home or relocate when essential services are unavailable.
0 1 2
Have another capable household member locate and explain essential emergency supplies without assistance.
0 1 2
Confirm that emergency contacts, medical information, operating instructions and evacuation details are available offline.
0 1 2
Identify household responsibilities that depend on one person and establish reasonable backups.
0 1 2
Recognize fatigue or stress that could interfere with safe decision-making.
0 1 2
Complete a household emergency simulation and record what worked, what failed and what needs improvement.
0 1 2
Copy assessment and results. Your ratings can be copied into a document or printed for future comparison.
How to Score Your Preparedness
For each skill, award yourself two points if you successfully demonstrated the task under safe practice conditions and understand its limitations. Award one point if you’re partially prepared, meaning you understand the task or have the necessary equipment but still need practice, clearer instructions or another resource. Give yourself zero points if you cannot currently complete the task or don’t have a workable alternative. Leave a skill unscored until you’ve actually assessed it rather than assuming you can perform it.
Add your points and divide that number by twice the number of skills you’ve assessed, then multiply by 100 to calculate your percentage. For example, if you evaluate twenty skills and earn thirty points out of a possible forty, your score is 75%. This isn’t a scientific measure of survival capability, and a high score doesn’t mean you’re prepared for every emergency. It’s simply a way to track improvements and identify areas that still need attention.
Don’t let the overall score hide a serious weakness. A household that scores well in most areas but has no safe drinking-water supply, workable evacuation plan or way to maintain essential medical care still has problems that deserve immediate attention. Address critical zero-point results first, particularly those involving life safety, drinking water, shelter, medical needs and evacuation.
The most useful comparison is between your own assessments over time. If you score 60% during your first round of testing and 85% several months later, look at which specific skills improved. Did you learn how to operate equipment? Correct storage problems? Develop another evacuation route? Make sure other household members can perform essential tasks? Those improvements tell you much more than the percentage alone.
Recording What Failed and What Needs to Change
Finding a weakness is useful only if you do something about it. It’s easy to finish an exercise, discover that your emergency radio doesn’t work or your water supply is insufficient, and then forget about the problem once normal life takes over. Keeping a simple corrective-action record helps prevent that.
For every skill you couldn’t complete, write down what happened, why it happened, what needs to change and when you’ll test it again. Be specific. Instead of writing that your water storage needs improvement, record that your household used 22 liters during a one-day exercise even though you’d planned for 16 liters. That gives you a measurable problem to solve.
The cause matters as well. Perhaps you underestimated how much water was needed for food preparation, or somebody used drinking water for cleaning because the non-potable supply wasn’t clearly labelled. One problem may require increasing your stored supply, while the other may be corrected by reorganizing and labelling containers.
Use the following record to document the problems you discover.
- Add problem
Once you’ve made a correction, repeat the original test. Don’t assume the problem is solved simply because you’ve purchased something, reorganized supplies or written new instructions. If the original problem was that nobody could operate the emergency radio, have another household member demonstrate that they can now use it. If your water storage was insufficient, repeat the consumption exercise and check whether the revised supply meets your actual needs.
Keep the completed records and review them every few months. Over time, you’ll begin to see whether the same weaknesses keep appearing or whether your household is becoming more capable.
Preparedness Action Plan
When the exercise is finished, review the results together. Identify what worked, what failed and what took longer than expected. Record the specific changes needed and decide who will be responsible for making them. If your household used more water than planned, recalculate your storage requirements. If someone couldn’t find the emergency radio, reorganize your supplies. If your evacuation plan depended on a road that might be inaccessible, investigate another realistic option. Make corrections based on what you actually discovered rather than purchasing more equipment simply because it seems useful.
After making those improvements, repeat the failed portions of the exercise. This is an important part of the process. A problem isn’t necessarily solved because you’ve written down a new procedure or purchased a replacement item. Someone needs to demonstrate that the correction works. If you’ve changed your water-storage arrangements, test whether the containers are accessible and whether the available supply meets your household’s needs. If you’ve rewritten operating instructions, have another household member follow them without assistance.
Try to make this a regular part of your preparedness routine. You might test water management one month, evacuation procedures the next and backup cooking or communications after that. Every six months, complete a broader household assessment using the skills-testing checklist. Review your results from previous exercises to see where you’ve improved and which problems still need attention. Also revisit your plans whenever you move, acquire new equipment, change vehicles or experience significant changes in household needs.
A Weekend Preparedness Challenge
This weekend, choose three skills from the checklist that you’ve never actually tested. Pick at least one involving an essential need such as drinking water, emergency heating, communications or evacuation. Don’t purchase anything new before completing the exercises unless it’s necessary for safety. Use the supplies and equipment you already have and find out what you can accomplish with them.
For the first exercise, choose something practical that can be measured. You might calculate your household’s water requirements, inspect your containers and determine exactly how many days your stored supply would last. For the second, test a piece of equipment such as your emergency radio, water filter or backup cooking system. For the third, have another household member demonstrate a skill that you normally handle yourself, such as locating emergency supplies or explaining the evacuation plan.
Record how each exercise went. If you completed the task successfully, make sure you understand the equipment’s limitations and whether the skill would still work under different conditions. If you struggled, write down what caused the problem. Maybe you need more practice, clearer instructions, a replacement part or a different approach. Whatever the reason, you now have something specific to improve.
The following weekend, correct at least one of the problems you discovered and repeat the test. Continue working through your preparedness skills in manageable sessions rather than trying to accomplish everything at once. Finding a weakness during a practice exercise is useful because you still have time to correct it. Finding the same weakness for the first time during a real emergency could have much more serious consequences.
Skills Learned
By completing the exercises in this guide, readers should be able to calculate their household’s drinking-water requirements, evaluate the limitations of water-treatment equipment, identify potential alternative water sources and determine how long their stored water would last during an extended interruption. They should also understand why water that appears clean may still be unsafe and how storage, handling and transportation can affect the reliability of an emergency water supply.
Readers should be able to develop and test an evacuation plan that considers local hazards, road conditions, alternative destinations, transportation limitations and the needs of everyone in their household. They should understand how to compare evacuation routes, recognize conditions requiring early preparation or immediate departure, and obtain reliable information when normal communications are disrupted.
The exercises also develop practical knowledge of maintaining safe temperatures during power outages, conserving food and cooking fuel, reducing unnecessary physical work and recognizing the warning signs of exhaustion, hypothermia and heat-related illness. Readers should be better equipped to determine which household activities are essential, which can safely wait and how to manage limited resources over several days.
Household security and community preparedness are another important part of these skills. Readers should be able to identify basic vulnerabilities around their property, protect emergency supplies without creating additional safety hazards and establish reasonable arrangements for communicating and cooperating with trusted neighbors.
Perhaps most importantly, readers should be able to recognize immediate dangers, evaluate available information, establish priorities and make practical decisions when several problems occur at once. They should also understand how to reduce their household’s dependence on one person, one piece of equipment or one system.
The skills-testing checklist and corrective-action record provide a way to measure those abilities, identify weaknesses and track improvements over time. Rather than assuming that owning emergency equipment means being prepared, households can demonstrate what they know, find out what doesn’t work and make corrections before an emergency occurs.
Preparedness isn’t measured only by what you have stored away. It’s also measured by what you know how to do when the things you’re counting on stop working.
© Prepping Communities. This content is for informational purposes only and not professional advice. Use at your own risk.
Terms | Privacy | Guidelines