

Lemons are easy to waste, especially when they’re purchased in larger bags. A few get used for cooking, and the rest sit in the refrigerator until they begin drying out or developing mould. Preserving them while they’re still fresh is a good way to take advantage of lower prices and keep citrus available for later use.
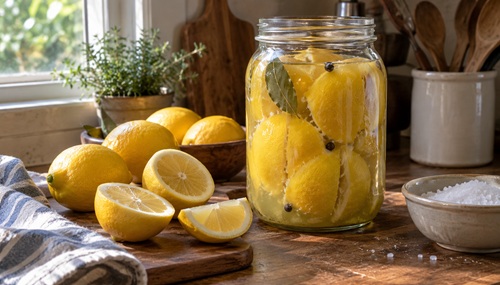
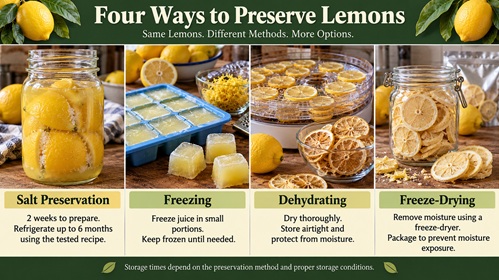
One of the oldest ways to preserve lemons is with salt. This method has been used for generations in North African and Middle Eastern kitchens, where lemons are packed into jars with salt and their own juice. Over time, the peel becomes soft, the sharp flavor changes, and the finished lemons can be used in soups, stews, rice, vegetables, chicken, and fish.
Unlike fresh lemons, where the juice is usually the part people want, preserved lemons are often used for their peel. Once softened, the peel can be finely chopped and added directly to food. A small amount provides a surprisingly strong citrus flavor, which is useful when cooking with basic pantry ingredients such as rice, beans, and lentils.
The preservation process begins when salt draws moisture from the cut lemons. As the lemons release their juice, the salt dissolves into the liquid, creating a salty, acidic environment. Naturally occurring lactic acid bacteria can also contribute to fermentation by converting some of the sugars into lactic acid. Over time, the peel softens, some of its bitterness fades, and the lemon develops a deeper, more savory flavor.
The amount of salt and the preparation conditions matter. Simply placing lemons into saltwater doesn’t guarantee they’ll remain safe for months. Traditional salt-preserved lemons use a generous amount of salt along with the lemons’ own juice, and the finished product is stored according to the recipe’s instructions.
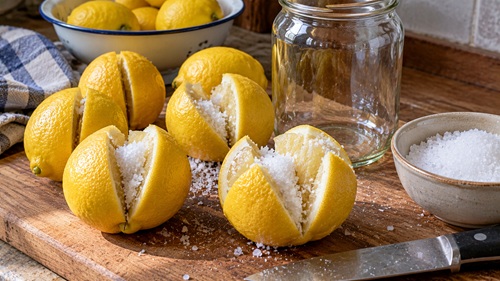
For this method, start with fresh, firm lemons that have no mould, punctures, or soft spots. Wash them thoroughly under running water, rubbing the skins to remove dirt and surface residues. Unwaxed lemons are convenient because the peel will eventually be eaten, although ordinary grocery-store lemons can also be used after washing. Avoid using soap or household detergents on produce.
A wide-mouth glass preserving jar makes the process easier because the lemons can be packed firmly and removed later without much difficulty. The jar must be sterilized before use, and the lid should be suitable for contact with acidic, salty food. No pressure canner or expensive equipment is needed for this particular recipe.
Recipe: Traditional Salt-Preserved Lemons
This recipe is based on the preserved-lemon method published by Clemson University Cooperative Extension and adapted from the Ball Complete Book of Home Preserving. It produces approximately one liter of preserved lemons. The lemons are prepared over two weeks and can then be refrigerated for up to six months.
Ingredients
- 10 fresh lemons, divided into five for preserving and five for juice
- ½ cup (125 mL by volume) pickling or canning salt
- 4 dried bay leaves (optional)
- 4 cinnamon sticks, approximately 4 inches long (optional)
- 1 teaspoon whole black peppercorns (optional)
Equipment
- One clean, wide-mouth 1-litre glass preserving jar with a suitable lid
- Large pot for sterilizing the jar
- Sharp knife and cutting board
- Citrus juicer
- Measuring cup and tablespoon
- Clean utensils
Instructions
Step 1 – Sterilize the jar. Place the clean glass jar in boiling water for 10 minutes. At elevations above 1,000 feet (305 meters), increase the sterilization time according to recognized home-preservation guidance.
Step 2 – Prepare the lemons. Wash and dry five lemons. Cut approximately ⅛ inch (3 mm) from the stem end of each lemon. Starting at that end, cut the lemons lengthwise into quarters without cutting completely through the bottom. The four sections should remain attached.
Step 3 – Prepare the juice. Squeeze the remaining five lemons to obtain approximately 1½ cups (375 mL) of fresh lemon juice.
Step 4 – Add the salt. Place one tablespoon of salt into the bottom of the sterilized jar. Open each of the five prepared lemons and work one tablespoon of salt into the exposed flesh. Close the quarters together again.
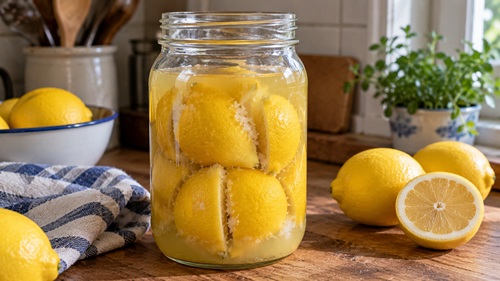
Step 5 – Pack the jar. Place the salted lemons into the jar with their stem ends facing upward. Press them down firmly enough to release some juice. Add the optional dried spices between the lemons and distribute the remaining measured salt over the fruit.
Step 6 – Add the lemon juice. Pour the freshly squeezed lemon juice into the jar until the liquid reaches approximately one inch (2.5 cm) below the rim, following Clemson Extension’s instructions. Close the jar with its lid.
Step 7 – Allow the lemons to preserve. Place the jar in a cool, dark location for two weeks. Gently shake the jar each day to distribute the salt. If gas pressure develops, carefully release it as needed.
Step 8 – Refrigerate the lemons. After two weeks, transfer the jar to the refrigerator. The lemons are ready to use and can be stored under refrigeration for up to six months.
Step 9 – Prepare for cooking. Remove a lemon with a clean utensil. Separate the softened peel from the pulp and membrane, which should be discarded. Rinse the peel under running water to remove excess salt, then chop or slice it as needed.
The optional spices add flavor but aren’t necessary. If using them, stick to dried spices or herbs. Adding fresh garlic, herbs, or other ingredients changes the recipe and may affect the acidity of the finished product.
Important Food Preservation Safety Warning
These salt-preserved lemons are not shelf-stable canned food. After the two-week preparation period, they must be refrigerated and used within the recommended six months. Do not reduce the salt, replace the lemon juice with water, or change the preparation conditions. The salt and acidity are important parts of the preservation process.
Some whole-lemon preservation methods shared online use a three-percent saltwater brine, approximately 30 grams of salt per liter of water. The lemons are sometimes left at room temperature for three days before being moved into cold storage, with claims that they can remain usable for a year.
That method should not be treated as a verified one-year preservation recipe. Whole lemons have intact skins that slow the movement of salt into the fruit. Even when the surrounding water contains three percent salt, the inside of the lemon may not reach the same concentration.
A lemon that remains juicy after several months isn’t necessarily safe to eat. Never taste questionable preserved food to determine whether it’s safe. Discard any batch that develops mould or other signs of spoilage, and remember that unsafe food doesn’t always show visible warning signs.
For emergency food storage, the distinction between refrigerated and shelf-stable food matters. A recipe that requires refrigeration still depends on maintaining the proper temperature during a prolonged power outage.
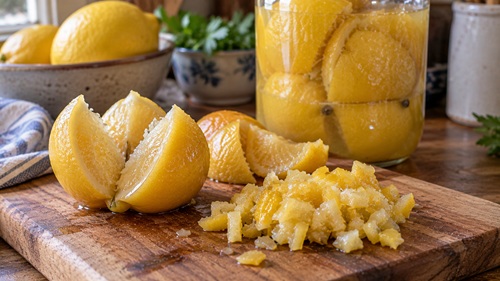
Once the lemons are ready, the softened peel can be used in many ordinary meals. Start with a teaspoon or two of finely chopped peel and adjust according to taste. Preserved lemon has a stronger flavor than fresh lemon, so a little usually goes a long way.
Rice is a good place to begin. A small amount of preserved lemon mixed with garlic and herbs can make plain rice much more flavorful. It also works well with beans, lentils, vegetable soups, and stews. Adding the peel near the end of cooking helps retain its citrus flavor.
Preserved lemon is particularly good with chicken and fish. The chopped peel can be mixed with olive oil, garlic, and herbs to make a marinade. It can also be added to roasted potatoes, carrots, and other vegetables. Because the lemons contain salt, taste the food before adding more seasoning.
Preserved lemons aren’t a direct substitute for fresh lemons in every recipe. Their salty flavor makes them less suitable for lemonade, sweet baking, and other recipes where fresh lemon juice is needed. For those purposes, freezing lemon juice is usually more practical.
Freezing is one of the easiest ways to preserve lemons that won’t be used before they spoil. Squeeze the juice and pour it into ice cube trays. Once frozen, transfer the cubes into freezer-safe bags or containers and label them with the date. This makes it easy to remove only the amount needed for cooking without thawing a larger quantity.
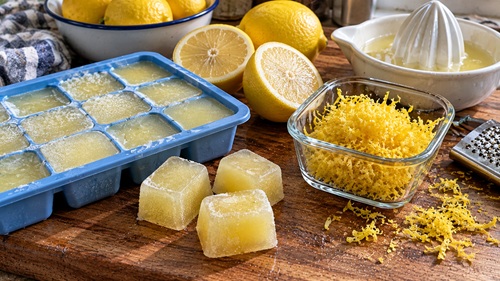
The zest can also be frozen separately. Before juicing the lemons, grate the outer yellow portion of the peel and store it in small portions. Lemon zest contains aromatic oils that add flavor to baking, sauces, vegetables, and other dishes. Avoid grating too deeply into the white pith because it can taste bitter.
Whole lemons can be frozen as well, although their texture changes after thawing. The flesh becomes soft, so they won’t be suitable for slicing and serving like fresh lemons, but the juice can still be used.
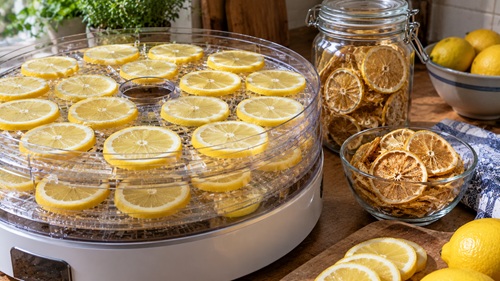
Dehydration provides another way to preserve lemons, particularly when the goal is to keep citrus available without continuous refrigeration. Wash the lemons and cut them into thin, even slices. Arrange the slices on dehydrator trays without overlapping them, then dry them thoroughly according to reliable fruit-dehydration instructions. The drying time depends on the thickness of the slices and the dehydrator being used.
Once the slices are completely dry, allow them to cool before packing them. Check for remaining moisture and condition the dried fruit according to recommended fruit-drying practices. Moisture trapped inside a container can cause mould to develop during storage, so this step shouldn’t be skipped.
Store dried lemon slices in airtight containers in a cool, dry location away from direct sunlight. Check the containers periodically for condensation or other signs of moisture. Dried slices can be added to tea, hot water, and some cooked dishes or ground into a citrus seasoning. The peel can become bitter when concentrated, so smaller amounts are usually best.
For households with a freeze-dryer, lemons can also be freeze-dried and packaged for extended storage. The process removes moisture while retaining much of the fruit’s flavor. Proper packaging is necessary to prevent moisture from entering after processing, but the finished product doesn’t require continuous refrigeration when correctly prepared and stored.
Keeping lemons in several forms provides more flexibility than relying on one preservation method. Fresh lemons can be used for immediate cooking, frozen juice can be kept for recipes requiring a fresh citrus flavor, and dried slices can be stored for times when refrigeration isn’t available. Salt-preserved lemons provide another option for savory meals.
It’s also worth learning how to use the finished products before preserving large quantities. A jar of salted lemons is only useful if the household enjoys eating them. Try a small amount in rice, vegetables, or a stew and see how the flavor works with foods already being prepared.
When lemons are inexpensive, buying extra can make sense if there’s a plan for using them. A large bag isn’t a bargain if several lemons end up in the garbage. Preserving the fruit while it’s still fresh allows more of the purchase to be used over time, and the same approach can be applied to other seasonal foods.
Preparedness Action Plan
Begin with a small batch of salt-preserved lemons using the measured recipe above. Follow the two-week preparation period and refrigeration requirements, and label the jar with the date. Once the lemons are ready, try adding small amounts of the softened peel to rice, soups, vegetables, or another meal prepared regularly.
Freeze some lemon juice in small portions and save the zest separately. If a dehydrator is available, dry a few lemon slices and practice packaging them properly. Compare the results to determine which methods are most useful for the household.
For emergency planning, pay attention to which foods require refrigeration. Salt-preserved lemons made using this recipe must remain refrigerated after the initial preparation period. Properly dried or freeze-dried lemons provide alternatives that can be stored without continuous electricity.
Key Takeaways
Salt-preserved lemons are a practical way to keep citrus available for cooking beyond the normal storage life of fresh fruit. The traditional method uses salt and lemon juice to soften the peel and develop a concentrated flavor that works particularly well in savory meals.
The recipe provided here takes approximately two weeks to prepare and allows refrigerated storage for up to six months. Whole lemons stored in a weak saltwater brine should not be assumed safe for a year simply because they remain juicy.
Freezing and dehydration provide other ways to preserve lemons, each with different storage requirements. Learning these methods while fresh produce is readily available helps reduce waste, make better use of seasonal purchases, and keep useful ingredients on hand.
Recipe source: Clemson University Cooperative Extension, Traditional Preserved Lemons: How to Make and Use Preserved Lemons at Home, adapted from the Ball Complete Book of Home Preserving.
https://hgic.clemson.edu/traditional-preserved-lemons-how-to-make-and-use-preserved-lemons-at-home/
© Prepping Communities. This content is for informational purposes only and not professional advice. Use at your own risk.
Terms | Privacy | Guidelines