
Introduction
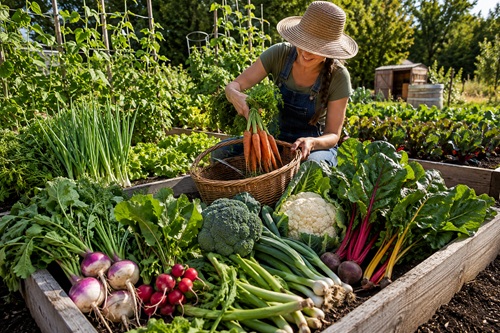
A successful preparedness garden is about far more than simply growing food. It is about making the most of every seed you plant, every square foot of growing space, and every harvest you bring into your kitchen. One of the biggest mistakes many gardeners make is harvesting only the most familiar part of a vegetable while throwing away other edible and highly nutritious portions of the plant. In many cases, leaves, stems, flowers, shoots, seed pods, and even seeds can provide valuable food that often goes unused. Learning how to use an entire plant is an important preparedness skill. During everyday life it reduces waste, stretches your grocery budget, and provides greater variety in your meals. During an emergency or long-term disruption, those same skills can significantly increase the amount of food your garden produces without requiring additional land, water, fertilizer, or labor. Simply put, getting more food from the plants you already grow is one of the easiest ways to improve your food security.
Many vegetables also offer multiple harvests throughout the growing season. Some produce edible leaves long before the main crop is ready, while others continue producing shoots or side growth after the primary harvest has been collected. Understanding when and how to harvest these different parts allows you to enjoy fresh food over a much longer period instead of waiting for a single harvest. Preservation is equally important because different parts of a plant respond better to different storage methods. Some freeze exceptionally well, others are ideal for dehydration or freeze-drying, while certain vegetables are best suited for pickling, pressure canning, fermentation, or root cellar storage. Knowing which preservation method works best for each edible part helps preserve flavor, nutrition, and shelf life while reducing waste.
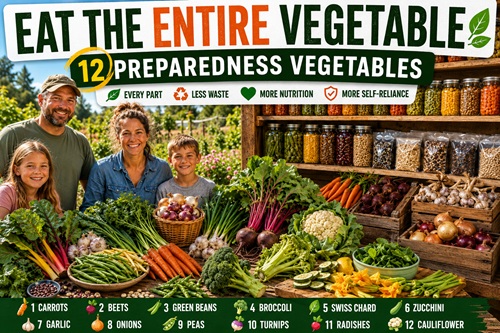
This guide explores eleven of the most productive vegetables that belong in nearly every preparedness garden. For each one, you’ll learn which parts are edible, when to harvest them, how to prepare them, and the best ways to preserve them for future use. You may discover that some of your favorite vegetables provide far more food than you ever realized.
Beets
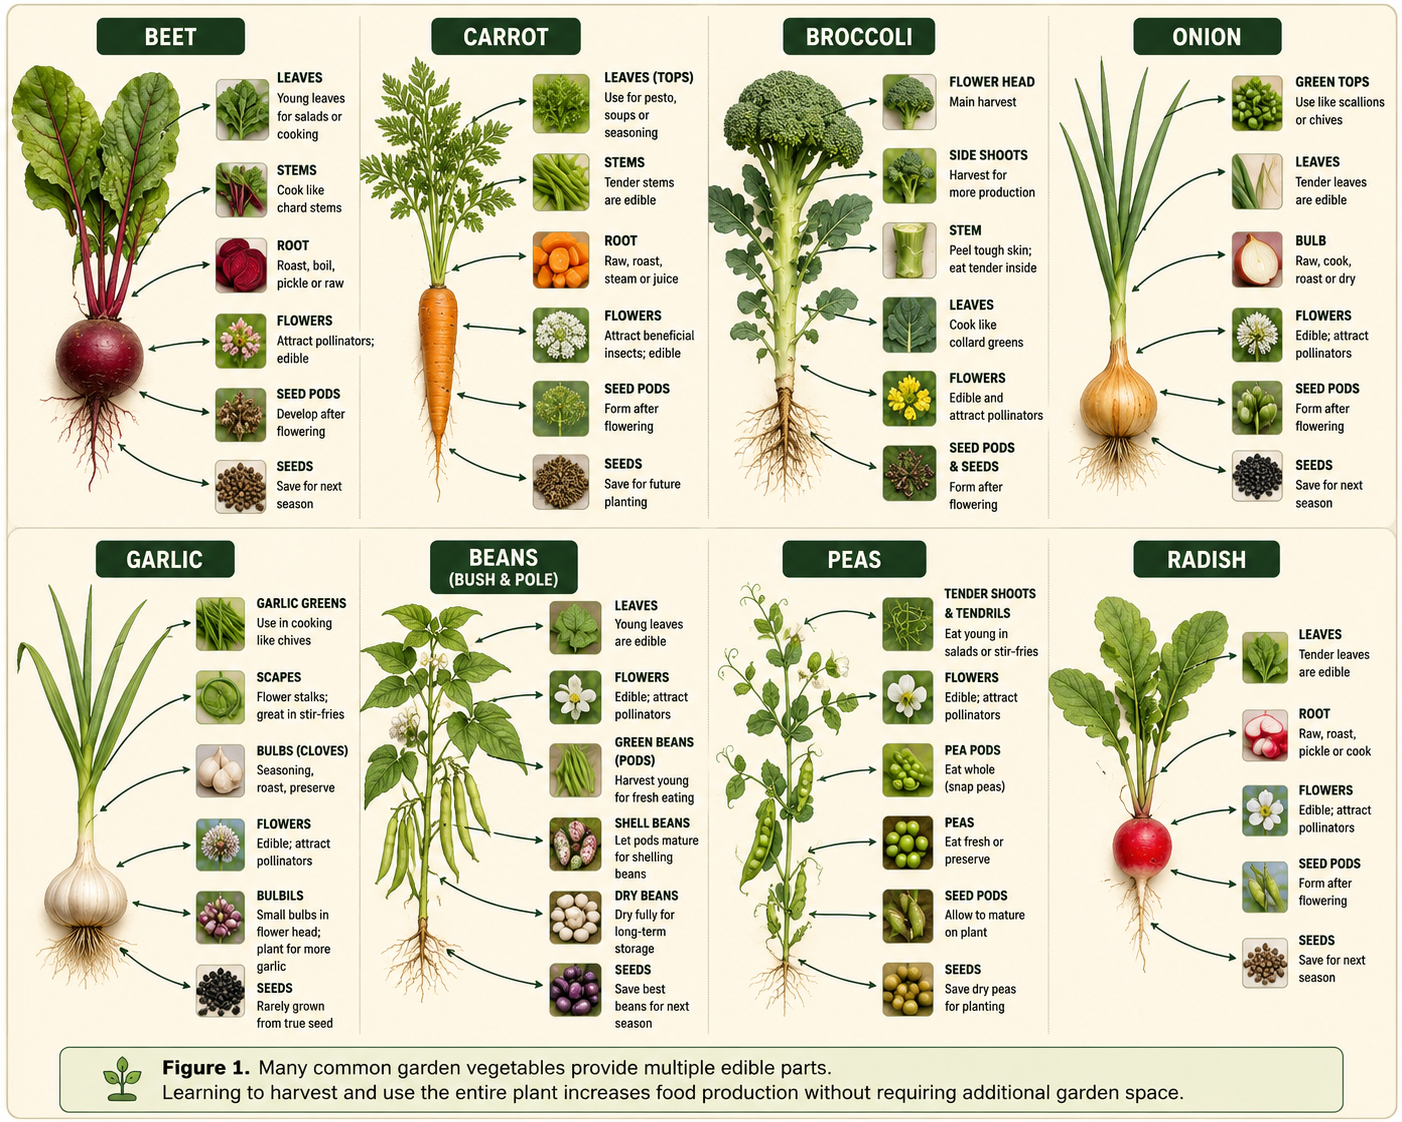
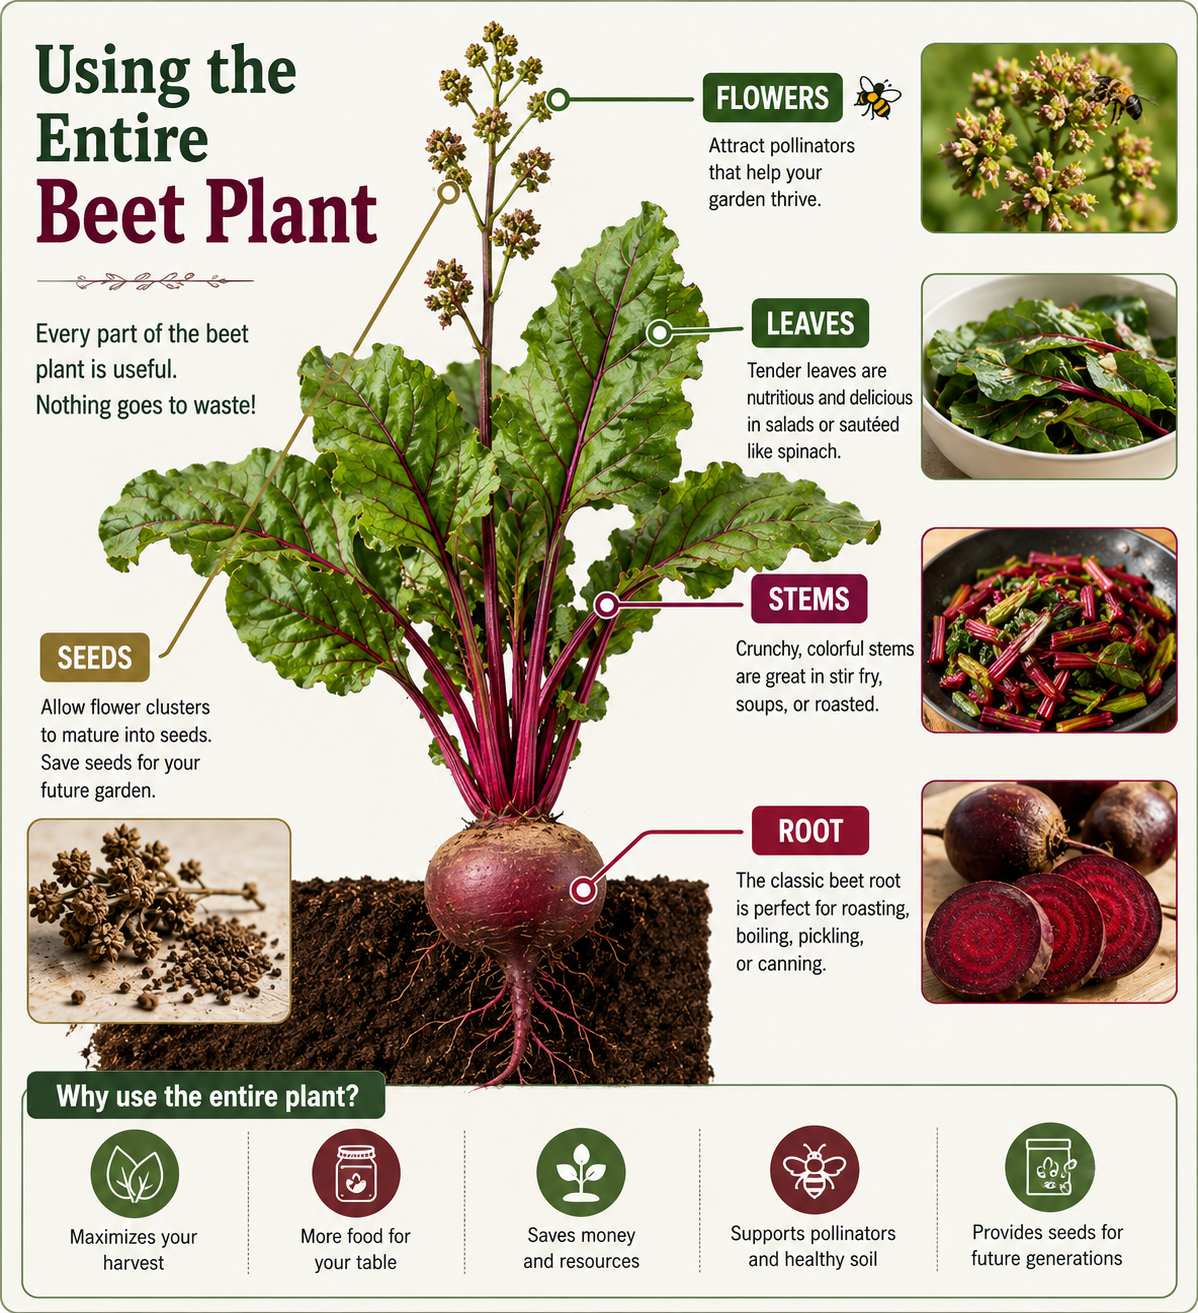
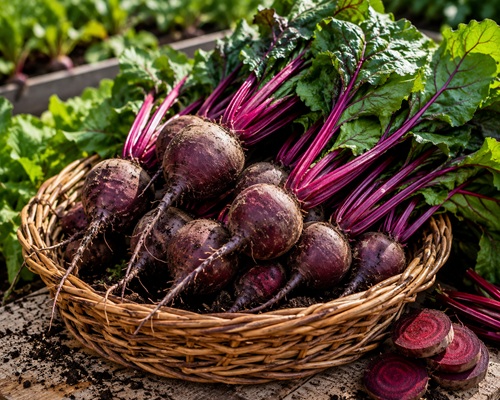 Beets are one of the most productive vegetables a gardener can grow because nearly every part of the plant has value. While most people grow beets for their sweet, earthy roots, the leaves, stems, flowers, and seeds all serve useful purposes. A single planting can provide fresh greens early in the season, nutritious roots for months afterward, and seeds for future gardens. Few vegetables offer such versatility from a relatively small amount of garden space, making beets an excellent choice for anyone focused on long-term food security.
The familiar beetroot is only one part of the harvest. Young roots are tender, sweet, and excellent roasted, boiled, steamed, baked, grated into salads, juiced, or added to soups. Larger roots develop a richer flavor and store exceptionally well through the winter. They can also be pressure canned, pickled, dehydrated into chips or powder, freeze-dried for decades of storage, or kept in a cool root cellar for several months. Their versatility makes them one of the easiest vegetables to preserve using almost any food storage method.
Many gardeners unknowingly discard the most nutritious part of the plant. Beet greens are rich in vitamins A, C, and K, along with calcium, magnesium, potassium, and iron. Young leaves have a mild flavor and are excellent in fresh salads, while mature leaves can be prepared much like spinach by steaming, sautéing, or adding them to soups, casseroles, pasta dishes, and omelets. The colorful stems are also completely edible and have a pleasant flavor similar to Swiss chard. They remain slightly crisp after cooking and add both color and texture to stir-fries and vegetable dishes.
If several beet plants are left in the garden through winter, they will produce flower stalks during their second growing season. Although the flowers themselves are not commonly eaten, they attract bees and other beneficial pollinators that improve the productivity of the entire garden. Once flowering is complete, the seed clusters mature and can be harvested, dried, and stored for future planting. Saving seed from healthy plants is an excellent preparedness practice because it reduces dependence on commercial seed suppliers while preserving varieties that perform well in your local climate.
Beet greens can usually be harvested once the plants reach about six inches tall. Rather than removing all the foliage, harvest only the outer leaves while leaving the center of the plant intact so it can continue producing both leaves and roots. This approach provides multiple harvests from the same plant. The roots are generally ready when they reach two to four inches in diameter. Smaller beets tend to be sweeter and more tender, while larger roots are better suited for long-term storage.
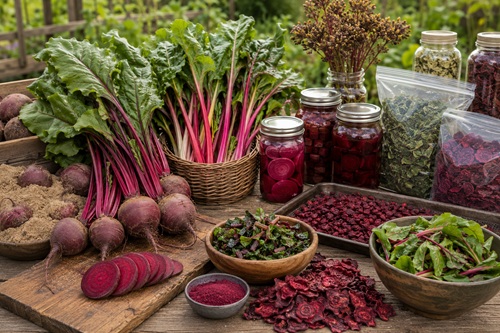
When it comes to preservation, beets are among the easiest vegetables to work with. Cooked roots freeze well and retain much of their texture after thawing. Freeze-drying preserves both the roots and greens while providing one of the longest shelf lives available. Cooked slices can also be dehydrated into chips or ground into beet powder that can later be added to soups, breads, smoothies, and sauces. Pressure canning produces shelf-stable plain beets, while pickling remains one of the most popular methods for preserving their flavor. Fresh roots stored in damp sand or sawdust inside a cool, humid root cellar often remain in excellent condition for several months without refrigeration.
One of the most common mistakes gardeners make is harvesting the roots while throwing the greens into the compost. Doing so wastes a highly nutritious food source that can be harvested repeatedly throughout the growing season. Another mistake is allowing the roots to become excessively large before harvesting, resulting in tougher texture and reduced sweetness. Proper harvesting and storage greatly improve both flavor and shelf life.
From a preparedness perspective, beets provide exceptional value. A single planting can supply fresh greens, nutritious roots, food for immediate use, vegetables for long-term storage, flowers that support pollinators, and seeds for future gardens. Very little of the plant goes to waste, making beets one of the most efficient and productive vegetables a prepper can grow.
Preparedness Action Plan
If beets are not already part of your garden, consider adding a row during your next growing season. Harvest the outer leaves regularly while allowing the roots to continue developing. Experiment with roasting, pickling, freezing, dehydrating, and freeze-drying to determine which preservation methods your family prefers. Finally, allow one or two healthy plants to produce seed so you can begin building your own sustainable seed supply for future gardens.
Skills Learned
After reading this guide, you should understand how to harvest every edible part of a beet plant, prepare each portion safely, preserve the harvest using several different methods, and maximize the amount of food produced from a single planting. These skills help reduce waste, improve self-sufficiency, and increase the long-term productivity of your preparedness garden.
Carrots
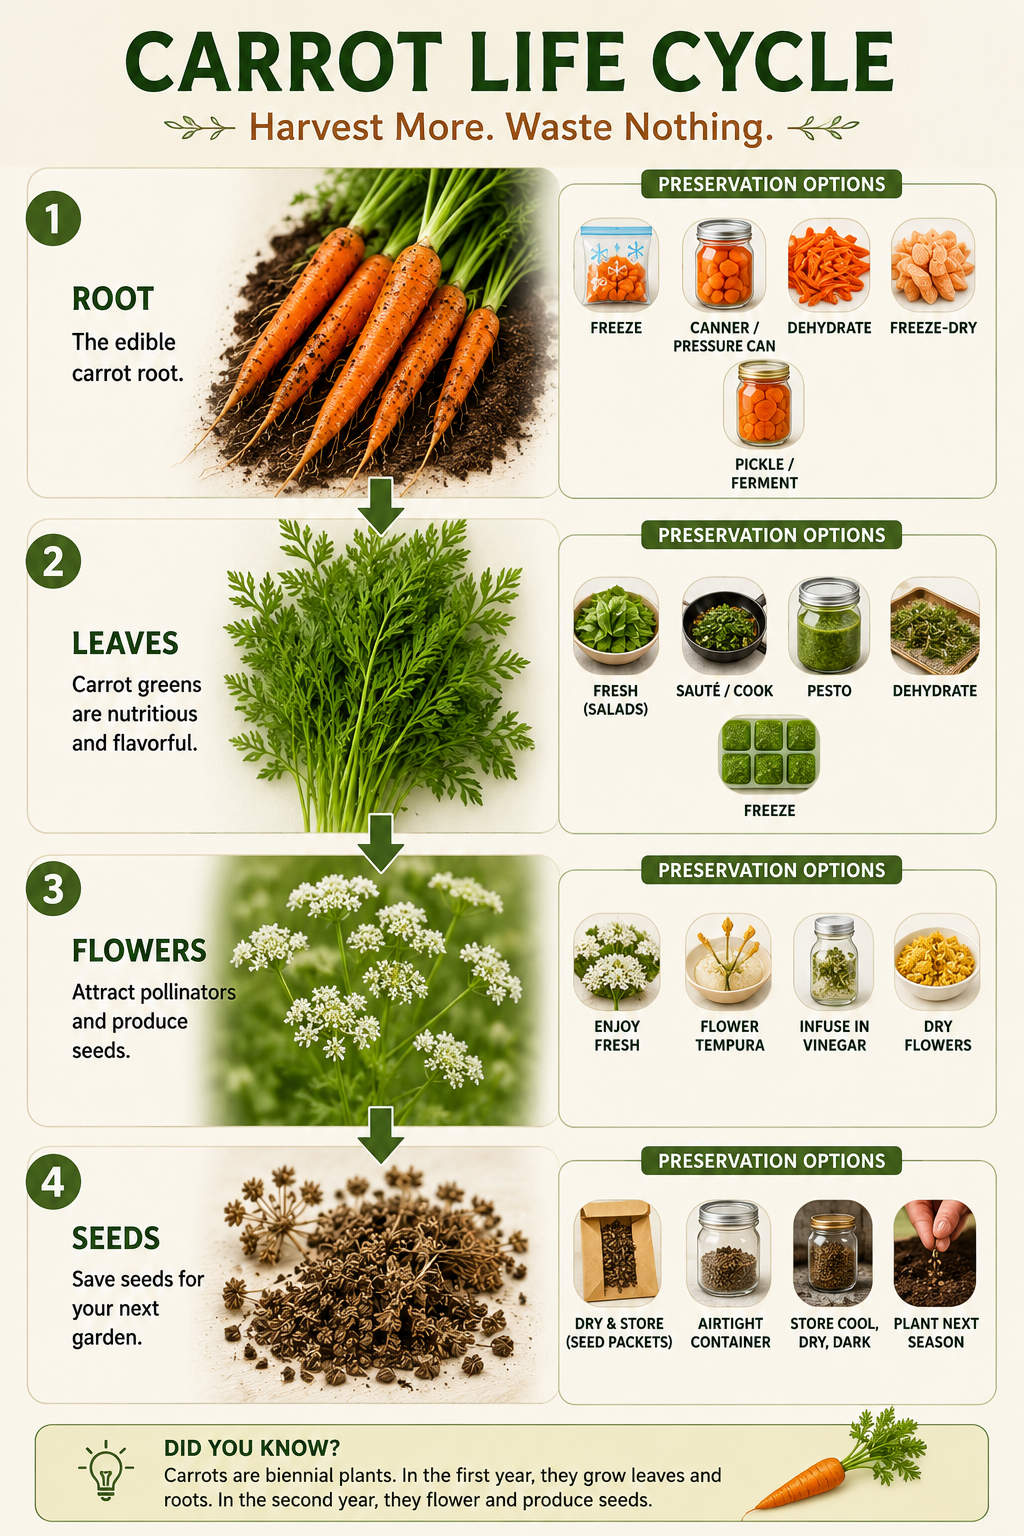
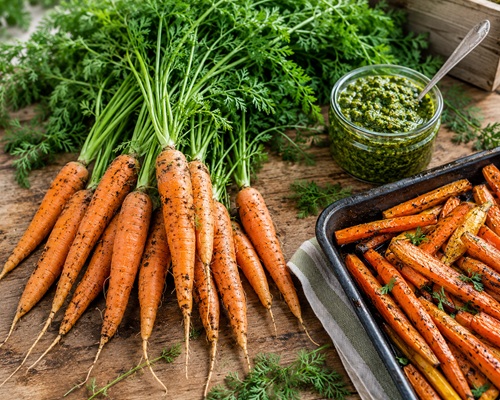 Carrots have earned a place in gardens around the world because they are dependable, nutritious, and easy to grow. Most gardeners focus exclusively on the familiar orange root, but the carrot plant offers much more than that. The leafy tops, flowers, and seeds all have practical uses, and understanding how to use each part allows you to get far more value from every planting. For a preparedness garden, carrots are an outstanding crop because they provide fresh food during the growing season, store well after harvest, and produce seed that can supply future gardens.
The carrot root is the primary harvest and one of the most versatile vegetables in the kitchen. Young carrots are naturally sweet and tender, making them excellent for fresh eating, while mature carrots develop a richer flavor that holds up well during cooking. They can be eaten raw, roasted, steamed, boiled, grilled, stir-fried, mashed, shredded into salads, blended into soups, baked into desserts, or juiced. Carrots are naturally rich in beta-carotene, which the body converts into vitamin A, an important nutrient for vision, immune function, and healthy skin. They also provide vitamin K, potassium, antioxidants, and dietary fiber, making them one of the healthiest vegetables found in a home garden.
Many gardeners are surprised to learn that carrot tops are completely edible. Although they have a slightly earthy flavor with a hint of parsley, they can be used in a variety of recipes when harvested while young and fresh. The leaves make an excellent pesto when blended with olive oil, garlic, nuts, and Parmesan cheese. They can also be chopped into soups, stirred into stews, mixed into salads, added to omelets, or used as a fresh herb in place of parsley. Because the flavor becomes stronger as the leaves mature, younger tops generally provide the best eating quality.
If carrots are left in the ground through winter, they will flower during their second growing season. Their large white umbrella-shaped flower clusters attract bees, butterflies, lacewings, ladybugs, parasitic wasps, and many other beneficial insects that help pollinate crops and naturally reduce pest populations. Allowing a few healthy carrots to flower each year can improve the overall health and productivity of your garden.
Once flowering is complete, the seed heads gradually dry on the plant. The mature seeds can then be collected, thoroughly dried, and stored in a cool, dry location for future planting. Properly stored carrot seed often remains viable for several years, making seed saving an excellent preparedness practice. Selecting seed from your healthiest and most productive plants gradually develops carrots that are better adapted to your local growing conditions.
Carrots are usually ready for harvest when the shoulders of the root begin pushing slightly above the soil surface. Depending on the variety, this is often when the roots reach between six and ten inches in length, although smaller “baby carrots” can be harvested much earlier. Carrots intended for long-term storage should be harvested before the ground freezes solid. If the soil remains workable, many gardeners simply leave carrots in the ground and harvest them as needed throughout the fall, protecting them with a thick layer of mulch to prevent freezing.
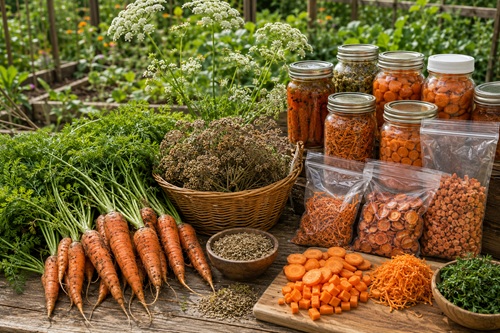
Preserving carrots is straightforward and offers several excellent options. Fresh carrots remain crisp for weeks when refrigerated and can often last four to six months inside a properly maintained root cellar. Freezing is one of the most common preservation methods, although carrots should first be peeled, sliced, and briefly blanched to preserve their color and texture. Freeze-drying produces exceptionally lightweight carrots that rehydrate well in soups, stews, casseroles, and emergency meals while offering a storage life measured in decades when packaged correctly.
Dehydrating carrots is another excellent option. Thin slices, diced carrots, or shredded carrots dry well and can later be rehydrated during cooking. Dehydrated carrots also grind easily into powder, which adds nutrition and natural sweetness to soups, sauces, breads, and pasta dough. Pressure canning allows carrots to become shelf-stable without refrigeration and is ideal for gardeners producing larger harvests. Carrots can also be fermented, creating a tangy, probiotic-rich food that stores well under refrigeration and supports digestive health.
The carrot tops can also be preserved. Although they are best enjoyed fresh, they freeze well after washing and chopping, and they can be dehydrated for later use in soups, broths, and seasoning blends. Freeze-dried carrot greens retain much of their flavor and nutrition while taking up very little storage space.
Several common mistakes reduce both the quality and productivity of carrot harvests. Many gardeners remove and discard the tops without realizing they are edible. Others leave mature carrots in the ground too long, allowing them to become woody or split after heavy rainfall. Carrots grown in rocky or compacted soil often become twisted or forked, making loose, well-prepared soil one of the simplest ways to improve both appearance and yield. Washing carrots before long-term storage can also shorten their shelf life if they are not dried thoroughly, so many gardeners simply brush away excess soil until they are ready to use them.
From a preparedness standpoint, carrots offer outstanding value. They produce reliable harvests, require relatively little maintenance, store exceptionally well, preserve using nearly every major food storage method, and provide highly nutritious food throughout the year. Their edible greens, flowers that attract pollinators, and seeds for future planting make them much more than simply a root crop. When every part of the plant is put to use, carrots become one of the most productive and dependable vegetables in a preparedness garden.
Preparedness Action Plan
The next time you harvest carrots, don’t throw away the tops. Instead, wash a handful of fresh leaves and try making carrot-top pesto or adding them to soup or salad. Preserve part of your carrot harvest using two different methods, such as freezing and dehydrating, so you can compare the results. Finally, consider allowing several healthy plants to remain in the garden through winter to produce flowers and seeds for future planting.
Skills Learned
After reading this section, you should understand how to harvest carrots at their peak quality, safely use the roots, tops, flowers, and seeds, preserve carrots using multiple storage methods, and maximize the amount of food each planting provides while building greater long-term food security.
Peas
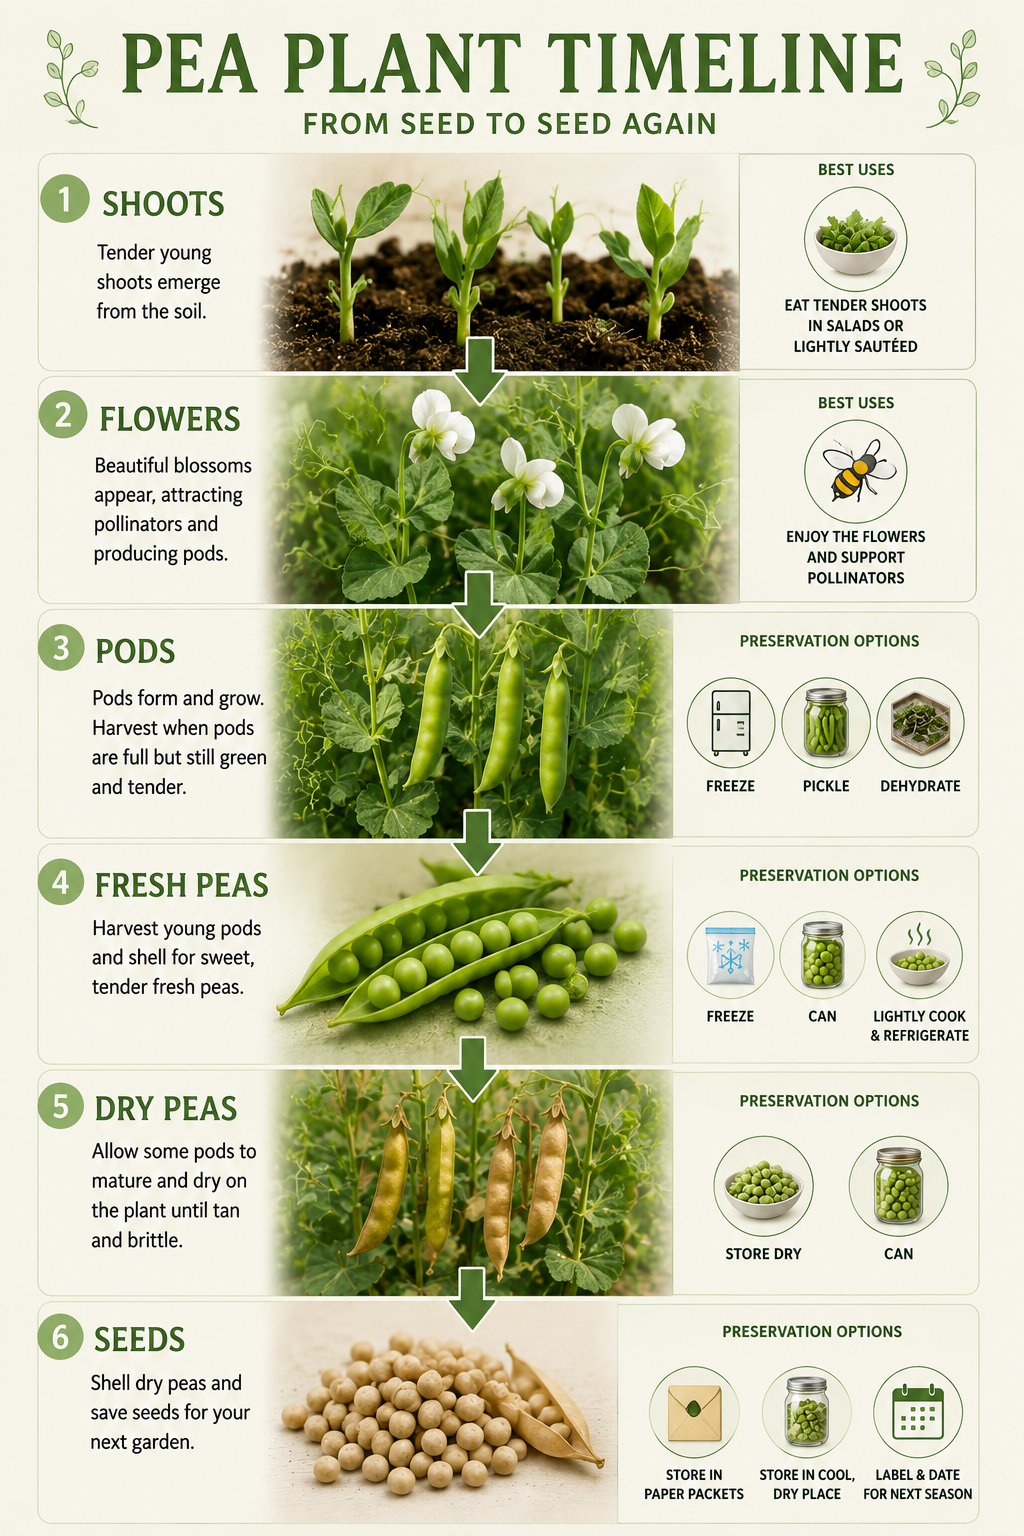
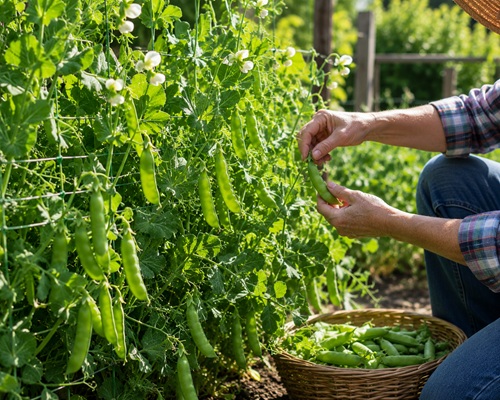 Peas are one of the earliest vegetables to produce a harvest each growing season and are among the most rewarding crops for both beginning and experienced gardeners. They thrive in cool weather, improve soil health by fixing nitrogen, and provide several edible parts throughout their life cycle. While most people think only of the peas inside the pod, the young shoots, tendrils, flowers, pods, and mature peas all have culinary value. A single planting can provide multiple harvests over several weeks, making peas one of the most efficient vegetables for maximizing food production in a preparedness garden.
The first edible harvest often comes long before the peas themselves are ready. Once the vines begin growing vigorously, the tender shoots and curling tendrils can be harvested sparingly without harming the plant. These young greens have a fresh, slightly sweet flavor that resembles fresh peas. They are excellent in salads, sandwiches, stir-fries, omelets, wraps, and soups. Because the shoots are highly nutritious and quick to regrow, they provide one of the earliest fresh vegetables available each spring.
As flowering begins, the delicate blossoms attract bees and other pollinating insects that benefit the entire garden. The flowers themselves are edible and make an attractive garnish for salads or desserts, although most gardeners prefer to leave them on the vine so they can develop into pods. Encouraging healthy pollinator activity during flowering also improves pod production and overall yields.
The pods themselves offer several different harvest opportunities depending on the variety being grown. Snow peas are harvested while the pods remain flat and tender, allowing the entire pod to be eaten. Snap peas are picked slightly later when the peas inside begin to swell, producing crisp, sweet pods that can also be eaten whole. Shelling peas are harvested after the peas have fully developed inside the pod. While the fibrous pods of shelling varieties are generally not eaten, they can still provide excellent flavor when simmered into vegetable broth before being composted.
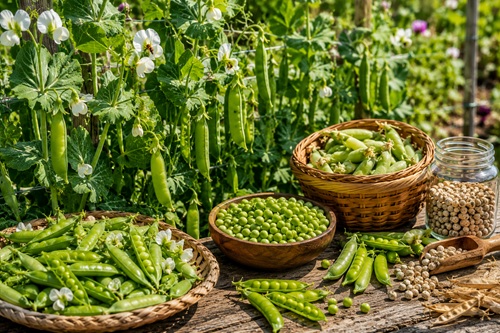
Fresh peas are one of the sweetest vegetables in the garden because their natural sugars begin converting to starch soon after harvest. For the best flavor, they should be eaten or preserved as quickly as possible. Fresh peas are delicious raw, steamed, boiled, sautéed, added to casseroles, blended into soups, or incorporated into pasta dishes, rice, and salads. They are an excellent source of vitamin C, vitamin K, folate, manganese, fiber, and plant-based protein, making them one of the most nutritious vegetables available during the early growing season.
If some pods are allowed to remain on the vines until completely mature, the peas inside eventually dry naturally. These dried peas become an outstanding pantry staple with an exceptionally long storage life when kept dry and protected from insects. Dried peas can be cooked into hearty soups, stews, curries, split pea soup, or ground into flour for use in baking and other recipes. They also provide seed for future gardens, making peas one of the easiest vegetables for gardeners interested in becoming more self-sufficient.
Harvesting peas frequently encourages the plants to continue producing. Mature pods left on the vine signal the plant that its life cycle is complete, often reducing additional flowering and pod development. During peak production, checking the vines every day or two allows you to harvest pods at their best quality while maximizing overall yields.
Peas preserve exceptionally well using several different methods. Freezing remains one of the most popular options because it retains much of their sweetness and texture. Fresh peas should be shelled, briefly blanched, cooled quickly in ice water, and frozen as soon as possible. Snow peas and snap peas also freeze well after blanching and make convenient additions to stir-fries and soups throughout the year.
Freeze-drying is another excellent preservation method. Both shelled peas and edible pod varieties rehydrate remarkably well and maintain much of their original flavor, color, and nutritional value. Properly packaged freeze-dried peas can remain shelf stable for decades, making them one of the best vegetables for long-term emergency food storage.
Dehydrating peas is less common but still effective, particularly for soup mixes and camping meals. Once rehydrated during cooking, dehydrated peas soften nicely and work well in stews and casseroles. Fully dried mature peas require no additional preservation beyond proper storage in airtight containers and are among the easiest vegetables to store for many years.
One common mistake gardeners make is waiting too long to harvest fresh peas. Overmature peas become starchy and lose much of the sweetness that makes them so enjoyable. Another frequent mistake is harvesting too aggressively by removing too many shoots early in the season, which can reduce the plant’s overall productivity. It is also important to avoid harvesting wet vines whenever possible, as this can spread fungal diseases between plants.
From a preparedness perspective, peas offer tremendous value. They provide one of the earliest fresh harvests of the growing season, improve the soil for future crops through nitrogen fixation, produce edible shoots and pods, preserve exceptionally well, and generate seed for future gardens. Their combination of nutrition, versatility, and storage potential makes them an excellent choice for any preparedness garden focused on long-term resilience.
Preparedness Action Plan
Plant both shelling peas and edible pod varieties so you can enjoy multiple types of harvests throughout the season. Try harvesting a few young shoots for salads while allowing the vines to continue producing pods. Preserve part of your harvest by freezing fresh peas, and allow a few pods to fully mature and dry naturally so you can save seed and build a long-term food supply.
Skills Learned
After reading this section, you should understand how to harvest peas at different stages of growth, recognize the edible portions of the plant, preserve peas using several storage methods, save seed for future gardens, and maximize the productivity of every pea planting in your preparedness garden.
Radishes
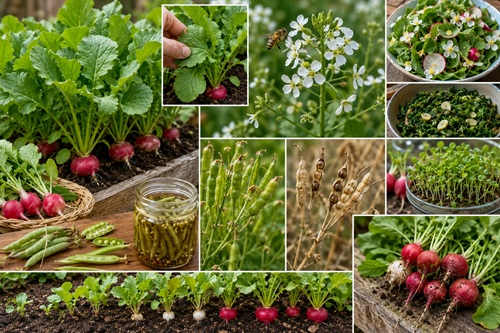
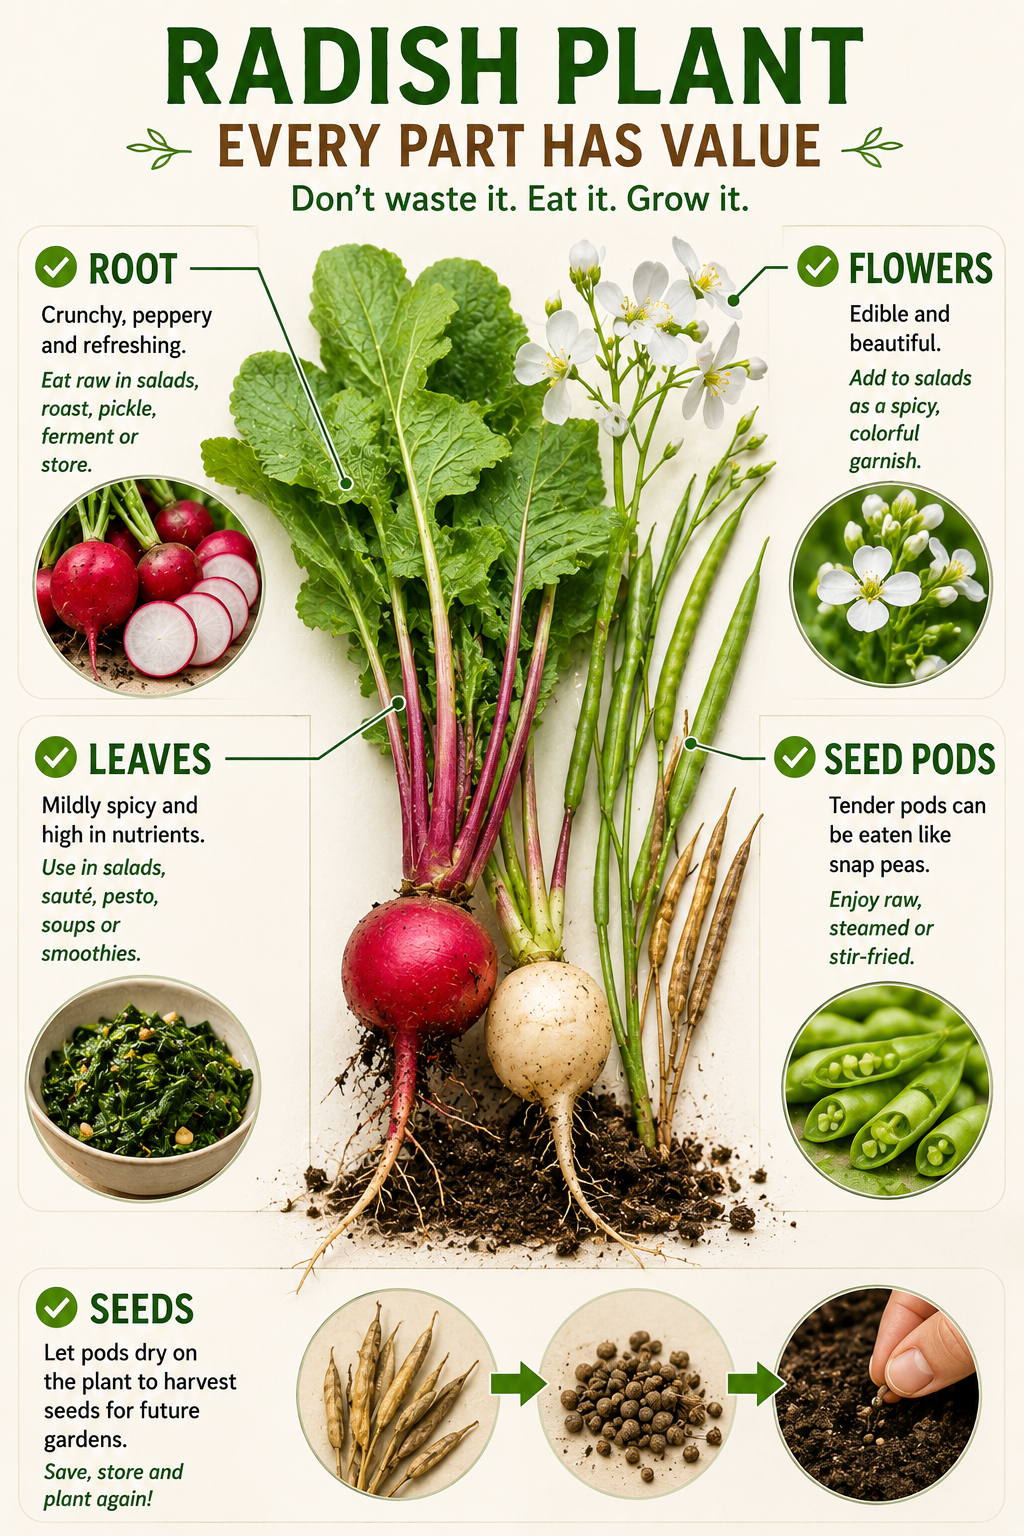
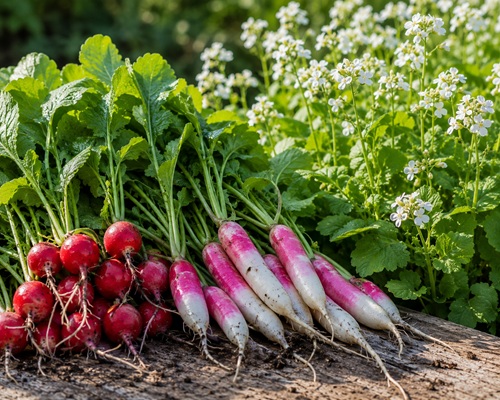 Radishes are often overlooked in preparedness gardens because they mature quickly and are commonly viewed as little more than a salad vegetable. In reality, they are one of the fastest and most versatile crops you can grow. Depending on the variety, radishes can be ready for harvest in as little as three to four weeks, providing fresh food long before many other vegetables are producing. Even more importantly, nearly every part of the plant is edible. The roots, leaves, flowers, seed pods, and seeds all have practical uses, making radishes an excellent choice for gardeners who want to maximize every square foot of growing space.
The familiar radish root is crisp, refreshing, and ranges in flavor from mildly sweet to pleasantly peppery depending on the variety. While most people enjoy radishes raw in salads or on vegetable trays, they become surprisingly mild when cooked. Roasting, sautéing, grilling, steaming, or adding them to soups transforms their sharp bite into a slightly sweet flavor that many people compare to young turnips or potatoes. Larger winter radishes, such as daikon, are particularly well suited for stir-fries, stews, and slow-cooked dishes.
The leaves are one of the most overlooked parts of the plant. Young radish greens are tender enough to eat fresh in salads, while mature leaves are excellent when sautéed with garlic, added to soups, blended into pesto, or mixed into casseroles. Their slightly peppery flavor adds character to many recipes and provides a rich source of vitamins A, C, and K, along with calcium, potassium, and antioxidants. Harvesting a few outer leaves while the roots continue to grow allows gardeners to enjoy multiple harvests from the same planting.
If radishes are left in the garden beyond their normal harvest period, they eventually produce clusters of delicate flowers that attract bees, butterflies, hoverflies, and many other beneficial insects. These pollinators not only improve seed production in the radishes themselves but also increase pollination throughout the entire garden. The flowers are edible and can be used as colorful garnishes or mixed into fresh salads, although most gardeners prefer to leave them in place so the plant can continue producing seed pods.
One of the most surprising features of radishes is their seed pods. Instead of harvesting the roots, some gardeners intentionally allow certain varieties to bolt because the young green seed pods are crisp, mildly spicy, and exceptionally flavorful. They can be eaten fresh, pickled, stir-fried, or added to salads much like snap peas. In some parts of the world, radishes are grown specifically for their edible pods rather than their roots.
As the pods mature, the seeds inside dry naturally on the plant. These seeds can be collected for future planting or even sprouted indoors to produce nutritious microgreens. Saving seed is especially worthwhile because radishes produce large quantities of seed with relatively little effort, making them one of the easiest vegetables for gardeners interested in long-term self-sufficiency.
Radishes should generally be harvested while they are still relatively small and tender. Waiting too long often results in woody, pithy roots that lose much of their crisp texture and pleasant flavor. Because different varieties mature at different rates, checking the seed packet and harvesting promptly produces the highest-quality crop. Successive plantings every week or two provide a continuous harvest throughout much of the growing season.
Although radishes are usually eaten fresh, they preserve surprisingly well using several different methods. Pickling remains the most popular option because it maintains much of their crisp texture while mellowing their natural peppery flavor. Pickled radishes add color and crunch to sandwiches, salads, tacos, and charcuterie boards. Fermentation is another excellent preservation method that produces beneficial probiotics while creating a pleasantly tangy flavor.
Radishes can also be frozen after blanching, although freezing softens their texture, making them better suited for soups and cooked dishes than fresh eating. Freeze-drying preserves both roots and greens exceptionally well while maintaining much of their original flavor and nutritional value. Thinly sliced radishes may also be dehydrated and later rehydrated for soups and stews, although dehydration changes their texture considerably. The greens themselves freeze, dehydrate, and freeze-dry well, making them a valuable leafy vegetable long after the growing season has ended.
One of the most common mistakes gardeners make is harvesting only the roots and immediately discarding the tops. Another is allowing the roots to remain in the ground too long, which significantly reduces quality. Many people also remove flowering plants too quickly without realizing they are giving up edible flowers, delicious seed pods, and hundreds of seeds that could supply future gardens.
From a preparedness perspective, radishes offer exceptional value because they mature faster than almost any other common garden vegetable. They provide an early harvest when food from the garden is still limited, produce several edible parts throughout their life cycle, improve garden biodiversity by attracting pollinators, and generate an abundant supply of seed for future planting. Their rapid growth also makes them an excellent crop for filling empty garden spaces between slower-growing vegetables, ensuring that every available section of the garden remains productive.
Preparedness Action Plan
Instead of harvesting every radish as soon as the roots mature, leave several healthy plants in the garden and observe how they continue to develop. Harvest the young leaves for cooking, taste the edible flowers, try the seed pods while they are still green, and allow some pods to mature completely so you can collect seed for next year’s garden. By experiencing the plant’s full life cycle, you’ll discover that a radish provides far more food than the root alone.
Skills Learned
After reading this section, you should understand how to harvest radishes at the proper stage for the best flavor, safely use the roots, leaves, flowers, and seed pods, preserve the harvest using multiple methods, collect seeds for future planting, and maximize the productivity of one of the fastest-growing vegetables in your preparedness garden.
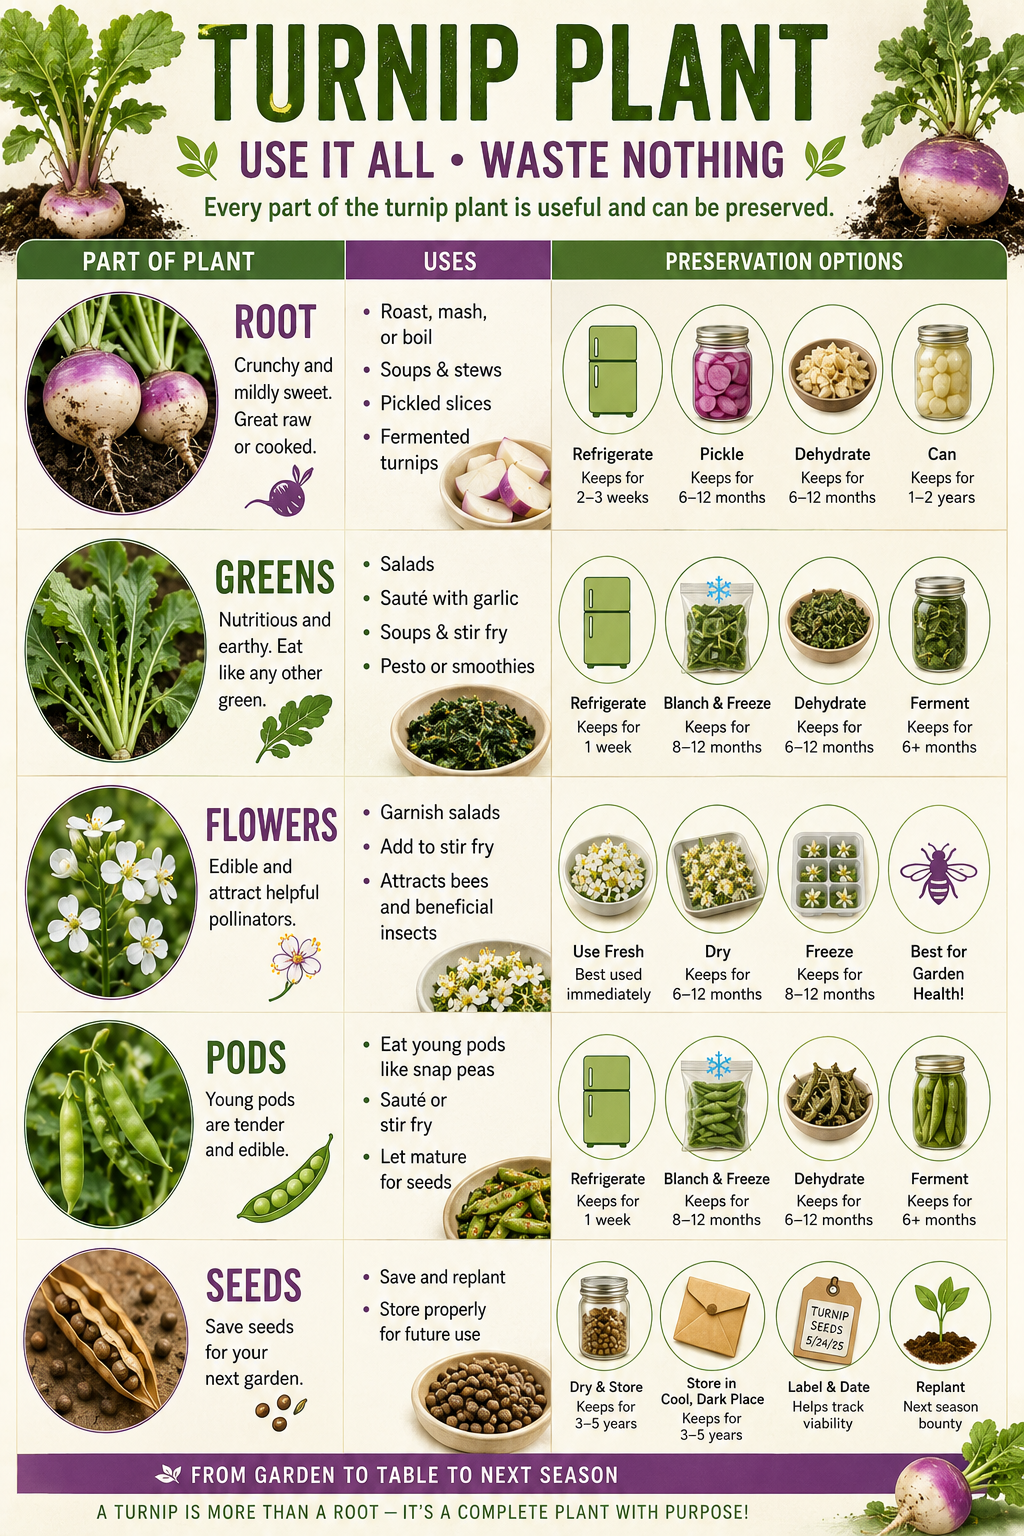
Turnips
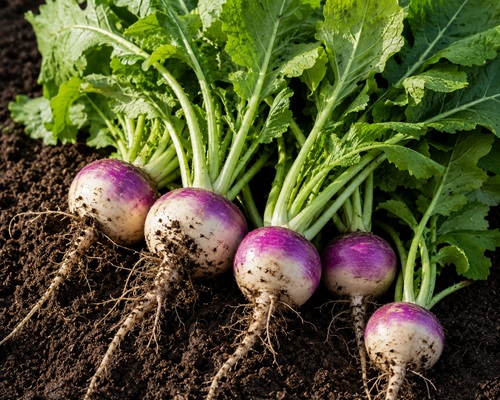 Turnips have been an important food crop for thousands of years and remain one of the most dependable vegetables for preparedness gardening. They grow quickly, tolerate cool temperatures, and produce generous harvests even in regions with relatively short growing seasons. While many people grow turnips only for their roots, the leaves, stems, flowers, seed pods, and seeds all provide useful food throughout the plant’s life cycle. This ability to produce multiple edible harvests from a single planting makes turnips one of the most valuable vegetables for anyone interested in self-sufficiency.
The turnip root is the best-known part of the plant and can be harvested at almost any stage of development. Small, young turnips are mild, tender, and slightly sweet, making them excellent for fresh salads or roasting. As they mature, they develop a firmer texture that stands up well in soups, stews, casseroles, and slow-cooked meals. Turnips can be mashed like potatoes, cubed into hearty vegetable dishes, grilled, steamed, boiled, or stir-fried. They readily absorb the flavors of herbs, seasonings, and broths, making them an extremely versatile ingredient in the kitchen. Nutritionally, turnips provide vitamin C, dietary fiber, potassium, folate, and several important antioxidants while remaining relatively low in calories.
The greens are often considered even more valuable than the roots themselves. Young turnip leaves are tender enough to eat fresh in salads, while mature greens become one of the finest cooking greens available. Their flavor is similar to mustard greens but generally milder, especially when harvested before the weather becomes hot. Turnip greens are exceptionally rich in vitamins A, C, and K, along with calcium, iron, magnesium, and numerous beneficial plant compounds. They can be steamed, sautéed, added to soups, mixed into pasta dishes, incorporated into omelets, or cooked slowly with onions, garlic, and smoked meats for a traditional meal that has been enjoyed for generations.
The stems are completely edible and can be cooked along with the leaves. Their slightly crisp texture adds variety to soups, stir-fries, and vegetable medleys. Rather than trimming them away, simply chop the stems into smaller pieces and allow them a few extra minutes of cooking time before adding the leaves.
If turnips remain in the garden beyond their normal harvest period, they begin producing tall flowering stalks during their second growing season. The bright yellow flowers attract honeybees, native bees, butterflies, hoverflies, and many other beneficial insects that improve pollination throughout the garden. Although the flowers themselves are edible and can brighten salads with their mild flavor, many gardeners leave them untouched to encourage healthy seed production.
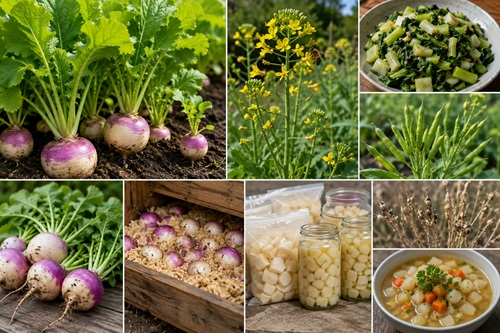
Following flowering, slender seed pods begin forming along the stems. When harvested while young, these pods are crisp and mildly peppery, making them a pleasant snack or addition to salads and stir-fries. If allowed to mature completely, the pods dry naturally and produce an abundant supply of seed for future planting. Saving turnip seed is straightforward and provides an excellent way to maintain a reliable food crop without relying on annual seed purchases.
Turnips are usually harvested once the roots reach between two and four inches in diameter, although many gardeners prefer harvesting smaller roots because they tend to be sweeter and more tender. The greens can be harvested much earlier by removing only the outer leaves while allowing the center of the plant to continue growing. This approach provides repeated harvests throughout the season without reducing root production. During the fall, many varieties become noticeably sweeter after experiencing several light frosts because the plant naturally converts starches into sugars as protection against cold temperatures.
Turnips preserve well using a variety of methods. Fresh roots remain in excellent condition for several months inside a cool, humid root cellar when packed in damp sand or wood shavings. Refrigeration also provides several weeks of storage for freshly harvested roots. Turnips freeze well after being peeled, cut into cubes, and briefly blanched. Once thawed, they work particularly well in soups, stews, casseroles, and mashed vegetable dishes.
Freeze-drying preserves both the roots and greens exceptionally well, providing lightweight, shelf-stable food that rehydrates easily while retaining much of its original nutrition. Turnip roots can also be dehydrated into slices or cubes for soups and emergency food supplies. Pressure canning creates shelf-stable roots that are ready to use directly from the jar, while pickling offers another flavorful preservation option that extends the usefulness of the harvest. Turnip greens can be frozen after blanching, dehydrated into flakes for soups, or freeze-dried for long-term storage.
Several common mistakes reduce both yield and quality. One of the most frequent is allowing roots to remain in the ground too long, resulting in large, woody turnips with stronger flavors and tougher textures. Another mistake is removing every leaf from the plant while it is still actively growing, which limits the plant’s ability to produce a healthy root. Many gardeners also overlook the edible flowers and seed pods, missing opportunities to enjoy additional harvests from the same planting.
From a preparedness standpoint, turnips deserve far more attention than they often receive. They mature quickly, tolerate cool weather, produce both roots and leafy greens, preserve well using nearly every major storage method, and provide seed for future gardens. Because they continue growing well into the cooler months, they help extend the harvest season long after many summer vegetables have stopped producing. Their reliability, nutritional value, and multiple edible parts make them one of the most dependable crops for long-term food security.
Preparedness Action Plan
Plant both spring and fall crops of turnips to experience how growing conditions affect their flavor and productivity. Harvest the outer leaves regularly while allowing the roots to continue developing, and compare the taste of turnips harvested before and after a light frost. Preserve part of your harvest using freezing, root cellar storage, or freeze-drying, and allow several healthy plants to produce flowers and seeds so you can build your own sustainable seed supply.
Skills Learned
After reading this section, you should understand how to harvest turnips for both greens and roots, safely prepare every edible portion of the plant, preserve turnips using several long-term storage methods, recognize the value of flowers and seed pods, and maximize the amount of food produced from every turnip planting in your preparedness garden.
Onions
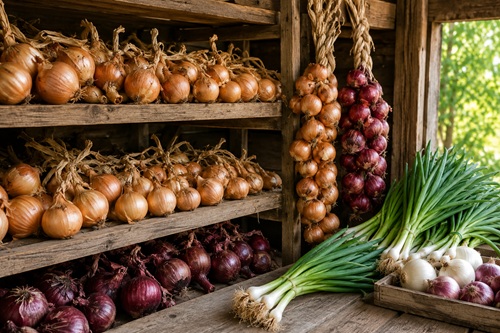 Onions are one of the most widely grown vegetables in the world and are a cornerstone of countless recipes. While they are usually thought of as a seasoning or flavoring ingredient, onions are much more valuable than many people realize. Nearly every part of the plant is edible, from the tender green leaves and immature bulbs to the flowers and seeds. Their long storage life, ease of preservation, and ability to improve the flavor of almost every savory meal make onions an essential crop for any preparedness garden.
The onion bulb is the part most gardeners are familiar with, but its flavor changes dramatically depending on when it is harvested. Young onions, often called green onions or spring onions, have a mild, fresh taste and can be eaten whole, including both the white stem and green leaves. As the plant matures, the bulb enlarges and develops the stronger flavor commonly associated with storage onions. Mature bulbs can be sliced for sandwiches, diced into soups and stews, caramelized, grilled, roasted, sautéed, fried, pickled, or incorporated into nearly every type of cooked meal. They are naturally rich in vitamin C, vitamin B6, folate, potassium, antioxidants, and sulfur compounds that have long been associated with supporting heart health and immune function.
The green tops are often harvested long before the bulbs reach maturity. These hollow leaves have a mild onion flavor that works exceptionally well in salads, scrambled eggs, baked potatoes, soups, dips, and homemade herb butter. Because harvesting only a few leaves from each plant allows the bulb to continue developing, gardeners can enjoy fresh onion greens throughout much of the growing season without sacrificing the final harvest.
If onions are left in the garden into their second year, they produce tall flower stalks topped with large, globe-shaped clusters of white or purple flowers. These blossoms are among the most attractive flowers in a vegetable garden and draw bees, butterflies, hoverflies, and numerous other beneficial insects. Healthy pollinator populations improve the productivity of many nearby crops, making flowering onions valuable even beyond their own seed production.
The flowers themselves are edible and have a mild onion flavor. Individual blossoms can be separated and sprinkled over salads, soups, potato dishes, pasta, or vegetable platters as both a garnish and seasoning. Although they are not commonly found in grocery stores, onion flowers offer another example of how much edible food a single plant can produce.
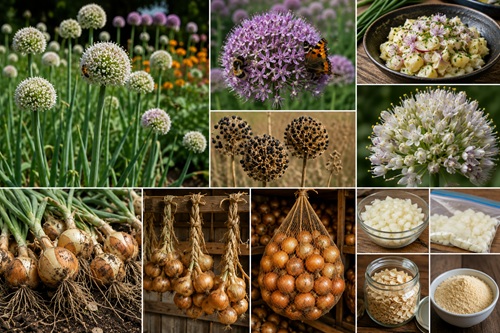
As the flowers mature, they produce black seeds that are easy to collect once the flower heads begin drying. After harvesting, the seeds should be dried thoroughly before being stored in airtight containers in a cool, dry location. While onion seed does not remain viable as long as some other vegetable seeds, saving fresh seed each season is an excellent preparedness practice that reduces dependence on outside suppliers.
Onions are generally ready for harvest when the tops naturally begin to yellow, weaken, and fall over. This signals that the bulbs have finished growing and are beginning to cure naturally. Harvesting during dry weather reduces the risk of rot and helps produce onions that store well through the winter. After pulling the bulbs from the ground, they should be allowed to cure in a warm, dry, well-ventilated location for two to four weeks. During this process, the outer layers dry into the familiar papery skin that protects the bulb during long-term storage.
Few vegetables store as well as properly cured onions. In cool, dry conditions with good air circulation, many storage varieties remain usable for six months or longer. Braiding soft-neck onions or storing them in mesh bags allows air to circulate around the bulbs, reducing the likelihood of spoilage. Moisture is the enemy of stored onions, so they should never be kept in sealed plastic bags or damp environments.
Although onions already store exceptionally well, they can also be preserved using several additional methods. Chopped onions freeze beautifully and are ready to use directly from the freezer without thawing. Freeze-drying preserves their flavor remarkably well while creating a lightweight product that rehydrates quickly in soups, stews, casseroles, and emergency meals. Dehydrating onions is one of the oldest and most practical preservation techniques. Dried onion flakes occupy very little storage space and can be ground into onion powder, providing a convenient seasoning that remains useful for years when properly stored.
Pickled pearl onions and small onions provide another flavorful way to preserve part of the harvest. While onions are not commonly pressure canned by themselves because of quality concerns, they are frequently canned as ingredients in soups, stews, relishes, chutneys, and other mixed recipes that follow approved preservation guidelines.
Several common mistakes reduce the quality of stored onions. Harvesting before the tops naturally fall over often produces bulbs that have not fully matured and therefore store poorly. Another frequent mistake is skipping the curing process, which leaves excess moisture inside the bulbs and significantly shortens their storage life. Some gardeners also remove all of the green tops early in the season, limiting the plant’s ability to produce large, healthy bulbs. Finally, onions should never be stored beside potatoes. Potatoes release moisture that encourages onions to sprout and spoil more quickly, while onions can also shorten the storage life of potatoes.
From a preparedness perspective, onions are one of the highest-value vegetables that can be grown. They require relatively little processing before storage, preserve well using multiple methods, occupy very little pantry space once dehydrated, and dramatically improve the flavor of stored foods. During an extended emergency, meals made from rice, beans, potatoes, vegetables, or wild game become far more enjoyable with the addition of onions. Their edible greens, attractive flowers, and seed production further increase their value, making onions one of the most productive and useful vegetables in any preparedness garden.
Preparedness Action Plan
Grow both green onions and storage onions so you can enjoy fresh harvests throughout the season while building a long-term food supply. Practice curing mature bulbs properly before storing them, preserve part of the harvest by dehydrating onion flakes and onion powder, and allow several healthy plants to flower so you can observe pollinators at work and collect seed for future gardens.
Skills Learned
After reading this section, you should understand how to harvest onions at different stages of growth, safely use the bulbs, green tops, flowers, and seeds, preserve onions using multiple long-term storage methods, cure onions for maximum shelf life, and maximize the value of one of the most important vegetables in a preparedness garden.
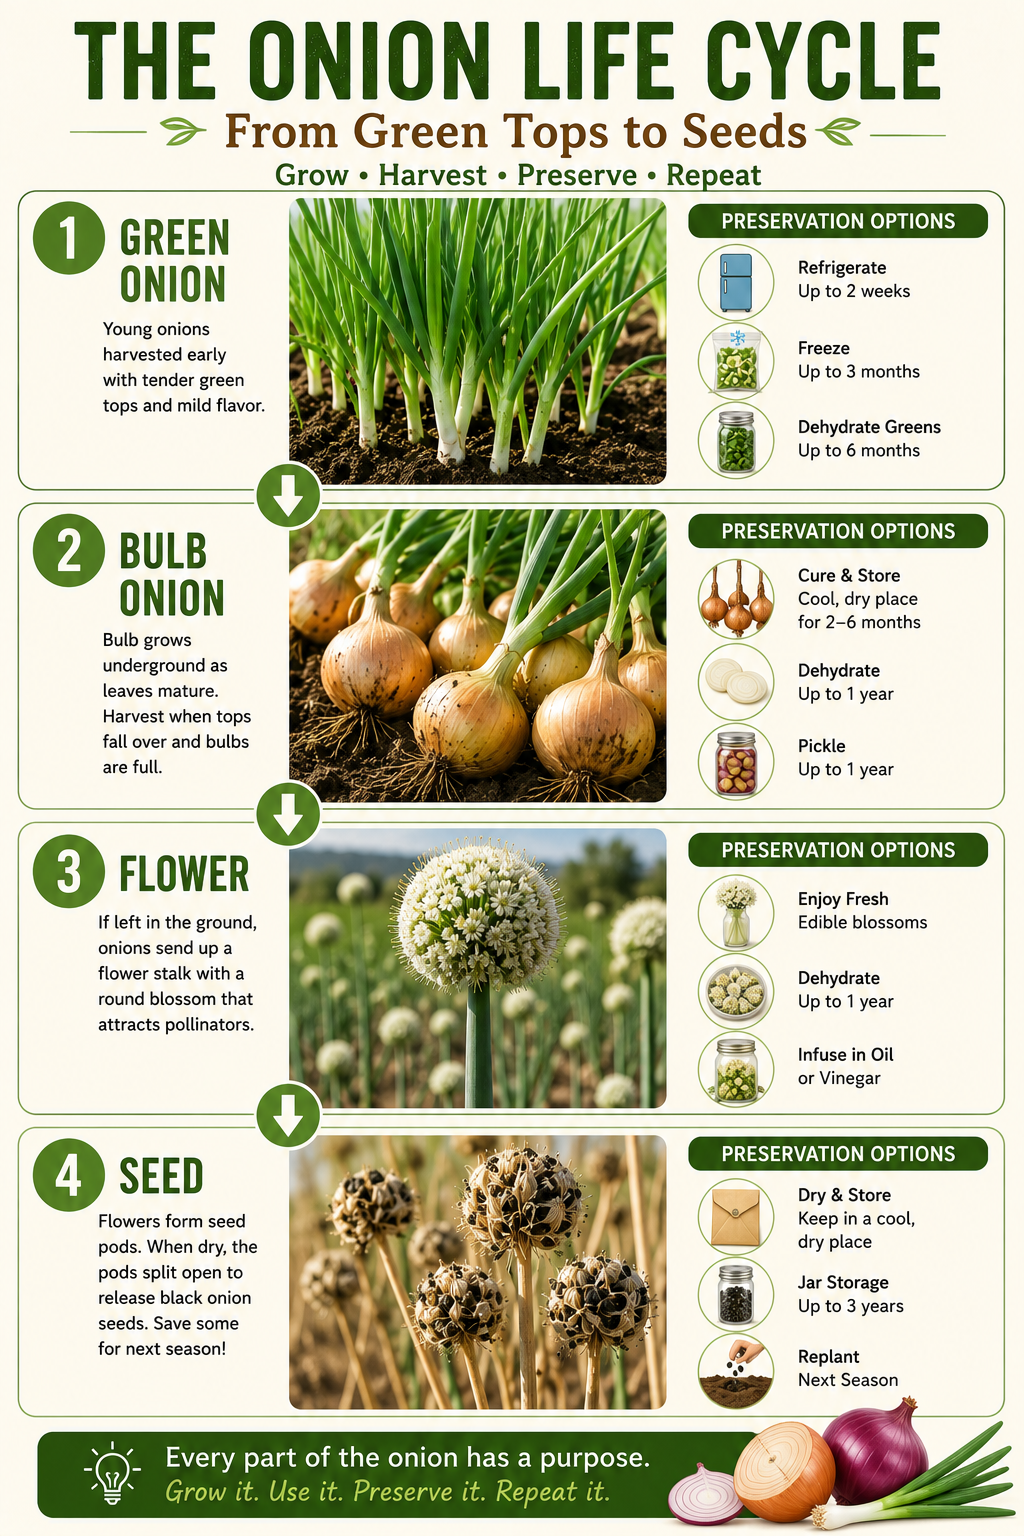
Garlic
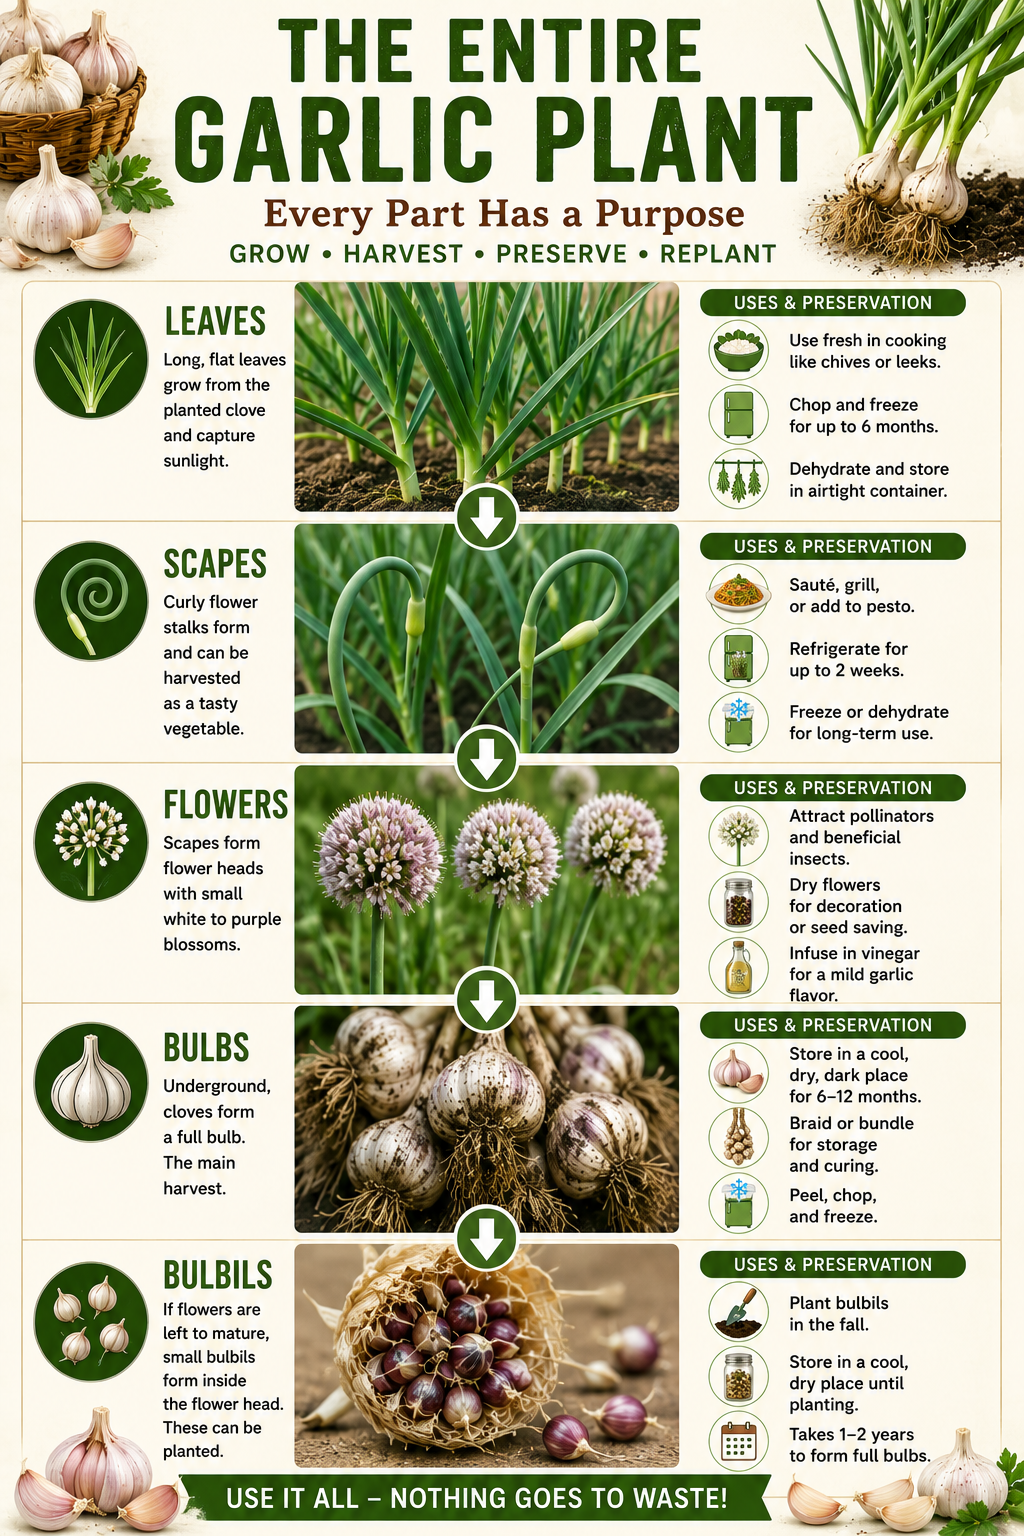
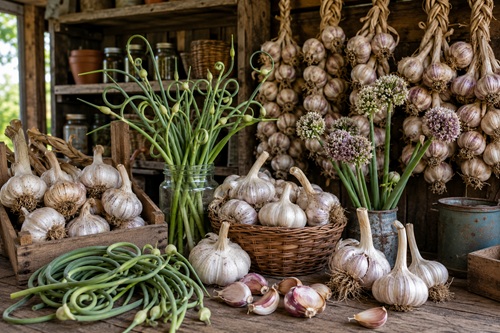 Garlic has been valued for thousands of years as both a food and a medicinal plant. It is easy to grow, requires relatively little maintenance, and produces one of the most useful harvests found in any preparedness garden. While most people are familiar with the bulb that is harvested at the end of the growing season, garlic offers several edible parts throughout its life cycle, including the young leaves, scapes, flowers, bulbils, and cloves. Each provides a different flavor and purpose, allowing a single planting to produce multiple harvests before the bulbs are ever dug from the ground.
The garlic bulb is the primary harvest and is made up of individual cloves enclosed within a protective papery wrapper. Each clove can be planted to produce an entirely new garlic plant or used in countless recipes. Garlic is one of the most versatile ingredients in the kitchen and serves as the foundation for soups, stews, sauces, marinades, roasted vegetables, meat dishes, salad dressings, breads, and countless other meals. In addition to its rich flavor, garlic contains vitamin C, vitamin B6, manganese, selenium, and sulfur-containing compounds such as allicin, which have been widely studied for their potential antimicrobial and antioxidant properties. Although garlic should never replace professional medical treatment, it has long been appreciated as both a flavorful food and a traditional home remedy.
Long before the bulbs mature, garlic produces narrow green leaves that resemble thick blades of grass. These leaves have a mild garlic flavor and can be harvested sparingly while the plants continue growing. Chopped garlic greens make an excellent addition to scrambled eggs, soups, salads, stir-fries, mashed potatoes, herb butter, and homemade breads. Because removing too many leaves reduces bulb development, only a few leaves should be harvested from each plant during the growing season.
Hardneck garlic varieties produce one of the garden’s most anticipated harvests: the garlic scape. A scape is the long flowering stalk that begins curling upward several weeks before the bulb reaches maturity. Removing the scape encourages the plant to direct more energy into developing a larger bulb, making this harvest beneficial for both immediate use and final production. Garlic scapes have a mild garlic flavor with a slight sweetness and are considered a seasonal delicacy by many gardeners. They can be grilled, roasted, sautéed, chopped into soups, blended into pesto, mixed into compound butter, pickled, or frozen for later use.
If the scapes are left on the plant, they eventually straighten and produce clusters of attractive flowers mixed with tiny bulbils. Although true flowers may produce a small amount of seed under certain conditions, garlic is most commonly propagated using the bulbils or individual cloves rather than botanical seed. The flowers themselves are edible and make an attractive garnish with a mild garlic flavor, while the bulbils can be planted to grow new garlic. Although bulbils require additional time to develop into full-sized bulbs, they provide an inexpensive way to increase your garlic supply over time.
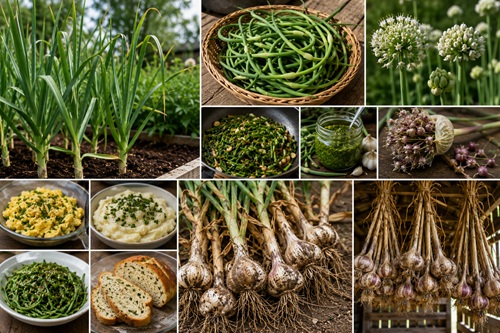
Garlic is generally ready for harvest when approximately one-third to one-half of the leaves have turned yellow or brown while the remaining leaves are still green. Waiting too long causes the outer wrapper surrounding the bulb to deteriorate, reducing storage life, while harvesting too early produces undersized bulbs that have not fully matured. Using a garden fork to gently loosen the soil before lifting the bulbs helps prevent damage to the protective wrapper.
Once harvested, garlic should never be washed unless absolutely necessary. Instead, gently brush away loose soil and allow the entire plant, including the leaves, to cure in a warm, dry, shaded location with good air circulation. Depending on humidity, curing usually takes two to four weeks. During this process, the leaves dry completely and the outer wrappers harden, creating the protective covering that allows garlic to store for many months.
Properly cured garlic is one of the easiest vegetables to store. Softneck varieties often remain in excellent condition for eight to twelve months when kept in a cool, dry location with adequate airflow. Hardneck varieties generally have a somewhat shorter storage life but are often preferred for their larger cloves and more complex flavor. Braiding softneck garlic or hanging bunches in mesh bags helps maintain good ventilation while creating an attractive storage display.
Garlic also preserves exceptionally well using several other methods. Individual cloves can be peeled and frozen whole or minced for convenient cooking throughout the year. Freeze-drying retains much of garlic’s original flavor while creating an extremely lightweight product that stores for decades when properly packaged. Garlic cloves dehydrate easily and can be sliced, minced, or ground into homemade garlic powder that far surpasses many commercial products in both flavor and aroma.
Garlic scapes preserve beautifully as well. They freeze exceptionally well after chopping and are excellent candidates for freeze-drying. Many gardeners also pickle scapes, creating a crisp, mildly garlicky condiment that pairs well with sandwiches, salads, and charcuterie boards. Homemade garlic pesto made from fresh scapes can also be frozen in small portions for year-round use.
Several common mistakes can reduce both yield and storage life. One of the most frequent is failing to remove the scapes on hardneck varieties, resulting in smaller bulbs. Another is harvesting either too early or too late, both of which reduce storage quality. Washing freshly harvested bulbs or storing them before they have completely cured often leads to mold and early spoilage. Garlic should also never be stored in sealed plastic containers because trapped moisture encourages rot.
From a preparedness perspective, garlic is difficult to surpass. It occupies very little growing space, stores for many months with minimal processing, preserves well using nearly every major food preservation method, produces multiple edible harvests, and serves as both a flavor enhancer and a traditional medicinal plant. Its ability to transform simple stored foods into satisfying meals while providing future planting stock makes garlic one of the most valuable crops a preparedness gardener can grow.
Preparedness Action Plan
Plant both hardneck and softneck garlic varieties so you can experience the advantages of each. Harvest and cook with garlic scapes before the bulbs mature, cure your bulbs properly for long-term storage, preserve part of the harvest by dehydrating homemade garlic powder, and save your healthiest bulbs for planting next season. Over time, you’ll develop a garlic crop that is increasingly adapted to your local growing conditions.
Skills Learned
After reading this section, you should understand how to harvest garlic at multiple stages of growth, safely use the leaves, scapes, flowers, bulbils, and bulbs, cure garlic for maximum storage life, preserve garlic using several long-term methods, and maximize the productivity of one of the most valuable crops in a preparedness garden.
Broccoli
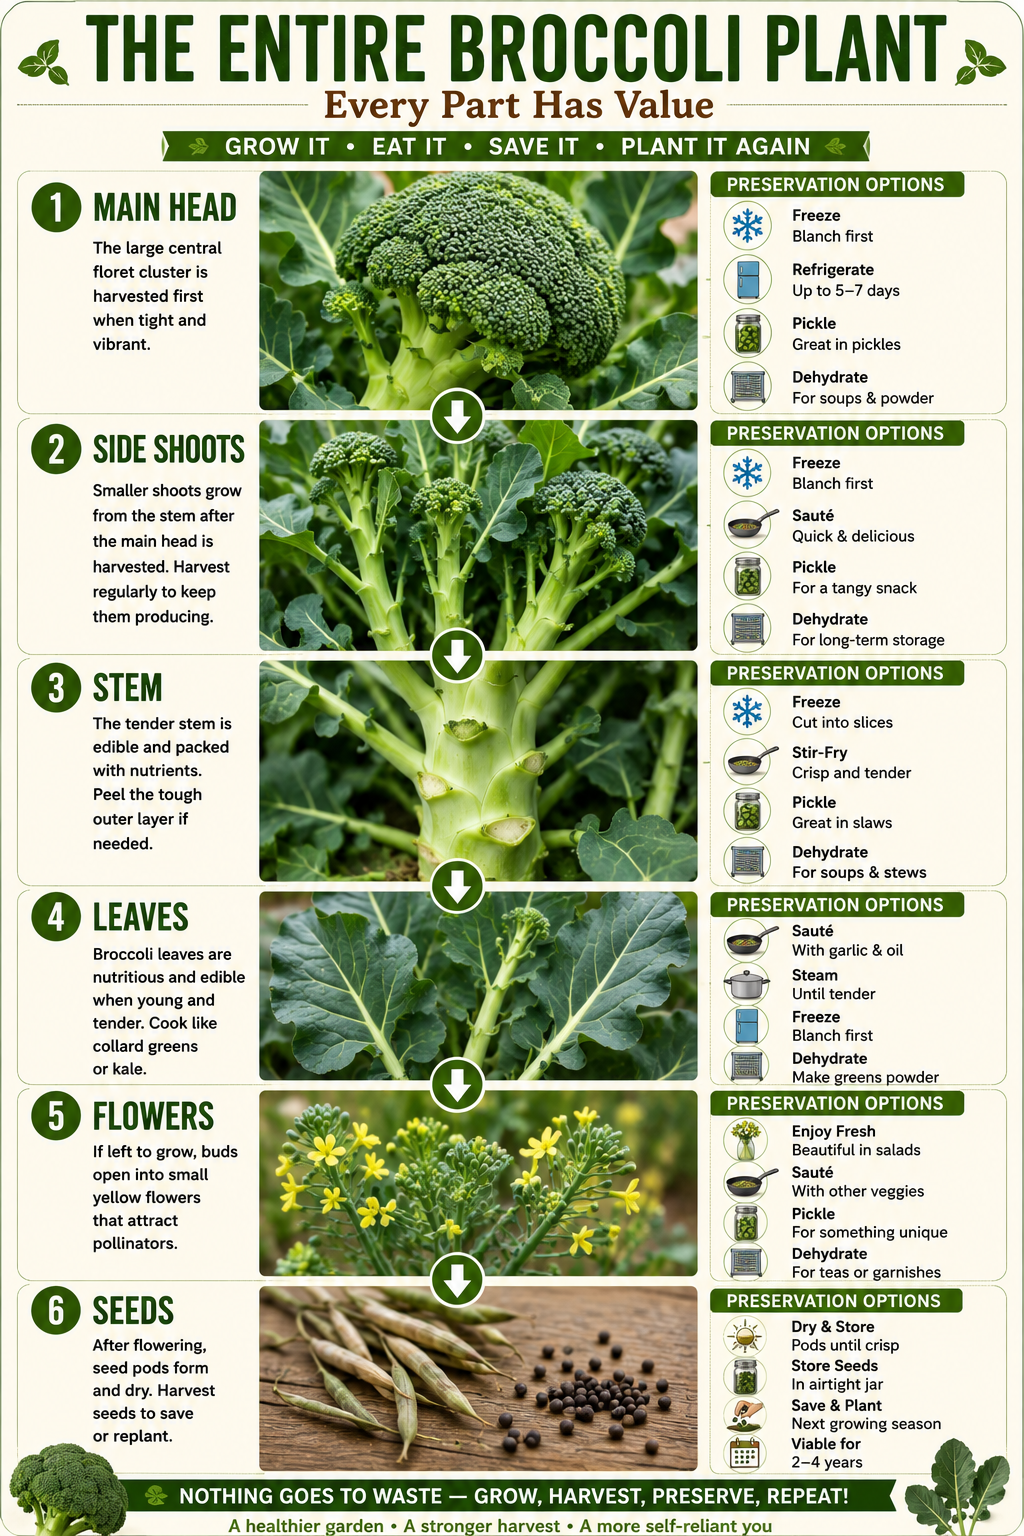
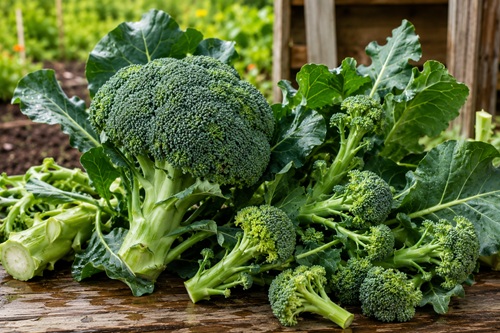 Broccoli is one of the most productive vegetables that can be grown in a preparedness garden because the harvest extends far beyond the large green head most people recognize. Every major part of the plant is edible, including the central head, side shoots, stems, leaves, flowers, and even the unopened flower buds. Many gardeners harvest the main head and remove the entire plant, never realizing that broccoli often continues producing for weeks or even months afterward. With proper harvesting techniques, a single broccoli plant can provide several meals instead of just one.
The central head is the first and largest harvest. It is made up of thousands of tightly packed flower buds that should be harvested before they begin opening into yellow flowers. At this stage, the buds are tender, flavorful, and packed with nutrients. Broccoli is exceptionally rich in vitamins C and K, folate, fiber, potassium, and antioxidants, making it one of the healthiest vegetables available. The head can be eaten raw with dips, lightly steamed, roasted, grilled, stir-fried, added to soups and casseroles, blended into creamy soups, or frozen for later use.
One of broccoli’s greatest advantages is what happens after the main head is harvested. Rather than removing the entire plant, cut the main head several inches below the crown while leaving the plant in the ground. Within days, numerous smaller side shoots begin developing along the stem. Although these secondary heads are smaller than the original crown, they are often even more tender and continue producing over an extended period. Regular harvesting encourages additional shoots, dramatically increasing the total yield from each plant.
The thick stem beneath the main head is another valuable source of food that is frequently discarded. After removing the tough outer skin with a vegetable peeler, the tender interior becomes surprisingly sweet and crisp. The peeled stem can be sliced into salads, stir-fries, soups, casseroles, vegetable platters, or roasted alongside other vegetables. Many people who believe they dislike broccoli stems have simply never prepared them properly.
Broccoli leaves are another hidden food source. Young leaves are tender enough for salads, while larger leaves can be steamed, sautéed, braised, or added to soups much like kale, collards, or cabbage. Their flavor is mild and slightly sweet, making them an excellent substitute for other leafy greens. Nutritionally, the leaves are extremely valuable, containing many of the same vitamins and minerals found in the broccoli head itself.
If broccoli remains in the garden after the flower buds begin opening, bright yellow flowers soon appear. Although this stage signals that the head has passed its peak eating quality, the flowers themselves remain edible. Their mild flavor and attractive appearance make them an excellent garnish for salads, rice dishes, soups, and vegetable platters. More importantly, flowering broccoli becomes a magnet for bees, butterflies, hoverflies, and many other beneficial insects that improve pollination throughout the garden.
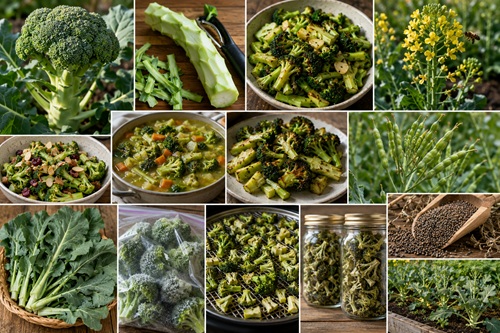
Once flowering is complete, long seed pods begin forming along the stems. While young pods can be eaten much like other members of the cabbage family, most gardeners allow them to mature fully so they can collect seed for future planting. Properly dried broccoli seed provides an economical way to maintain future gardens and reduce dependence on purchasing seed each season.
Broccoli is best harvested while the flower buds remain tightly closed and deep green. Waiting only a few days too long can allow the buds to begin opening, reducing both flavor and texture. During warm weather, broccoli heads can mature rapidly, so checking the plants daily once the heads begin forming helps ensure they are harvested at their peak.
Broccoli preserves exceptionally well using several methods. Freezing remains one of the most popular choices because properly blanched florets maintain excellent quality for many months. Both the florets and peeled stems freeze successfully and are ready to use directly from the freezer in cooked dishes. Freeze-drying preserves nearly all edible portions of the plant while providing one of the longest storage lives available. Once rehydrated, freeze-dried broccoli performs well in soups, casseroles, pasta dishes, and emergency meals.
Dehydrating broccoli requires blanching beforehand but produces lightweight florets that rehydrate effectively during cooking. The stems can also be dehydrated after slicing into thin pieces. Pressure canning broccoli is generally not recommended because it becomes excessively soft and loses much of its desirable texture, making freezing or freeze-drying the preferred long-term preservation methods.
Several common mistakes reduce broccoli production. Perhaps the biggest is removing the entire plant immediately after harvesting the central head. Doing so eliminates weeks of additional side shoot production that requires almost no additional effort. Another mistake is discarding the thick stems without realizing how tender they become after peeling. Many gardeners also overlook the edible leaves and flowers, leaving valuable food in the garden. Finally, allowing the main head to flower before harvesting significantly reduces eating quality, although the flowers themselves still remain useful.
From a preparedness perspective, broccoli offers tremendous value because it provides multiple harvests from a single planting, produces several edible plant parts, attracts pollinators when flowering, and preserves exceptionally well. Few vegetables offer such a combination of nutrition, productivity, and versatility. When harvested correctly, broccoli can continue feeding a household long after the first head has been removed, making it one of the highest-yield vegetables in the preparedness garden.
Preparedness Action Plan
When harvesting broccoli this season, resist the temptation to pull the entire plant. Instead, remove only the main head and continue harvesting the side shoots as they develop. Peel and cook the stems rather than discarding them, try preparing the leaves as a cooked green, and allow one healthy plant to flower so you can observe pollinators and collect seed for future planting.
Skills Learned
After reading this section, you should understand how to maximize broccoli production by harvesting multiple edible parts, properly prepare the heads, stems, leaves, flowers, and seed pods, preserve broccoli using several storage methods, and significantly increase the amount of food each broccoli plant provides in a preparedness garden.
Cauliflower
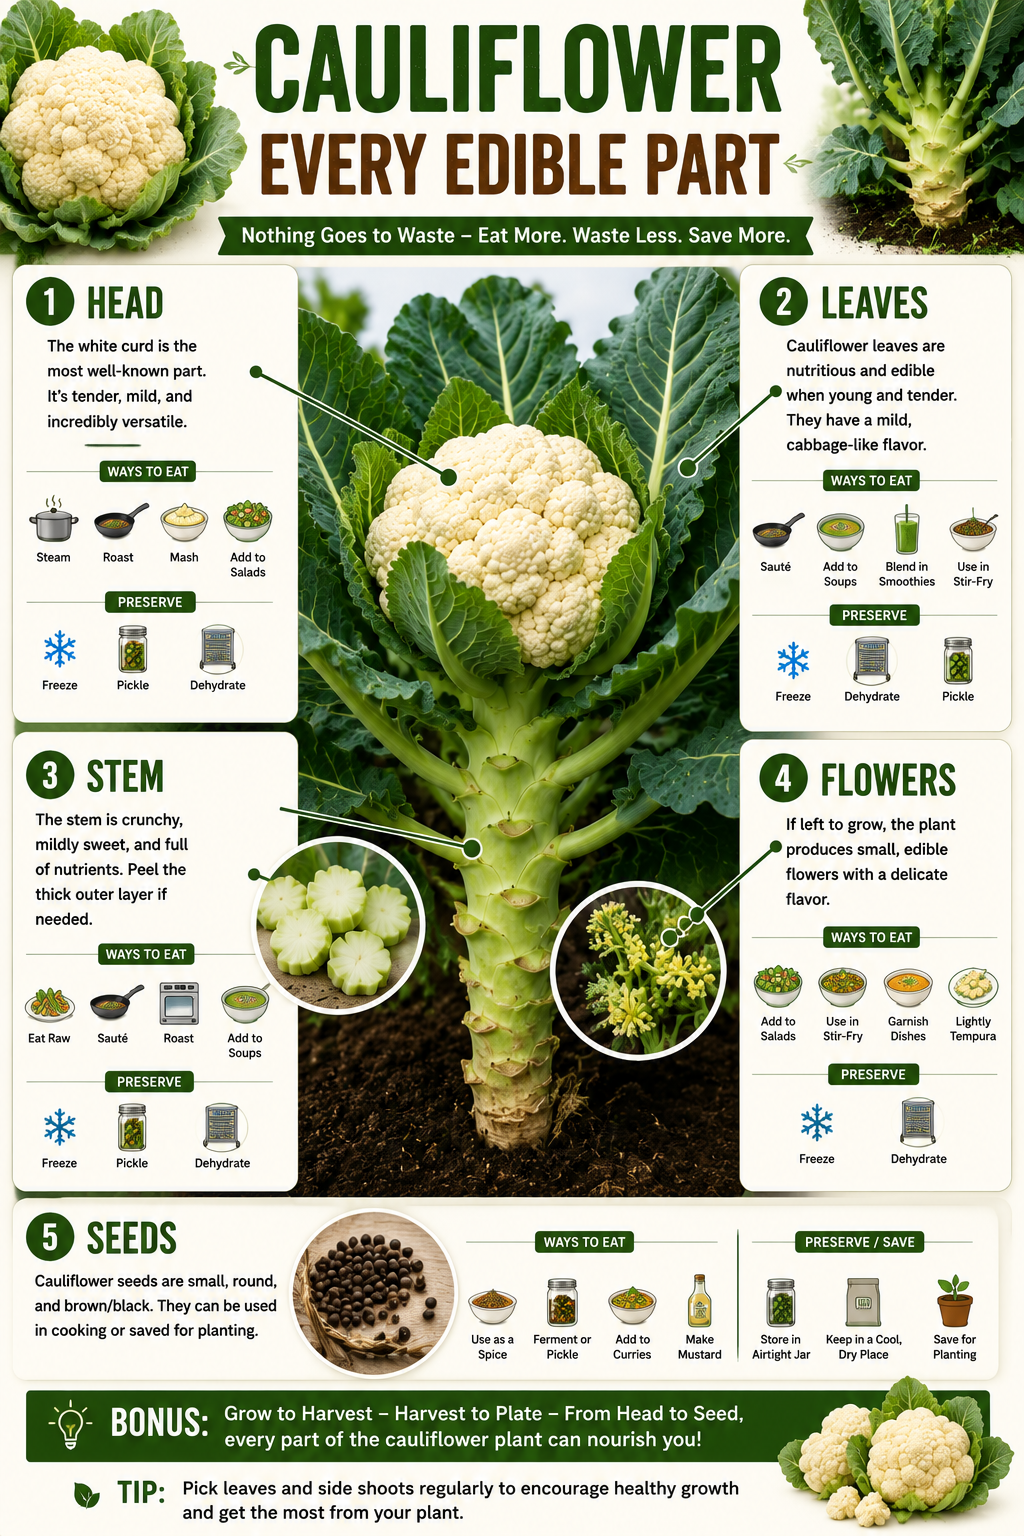
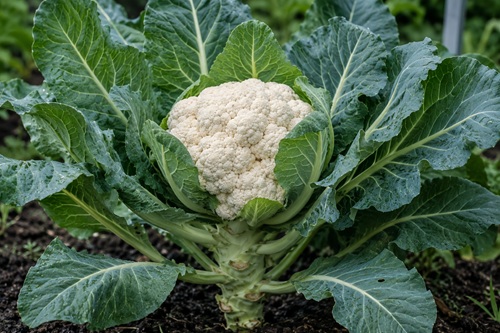 Cauliflower is often thought of as a single-harvest vegetable, with most gardeners growing it only for its large white head before removing the rest of the plant. In reality, cauliflower offers much more than its familiar curd. The leaves, stems, shoots, flowers, and seeds all have practical value, making it another excellent choice for a preparedness garden where maximizing every harvest is a priority. While cauliflower does not usually continue producing side shoots as vigorously as broccoli, nearly every part of the plant can still contribute to your table instead of ending up in the compost pile.
The cauliflower head, often referred to as the curd, is made up of tightly packed, undeveloped flower buds. It should be harvested while the surface remains firm, compact, and free from separating florets. Once harvested at the proper stage, cauliflower has a mild, slightly sweet flavor that works well in countless recipes. It can be eaten raw with dips, steamed, roasted, grilled, mashed as a potato substitute, blended into creamy soups, added to casseroles, turned into pizza crust, grated into cauliflower rice, or incorporated into stir-fries. Its ability to absorb surrounding flavors makes it one of the most versatile vegetables in the kitchen.
Nutritionally, cauliflower is an excellent source of vitamin C, vitamin K, folate, fiber, and numerous antioxidants. It is naturally low in calories and carbohydrates while providing valuable nutrients that support immune function and overall health. For preparedness-minded families looking to grow highly nutritious food in limited space, cauliflower offers an excellent return on the effort invested.
The large leaves surrounding the head are often discarded, yet they are completely edible. Young leaves are tender enough to chop into salads, while mature leaves become excellent cooking greens. Their flavor is similar to cabbage or collard greens, making them ideal for steaming, sautéing, stir-frying, soups, stews, or wrapping around fillings before baking. Because the leaves are substantial and nutritious, using them instead of throwing them away significantly increases the amount of food harvested from each plant.
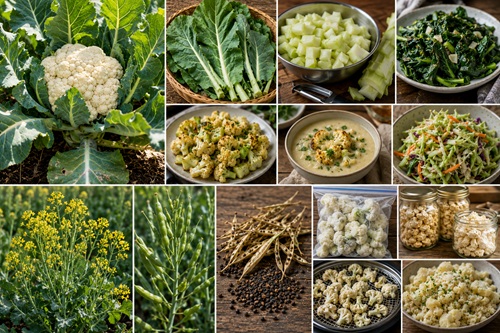
The thick stalk supporting the cauliflower head is another valuable food source. After peeling away the tougher outer layer, the tender interior becomes crisp and mildly sweet. It can be sliced into vegetable trays, roasted with the florets, diced into soups, stir-fries, casseroles, or grated into slaws. Many cooks find the peeled stem nearly indistinguishable from the florets once it has been cooked.
If the head is left unharvested, the tightly packed buds eventually separate and open into clusters of bright yellow flowers. While this signals that the cauliflower has passed its peak eating quality, the flowers remain edible and have a delicate flavor. More importantly, they attract bees, butterflies, hoverflies, and other beneficial insects that improve pollination throughout the garden. Allowing one or two plants to flower each season can contribute to a healthier and more productive growing environment.
Following flowering, slender seed pods begin developing along the stems. These pods mature and dry naturally on the plant, producing seeds that can be harvested for future gardens. Saving seed from vigorous, healthy plants gradually produces cauliflower that is increasingly adapted to your local climate and growing conditions, an important step toward greater long-term self-sufficiency.
Cauliflower should be harvested while the head remains firm, compact, and tightly closed. Depending on the variety, this usually occurs when the head reaches six to eight inches in diameter. Waiting too long allows the florets to separate, reducing both appearance and texture. In hot weather, heads can mature quickly, making regular inspection important during the harvest period.
Fresh cauliflower stores well in the refrigerator for one to three weeks when kept cool and dry. For longer storage, freezing remains one of the best preservation methods. The florets should be cut into uniform pieces, briefly blanched, cooled rapidly in ice water, and frozen in airtight containers. Properly frozen cauliflower maintains excellent quality for many months and is ready to use directly in cooked dishes.
Freeze-drying is another outstanding option for long-term preparedness. Both the florets and peeled stems rehydrate remarkably well and retain much of their original flavor and nutrition. Properly packaged freeze-dried cauliflower can remain shelf stable for decades while taking up very little storage space. Dehydrating also works well, particularly for soups, casseroles, and emergency meals where the cauliflower will be fully rehydrated during cooking.
Cauliflower can also be pickled, creating a crisp, tangy vegetable that stores well and adds variety to pantry shelves. It is commonly included in mixed pickled vegetables and relishes. While pressure canning plain cauliflower is generally not recommended because the texture deteriorates significantly, it performs well in approved mixed vegetable recipes designed specifically for canning.
Several common mistakes reduce the value of a cauliflower harvest. The most frequent is discarding the leaves and stem, which together can represent a substantial amount of additional food. Another mistake is harvesting too late, allowing the head to separate into loose florets that lose their firm texture. Some gardeners also remove flowering plants immediately, missing the opportunity to support pollinators and collect seed for future planting.
From a preparedness perspective, cauliflower is far more valuable than many people realize. It produces several edible plant parts, preserves well through freezing, freeze-drying, and dehydration, stores fresh for extended periods, and provides seed for future gardens. Combined with its exceptional nutritional value and remarkable versatility in the kitchen, cauliflower deserves a place in nearly every preparedness garden.
Preparedness Action Plan
The next time you harvest cauliflower, prepare the entire plant rather than just the head. Peel and cook the stem, sauté the leaves as a side dish, and preserve extra florets using freezing or freeze-drying. If space allows, leave one healthy plant to flower and produce seed, giving you firsthand experience with the complete life cycle of one of the garden’s most productive vegetables.
Skills Learned
After reading this section, you should understand how to harvest cauliflower at its peak quality, safely prepare the head, leaves, stems, flowers, and seeds, preserve cauliflower using several long-term storage methods, and maximize the amount of food produced from every cauliflower plant in your preparedness garden.
Swiss Chard
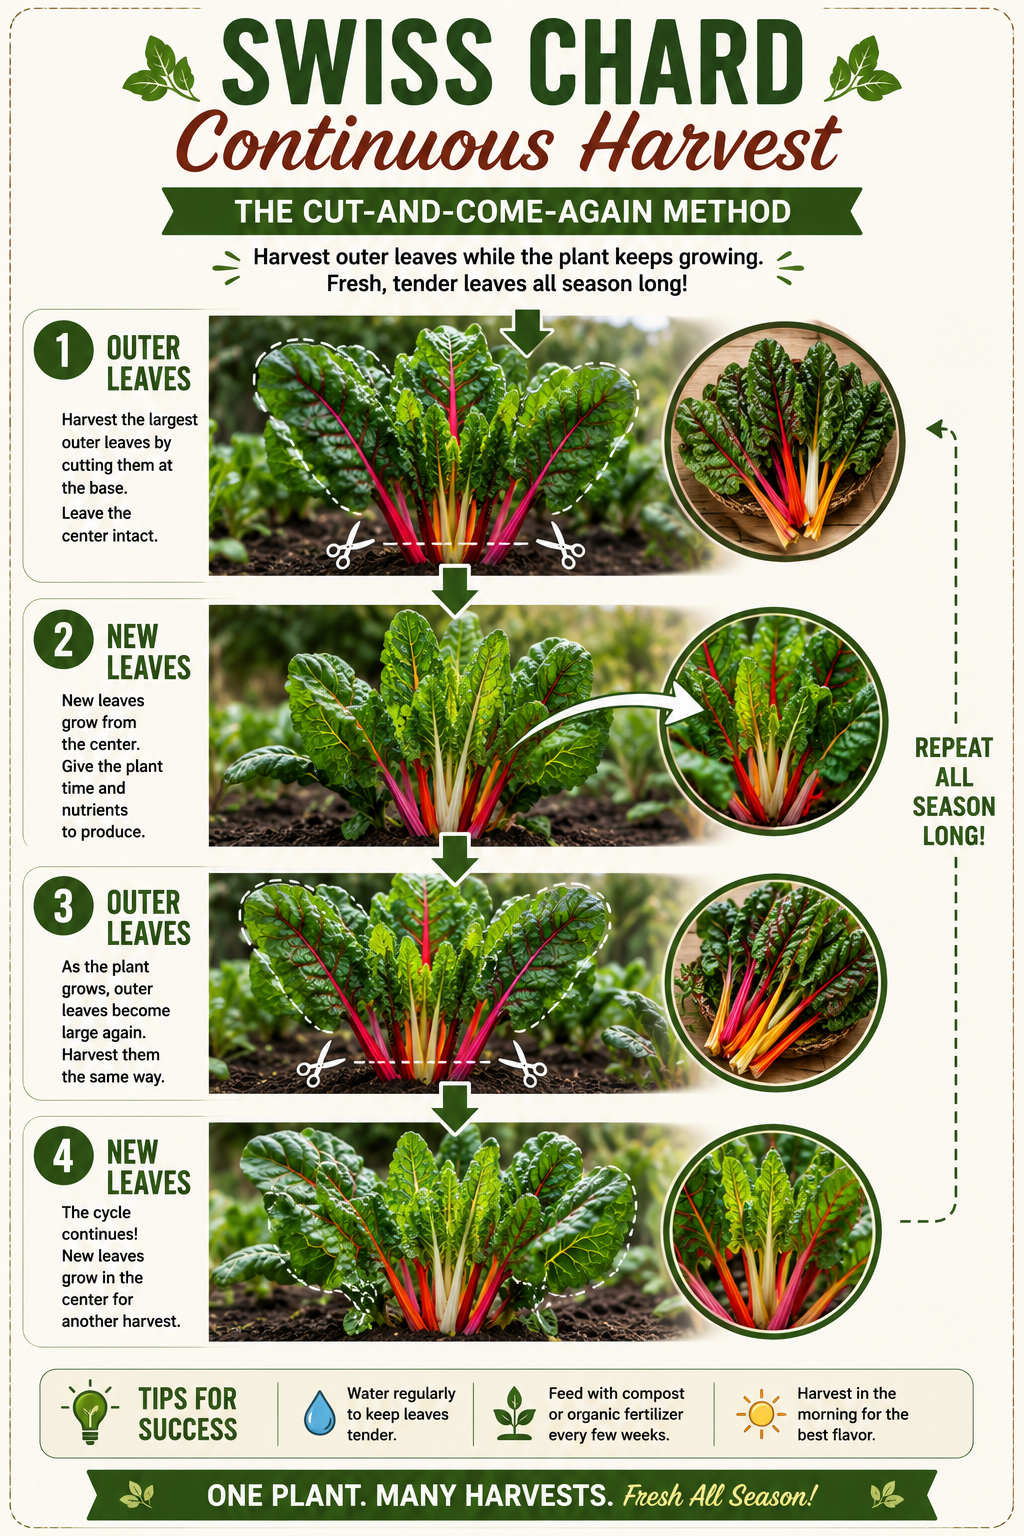
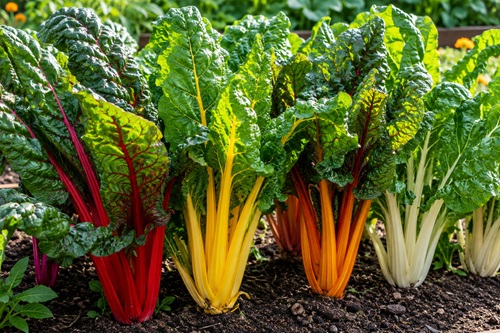 Swiss chard is one of the most productive vegetables a preparedness gardener can grow because it provides an almost continuous harvest from a single planting. Unlike many vegetables that are harvested once and removed from the garden, Swiss chard is a “cut-and-come-again” crop. As long as the growing point remains intact, the plant continually produces new leaves throughout the season. In many climates, it will continue growing until hard frosts arrive and, in milder regions, may even survive the winter to produce fresh greens the following spring. This remarkable productivity makes Swiss chard one of the highest-yield vegetables available for long-term food production.
The large, colorful leaves are the primary harvest and are among the most nutritious leafy greens found in the garden. Rich in vitamins A, C, and K, along with magnesium, potassium, iron, calcium, and antioxidants, Swiss chard provides exceptional nutrition while requiring very little maintenance. Young leaves are tender enough to eat raw in salads, wraps, and sandwiches, while mature leaves become excellent cooking greens. They can be steamed, sautéed, braised, added to soups, casseroles, pasta dishes, omelets, quiches, and stir-fries. Their mild, earthy flavor pairs well with garlic, onions, olive oil, butter, lemon, and many different herbs and spices.
The thick, colorful stems are equally valuable and should never be discarded. Depending on the variety, they may be white, yellow, orange, pink, or deep red, adding both color and texture to meals. The stems remain pleasantly crisp after cooking and have a flavor that many people compare to celery with a slight sweetness. They can be sliced into stir-fries, soups, stews, roasted vegetable dishes, casseroles, and pasta recipes. Because they require slightly longer cooking than the leaves, many cooks simply begin cooking the stems first before adding the chopped leaves a few minutes later.
One of Swiss chard’s greatest strengths is its ability to tolerate repeated harvesting. Instead of cutting down the entire plant, gardeners should harvest only the large outer leaves while leaving the smaller center leaves untouched. The center continues producing new growth, allowing the same plant to provide harvest after harvest for months. This continual production reduces the need for repeated planting and provides a dependable supply of fresh greens throughout much of the growing season.
If Swiss chard survives into its second growing season, it eventually sends up tall flowering stalks. Although the leaves become tougher once flowering begins, the flowers provide an important food source for bees and other beneficial insects. As flowering continues, the plants produce abundant seed clusters that dry naturally on the stalk. Once completely dry, these seeds can be harvested and stored for future gardens. Saving seed from healthy, vigorous plants gradually produces Swiss chard that becomes increasingly adapted to your local growing conditions.
Swiss chard should be harvested regularly to encourage continuous growth. The largest outer leaves are usually ready once they reach eight to twelve inches in length, although younger leaves can be picked at almost any stage for use as tender salad greens. Frequent harvesting actually improves production because it stimulates the plant to replace older leaves with fresh new growth. During hot summer weather, providing adequate moisture helps maintain tender leaves while reducing bitterness.
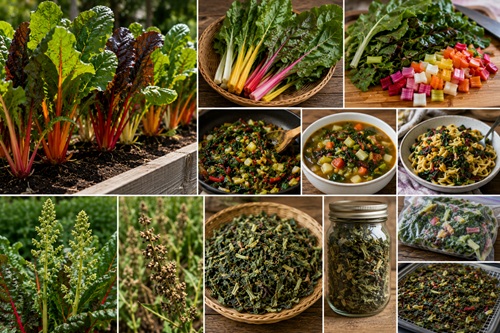
Swiss chard preserves exceptionally well using several different methods. Freezing remains one of the easiest options. After washing thoroughly, the leaves should be blanched briefly before cooling rapidly in ice water and packaging for the freezer. Properly frozen Swiss chard retains much of its flavor and nutritional value and works well in cooked dishes throughout the year.
Freeze-drying produces outstanding results for both the leaves and stems. Once rehydrated, freeze-dried Swiss chard performs well in soups, casseroles, pasta dishes, and emergency meals while offering one of the longest shelf lives available. Dehydrating is another excellent preservation method. Dried leaves crumble easily into flakes that occupy very little storage space and can later be added directly to soups, stews, sauces, or casseroles. Some gardeners also grind dehydrated leaves into a fine green powder that can be mixed into breads, smoothies, sauces, and pasta dough to increase nutritional value without significantly changing flavor.
Although Swiss chard is not commonly canned by itself because its texture softens considerably during processing, it freezes, dehydrates, and freeze-dries so successfully that these methods generally provide better quality. Freshly harvested leaves also remain in excellent condition for about a week when refrigerated, making them easy to use during everyday meal preparation.
Several common mistakes reduce the productivity of Swiss chard. One of the most frequent is harvesting the entire plant instead of removing only the outer leaves. Doing so eliminates months of additional production that the plant could have provided. Another mistake is discarding the colorful stems, which are just as edible and nutritious as the leaves. Many gardeners also remove flowering plants immediately, missing the opportunity to collect a generous supply of seed for future gardens.
From a preparedness perspective, Swiss chard is one of the most dependable vegetables that can be grown. It produces fresh food over an exceptionally long season, tolerates repeated harvesting, offers multiple edible plant parts, preserves well using several methods, and provides seed for future planting. Few vegetables deliver such a large amount of nutritious food from so little garden space. Its reliability, resilience, and continuous production make Swiss chard one of the true workhorses of the preparedness garden.
Preparedness Action Plan
If you are not already growing Swiss chard, dedicate a small section of your garden to it this season and practice harvesting only the outer leaves. Experiment with using both the leaves and stems in different recipes, preserve part of your harvest by freezing and dehydrating it, and allow one healthy plant to produce seed for next year’s garden. You’ll quickly discover why Swiss chard is considered one of the most productive vegetables available to home gardeners.
Skills Learned
After reading this section, you should understand how to harvest Swiss chard continuously throughout the growing season, safely use both the leaves and stems, preserve the harvest using several long-term storage methods, collect seed for future planting, and maximize the productivity of one of the most dependable vegetables in a preparedness garden.
Beans (Bush Beans & Pole Beans)
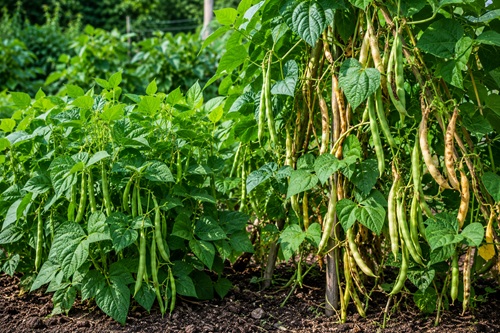 Beans are one of the most valuable crops a preparedness gardener can grow because they provide fresh vegetables, protein-rich dry beans, seed for future gardens, and even improve the soil they grow in. Unlike many vegetables that produce only a single harvest, beans can provide food throughout the growing season when picked as green beans and then continue supplying mature beans for long-term storage if some pods are allowed to fully develop. Their remarkable versatility, nutritional value, and exceptional storage life have made beans one of the world’s most important food crops for thousands of years.
Bush beans and pole beans each have their own advantages. Bush beans grow in compact plants that require little support and typically produce a large harvest over a relatively short period, making them ideal for gardeners who want to preserve a significant amount of food at one time. Pole beans, on the other hand, climb trellises, fences, or poles and continue producing new pods over a much longer season. While they require vertical support, they often produce a larger overall harvest from a smaller amount of garden space. Many preparedness gardeners grow both types to enjoy early harvests from bush beans while relying on pole beans for a steady supply throughout the summer.
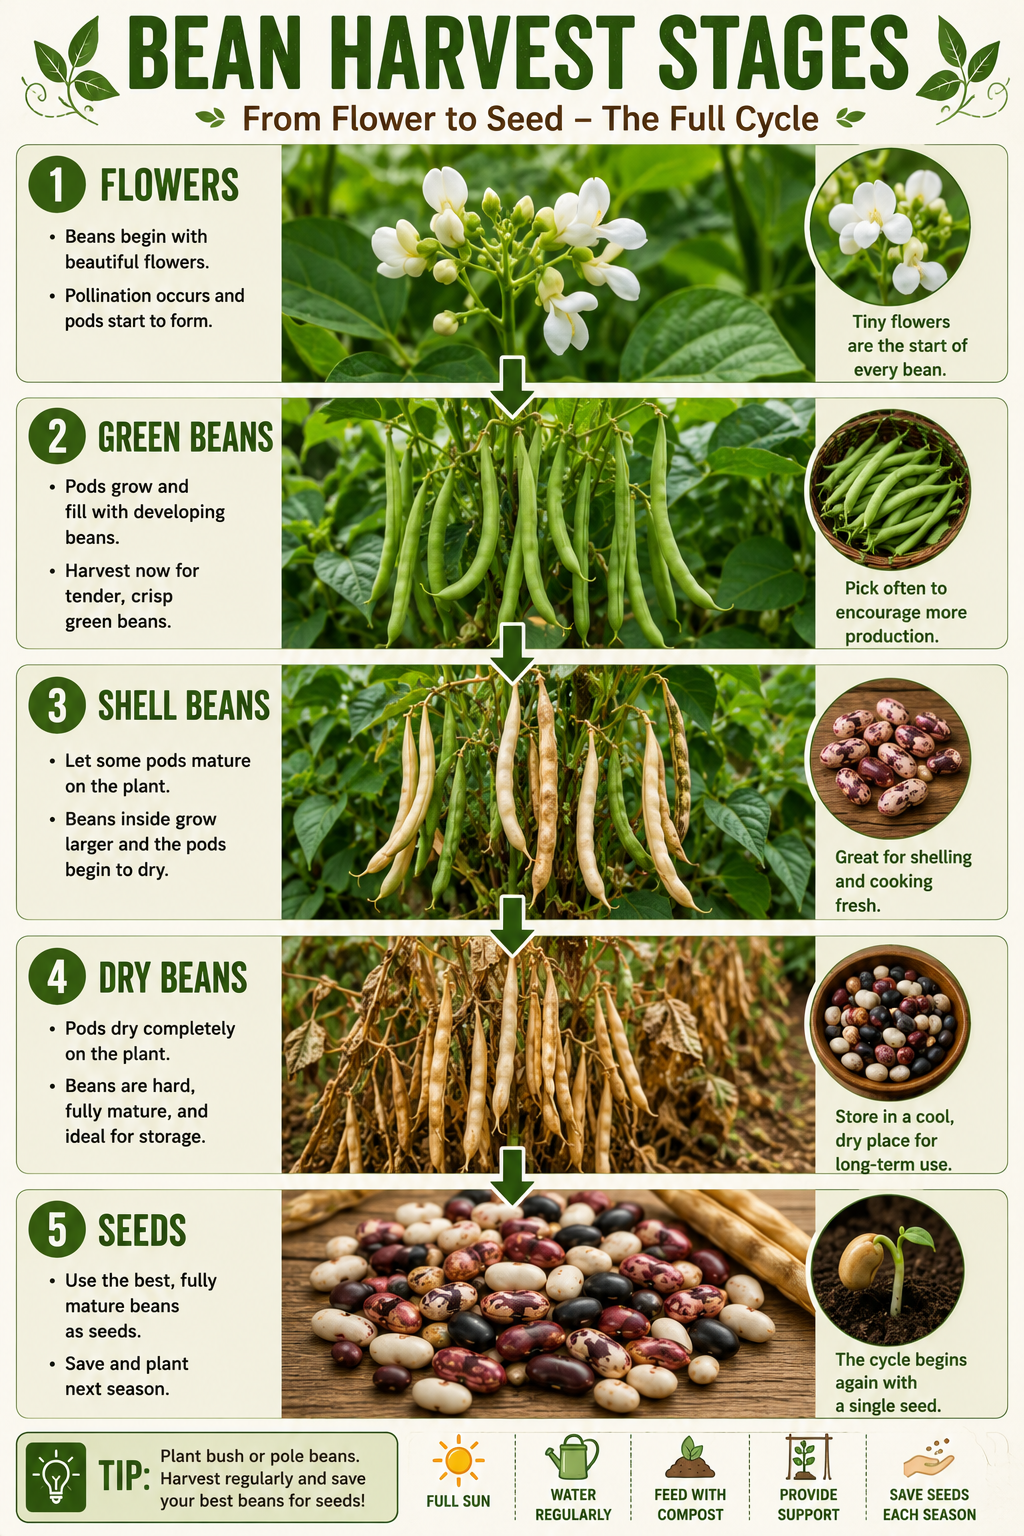
The young pods are the harvest most people recognize. Green beans are best picked while the pods are still tender and before the seeds inside begin swelling significantly. At this stage, they are crisp, flavorful, and suitable for eating raw, steaming, boiling, roasting, grilling, stir-frying, or adding to soups, casseroles, and stews. Regular harvesting encourages the plants to continue flowering and producing new pods. Allowing mature pods to remain on the plant signals that seed production has begun, reducing future harvests.
As the pods mature, the beans inside continue developing. At the shelling stage, the beans are plump but still soft and can be removed from their pods for fresh cooking. Shelling beans are excellent in soups, chili, casseroles, succotash, and other hearty dishes. Their creamy texture and rich flavor make them a favorite during the late summer harvest when many other vegetables are reaching maturity.
If some pods are left on the plants until they become dry and brittle, the beans inside transform into one of the finest long-term storage foods available. Dry beans are exceptionally rich in protein, dietary fiber, complex carbohydrates, folate, iron, magnesium, potassium, and numerous other nutrients that help support a balanced diet. Stored properly in airtight containers with oxygen absorbers and protected from heat, moisture, and insects, dry beans can remain usable for decades. They have earned their place as one of the foundation foods in emergency food storage because they are nutritious, inexpensive, lightweight, and remarkably durable.
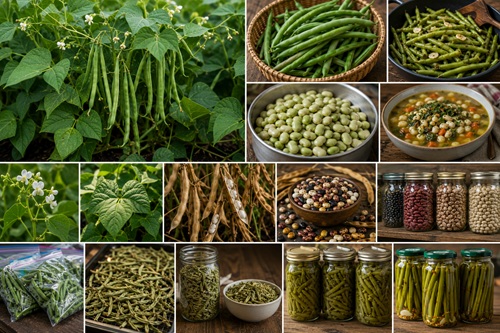
Many gardeners are surprised to learn that young bean leaves from common green bean varieties are also edible when harvested sparingly. They should always be cooked before eating and can be added to soups, stews, or stir-fries much like spinach. Only a few leaves should be removed from each healthy plant so that growth and bean production are not affected. The blossoms themselves are also edible and have a mild bean flavor, although most gardeners prefer to leave them in place so they can develop into additional pods. The flowers also attract bees and other beneficial pollinators that improve production throughout the garden.
Beans are unique because they improve the soil while they grow. Through a natural relationship with beneficial bacteria living on their roots, bean plants capture nitrogen from the atmosphere and convert it into forms that plants can use. This process, known as nitrogen fixation, enriches the soil and benefits crops that follow. Rotating beans through different garden beds helps maintain soil fertility while reducing the need for additional fertilizer.
Harvest timing depends on how the beans will be used. Green beans should be picked every few days while the pods remain young and tender. Shelling beans should be harvested when the beans inside have reached full size but remain soft. Dry beans should remain on the plant until the pods become brown, dry, and brittle. If wet weather threatens before the pods have completely dried, entire plants can be pulled and hung upside down in a dry, well-ventilated location until the beans finish curing.
Beans preserve exceptionally well using several different methods. Fresh green beans freeze beautifully after a brief blanching and retain excellent flavor and texture for many months. Freeze-drying produces lightweight beans that rehydrate well and are ideal for long-term emergency storage. Green beans also dehydrate successfully for use in soups and stews, although they should be fully rehydrated during cooking. Pressure canning remains one of the most popular methods for preserving green beans, producing shelf-stable jars that are ready to use whenever needed. Pickled beans, often called dilly beans, provide another flavorful option that adds variety to pantry shelves.
Dry beans require almost no processing beyond proper drying and storage. Once the pods have completely dried, the beans can be removed, cleaned of plant debris, and stored in airtight containers. Properly dried beans not only provide years of dependable food but also serve as seed for future gardens. Selecting seed from the healthiest, most productive plants each season gradually produces bean varieties that become increasingly adapted to your local climate and growing conditions.
Several common mistakes reduce bean production and storage quality. Harvesting too infrequently allows pods to become overmature, slowing additional flowering and reducing yields. Picking plants while they are wet increases the risk of spreading fungal diseases throughout the garden. Another common mistake is harvesting every pod for fresh eating without allowing some to mature into dry beans for long-term storage and seed saving. Finally, storing dry beans before they have completely cured can lead to mold, spoilage, or insect problems during storage.
From a preparedness perspective, beans are one of the most important vegetables a family can grow. They produce abundant harvests over an extended season, preserve exceptionally well using multiple methods, improve soil fertility, provide highly nutritious food, and generate seed for future planting. Their combination of productivity, versatility, and outstanding storage life makes them one of the true foundation crops of a self-sufficient garden.
Preparedness Action Plan
Plant both bush beans and pole beans so you can compare their harvest patterns and productivity. Preserve part of your green bean harvest by freezing or pressure canning, while allowing another portion of the crop to mature into dry beans for long-term storage. Save seed from your healthiest plants each season to build a dependable, locally adapted food supply that can support future gardens for years to come.
Skills Learned
After reading this section, you should understand how to harvest beans at multiple stages of growth, safely use green beans, shelling beans, dry beans, flowers, and young leaves, preserve beans using several long-term storage methods, improve soil health through nitrogen fixation, save seed for future planting, and maximize the productivity of one of the most valuable crops in a preparedness garden. These skills will help you grow a more resilient food supply while ensuring every stage of the bean plant contributes to both your current harvest and future self-sufficiency.
Zucchini (Summer Squash)
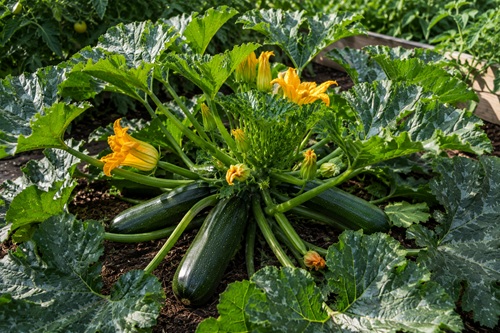 Zucchini is one of the most productive vegetables a preparedness gardener can grow. A single healthy plant can produce dozens of fruits over the course of a growing season, providing an abundant supply of fresh food with relatively little space or maintenance. While most people harvest only the familiar green squash, nearly every part of the zucchini plant has value. The blossoms are edible, the young leaves can be cooked, the seeds can be roasted or saved for future gardens, and even oversized fruits that are no longer ideal for fresh eating can be transformed into soups, breads, relishes, or animal feed. Few garden vegetables offer as many opportunities to reduce waste while increasing food production.
Zucchini belongs to the squash family and grows rapidly during warm weather. Once production begins, plants often produce new fruit every day or two, making frequent harvesting essential. Regular picking encourages continued flowering and fruit production, while allowing too many mature fruits to remain on the plant signals that seed production has begun and often slows additional harvests. This simple harvesting practice can dramatically increase the total amount of food produced from each plant throughout the season.
Young zucchini are generally harvested when they measure between six and eight inches long. At this stage they have thin, tender skin, small immature seeds, and excellent flavor. Smaller fruits are often sweeter and require no peeling, making them ideal for fresh eating, grilling, roasting, stir-fries, casseroles, soups, pasta dishes, and baking. As the fruits become larger, the skin thickens and the seeds become more noticeable, but oversized zucchini remain extremely useful for shredding into breads, muffins, cakes, soups, sauces, and dehydrated vegetable blends.
One of the most overlooked parts of the zucchini plant is the flower. Both male and female blossoms are edible and have long been considered a delicacy in many parts of the world. The large yellow flowers can be stuffed with cheese, herbs, or meat before frying or baking, added fresh to salads, or chopped into soups and egg dishes. Since only the female flowers develop into fruit, many gardeners harvest primarily the male blossoms, leaving enough flowers behind to ensure excellent pollination and continued zucchini production.
The large leaves also have value, although they are not commonly eaten in North America. Young, tender leaves can be cooked similarly to spinach or other leafy greens after removing the tougher stems and prickly surface hairs. When sautéed, steamed, or added to soups, they provide additional nutrition while allowing gardeners to make greater use of the entire plant. Even older leaves that are not harvested for food continue serving an important purpose by shading the fruit, conserving soil moisture, and supporting vigorous plant growth.
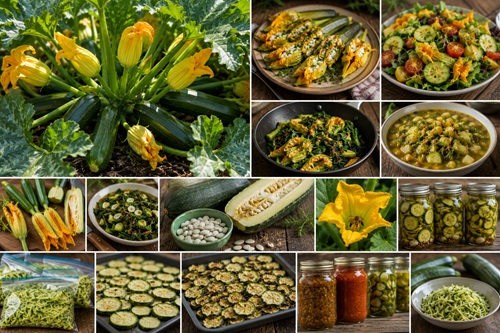
If several zucchini are allowed to fully mature on the vine, they eventually develop hard skins and fully formed seeds. Although these oversized fruits are no longer ideal for fresh eating, the mature seeds inside can be washed, dried, and stored for planting the following year. Selecting seed from healthy, productive plants gradually develops varieties that perform especially well in your local growing conditions while reducing dependence on commercial seed suppliers. The mature seeds can also be roasted as a nutritious snack rich in healthy fats, protein, magnesium, and zinc.
Zucchini flowers attract bees and numerous other pollinating insects that benefit the entire garden. Good pollination is essential because each female blossom requires pollen from a male flower in order to develop properly. Gardens with abundant pollinator activity generally produce larger harvests while also improving pollination for nearby cucumbers, pumpkins, melons, squash, and many flowering vegetables.
Preserving zucchini is remarkably versatile. Fresh zucchini normally stores for one to two weeks under refrigeration. For longer storage, sliced or shredded zucchini freezes exceptionally well after blanching and can later be used in soups, casseroles, breads, muffins, and sauces. Freeze-drying produces lightweight zucchini that rehydrates well while offering one of the longest storage lives available when packaged correctly. Thin slices also dehydrate into vegetable chips or can later be powdered and added to soups, pasta sauces, breads, and smoothies to increase nutrition without significantly altering flavor.
Pressure canning allows zucchini to be safely incorporated into soups, stews, and mixed vegetable recipes, while water-bath canning is commonly used for zucchini relish, chutneys, and pickled zucchini recipes that contain sufficient acidity. Fermentation offers another excellent preservation option, producing probiotic-rich zucchini pickles that store well under refrigeration while supporting digestive health. Shredded zucchini can also be frozen in measured portions, making it easy to add directly into baked goods throughout the year.
Because zucchini grows so quickly, harvesting should be performed every day or two during peak production. Frequent harvesting keeps fruits tender, encourages additional flowering, and greatly increases total seasonal yields. Even gardeners with limited growing space can often produce hundreds of pounds of food from only a handful of healthy plants, making zucchini one of the most productive vegetables available for preparedness gardening.
Preparedness Action Plan
Plant at least two zucchini plants for every four family members to ensure reliable pollination and continuous production throughout the growing season. Harvest fruits while they are young and tender for the best flavor, but intentionally allow several fruits to fully mature each year for seed saving. Preserve surplus harvests using a combination of freezing, freeze-drying, dehydrating, fermentation, and canning to create a diverse long-term food supply. Learn to use the blossoms, young leaves, mature fruits, and seeds so that very little of the plant goes to waste. Incorporating zucchini into your preparedness garden provides an abundant, renewable source of fresh food while reducing dependence on outside food supplies.
Skills Learned
After reading this section, you should understand how to harvest zucchini at multiple stages of growth, safely use the fruits, blossoms, young leaves, and mature seeds, preserve zucchini using several long-term storage methods, encourage continuous production through proper harvesting, save seed for future planting, and maximize the productivity of one of the highest-yielding vegetables in a preparedness garden. These skills will help you produce more food from less space while making full use of every valuable part of the zucchini plant.
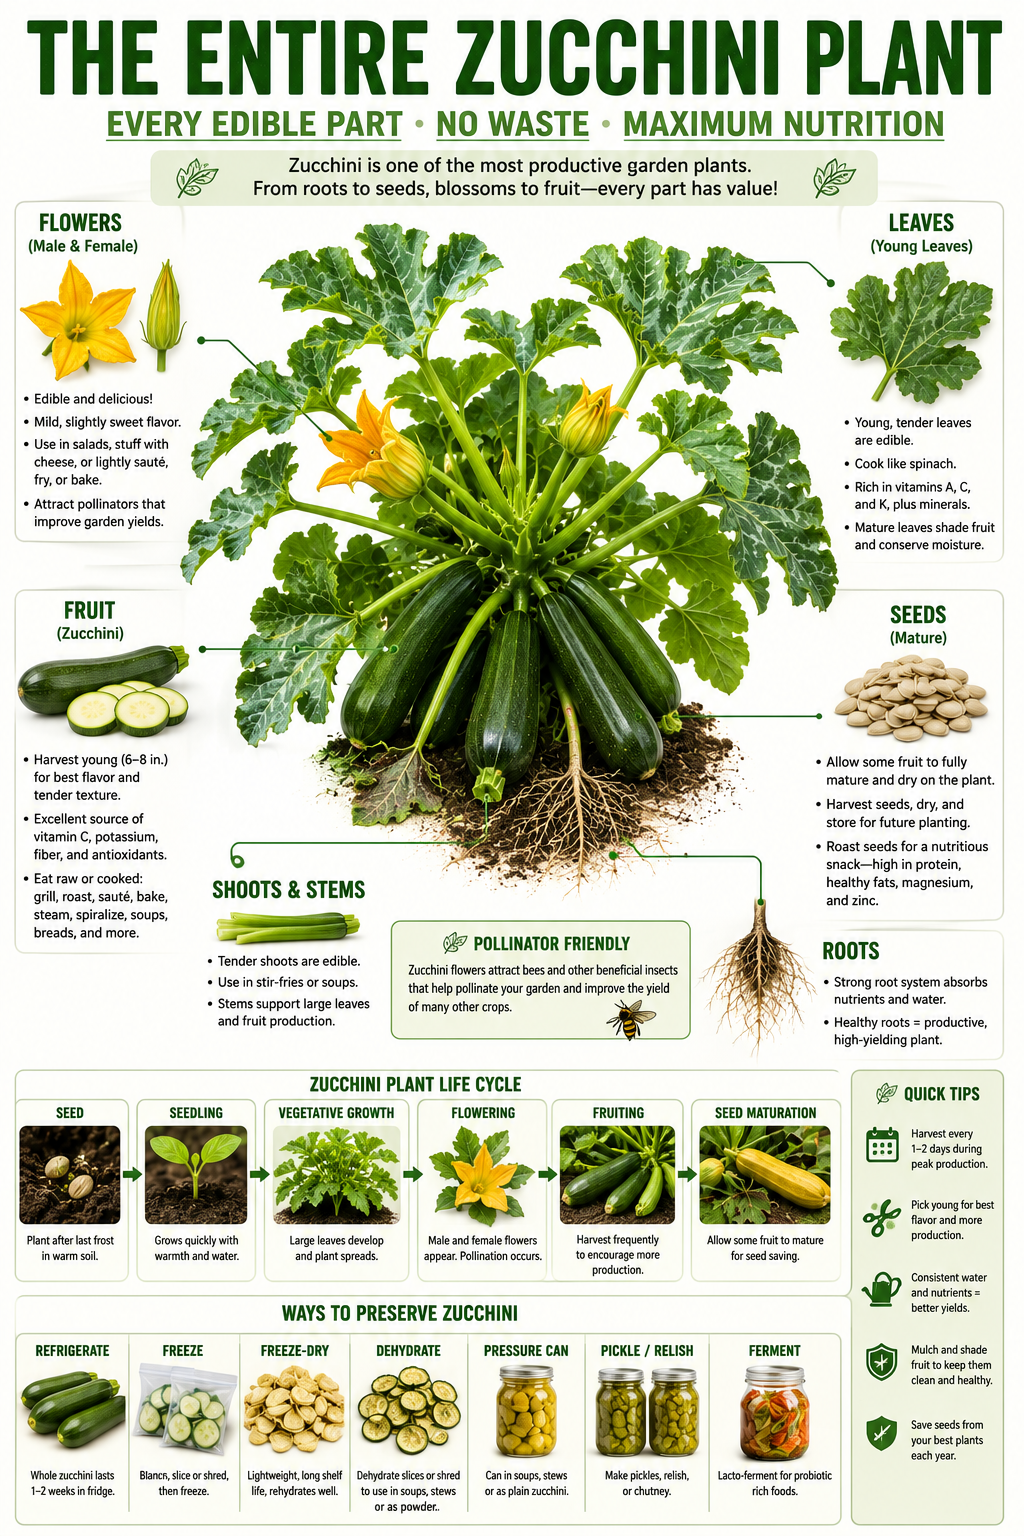
Top 12 Preparedness Garden Vegetables at a Glance
Compare the edible parts, best fresh uses, preservation methods, seed-saving potential, and overall preparedness value of the twelve most versatile vegetables for a resilient garden.
| Vegetable | Edible Parts | Best Fresh Uses | Best Preservation Methods | Seed Saving | Preparedness Rating |
|---|---|---|---|---|---|
| Beets | Root, leaves, stems, flowers, seeds | Salads, roasting, soups, sautéed greens | Root cellar • Freeze • Freeze-dry • Dehydrate • Pressure can • Pickle | ⭐⭐⭐⭐⭐ | ⭐⭐⭐⭐⭐ |
| Carrots | Root, tops, flowers, seeds | Raw, soups, roasting, pesto | Root cellar • Freeze • Freeze-dry • Dehydrate • Pressure can | ⭐⭐⭐⭐⭐ | ⭐⭐⭐⭐⭐ |
| Peas | Shoots, tendrils, flowers, pods, peas, seeds | Salads, stir-fries, soups | Freeze • Freeze-dry • Dehydrate • Dry storage | ⭐⭐⭐⭐⭐ | ⭐⭐⭐⭐⭐ |
| Radishes | Root, leaves, flowers, seed pods, seeds | Salads, roasting, sautéing | Pickle • Ferment • Freeze-dry • Dehydrate | ⭐⭐⭐⭐⭐ | ⭐⭐⭐⭐☆ |
| Turnips | Root, greens, stems, flowers, seed pods, seeds | Roasted, mashed, soups, cooked greens | Root cellar • Freeze • Freeze-dry • Dehydrate • Pressure can | ⭐⭐⭐⭐⭐ | ⭐⭐⭐⭐⭐ |
| Onions | Bulb, green tops, flowers, seeds | Fresh, soups, stir-fries, seasoning | Cure • Dehydrate • Freeze • Freeze-dry • Pickle | ⭐⭐⭐⭐☆ | ⭐⭐⭐⭐⭐ |
| Garlic | Bulbs, leaves, scapes, flowers, bulbils | Seasoning, pesto, roasting | Cure • Dehydrate • Freeze • Freeze-dry • Pickle | ⭐⭐⭐⭐⭐ | ⭐⭐⭐⭐⭐ |
| Broccoli | Head, side shoots, stems, leaves, flowers, seeds | Steamed, roasted, soups | Freeze • Freeze-dry • Dehydrate | ⭐⭐⭐⭐⭐ | ⭐⭐⭐⭐☆ |
| Cauliflower | Head, stems, leaves, flowers, seeds | Roasted, mashed, soups | Freeze • Freeze-dry • Dehydrate • Pickle | ⭐⭐⭐⭐⭐ | ⭐⭐⭐⭐☆ |
| Swiss Chard | Leaves, stems, flowers, seeds | Salads, sautéed greens, soups | Freeze • Freeze-dry • Dehydrate | ⭐⭐⭐⭐⭐ | ⭐⭐⭐⭐⭐ |
| Beans (Bush & Pole) | Pods, shell beans, dry beans, young leaves, flowers, seeds | Fresh beans, soups, chili | Dry storage • Pressure can • Freeze • Freeze-dry • Dehydrate | ⭐⭐⭐⭐⭐ | ⭐⭐⭐⭐⭐ |
| Zucchini (Summer Squash) | Fruit, blossoms, young leaves, seeds | Grilled, roasted, stir-fries, breads, soups, stuffed blossoms | Freeze • Freeze-dry • Dehydrate • Pressure can • Pickle • Relish • Ferment | ⭐⭐⭐⭐⭐ | ⭐⭐⭐⭐⭐ |
Preparedness Rating Guide
| Rating | Meaning |
|---|---|
| ⭐⭐⭐⭐⭐ | Outstanding preparedness crop with multiple edible parts, excellent nutrition, high productivity, versatile preservation options, and excellent seed-saving potential. |
| ⭐⭐⭐⭐☆ | Excellent preparedness crop with multiple edible parts and strong preservation options, but slightly fewer preparedness advantages than the highest-rated vegetables. |
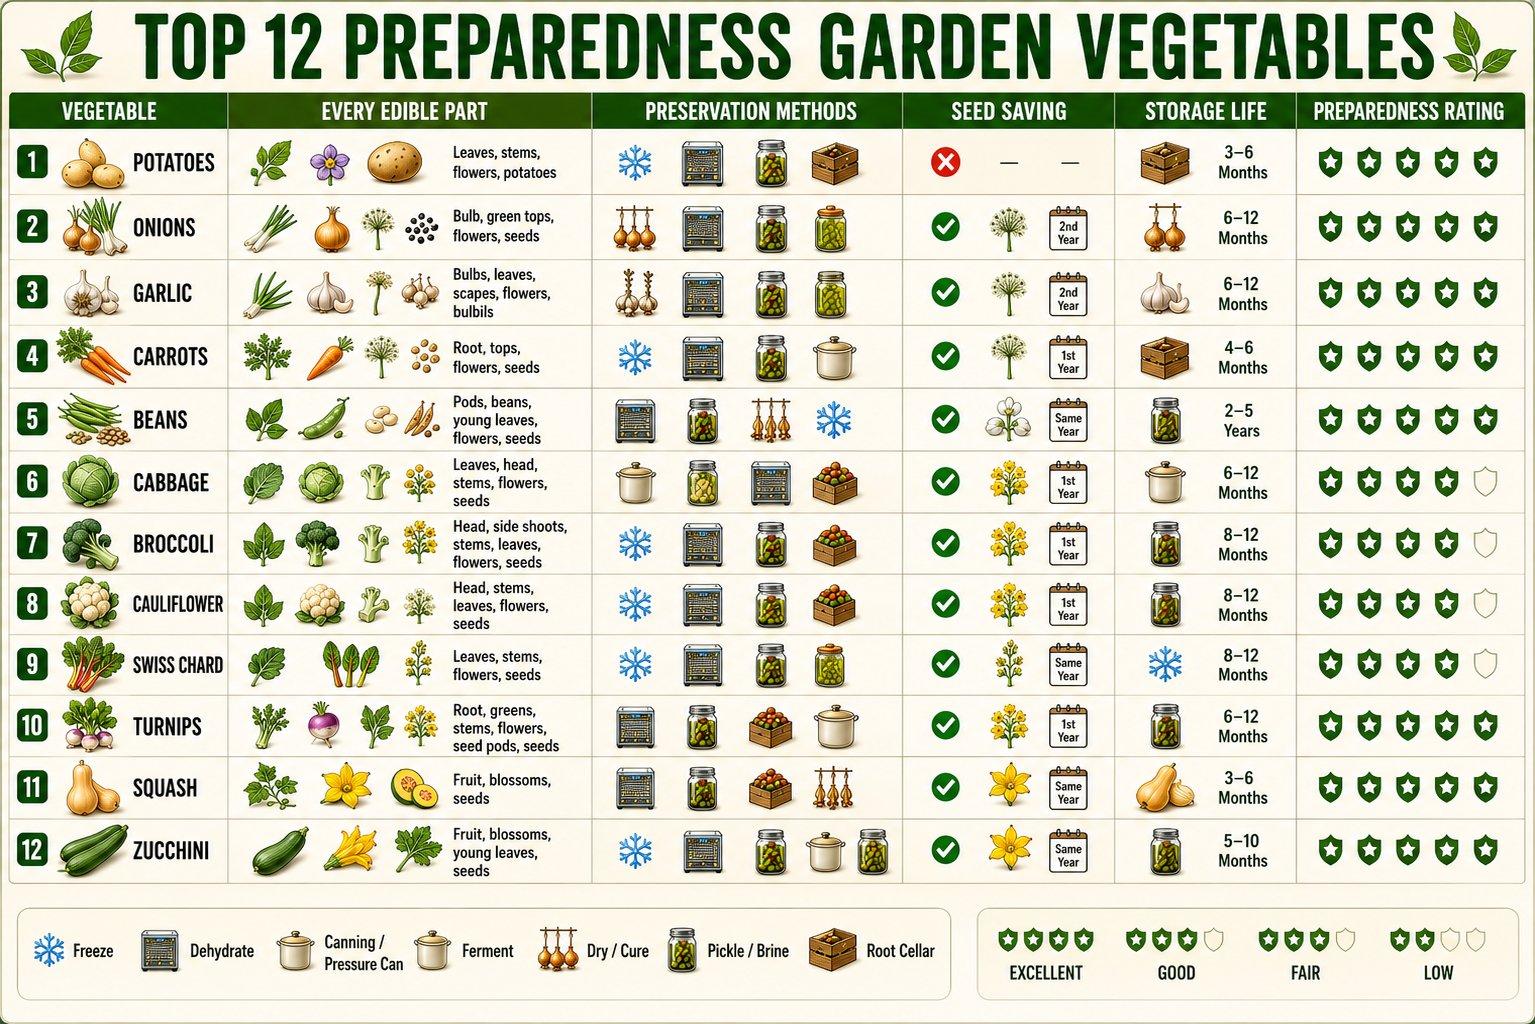
Preparedness Tip: The highest-value garden vegetables are those that provide multiple edible harvests, preserve well using several methods, store for extended periods, and produce seed for future gardens. By selecting crops that meet all of these criteria, you can dramatically increase the productivity and resilience of your preparedness garden without expanding its size.
In Summary
Growing a preparedness garden is about far more than producing vegetables. It is about learning to recognize the full value of every plant and making the most of every harvest. As you’ve seen throughout this guide, many of the vegetables we commonly grow offer far more food than most gardeners realize. Leaves, stems, flowers, seed pods, and seeds often provide additional meals that are routinely overlooked or discarded.
Learning to use every edible part of a plant increases food production without expanding your garden. The same garden space, the same amount of water, and the same amount of effort can often produce significantly more food simply by understanding the complete life cycle of each crop. These small improvements become especially valuable during times of rising food prices, supply chain disruptions, poor harvests, or extended emergencies when every calorie and every harvest matters.
Preparedness also means thinking beyond today’s meal. The vegetables in this guide were selected because they offer multiple advantages: nutritious harvests, excellent preservation options, reliable seed production, support for pollinators, and the ability to produce food over an extended growing season. Together, these qualities create a garden that is more resilient, more productive, and better able to support your family year after year.
No gardener needs to master every crop at once. Begin by choosing a few vegetables and challenge yourself to harvest every edible part they produce. Try a new preservation method. Save seed from your healthiest plants. Observe how each vegetable changes throughout its growing season. Every season builds experience, and every harvest builds confidence.
A preparedness garden is more than a source of food. It is an investment in knowledge, self-reliance, and long-term resilience. The more completely you learn to use the plants you grow, the more valuable your garden becomes. Over time, these practical skills will help you waste less, harvest more, and build a dependable food supply that can continue serving your family regardless of what challenges the future may bring.
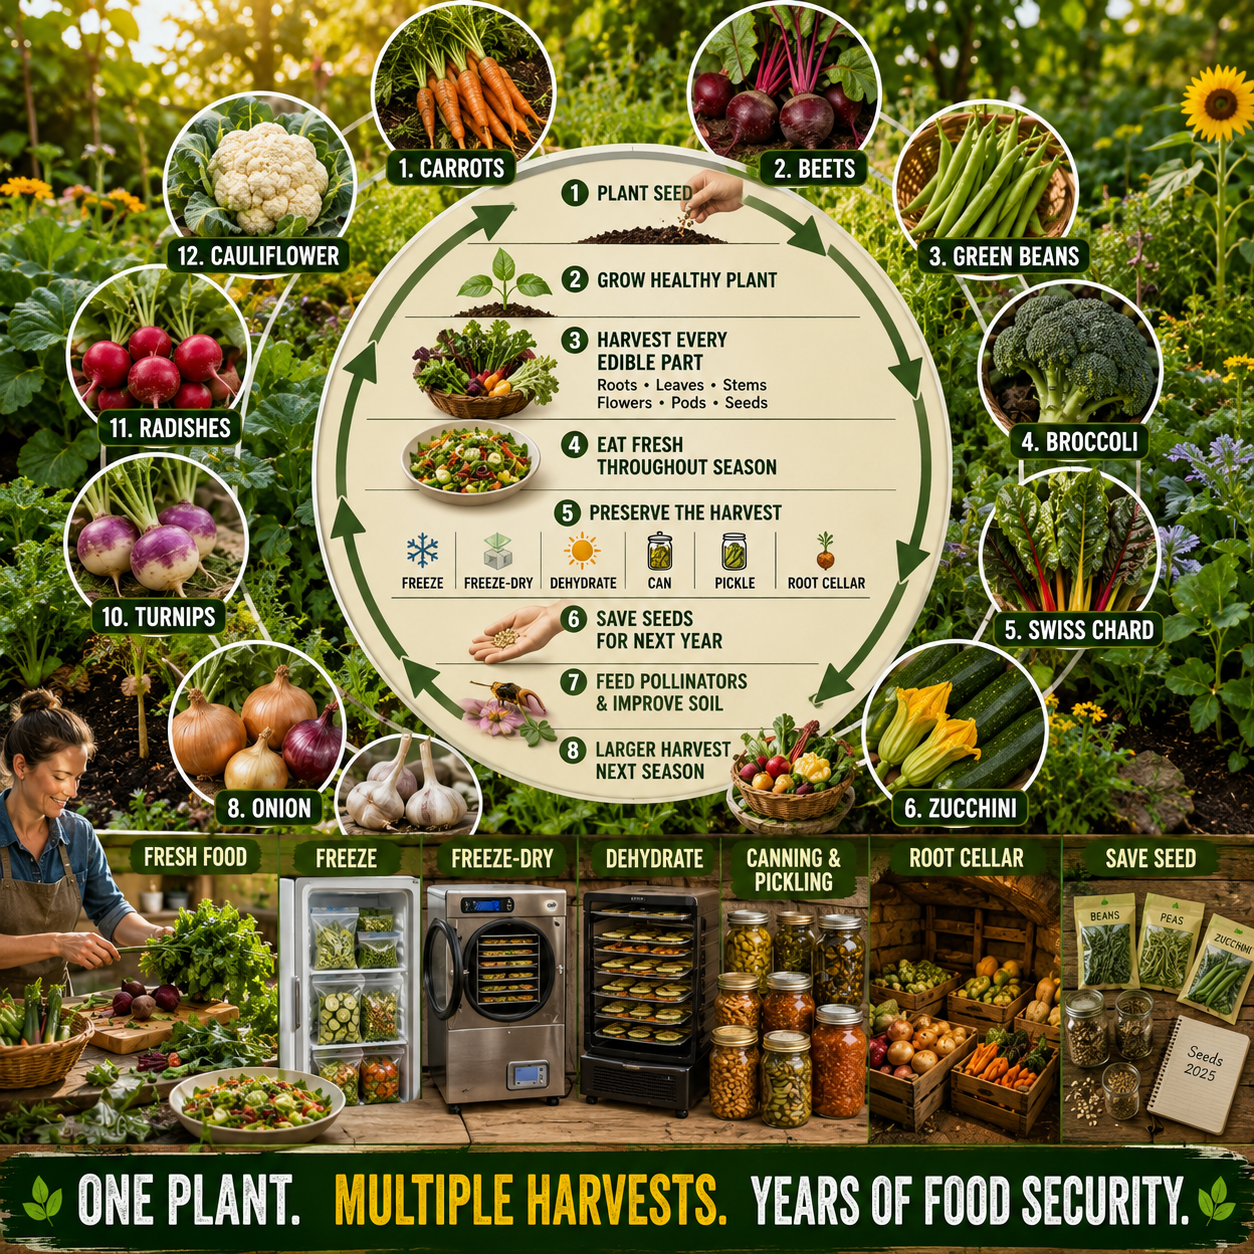
© Prepping Communities. This content is for informational purposes only and not professional advice. Use at your own risk.
Terms | Privacy | Guidelines