
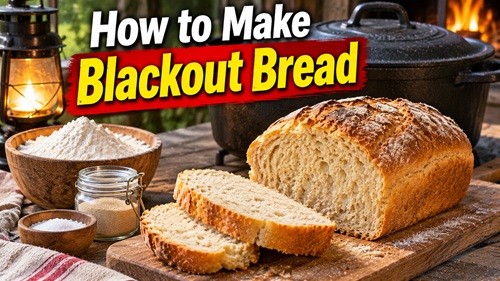
How to Bake Bread Without Electricity During a Power Outage
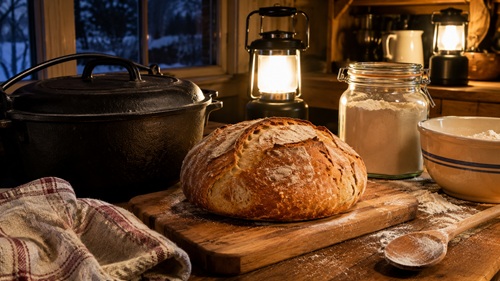
Most people who store emergency food have flour, yeast, and other baking ingredients tucked away somewhere. But what happens when the electricity goes out and your oven no longer works? Having enough ingredients to make bread is one thing. Knowing how to turn those ingredients into something your family can eat without electricity is another, and it’s a skill worth learning before an emergency happens.
Bread has been made without electricity for thousands of years. Long before modern kitchens existed, people relied on wood-fired ovens, heated stones, cast-iron cookware, and other methods to prepare one of the most basic foods in the world. These weren’t considered emergency cooking methods at the time. They were simply how people prepared their daily meals, using the equipment and fuel they had available. Today, most households depend on appliances that may become unusable during an extended blackout. Even some gas ovens require electricity for ignition, electronic controls, or safety systems, so having a gas appliance doesn’t necessarily mean it will continue working when the power goes out.
Fortunately, making bread without electricity doesn’t have to be complicated. With a few basic ingredients, some practice, and suitable off-grid cooking equipment, it’s possible to prepare fresh bread without relying on a conventional oven. A covered cast-iron Dutch oven is particularly useful because its heavy walls absorb and distribute heat, while the lid helps retain warmth around the dough. Other options include purpose-built outdoor cooking stoves, wood-fired ovens, and simple flatbreads that can be cooked in a pan.
There have even been experiments using tea lights to heat covered cookware and bake bread over several hours. While these experiments demonstrate how heat can be retained and used for cooking, tea lights aren’t designed to operate as grouped cooking burners. Concentrated heat can overheat the wax, create fire hazards, and make improvised cooking arrangements unstable. For practical emergency preparedness, equipment specifically designed for cooking is a safer and more dependable choice.
The important lesson isn’t that every household needs a specialized bread oven. It’s that stored ingredients become much more valuable when you understand how to prepare them under different conditions. Learning to make bread by hand, choosing an appropriate alternative heat source, and understanding how to conserve cooking fuel can make a meaningful difference during an extended power outage.
Understanding Blackout Bread and How It Works
Blackout bread isn’t a particular variety of bread or a special recipe. It simply refers to bread prepared when conventional electrical cooking equipment is unavailable. The ingredients are essentially the same as those used for ordinary homemade bread, but the baking process relies on another source of heat. The challenge is maintaining enough heat for long enough to cook the dough thoroughly without burning the outside or leaving the centre undercooked.
Traditional bread requires only a few basic ingredients. Flour provides the structure, water hydrates the dough, yeast produces gases that help it rise, and salt contributes flavour while influencing fermentation and dough development. When these ingredients are combined and kneaded, proteins in wheat flour develop a network of gluten that helps trap the gases produced by the yeast. As the dough rises, it becomes lighter and develops the structure that eventually produces the soft interior of a loaf of bread.
Once the dough has risen, it must be exposed to sufficient heat to bake. A conventional oven accomplishes this by surrounding the dough with heated air and transferring heat through the baking pan. Without an oven, the challenge is recreating enough of those conditions to cook the bread evenly. A heavy covered pot can help because it absorbs heat and gradually releases it into the enclosed cooking space. The lid also reduces heat loss, making it easier to maintain a relatively consistent temperature around the bread.
A cast-iron Dutch oven is particularly useful for this purpose. Cast iron has substantial thermal mass, meaning it can store considerable heat once warmed. This helps moderate temperature fluctuations when the external heat source isn’t perfectly consistent. However, cast iron also takes time and fuel to heat, so it isn’t automatically the most fuel-efficient option in every situation. The effectiveness of the cooking method depends on the cookware, heat source, surrounding temperature, and amount of fuel available.
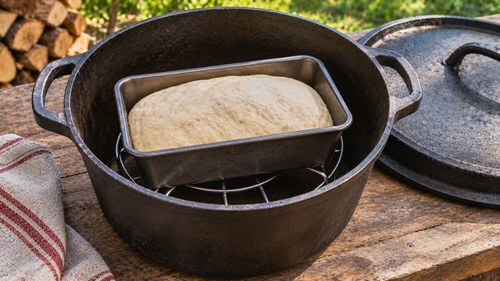
Some baking arrangements use a smaller bread pan inside a larger Dutch oven. The inner container is raised slightly above the bottom to create an air gap, reducing direct contact with the hottest surface and allowing heated air to circulate. This can help prevent the bottom of the bread from scorching before the centre has finished baking. The inner pan must be suitable for the temperatures involved, and there must be enough clearance for the lid to close properly without touching the dough as it rises.
Understanding these principles is useful because they apply to more than bread. The same concepts of heat retention, circulation, and temperature control can help when preparing casseroles, biscuits, baked vegetables, and other foods using approved off-grid cooking equipment.
Blackout Bread Recipe
This basic bread recipe uses four ingredients and can be prepared entirely by hand. No electric mixer, bread machine, or other powered equipment is required. It produces a small loaf suitable for baking in an appropriately sized Dutch oven or another suitable baking appliance.
Yield: One small loaf
Preparation Time: Approximately 15–20 minutes
Rising Time: Approximately 1–3 hours, depending on temperature
Baking Time: Depends on the equipment and heat source
Ingredients
-
450 grams all-purpose flour or bread flour
-
1–2 teaspoons dry yeast
-
1–1½ teaspoons salt
-
280 millilitres water
For a slightly larger loaf, use 500 grams of flour and increase the water to 300 millilitres. The remaining ingredients can stay the same.
Equipment Needed
-
Large mixing bowl
-
Wooden spoon or mixing utensil
-
Clean cloth or bowl covering
-
Suitable bread pan or baking container
-
Food thermometer
-
Manufacturer-approved off-grid baking equipment
Preparation Instructions
1. Combine the dry ingredients. Place the flour, yeast, and salt into a large mixing bowl. Stir until everything is evenly distributed. Mixing the dry ingredients first helps ensure the yeast and salt are spread throughout the flour.
2. Add the water. Gradually pour in the water while stirring with a wooden spoon. Continue mixing until the flour absorbs the water and a rough dough forms. If the dough is excessively dry, add a small amount of additional water. Different types of flour absorb moisture differently, so minor adjustments may be necessary.
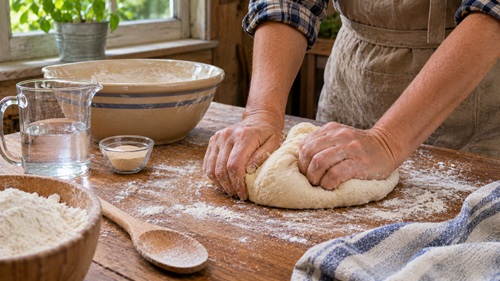
3. Knead the dough. Transfer the dough to a clean work surface or continue kneading inside the bowl. Knead by hand for approximately 8–10 minutes, or until the dough becomes reasonably smooth and elastic. Proper kneading helps develop the gluten structure that allows the bread to rise and hold its shape.
4. Allow the first rise. Place the dough back into the bowl and cover it with a clean cloth or suitable covering. Leave it in a reasonably warm location until it approximately doubles in size. This may take one to two hours under favourable conditions, although colder temperatures can extend the rising time considerably.
5. Shape the loaf. Gently fold the risen dough to redistribute trapped gases, then shape it into a loaf that fits the baking container. Avoid adding excessive flour during shaping, as this can make the finished bread dry.
6. Allow the second rise. Place the shaped dough into a prepared baking pan, cover it, and allow it to rise again until noticeably expanded. The second rise helps produce a lighter loaf with a more even texture. Avoid allowing the dough to rise excessively, as over proofed dough may collapse during baking.
7. Bake the bread. Place the prepared loaf into a suitable off-grid baking appliance and follow the manufacturer’s operating instructions. Baking temperatures and cooking times will vary depending on the equipment. Where temperature control is available, approximately 190–220°C (375–425°F) is a common baking range for small yeast loaves, although the recipe and appliance may require adjustments. Check the centre of the bread with a food thermometer. For many yeast breads, an internal temperature of approximately 93–96°C (200–205°F) is a useful indication of doneness.
8. Cool before slicing. Remove the finished loaf from the baking container and place it on a suitable cooling surface. Allowing the bread to cool helps the interior structure finish setting and prevents the crumb from becoming gummy when sliced.
Choosing the Right Flour
All-purpose flour and bread flour are both suitable for this recipe. Bread flour generally contains more protein, which helps develop gluten and produces a stronger dough structure and chewier texture. All-purpose flour is more versatile for emergency storage because it can also be used for pancakes, biscuits, flatbreads, thickening sauces, and other basic foods. Spelt flour can also be used, although it behaves somewhat differently during kneading and rising. Wholemeal flour provides additional fibre and nutrients but absorbs water differently and may require minor adjustments to the recipe.
Rye flour can be included in smaller quantities, although using too much may produce a denser loaf because rye doesn’t develop the same gluten structure as wheat. For this particular recipe, keeping rye flour to approximately 15 percent of the total flour mixture is a reasonable starting point. Households that regularly bake with whole grains may want to experiment with different combinations before an emergency to determine which produce the best results with their available equipment.
Baking Bread in a Dutch Oven Without Electricity
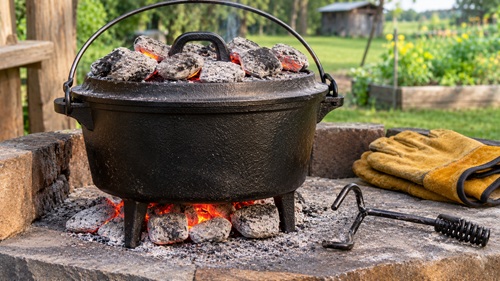
A Dutch oven is one of the more practical tools for baking bread without a conventional oven, particularly when paired with an appropriate outdoor cooking system. Its heavy construction helps retain heat, while the lid creates an enclosed cooking space around the dough. Unlike an ordinary cooking pot, a Dutch oven designed for outdoor baking can be used with carefully managed heat from charcoal or another manufacturer-approved source, allowing bread to bake without electricity.
For outdoor cooking, Dutch ovens specifically designed for charcoal briquettes are particularly useful. Some models have short legs that allow the pot to sit above prepared coals and a flat, rimmed lid that can hold additional briquettes. This arrangement allows heat to reach the bread from above and below, creating a more balanced baking environment. The number and placement of briquettes depend on the size of the Dutch oven, the desired cooking temperature, and the manufacturer’s recommendations. Rather than relying on a fixed number of coals for every situation, it’s better to learn the requirements of your particular cookware and cooking system.
Not all Dutch ovens are suitable for direct charcoal cooking. Enameled cookware, glass lids, plastic handles, and other components may have temperature limitations or may not be designed for contact with coals. A household planning to use a Dutch oven during emergencies should confirm that the cookware is compatible with the intended heat source before attempting to use it.
When preparing bread, the dough may be placed directly into an appropriately prepared Dutch oven or into a smaller oven-safe baking container that fits inside it. Using an inner container can help reduce excessive heat transfer to the bottom of the loaf, particularly when the cooking system concentrates heat beneath the pot. However, sufficient clearance is necessary for heat circulation, and the arrangement must remain stable throughout the cooking process.
The Dutch oven should be heated according to the instructions for the specific cooking system. Some methods require preheating the vessel before adding the dough, while others use a different procedure. Once the bread is inside, keeping the lid closed as much as practical helps retain heat and maintain more consistent cooking conditions. Repeatedly lifting the lid allows hot air to escape, which can extend baking time and produce uneven results.
Outdoor baking also introduces variables that aren’t usually encountered in a conventional kitchen. Wind can increase heat loss, cold weather may lengthen cooking times, and changing fuel conditions can affect the temperature inside the pot. A sheltered outdoor cooking location, appropriate fire-resistant surfaces, and a reliable food thermometer can help improve consistency. Any shelter must still allow the ventilation and clearances required by the cooking equipment.
With practice, a Dutch oven can become a dependable part of an emergency cooking setup. The important thing is to become familiar with the equipment before a power outage rather than attempting to learn how to control temperatures while also dealing with the other challenges of an emergency.
Other Practical Ways to Bake Bread Without Electricity
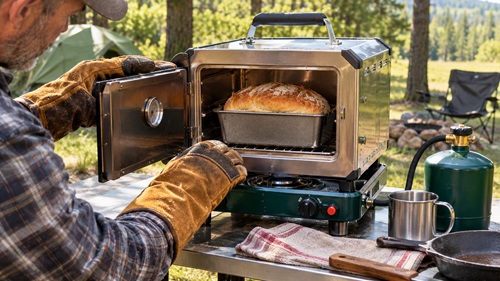
A Dutch oven isn’t the only option for preparing bread during a blackout. Several other cooking methods can work well, depending on the equipment, fuel, and conditions available. The best choice is usually the one a household already understands and can operate safely rather than an unfamiliar method attempted for the first time during an emergency.
Some portable camping stoves can be paired with manufacturer-approved baking accessories or small camping ovens. These systems are designed to distribute heat around the food rather than concentrating it directly beneath a cooking pot. However, not every camping stove is suitable for baking. Many compact burners are designed primarily for boiling water or heating meals, and they may struggle to maintain the consistent temperatures needed for a traditional loaf.
Fuel consumption is an important consideration when using portable cooking equipment. Baking bread may require sustained heating for an extended period, and a small fuel canister may not last as long as expected. Before relying on a camping stove for emergency baking, households should test the equipment under normal conditions, determine how much fuel is consumed, and establish whether the results justify the amount of energy required.
Wood-fired ovens offer another alternative, particularly in rural or off-grid environments where suitable firewood is available. These ovens have been used for centuries and can retain considerable heat after the fire has burned down. In a properly designed wood-fired oven, the heated cooking chamber and surrounding masonry gradually release stored heat, allowing bread to bake without requiring a continuous flame directly beneath it.
Some outdoor cooking systems also allow suitable Dutch ovens to be used with prepared wood coals. This requires experience managing the heat because wood fires behave differently from conventional burners. The type of wood, amount of fuel, surrounding weather conditions, and position of the cookware can all influence the temperature available for cooking.
Local fire restrictions must also be considered. During dry weather or wildfire season, outdoor wood fires may be prohibited even on private property. Households should check applicable regulations and avoid relying on a cooking method that may be unavailable when an emergency occurs.
Regardless of the heat source, carbon monoxide and fire safety are essential considerations. Charcoal, propane, and other outdoor combustion appliances must never be used inside homes, garages, tents, or enclosed spaces unless specifically designed and approved for indoor operation. Carbon monoxide is colourless and odourless, and dangerous concentrations can develop without obvious warning signs.
A safe alternative cooking plan should identify where equipment will be used, how fuel will be stored, and what precautions are needed to protect people and surrounding property.
Emergency Flatbread: A Faster Alternative When Fuel Is Limited
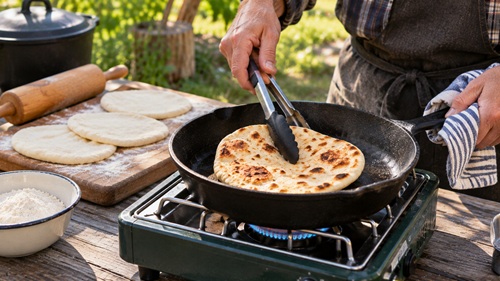
Traditional yeast bread is useful, but it isn’t always the most practical option during an extended power outage. A large loaf requires time for the dough to rise and enough sustained heat to bake thoroughly. When cooking fuel is limited or temperatures are too cold for reliable fermentation, flatbread can provide a much simpler alternative.
Flatbreads have been prepared in many cultures for generations using basic ingredients and relatively simple cooking equipment. Many varieties require no yeast, eliminating the need to wait for dough to rise. Because the dough is rolled or pressed into thin portions, it cooks much more quickly than a traditional loaf and can be prepared on a suitable griddle or frying pan.
This makes flatbread particularly valuable during emergencies. A household can prepare small batches as needed, use ordinary flour from its emergency supplies, and serve the finished bread alongside soups, stews, beans, canned meats, and other stored foods. Flatbread can also be used to wrap fillings or replace conventional sandwich bread when no oven is available.
Emergency Flatbread Recipe
Yield: Approximately 6 small flatbreads
Preparation Time: Approximately 10 minutes
Resting Time: 15–20 minutes
Cooking Time: Approximately 2–4 minutes per flatbread, depending on thickness and heat
Ingredients
-
250 grams all-purpose flour
-
Approximately 150 millilitres water
-
½ teaspoon salt
-
1 tablespoon cooking oil (optional)
Preparation Instructions
1. Combine the ingredients. Place the flour and salt into a mixing bowl. Gradually add the water while stirring until a soft dough forms. Add the optional oil if desired. The dough should be workable without being excessively sticky.
2. Knead the dough. Knead by hand for approximately 3–5 minutes until the mixture becomes smooth and manageable. If necessary, add a small amount of flour or water to adjust the consistency.
3. Allow the dough to rest. Cover the dough and leave it for approximately 15–20 minutes. Resting allows the gluten to relax, making the dough easier to flatten without springing back.
4. Divide the dough. Separate the dough into approximately six equal portions. Roll each portion into a ball before flattening.
5. Shape the flatbreads. Use a rolling pin or your hands to flatten each portion into a thin round. Try to keep the thickness reasonably consistent so the bread cooks evenly.
6. Cook the flatbreads. Heat a suitable griddle or frying pan using an approved cooking appliance. Place one flatbread onto the heated surface and cook until browned spots begin to develop. Turn it over and continue cooking until both sides are lightly browned and the dough is cooked through.
7. Serve or store. Remove the cooked flatbread and allow it to cool slightly. Serve warm or store leftovers in a clean, covered container. Because homemade flatbreads contain no preservatives, they should be consumed promptly or stored under appropriate food-safe conditions.
Flatbread is particularly useful when a household needs to conserve fuel. Smaller, thinner portions cook more quickly than a traditional loaf, reducing the amount of time a burner must remain in operation. The dough also requires no yeast, making it a dependable option when stored yeast has expired or indoor temperatures are too low for practical fermentation.
Learning both traditional yeast bread and flatbread provides flexibility. One method may be more suitable when fuel and time are available, while the other may be preferable when resources are limited.
Planning Cooking Fuel for an Extended Blackout
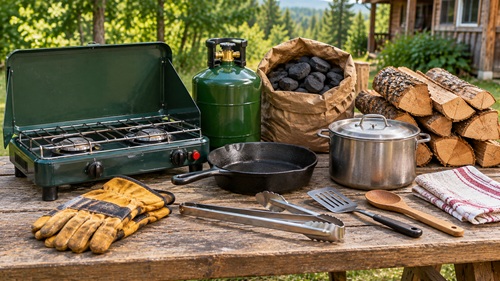
One of the most overlooked aspects of emergency food preparedness is the amount of fuel required to prepare stored ingredients. A household may have enough flour, rice, beans, and dried grains to last several months but only enough cooking fuel for a few days. During an extended outage, this imbalance can quickly become a problem.
Different foods require different amounts of cooking time and energy. Dried beans may need prolonged heating unless they have been properly soaked or pressure-cooked, while foods such as couscous, instant grains, and flatbreads can often be prepared more quickly. Traditional bread also requires sustained heat, particularly when baking a large loaf, so it may not always be the most fuel-efficient choice.
The efficiency of a cooking system depends on several factors, including the type of burner, cookware, fuel, weather conditions, and preparation method. Heavy cast-iron cookware retains heat well once warmed, but it also requires energy to reach cooking temperature. A smaller, lighter pan may be more practical for quick meals, while a Dutch oven may be better suited to foods requiring sustained, even heat.
Households should consider how often they expect to cook during an emergency and how much fuel each cooking session will consume. Testing equipment before an outage provides a more realistic understanding of fuel requirements than relying entirely on manufacturer estimates.
For example, a household using a suitable outdoor cooking system might prepare several foods during one heating session rather than repeatedly warming the equipment throughout the day. Cooking larger portions and safely storing leftovers may also reduce fuel consumption, although refrigeration limitations during a blackout must be considered.
Planning meals around available fuel is particularly important when replacement supplies may be difficult to obtain because of transportation disruptions, severe weather, or supply shortages. Having several cooking methods available provides more flexibility than depending on a single appliance or fuel source.
Storing Bread-Making Ingredients for Emergencies
Flour is one of the more versatile ingredients a household can keep in its emergency food supplies. It can be used to prepare bread, flatbreads, biscuits, pancakes, dumplings, and other foods that help make stored meals more filling and varied. However, flour must be stored correctly if it is expected to remain usable over time.
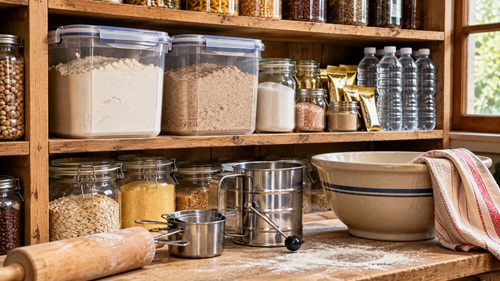
White flour generally has a longer shelf life than wholemeal flour because it contains fewer natural oils that can become rancid. Both types should be kept in a cool, dry location and protected from moisture, insects, excessive heat, and contamination. Food-grade airtight containers can help protect flour from environmental exposure, although storage conditions and packaging still influence how long it remains suitable for use.
Wholemeal flour provides additional fibre and nutrients, but its shorter storage life makes regular stock rotation especially important. Households that prefer whole grains may also consider storing intact grains and grinding them when needed, although this requires suitable manual or powered equipment and additional preparation time.
Dry yeast is another ingredient that deserves attention. Commercially packaged yeast can remain viable for an extended period when stored according to the manufacturer’s instructions, but its effectiveness gradually declines. Keeping yeast in sealed packaging and checking expiration dates can reduce the risk of discovering that it no longer works when needed. Older yeast can be tested before baking by combining a small amount with warm water and a little sugar to see whether it produces visible activity.
Salt is relatively easy to store because it remains stable for a very long time when protected from moisture and contamination. It also serves several purposes in bread making, contributing flavour while influencing dough development and fermentation.
Water availability is equally important. The basic blackout bread recipe requires approximately 280 millilitres of water, but additional water will be needed for cleaning utensils and maintaining food hygiene. During a prolonged emergency, water may become more difficult to obtain than flour or yeast, particularly if the household depends on an electrically powered well pump or municipal infrastructure affected by the outage.
Bread-making plans should therefore be included in a household’s overall emergency water calculations. The ability to prepare food depends not only on stored ingredients but also on having enough safe water to use them.
Manual kitchen equipment is another practical consideration. Mixing bowls, wooden spoons, measuring containers, dough scrapers, and suitable baking pans are relatively inexpensive, yet they can become extremely useful when powered appliances are unavailable. Keeping these items accessible with emergency cooking supplies can make food preparation much easier.
Baking Bread During Cold Weather
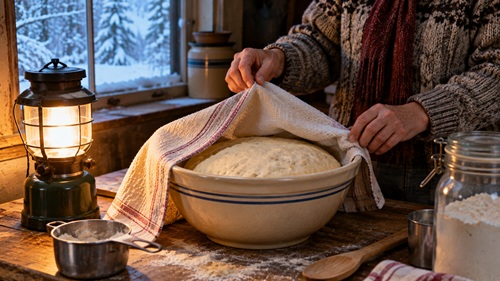
Cold weather can make bread preparation more challenging, particularly during a winter blackout when indoor heating may also be unavailable. Yeast activity slows as temperatures fall, meaning dough that normally doubles in size within an hour or two may take considerably longer in a cold room.
This doesn’t necessarily mean the yeast has stopped working. It may simply require more time to produce enough gas for the dough to rise. A slower fermentation can still produce good bread, but households should be prepared for longer waiting periods when indoor temperatures are low.
Choosing a reasonably warm location away from cold drafts can help. The dough should remain covered to prevent its surface from drying out, and the container should be protected from sudden temperature changes. However, placing dough directly against excessively hot surfaces or improvised heaters should be avoided because too much heat can damage the yeast or create unsafe conditions.
If the home becomes too cold for practical yeast bread preparation, flatbread may be a better choice. Because it doesn’t depend on yeast fermentation, it can be prepared more quickly and with fewer temperature-related complications.
This is another reason why learning several bread-making methods is valuable. A recipe that works well during a summer power outage may be less practical during a winter emergency, particularly when the household is also trying to conserve heating fuel.
Knowing When Blackout Bread Is Fully Baked
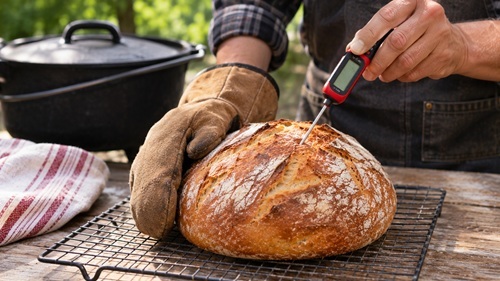
One of the challenges of baking without a conventional oven is determining when the bread is finished. Alternative cooking equipment may produce uneven heat, particularly when most of the heat comes from beneath the cooking vessel. A loaf can develop a dark crust while remaining undercooked in the centre, making appearance alone an unreliable indication of doneness.
A food thermometer provides a more dependable way to assess whether the bread has baked sufficiently. For many yeast breads, an internal temperature of approximately 93–96°C (200–205°F) is a useful target. The thermometer should be inserted into the thickest part of the loaf without touching the baking pan.
The texture and appearance of the finished bread can provide additional clues. A properly baked loaf generally has a firm crust and a structure that holds together when sliced. However, these signs should be considered alongside the internal temperature, particularly when experimenting with unfamiliar cooking equipment.
Once the bread is finished, remove it from the baking container and allow it to cool on a suitable surface. Cooling helps the interior structure set and reduces the likelihood of a gummy texture when sliced. Cutting bread immediately after baking may make the centre appear undercooked even when it has reached the appropriate temperature.
During an emergency, wasting a loaf because it was removed too early can mean losing valuable ingredients and cooking fuel. Learning to recognize properly baked bread is therefore an important part of developing dependable off-grid cooking skills.
Practicing Bread Making Before an Emergency
Emergency food preparedness involves more than accumulating supplies. Stored ingredients are useful only when households have the knowledge and equipment needed to prepare them. A family may have months of flour, rice, beans, and dried grains but still struggle to prepare meals if electricity becomes unavailable and no practical cooking alternative has been established.
Bread making is an excellent skill to practice because it teaches several basic food preparation principles. It helps people understand how ingredients interact, how fermentation works, how temperature affects cooking, and how different equipment changes the finished product. These skills can also be applied to other foods, making them valuable beyond bread alone.
Practice can reveal weaknesses in emergency cooking plans that might otherwise remain unnoticed. An alternative stove may struggle to maintain sufficient heat, a Dutch oven may be too small for the available bread pan, or a particular recipe may consume more fuel than expected. These are much easier problems to solve during normal conditions than during an actual emergency.
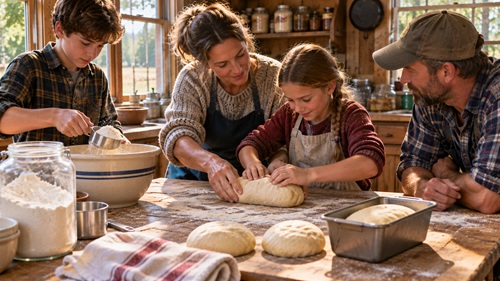
Begin by preparing bread dough entirely by hand, even if you initially bake it in a conventional oven. Once comfortable with the recipe, practice using a safe, manufacturer-approved off-grid cooking system. Pay attention to how long the process takes, how much fuel is consumed, and whether the finished bread cooks evenly.
Keeping simple notes can help improve future results. Recording the flour used, rising time, outdoor temperature, cooking method, and fuel consumption makes it easier to identify which adjustments produce better bread. Over time, households can develop a dependable method suited to their particular equipment and local conditions.
You may discover that smaller loaves, flatbreads, or other simple baked foods are better suited to your emergency cooking setup than traditional full-sized loaves. The objective isn’t to recreate every convenience of a modern kitchen. It’s to make sure your household can prepare familiar, nutritious food when normal services are interrupted.
Preparedness Action Plan
Begin by reviewing the flour, yeast, salt, and other baking ingredients already included in your emergency food supplies. Check their storage conditions, rotate older ingredients, and make sure you have enough potable water available for food preparation and cleaning. If you store large quantities of flour, consider how quickly your household normally uses it and whether your storage arrangements are suitable for maintaining its quality.
Practice preparing the blackout bread recipe using only manual kitchen tools. Become comfortable mixing, kneading, shaping, and allowing dough to rise without relying on a bread machine or electric mixer. Start by baking the dough in your conventional oven so you can become familiar with the recipe before introducing the additional challenge of an alternative heat source.
Once you can consistently prepare the dough, evaluate your household’s off-grid cooking equipment. Determine whether you have a safe, dependable way to bake bread without electricity and whether you maintain enough fuel to operate that equipment during an extended outage. If your current equipment is limited, consider a purpose-built outdoor cooking system, a suitable Dutch oven, or another appliance designed for off-grid use.
Practice operating the equipment before an emergency occurs. Monitor cooking temperatures, measure fuel consumption, and confirm that the bread is fully baked before serving. Take note of any difficulties, including uneven heating, excessive cooking times, or problems maintaining a stable temperature. These observations will help you improve your cooking setup while normal services are still available.
Finally, learn at least one flatbread recipe that requires no yeast and less cooking time. This provides another option when fuel is limited, indoor temperatures are too cold for reliable fermentation, or meals need to be prepared quickly. Having several ways to prepare bread will make your stored ingredients more useful under different emergency conditions.
Key Takeaways
Blackout bread demonstrates that baking doesn’t have to depend on electricity. With basic ingredients, manual preparation skills, and an appropriate heat source, households can continue making bread even when conventional kitchen appliances are unavailable. The same principles that supported traditional bread making for generations remain useful today, particularly when modern conveniences can no longer be relied upon.
A covered Dutch oven, suitable outdoor cooking equipment, and an understanding of heat retention can provide dependable alternatives to conventional electric ovens. However, choosing equipment designed for the intended heat source is essential. Improvised candle-powered cooking arrangements may demonstrate interesting principles, but they introduce fire hazards that make them unsuitable as a primary emergency cooking method.
Learning to make bread by hand also makes stored food more valuable. Flour and yeast are useful supplies, but knowing how to turn them into meals is what makes those supplies practical during an emergency. Developing that knowledge through regular practice can reduce uncertainty and help households make better use of limited resources.
During an extended power outage, preparing a simple loaf of bread can help maintain familiar routines, provide variety in emergency meals, and make stored foods more versatile. More importantly, it demonstrates the value of learning practical skills before they’re needed, so that when normal services are interrupted, the household already knows what to do.
© Prepping Communities. This content is for informational purposes only and not professional advice. Use at your own risk.
Terms | Privacy | Guidelines