
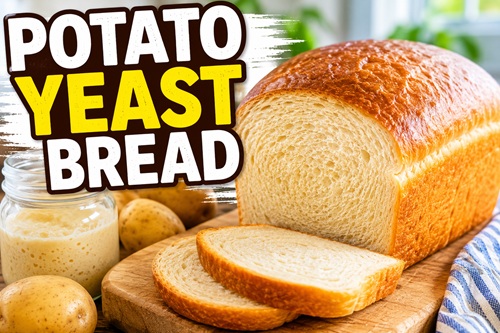
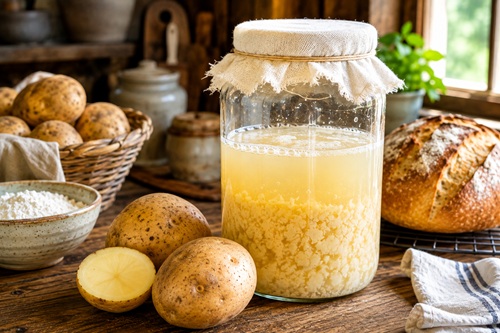
Commercial yeast makes bread baking fast and convenient, but it isn’t the only way to make dough rise. Long before packets and jars of baker’s yeast were common, people maintained their own cultures and used naturally occurring yeast to make bread. One surprisingly simple way to experiment with this is with an ordinary potato.
Potatoes contain plenty of starch and other nutrients that can support a developing yeast culture. By cooking a potato, saving the starchy water, and allowing the mixture to ferment under suitable conditions, you can create a homemade starter that can be used for bread baking. The process isn’t as fast or predictable as commercial yeast, but that’s part of what makes it a useful DIY skill to learn.
This isn’t quite the same thing as maintaining a traditional flour-and-water sourdough starter. The goal here is to create an active potato-based culture that can provide fermentation for bread dough. The original method is remarkably simple: a thoroughly cooked potato, its cooking water, a clean jar, and time.
What You’ll Need
You don’t need specialized equipment. For the starter, you’ll need one medium potato, approximately 3 to 4 cups of clean non-chlorinated water, and a clean quart-sized glass jar. You’ll also need a small saucepan, fork or potato masher, spoon, and a clean cloth or coffee filter that can be secured over the opening of the jar.
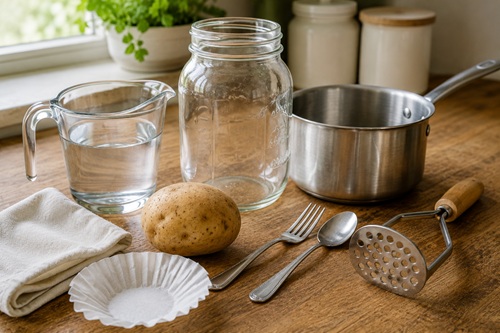
Using non-chlorinated water is helpful because chlorine can interfere with the microorganisms you’re trying to establish. If your tap water is heavily chlorinated, use suitable filtered or bottled drinking water instead.
The jar should be thoroughly cleaned before you begin. You’re intentionally encouraging a culture to develop, so starting with clean equipment reduces the chances of undesirable organisms getting established instead.
Potato Yeast Starter Recipe
For one batch of potato yeast starter, use one medium potato and approximately 3 to 4 cups of non-chlorinated water. That’s enough to create a simple quart-sized starter without needing commercial yeast, flour, or other specialized ingredients.
Peel the potato and remove any damaged areas. Place it in a saucepan and cover it generously with water. Bring the water to a boil, reduce the heat, and simmer the potato until it is completely soft all the way through. Depending on the size of the potato, this will usually take somewhere around 35 to 45 minutes. Push a fork through the center to make sure it is thoroughly cooked rather than simply soft around the outside. The source method likewise cooks the potato until completely soft before combining it with its starchy water.
When the potato is ready, don’t drain the cooking water down the sink. Carefully pour the starchy water into a clean container and set it aside to cool. Mash the cooked potato thoroughly with a fork or potato masher.
Allow both the mashed potato and cooking water to cool to around room temperature. You don’t want to pour very hot liquid into the jar when the purpose is to establish a living culture.
Place the mashed potato in the bottom of the clean quart jar and pour the cooled potato water over it. Leave some room at the top rather than filling the jar completely. If you don’t have quite enough potato water, add a little clean, non-chlorinated water.
Stir the mixture thoroughly.
Cover the opening of the jar with a clean cloth, coffee filter, or another breathable covering and secure it around the rim. Don’t seal the starter tightly while you’re trying to establish the initial culture.
Place the jar somewhere at normal room temperature away from direct sunlight and excessive heat.
Then give it time.
Watch for the Starter to Come Alive
During the first day, you may not see much happening. Look closely at the potato sediment near the bottom of the jar and along the surface of the liquid. Tiny bubbles are usually the first obvious indication of fermentation.
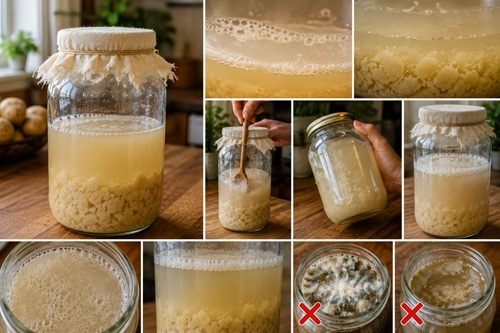
The source recipe reports that the first small bubbles can appear after roughly 24 to 36 hours, followed by considerably stronger bubbling over the following day or so. Your starter may behave somewhat differently because room temperature and the microorganisms present in your environment can affect how quickly it develops.
Once you notice activity, stir the mixture vigorously with a clean spoon. Another option is to temporarily put a lid on the jar, shake it vigorously, remove the lid, and replace the breathable covering. Stirring helps redistribute the potato and developing culture throughout the liquid.
Give the starter another day and check it again. A healthy active culture should become noticeably bubbly and develop a mild fermented or bread-like aroma.
Don’t worry if the mixture separates. The heavier mashed potato will naturally settle toward the bottom of the jar while liquid remains above it.
What you don’t want is obvious spoilage. A rotten or strongly unpleasant smell, fuzzy mold, or suspicious colored growth means something other than the culture you wanted may have become established. Don’t scrape mold away and continue using the batch. Discard it, clean your equipment, and start again.
How Do You Know When It’s Ready?
Don’t judge your potato yeast entirely by the calendar. Look at what the culture is actually doing.
A starter that has been sitting for two days but shows no bubbles or fermentation isn’t ready simply because enough hours have passed. On the other hand, a vigorously bubbling starter with a pleasant fermented aroma is giving you much better evidence that fermentation is underway.
A warmer kitchen may produce activity relatively quickly, while a cool room can slow things considerably.
The aroma should be mildly yeasty and reminiscent of fermenting bread dough. A little tang can develop, but the starter shouldn’t smell putrid or rotten. The source similarly describes a successful culture as pleasantly yeasty and advises discarding a starter that smells spoiled.
Once the starter is actively bubbling, you can try baking with it.
Using Potato Yeast in Bread
The easiest way to use potato yeast is to use some of the active starchy liquid as the liquid portion of your bread dough. The source describes pouring off the cultured potato water and substituting it for water in a bread recipe.
The important difference is that wild yeast doesn’t necessarily work as quickly as commercial baker’s yeast. A dough that normally rises in an hour with commercial yeast could take several hours with a homemade culture.
Don’t assume the starter has failed simply because the dough hasn’t doubled according to the schedule printed in a conventional bread recipe.
Watch the dough rather than the clock.
When it becomes visibly larger, softer, and aerated, the yeast is doing its job.
Simple Potato Yeast Bread Recipe
Once your potato starter is vigorously active, you can test it by making a simple loaf of bread. For one loaf, start with about 3 cups of bread flour or all-purpose flour, 1 cup of active potato yeast liquid, 1 tablespoon of honey or sugar, 1 teaspoon of salt, and 1 tablespoon of softened butter or cooking oil.
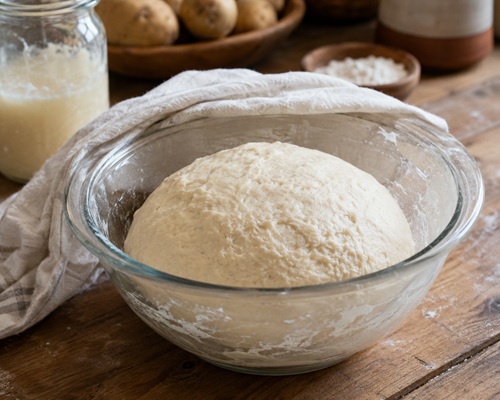
Because homemade starters aren’t standardized and different flours absorb different amounts of water, don’t treat the flour quantity as something that can never change. Start with less flour and add more as necessary until the dough reaches the right consistency.
Pour the active potato yeast liquid into a large mixing bowl and stir in the honey or sugar. Add approximately 2½ cups of flour along with the salt and butter or oil, then stir until everything begins forming a rough dough.
Add the remaining flour gradually rather than dumping it in all at once. Once the dough becomes soft and manageable, turn it onto a lightly floured surface.
Knead the dough for several minutes. As you work it, the rough mixture should gradually become smoother and more elastic. Add only enough additional flour to prevent excessive sticking. Too much flour can produce a heavy, dry loaf.
Place the kneaded dough in a lightly greased bowl and cover it with a clean towel or other suitable covering.
Now wait for the potato yeast to work.
Give It a Long First Rise
This isn’t the time to become impatient.
Commercial baker’s yeast has been selected to produce fast and predictable fermentation. Your homemade potato culture hasn’t, so the dough may need considerably longer to rise.
Depending on the strength of your starter and the temperature of your kitchen, the first rise could take several hours.
Place the bowl somewhere comfortably warm rather than hot and watch the dough. You’re looking for a substantial increase in volume and a dough that looks lighter and aerated.
If you’re accustomed to commercial yeast, the slower pace may initially make you think nothing is happening. Give the starter a chance.
The source notes that bread made with homemade potato yeast may require rise times two or three times longer than bread made with commercial yeast.
Shape the Loaf and Let It Rise Again
Once the dough has completed its first rise, gently press it down to release some of the accumulated gas.
Shape the dough into a loaf and place it into a lightly greased loaf pan. Cover it again and return it to a warm location for its second rise.
Again, don’t rely entirely on a timer.
Wait until the loaf has noticeably expanded and looks light enough to bake. Depending on your starter, this may happen relatively quickly or require another few hours.
Working with homemade yeast teaches you to read the dough rather than simply following a clock.
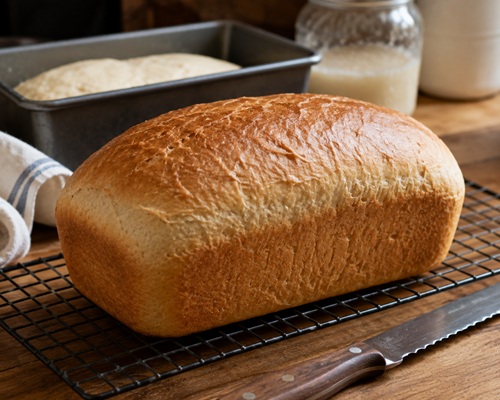
Bake Your Potato Yeast Bread
When the loaf is approaching the end of its second rise, preheat the oven to approximately 375°F (190°C).
Place the risen loaf into the oven and bake until the crust is nicely browned and the bread is fully baked through. A typical loaf may need approximately 30 to 40 minutes, although ovens and loaf sizes vary.
If you have an instant-read thermometer, the center of a basic loaf will generally be finished at roughly 190–200°F (88–93°C).
Remove the bread from the pan and place it on a cooling rack.
Let it cool before slicing. Fresh bread smells fantastic straight from the oven, but cutting it immediately can release too much steam and leave the interior gummy.
Once cooled, slice it and see how your first naturally leavened potato bread turned out.
Keeping the Potato Yeast Going
If your starter works well, you don’t necessarily need to begin again with another jar every time you bake.
After removing some starter for bread, cook another peeled potato until completely soft. Save the starchy cooking water and mash the potato. Allow everything to cool completely before adding some of your established culture.
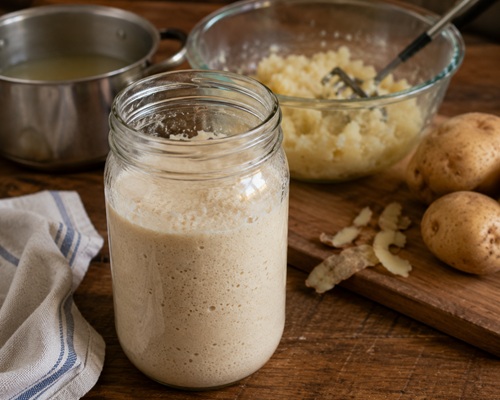
Mix the existing culture with the fresh potato and cooled potato water and allow it to become active again. This gives the microorganisms another supply of starch and nutrients.
The source also describes refreshing an established culture with another cooked potato and its cooking water.
If you’re going to bake again soon, the starter can be refreshed for the next loaf. If you’re not planning to bake for several days, refrigerate the active starter rather than leaving it indefinitely at room temperature.
Bring it back toward room temperature and refresh it before your next baking session.
If the Starter Doesn’t Work
A quiet starter after the first day doesn’t necessarily mean you’ve failed. Give it additional time, especially if your kitchen is cool.
If nothing happens after several days, look at the conditions you provided. Make sure the potato was thoroughly cooked, the mixture wasn’t hot when you started the culture, and the water wasn’t heavily chlorinated.
Give the starter a vigorous stir periodically. This redistributes the culture and introduces oxygen.
If the starter develops a rotten odor, visible mold, or other obvious signs of spoilage, don’t keep waiting for it to improve.
Throw it away and make another batch.
One of the advantages of this experiment is that starting over costs little more than a potato and some time.
Why Practice Making Potato Yeast?
Commercial yeast is inexpensive, reliable, and much easier to use. There is no reason to stop keeping it in the pantry simply because you know how to make potato yeast.
The value of this project is learning another way to make bread.
Bread existed long before modern packets of yeast, and naturally cultured yeast demonstrates how basic ingredients can be turned into something much more useful through fermentation.
Making a starter also teaches practical skills that reading about fermentation can’t completely provide. You learn what an active culture looks like, what it smells like, how temperature changes fermentation speed, how wild yeast behaves in bread dough, and how much additional time naturally leavened bread may require.
Your first loaf may not look like something from a commercial bakery.
That’s okay.
The goal of the first batch is to learn the process.
Key Takeaways
Making potato yeast doesn’t require complicated equipment or unusual ingredients. A cooked potato, its starchy cooking water, a clean jar, and enough time can be used to establish an active culture for bread baking.
Cook the potato until completely soft, save the cooking water, mash the potato, combine everything after it has cooled, and allow the mixture to ferment under a breathable covering. Watch for bubbling and a pleasant fermented aroma before attempting to bake with it.
Once the culture is active, use the potato yeast liquid as part of the liquid in your bread recipe and be prepared for considerably longer rising times than you would expect from commercial yeast.
The included bread recipe gives you a practical way to test your starter rather than simply making a jar of potato yeast and wondering what to do with it.
Make the starter, bake a loaf, see how it behaves in your kitchen, and adjust from there. That’s the real value of learning the skill.
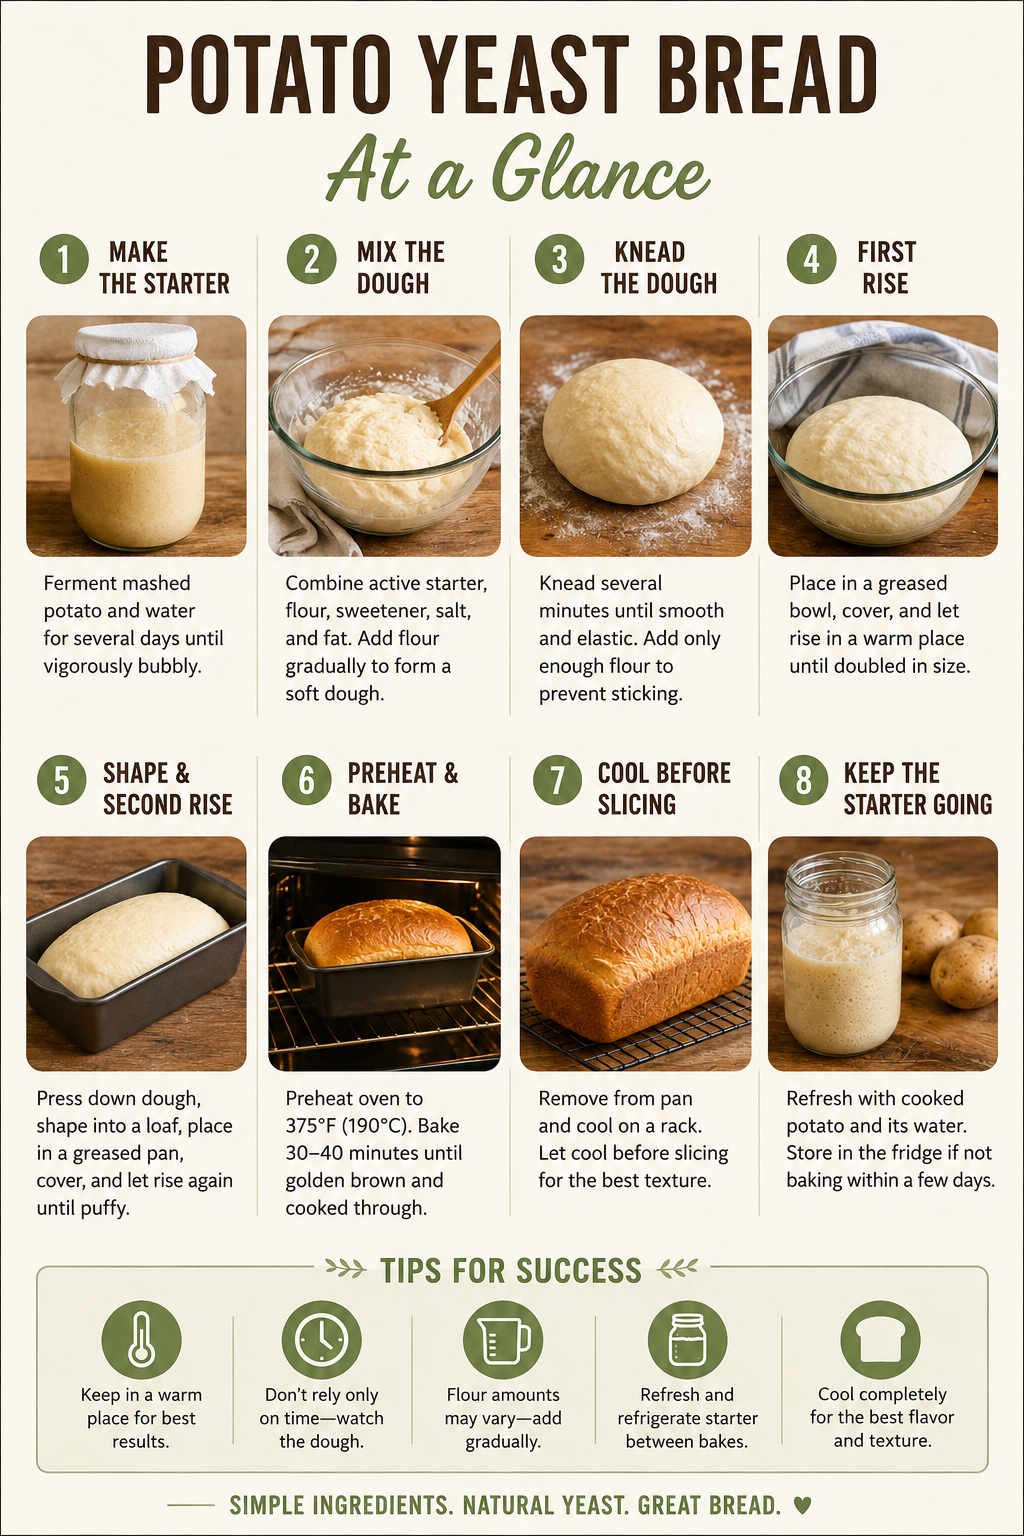
© Prepping Communities. This content is for informational purposes only and not professional advice. Use at your own risk.
Terms | Privacy | Guidelines