

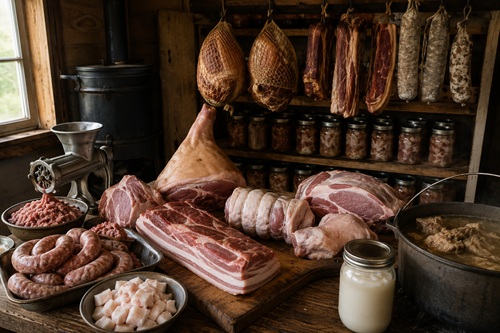
A whole pig can provide a tremendous amount of food, but once the animal is butchered, you need a plan for what happens to all that fresh meat. Without relying entirely on refrigeration or freezing, the easiest approach is to divide the pig into smaller preservation projects and work through them one at a time.
Instead of thinking about how to preserve an entire pig, think about what each part can become. The hind legs can be set aside for ham, the belly can become bacon or pancetta, shoulder and good trimmings can become sausage, jowls and selected whole muscles can be cured, clean fat can be rendered into lard, and bones can become stock. Suitable portions can also be pressure canned using tested procedures. Once each part has a destination, the project becomes much easier to manage.
Start With a Preservation Plan
The worst time to decide what you’re going to do with a pig is after the animal has already been butchered and the meat is sitting in front of you. Before processing day, decide which cuts will be eaten fresh, which will be cured, which will become sausage, which will be pressure canned, and which fat will be rendered.
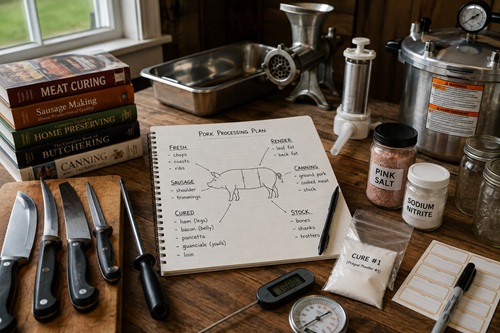
If you’re planning to make bacon, ham, pancetta, guanciale, or another cured product, select the tested recipe beforehand. This gives you time to obtain the correct curing ingredients and determine whether you have the equipment and environmental conditions required for that particular process.
Prepare your knives, cutting surfaces, food-safe containers, digital scale, grinder, sausage stuffer, curing ingredients, thermometer, hygrometer, pressure canner, jars, and labels before processing begins. Ideally, when each major cut comes off the carcass, you should already know exactly where it is going.
Keep the Meat Cold While You Work
Preserving pork without refrigeration doesn’t mean fresh pork can be allowed to sit warm while you’re processing it. The finished product may eventually be stored without refrigeration, but the fresh meat still needs to be handled safely while you’re butchering, trimming, grinding, curing, stuffing, or preparing it for canning.
Work through the pig in manageable amounts and keep meat that isn’t actively being processed cold. This is one reason hog processing was traditionally associated with colder weather. Low outdoor temperatures made handling a large carcass much easier before mechanical refrigeration became available.
Cleanliness matters just as much. Keep the clean meat-processing area separated from dirty slaughtering work whenever possible, and clean knives, tables, grinders, tubs, scales, and other equipment appropriately throughout the process.
Sort the Pig as You Break It Down
As the pig is broken into individual cuts, sort the meat immediately rather than creating one large pile to deal with later. Put the hind legs aside, separate the belly, keep shoulder and suitable trimmings together for sausage, collect clean fat separately, and place bones and connective tissue intended for stock into another container.
If you’re planning to pressure can some of the pork, put that meat aside as well. Large whole muscles intended for curing should remain intact and clean rather than being mixed with general trimmings.
This simple organization turns one enormous processing job into several manageable projects. Instead of looking at a table covered with pork, you’re looking at a ham project, a bacon project, a sausage project, a lard project, a stock project, and perhaps a pressure-canning project.
Set the Hind Legs Aside for Ham
Once the hind legs have been removed, trim them according to the ham recipe you intend to use. Remove loose tissue and anything the recipe doesn’t require, then weigh each leg accurately and write down the starting weight.
The weight matters because many curing processes calculate salt and curing ingredients according to the amount of meat being cured. Follow the tested recipe rather than estimating the amount of cure by eye. Apply the cure exactly as directed, label the ham with the starting date and weight, and place it into the conditions required by that particular process.
Whole hams are substantial pieces of meat and some traditional preparations can take many months to complete. They aren’t a good place to experiment with improvised curing methods. If the recipe requires controlled temperature and humidity and you can’t provide those conditions, choose another tested method rather than risking one of the most valuable cuts on the animal.
Turn the Belly Into Bacon
Lay the pork belly on a clean cutting surface and trim away ragged edges or unwanted pieces. Weigh the finished belly and record that weight before preparing the cure.
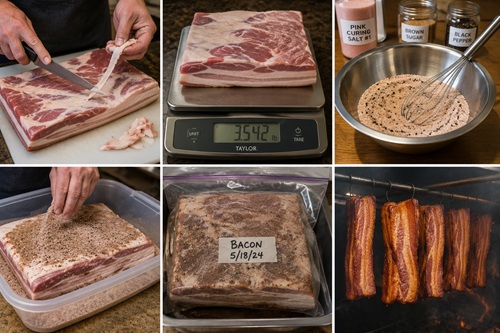
Choose the exact type of bacon you’re making and follow a tested recipe for that product. Measure the curing ingredients accurately, distribute the cure as directed, and place the belly into the appropriate container or bag. Label it so you know when curing started.
During the curing period, follow the recipe for turning or redistributing the cure if required. Once curing is complete, the belly may need to be rinsed, dried, smoked, cooked, or otherwise finished depending on the particular recipe.
One important thing to remember is that homemade bacon isn’t automatically shelf-stable. Many homemade bacon recipes still produce a product that requires refrigeration or freezing. Smoking doesn’t automatically change that. If your goal is storage without refrigeration, make sure the process you’re using actually produces a product suitable for those storage conditions.
Make Pancetta From Part of the Belly
If you want to try another preservation method, divide the belly before curing and use one section for pancetta. Trim and weigh that portion separately, prepare the cure according to a tested pancetta recipe, and apply it evenly to the meat.
After curing, pancetta may be left flat or rolled depending on the style you’re making. It then needs to be handled under the temperature and humidity conditions specified by the recipe.
Treat pancetta as a separate project rather than thinking of it simply as bacon without smoke. The curing and drying requirements can be different, and those differences matter when you’re trying to produce a safe finished product.
Turn the Shoulder Into Sausage
Pork shoulder is particularly useful for sausage because it contains flavorful meat along with a useful amount of fat. Start by cutting the shoulder into pieces small enough to fit your grinder. Remove glands, bone fragments, damaged tissue, and anything else you don’t want in the finished sausage.
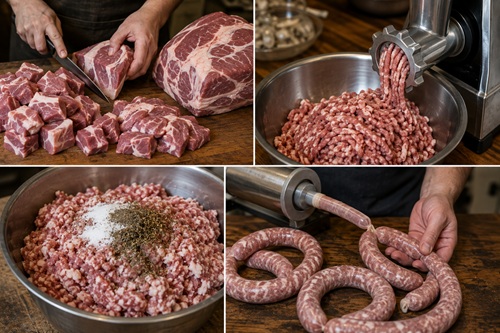
Keep the meat and fat cold while you work. Cold meat grinds cleanly, while warm fat tends to soften and smear through the grinder. If the meat becomes too warm while you’re cutting it, return it to cold storage before grinding.
Run the chilled meat through the grinder using the plate required by your recipe. If additional fat is needed, weigh and add it in the proportion specified. Add the measured salt, spices, and any other required ingredients, then mix everything thoroughly before stuffing it into casings if you’re making links.
At this point, the type of sausage you’re making becomes important. Fresh sausage is still fresh meat. Smoked sausage isn’t necessarily shelf-stable. Fermented and dry-cured sausages require entirely different controlled processes. Decide what type of sausage you’re making before you begin rather than trying to turn ordinary fresh sausage into a preserved product afterward.
Learn Fresh Sausage Before Dry-Cured Sausage
If you’ve never made sausage before, fresh sausage is a good place to start. It lets you learn how to keep meat cold, operate the grinder, combine meat and fat, distribute seasoning evenly, and fill casings without also having to manage fermentation and controlled drying.
Once you’re comfortable with those basic skills, fermented and dry-cured sausage can become another project. These sausages aren’t made simply by hanging fresh sausage somewhere cool. They depend on carefully controlled ingredients, fermentation, acidity, temperature, humidity, and moisture loss.
Treat dry-cured sausage as its own preservation skill. Learning it separately makes much more sense than trying to figure it out while an entire pig is waiting to be processed.
Save the Jowls
When the jowls are removed, keep them out of the general trimming pile. They’re flavorful cuts containing both meat and fat and can be used for cured products such as guanciale.
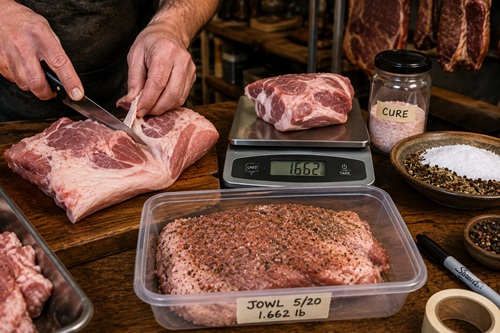
Trim the jowl according to the recipe you’re using, weigh it, record the weight, and calculate the curing ingredients exactly as directed. Apply the cure evenly and label the meat before placing it into the required curing conditions.
Because a jowl is much smaller than a whole ham, it can be a manageable project for someone developing whole-muscle curing skills. It also turns a part of the pig that might otherwise be overlooked into a useful preserved product.
Try Smaller Whole-Muscle Cures
The loin, tenderloin, neck, and other intact muscles can also be candidates for curing. If you’re learning, smaller cuts may be easier to work with than a large hind leg.
Choose the finished product first, then trim and weigh the meat. Apply the cure according to a tested recipe and label the meat with the starting weight and date. Place it into the required curing environment and monitor it according to the process you’re following.
Smaller projects give you an opportunity to learn how cured meat changes over time. You can become familiar with monitoring temperature and humidity, observing how the surface changes, tracking moisture loss, and keeping accurate records before committing to a much larger and longer project.
Render the Fat Into Lard
As you butcher the pig, separate clean fat instead of throwing it into the general scrap pile. If possible, keep leaf fat separate from firmer back fat because they have somewhat different uses. Leaf fat, located around the kidneys, produces particularly mild lard that is excellent for baking, while back fat can be useful for cooking, sausage making, rendering, and certain cured products.
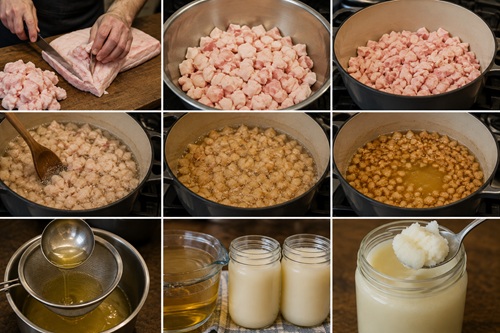
Cut the fat into small pieces or grind it while cold. Smaller pieces expose more surface area and allow the fat to melt more efficiently.
Place the prepared fat into a heavy pot and begin heating it gently. The goal isn’t to fry it aggressively. You want the fat to slowly melt away from the remaining tissue without scorching.
As the fat warms, clear liquid lard begins collecting in the pot. Stir occasionally and keep the heat controlled. The solid pieces gradually shrink as more of their fat is released.
Once the fat has rendered, strain the liquid lard while it is still fluid into clean, heat-safe containers and handle and store it according to an appropriate tested rendering and storage method.
Rendering lard is one of the more approachable projects when processing a pig and gives you a useful cooking fat from something that could easily be wasted.
Turn the Bones Into Stock
Once the major cuts have been removed, save the meaty bones, joints, and suitable connective tissue. These still contain flavor, marrow, collagen, and small amounts of meat that can be turned into stock.
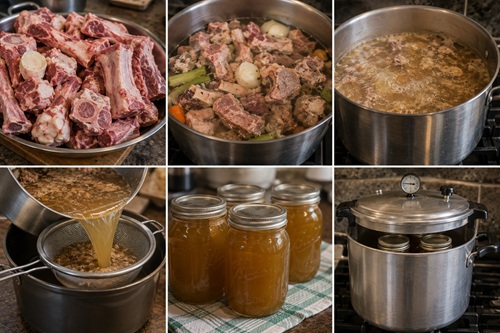
Place the appropriate bones into a large stockpot and prepare pork stock using a tested recipe. As the bones cook, flavor and gelatin move into the liquid. Once the stock is finished, strain it to remove bones and solids.
If you’re going to use the stock immediately, handle it as fresh stock. If you want shelf-stable stock that doesn’t require freezer space, pressure can it according to a current tested procedure.
Meat stock is a low-acid food and requires pressure canning for shelf-stable storage. Follow the specified jar size, processing time, pressure, and altitude adjustment. A boiling-water canner isn’t an appropriate substitute for pressure canning meat stock.
Pressure Can Some of the Pork
Pressure canning is especially useful because not every piece of a pig needs to become a traditional cured product. Suitable pork can be prepared according to a current tested meat-canning procedure and processed into jars that don’t depend on freezer space after processing.
Trim and prepare the meat according to the tested method you’re using. Follow its instructions for raw packing or hot packing, fill the jars correctly, maintain the required headspace, and process them for the specified time and pressure. Make any required adjustment for your altitude.
Once the jars have finished processing and cooled undisturbed, check the seals, label the jars, and store them appropriately.
Don’t shorten processing times because the pieces are small or because the meat was cooked first. The processing schedule is part of what makes a low-acid food such as pork safe for shelf-stable storage.
Use the Small Pieces
As you trim the animal, don’t automatically discard a piece simply because it isn’t large enough to become a chop or roast. Clean trimmings can become sausage, ground pork, canned meat, or another appropriate preparation. Fat can be separated for rendering or sausage making, while meaty bones can go into the stockpot.
This is where whole-animal processing begins to make sense. Instead of judging every piece by whether it resembles something from a supermarket meat counter, decide what useful purpose it can serve.
A few ounces here and there may not seem important, but across an entire pig those small pieces can add up to a substantial amount of food.
Don’t Forget the Head, Shanks, and Trotters
The head, shanks, and trotters also contain useful meat, connective tissue, fat, collagen, and gelatin. These parts have traditionally been used in cooked dishes, stocks, and preparations such as head cheese.
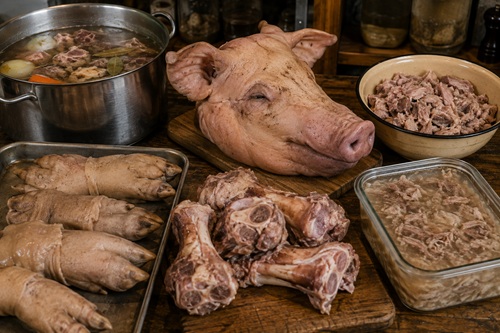
Not everything made from these portions is intended for long-term room-temperature storage, and that is perfectly fine. Some parts of the pig can be cooked and eaten during processing while other cuts are being preserved.
Eating some of the less-storable parts immediately also reduces the amount of meat you need to preserve.
Decide What to Do With the Ribs
Ribs can be awkward when your main goal is long-term preservation because they don’t lend themselves as naturally to whole-muscle curing as a ham, belly, or jowl.
Set them aside during butchering and decide early what you’re going to do with them. They can be cooked and eaten fresh, or suitable meat can be handled using another appropriate tested preservation process.
There is no reason to force every cut into a traditional dry cure. Choosing the preservation or cooking method that actually suits the cut is more practical than trying to preserve everything the same way.
Set Up the Curing Space Before Hanging Meat
If you’re planning to dry cure meat, check the space you’re going to use before anything is hung there.
Place a reliable thermometer and hygrometer in the area and measure the actual temperature and relative humidity. Don’t rely on the room simply feeling cool or damp.
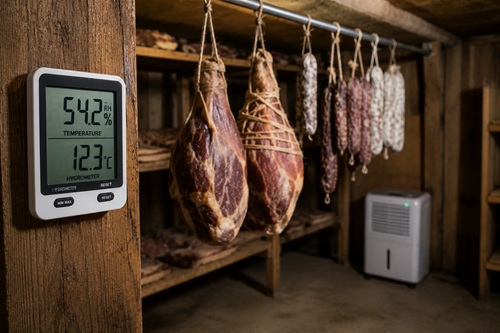
Compare those measurements with the requirements of the tested recipe you’re following. If the room is too warm, too cold, too humid, or too dry, correct the conditions or choose another preservation method.
Some basements and cellars may provide useful curing conditions during certain seasons, while other locations require a controlled curing chamber. What matters is knowing the conditions rather than guessing.
Treat Smoking as One Part of the Process
Smoking can be part of making bacon, ham, sausage, and other preserved meats, but smoke by itself doesn’t automatically make fresh pork shelf-stable.
Know whether your recipe calls for hot smoking or cold smoking and whether the meat needs to be cured before it enters the smoker. Follow the temperatures and times required by the particular process.
Once smoking is finished, store the meat according to the recipe. If the finished product still requires refrigeration, smoking it doesn’t remove that requirement.
Think of smoking as one possible stage in a larger preservation process rather than a shortcut for preserving fresh meat.
Measure Every Cure
Keep a reliable digital scale nearby whenever you’re curing meat. Weigh the meat first and calculate the curing ingredients according to the tested recipe.
If a recipe specifies a particular curing salt, use that exact product. Don’t substitute another curing mixture because the names sound similar, and don’t estimate the amount by eye.
Adding extra curing salt doesn’t make the meat safer. Curing ingredients are intended to be used at specific concentrations, which is why accurate measurement matters.
The same principle applies to fermentation temperatures, curing times, humidity, and other measurable parts of the process. If the recipe provides a measurement, treat that measurement as part of the preservation method.
Label Everything You Start
Once several cuts are curing at the same time, remembering which one started when becomes surprisingly difficult.
Label each project when you start it. Record what the meat is, its starting weight, the date, and the recipe you’re following. If the process requires later weight measurements, record those as well.
Do the same with sausage batches, rendered fat, stock, and pressure-canned jars.
A simple notebook and properly labeled containers are enough. Months later, you should be able to identify every curing piece without relying on memory.
Build Your Skills One Pig at a Time
You don’t have to master every pork-preservation method the first time you process an animal.
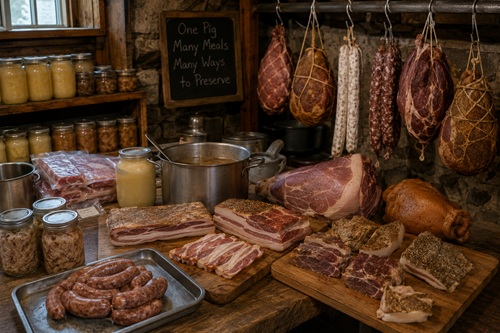
Start with projects you can safely manage. You might render the fat, make stock, pressure can some pork using tested procedures, make fresh sausage, and cure a belly using an established recipe.
The next time, add a smaller whole-muscle cure. Once you have an appropriate curing environment and more experience, you might tackle a whole ham or learn fermented sausage.
Adding one or two new skills at a time lets you learn without risking large amounts of valuable meat.
Know When Something Isn’t Right
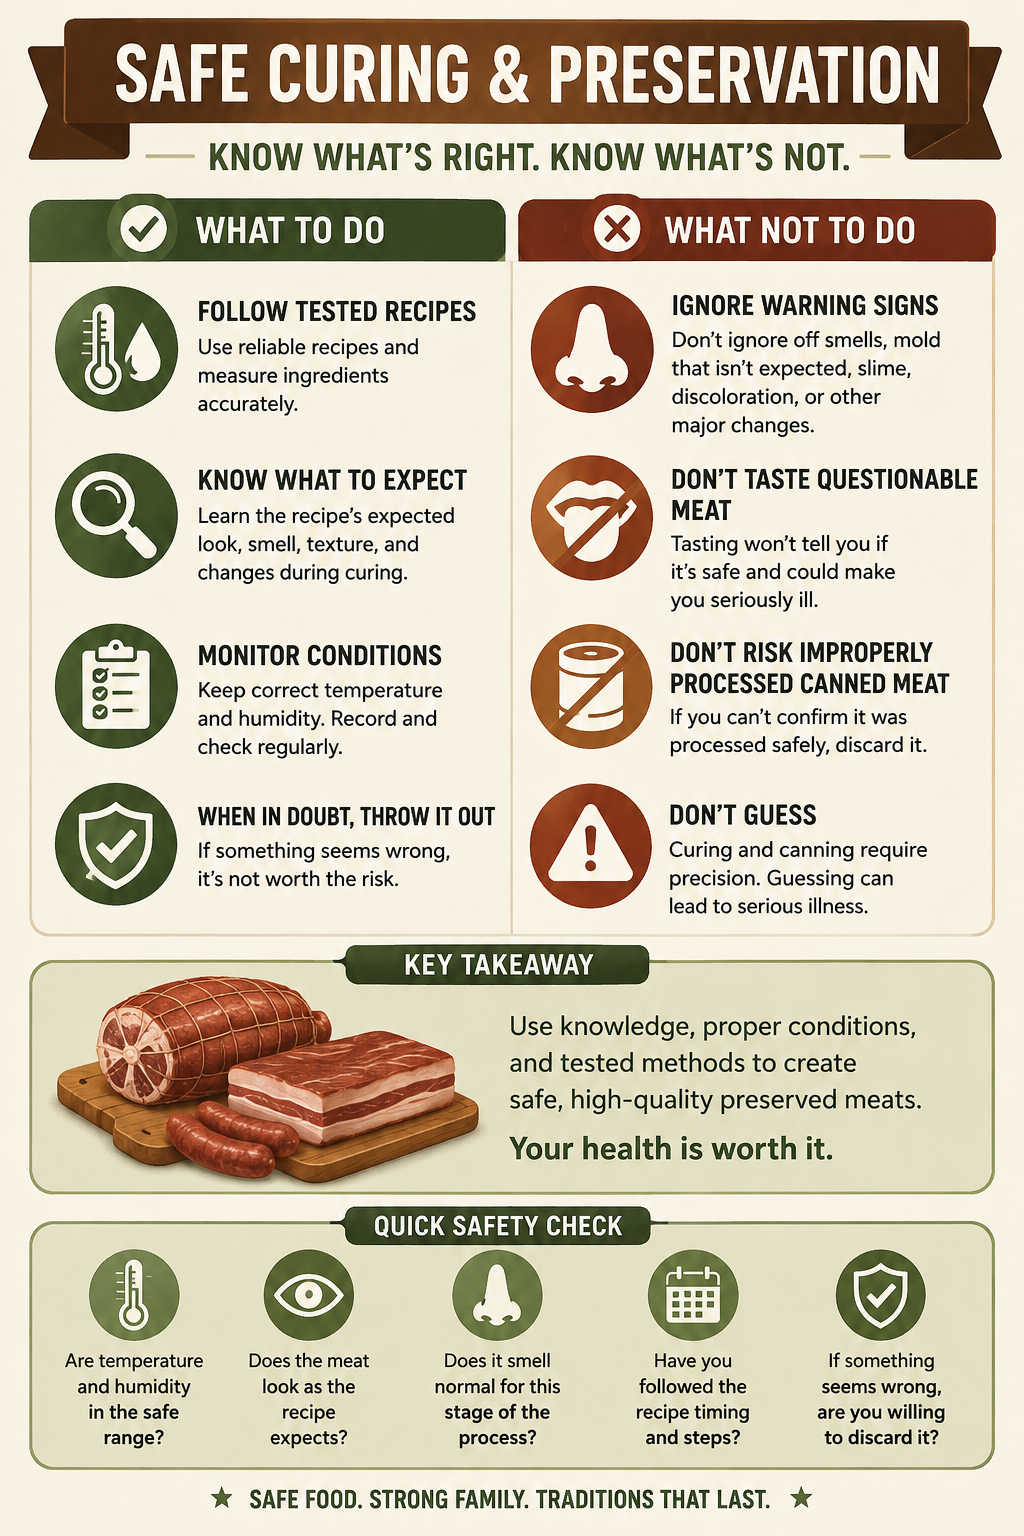
Meat changes considerably during curing, so learn what the tested recipe says the product should look, smell, and feel like as it progresses.
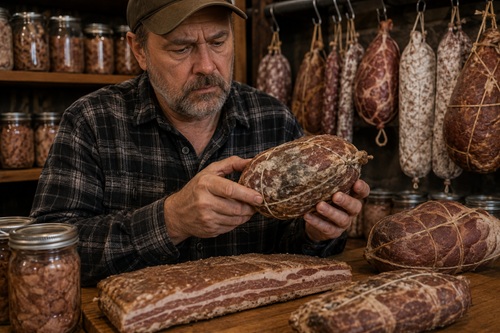
Pay attention when something falls significantly outside those expectations. Major temperature failures, failed fermentation, putrid odors, signs of internal spoilage, or other substantial departures from the expected process shouldn’t simply be ignored.
Don’t taste questionable meat to determine whether it is safe.
The same caution applies to improperly processed canned meat. If you cannot establish that a meat product was processed safely, discard it rather than taking a chance with serious foodborne illness.
Bringing the Whole Pig Together
When everything is planned beforehand, the overall process becomes surprisingly straightforward. The hind legs move into the ham project. The belly goes toward bacon or pancetta. Shoulder and suitable trimmings become sausage. Jowls and selected smaller muscles can become curing projects. Clean fat moves to the rendering pot. Bones become stock. Suitable remaining meat can be pressure canned using tested procedures.
Some cuts can simply be cooked and eaten fresh.
You don’t need to make every piece shelf-stable, and you don’t need to preserve every part using the same method. You simply need to know what you’re doing with each part before it becomes a problem.
Key Takeaways
Preserving a whole pig without relying entirely on refrigeration becomes much easier when you treat the animal as a collection of smaller DIY projects rather than one enormous preservation job.
Plan what you’re making before processing day and have the equipment, tested recipes, and ingredients ready. Keep fresh meat cold and clean while you work. Sort each cut according to its intended use. Weigh meat before curing and measure curing ingredients accurately. Use shoulder and trimmings for sausage, render clean fat into lard, turn bones into stock, and pressure can suitable meat and stock using tested procedures.
Most importantly, don’t feel like you need to master every technique at once. Start with a few processes you can safely control and add another preservation skill as you gain experience.
Once you begin looking at the pig cut by cut, the project stops feeling like one overwhelming amount of meat. The hind leg is a ham project. The belly is a bacon project. The shoulder is a sausage project. The fat is a lard project. The bones are a stock project.
Work through those projects one at a time, and preserving more of a whole pig becomes a much more practical and achievable skill.
© Prepping Communities. This content is for informational purposes only and not professional advice. Use at your own risk.
Terms | Privacy | Guidelines