
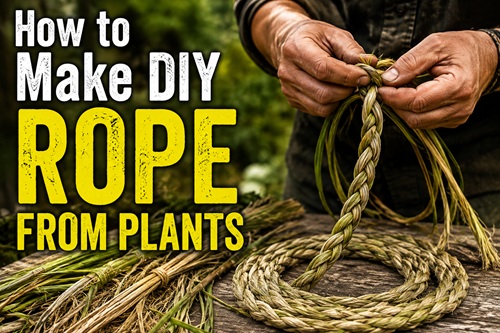
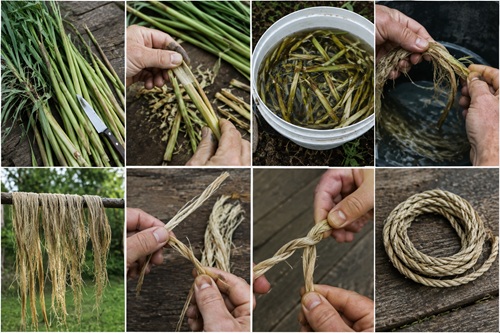
Making rope from plants might sound like an advanced bushcraft skill, but the basic technique is surprisingly simple. You don’t need special equipment, and you don’t need to make a huge length of rope the first time you try it. Start with a short piece of cordage, learn how the fibers behave, and practice the twisting technique. Once you understand the basic process, you can make longer and thicker cordage as needed.
The idea behind plant rope is simple. Many plants contain long, strong fibers hidden inside their stems, leaves, or bark. Once those fibers are separated from the softer plant material, they can be twisted together to create surprisingly useful cordage.
What You’ll Need
You only need a few basic things: suitable fibrous plant material, a knife or cutting tool, water if the fibers need soaking, and somewhere to dry them.
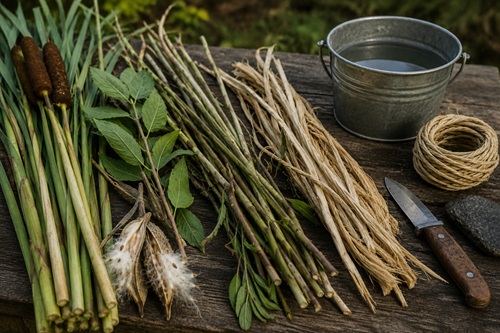
Plants traditionally used for cordage include cattails, milkweed, dogbane, nettles, yucca, willow, basswood, and other fibrous plants. What works best will depend on what grows in your area.
Always positively identify a plant before handling or harvesting it. Avoid plants growing along contaminated waterways, heavily traveled roadsides, or areas that may have been sprayed with herbicides or other chemicals.
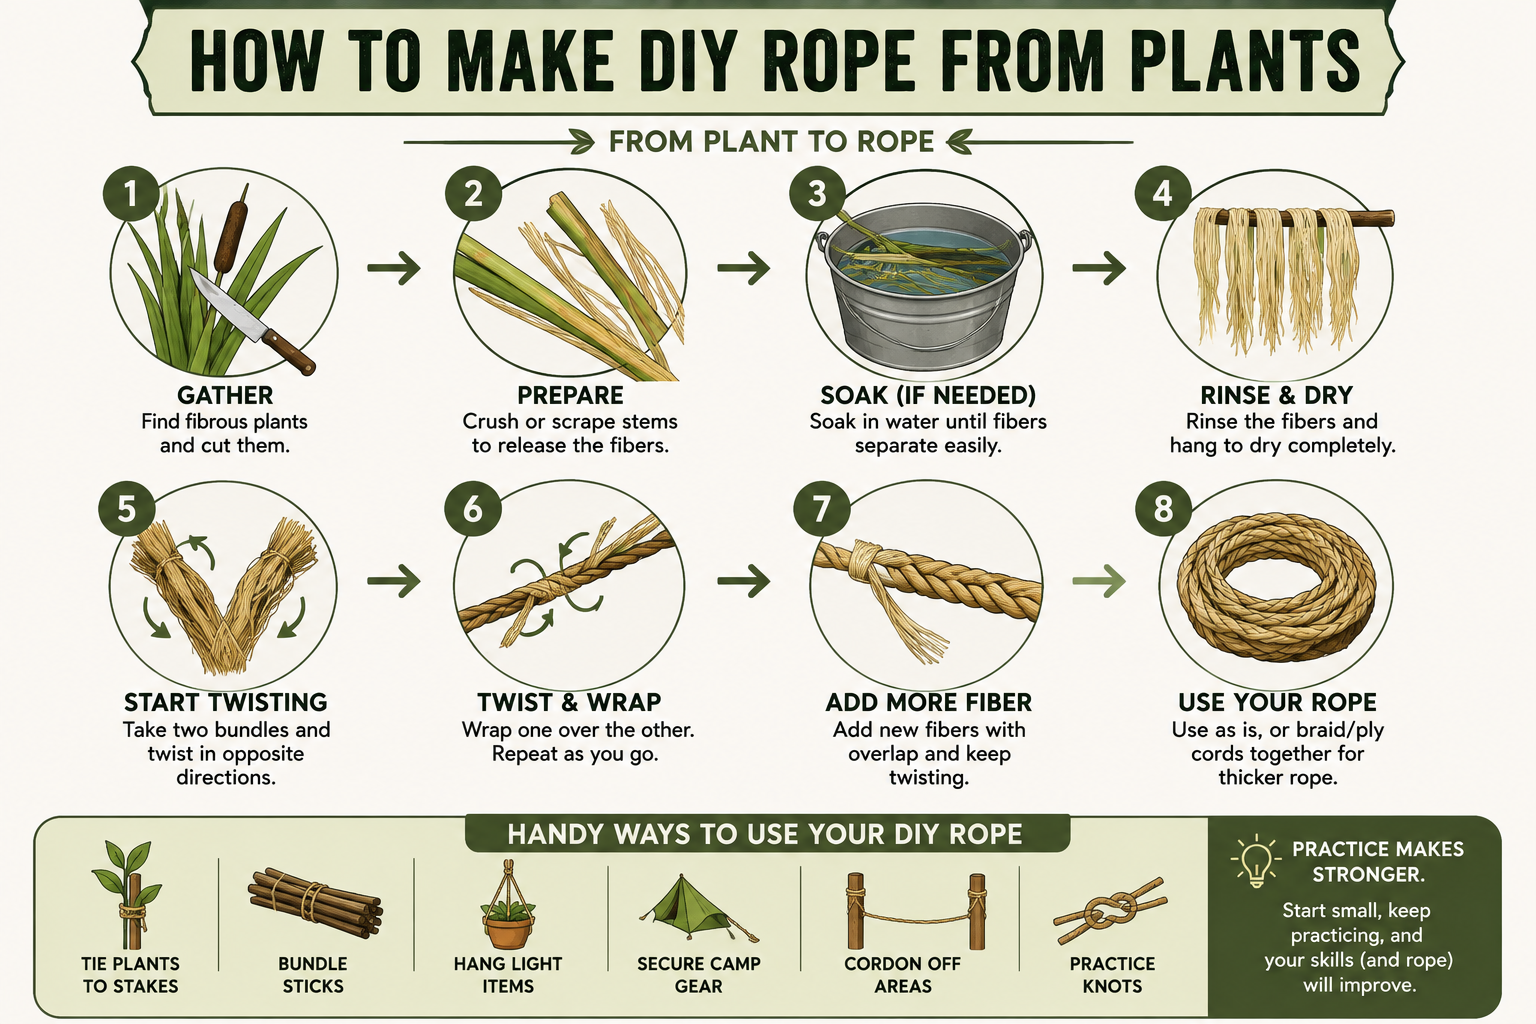
Step 1 — Gather Your Plant Material
Look for long stems, stalks, leaves, or inner bark containing strong fibers. Generally, longer fibers are easier to work with because fewer pieces have to be joined together while making the rope.
Cut the material instead of unnecessarily pulling up the entire plant. With perennial plants such as cattails, leaving the roots and rhizomes behind allows the plant to continue growing.
Gather considerably more material than you think you’ll need. Once the softer parts of the plant are removed, the amount of usable fiber can be much smaller than the original pile.
Step 2 — Separate the Fibers
The next job is separating the strong fibers from the rest of the plant. Exactly how this is done depends on the species you’re using.
Some plant stalks can be dried, split open, and worked apart by hand. Tougher stems may need to be gently crushed or flattened first. The goal isn’t to pulverize the stalk. You simply want to break up the harder outer material enough that you can peel or scrape it away without cutting through the long fibers underneath.
Don’t worry about producing perfectly clean fibers on your first attempt. As long as you can produce long, flexible strands that don’t immediately break when pulled, you have something you can work with.
Step 3 — Soak Tough Fibers if Needed
Some plants release their fibers much more easily after soaking. This process is commonly called retting.
Place the stalks or leaves in a bucket, tub, or other container filled with water. The water gradually helps break down the softer plant material surrounding the fibers.
There isn’t one perfect soaking time for every plant. Temperature, plant species, age of the material, and other conditions can all change how quickly it happens. Instead of relying entirely on a certain number of days, check the material regularly.
Remove a piece and try pulling the fibers apart. If they still cling tightly to the plant material, they probably need more time. When the fibers begin separating fairly easily, they’re ready to process. Don’t leave them soaking indefinitely because eventually the useful fibers can begin deteriorating as well.
Step 4 — Clean and Dry the Fibers
Once the fibers separate easily, rinse them thoroughly with clean water and remove as much remaining plant material as possible. Gently work the fibers apart with your fingers until you have long strands.
Hang or spread them somewhere with good airflow and allow them to dry. You don’t want to store wet plant fibers because trapped moisture can encourage mold and deterioration.
Once they’re dry, separate them into small workable bundles. At this point, what started as a pile of plants should begin looking more like raw material for making cordage.
Step 5 — Make Your First Piece of Cord
Take a small bundle of fibers and divide it into two roughly equal sections. Hold the sections together near one end, leaving a short tail.
The easiest way to make strong two-strand cordage is with a technique commonly called the reverse twist or reverse wrap. The name makes it sound more complicated than it actually is.
Take one bundle and twist it tightly in one direction. Then wrap that bundle over the second bundle in the opposite direction. Now repeat the process with the other strand.
Think of it simply as:
Twist. Wrap. Twist. Wrap.
Keep repeating the same movement as you work your way down the fibers. Because each individual strand is twisted in one direction while the two strands are wrapped together in the opposite direction, they help lock each other in place.
Your first few inches may look uneven. That’s normal. After practicing for a while, you’ll start developing a rhythm and the cord will become much more consistent.
Step 6 — Add More Fiber as You Go
Plant fibers aren’t usually long enough to make an entire piece of rope from one continuous strand, so you’ll need to add new fibers as you work.
When one bundle begins getting short, lay another fiber alongside it with plenty of overlap and continue twisting. The new fiber becomes trapped within the cord as you continue working.
Try to stagger these additions instead of adding new fibers to both strands at exactly the same location. If every fiber ends in the same place, you can create a weak section in the rope. Spreading the joins along the length of the cord helps maintain a more consistent thickness and strength.
Continue twisting, wrapping, and adding fibers until your cord reaches the length you want.
Step 7 — Test What You Made
Once you’ve made a foot or two of cordage, stop and test it.
Pull on it gently, bend it, and try tying a simple knot. Look closely at areas where you added new fibers. If a section begins separating, untwist it slightly, add more fiber, and work that section again.
This is actually one of the best ways to learn the skill. Your first piece of plant rope probably won’t be perfect, but you’ll quickly discover how much fiber to use, how tightly to twist it, and how much overlap is needed when adding another strand.
Making Thicker Rope
Once you can make basic cordage, making thicker rope is simply an extension of the same idea. Several finished cords can be twisted or braided together to produce something larger and stronger. Those larger cords can even be combined again.
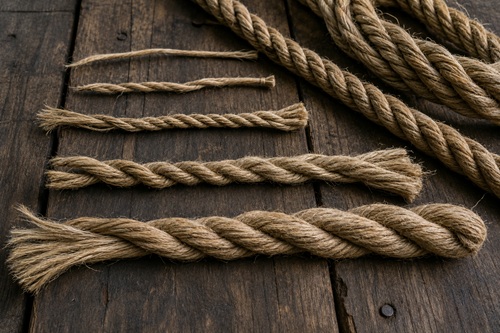
This is how relatively small plant fibers can eventually become substantial rope: fibers become strands, strands become cord, and multiple cords are combined into heavier rope.
Homemade plant cordage can vary enormously in strength, however, so don’t assume an untested piece can safely support a person, secure a heavy load, or perform another safety-critical job.
Simple Uses for Homemade Plant Rope
Your first piece doesn’t have to perform some major survival task to be useful. Try using it to tie garden plants to stakes, bundle small sticks, hang lightweight items, practice knots, secure something around camp, or make a simple repair.
The real value of this DIY project is learning that cordage doesn’t necessarily have to come from a store.
Once you understand what usable plant fibers look like and how to reverse-twist them together, you’ll begin recognizing potential cordage materials differently when you’re outdoors.
Try It Yourself
Don’t start by trying to make 50 feet of perfect rope. Gather enough suitable plant fiber to make a short piece and concentrate on learning the technique.
Separate the fibers, divide them into two bundles, and remember the basic motion:
Twist. Wrap. Twist. Wrap.
It might look rough the first time. That’s fine.
If you can take plant fibers that would normally be overlooked and turn them into a piece of cordage strong enough to tie something together, you’ve learned the skill.
That’s what makes this such a good DIY project. It’s simple, practical, and after trying it once, it’s easy to think:
Hey, I can actually do this.
© Prepping Communities. This content is for informational purposes only and not professional advice. Use at your own risk.
Terms | Privacy | Guidelines