

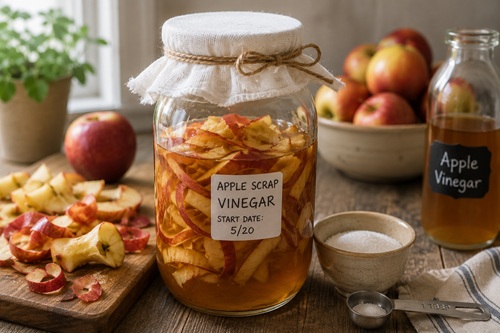
Making apple vinegar at home is a simple fermentation project and a practical way to get more use from an apple harvest. You can make traditional apple cider vinegar from fresh apple juice or cider, or make apple scrap vinegar from peels and cores that might otherwise be thrown away.
The apple scrap method is particularly useful at home because it doesn’t require a cider press or large quantity of apples. Save the peels and cores from making pies, applesauce, dehydrated apples, or other recipes and turn them into a useful homemade vinegar.
Technically, vinegar made from scraps and sugar water is apple scrap vinegar, while traditional apple cider vinegar begins with apple juice or cider. The process and finished products are similar enough that the scrap method is worth knowing, especially when the goal is to use as much of an apple harvest as possible.
Simple Apple Scrap Vinegar Recipe
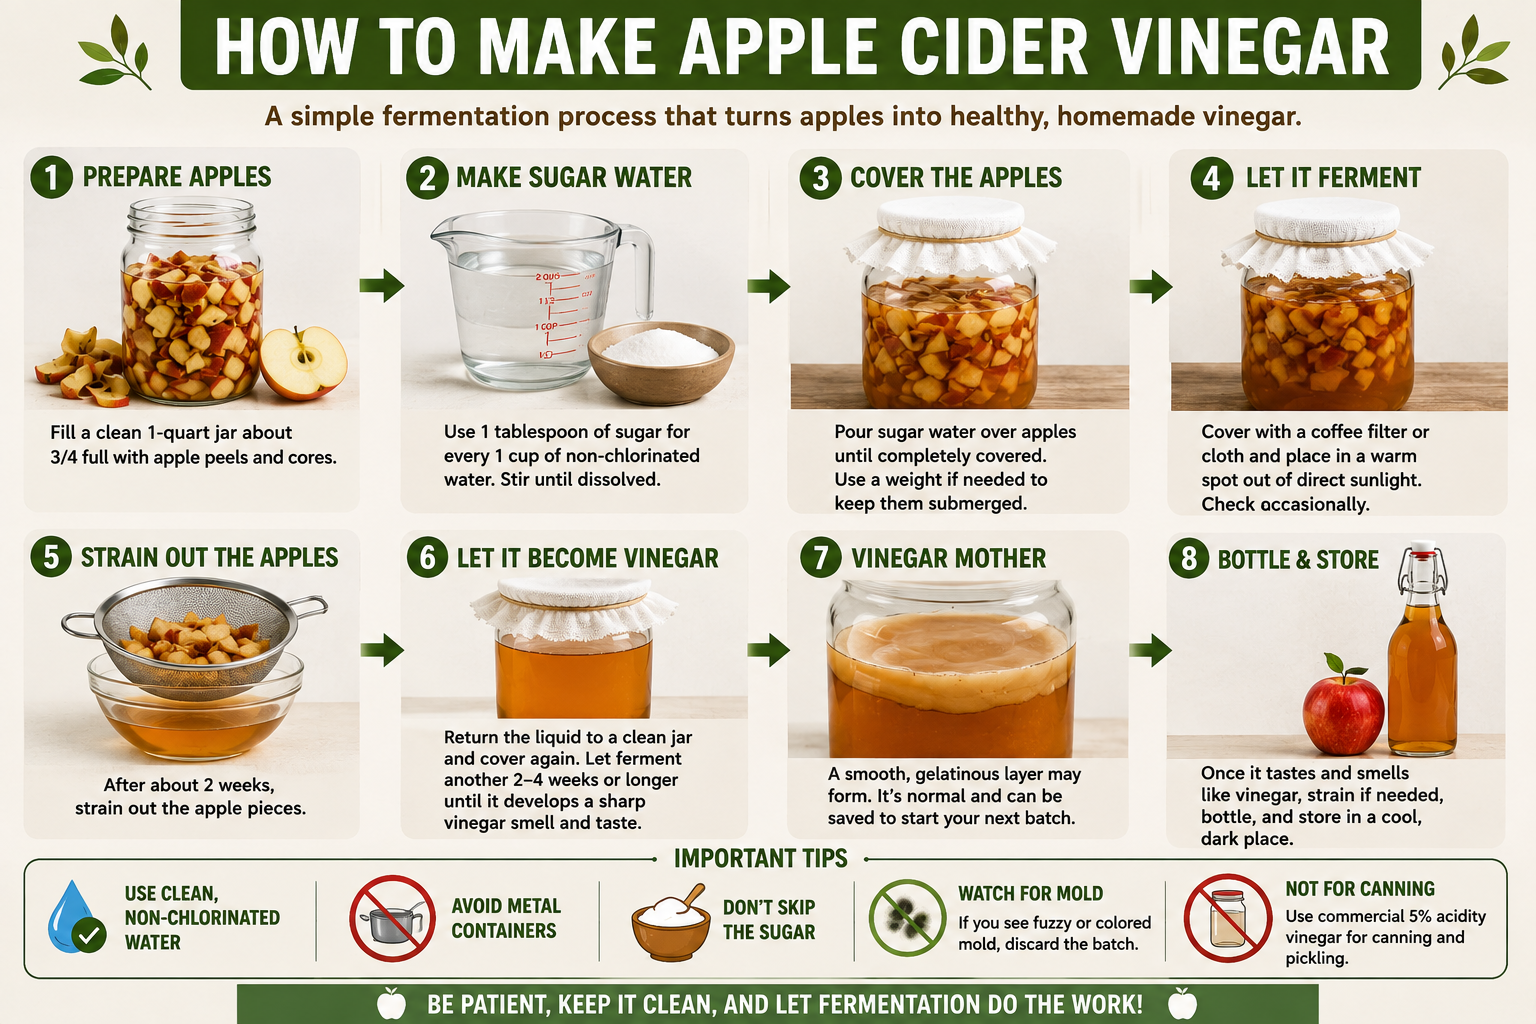
For a 1-quart glass jar, you will need enough clean apple peels and cores to fill the jar approximately three-quarters full. You will also need 1 tablespoon of sugar for every 1 cup of non-chlorinated water used. The exact amount of water isn’t fixed because it depends on how tightly the apple scraps fill your jar. Make enough sugar water to completely cover the fruit.
Ingredients
Apple peels and cores: Enough to fill a 1-quart jar about ¾ full
Sugar: 1 tablespoon per cup of water
Non-chlorinated water: Enough to completely cover the apples
You will also need a clean 1-quart glass jar, a coffee filter or tightly woven clean cloth, a rubber band or string, and ideally a fermentation weight to keep the apple pieces beneath the liquid.
Step 1 – Prepare the Apples
Start with clean apple peels and cores. Slightly bruised or browned apples can still provide usable scraps, but don’t use rotten or moldy fruit.
Fill your clean glass jar approximately three-quarters full with the apple scraps. Don’t pack them down extremely tightly. You want enough room for the sugar water to move around the fruit and completely cover it.
If you don’t have enough scraps to make a batch, freeze them. Continue saving peels and cores in the freezer until you have enough to fill a jar. This is an easy way to collect scraps gradually instead of wasting them.
Step 2 – Make the Sugar Water
For every cup of water you use, add 1 tablespoon of sugar. For example, if it takes 2 cups of water to cover your apples, use 2 tablespoons of sugar.
Stir the sugar into the water until it is mostly dissolved.
The sugar serves an important purpose. It provides fermentable carbohydrates that microorganisms can use during the fermentation process. It isn’t simply being added to make the finished vinegar sweet.
Use non-chlorinated water when possible. Filtered water is a simple choice. Chlorinated water can interfere with the microorganisms involved in fermentation.
Step 3 – Cover the Apples
Pour the sugar water over the apple scraps until they are completely covered. Leave a few inches of empty space near the top of the jar rather than filling it all the way to the rim.
Apple pieces naturally want to float, but keeping them beneath the liquid helps reduce the chance of unwanted growth developing on exposed fruit. A clean fermentation weight is useful for holding everything down.
Cover the opening of the jar with a coffee filter or tightly woven clean cloth and secure it with a rubber band or string. The covering helps keep fruit flies and debris out while still allowing airflow.
Step 4 – Let It Ferment
Place the jar somewhere warm and away from direct sunlight.
Over the next couple of weeks, fermentation should begin. You may notice bubbles, cloudiness, or changes in the aroma. These are signs that microorganisms are working on the sugars.
Check the jar periodically and make sure the apple pieces remain submerged.
Clean equipment is important throughout the process. Starting with clean jars, utensils, and work surfaces reduces the opportunity for unwanted microorganisms to take over the fermentation.
Step 5 – Strain Out the Apples
After approximately two weeks, strain the apple pieces from the liquid.
Don’t expect the liquid to taste like finished vinegar yet. At this stage it may still have a sweet, fruity, fermented, or slightly alcoholic character.
Pour the strained liquid back into a clean glass jar and cover it again with your coffee filter or cloth.
Now the liquid needs additional time for the vinegar-producing bacteria to continue their work.
Step 6 – Let It Become Vinegar
Allow the strained liquid to ferment for another two to four weeks, checking it periodically.
There isn’t an exact day when every batch will be finished. Temperature, microbial activity, oxygen exposure, and other conditions can make one batch develop faster than another.
As fermentation progresses, the aroma should become sharper and increasingly recognizable as vinegar. The flavor should also become progressively more acidic.
If it still seems weak after four weeks, don’t assume the batch has failed. Give it additional time and check it again later.
What Is Happening Inside the Jar?
The process is essentially occurring in two stages.
First, yeast consumes sugars and produces alcohol. The next group of microorganisms, primarily acetic-acid bacteria, uses oxygen and converts that alcohol into acetic acid.
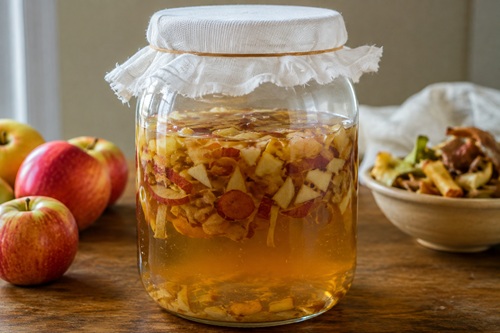
That second transformation is what gives vinegar its distinctive sharp flavor and aroma.
This is also why airflow becomes important during vinegar production. Unlike alcoholic fermentation, which is commonly performed with limited oxygen, vinegar-producing bacteria need access to oxygen.
What Is the Vinegar Mother?
You may eventually notice a smooth, gelatinous material developing in your vinegar. This is commonly called the vinegar mother.
It may look translucent, cream-colored, tan, brownish, or cloudy. It is associated with the acetic-acid bacteria responsible for producing vinegar and isn’t normally a sign that something has gone wrong.
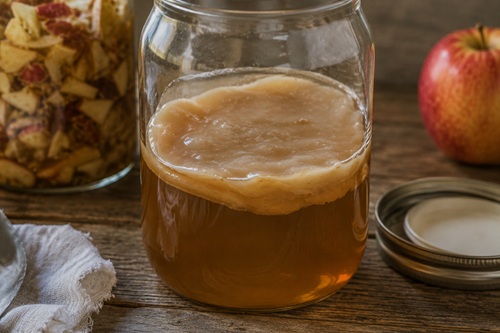
A mother can be left in the vinegar or saved along with some finished vinegar to help start another batch. Your source also notes that a naturally formed mother can be used to jump-start future vinegar batches.
Don’t confuse a vinegar mother with mold. A mother generally looks smooth, wet, or rubbery. Mold typically appears fuzzy or hairy and may develop green, blue, black, or other colored patches. If you believe the batch has developed mold, discard it rather than trying to rescue it.
Step 7 – Check the Vinegar
After several weeks, begin checking the vinegar periodically using a clean utensil.
You are looking for the familiar sharp vinegar aroma and an acidic flavor rather than the sweetness of apple juice or the alcoholic character of fermented cider.
If it isn’t there yet, let the batch continue fermenting.
Homemade vinegar doesn’t have to follow an exact calendar. Allow the fermentation itself to determine when the vinegar is ready.
Step 8 – Bottle and Store
Once you’re satisfied with the flavor, strain the vinegar again if necessary and transfer it into clean glass bottles or jars.
At this point, the vinegar can be capped for storage.
Don’t be concerned if your homemade vinegar isn’t perfectly clear. Raw vinegar may contain sediment, cloudiness, or a vinegar mother. Commercial vinegar generally looks clearer because it is often filtered and sometimes pasteurized.
Making Traditional Apple Cider Vinegar
If you have a cider press, juicer, or fresh preservative-free apple cider, you can also make traditional apple cider vinegar.
Instead of starting with apple scraps and sugar water, start with fresh apple juice. The natural sugars in the juice are first fermented into alcohol, producing hard cider. Once alcoholic fermentation is largely complete, the cider is exposed to oxygen so acetic-acid bacteria can convert the alcohol into vinegar.
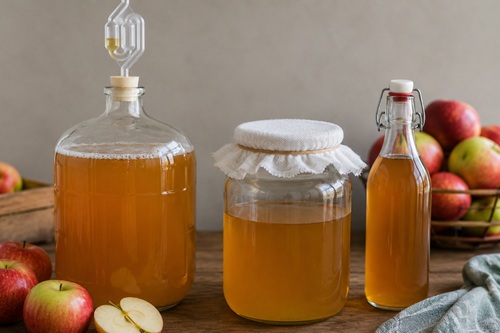
An appropriate cider or wine yeast can make the first fermentation more predictable. During this alcoholic stage, a fermentation vessel fitted with an airlock provides a more controlled environment.
Once alcoholic fermentation has finished, transfer the cider to a clean wide-mouth glass container and cover it with a breathable covering. Raw vinegar containing active cultures or an established vinegar mother can be added to help introduce the bacteria responsible for vinegar production.
Give it several more weeks and allow the vinegar character to develop before bottling.
What Can You Use Homemade Apple Vinegar For?
Homemade apple vinegar can be useful for salad dressings, sauces, marinades, and other recipes where you want a tart vinegar flavor. Apple scrap vinegar can also be useful for certain household cleaning applications.
Making it is especially worthwhile if you regularly process apples. Instead of throwing peels and cores away, you can turn another part of the harvest into something useful.
There is, however, one important limitation.
Important Canning and Pickling Warning
Do not substitute homemade apple cider vinegar or apple scrap vinegar for commercial 5% acidity vinegar in tested shelf-stable canning or pickling recipes unless the acidity of your homemade vinegar has been properly verified.
Homemade vinegar can vary considerably in acidity from batch to batch. A strong vinegar smell or sharp taste doesn’t prove that the vinegar has reached the acidity required for safe home canning.
The source material makes the same important distinction: homemade vinegar shouldn’t be assumed to have the 5% acidity required for preservation.
When a tested preservation recipe calls for 5% acidity vinegar, use commercially produced vinegar labeled at the required acidity unless you have an appropriate method for verifying the acidity of your homemade batch.
Key Takeaways
The easiest apple scrap vinegar recipe is simple: fill a clean jar about three-quarters full with apple peels and cores, mix 1 tablespoon of sugar into every cup of non-chlorinated water you need, completely cover the apples, and let fermentation do the work.
After about two weeks, strain out the apples and allow the liquid to continue fermenting for another two to four weeks or longer until it develops the characteristic smell and flavor of vinegar.
It takes patience rather than complicated equipment. Keep everything clean, keep the fruit submerged, allow airflow, watch for signs of contamination, and give the fermentation enough time to finish.
Most importantly, this is another way to get more value from an apple harvest. Peels and cores that might normally end up in the garbage or compost pile can instead become a useful homemade vinegar.
© Prepping Communities. This content is for informational purposes only and not professional advice. Use at your own risk.
Terms | Privacy | Guidelines