
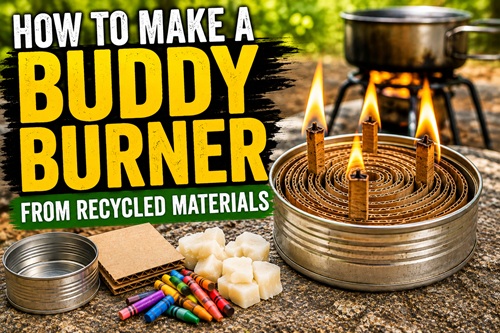
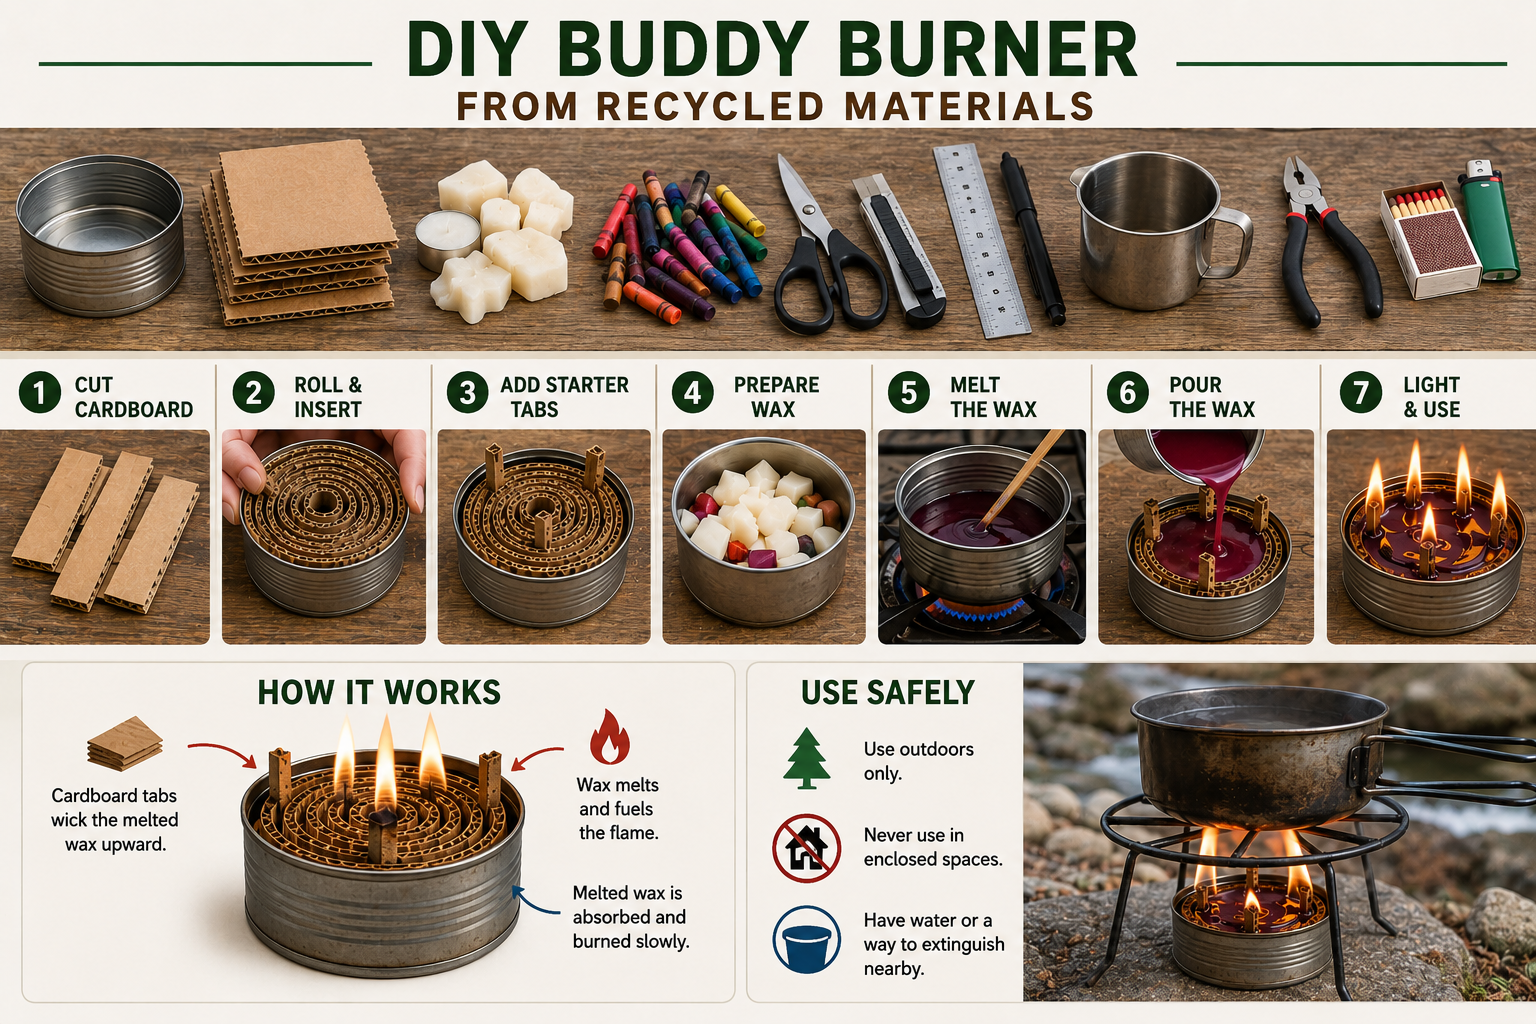
A buddy burner is a simple homemade heat source that can be made almost entirely from materials that would normally be thrown away. A small metal can, corrugated cardboard, and leftover wax are the main ingredients. The finished burner works somewhat like a large candle, with the cardboard helping draw melted wax toward the flame.
Buddy burners have been used for camping, emergency cooking, and preparedness for generations because they are inexpensive and surprisingly easy to make. They are also a good example of how ordinary household materials can be repurposed into something useful. Because a buddy burner produces an open flame and the metal can becomes extremely hot, it should only be used outdoors on a stable, noncombustible surface.
What You Will Need
You don’t need much to make one. Start with a clean, shallow metal can such as a tuna can. You will also need corrugated cardboard, leftover candle wax, paraffin wax, or broken crayons, along with scissors or a utility knife. A ruler and marker make cutting the cardboard easier. You will also need a heat-safe container for melting the wax, pliers or heat-resistant gloves for handling hot containers, and matches or a lighter when you are ready to test the burner.
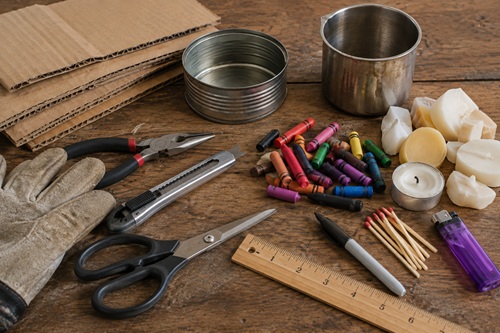
Old candle ends are generally a better choice than crayons because they are primarily intended to burn. Crayons can work, but their pigments and other additives may cause them to burn differently or produce additional smoke.
Step 1 – Cut the Cardboard
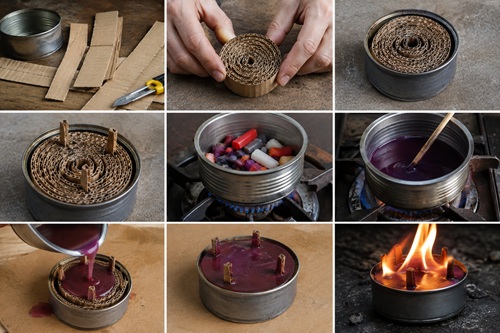
Begin by measuring the inside height of your metal can. Cut long strips of corrugated cardboard slightly shorter than the height of the can so they will fit neatly inside without extending far above the rim. With a typical tuna can, strips around 1 to 1¼ inches wide will usually be close, but measuring your particular can gives you a better fit.
Plain corrugated cardboard from shipping boxes works well. Avoid cardboard that is heavily coated, laminated, oily, or covered with plastic because those materials aren’t something you want burning in your buddy burner.
Cut several long strips because it usually takes more cardboard than expected to completely fill the can.
Step 2 – Roll the Cardboard Into the Can
Take your first cardboard strip and begin rolling it tightly into a coil. When you reach the end, tuck another strip against it and continue rolling. Keep adding strips until the cardboard coil is approximately the same diameter as the inside of your metal can.
Test the roll by placing it inside the can. It should fit snugly enough that it doesn’t fall apart but shouldn’t need to be forced aggressively into place. If the roll is too small, add another strip. If it is too large, remove or trim some cardboard.
Once the size is right, push the entire cardboard roll into the can. The top of the cardboard should sit roughly level with or slightly below the rim.
Step 3 – Add Small Starter Wicks
The rolled cardboard can act as the wick, but adding a few small cardboard starter tabs makes the burner easier to light. Cut several narrow pieces of cardboard and push them into gaps between the rolled layers.
Only a small amount needs to extend above the surface. These pieces provide an easy place for a match or lighter to start the flame. Once the burner gets hot enough, the surrounding wax begins melting and feeding the flame through the cardboard.
Avoid making the tabs excessively long because you want the wax to become the main fuel rather than simply burning exposed pieces of dry cardboard.
Step 4 – Prepare the Wax
Next, prepare your wax. Leftover candle stubs are ideal because this gives you another opportunity to reuse something that would otherwise be discarded. Paraffin wax also works well, and old broken crayons can be used if that is what you have available.
Remove paper wrappers, old wick pieces, labels, and other debris before melting the wax. Place the wax into a heat-safe container that you don’t mind dedicating to projects like this.
Wax should always be heated carefully because it is combustible. Never leave melting wax unattended, and don’t allow it to become hot enough to smoke. Using indirect heat, such as a water-bath arrangement, provides better temperature control than heating wax directly over an open flame. Keep water from getting into the melted wax.
Step 5 – Pour the Wax Into the Burner
Place the cardboard-filled can on a heat-resistant work surface before pouring. Once the wax has completely melted, carefully pour a small amount over the cardboard and give it a moment to soak in.
Continue adding wax gradually, working your way around the can. You want the melted wax to penetrate deeply into the corrugated cardboard rather than simply forming a thick layer across the top.
You may notice the wax level dropping shortly after you pour it. That is normal because the cardboard is absorbing the liquid wax. Continue adding small amounts until the cardboard is thoroughly saturated while leaving the small starter tabs partially exposed.
Don’t fill the can all the way to the rim. Leaving a little space at the top reduces the chance of hot liquid wax spilling when the burner is eventually used.
Step 6 – Let Everything Cool
Once the cardboard has absorbed the wax, leave the burner alone until everything has completely cooled. The metal can can remain surprisingly hot after the wax has been poured, so don’t assume it is safe to handle just because the surface of the wax has begun to harden.
Allow the wax to solidify naturally. Don’t pour water onto the burner to speed up the cooling process.
When completely cool, the cardboard should feel securely held in place by the hardened wax. At this point, your buddy burner is finished.
Step 7 – Light the Buddy Burner
Choose your location carefully before lighting it. Place the buddy burner outdoors on bare soil, stone, concrete, or another stable, noncombustible surface. Clear away dry grass, leaves, wood, fuel, and anything else that could catch fire. Keep water or another suitable method of extinguishing a nearby fire available.
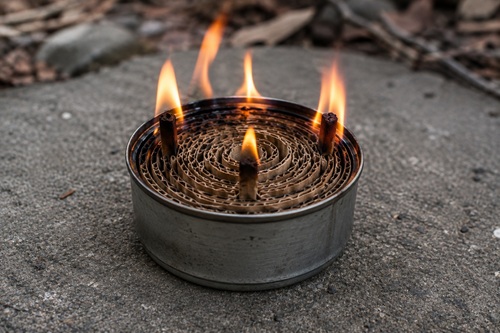
Light one or more of the exposed cardboard starter tabs. Initially, you may see mostly cardboard burning. As the burner heats, the wax surrounding the cardboard begins to melt. The cardboard then draws some of that liquid wax toward the flame, allowing the wax to become the primary fuel.
The flame may gradually spread across more of the cardboard surface as the burner warms. Never pick up or move the burner once it has been lit. The metal can becomes extremely hot and may contain liquid wax.
How a Buddy Burner Works
The easiest way to understand a buddy burner is to think of it as an oversized candle. A normal candle uses a small wick to draw melted wax toward the flame. Heat from the flame vaporizes some of that wax, and the wax vapor burns.
A buddy burner works on the same basic principle, except corrugated cardboard takes the place of the traditional wick. The cardboard contains numerous small spaces and exposed edges that absorb melted wax and help move it toward the burning surface.
This is why tightly packing the cardboard and thoroughly saturating it with wax are important. The cardboard provides the structure while the wax supplies most of the usable fuel.
Cooking With a Buddy Burner
A buddy burner can provide enough heat for simple outdoor cooking, but cookware should not be placed directly on top of the burner. Doing so can restrict airflow, interfere with the flame, and create an unstable cooking setup.
Instead, use a separate stable metal support that holds a small pot or pan above the flame while leaving enough space for air to circulate around the burner. Keep the entire setup low and stable so cookware cannot easily tip over.
Buddy burners can also produce soot, so don’t be surprised if the bottom of your cookware becomes blackened. They are improvised emergency heat sources rather than clean-burning modern camping stoves.
Never operate a buddy burner inside a house, garage, vehicle, tent, RV, shed, or other enclosed or partially enclosed space. Burning fuel can produce dangerous combustion gases in addition to creating a serious fire hazard.
Putting Out the Burner
When you are finished using the burner, the safest approach is to smother the flame with a larger metal lid or other suitable noncombustible cover. Covering the burner removes the oxygen needed to keep the flame burning.
Avoid blowing forcefully onto the burner because there may be liquid wax near the surface. More importantly, never pour water onto burning or extremely hot wax. Water can cause hot wax to splash or spread.
After the flame has gone out, leave the burner exactly where it is until the metal and wax have completely cooled. Once the wax hardens again, the burner can usually be stored and reused.
Reusing and Storing Your Buddy Burner
One advantage of this simple design is that the burner doesn’t necessarily have to be discarded after one use. If enough wax and cardboard remain, allow everything to cool and simply relight it the next time it is needed.
Store a completely cooled buddy burner in a dry location away from excessive heat or ignition sources. Keeping it inside a metal container can help protect it and prevent softened wax from making a mess if storage temperatures become unusually warm.
Eventually, most of the wax and cardboard will be consumed. At that point, the metal can may be cleaned out and reused to build another buddy burner.
Key Takeaways
Making a buddy burner is a simple project that demonstrates how ordinary discarded materials can be turned into something useful. A shallow metal can provides the container, corrugated cardboard acts as the wick and fuel-delivery structure, and leftover wax supplies the energy.
The process itself is straightforward: cut cardboard to fit the can, roll it tightly, add a few small starter tabs, saturate the cardboard with melted wax, and allow everything to cool completely.
The project also teaches something more useful than simply how to make another piece of emergency equipment. It demonstrates how understanding basic principles can allow common materials to be repurposed when conventional equipment isn’t available.
A buddy burner is still a real open-flame device and should be treated accordingly. Use it outdoors, keep it away from combustible materials, never leave it unattended, don’t move it while it is burning, and always allow it to cool completely before handling or storing it.
© Prepping Communities. This content is for informational purposes only and not professional advice. Use at your own risk.
Terms | Privacy | Guidelines