
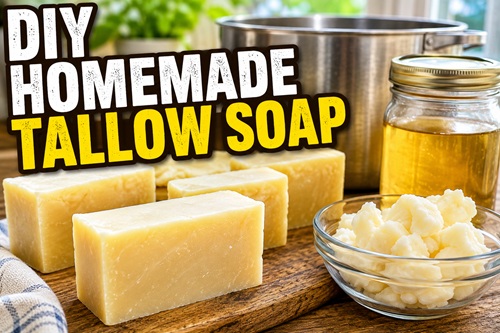
Make Simple, Long-Lasting Soap From Tallow, Lye, and Water
Homemade tallow soap is a practical way to turn rendered beef fat into hard, long-lasting bars of soap. The basic version requires only three ingredients: clean rendered tallow, distilled water, and sodium hydroxide, commonly called lye. The process is straightforward. You melt the tallow, prepare the lye solution, combine the two, blend the mixture until it thickens, pour it into a mold, and allow the finished bars to cure.
Soapmaking does require accuracy. Unlike many DIY projects where measurements can be adjusted as you work, soap depends on the correct relationship between the fat and lye. The ingredients should be weighed rather than estimated, and the amount of lye should never be casually increased or decreased.
This batch makes approximately 2½ pounds of soap, or about 7–8 bars, depending on the size of your mold and how thick you cut them.
What You’ll Need
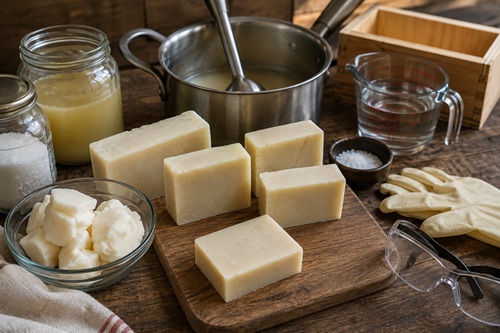
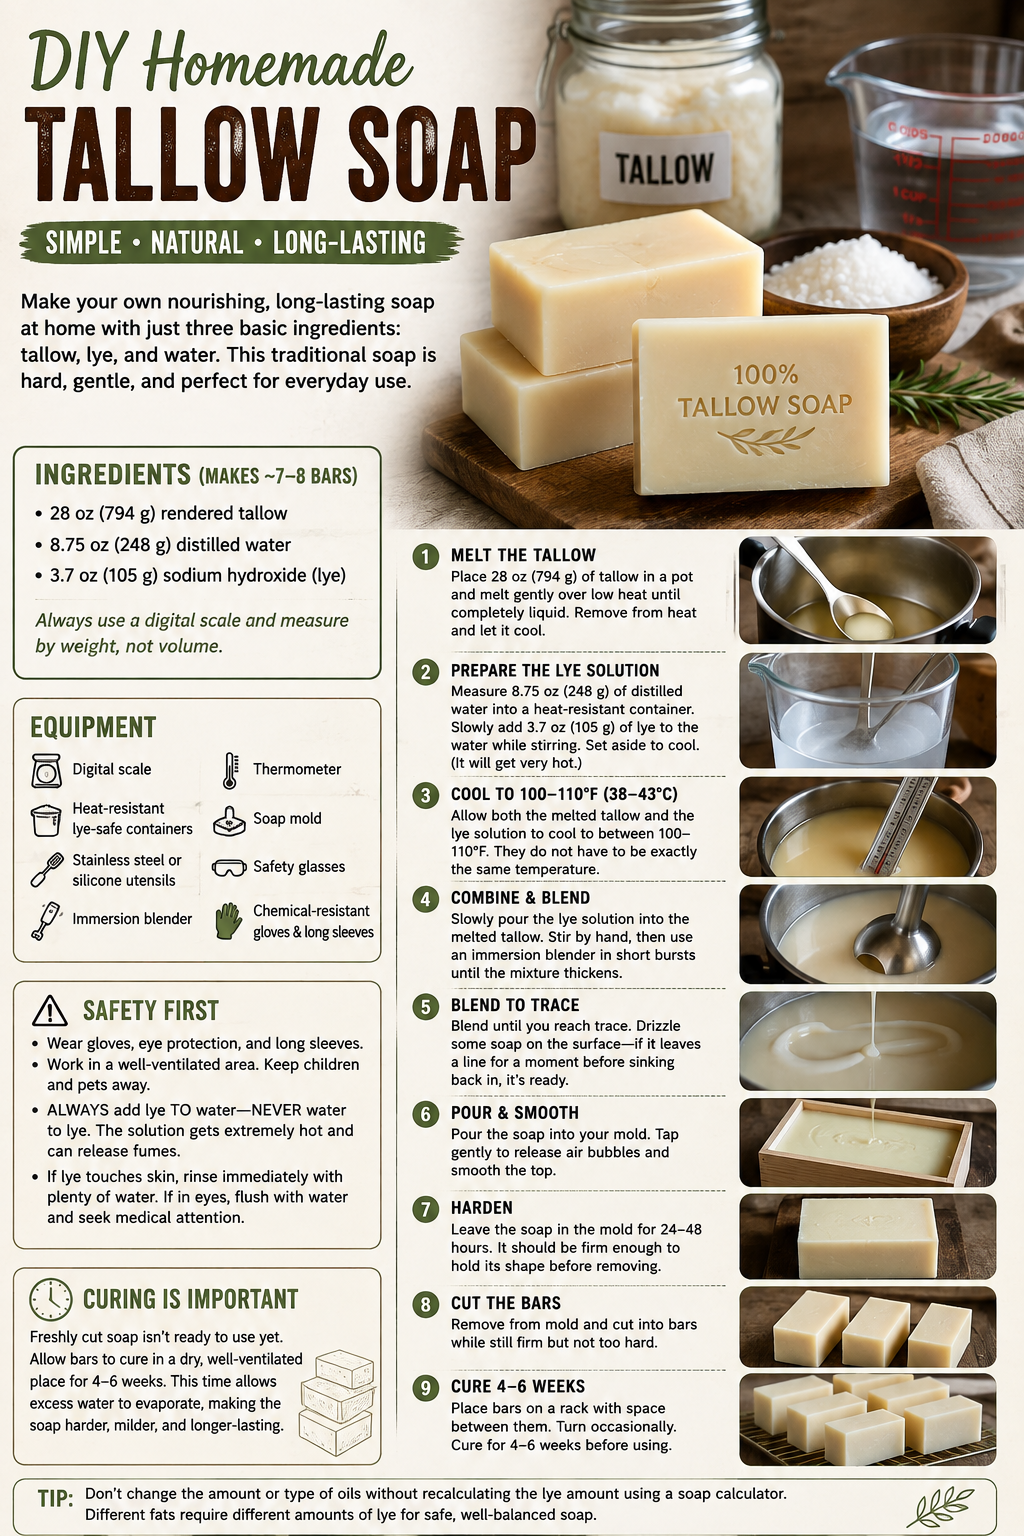
For this batch, you will need 28 ounces (794 g) of clean rendered tallow, 8.75 ounces (248 g) of distilled water, and 3.7 ounces (105 g) of sodium hydroxide (lye). Measure all three ingredients by weight using a digital scale rather than measuring cups.
You’ll also need a heat-resistant lye-safe container, a container for the melted tallow, stainless-steel or silicone mixing utensils, an immersion blender, thermometer, soap mold, digital scale, safety glasses, chemical-resistant gloves, and long sleeves. Avoid aluminum containers or utensils because aluminum reacts with lye. Stainless steel and suitable heat-resistant plastics are better choices.
How to Render Beef Fat Into Tallow
If you already have clean rendered tallow, you can skip this section. If you’re starting with raw beef fat, you’ll need to render it before making soap. Rendering separates the usable fat from pieces of meat, connective tissue, and other material that you don’t want in your finished soap.
Beef suet, the firm fat found around the kidneys and loins, is especially good for making tallow, although other clean beef fat trimmings can also be rendered. Start by trimming away as much meat, blood, and connective tissue as practical. Cut the fat into small pieces or grind it. Smaller pieces render more evenly and make it easier to extract the fat without excessive heating.
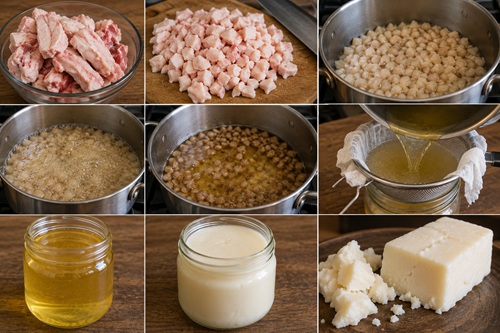
Place the prepared fat in a heavy pot or slow cooker and heat it slowly over low heat. The goal is to melt the fat, not fry or brown it. As it warms, liquid fat will gradually separate from the remaining solid material. Stir occasionally and keep the heat low enough that the solids don’t burn.
Continue heating until most of the usable fat has melted and the remaining solid pieces have shrunk considerably. Remove the pot from the heat and carefully pour the hot liquid fat through a fine-mesh strainer lined with cheesecloth into a clean, heat-safe container. This removes the larger pieces of meat, connective tissue, and other solids.
Allow the strained fat to cool. Properly rendered beef tallow will become firm as it cools and is generally pale cream to white when clean. If you can still see sediment, water, or other impurities, the tallow can be melted and strained again before using it for soap.
For soapmaking, starting with clean, dry tallow is important. Any remaining water or food material can affect storage and the quality of the finished product. Once the tallow is clean and fully cooled, weigh out the amount required for the soap recipe.
What You’re Looking For
Your finished tallow should be firm, clean, well-strained, and free of obvious meat, sediment, or water. It should smell like clean rendered fat rather than burnt, rancid, or spoiled meat.
Once you have clean tallow, you’re ready to make the soap.
Start With Clean Tallow
The quality of your finished soap begins with the tallow. Use tallow that has been properly rendered and strained rather than raw beef fat. It should be free of pieces of meat, connective tissue, sediment, and obvious water.
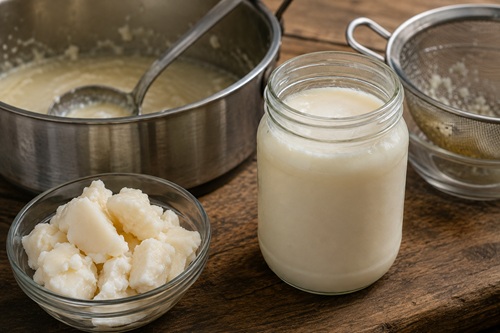
When cooled, properly rendered tallow should be firm. If your tallow contains visible impurities or moisture left over from rendering, clean or re-render it before making soap. If it smells obviously rancid or spoiled, don’t try to cover the smell with fragrance. Start with better tallow.
Work Safely With Lye
Lye is highly caustic before it reacts with the fat, so put on gloves, safety glasses, and long sleeves before beginning. Work in a well-ventilated area and keep children and pets away from your work area.
The most important rule to remember is always add lye to water, never water to lye. When lye dissolves in water, the solution becomes extremely hot and can initially release irritating fumes. Keep your face away from the container and don’t breathe directly over it.
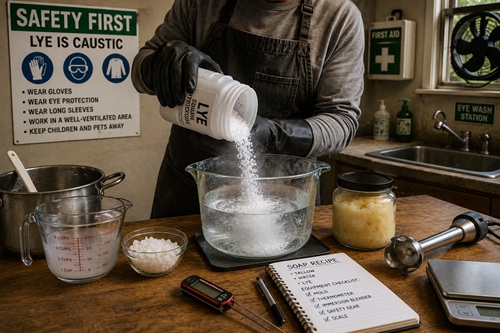
If lye or fresh soap mixture gets on your skin, remove contaminated clothing and rinse the affected area thoroughly with plenty of running water. If it gets into your eyes, flush them continuously with clean water and seek urgent medical attention.
Have all your equipment ready and your ingredients measured before you begin. Once you start mixing, you don’t want to discover that your mold, thermometer, or immersion blender is somewhere else.
Step 1 – Measure and Melt the Tallow
Begin by weighing 28 ounces (794 g) of rendered tallow and placing it into your soapmaking container. Slowly warm the tallow until it becomes completely liquid. You aren’t trying to cook or fry the fat, so use only enough heat to melt it.
Once the tallow has completely melted, remove it from the heat and allow it to begin cooling. If it starts becoming cloudy or solidifying around the edges before you’re ready to combine it with the lye solution, gently warm it again until it is completely liquid.
Step 2 – Prepare the Lye Solution
Measure 8.75 ounces (248 g) of distilled water into a heat-resistant lye-safe container. In a separate container, carefully weigh 3.7 ounces (105 g) of lye.
With your gloves and eye protection on, slowly add the lye to the water while gently stirring. Don’t dump the entire amount into the water at once. As the lye dissolves, the solution will become very hot. This is normal.
Continue stirring gently until the lye has completely dissolved and you no longer see undissolved granules. Set the container somewhere secure where it cannot be knocked over, mistaken for drinking water, or reached by children or animals.
Step 3 – Let Everything Cool
Allow both the melted tallow and the lye solution to cool to approximately 100–110°F (38–43°C). Depending on the temperature of the room and the containers you’re using, the lye solution may take around 20–40 minutes to cool.
The two mixtures don’t need to reach exactly the same temperature at exactly the same time. The goal is simply to have them in roughly the same workable temperature range while making sure the tallow remains completely liquid.
Use this waiting time to prepare your mold and clear unnecessary equipment from the work area.
Step 4 – Combine the Tallow and Lye Solution
Once the tallow and lye solution have cooled into the proper range, slowly pour the lye solution into the melted tallow. Begin stirring carefully by hand before switching to the immersion blender.
Use the immersion blender in short bursts rather than running it continuously. Blend for several seconds, stop and stir manually, then blend again. At first, the mixture may look thin and oily, but it should gradually become more uniform and creamy as the ingredients combine.
Continue alternating between blending and stirring until the mixture begins to noticeably thicken.
Step 5 – Blend Until You Reach Trace
The point you’re looking for is called trace. Despite the soapmaking terminology, it’s easy to recognize once you know what you’re looking for.
Lift the blender or spatula slightly and allow some of the soap mixture to drizzle across the surface. If the drizzle leaves a visible trail for a moment before sinking back into the mixture, the soap has reached trace. The consistency may resemble thin pudding, custard, or lightly thickened cake batter.
You don’t need to continue blending until the mixture becomes extremely thick. A lighter trace is actually easier to pour into the mold. If the soap begins thickening quickly, stop blending and move directly to the next step.
Step 6 – Pour the Soap Into the Mold
Carefully pour the soap mixture into your prepared mold. Use a silicone spatula to scrape the remaining soap from the mixing container and smooth the top if necessary. Gently tapping the mold against the work surface a few times can help release trapped air.
Move the mold somewhere protected where it can remain undisturbed. Fresh soap should still be treated carefully because the soapmaking reaction isn’t finished. Keep wearing your gloves when handling the mold, cleaning equipment, or dealing with spills.
Step 7 – Let the Soap Harden
Leave the soap undisturbed in its mold for approximately 24–48 hours. The exact amount of time can vary depending on room temperature, mold size, and the batch itself, so don’t rely entirely on the clock.
The soap should be firm enough to hold its shape when removed. If it is still very soft, sticky, or easily dented, leave it in the mold longer.
Tallow normally produces a fairly hard bar. Once the loaf has become firm enough to remove, don’t leave it sitting unnecessarily for several more days because it may become more difficult to cut.
Step 8 – Remove and Cut the Bars
Put your gloves back on before handling freshly unmolded soap. Carefully remove the soap from the mold and place it on a clean work surface.
If you used individual bar molds, you can move directly to curing. If you used a loaf mold, cut the loaf into individual bars while it is firm but still reasonably easy to slice. Waiting too long can make a tallow soap loaf considerably harder to cut cleanly.
The exact number of bars doesn’t matter, but this recipe should produce approximately 7–8 normal-sized bars.
Step 9 – Cure the Soap for 4–6 Weeks
Freshly cut soap may look finished, but it still needs time to cure. Arrange the bars on a rack, tray, or clean surface where air can circulate around them. Leave some space between the bars instead of stacking them together.
Allow the soap to cure in a dry, well-ventilated location for approximately 4–6 weeks. Turn the bars occasionally so different surfaces are exposed to the air. During this time, excess water gradually evaporates and the bars become harder and longer lasting.
Don’t try to speed curing by sealing the bars in containers or placing them somewhere excessively hot. Good airflow and time are what the soap needs.
One simple way to watch the curing process is to weigh one bar when you first cut it and write down the weight. Weigh that same bar periodically. Its weight should gradually decrease as water evaporates. Eventually the weight loss will slow considerably as the bar finishes curing.
If Something Doesn’t Look Right
Don’t panic if your first batch doesn’t behave exactly as expected. If the soap is taking longer to reach trace but remains evenly mixed, continue alternating short bursts with the immersion blender and hand stirring. Sometimes reaching trace simply takes longer.
If the mixture separates into obvious oily and watery layers while you’re still mixing, continue carefully blending to see whether it comes back together. If the soap becomes extremely thick instead, stop blending and get it into the mold before it becomes difficult to work with.
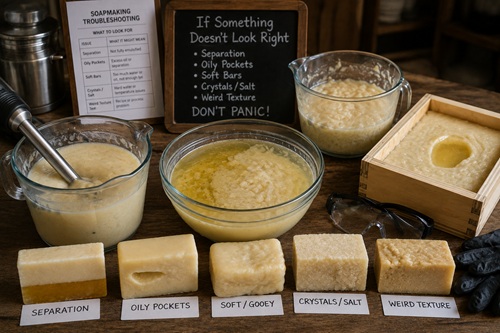
After molding, a bar that is still somewhat soft may simply need more time. However, obvious pockets of liquid, unusual crystals, severe separation, or persistent oily areas can indicate that something went wrong with the batch.
Don’t assume that leaving a questionable batch to cure for several weeks will automatically make it safe. Curing removes water and hardens properly made soap; it doesn’t correct a serious measurement error or an incorrect amount of lye.
Never taste soap or touch it to your tongue to determine whether lye remains.
Clean Up Carefully
Keep your gloves and eye protection on while cleaning your work area. Scrape as much remaining soap mixture from your equipment as practical before washing it, and be especially careful with anything that held the lye solution or fresh soap.
Once everything is cleaned, securely close the original lye container and store it somewhere dry and inaccessible to children and pets. Keep it clearly labeled and never transfer lye into an unmarked food or beverage container.
Store Your Finished Tallow Soap
Once the bars have completed their 4–6 week cure, store them somewhere cool and dry. Avoid trapping moisture around the soap, particularly if you’re storing a large batch.
If you make soap regularly, label each batch with the date it was made. That makes it easier to rotate older soap first and also helps you identify a particular batch if you notice a problem later.
Changing the Recipe
Once you’ve successfully made basic tallow soap, you may eventually want to experiment with other fats and oils. Coconut oil, olive oil, lard, and other soapmaking fats can change the hardness, cleansing ability, and lather of the finished bar.
However, don’t simply substitute another oil for some of the tallow while continuing to use 105 g of lye. Different fats require different amounts of sodium hydroxide. Whenever the amount or type of fat changes, the entire recipe needs to be recalculated with a reliable soapmaking lye calculator.
Fragrances and other additions also require some understanding of soap formulation, so mastering the simple three-ingredient version first gives you a good foundation for experimenting later.
DIY Project Complete
Once the soap has spent approximately 24–48 hours in the mold, it should be firm enough to remove and cut. After another 4–6 weeks of curing, you’ll have approximately 7–8 homemade tallow soap bars ready for regular use.
The basic process is easy to remember: measure the ingredients, melt the tallow, prepare the lye solution, allow both mixtures to cool, combine them, blend to trace, pour into the mold, cut the bars, and let them cure.
It’s a relatively simple DIY project, but it teaches a useful practical skill: how to take rendered animal fat and turn it into a durable household product using a small number of basic ingredients.
© Prepping Communities. This content is for informational purposes only and not professional advice. Use at your own risk.
Terms | Privacy | Guidelines