
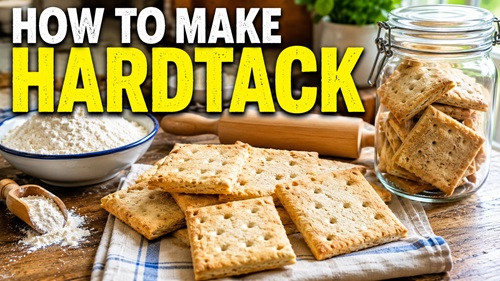
Hardtack is one of the simplest emergency foods you can learn to make. At its most basic, it requires nothing more than flour, water, salt, heat and time. It isn’t supposed to be soft bread, and it certainly isn’t something most people would choose for dinner when better food is available. Hardtack was developed for durability. By removing most of the moisture from a simple flour-and-water dough, people were able to create a compact grain food that could be carried and stored far longer than ordinary bread.
For preparedness, the real value of learning to make hardtack goes beyond the food itself. It teaches one of the fundamental principles of food preservation: moisture matters. Most microorganisms responsible for food spoilage need available moisture. Removing as much moisture as practical, then protecting the finished food from humidity, insects and contamination, can dramatically improve its storage potential. Hardtack is a simple way to see that principle in action.
What Hardtack Actually Is
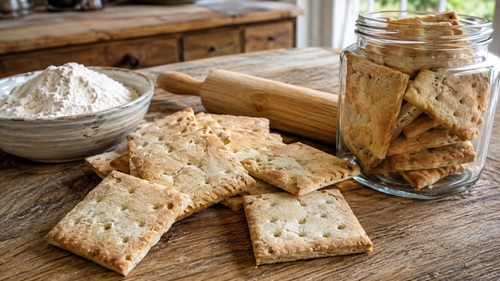
Hardtack is a very dry unleavened biscuit traditionally made from flour, water and sometimes salt. There is no yeast or baking powder because the objective isn’t to make the dough rise. In fact, the finished biscuit should remain approximately the same thickness as the dough that went into the oven. Instead of creating a light, soft interior like bread, hardtack is baked slowly until it becomes extremely dry and hard.
Versions of dried grain breads have been used for centuries by sailors, soldiers, travelers and others who needed food that could survive transportation without refrigeration. That history makes hardtack interesting, but it shouldn’t lead to the idea that it is some kind of perfect survival food. Hardtack is primarily a source of carbohydrates. For modern preparedness, it makes much more sense as one component of an emergency pantry containing stored beans, grains, preserved meat, fruits, vegetables, fats and other foods.
What You Need
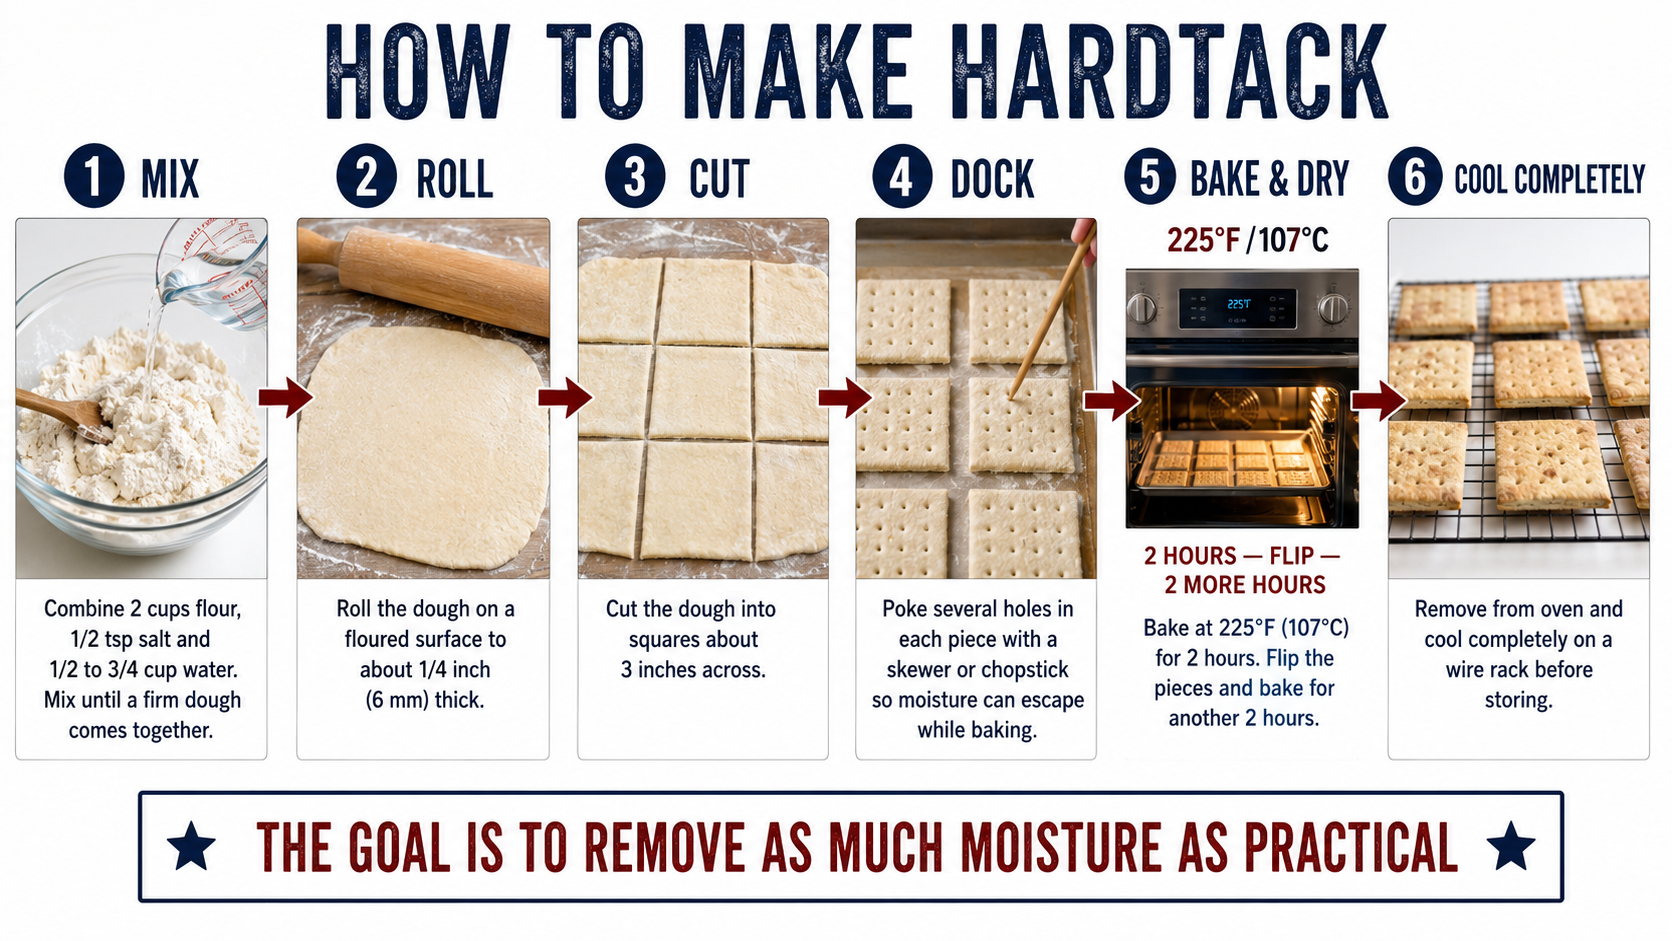
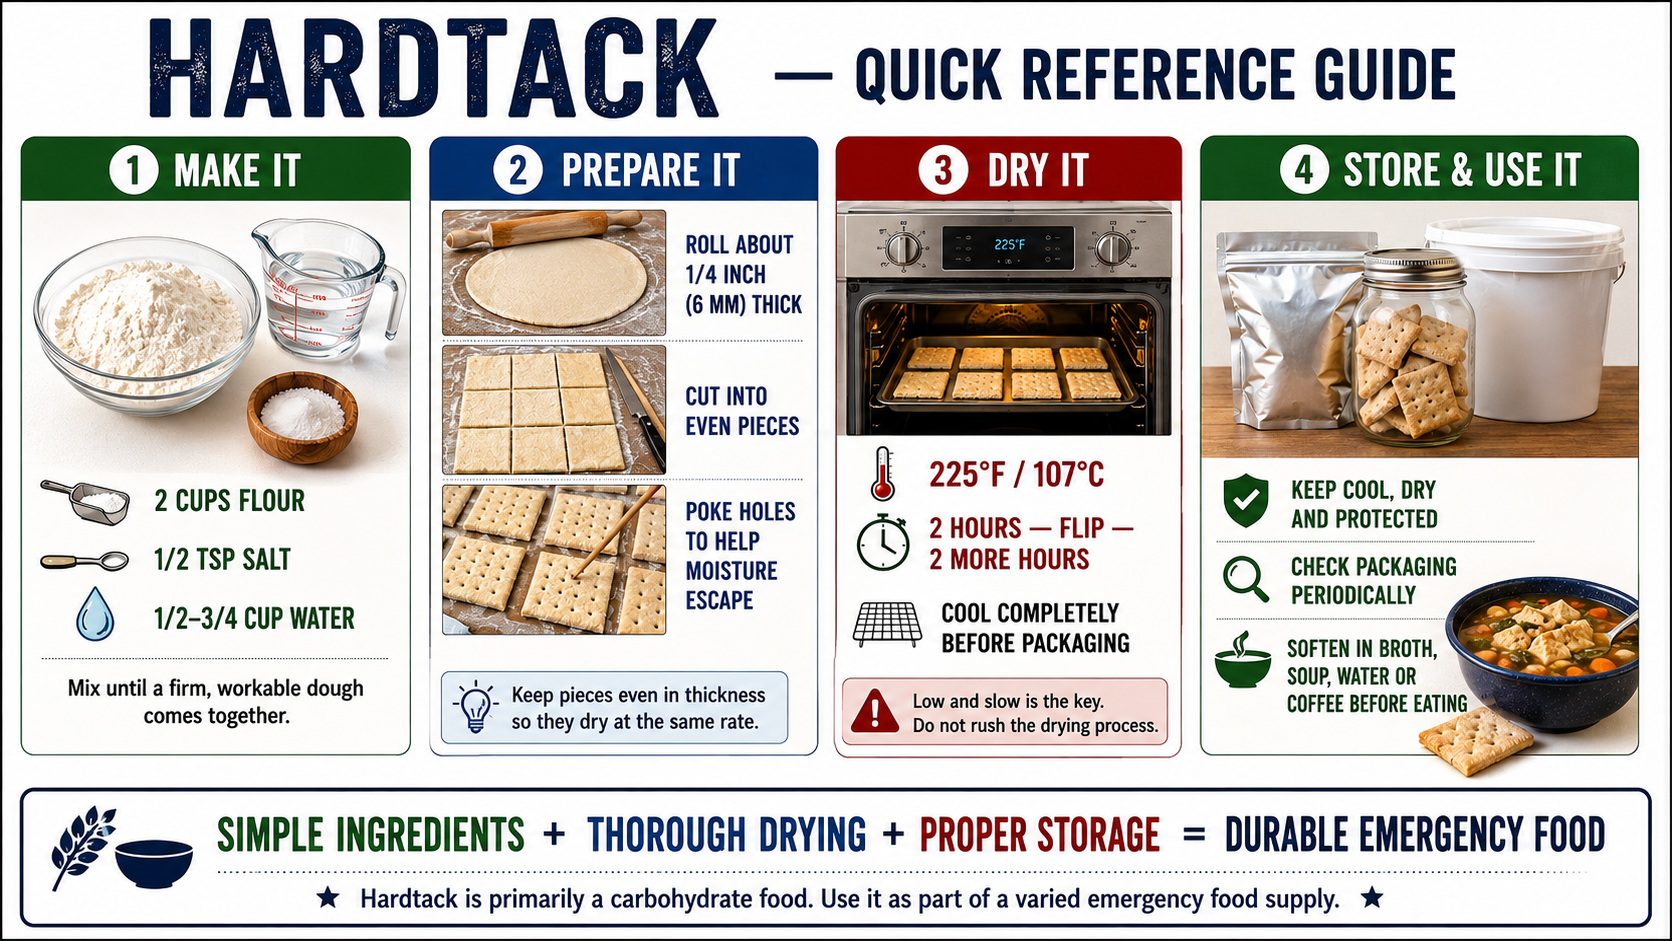
A basic batch can be made with 2 cups of white all-purpose flour, 1/2 teaspoon of salt and approximately 1/2 to 3/4 cup of water. You will also need a mixing bowl, measuring cup, rolling pin or similar object, knife or cutter, baking sheet, cooling rack and something narrow such as a skewer or chopstick for making holes in the dough.
White flour is generally a better choice when storage is the priority because whole-grain flour contains more natural oils. Those oils can eventually oxidize and become rancid. This is an important distinction because a food that is more nutritious when fresh isn’t necessarily the better choice for very long storage. Hardtack works because the recipe is intentionally simple.
Step 1 — Make the Dough
Place the flour and salt into a clean mixing bowl and combine them. Start by adding approximately half a cup of water and work it into the flour. Add additional water gradually rather than pouring the entire amount in at once. Flour behaves differently depending on the type being used, environmental humidity and even how it was measured, so there isn’t one exact amount of water that will be perfect for every batch.
The finished dough should hold together well enough that you can roll and shape it, but it shouldn’t feel like soft bread dough. If it is wet, sticky or spongy, too much water has probably been added. Work in a little more flour. If it is so dry that it crumbles apart, add a very small amount of water and continue mixing. You’re trying to create workable dough while introducing as little unnecessary moisture as possible.
When preparing hardtack for storage, resist the temptation to improve the recipe with butter, oil, milk, eggs or other ingredients normally used in bread and biscuits. They may make the finished product taste better, but they can also shorten its useful storage life. If you’re making hardtack for a weekend camping trip, experimenting isn’t much of a concern. If you’re making it specifically as a long-term emergency food, simplicity is an advantage.
Step 2 — Roll and Cut the Dough
Lightly flour a clean work surface and roll the dough to approximately 1/4 inch, or about 6 millimeters, thick. Try to maintain a fairly consistent thickness across the entire piece. If sections are much thicker than others, the outside can become extremely hard while moisture remains trapped toward the center. Very thin pieces can become brittle or brown too quickly. Around a quarter inch provides a practical starting point.
Cut the rolled dough into squares approximately three inches across, or make smaller rectangles or circles if those shapes work better for your storage containers. There is nothing particularly important about the traditional square shape. Consistent thickness matters much more. Smaller pieces can actually be convenient because they fit more easily into jars and storage packages and can be portioned more easily later.
Step 3 — Dock the Hardtack
Before putting the pieces into the oven, use a clean skewer, chopstick or similar utensil to poke several holes across each one. This is called docking. The familiar holes seen in traditional hardtack aren’t there just for appearance. They help moisture and steam escape from the dough as it heats and dries.
This step illustrates what you’re really trying to accomplish. Baking hardtack isn’t simply about cooking flour. You’re deliberately trying to remove moisture throughout the entire biscuit. Anything that helps moisture escape from the interior contributes to that process.
Step 4 — Bake Low and Slow
Place the pieces onto a clean, dry baking sheet and put them into an oven heated to approximately 225°F (107°C). Avoid greasing the baking sheet with butter or oil when making hardtack intended for storage. Fat transferred to the biscuit defeats part of the reason for using such a simple low-fat recipe.
Bake the hardtack for approximately two hours, remove the tray and carefully turn each piece over. Return the tray to the oven and continue baking and drying for approximately another two hours. The exact time can vary depending on the thickness of your pieces, the oven and environmental humidity, so don’t treat four hours as an absolute rule.
Hardtack shouldn’t be judged the way you would judge cookies or ordinary biscuits. You’re not waiting for a particular golden-brown appearance. The goal is thorough drying. Low heat and a long drying period allow moisture inside the biscuit more opportunity to migrate outward and escape without simply burning the exterior.
Step 5 — Cool and Dry Completely
When the hardtack is finished, transfer the pieces to a wire rack and allow them to cool completely. Don’t rush this part. Putting warm hardtack directly into an airtight storage container can trap residual warmth and moisture. If condensation develops inside the package, you have introduced exactly the condition you were trying to eliminate.
If you live in a dry environment, allowing the hardtack additional time exposed to clean, dry air can help remove remaining surface moisture. The finished pieces should feel extremely hard and dry. If you are uncertain whether a thick piece has dried completely, break one open and inspect the center before packaging the entire batch. It is better to discover a drying problem now than after the food has been sitting in storage.
Storing Hardtack
Storage is just as important as preparation. The primary enemies are moisture, oxygen, insects, heat and damaged packaging. Once the hardtack is completely cooled and dry, place it into an appropriate airtight food-storage container. Depending on your intended storage period, food-grade Mylar packaging, vacuum-sealed packaging or other suitable food-storage systems can provide additional environmental protection. Oxygen absorbers may also be appropriate when they are used correctly and according to the manufacturer’s instructions.
Whatever packaging method you use, the basic principle remains the same: keep the hardtack cool, dry and protected from pests and environmental moisture. Label the container with the preparation date and periodically include it in your stored-food inspections. Long-term packaging should never be treated as a guarantee that food will remain safe forever. If you eventually open a package and find moisture, mold, pest activity, damaged packaging, an unusual odor or anything else that suggests deterioration, discard the food.
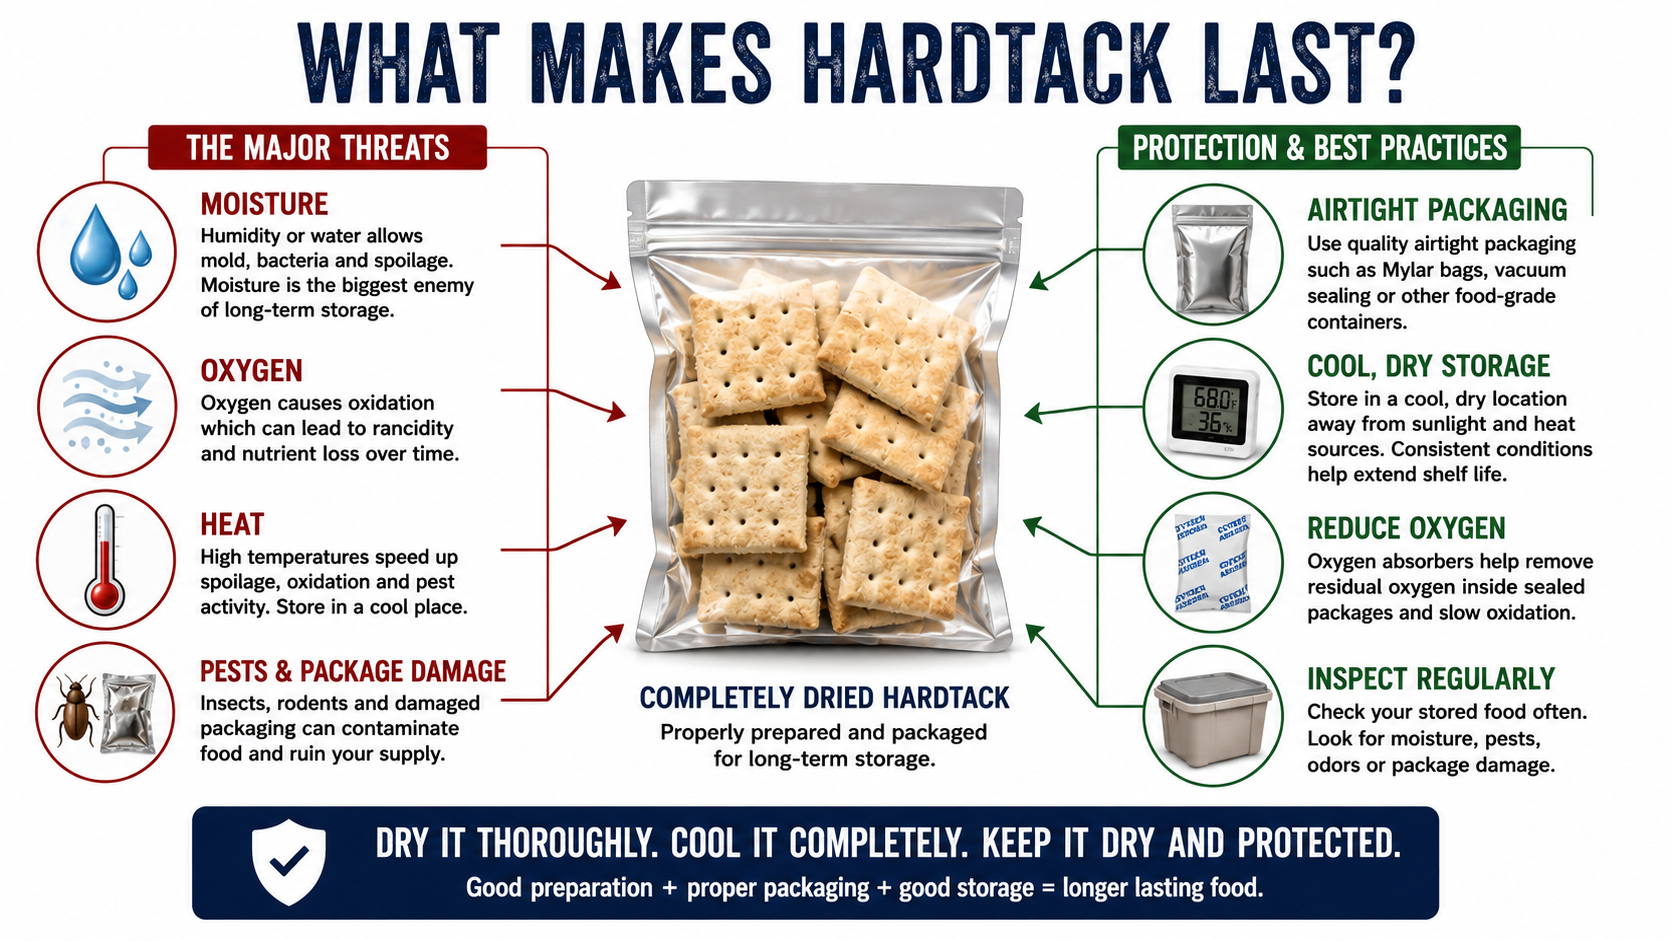
Hardtack has a reputation for lasting extraordinarily long periods, and historical examples demonstrate just how durable an extremely dry biscuit can be under the right conditions. For practical preparedness, however, it is better not to think of hardtack as having a guaranteed 50-year or 100-year expiration date. Shelf life depends on the ingredients, how thoroughly the food was dried, packaging integrity, temperature, humidity and storage conditions. The useful lesson is that properly prepared and protected hardtack can be exceptionally durable, not that every homemade batch will automatically remain safe for a century.
How to Eat Hardtack Without Breaking a Tooth
There is a reason it is called hardtack. Properly dried pieces can become extremely hard, and biting directly into a thick biscuit can potentially damage a tooth or dental work. In an emergency, the last thing you need is a broken tooth because you tried to prove you could bite through a survival biscuit.
A much better approach is to soften it first. Hardtack can be soaked in hot water, coffee, broth or soup until it becomes easier to chew. It can also be broken or crushed into smaller pieces and added directly to soups and stews. As it absorbs liquid, it softens while contributing carbohydrates and potentially thickening the meal. Historically, people developed many variations of this basic approach because eating hardtack dry was often the least pleasant way to use it.
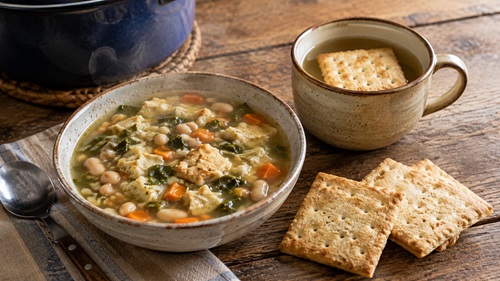
This is also why stored-food practice matters. Don’t make twenty pounds of something you’ve never actually eaten. Make a small batch and experiment with it. Put a piece into hot broth and see how long it takes to soften. Crush another into soup. Take some camping and see how well it survives being carried around. Learning how to turn stored ingredients into meals is every bit as important as owning the ingredients.
Hardtack Is Not a Complete Survival Diet
Hardtack can provide valuable calories and carbohydrates, but it should never be confused with a nutritionally complete emergency food. It lacks the protein, fats, vitamins and minerals needed for a balanced long-term diet. Surviving an extended emergency requires more than simply consuming enough calories to stop feeling hungry.
A stronger preparedness pantry uses foods that complement one another. Hardtack or stored grains can provide carbohydrates. Beans and legumes can contribute protein and fiber. Preserved meat can provide additional protein and fat. Stored or preserved fruits and vegetables contribute nutrients and variety. Cooking oils and other appropriately stored fats can provide concentrated calories. The objective should be a food system rather than dependence on one supposed miracle survival food.
This also explains why adding nutritious ingredients directly to long-storage hardtack isn’t necessarily the best solution. Adding oils, nuts, seeds or other high-fat ingredients may improve its nutritional profile while simultaneously reducing the characteristic that makes hardtack useful: exceptional storage potential. It can be better to store complementary foods separately and combine them when preparing the meal.
What Hardtack Really Teaches
Hardtack is worth making even if you never plan to store large quantities of it. The process teaches several important preparedness principles at once. Moisture control matters. Ingredients affect shelf life. Packaging matters. Storage conditions matter. And knowing how to prepare stored food matters just as much as buying it.
It also demonstrates the difference between owning supplies and having skills. A bag of flour sitting on a shelf is a resource. Knowing several ways to turn that flour into usable food is capability. During a prolonged disruption, capability gives you more options.
That is why the best time to make your first batch isn’t during an emergency. Make it while your kitchen is functioning normally. Learn what properly mixed dough feels like. See how your oven handles the drying process. Discover how thick you prefer the pieces and how you like to soften them for eating. If your first batch doesn’t turn out perfectly, flour and water are inexpensive lessons.
Preparedness Action Plan
Make a small test batch using only flour, salt and water. Roll it approximately 1/4 inch thick, cut it into reasonably uniform pieces, dock each piece and slowly bake and dry both sides. Allow the finished hardtack to cool completely before packaging any of it.
Keep several pieces out instead of storing the entire batch. Use those pieces to practice different preparation methods. Soak one in hot broth, crumble another into soup and take a few on your next camping trip. The purpose isn’t simply to prove that you can make hardtack. The goal is to understand how you would actually use it when normal food options are limited.
Once you’re comfortable with the process, decide whether hardtack deserves a place in your emergency pantry. If it does, make additional batches, package them appropriately, label them and incorporate them into your normal food-storage inspection and rotation system.
Key Takeaways
Hardtack is one of the simplest forms of emergency food: flour, water and salt transformed into an extremely dry biscuit. Its durability comes primarily from removing moisture and then preventing moisture from returning during storage.
Keeping the recipe simple helps improve storage potential. Adding fats and other ingredients may improve flavor but can reduce longevity. Slow, thorough drying, complete cooling and proper packaging are therefore more important than trying to make hardtack taste like ordinary bread.
Most importantly, hardtack should be viewed as one part of a larger emergency food system, not as a complete survival diet. Its greatest value may be what making it teaches: how basic ingredients, preservation skills and practical experience can give you more options when normal food systems aren’t available.
© Prepping Communities. This content is for informational purposes only and not professional advice. Use at your own risk.
Terms | Privacy | Guidelines