

Changing the oil and filter on a Ford F-150 with the 5.0L V8 is one of the more useful maintenance jobs an owner can learn. It doesn’t require a fully equipped shop, and on many stock-height F-150s there is enough room underneath to reach the drain and filter without lifting the truck. Once you know where everything is located, the job is fairly straightforward.
The basic process is to warm the oil slightly, drain it, replace the oil filter, refill the engine, run it long enough to circulate the new oil, and then verify the level and check for leaks. Give yourself plenty of time the first time you do it. Speed doesn’t matter nearly as much as making sure the drain plug, filter, and final oil level are correct.
One thing to keep in mind is that 2015 through 2020 covers more than one version of the 5.0L engine, so don’t assume every specification is identical across all six model years. Before starting, verify the required oil viscosity, oil capacity, filter, and drain-plug arrangement for your exact truck using the owner’s manual and the information on the vehicle.
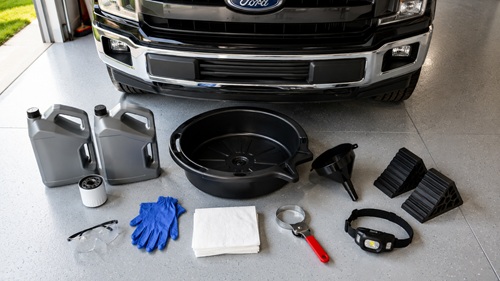
What You’ll Need
Get everything together before crawling underneath the truck. Once the old oil is draining, you don’t want to discover that the new filter is still sitting on a parts-store shelf.
For a typical oil change you’ll need:
- Correct engine oil for your model year
- Correct replacement oil filter
- Large oil drain pan
- Funnel
- Gloves
- Safety glasses
- Shop towels or rags
- Oil-filter wrench if needed
- Wheel chocks
- Flashlight or headlamp
- Container for transporting the used oil
The Motorcraft FL-500S is commonly used on these 5.0L applications, but confirm the filter for your exact truck before starting. Do the same with the engine oil. Some trucks in this range specify different oil quantities or specifications, so use the information for your particular year rather than relying on a single number for every 2015–2020 F-150.
Step 1 – Park and Prepare the Truck
Start with the truck parked on a solid, level surface. Put the transmission in Park, apply the parking brake, and chock a wheel. Level ground makes the truck safer to work around and gives you a more reliable dipstick reading when the job is finished.
It helps to have the engine slightly warm because warm oil flows more easily than cold oil. Run the engine briefly if necessary, then shut it off. You don’t want it extremely hot. Engine oil and exhaust components can become hot enough to cause serious burns, so if the truck has just returned from a long drive, give it some time to cool.
Many F-150 owners can perform the oil change without raising the truck. If yours must be lifted to provide enough working room, use properly rated equipment and support the vehicle correctly with jack stands at approved locations. Never work underneath a truck supported only by a jack.
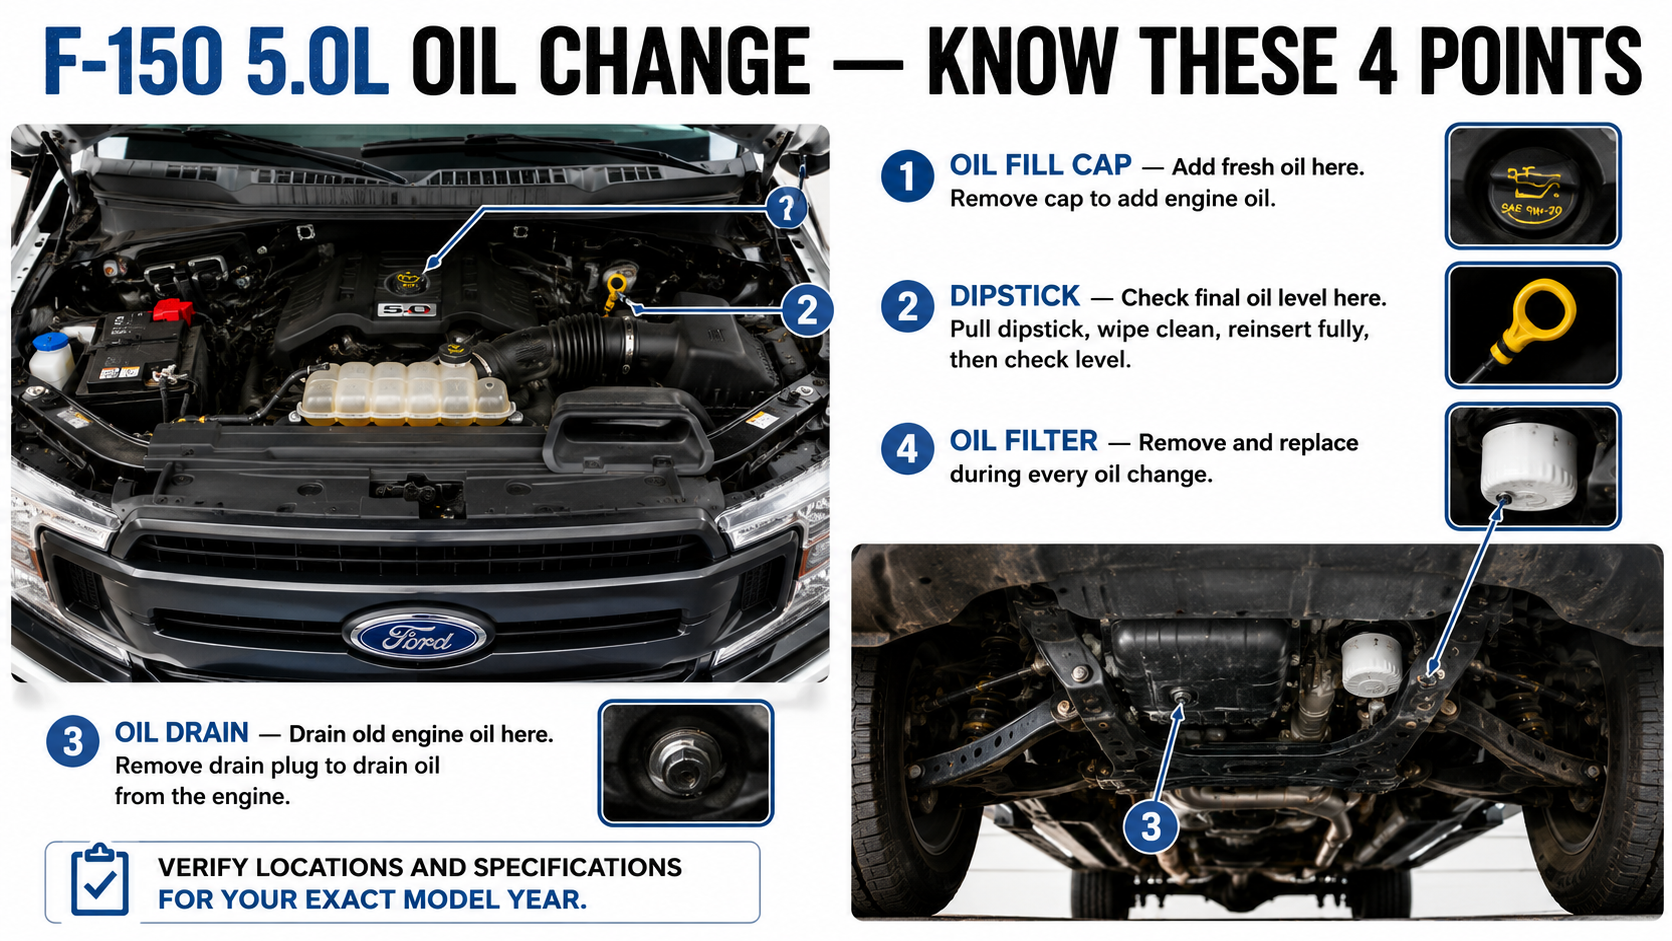
Step 2 – Find the Oil Fill Cap, Dipstick and Drain
Open the hood and locate the engine oil-fill cap and dipstick. This is also a good time to verify the required oil viscosity shown for your particular engine and model year.
Remove the oil-fill cap and put it somewhere clean and obvious. Leaving the fill opening uncovered while the oil drains also gives you a visual reminder that the job isn’t finished and the engine still needs fresh oil.
Next, look underneath the truck and identify the engine-oil drain. Make sure you know exactly what you’re looking at before removing anything. You don’t want to accidentally drain another fluid because you assumed the first plug you found belonged to the engine.
Position a large drain pan underneath the oil drain. Don’t put it directly beneath the opening. When the plug first comes out, the oil can shoot outward before the stream gradually moves closer to the oil pan as it slows. Give yourself plenty of catch area and keep some rags nearby.
Step 3 – Drain the Old Engine Oil
Carefully remove the drain plug and let the oil flow into the drain pan. Some F-150s in this generation use a quick-release style drain plug that can be removed without a conventional wrench. If your truck has one, release it according to its design and keep your fingers out of the stream.
Be ready when the plug comes free. Warm oil can come out quickly.
Let the engine drain until the heavy stream has slowed to an occasional drip. There is no reason to rush this part. While you’re waiting, inspect the drain plug and its sealing surfaces. If the plug or seal is damaged, replace it rather than hoping it will make it through another service interval.
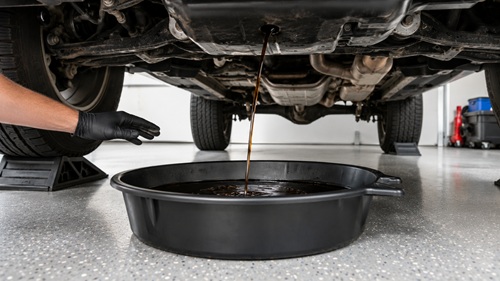
Also pay attention to the old oil. You don’t need to perform a laboratory analysis in your driveway, but anything obviously unusual – such as significant metallic debris or evidence of coolant contamination—deserves further investigation.
Step 4 – Reinstall the Drain Plug
Once the oil has finished draining, wipe the drain area clean and reinstall the plug.
If your truck uses the quick-release style plug, make sure it is completely seated and locked into position. If it uses a conventional threaded drain plug, install it according to the correct procedure and torque specification for your truck.
Don’t assume tighter is always better. Excessive force can damage the plug, sealing surface, threads, or oil pan.
Before moving on, physically check that the plug is installed.
It sounds almost too simple to mention, but this is one of those mistakes that can turn an ordinary oil change into a disaster. You do not want to discover that the drain plug is still sitting beside the drain pan after you start pouring fresh oil into the engine.
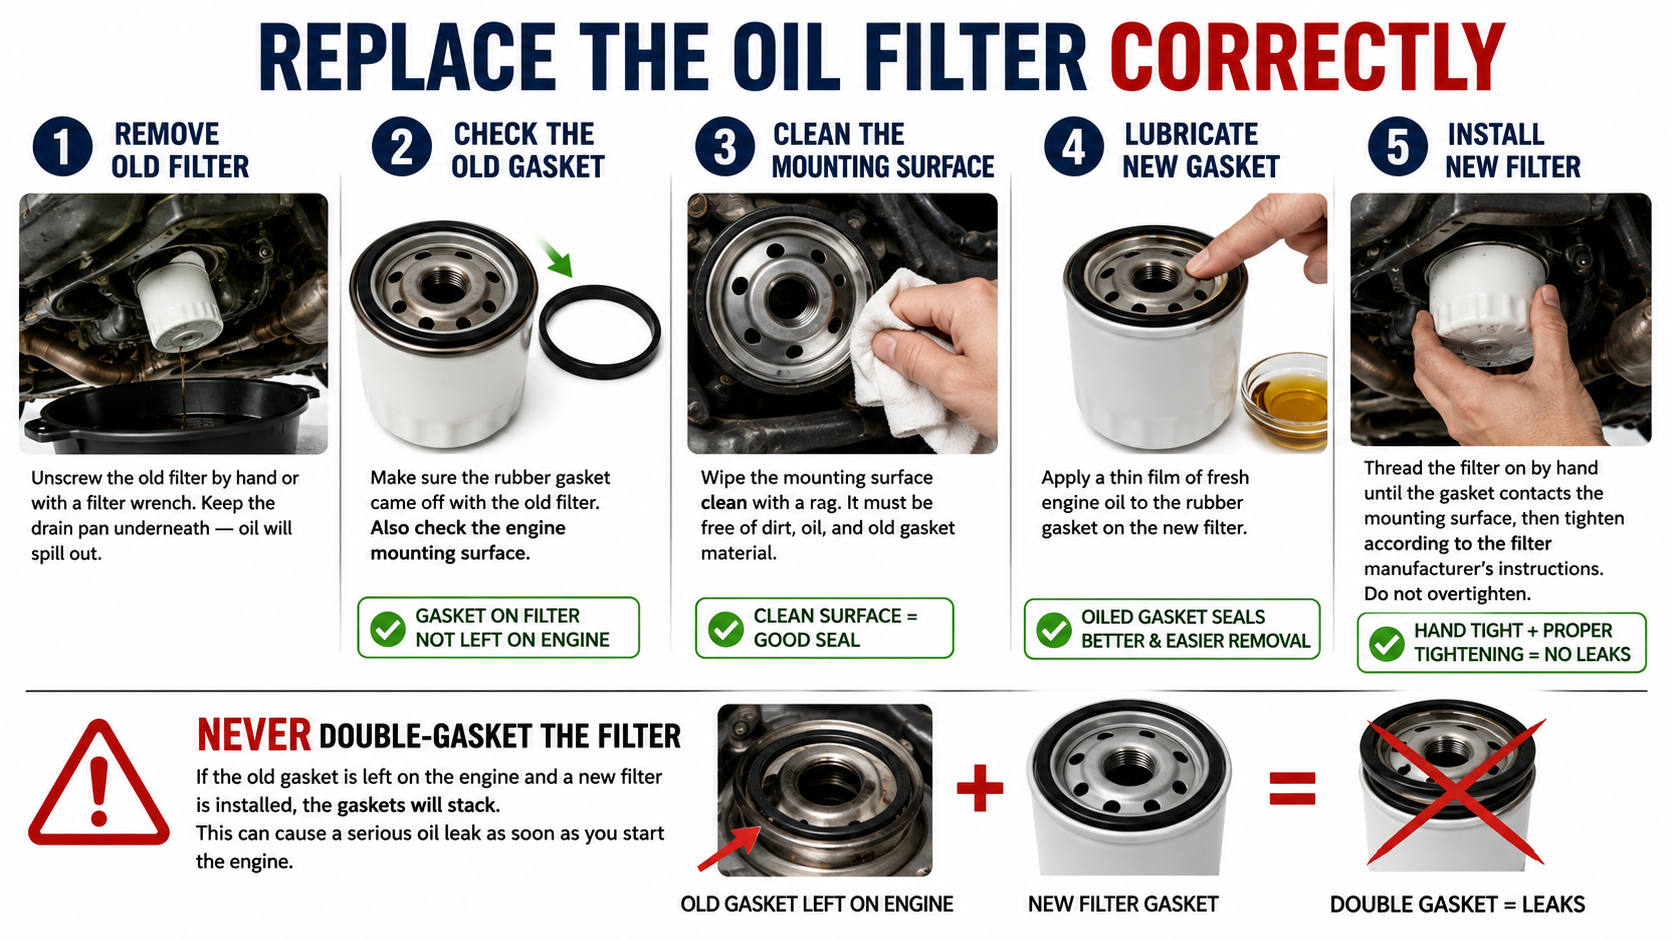
Step 5 – Remove and Replace the Oil Filter
Move the drain pan underneath the oil-filter area before removing the old filter. Even though the oil pan has already drained, there will still be oil inside the filter and around its mounting point.
Try loosening the filter by hand. If it won’t move, use an oil-filter wrench to break it loose and then continue unscrewing it carefully by hand. As it comes off, try to keep it upright so you don’t dump the remaining oil everywhere.
Once the old filter is removed, stop and inspect it.
Look at the filter’s rubber sealing gasket and make sure it came off with the filter. Then inspect the mounting surface on the engine. An old gasket stuck to the engine can be easy to overlook. If you install the new filter over it, you create a double gasket that may leak badly as soon as oil pressure builds.
Wipe the mounting surface clean.
Take the new filter and put a thin film of fresh engine oil around its rubber gasket. Thread the filter onto the engine by hand, being careful not to cross-thread it. Once the gasket contacts the mounting surface, tighten the filter according to the filter manufacturer’s instructions.
There is usually no reason to crank a new spin-on filter down as tightly as possible with a wrench. It needs to be properly seated and sealed, not overtightened.
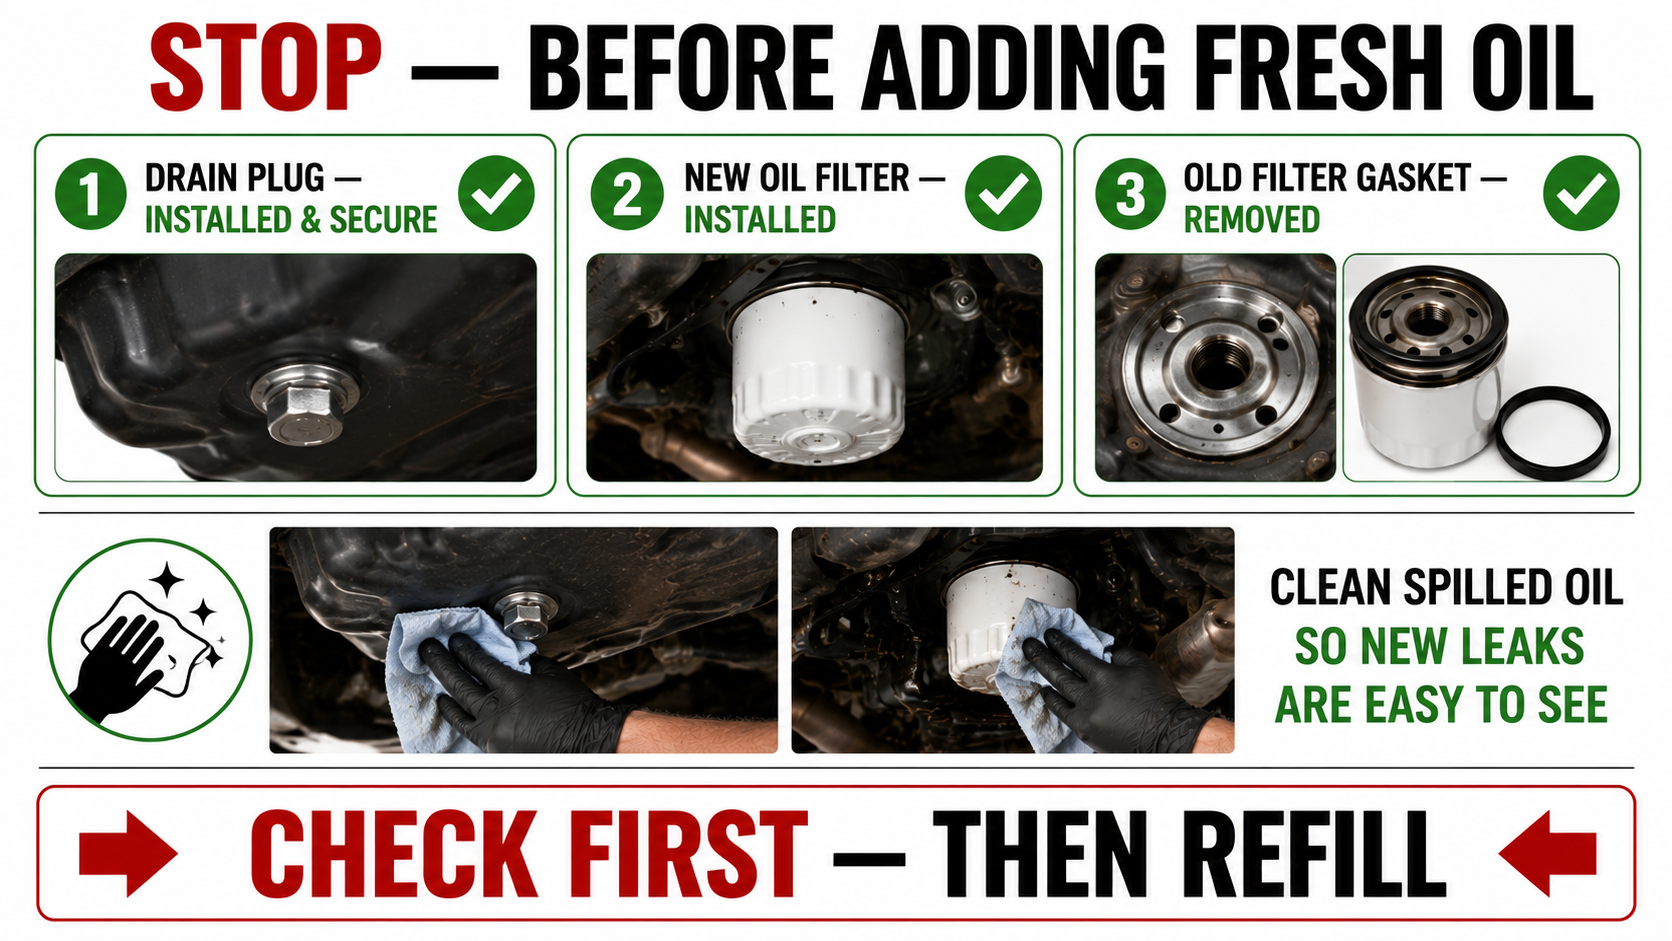
Step 6 – Stop and Check Your Work
Before adding any fresh oil, take thirty seconds and check everything underneath the truck.
Make sure the drain plug is installed, the new oil filter is installed, and the old filter gasket isn’t stuck to the engine. Wipe away spilled oil around the drain and filter areas so that any new leakage will be easier to spot later.
Move the drain pan, tools, rags, and old filter out from underneath the truck.
This short check is worth doing every single time.
Step 7 – Add the Fresh Engine Oil
Put a clean funnel into the oil-fill opening and begin adding the correct engine oil for your truck.
This is where verifying the specifications beforehand matters. Don’t automatically pour in an amount because somebody else’s 5.0L F-150 took that much. Engine changes during the 2015–2020 period mean the correct quantity can depend on the model year.
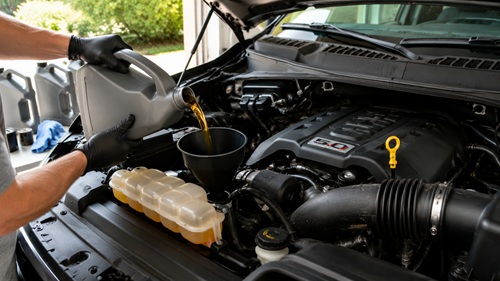
Start below the verified total capacity rather than trying to hit the final level in one pour. You can always add a little more after checking the dipstick.
When you are approaching the expected capacity, stop adding oil and reinstall the oil-fill cap.
Before starting the engine, look around the engine compartment and underneath the truck. Make sure nothing has been left near moving components and that there isn’t already oil appearing underneath.
Step 8 – Start the Engine and Check for Leaks
Start the engine and let it idle.
The new filter needs to fill with oil and the lubrication system needs to build normal pressure. Watch the instrument panel. If an oil-pressure warning remains on instead of going out promptly, shut the engine off and investigate rather than letting it continue to run.
While the engine is idling, look underneath the truck. Pay particular attention to the oil filter and drain plug.
There should not be oil dripping or streaming from either location.
If you see a significant leak, shut the engine off immediately and correct the problem.
If everything looks good, let the engine run briefly and then shut it down.
Step 9 – Check the Final Oil Level
Give the engine several minutes after shutdown so the oil can drain back into the oil pan. Keep the truck on level ground.
Pull out the dipstick, wipe it completely clean, reinstall it fully, and then remove it again to get your reading.
The oil should be within the proper operating range shown on the dipstick. If it is below the desired level, add a small amount of oil through the fill opening and check again.
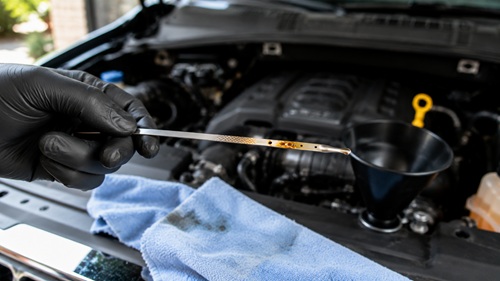
As you get close to full, add oil in small amounts. Don’t pour another large quantity into an engine that’s already close to the upper mark.
Also avoid intentionally overfilling the engine. More oil is not automatically better.
Once the level is correct, reinstall the dipstick and make sure the oil-fill cap is secure.
Step 10 – Check Again After Running the Truck
Take another look around the oil filter and drain plug for signs of leakage. If everything is dry, take the truck for a short drive and bring it back to the same level parking area.
Shut the engine off, wait several minutes, and check underneath again.
It is also worth checking the dipstick one more time. The filter has now filled and the oil has circulated throughout the engine, so this gives you a good opportunity to confirm the final level.
If the oil is within the correct range and there are no leaks, the mechanical part of the oil change is finished.
Step 11 – Reset the Oil-Life Monitor
Reset the F-150’s oil-life monitoring system after the oil change.
The exact menu and button sequence can vary depending on the model year and instrument cluster, so follow the procedure for your particular truck rather than assuming every 2015–2020 F-150 uses the same menu.
The reset should only be performed after the oil has actually been changed. Once reset, the truck can begin tracking the next service interval from fresh oil.
Step 12 – Record the Service and Recycle the Used Oil
Write down the date and current mileage while they’re fresh in your mind. It’s also useful to record the oil viscosity and brand, filter used, and approximately how much oil was added.
A simple maintenance record might look like this:
Date: __________
Mileage: __________
Oil: __________
Filter: __________
Amount Added: __________
Next Service: __________
Transfer the used oil into a clean, sealed container and take it to an appropriate recycling or used-oil collection facility. Allow the old filter to drain safely and recycle or dispose of it according to local requirements.
Never dump used motor oil onto the ground, into a storm drain, or down a household drain.
Quick Garage Reference
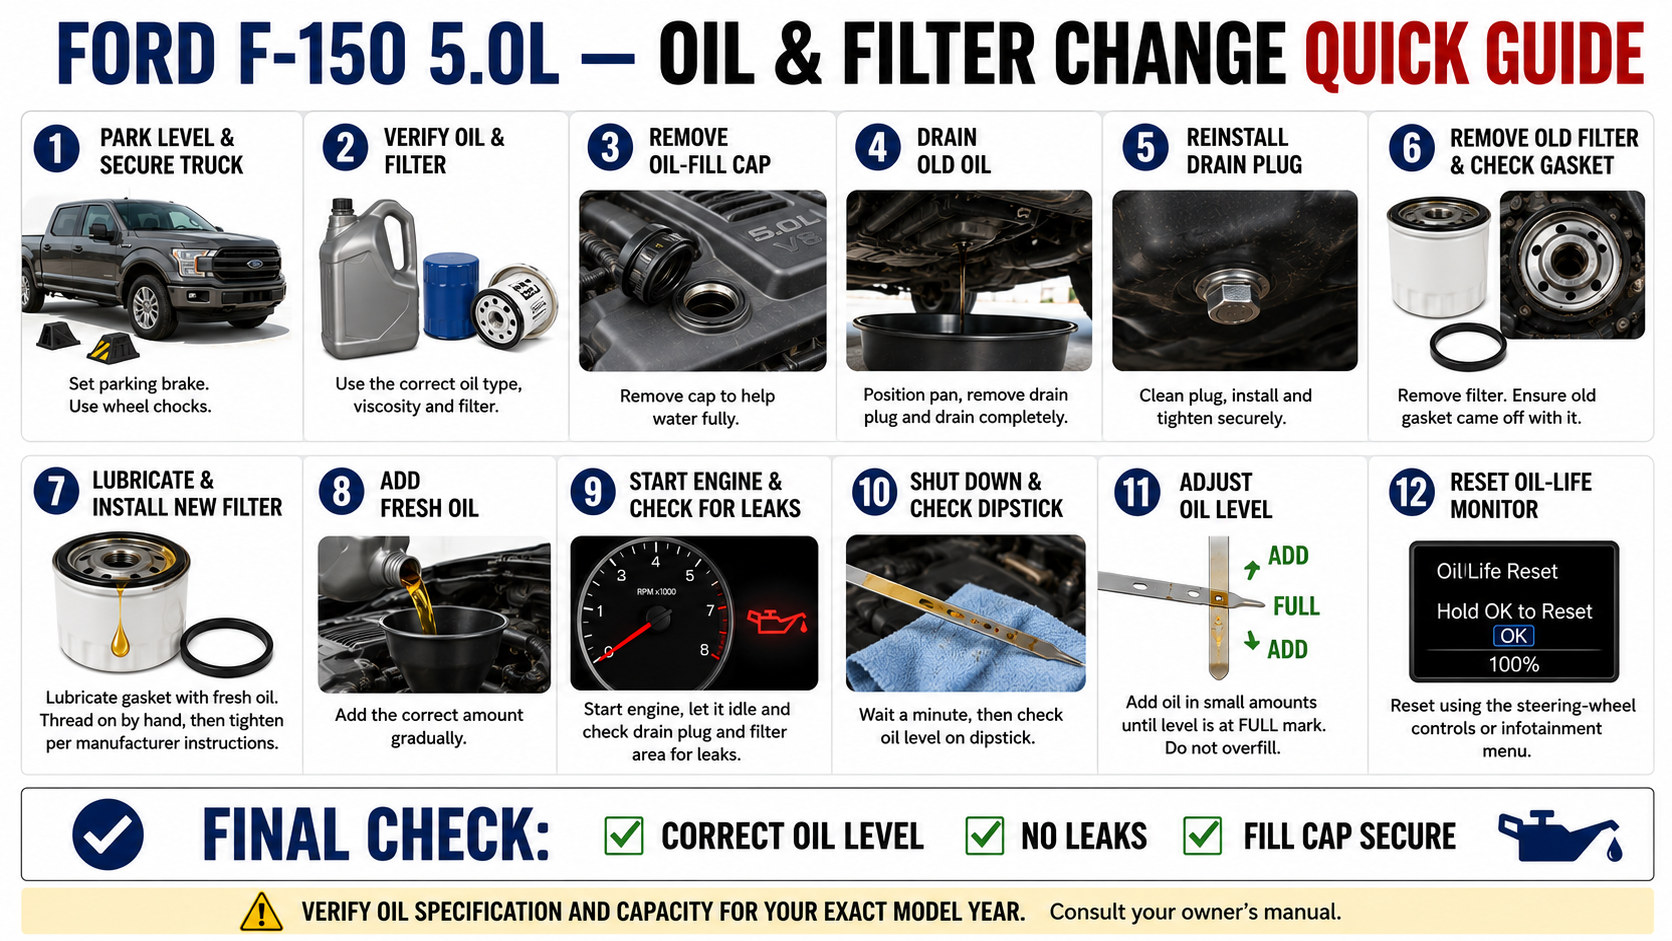
If you’ve done the job before and only need the basic sequence, use this:
1. Park the truck level, apply the parking brake and secure it.
2. Warm the engine slightly, then shut it off.
3. Verify the correct oil, capacity and filter for your model year.
4. Remove the oil-fill cap.
5. Position the drain pan and drain the old oil.
6. Inspect and reinstall the drain plug.
7. Remove the old filter and verify its gasket came off.
8. Oil the new filter gasket and install the filter.
9. Confirm the drain plug and filter are both installed.
10. Add fresh oil.
11. Start the engine and check for leaks.
12. Shut it off, wait several minutes and check the dipstick.
13. Add oil gradually if necessary.
14. Check again for leaks.
15. Reset the oil-life monitor.
16. Record the mileage and recycle the old oil and filter.
Common Mistakes That Cause Problems
Most DIY oil-change problems don’t come from the job being difficult. They come from overlooking something simple.
One of the biggest is using specifications from the wrong model year. The 2015–2020 5.0L F-150 range shouldn’t be treated as though every engine is identical, so verify your truck before buying the oil and filter.
Another common problem is leaving the old filter gasket stuck to the engine. Always look at the old filter after removing it. You want to physically see the gasket attached to it before installing the replacement.
Overtightening is another unnecessary mistake. The oil filter and drain plug need to seal correctly, but excessive force can create problems rather than prevent them.
Finally, never assume the job is finished because the new oil has been poured in. The final dipstick reading and leak inspection are part of the oil change. Take the extra few minutes to do both.
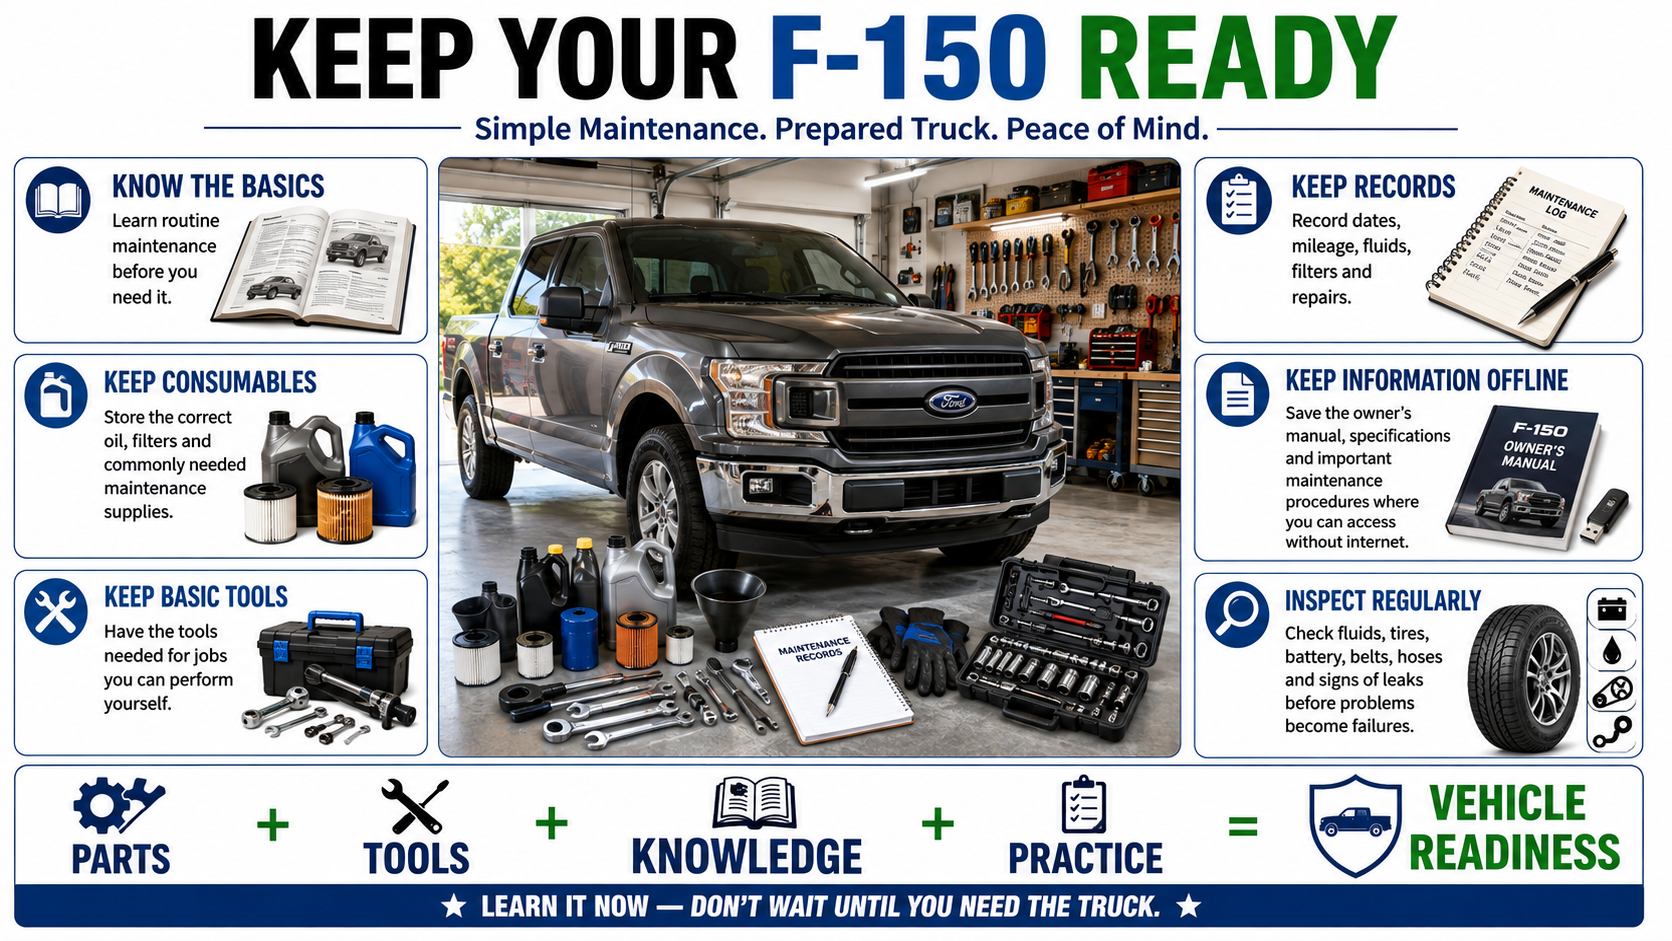
Why Keep Oil-Change Supplies on Hand?
For everyday maintenance, having oil and filters on the shelf means you can service the truck when it is convenient rather than waiting for an appointment or making a special trip for parts. From a preparedness standpoint, it also gives you the ability to maintain an important vehicle during periods when stores, repair shops, shipping, or normal services may be disrupted.
A practical spare-parts shelf for a truck you intend to keep for years can include several oil filters and enough of the correct engine oil for future changes. Other routine consumables can be added as you become comfortable performing more of your own maintenance.
The point isn’t to stock every possible replacement part. Start with the maintenance items you know the truck will eventually need and the jobs you actually know how to perform.
Preparedness Action Plan
If you’ve never changed the oil in your F-150 yourself, learn the job while everything is working normally. Find the drain plug and oil filter before service day, verify the correct oil and capacity for your exact model year, and make sure you have the necessary equipment.
After you’ve successfully performed the job, consider keeping the supplies for the next oil change on hand. Store the oil and filters properly and keep your truck’s owner’s manual and important maintenance information available offline.
Knowing how to change your own oil isn’t advanced mechanical knowledge. It’s basic vehicle maintenance that reduces your dependence on somebody else to keep an important vehicle running.
Key Takeaways
An oil and filter change on a 2015–2020 Ford F-150 5.0L V8 is a manageable DIY job once you understand the basic process. The important part is doing each stage carefully rather than trying to do it quickly.
Verify the specifications for your exact model year, drain the old oil safely, inspect and reinstall the drain plug, make sure the old filter gasket comes off, install the new filter correctly, refill the engine gradually, and always finish by checking the dipstick and looking for leaks.
Do the job correctly once and the next oil change becomes much easier. More importantly, you’ve added another basic maintenance job that you can handle yourself when you need to.
© Prepping Communities. This content is for informational purposes only and not professional advice. Use at your own risk.
Terms | Privacy | Guidelines