
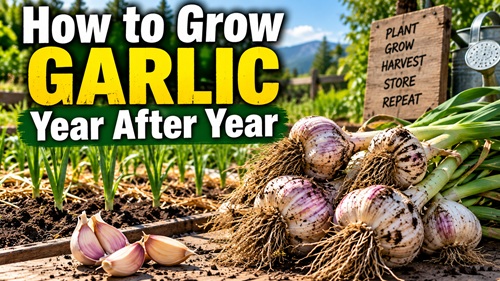
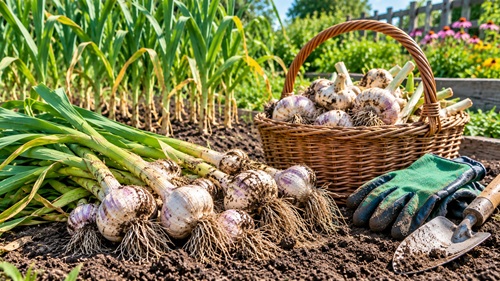
Garlic is one of the easiest food crops to add to a preparedness garden, even if you have very little gardening experience. It doesn’t require a huge amount of space, it can be stored for months after harvest, and part of your harvest can be planted again to produce the following year’s crop. That last point is especially important for preparedness. The goal isn’t simply to grow some garlic for dinner. The goal is to learn a repeatable process that can provide garlic year after year.
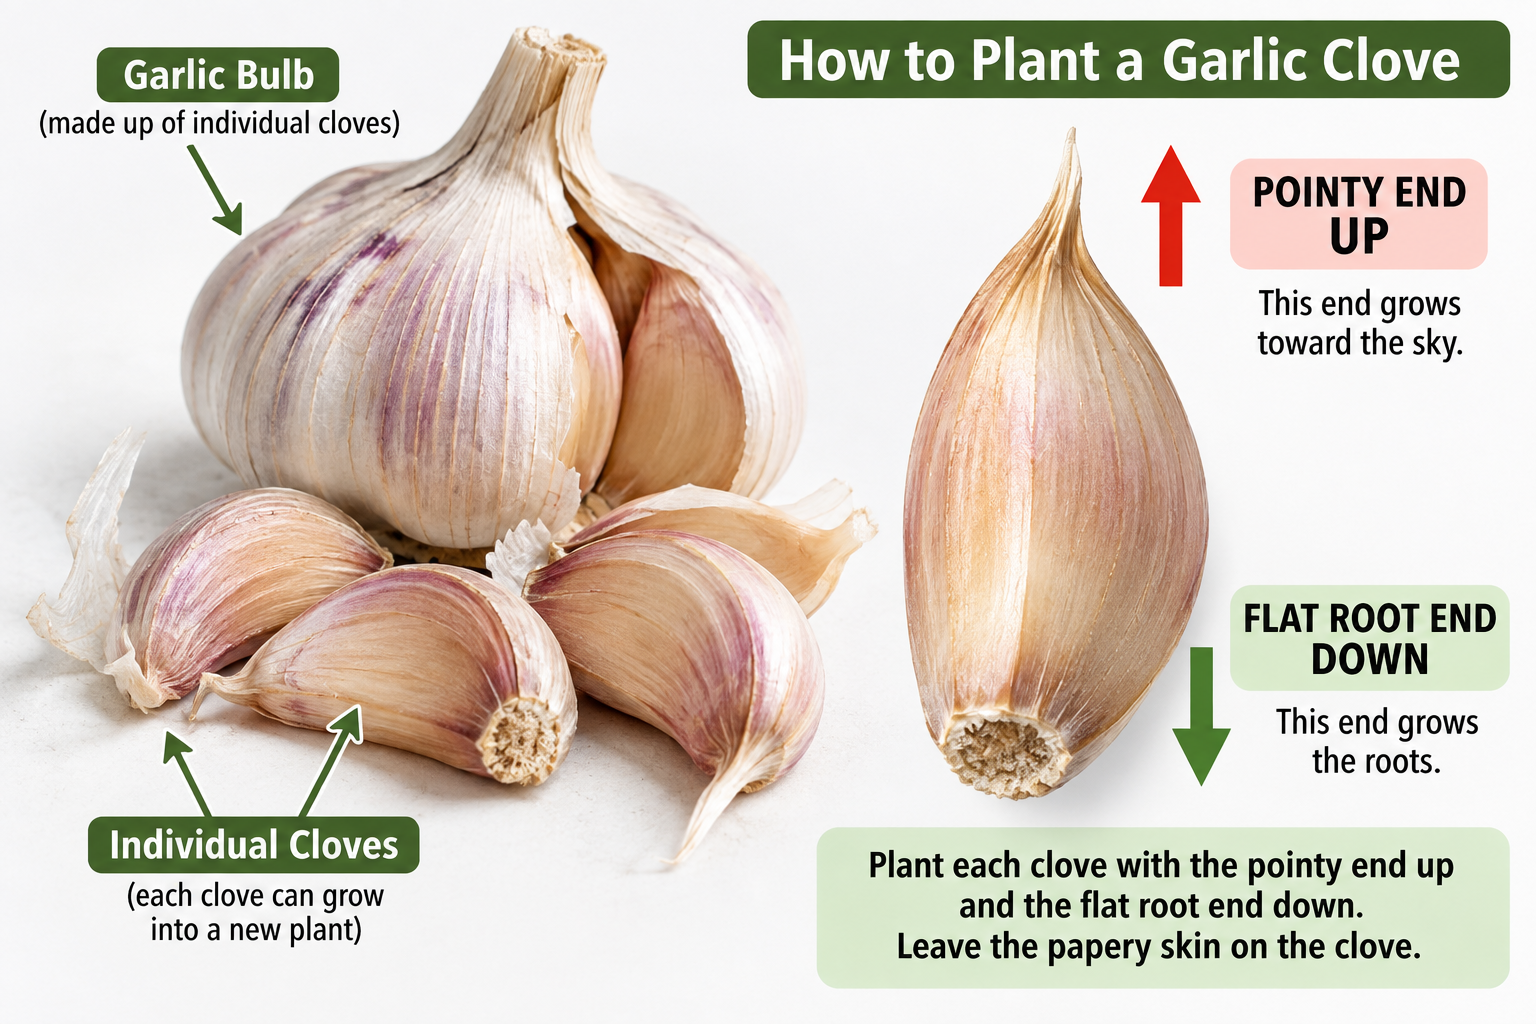
Before planting anything, it helps to understand exactly what you’re working with. Pick up a normal bulb of garlic and look at it. The whole round head is the bulb. When you pull it apart, you’ll find the individual pieces called cloves. Each healthy clove can be planted and potentially grow into an entirely new bulb containing several new cloves. You don’t plant the whole bulb together. You separate it into individual cloves and plant those cloves separately.
Look closely at one clove before putting it into the ground. One end comes to a point and the other end is flatter and rougher. The pointed end goes up toward the sky, while the flat end goes down into the soil because that’s where the roots develop. This is probably the easiest way for a beginner to remember how to plant garlic: pointy end up, flat end down. Leave the papery skin around the clove in place rather than peeling it off.
Choosing Garlic to Plant
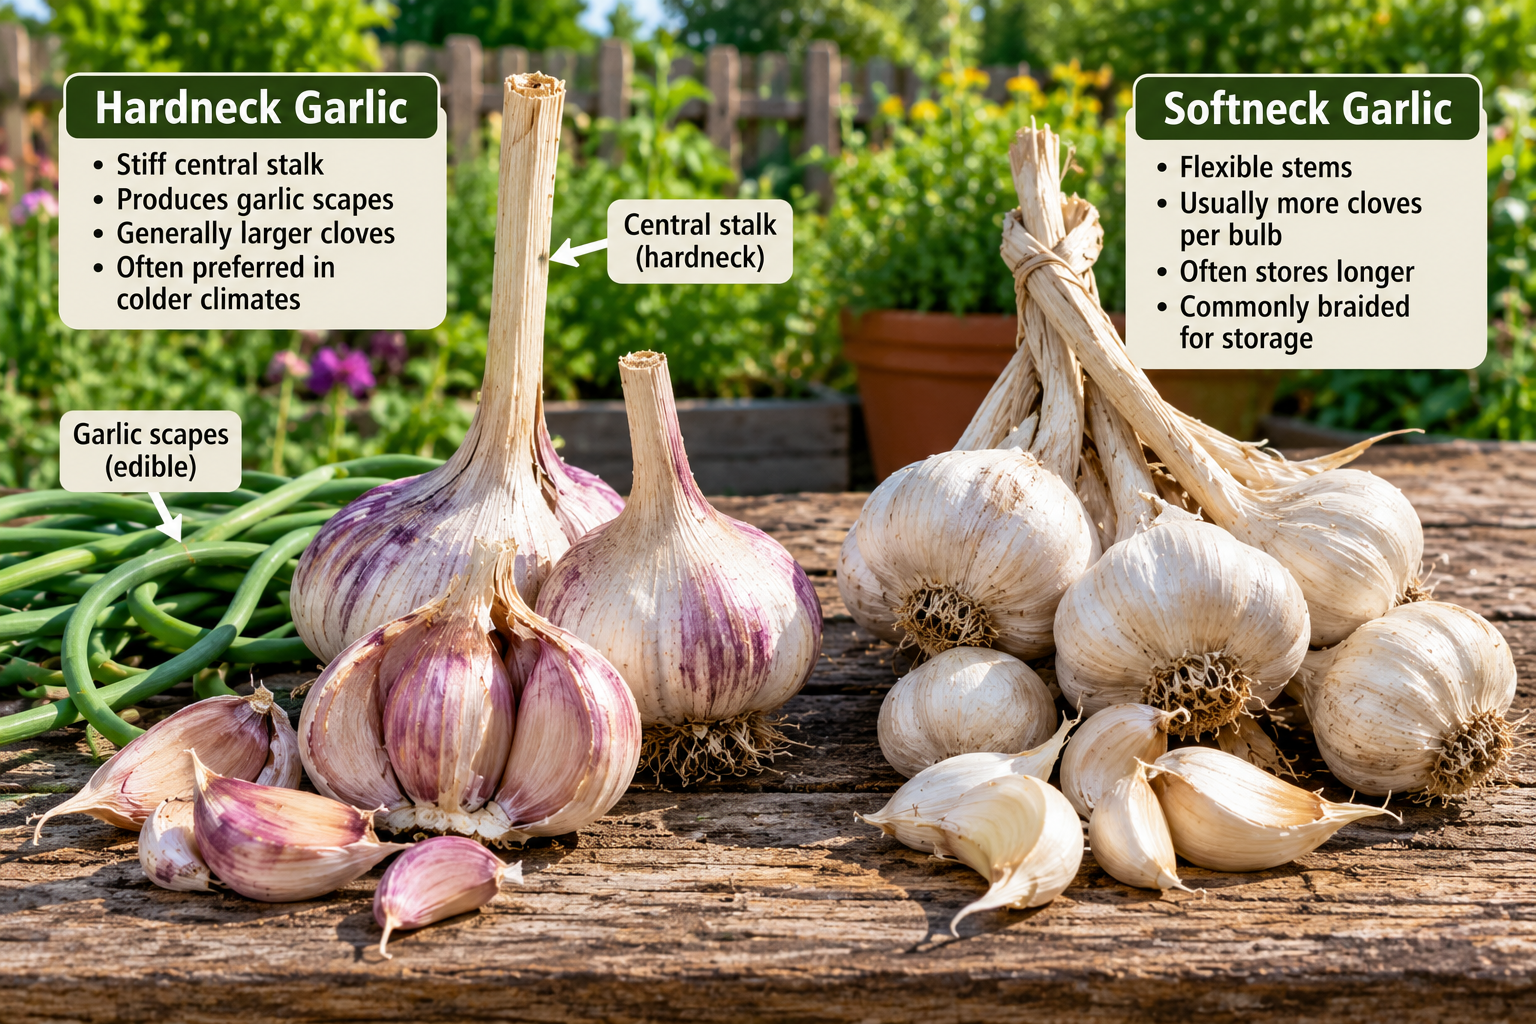
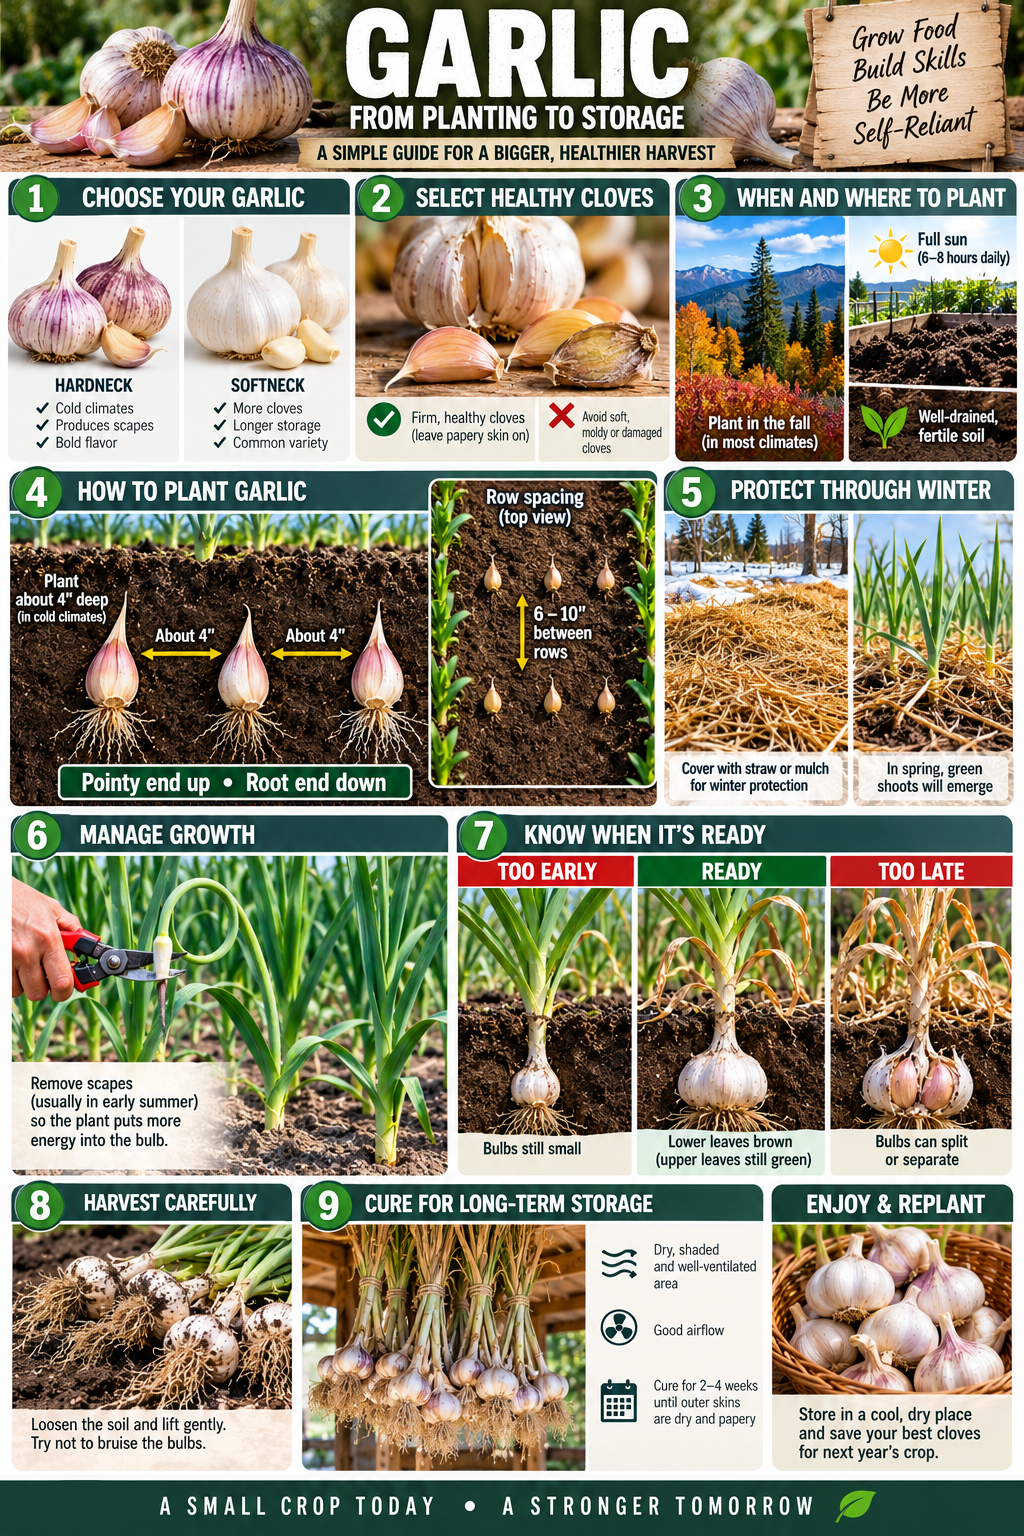
There are two main types of garlic that a home gardener is likely to encounter: hardneck and softneck. Hardneck garlic generally performs well in colder climates and produces a stiff central stalk. It also produces an edible curly stalk called a garlic scape. Softneck garlic generally produces more cloves per bulb and often stores longer. It is also the type commonly braided for storage. Neither is automatically the right choice for everyone. Your climate and how you plan to use and store the garlic should help determine what you grow.
Whenever possible, start with healthy seed garlic from a reputable supplier or local grower. Grocery-store garlic can sometimes grow, but you may not know the variety, how it was handled, or whether it is suitable for your climate. Look for firm, healthy bulbs without mold, soft areas, rot, or obvious damage. Don’t separate the bulbs into cloves until you’re getting ready to plant them, and select the biggest, healthiest cloves for planting.
When and Where to Plant
In many areas with cold winters, garlic is planted in the fall and harvested the following summer. The idea is to get the cloves into the ground while the soil is still workable but after the weather has begun cooling. The garlic starts developing roots before winter, becomes largely dormant during the coldest part of the year, and begins growing again when spring arrives. A little green growth appearing before winter isn’t necessarily a problem.
Choose a location that receives plenty of direct sunlight, preferably around six to eight hours during the growing season. Just as importantly, choose soil that drains well. Garlic needs moisture, but it doesn’t want to sit in constantly wet soil. After a heavy rain, look at the area you’re considering. If water sits there for long periods and the soil remains muddy, find another location or consider using a raised bed.
Garlic also benefits from fertile soil. Working finished compost into the bed before planting can improve the growing conditions. If you’re developing a garden that you expect to use for food production year after year, a soil test can eventually be very useful because it tells you what the soil actually needs instead of forcing you to guess.
Planting the Garlic
When you’re ready to plant, carefully separate a garlic bulb into individual cloves. Leave the papery covering on each clove and choose the largest healthy cloves for your planting bed. Make a hole in the soil and place one clove into it with the pointed end facing upward and the flat root end facing downward.
In a colder climate, planting approximately four inches deep provides the clove with additional protection. Shallower planting of around two to three inches can be appropriate in warmer climates. Space the cloves roughly four inches apart. If you’re standing in the garden without a ruler, four inches is approximately the width of an adult fist. Leave roughly six to ten inches between rows so the plants aren’t competing heavily with one another as they grow. These measurements are useful starting points rather than something you need to obsess over down to the fraction of an inch.
Once all the cloves are planted, cover them with soil and water the bed. You want enough water to settle the soil around the cloves and provide moisture for root development, but you don’t want to create a muddy, waterlogged bed. A useful way to think about garlic soil is damp sponge, not wet swamp.
Protecting the Garlic Through Winter
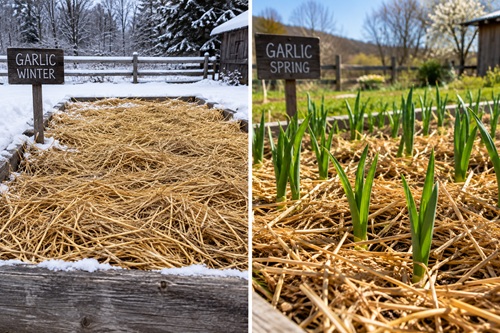
In colder climates, cover the garlic bed with a layer of clean straw or another suitable organic mulch after the soil has cooled. Think of the mulch as a blanket over the garden. It helps protect the soil from rapid temperature changes, conserves moisture, and can reduce weeds.
Then there really isn’t much to do for a while. The garlic remains in the ground through winter. You don’t need to dig it up, move it indoors, or keep checking the cloves. They are supposed to be there.
When spring arrives, green shoots will begin appearing through the soil and mulch. If the mulch is extremely thick, gradually pull some of it away so the new growth isn’t smothered and the soil can begin warming. Some mulch can remain around the plants to conserve moisture and discourage weeds.
Caring for Garlic in Spring and Summer
Once garlic begins actively growing in spring, pay more attention to water and weeds. The plants need fairly consistent moisture while they’re producing leaves and developing bulbs underground. This doesn’t mean watering every day automatically. Push a finger into the soil. If the soil below the surface still feels slightly moist, the plants may not need additional water. If it feels very dry, it’s probably time to water. If you’re constantly finding mud, you’re likely giving them too much.
Keep weeds under control because garlic doesn’t compete particularly well with them. A few tiny weeds may not look threatening, but as they grow they’re competing with your garlic for moisture, nutrients, sunlight, and space. Pull them while they’re small, taking care not to disturb the garlic bulbs developing underground.
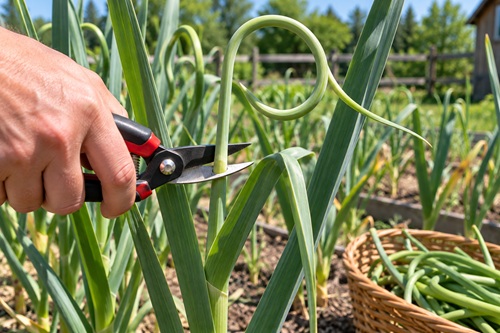
If you’re growing hardneck garlic, you’ll eventually notice a strange-looking green stalk emerging from the center of the plant and beginning to curl. This is called a garlic scape, and seeing it doesn’t mean anything has gone wrong. The scape is part of the plant’s flowering process, and it’s edible. Cut it while it’s young and tender, usually after it begins curling but before it becomes tough. Removing the scape also allows the plant to direct more of its energy toward developing the garlic bulb underground.
Knowing When Your Garlic Is Ready
One of the biggest questions for a first-time garlic grower is, “How do I know when to dig it up?” Don’t depend entirely on a calendar. Look at the plant.
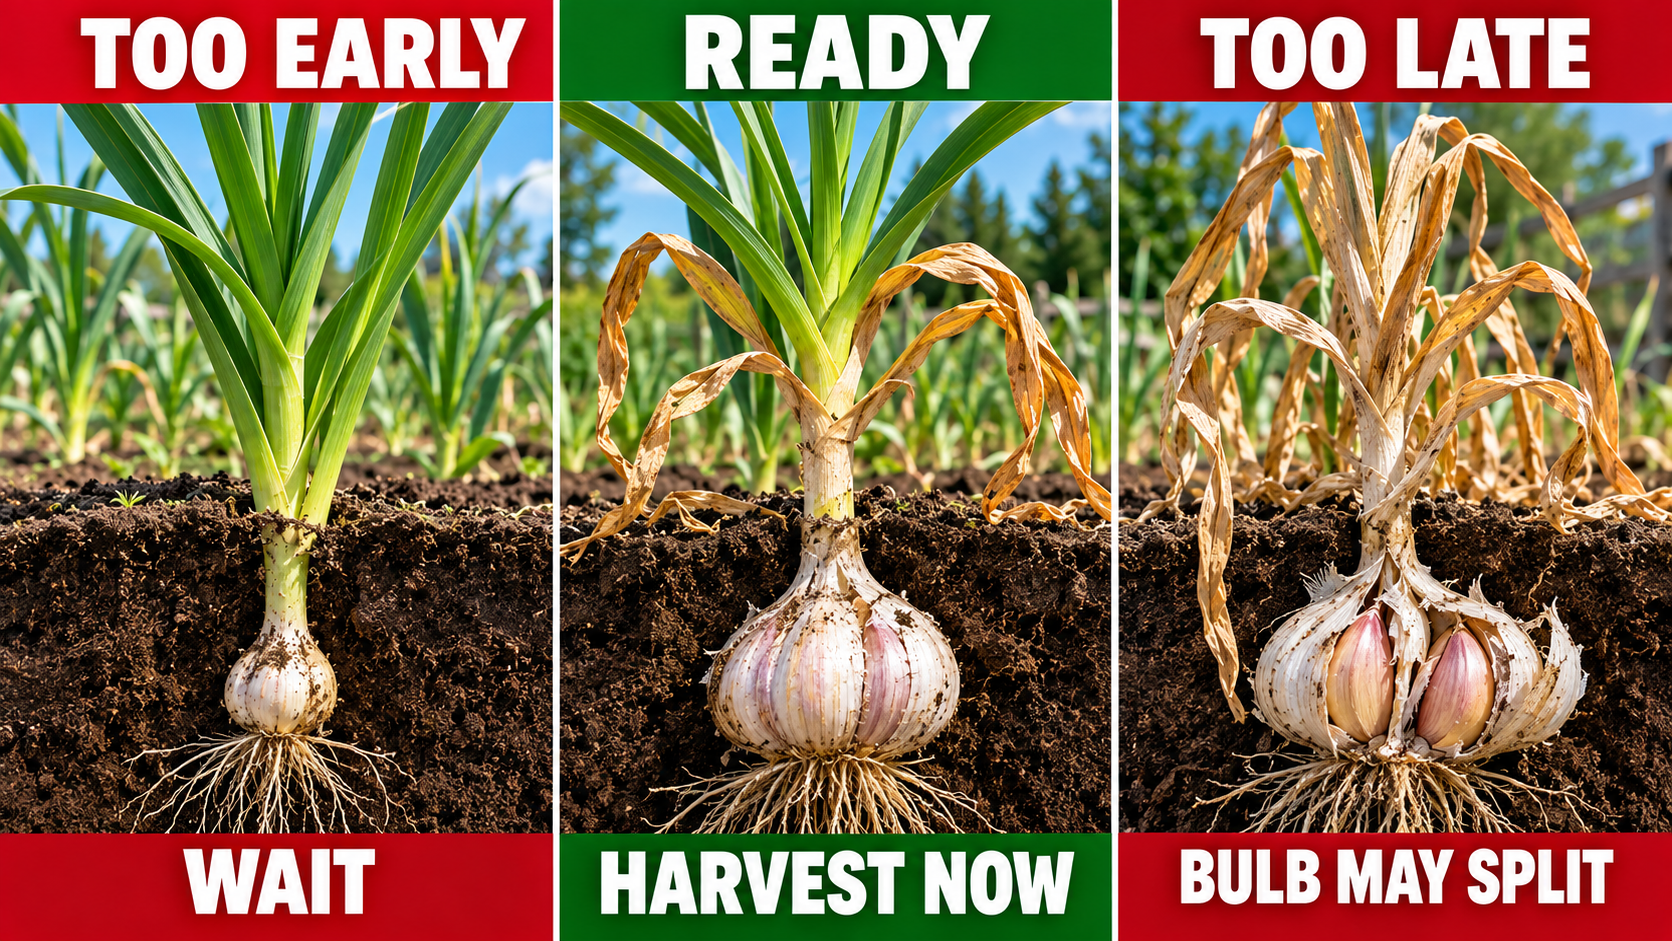
As garlic approaches maturity in summer, the leaves near the bottom of the plant begin turning yellow and brown while some of the upper leaves remain green. When roughly 40 to 60 percent of the leaves have browned, it’s time to start checking the crop.
Don’t dig up everything immediately. Pick one plant and carefully dig it up as a test. Look at the bulb. You want to see something that clearly resembles a normal head of garlic, with individual cloves developed underneath layers of outer skin. If the bulb is still very small and doesn’t appear properly developed, leave the rest of the crop in the ground a little longer.
This is much easier once you’ve actually seen it. After your first season, you’ll begin recognizing what mature garlic looks like instead of relying entirely on written instructions.
Harvesting Without Damaging the Bulbs
When the garlic is ready, don’t grab the leaves and yank the plant out of the ground. That can break the stalk or damage the bulb. Instead, use a garden fork or similar tool to loosen the soil beside the plant. Keep the tool far enough away that you don’t accidentally stab the garlic bulb. Once the surrounding soil is loose, gently lift the entire plant from underneath.
Brush away loose soil with your hands, but don’t wash the garlic if you’re preparing it for storage. Freshly harvested garlic still contains considerable moisture, and adding more moisture before curing can increase the chance of mold or rot.
As harvest approaches, you can also reduce watering and stop watering approximately a week or two before you expect to dig the crop, depending on your weather and soil conditions. Drier soil generally makes harvesting and beginning the curing process easier.
Curing Garlic So It Will Store
Curing is simply the process of allowing freshly harvested garlic to dry properly before you put it into storage. This is an important step because garlic taken directly from moist garden soil isn’t ready to be packed away for months.
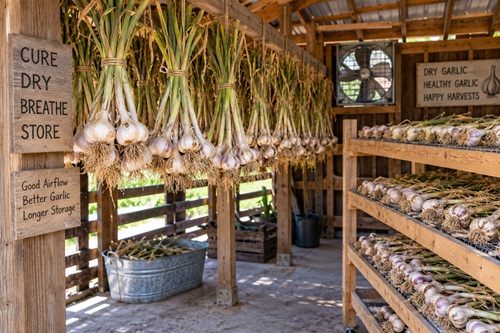
Move the freshly harvested plants somewhere dry, shaded, and well ventilated. A shed, covered porch, garage, or similar protected area can work if there is good airflow and the garlic isn’t sitting in damp conditions. You can hang the plants in small bundles or spread them in a single layer on a screen or rack. Don’t pile a large amount of fresh garlic into a bucket or deep container because moisture can become trapped between the bulbs.
Leave the stalks and roots attached while the garlic cures. Under suitable conditions, curing commonly takes around two to three weeks, although humidity and other conditions can change the timing. You’re looking for the outer skin to become dry and papery, the neck to become completely dry, and the roots to become dry and brittle.
Storing Garlic for the Months Ahead
Once the garlic is properly cured, trim the dry roots and cut back the stalks. If you’re growing softneck garlic and want to braid it, leave enough of the stems intact to do so.
Store the bulbs somewhere cool, dry, dark, and ventilated. Mesh bags, baskets, and other containers that allow air to move around the bulbs are generally better choices than sealed plastic bags. Check the stored garlic occasionally. If you find a bulb becoming soft, moldy, or rotten, remove it so it doesn’t create problems for the garlic around it.
Storage life varies by variety and conditions. Hardneck garlic may remain usable for up to around six months under suitable conditions, while softneck varieties can sometimes remain usable for six to nine months.
Turning One Harvest Into Next Year’s Crop
This is where growing garlic becomes particularly valuable for preparedness. Don’t eat every bulb you harvest.
When the crop has been cured, go through it and identify some of the largest, healthiest, best-looking bulbs. Set those aside specifically for planting. Store them properly along with the rest of your garlic, but make sure everyone in the household knows they’re being saved so they don’t accidentally end up in dinner.
When fall arrives, take those saved bulbs apart. Each bulb gives you several cloves. Each healthy clove can then be planted and potentially become another complete bulb.
Think about what has happened. You originally purchased or obtained some garlic for planting. You planted individual cloves. Those cloves produced bulbs containing several new cloves. You ate some of the harvest and saved some. Those saved bulbs now provide the planting stock for another crop.
That creates a repeating cycle: plant, grow, harvest, cure, store, save and replant.
Once you can repeat that process reliably, you’re no longer simply growing a vegetable. You’re learning how to maintain a small renewable food supply.
Preparedness Action Plan
If you’ve never grown garlic before, don’t try to become an expert in your first season. Start with a manageable number of cloves and use the first year to learn what the plant actually looks like as it develops. Plant the cloves correctly, watch the shoots emerge in spring, feel the soil instead of guessing whether it needs water, learn what a garlic scape looks like, watch the lower leaves begin browning, and dig one test bulb before harvesting everything.
Then complete the entire process. Cure the garlic yourself, store it, and pay attention to how well it keeps under your actual storage conditions. Most importantly, save several of your strongest bulbs and plant them again.
The second year will be different because the instructions will no longer be completely theoretical. You’ll recognize the plants, understand the growing cycle, and know what you’re looking for. After several seasons, you can begin increasing production and determining how much garlic your household needs for eating, preserving, and replanting.
That is the preparedness objective: not simply having garlic stored somewhere, but developing the knowledge and practical ability to produce it again.
Key Takeaways
Growing garlic is much simpler once you can picture the process. Separate a bulb into cloves, leave the papery skin on, and remember pointy end up and flat end down. Give the plants sunshine, well-drained soil, enough moisture without keeping them soggy, and enough room that they aren’t fighting weeds for resources.
Watch the plant rather than depending entirely on dates. The changing leaves help tell you when harvest is approaching. Dig one test bulb before harvesting everything. Once harvested, don’t wash the bulbs you’re planning to store. Cure them somewhere dry, shaded, and well ventilated before moving them into long-term storage.
Finally, don’t eat your entire harvest. Save some of your largest and healthiest bulbs for the following year’s planting. That simple habit changes garlic from something you merely consume into something you can potentially produce for yourself year after year.
© Prepping Communities. This content is for informational purposes only and not professional advice. Use at your own risk.
Terms | Privacy | Guidelines