
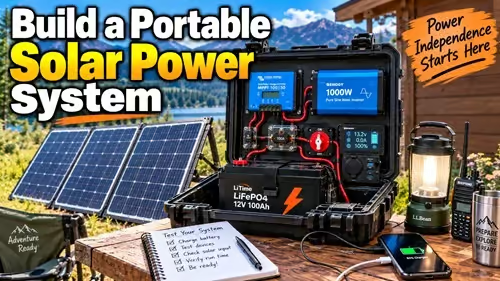
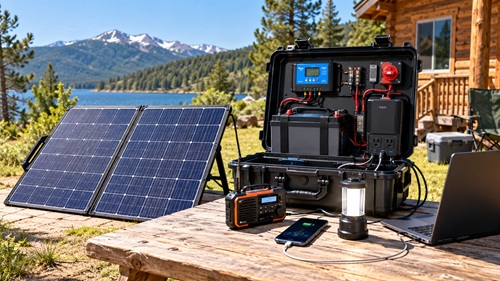
A Beginner’s Guide
A portable solar power system can look intimidating the first time you see one. There may be a solar panel, battery, charge controller, inverter, fuses, breakers, switches, connectors, and several different wires. If you have never worked with solar before, it is easy to look at all of that equipment and wonder where you would even begin. The good news is that a small portable solar system is much easier to understand once you stop looking at it as a collection of electrical components and start looking at the path the electricity follows.
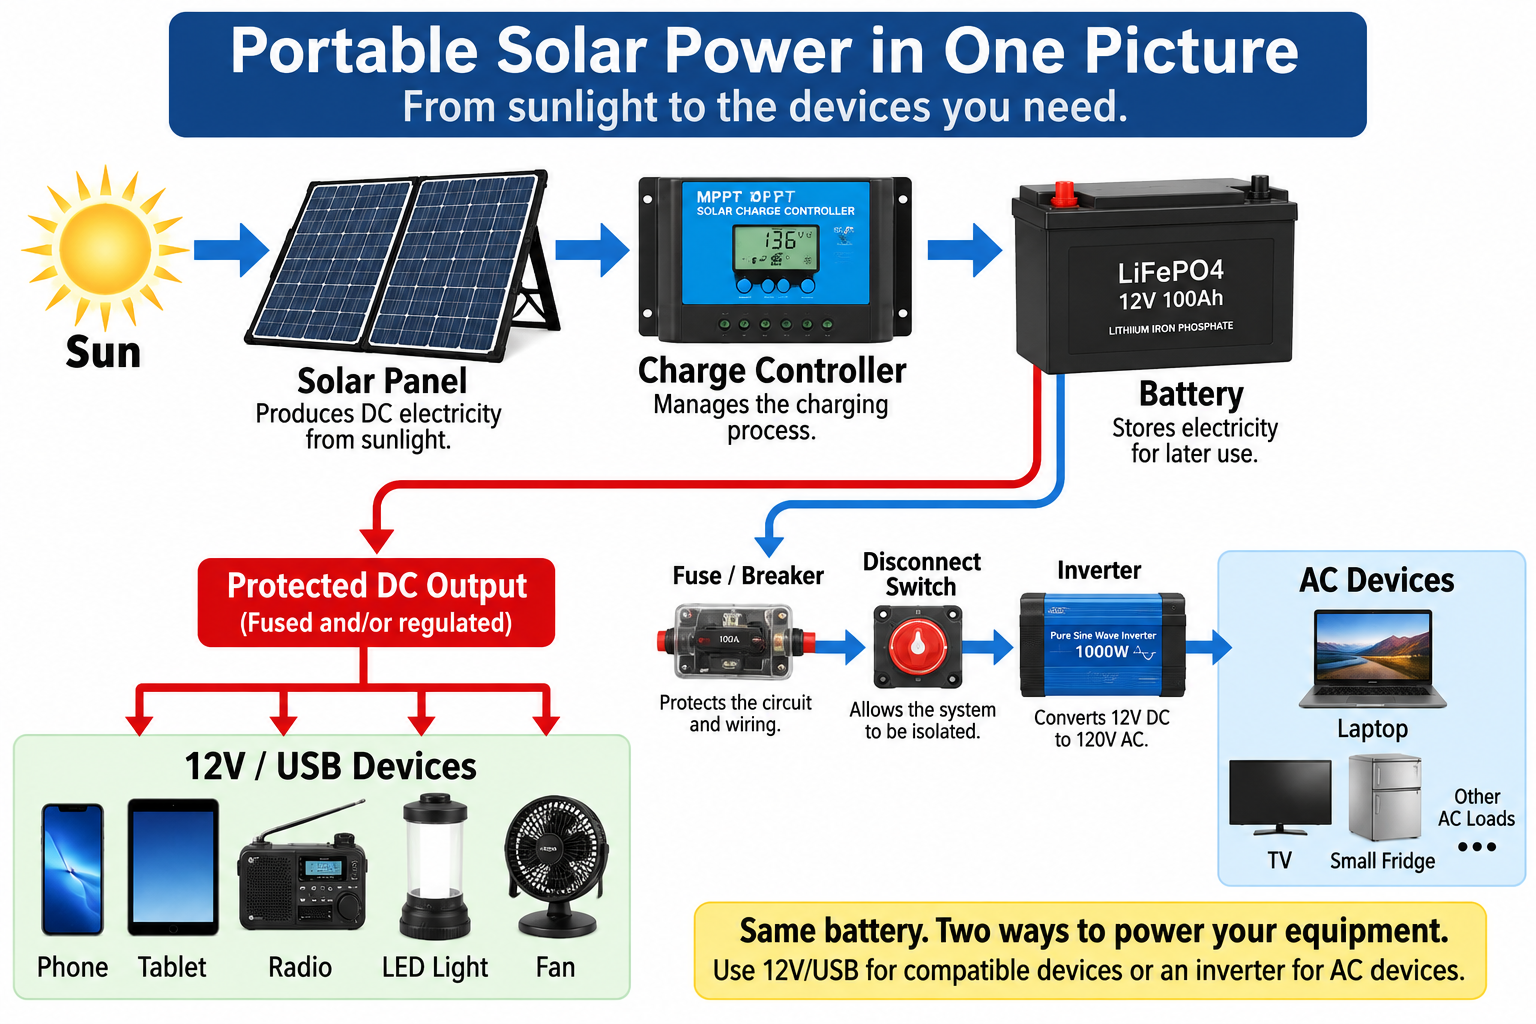
The basic idea is simple. The solar panel makes electricity, the charge controller manages the charging, the battery stores the electricity, and the inverter converts stored DC electricity into AC electricity when you need to operate ordinary household equipment. Some suitable 12-volt and USB equipment can also be powered from properly protected DC outputs without using the inverter. If you can understand that basic flow, you already understand the foundation of the system.
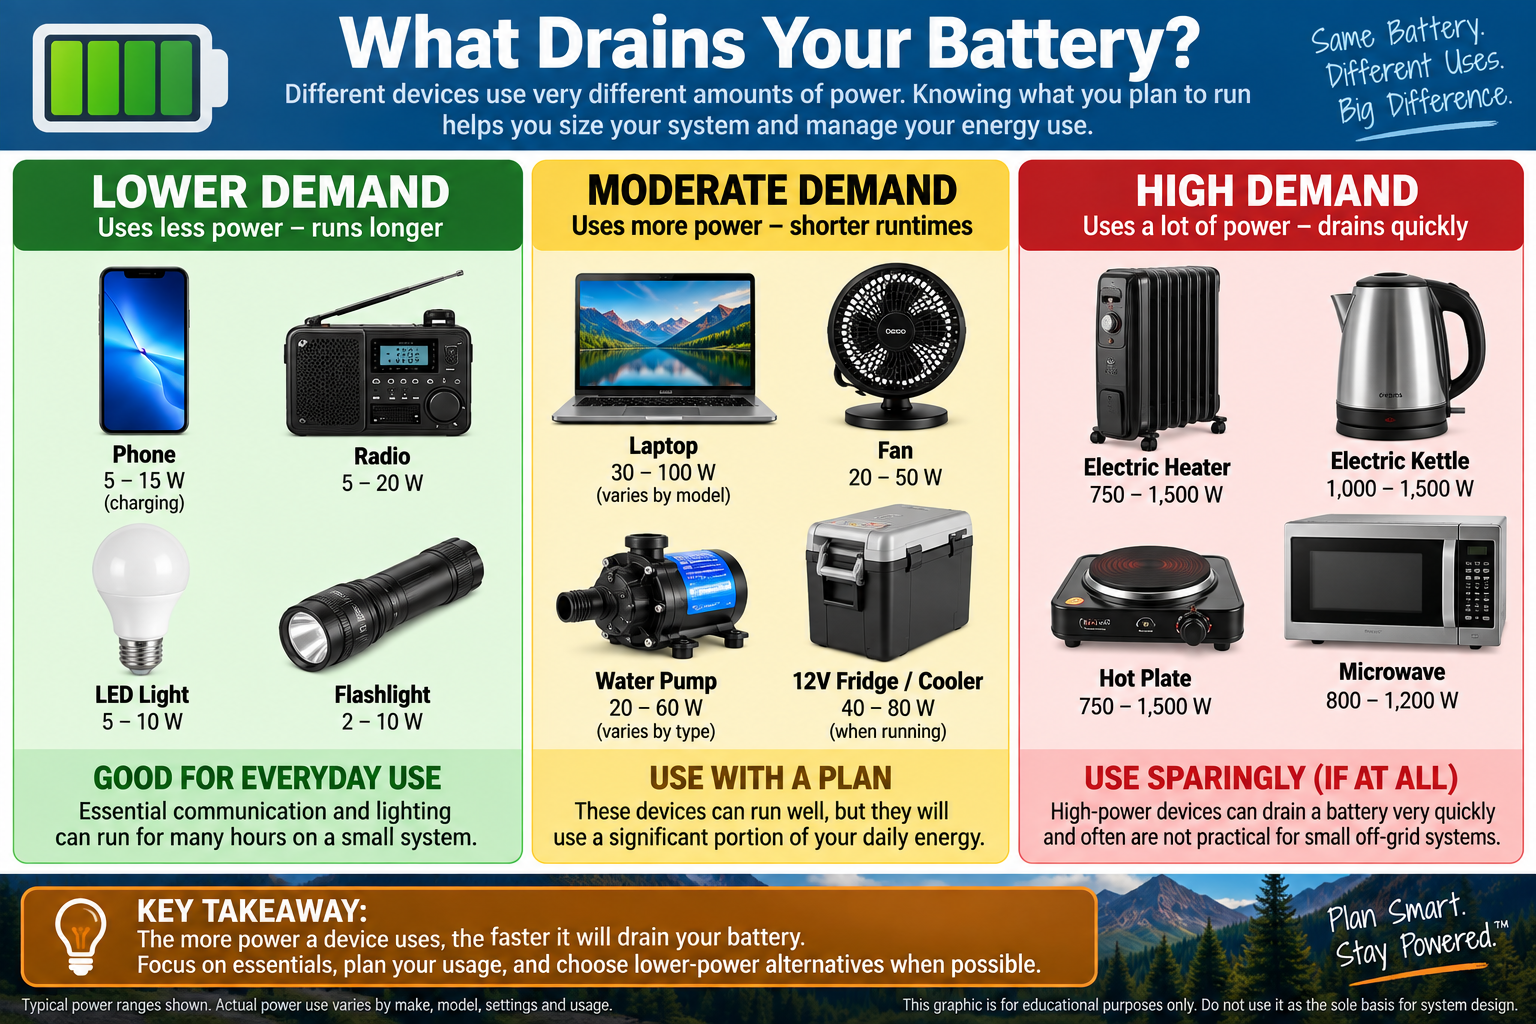
For preparedness purposes, you do not necessarily need to build a system capable of powering your entire house. That can become expensive and complicated very quickly. A smaller portable system can be designed around keeping important equipment working during an extended outage. Depending on its size, that might include phones, radios, rechargeable flashlights, LED lighting, battery chargers, communications equipment, a laptop, a small fan, or other modest electrical loads. High-demand equipment such as electric heaters, kettles, hot plates, microwave ovens, air conditioners, large pumps, and electric cooking appliances can require much more electricity and may be impractical for a small portable system.
The best way to learn is to start with a modest system, understand how it works, and expand it later if necessary. More importantly, actually use it before an emergency. The goal is not simply to own solar equipment. The goal is to understand it well enough that you can confidently operate it when normal electricity is unavailable.
Understanding What You Are Building
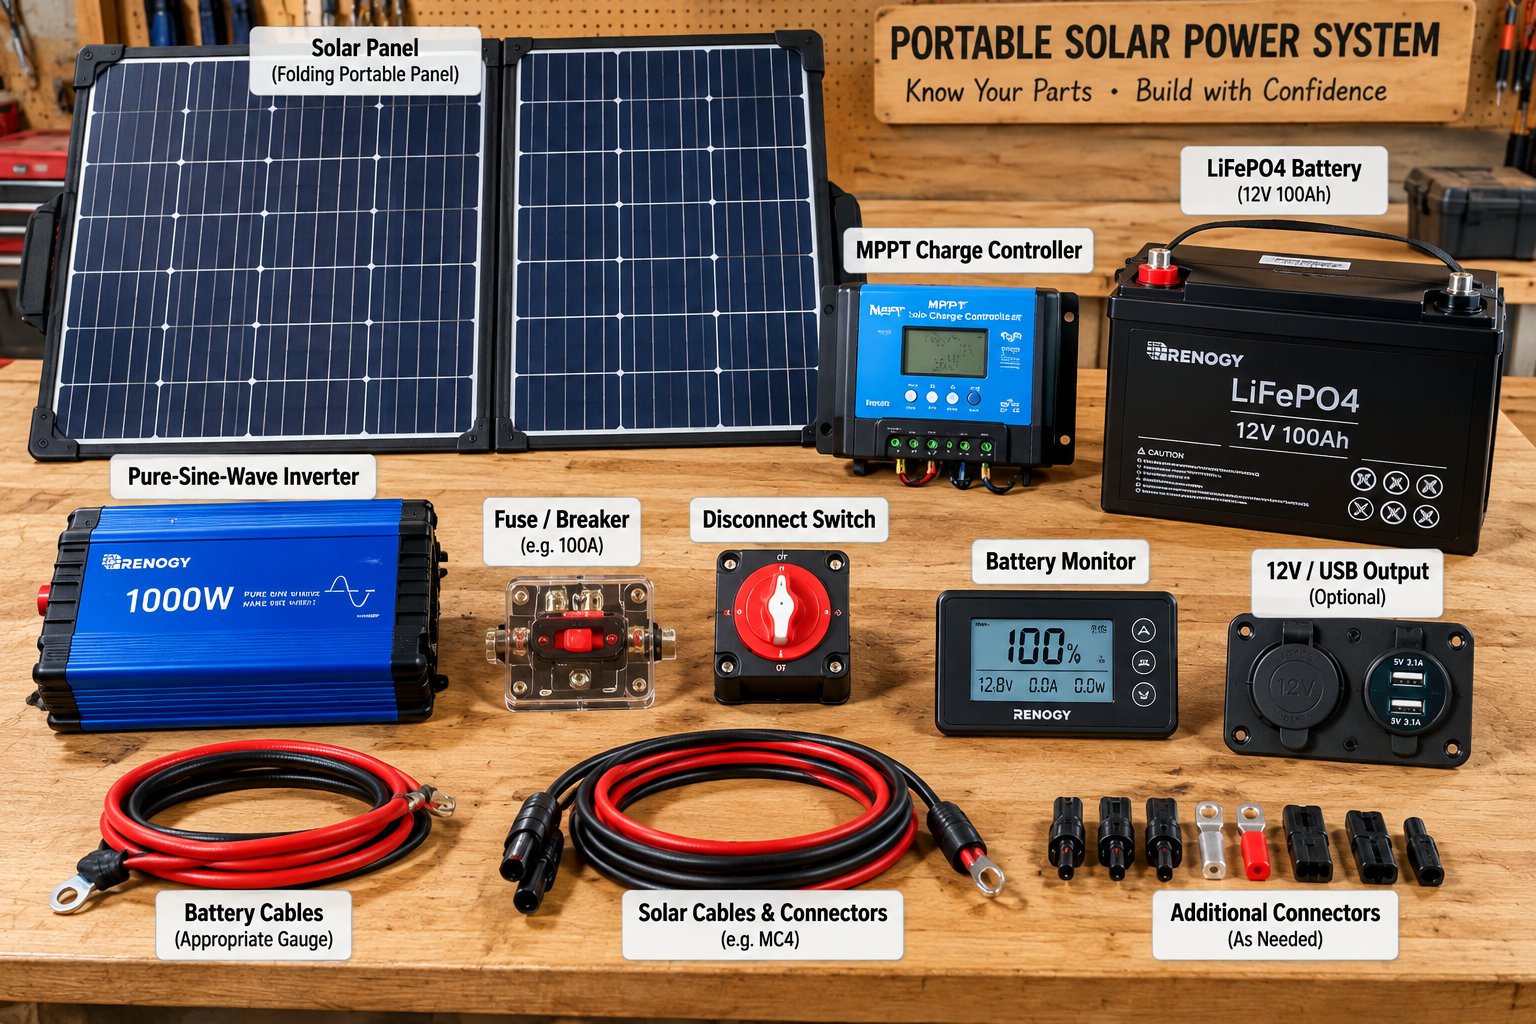
Before connecting anything, lay the major components out where you can see them. You will normally have a solar panel, charge controller, battery, appropriate cables and connectors, circuit protection such as fuses or breakers, and possibly an inverter. Depending on the design, you may also have disconnect switches, a battery monitor, and protected 12-volt or USB outputs. At this stage, don’t connect anything. Simply learn what each component does.
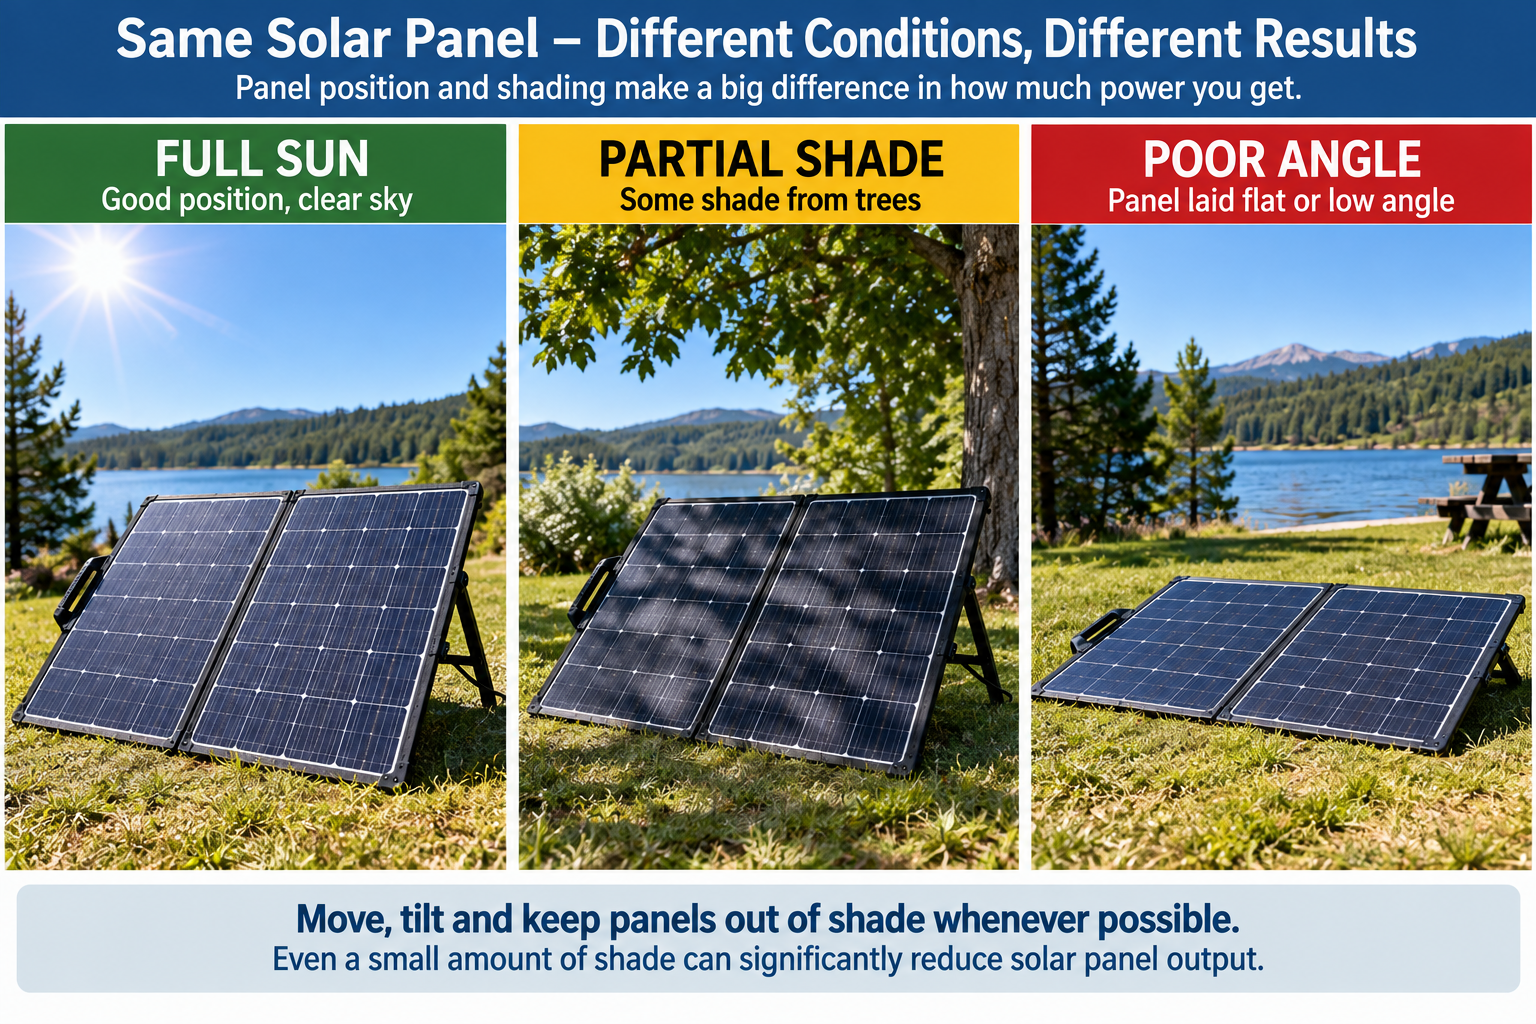
Start with the solar panel. This is the part that actually produces electricity from sunlight. Solar panels come in many sizes, and their output is usually described in watts. You might see portable panels rated at 50 watts, 100 watts, 200 watts, or considerably more. A 100-watt rating does not mean that the panel continuously produces 100 watts all day. It describes its rated output under specified test conditions. Clouds, shade, panel angle, temperature, smoke, snow, dirt, season, and the amount of available sunlight can all change how much electricity the panel actually produces.
This is an important preparedness lesson because you should never design a solar system around the assumption that every day will provide perfect sunshine. A portable panel does have one useful advantage: you can often move it. If the panel becomes shaded by a tree or building, you may be able to reposition it. You can also adjust its angle as the sun moves. Even a relatively small amount of shading can significantly reduce the output of some solar configurations, so learning how to position the panel is part of learning how to use the system.
Electricity from the solar panel then needs to reach the battery, but the panel should not simply be connected to the battery because both have positive and negative connections. The charge controller sits between them and manages the charging process. Think of the controller as the traffic manager between your source of electricity and your stored electricity. Its job is to make sure the battery is charged according to the appropriate requirements for that system.
You will commonly encounter charge controllers described as PWM or MPPT. You do not need to become an expert on either technology before understanding the system. PWM controllers tend to be simpler, while MPPT controllers are often used when greater efficiency or more capable solar configurations are desired. What matters most for a beginner is making sure the controller is compatible with the solar array, system voltage, battery chemistry, and expected charging current. If you think you might add more solar panels later, it can also make sense to select a controller with some room for expansion rather than one that is already at its limit.
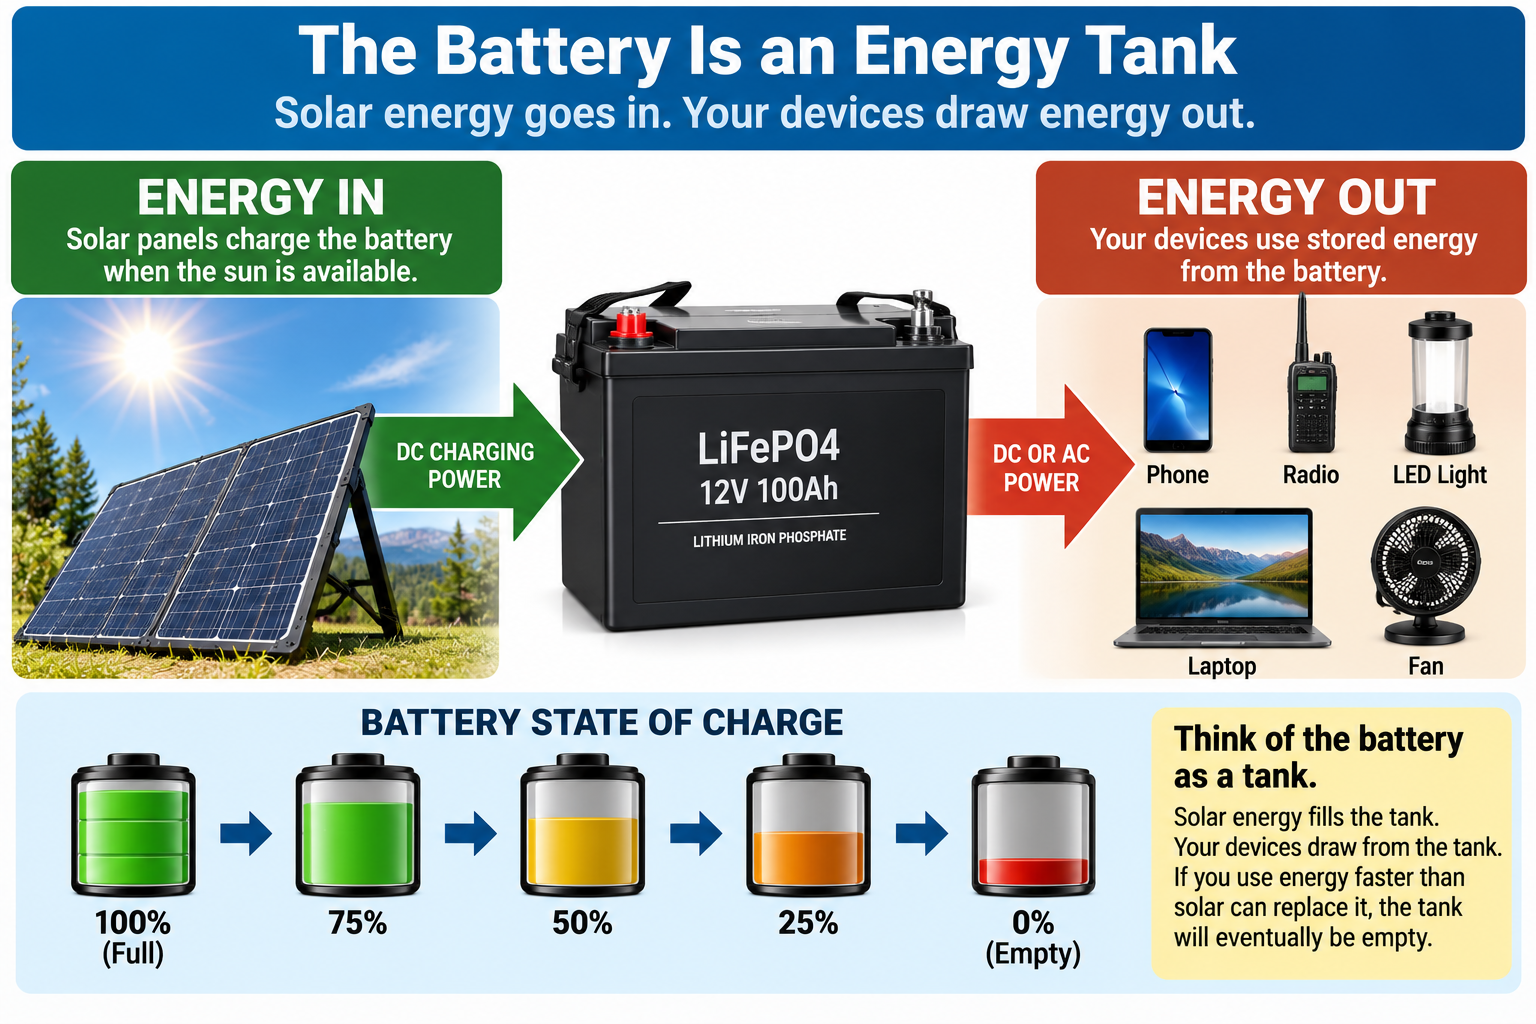
After the charge controller comes the battery. The battery is your energy storage. A useful way to picture it is as a tank. During good sunlight, solar energy flows into the battery. When you turn on equipment, energy flows out. If you continually remove energy faster than the solar panels replace it, eventually the battery becomes depleted. Understanding that relationship is one of the most important lessons in off-grid electricity.
Different batteries behave differently. Flooded lead-acid batteries are widely available and relatively inexpensive but have maintenance, ventilation, charging, and discharge requirements. AGM batteries reduce some of those maintenance requirements. Lithium iron phosphate batteries, usually identified as LiFePO4, have become popular for portable solar systems because of characteristics such as usable capacity, weight, efficiency, and cycle life, although they can cost more initially and require compatible charging equipment. Whichever type you choose, follow the battery manufacturer’s charging, temperature, installation, and discharge requirements.
The capacity printed on a battery should also not automatically be treated as the amount of energy you can routinely remove from it. Usable capacity depends on the battery chemistry and manufacturer’s recommendations. This is particularly important with some lead-acid batteries, which can suffer shortened life if they are repeatedly discharged too deeply. The important number for preparedness is not simply how large the battery sounds; it is how much usable energy it can reliably provide.
Following the Electricity Through the System
Now imagine electricity moving through the system. Sunlight reaches the solar panel and the panel produces DC electricity. That electricity travels to the charge controller. The controller manages the charging process and sends appropriate charging power to the battery. The battery stores that energy until you need it. From the battery, electricity can follow one of two general paths depending on what you want to operate.
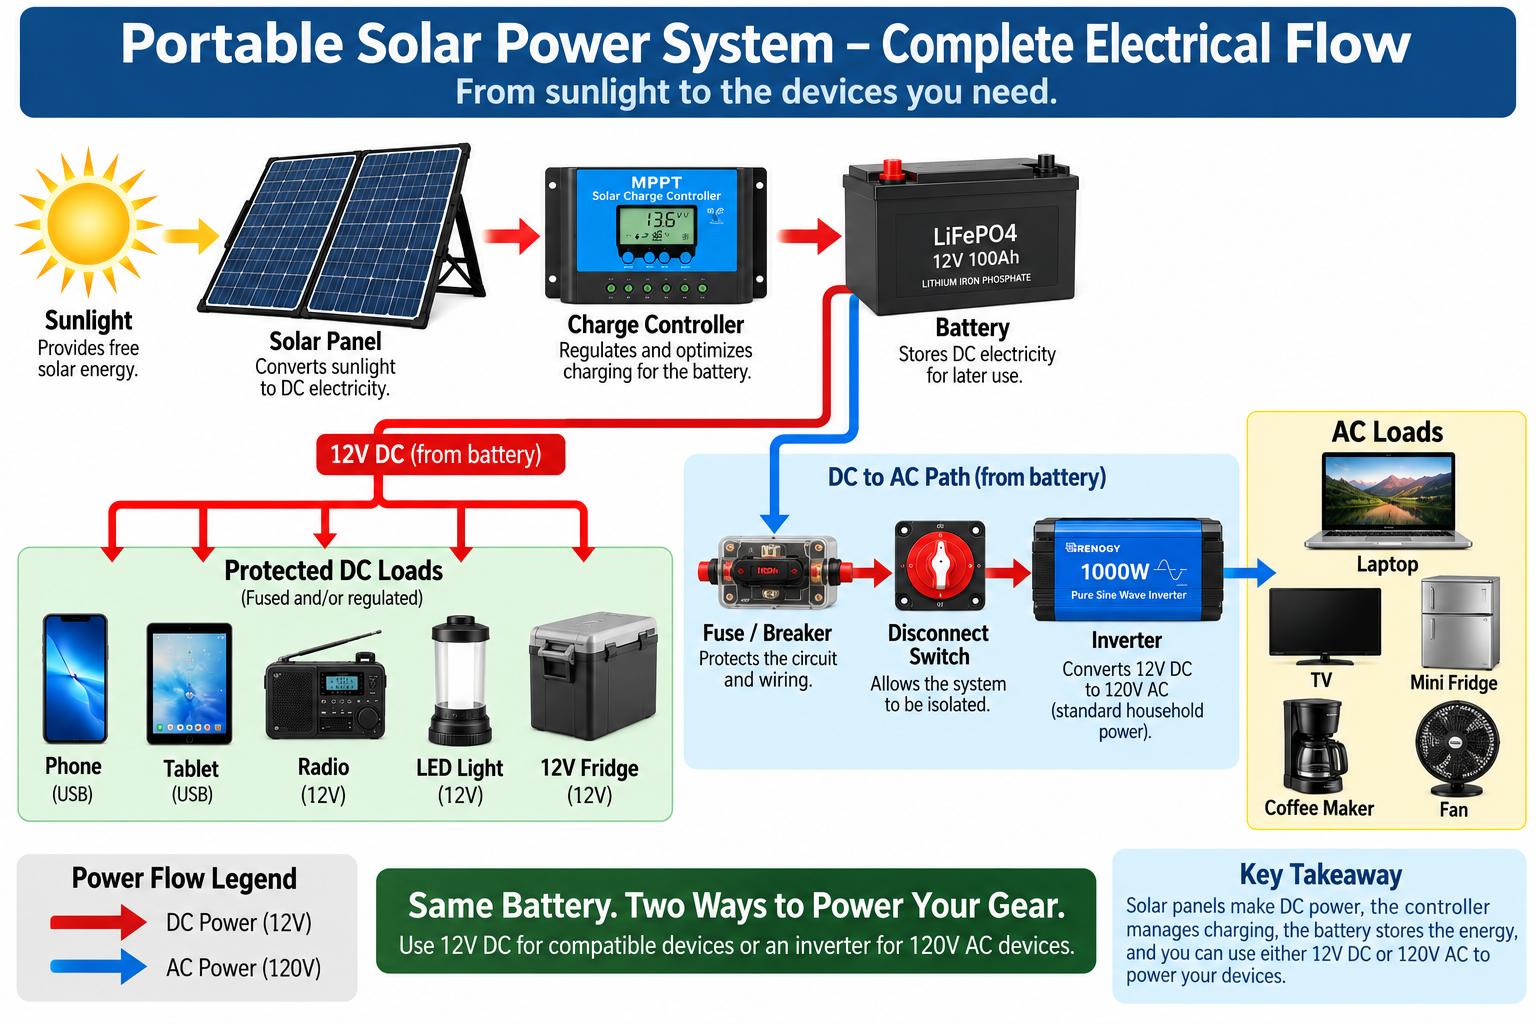
Suitable DC equipment may be powered through properly designed and protected DC outputs. This can be useful for certain radios, lights, USB charging equipment, communications equipment, and other compatible devices. Whenever appropriate, using DC directly can sometimes improve efficiency because you avoid converting battery DC electricity into AC electricity only to have a device’s power adapter convert it back into low-voltage DC.
The second path is through an inverter. The inverter takes DC electricity stored in the battery and converts it into AC electricity for compatible equipment that normally plugs into a household outlet. This makes the system much more versatile, but an inverter does not create additional energy. If your battery contains a limited amount of stored electricity, installing a huge inverter does not increase that amount. It simply gives the system the potential to consume the available energy much faster if a large load is connected.
This becomes easier to appreciate when you consider the current involved. A 1,000-watt load supplied from a nominal 12-volt battery can require roughly 83 amps before inverter losses are considered. That is a substantial amount of current. It is one reason the wiring between a battery and a large inverter is much heavier than the wire used to charge a phone.
Pure sine wave inverters are generally preferable for sensitive electronics and many motor-driven devices because their output more closely resembles conventional utility electricity. Whatever inverter is selected, it needs to be appropriate for the loads you intend to operate, and the battery, wiring, connectors, circuit protection, and overall system must be capable of supporting it.
Wiring the System Safely
This is the part where beginners need to slow down. You now understand what connects to what, but that does not mean you should start attaching wires based solely on a generic diagram. Electrical connections need to follow the instructions supplied with the actual equipment you purchased.
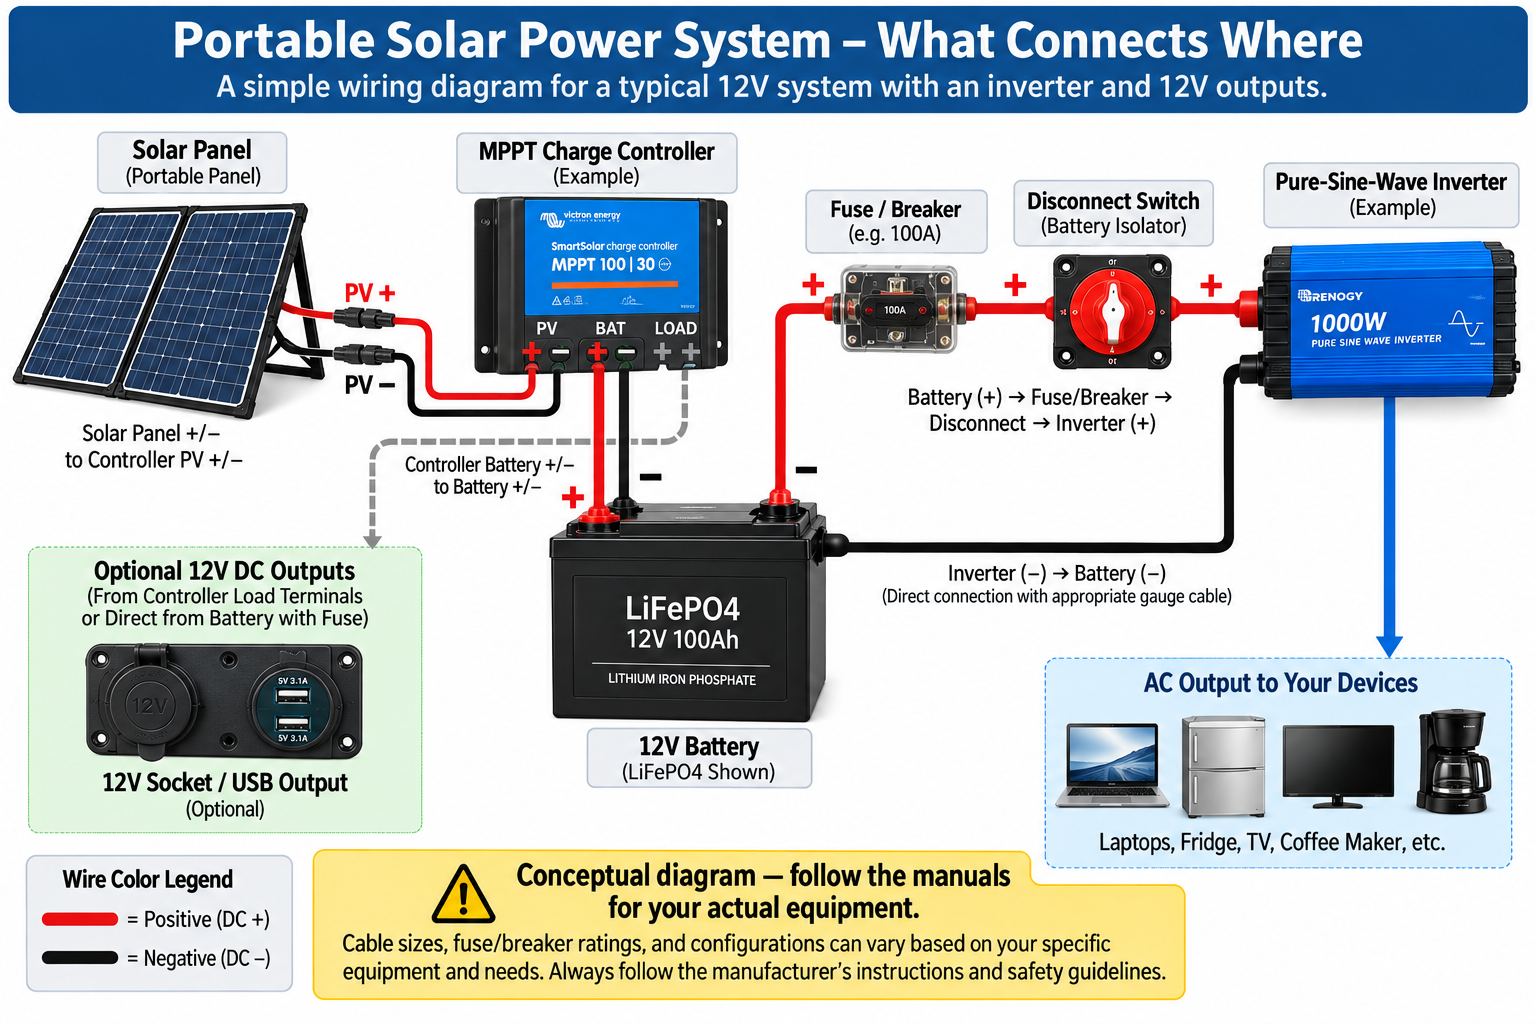
Many charge controllers, for example, require the battery to be connected before the solar panel so the controller can initialize and recognize the battery or system voltage. That is common, but it should not be treated as a universal rule. Read the manual for your particular controller and follow its required connection and disconnection sequence.
If the manufacturer’s instructions specify connecting the battery first, the appropriate positive and negative battery connections are made to the battery terminals on the controller using the required conductors, circuit protection, and other components specified for that system. Positive and negative polarity matter. Never guess which terminal or wire is which.
The solar panel is then connected to the controller’s solar input according to the required sequence. These connections may be identified as PV, Solar, PV+ and PV−, or something similar. Again, the positive panel connection goes to the appropriate positive solar input and the negative connection goes to the appropriate negative input. The actual installation may also require solar-side fuses, breakers, disconnects, or other protection depending on the equipment and configuration.
The inverter is connected on the battery side of the system rather than directly to the solar panel. On a typical high-current battery circuit, the positive side may conceptually follow a path from the battery through appropriately selected overcurrent protection and a disconnect before reaching the inverter. The negative side completes the circuit according to the system design. The exact arrangement must follow the inverter, battery, and system manufacturers’ requirements.
Circuit protection is not an optional detail. Batteries can deliver very large amounts of current into a short circuit. An undersized wire, damaged conductor, loose connection, or electrical fault can generate considerable heat. Properly selected fuses or circuit breakers are intended to interrupt dangerous overcurrent before the conductors or equipment are damaged.
There is no single fuse size or wire gauge that is correct for every portable solar system. The correct conductor size and circuit protection depend on the current, equipment ratings, cable length, allowable voltage drop, conductor specifications, inverter requirements, installation environment, and other factors. This is why a generic guide should never tell every reader to simply use a particular fuse and cable size without knowing the actual equipment involved.
If high-current battery wiring, grounding, circuit protection, or conductor sizing does not make sense to you, have that portion of the design checked by someone qualified. You can still understand and operate your system without pretending to know something you have not yet learned. In preparedness, knowing where your knowledge ends is itself an important safety skill.
Figuring Out How Much Power You Need
Once you understand how the system works, you can start determining how large it needs to be. The easiest mistake is to begin by asking what size solar panel to buy. Start instead with what you want to operate.
Suppose you have a 10-watt LED light and expect to operate it for four hours each evening. Multiply the power by the operating time. Ten watts multiplied by four hours equals 40 watt-hours. If a 50-watt device operates for two hours, it consumes approximately 100 watt-hours. Repeat that calculation for your essential equipment and add the numbers together.
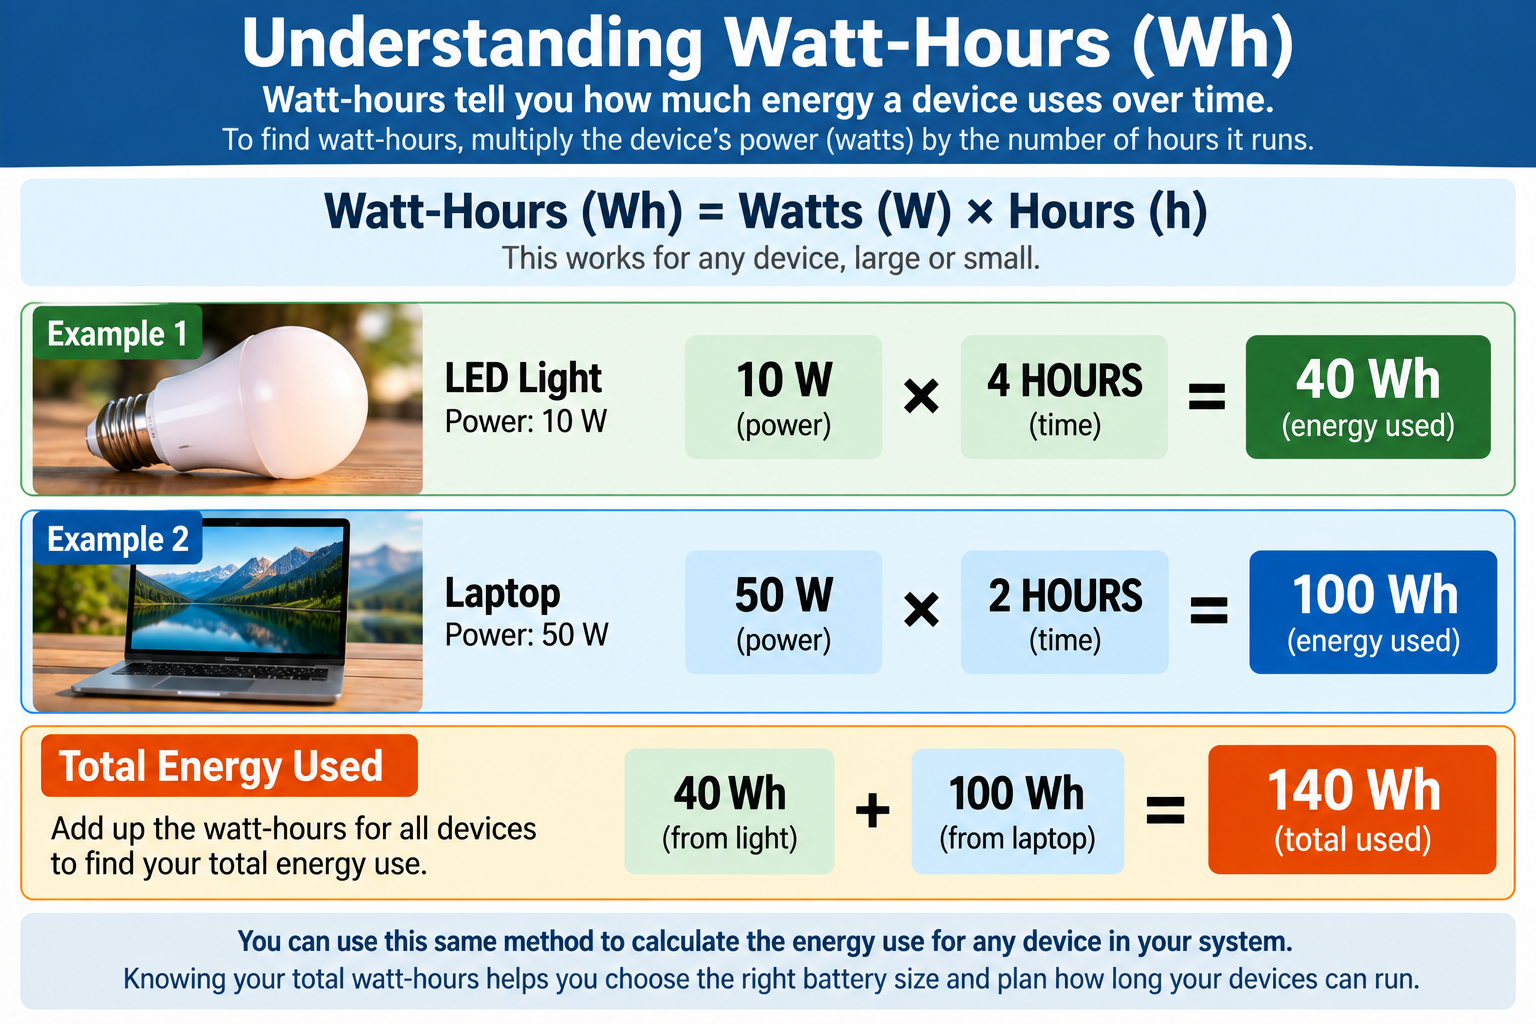
That total gives you an estimate of your daily electrical requirement. Real systems also experience losses, and actual consumption can differ from labels or estimates, so some reserve should be included rather than designing everything to operate exactly at its theoretical limit.
The battery-as-a-tank analogy becomes useful again here. Your phone takes a little energy from the tank. LED lights take some more. A radio takes some. A laptop may take considerably more. An electric heater, kettle, or cooking appliance can drain energy at a dramatically higher rate. Meanwhile, your solar panels are trying to put energy back into the tank.
If your equipment consumes 800 watt-hours in a day while your panels only manage to replace 400 watt-hours, you have lost 400 watt-hours from your stored reserve. If the same thing happens the following day, the deficit becomes larger. Unless another charging source is available or consumption is reduced, eventually the battery reaches its allowable discharge limit.
This is why conservation is part of an emergency energy system. Sometimes the least expensive way to increase your electrical endurance is not buying another battery. It is reducing unnecessary electrical consumption.
During a prolonged outage, communications, emergency lighting, medical requirements, water systems, information access, and other important capabilities should receive priority. Convenience loads can be reduced or eliminated when stored energy becomes limited.
Making the System Portable and Practical
A portable system should be designed so it can actually be moved and deployed when needed. Depending on the equipment and manufacturer requirements, the battery, charge controller, inverter, circuit protection, disconnects, monitoring equipment, and outputs may be mounted in or on an appropriate equipment case, battery box, cart, or mounting board. The solar panel can remain separate so it can be positioned outside in good sunlight while the battery and electronics remain in a protected location.
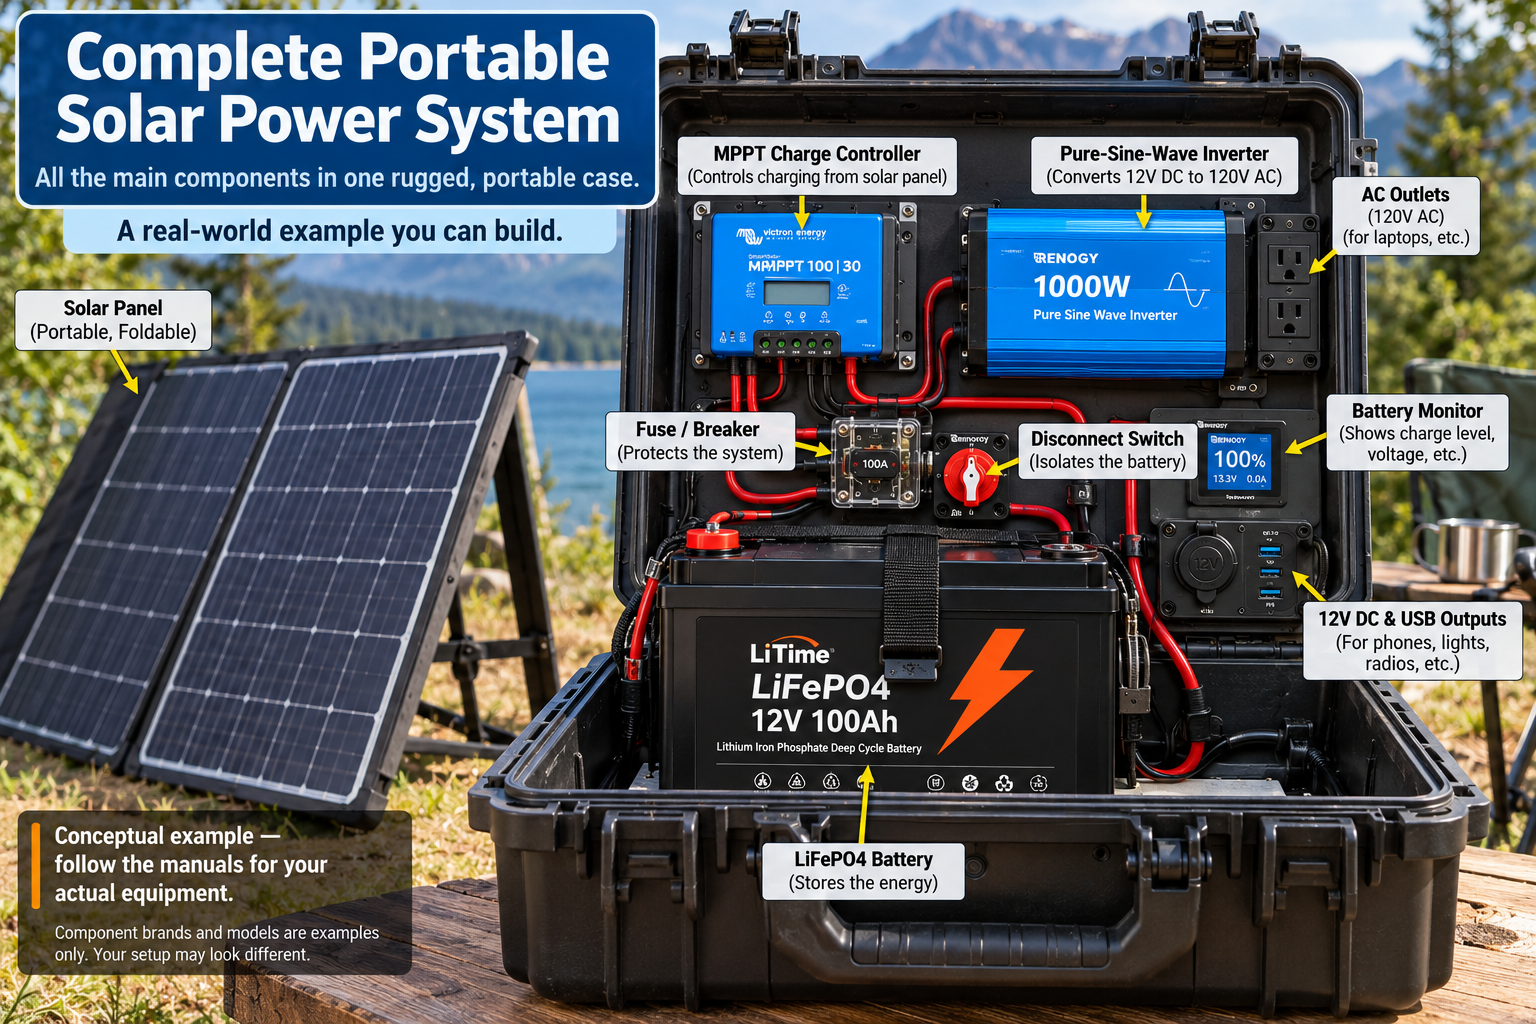
Do not simply pack electrical components tightly into a sealed container because it looks neat. Batteries, inverters, charge controllers, and other equipment can have ventilation, temperature, spacing, mounting, and environmental requirements. Follow those requirements when designing the enclosure.
Portability gives the system another preparedness advantage. The same equipment may potentially be used at home during an outage, taken to a cabin or campsite, used at a temporary shelter, moved to a workshop, or deployed wherever limited electrical power is needed.
Monitoring also makes a portable system much more useful. Many charge controllers display information such as battery voltage, charging current, or charging status. A dedicated battery monitor can provide considerably more information about electricity entering and leaving the battery and help estimate remaining capacity.
This allows you to manage electricity rather than guess. If the battery is becoming depleted and several cloudy days are expected, you can reduce nonessential consumption before the battery reaches a critical level. That decision might preserve enough electricity for communications, lights, radios, or another important device.
Prepare for the Days When Solar Isn’t Enough
Solar is renewable, but it is not continuously available. Several cloudy days can dramatically reduce production. Winter can mean shorter days and lower sun angles. Snow can cover the panel. Wildfire smoke can reduce solar intensity. Trees, buildings, and mountains can limit sunlight.
A preparedness system should therefore be planned around imperfect conditions rather than the best sunny day of the year.
This is where redundancy becomes valuable. Solar may be the primary method of recharging the battery, while another compatible charging source provides backup. Depending on the system, that might include grid charging while electricity is available, an appropriately designed vehicle charging system, a generator, or another suitable source.
Each method solves a different problem. A generator can produce substantial electricity quickly but depends on fuel. A battery provides immediate, quiet electricity but eventually becomes depleted. Solar can replenish batteries without continuously consuming stored fuel, but it depends on sunlight.
Using more than one appropriate charging method can make the overall emergency power system more resilient.
Learn the System Before You Depend on It
One of the best reasons to start with a modest portable solar system is that it gives you an opportunity to learn.
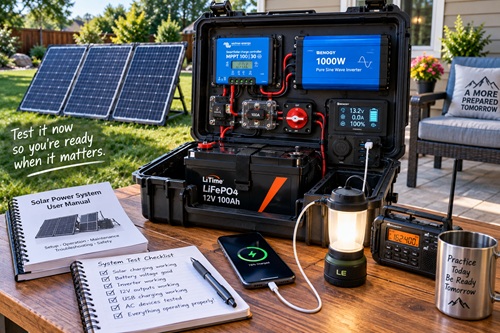
Set it up during normal conditions and actually use it. Put the panel in the sun and watch how much power it produces. Observe what happens when a cloud passes overhead. Move part of the panel into shade and watch the difference. Operate your lights, charge your phone, run your radio, and use the other equipment you expect to depend upon.
Then watch what happens to the battery.
Try operating your planned emergency equipment for an entire day without plugging those devices into grid electricity. Recharge the battery using solar. Once you are comfortable doing that, try it for a weekend.
You may discover that the system is larger than you need. You may discover that it is far too small. You might discover that one particular appliance is consuming most of your electricity. You may learn that your battery has plenty of capacity but your solar panels cannot recharge it quickly enough.
Every one of those discoveries is useful because you made it while the electrical grid was still available.
Those observations also tell you how to expand intelligently. If the battery frequently reaches full charge but cannot carry your loads through the night, more usable battery capacity might help. If the battery rarely becomes fully charged, additional solar generation may be more useful. If one inefficient appliance consumes most of your available energy, replacing that appliance may be cheaper and more effective than expanding the entire power system.
Keep the manuals for every component with the system. Also keep a simple wiring diagram, component specifications, fuse and breaker information, operating instructions, and troubleshooting information available offline. Label cables and connections where confusion is possible. Store appropriate spare fuses, connectors, adapters, and basic tools with the equipment.
The goal is for the system to remain understandable even months or years after you built it.
Preparedness Action Plan
Begin by deciding what you actually need electricity for during an extended outage. Write down your essential devices, find their wattage, estimate how many hours each will operate, and calculate their approximate daily watt-hour consumption. Separate genuine needs from convenience loads. This gives you a realistic target for the amount of electricity your system needs to generate and store.
Next, learn the major components before purchasing or connecting them. You should be able to identify the solar panel, charge controller, battery, inverter, circuit protection, disconnects, wiring, connectors, monitoring equipment, and DC outputs included in your design. More importantly, you should be able to explain what each one does.
Lay the equipment out without connecting it and trace the energy path: solar panel to charge controller, charge controller to battery, and battery to the equipment being powered. If AC electricity is needed, trace the protected battery circuit to the inverter and then to the AC load.
Verify that the solar array, charge controller, battery chemistry, inverter, wiring, connectors, fuses or breakers, disconnects, and other components are compatible. Use the manuals for the actual equipment to determine connection sequence, conductor requirements, circuit protection, settings, grounding, mounting, ventilation, and other installation requirements. Do not substitute a generic internet diagram for the manufacturer’s specifications.
Once the system is safely assembled and verified, practice using it. Operate your emergency equipment from the battery, recharge the battery from solar, monitor the energy entering and leaving the system, and determine how your setup performs during less-than-perfect weather.
Finally, document what you have learned. Keep your manuals, wiring diagram, component specifications, operating instructions, troubleshooting information, and important replacement parts with the system and available offline. Someone other than the person who built it should be able to look at the documentation and understand how the system is supposed to operate.
Key Takeaways
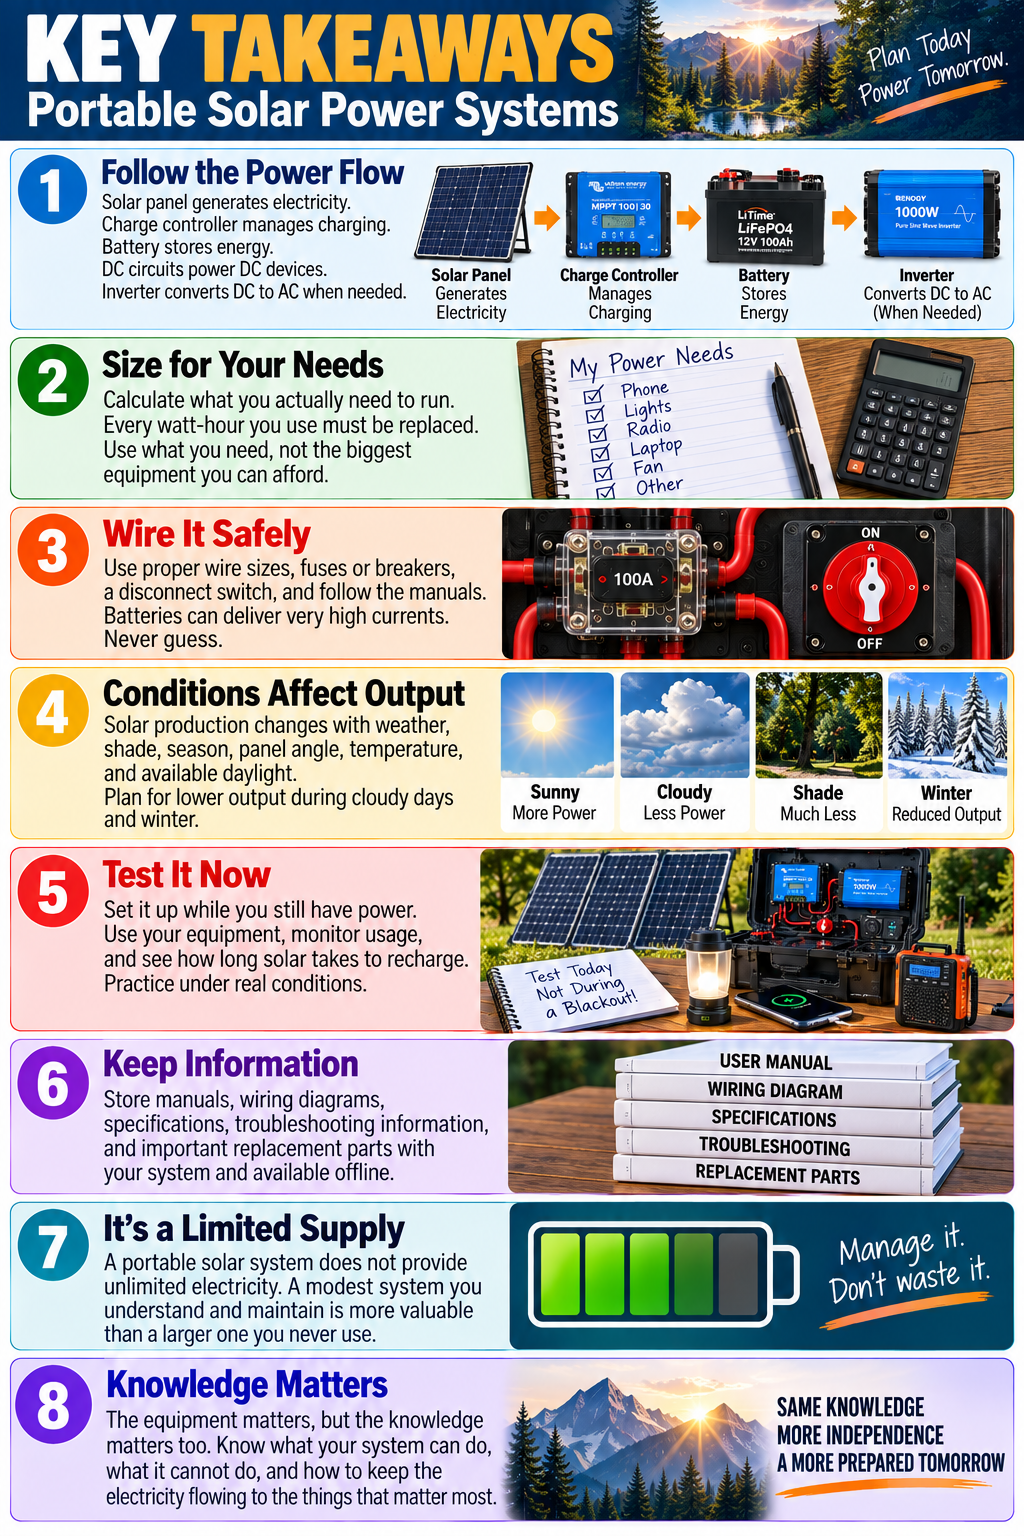
A portable solar power system becomes much easier to understand when you stop thinking about individual pieces of equipment and instead follow the electricity. The solar panel generates electricity. The charge controller manages battery charging. The battery stores energy. Protected DC circuits can operate compatible DC equipment, and an inverter converts stored DC energy into AC electricity when AC power is required.
The system should be sized around what you actually need to operate rather than around the largest solar panel, battery, or inverter you can afford. Calculate your electrical needs, understand your usable battery capacity, and remember that every watt-hour you consume eventually has to be replaced. Reducing unnecessary power consumption can sometimes improve your emergency electrical endurance just as effectively as adding more batteries or solar panels.
Wiring and circuit protection deserve the same attention as the solar panel, battery, and inverter. Batteries can supply very high currents, so conductor size, connections, fuses or breakers, disconnects, polarity, grounding, and other electrical requirements should never be guessed. A generic wiring diagram can help you understand how the pieces relate to one another, but the manuals and specifications for your actual equipment should determine how the system is connected and protected.
Solar production also changes with conditions. Clouds, shade, panel angle, season, temperature, smoke, snow, and available daylight can all affect how much energy reaches the battery. A system that works comfortably on a perfect summer day may perform very differently during several cloudy winter days. Building some reserve into the system and having another compatible way to recharge the battery can make emergency power considerably more resilient.
Most importantly, owning solar equipment is not the same as knowing how to use it. Set the system up while normal electricity is still available. Charge the battery, operate the equipment you expect to depend on, monitor how quickly energy is consumed, and see how long solar takes to replace it. Practice under less-than-perfect conditions and learn where your system’s limits are before those limits matter.
Keep the equipment manuals, wiring diagram, component specifications, operating instructions, troubleshooting information, and important replacement parts with the system and available offline. Someone should be able to understand how the system works even if the person who originally built it is unavailable.
A portable solar system does not provide unlimited electricity, and it does not need to. Its preparedness value comes from giving you a way to generate, store, manage, and replenish a limited supply of electricity when normal power is unavailable. A modest system that you understand, maintain, and have practiced using can be far more valuable in an emergency than a larger system you have never tested.
The equipment matters, but the knowledge matters just as much. Know what your system can do, know what it cannot do, and know how to keep the electricity flowing to the things that matter most.
© Prepping Communities. This content is for informational purposes only and not professional advice. Use at your own risk.
Terms | Privacy | Guidelines