
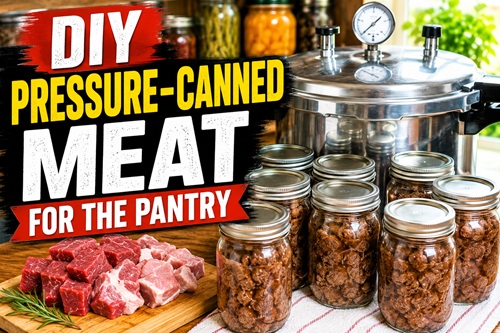
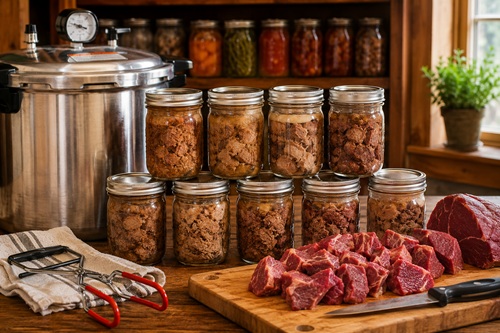
Pressure canning meat is a practical way to turn fresh or frozen meat into shelf-stable food that doesn’t depend on your freezer staying powered. For a homestead or preparedness pantry, that gives you another way to preserve beef, pork, venison, and other suitable meats while also creating food that’s already largely cooked when you need it.
Canned meat can be used in soups, stews, gravy, sandwiches, tacos, rice dishes, pasta, casseroles, and countless other meals. Pressure processing also tends to tenderize tougher cuts of meat, making inexpensive cuts especially useful for canning. The source material provided for this posting notes the same advantage and describes both raw-pack and hot-pack methods for meat.
There is one important rule before getting started. Meat is a low-acid food and must be processed in a pressure canner using a current tested canning procedure. A boiling-water canner cannot safely replace a pressure canner for meat. Unlike many DIY food projects where you can experiment with ingredients and techniques, the processing times, pressures, jar sizes, and preparation methods used for pressure canning should come from a tested recipe.
What You’ll Need
The basic equipment is fairly straightforward. You’ll need a pressure canner designed for home canning, Mason-type canning jars, appropriate lids and screw bands, a jar lifter, canning funnel, clean towels, cutting board, sharp knife, and pots or skillets if you’re using the hot-pack method.
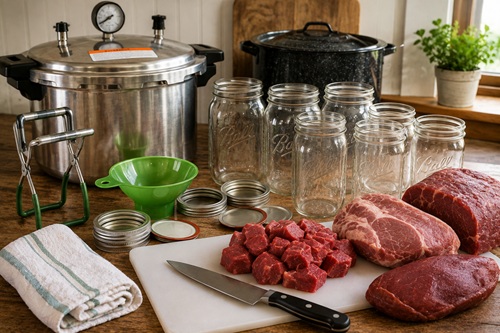
Don’t automatically assume that a small pressure cooker or electric multicooker can be substituted for a pressure canner. Use equipment intended and recommended for pressure canning and follow the manufacturer’s instructions for operating it.
You’ll also need good-quality meat. Beef, pork, lamb, venison, and other meats covered by tested canning procedures can be preserved this way. Canning isn’t a method for rescuing meat that’s beginning to spoil. Avoid anything with an unusual smell, slimy surface, or other indication that the meat is questionable. The source material likewise emphasizes starting with good-quality meat and keeping it properly chilled before canning.
Prepare the Meat
Keep the meat cold while you’re working with it. Trim away bruised areas, gristle, large pieces of visible fat, and other unwanted material. Some fat in the finished jar is normal, particularly with well-marbled cuts, but excessive fat isn’t desirable.
Cut boneless meat into reasonably uniform strips, cubes, or chunks. You don’t need every piece to be identical, but reasonably consistent pieces make packing easier and give you a more useful finished product.
This is also a good opportunity to think about how you’ll eventually use the meat. Cubes work well for stew, soup, gravy, and casseroles, while strips or somewhat larger pieces may be more useful for sandwiches, shredded meat, or serving with potatoes and vegetables.
Choose Raw Pack or Hot Pack
Plain meat can generally be prepared using either a tested raw-pack or hot-pack procedure. Both approaches work, but they’re slightly different.
With raw packing, prepared raw meat goes directly into the jars. For the tested procedure for plain meat strips, cubes, or chunks, the meat is packed into the jars leaving 1 inch of headspace, and no additional liquid is added. The meat releases its own juices while being processed.
Raw packing is convenient because there’s very little preparation. Trim the meat, cut it, fill the jars, and prepare them for processing.
Hot packing requires an additional step. The meat is partially cooked by browning, roasting, or stewing before being placed into the jars. Hot broth, water, or meat drippings specified by the tested procedure are then added, again leaving the required 1 inch of headspace.
Hot packing takes a little more time, but it generally provides better liquid coverage in the finished jars. The source material supplied for this posting also describes both raw and hot packing as options for beef and pork strips, cubes, and chunks.
Raw-Pack the Meat
If you’re using the raw-pack method, prepare your pressure canner according to its manufacturer’s directions while you trim and cut the chilled meat.
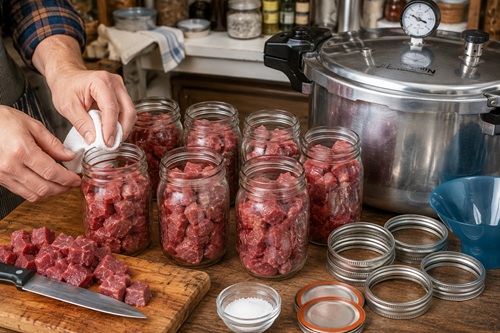
Pack the raw meat into the jars, leaving 1 inch of headspace. Don’t cram the meat down as tightly as possible. Fill the jar appropriately while maintaining the required headspace.
For plain raw-packed meat, don’t add water or broth unless the particular tested recipe you’re following specifically calls for it. The meat will produce liquid as it processes, although the finished liquid may not completely cover every piece.
Salt is optional. It’s there for flavor rather than preservation, so you can leave it out if you prefer.
Carefully wipe the jar rims so they’re clean, position the lids, apply the screw bands according to the lid manufacturer’s directions, and place the jars into the pressure canner.
Hot-Pack the Meat
For hot packing, begin by partially cooking the prepared meat. It can be browned, roasted, or stewed until rare according to the tested procedure you’re using.
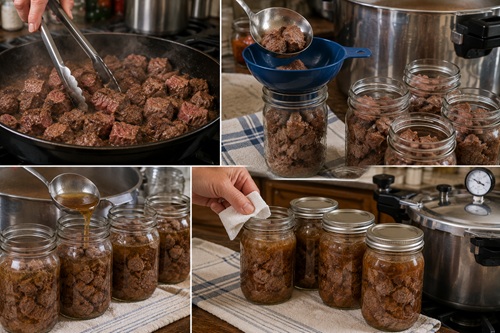
You’re not trying to fully cook dinner at this point. The meat is still going to spend considerable time being processed inside the pressure canner.
Place the hot meat into the prepared jars and add boiling broth, water, meat drippings, or whatever liquid the tested procedure specifies. Maintain 1 inch of headspace.
Remove trapped air bubbles where appropriate, recheck the headspace, clean the rims, apply the lids and bands, and place the jars into the pressure canner.
Pressure-Process the Jars
This is the point where following a current tested procedure becomes especially important.
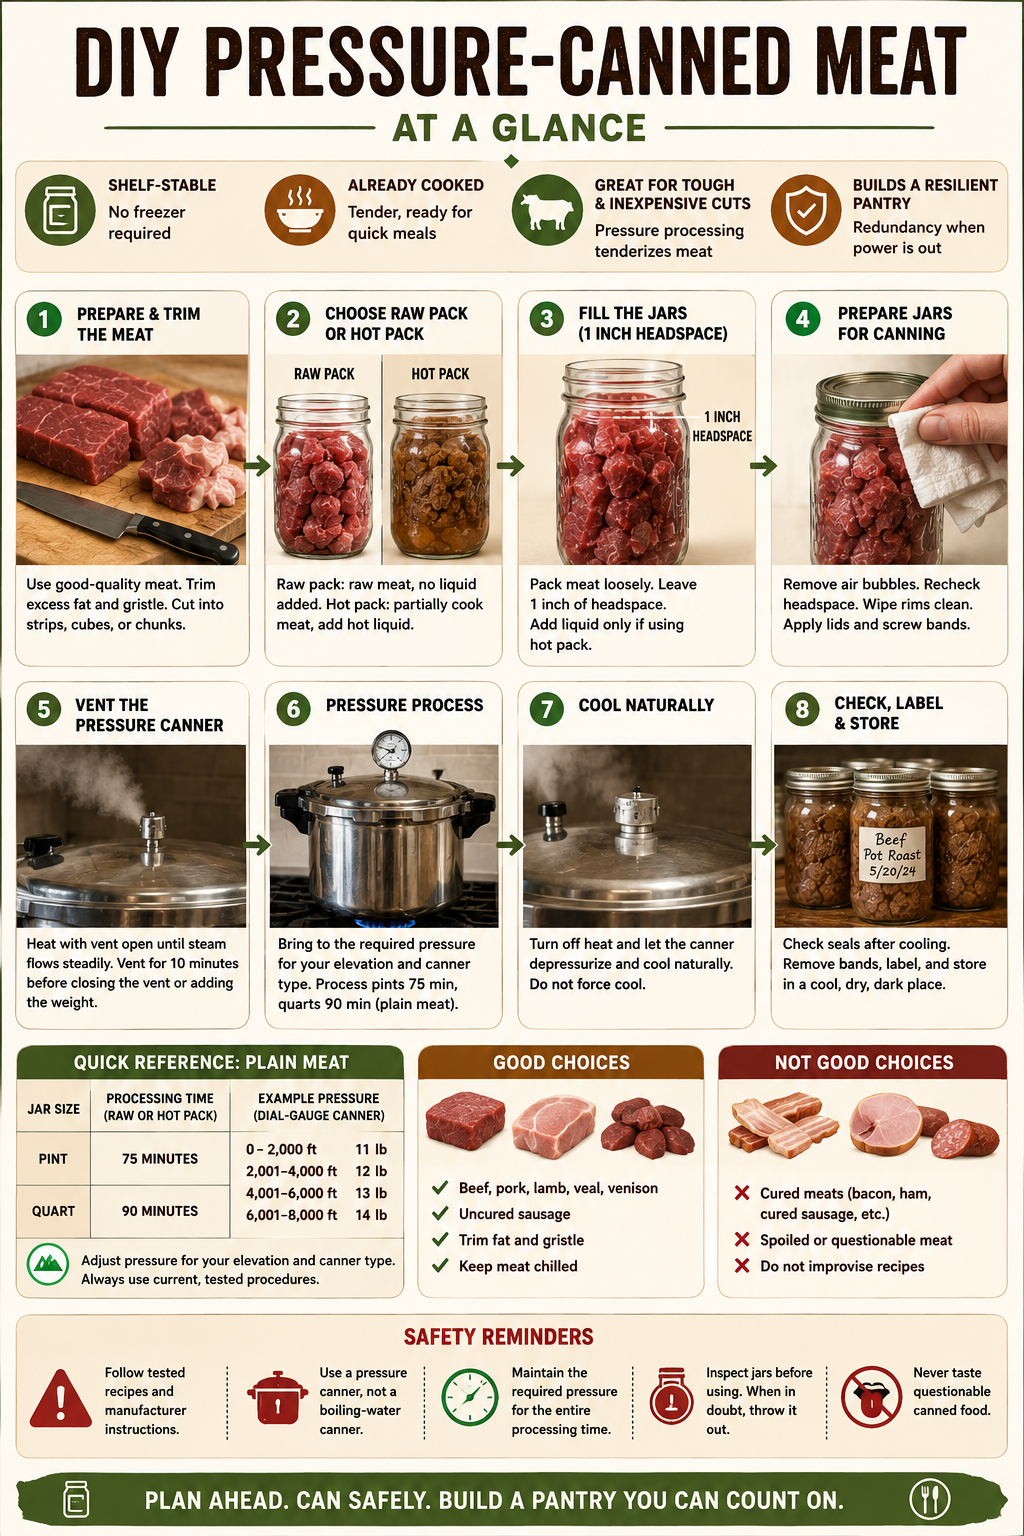
For plain meat strips, cubes, and chunks, current USDA/NCHFP guidance specifies processing pint jars for 75 minutes and quart jars for 90 minutes. Those processing times apply to both hot-packed and raw-packed plain meat.
The required pressure, however, depends on both your elevation and the type of pressure canner you’re using.
With a dial-gauge pressure canner, the required pressure increases as elevation increases. Weighted-gauge canners use a different pressure schedule. This means an instruction that simply says “process meat at 10 PSI” isn’t sufficient for everyone.
Know your elevation and use the appropriate current processing table for your canner.
Vent the Pressure Canner
Pressure canning isn’t simply a matter of closing the lid, bringing the gauge to pressure, and starting a timer.
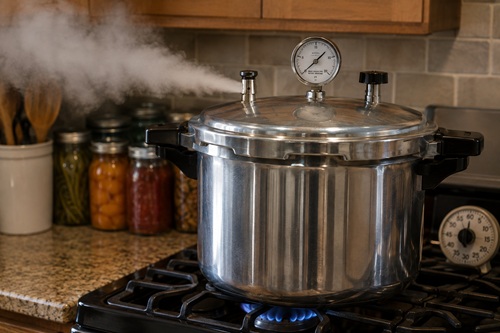
Follow your particular canner’s operating instructions. With conventional pressure canners, the canner is heated with the vent open until steam flows steadily from the vent. The steam is allowed to exhaust continuously for the required venting period – commonly 10 minutes under USDA/NCHFP procedures – before the vent is closed or the weight is applied.
The pressure is then allowed to rise to the level required for your elevation.
Only after the correct processing pressure has been reached should the processing timer begin.
Maintain the required pressure for the entire processing period. Don’t intentionally reduce the heat so far that the pressure repeatedly falls below the required level.
Let the Canner Depressurize Naturally
Once the processing time has finished, turn off the heat and allow the pressure canner to cool and depressurize naturally according to the manufacturer’s instructions.
Don’t try to save time by pouring cold water over the canner, removing the weight prematurely, opening the vent, or otherwise forcing the pressure down.
Pressure continues to play an important role while the canner is cooling. Rapidly changing the pressure can also cause liquid to be forced from jars and may interfere with sealing.
Once the canner has completely depressurized, open it according to the manufacturer’s directions. Be mindful of the hot steam when removing the lid.
Lift the jars straight up using a jar lifter and place them upright on a towel or another suitable heat-resistant surface.
Then leave them alone.
Don’t tighten the bands, push down on the lids, or disturb the jars unnecessarily while they’re cooling.
Check the Jars After Cooling
Once the jars have cooled completely, check every seal.
Remove the screw bands and verify that the lids are firmly sealed. Don’t put an improperly sealed jar into pantry storage and hope that it’s fine.
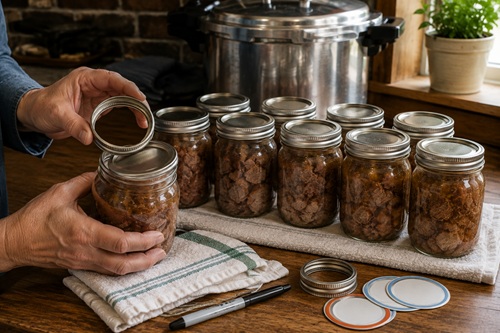
Wash or wipe the outside of the jars if necessary and label them with the contents and processing date. Store properly sealed jars somewhere cool, dry, and dark.
Before using any home-canned food, inspect the jar carefully. A leaking jar, loose or bulging lid, unusual appearance, mold, spurting liquid, or other indication that something isn’t right should be taken seriously.
Never taste questionable home-canned food to determine whether it’s safe.
What About Ground Meat?
Ground meat shouldn’t simply be substituted for meat chunks in the instructions above.
Ground or chopped meat has its own tested preparation procedure. Beef, pork, lamb, venison, and suitable uncured sausage are generally browned before being packed into jars. Excess fat is removed, and boiling liquid specified by the tested procedure is added.
Ground-meat procedures still commonly use 75 minutes for pints and 90 minutes for quarts, but you should follow the complete tested procedure rather than borrowing only the processing time.
This is an important principle throughout home canning. Two foods may look similar in a jar while requiring different preparation or processing.
Be Careful With Cured Meat
Bacon, ham, cured sausage, and other cured meats shouldn’t automatically be treated like fresh meat.
Curing changes the characteristics of the meat, and tested canning procedures for fresh meat shouldn’t simply be extended to cured products. The source material specifically raises this issue and recommends caution rather than assuming that because someone has canned a particular cured meat before, the practice has been demonstrated to be safe.
If you want to preserve sausage, bacon, ham, or another cured product, find a current tested procedure specifically covering that product rather than modifying a plain-meat recipe.
Don’t Invent Your Own Meal-in-a-Jar Recipe
Once you’ve successfully canned meat a few times, it’s easy to start thinking about everything else you could put into the jar.
Beef, potatoes, carrots, onions, gravy, flour, butter, cream, mushrooms, and seasonings might make a great dinner, but that doesn’t mean those ingredients can simply be combined in whatever proportions you want and pressure canned.
The density and composition of food affect how heat moves through the jar. Adding flour, starch, dairy products, large amounts of fat, or changing ingredient proportions can change the way the product heats during processing.
Use a tested recipe when canning complete meals.
If you want gravy, cream, cheese, flour, cornstarch, or another thickener, it’s often much easier to add those ingredients after opening the jar when you’re preparing the meal.
That gives you considerably more freedom while keeping the actual preservation process based on a tested method.
Keep Some Jars Simple
There’s a strong argument for keeping a large portion of your canned meat plain.
A jar of plain beef can become beef stew one night and tacos the next. It can be added to rice, potatoes, noodles, soup, gravy, sandwiches, casseroles, or vegetables.
Plain pork can become pulled-pork sandwiches, soup, tacos, rice bowls, or numerous other meals.
Plain canned meat gives you flexibility.
That’s particularly useful for long-term food storage because you don’t know exactly what you’ll want to eat months from now. Instead of filling your pantry with dozens of highly specialized meals, you’re preserving ingredients that can be combined with whatever else you have available.
Use Tougher Cuts
Pressure canning can be particularly useful for tougher and less expensive cuts.
The extended pressure-processing period naturally tenderizes the meat. Cuts that might otherwise require hours of slow cooking can come out of the jar tender and ready to incorporate into a meal.
The supplied source material specifically notes that pressure canning can make tough cuts such as brisket tender without requiring the usual long stovetop cooking.
That creates an opportunity for homesteaders and households buying meat in bulk. You don’t necessarily need to reserve your best steaks and roasts for canning. Less expensive cuts can become extremely useful pantry food.
Why Pressure-Canned Meat Matters for Preparedness
A freezer is an excellent way to preserve meat, but every freezer has one obvious weakness: it depends on electricity.
During a short power outage, that isn’t necessarily a serious problem. During a prolonged outage, however, a freezer full of meat can quickly turn into a race against time.
Pressure canning gives you another preservation method.
The goal doesn’t have to be eliminating the freezer. A more resilient approach is spreading your food across several preservation methods. Some meat can remain frozen. Some can be pressure canned. Other suitable foods can be dehydrated, freeze-dried, commercially canned, or preserved using other appropriate methods.
If one system fails, you haven’t necessarily lost everything.
Pressure-canned meat also requires relatively little preparation when it’s time to eat it. That’s useful during ordinary busy days, but it becomes even more valuable during an emergency when fuel, electricity, water, or cooking time may be limited.
Start With a Small Batch
If you’ve never pressure canned meat before, there’s no reason to start with 50 pounds of beef.
Begin with a small batch using a straightforward tested recipe for plain meat.
Learn your pressure canner.
Pay attention to how long it takes to heat, vent, reach pressure, complete processing, and cool naturally. Learn how your stove responds when you’re trying to maintain steady pressure. See how much meat actually fits comfortably into each jar.
Then open one of those jars later and cook with it.
See what you think of the texture and flavor. Try the meat in stew, gravy, tacos, rice, or another familiar meal.
Once you’re comfortable with the entire process, increasing the size of your batches becomes much easier.
Keep Your Canning Information Offline
If pressure canning is part of your preparedness plan, don’t make internet access a requirement for using your equipment.
Keep the manufacturer’s manual with your pressure canner. Print or save current USDA/NCHFP processing tables, altitude adjustments, tested meat-canning procedures, troubleshooting information, and your own notes about operating your particular canner.
Write down your elevation and the appropriate pressure settings for your location.
That way, years from now, you aren’t trying to remember whether a particular jar requires 75 minutes, 90 minutes, 10 pounds, 11 pounds, or something else.
The pressure canner is only part of the system. The jars, lids, food, tested instructions, and knowledge of how to use everything safely are equally important.
Pressure canning meat isn’t difficult once you understand the process, but it isn’t a preservation method where guessing is worthwhile. Learn the method, use tested procedures, understand your equipment, and practice while everything is normal.
Then those jars on the pantry shelf become more than stored food. They represent another way to keep feeding your household when the freezer – or the electrical system supporting it – isn’t available.
© Prepping Communities. This content is for informational purposes only and not professional advice. Use at your own risk.
Terms | Privacy | Guidelines