
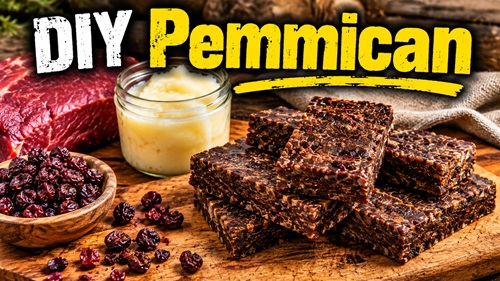
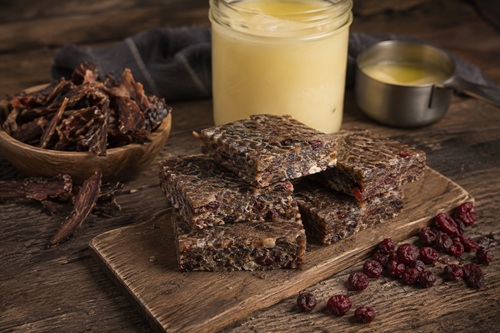
How to Make Traditional Meat and Tallow Pemmican
Pemmican is a simple, calorie-dense food made primarily from completely dried lean meat and rendered animal fat. Traditional versions were made with available meats such as bison, deer, moose, and caribou. Today, very lean beef and rendered beef tallow provide an accessible way to learn the same basic technique at home. Dried berries can also be included, although they aren’t necessary. The basic foundation remains dried meat and rendered fat.
The process isn’t complicated. Lean meat is dried until almost all of its moisture has been removed, ground into very small particles, and combined with enough melted tallow to bind everything together. The mixture is then compressed and allowed to cool until the tallow becomes solid again.
A useful starting formula is two parts completely dried and ground meat to approximately one part rendered tallow by volume. This ratio applies to the meat after it has been dried and ground, not to raw meat. The source recipe, for example, combined 1½ cups of dried beef with approximately ¾ cup of tallow.
DIY Pemmican Recipe
For a small batch, use 2 cups completely dried and finely ground lean beef, approximately 1 cup clean rendered beef tallow, and ¼ to ½ cup completely dehydrated berries if desired.
The berries are optional. Blueberries, cranberries, or cherries can be used, but a first batch can be made with nothing more than dried meat and tallow. Keeping the recipe simple also eliminates additional ingredients that may affect storage. The source similarly notes that adding more ingredients can reduce potential shelf life.
Don’t assume that you must use the entire cup of tallow. The 2:1 ratio is a starting point. Some batches of dried meat will require slightly more or less fat to reach the right consistency. Add the tallow gradually and judge the mixture by how well it holds together.
Preparing the Meat
Start with a very lean cut of beef such as eye of round and trim away as much visible fat and connective tissue as practical. Venison or another very lean red meat can also be used. Removing the original fat might seem unnecessary when you’re going to add tallow later, but separating the lean meat and fat gives you better control over drying. Once the meat has been thoroughly dried, clean rendered fat can be added back in a controlled amount.
Partially freezing the meat makes it considerably easier to cut into thin slices. Try to keep the pieces reasonably uniform because pieces of dramatically different thickness will dry at different rates. Thin, consistent pieces also make it easier to determine whether the center has completely dried.
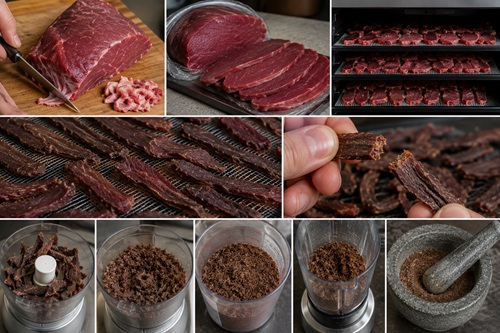
Use a food dehydrator and follow a tested meat-dehydration process that includes an appropriate food-safety heating step. Drying meat isn’t simply a matter of putting raw beef into warm moving air and waiting for it to become hard. Proper handling and heating are important when preparing meat for dehydration.
Arrange the meat in a single layer so air can circulate around the individual pieces. Continue drying until the meat becomes very dry and brittle. You’re deliberately going considerably further than the soft or flexible texture associated with many types of jerky.
When you think the meat is finished, allow one of the thicker pieces to cool and try bending it. Properly dried meat for pemmican should snap or crumble rather than simply bend. Break a thicker piece apart and inspect the center as well. If it remains soft, pliable, or noticeably moist, continue drying. The source preparation uses essentially the same test, drying the beef until the strips break instead of bending.
Very lean ground beef can also be used. Cook it thoroughly, drain away as much grease as practical, break it into small pieces, and then thoroughly dehydrate it. The source also identifies lean ground beef as an alternative when a suitable lean roast or steak isn’t available.
Once the meat is completely dry, allow it to cool and grind it using a food processor, powerful blender, or other suitable grinder. Small quantities can even be processed with a mortar and pestle. Continue grinding until the meat resembles coarse powder, fine fibers, or sawdust. It doesn’t have to become flour, but large pieces of jerky aren’t what you’re looking for.
Grinding the meat finely allows the melted tallow to spread throughout the mixture instead of simply coating larger chunks of meat. It also helps the finished pemmican hold together. The source preparation repeatedly processed its dried beef until it had been reduced to very small particles.
Measure the meat after grinding it. This is important because the amount of dried meat determines how much tallow you’ll need. If you end up with 2 cups of dried meat powder, prepare approximately 1 cup of tallow. If you have only 1 cup of dried meat, start with approximately ½ cup.
Preparing the Tallow and Optional Berries
Use clean, properly rendered beef tallow rather than ordinary pan drippings or leftover cooking grease. Cooking grease can contain meat juices, seasonings, food particles, and moisture that you don’t want in the finished pemmican. Properly rendered tallow separates the usable fat from water and unwanted solids and becomes firm when cooled.
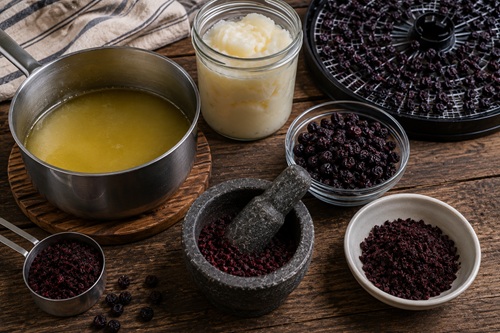
Place the tallow in a small saucepan and warm it gently until it becomes liquid. There’s no need to boil or aggressively heat it. You simply want the fat warm enough to pour and mix easily.
If you’re adding berries, they should be completely dehydrated before being mixed with the meat. Fresh berries should not be used because they introduce moisture back into a food where moisture removal is one of the main objectives.
Once the berries are completely dry, grind or crush them into small pieces. For 2 cups of ground meat, ¼ to ½ cup of dried berries is enough for a small experimental batch. Mix the dried fruit thoroughly into the meat before adding the tallow so it is distributed throughout the mixture.
There’s also nothing wrong with leaving the berries out. In fact, making your first batch with only meat and tallow is a good way to learn what properly made basic pemmican should look and feel like before experimenting with additional ingredients.
Making the Pemmican
Place the ground dried meat and any optional dried berries into a clean, completely dry mixing bowl. Begin adding the warm melted tallow gradually rather than pouring the entire amount in at once.
Start with perhaps three-quarters of the amount you expect to need and mix thoroughly. The finely ground meat will begin absorbing the fat. Continue adding small amounts of tallow and working everything together until the mixture begins holding its shape.
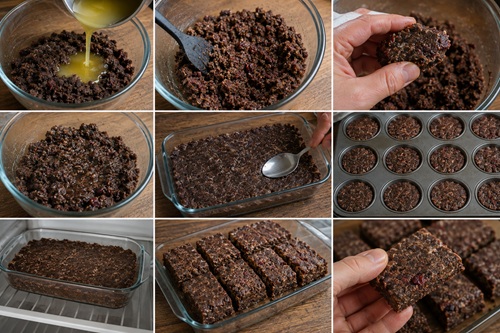
The easiest way to judge the consistency is to squeeze some of the mixture in your hand. If it forms a compact mass and stays together when released, you’re getting close. If it immediately crumbles apart, mix in a little more melted tallow. If liquid fat begins collecting at the bottom of the bowl, stop adding tallow.
The goal isn’t to saturate the meat with as much fat as possible. You want enough tallow to thoroughly bind the dry ingredients without leaving the finished pemmican swimming in grease. The source recipe uses a similar approach, adding a little additional tallow until the mixture held its shape properly.
Once the consistency is right, transfer the mixture into a shallow baking dish, loaf pan, muffin pan, or silicone mold while it is still warm. Press it down firmly with the back of a spoon, spatula, or clean hands. Compressing the mixture removes loose spaces and helps produce a solid piece rather than a collection of meat crumbs held loosely together by fat.
You can press the entire batch into one slab and cut it into bars later, or make individual portions using smaller molds. The source batch used a mini muffin pan to make individual pieces.
Leave the pemmican undisturbed until the tallow has completely cooled and hardened. As the fat solidifies, the mixture should become noticeably firmer. A finished piece should be compact enough to pick up and handle without immediately falling apart.
If the cooled pemmican crumbles easily, the meat may have been ground too coarsely, the mixture may not have been compressed firmly enough, or slightly more tallow may have been needed. If a noticeable layer of fat has accumulated around the bottom of the pieces, you probably added more tallow than necessary.
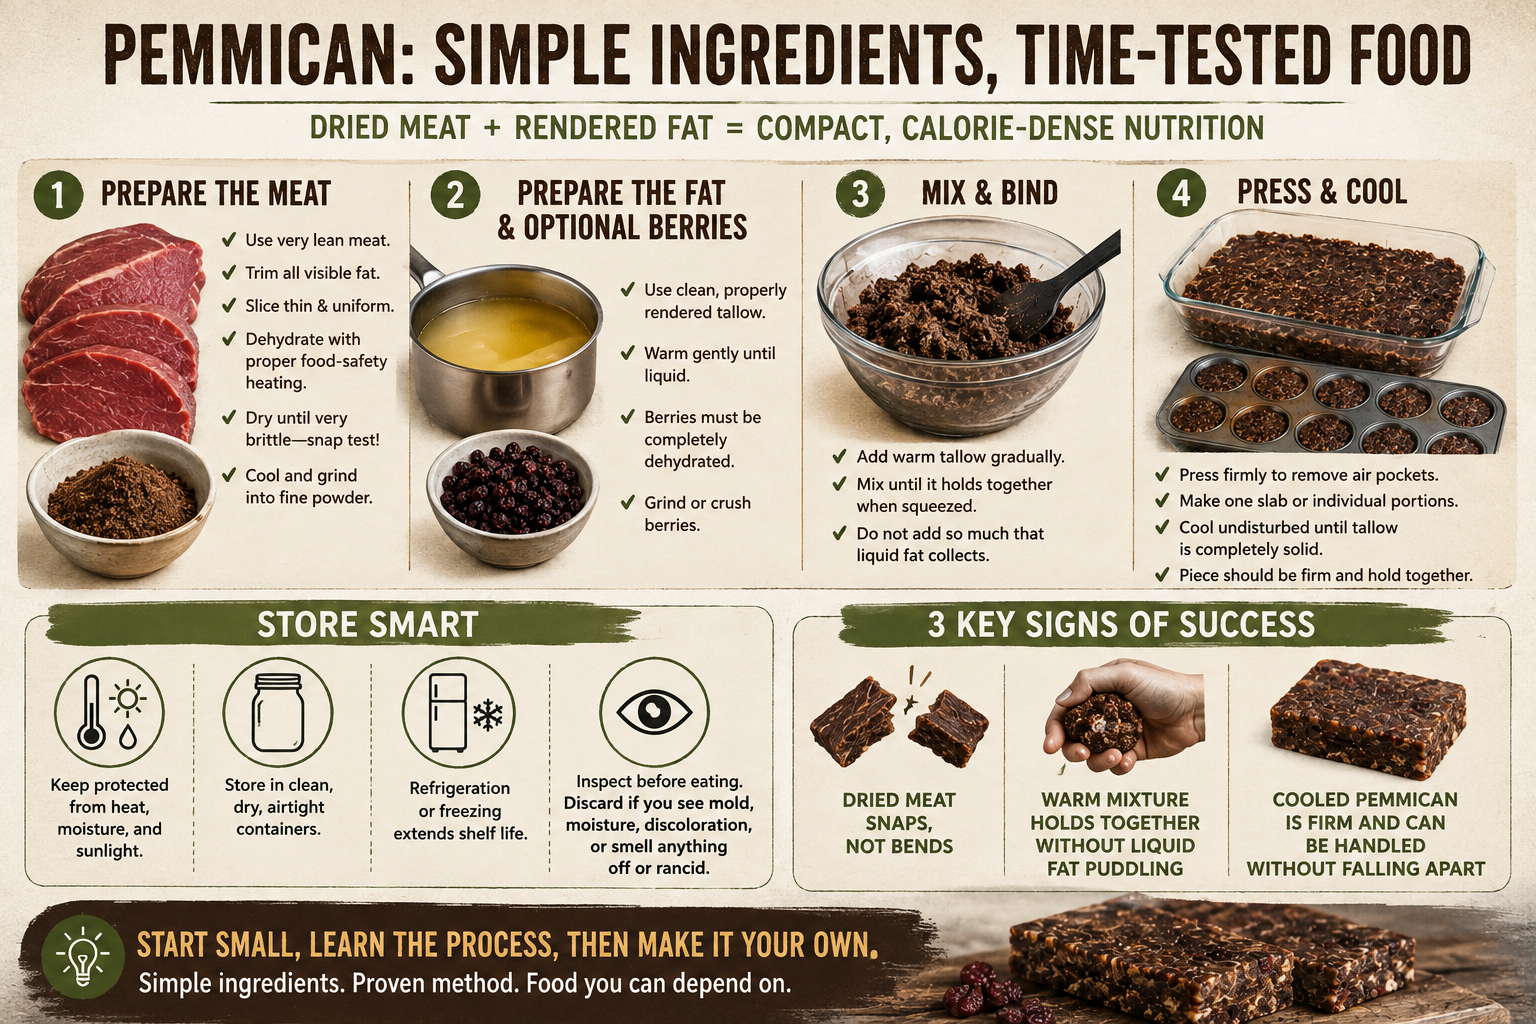
There are three useful physical signs to remember throughout the process. The dried meat should snap rather than bend before grinding, the warm meat-and-tallow mixture should hold together when squeezed without liquid fat pooling underneath it, and the cooled pemmican should form a firm piece that can be handled without falling apart.
Eating and Using Pemmican
Don’t expect basic pemmican to taste like commercial beef jerky or a modern protein bar. At its simplest, you’re eating dried meat and rendered fat without the large amounts of salt, sugar, smoke flavor, or seasoning commonly found in modern snacks. The flavor and texture can take some getting used to.
Dried berries can add another dimension to the flavor, but they won’t necessarily turn the finished pemmican into something sweet. In the source preparation, one person strongly disliked the finished product while another considered it perfectly acceptable as practical food.
This is one reason it’s worth making a small batch first. Learn how to make it, taste it, and determine how you would actually use it before producing a large quantity.
Pemmican also doesn’t have to be eaten cold. It can become an ingredient in a cooked meal. One traditional preparation associated with pemmican is rubaboo, a soup or stew in which pemmican supplies meat and fat while other available ingredients can be added.
Pemmican can also be heated in a skillet. As it warms, some of the tallow melts and can provide cooking fat for ingredients such as potatoes or onions. The source discusses both soup and skillet preparations as practical ways of using pemmican.
Storing Homemade Pemmican
Pemmican is frequently described as an exceptionally long-lasting food, but homemade pemmican shouldn’t automatically be assumed to remain safe for decades at room temperature.
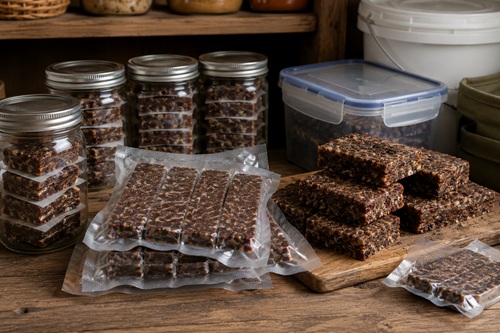
Its actual storage life depends on many things: how thoroughly the meat and optional fruit were dried, how cleanly the tallow was rendered, sanitation during preparation, the amount of moisture remaining in the ingredients, packaging, temperature, humidity, oxygen exposure, and storage conditions. The source itself questions some of the extremely long shelf-life claims commonly associated with pemmican and notes the uncertainty surrounding its actual storage life.
Allow the finished pemmican to cool completely before packaging it. Sealing it while still warm can create condensation inside the container and introduce moisture after you’ve spent considerable effort removing it.
Package the cooled pemmican in clean, dry containers and keep it protected from heat and moisture. If refrigeration or freezing is available, either provides a more conservative storage option for homemade batches.
Inspect stored pemmican before eating it. Mold, unexpected moisture, significant discoloration, or a clearly rancid or abnormal odor are reasons to discard it. Don’t taste questionable pemmican simply to determine whether it has spoiled.
Start With a Small Batch
Pemmican is a useful food-making skill precisely because the underlying process is so simple. You don’t need a complicated recipe or a long list of ingredients. What matters is understanding how the components work together.
Start with very lean meat and dry it until it becomes brittle. Grind that meat into very small particles and measure it. Prepare roughly half that volume of clean rendered tallow, but add the tallow gradually rather than automatically using all of it. Mix until the meat holds together when compressed, press the mixture firmly into a mold, and allow it to cool completely.
The basic recipe is easy to remember: 2 parts completely dried and finely ground lean meat to approximately 1 part clean rendered tallow, with completely dehydrated berries as an optional addition.
Your first batch doesn’t need to be large. A small batch will teach you what properly dried meat feels like, how fine it needs to be ground, how much tallow it actually absorbs, what the mixture should feel like before molding, and whether you prefer eating pemmican by itself or incorporating it into a cooked meal.
Once you’ve made it successfully, the recipe becomes much less important than understanding the process. That is the useful skill: knowing how to turn thoroughly dried lean meat and rendered fat into a compact, practical food using a method simple enough to reproduce with basic equipment.
© Prepping Communities. This content is for informational purposes only and not professional advice. Use at your own risk.
Terms | Privacy | Guidelines