
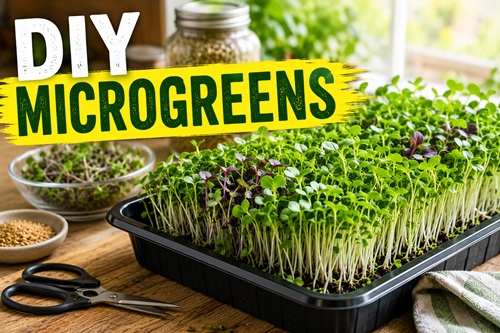
Grow Fresh Greens Indoors With Natural Light
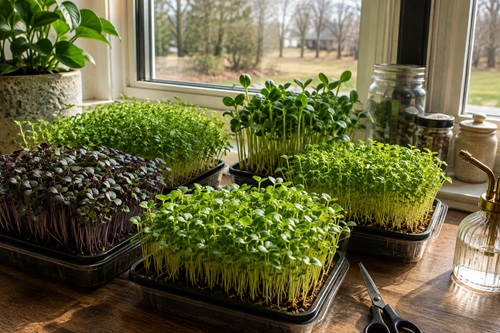
Microgreens are one of the simplest ways to grow fresh food indoors without needing a greenhouse, large garden, or complicated growing system. You can grow them on a kitchen counter, table, shelf, or windowsill using natural light, and many varieties can be harvested relatively quickly. For anyone interested in homesteading, self-sufficiency, or producing more food at home, they are an easy project that can be repeated throughout the year.
Microgreens aren’t going to replace a vegetable garden or provide the calories your family would need during an emergency. What they can do is give you a dependable way to grow something fresh indoors when your outdoor garden isn’t producing. That’s especially useful during winter, periods of bad weather, or anytime access to fresh produce becomes limited.
The nice thing is that you don’t need much to get started. A shallow container, some growing mix, seeds, water, natural light, and a pair of scissors are enough to produce your first crop.
What Are Microgreens?
Microgreens are young edible plants harvested shortly after germination. Instead of allowing a radish, broccoli plant, mustard plant, or another vegetable to grow to maturity, you harvest the tender young stems and leaves while the plants are still small.
Microgreens are different from sprouts. Sprouts are normally grown without soil and eaten at a much younger stage, often including the seed and root. Microgreens are generally grown in soil or another growing medium and are harvested by cutting the stems above the soil.
The first leaves you see are called seed leaves, or cotyledons. After those have developed, the plant begins producing its first true leaves. This is often around the stage when microgreens are harvested, although the exact timing depends on the variety and your personal preference.
What You’ll Need
You don’t need special equipment to try this. Start with a shallow container that is roughly two inches deep or deeper. Commercial seed-starting trays work well, but recycled containers can work just as well. Plastic berry containers are particularly handy because many already have drainage holes. Takeout containers and other shallow food-safe containers can also be repurposed.
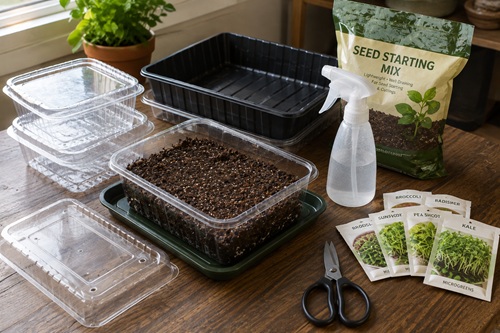
If the container doesn’t have drainage, make several small holes in the bottom and place it on a plate, pan, or second tray to catch the excess water. Drainage is important because microgreens like consistent moisture but don’t do well sitting in saturated growing mix.
You’ll also need light seed-starting or potting mix, seeds suitable for growing edible microgreens, a spray bottle or another gentle method of watering, and clean scissors for harvesting. A clear cover can be useful during germination because it helps retain moisture, but it isn’t absolutely necessary.
Choosing Microgreen Seeds
There are plenty of plants that can be grown as microgreens. Radish, broccoli, mustard, kale, cabbage, arugula, cress, bok choy, basil, beet, and several other vegetables and herbs are possibilities.
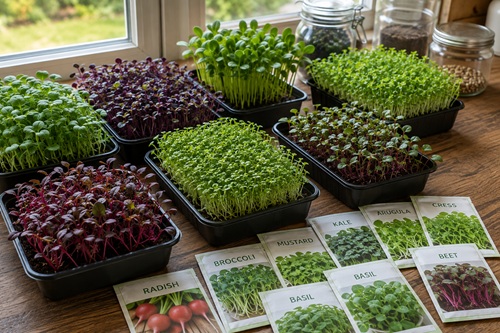
For your first tray, consider starting with something relatively fast and forgiving such as radish or mustard. Once you understand the basic process, you can start experimenting with other varieties.
It is usually easier to grow one variety in each container when you’re learning. Different plants don’t necessarily germinate or mature at the same rate. If you mix several varieties together, one may be ready to harvest while another is just getting established.
Make sure you’re using seed suitable for producing food. Avoid seed that has been chemically treated in ways that make it inappropriate for this type of edible crop. It’s also important to know that not every garden plant should be eaten as a microgreen. Just because a plant eventually produces an edible fruit or vegetable doesn’t automatically mean its young leaves and stems are edible.
Prepare the Growing Container
Start by thoroughly cleaning your container, particularly if you’re reusing something that previously held food or plants. Microgreens are planted densely and kept moist, which means cleanliness becomes important for reducing mold and disease problems.
Fill the container with approximately an inch and a half to two inches of light growing mix. You don’t need a deep container because the plants will be harvested long before they develop the root system of a mature vegetable.
Gently level the surface without packing the soil down hard. If the growing mix is very dry, moisten it before planting. You want it to feel something like a wrung-out sponge: evenly damp but not dripping wet.
Plant the Seeds
Microgreens are planted much closer together than vegetables that are going to remain in the garden until maturity. Scatter the seeds evenly across the surface of your growing mix.
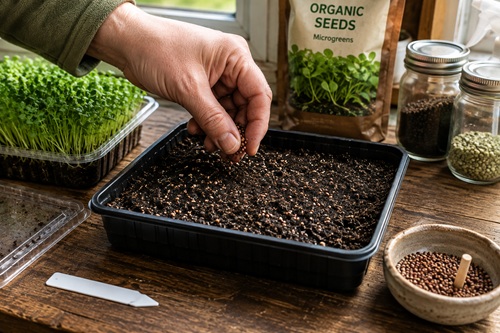
The goal is good coverage without piling seeds on top of one another. Overcrowding can trap moisture and reduce airflow, creating better conditions for mold. Larger seeds naturally need slightly more space than very small seeds.
Once the seeds are distributed, gently press them against the damp growing mix. This improves contact between the seeds and the moisture they need for germination. Depending on the variety, you can leave them on the surface or cover them with a very thin layer of growing mix.
Don’t bury them deeply. These seedlings only need enough coverage to maintain good contact with the moist growing medium.
Water the Seeds Carefully
A newly planted tray should be watered gently. Pouring water directly onto the surface can wash seeds into piles or bury some while exposing others.
A spray bottle works well during this stage. Mist the surface until the growing mix is evenly moist. You don’t want water pooling in the bottom of the container.
Another option is bottom watering. Place a small amount of water in the tray underneath your growing container and allow the soil to absorb moisture through the drainage holes. Once the growing mix has absorbed what it needs, remove any standing water.
Bottom watering becomes particularly useful as the plants grow because it keeps water away from the leaves and stems while delivering moisture directly to the root zone.
Germinate the Seeds
During germination, the main goal is keeping the seeds consistently moist without drowning them. You can loosely cover the container with a clear lid or another suitable cover to help hold humidity around the seeds.
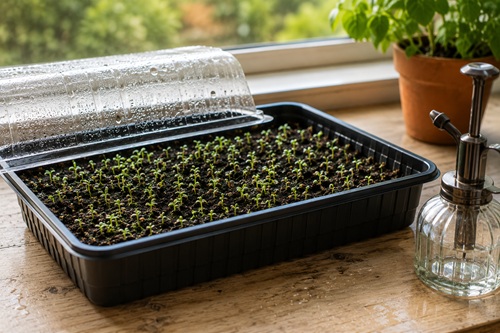
Check the container daily. The growing medium shouldn’t be allowed to completely dry out, but it shouldn’t remain soaking wet either.
Depending on what you’re growing, you may begin seeing seedlings surprisingly quickly. Once the plants begin emerging, remove the cover and give them access to natural light and better airflow.
Give Them Plenty of Natural Light
Move the tray near a bright window once the seedlings emerge. In the Northern Hemisphere, a south-facing window often provides good light, but the actual amount of sunlight matters more than the direction written on a compass. Trees, nearby buildings, roof overhangs, and the time of year can all change how much usable light reaches the plants.
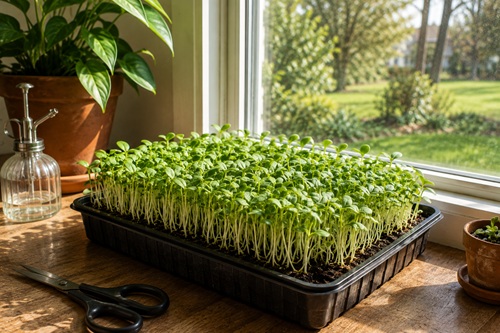
Watch how your microgreens grow. Healthy plants should develop good color and reasonably sturdy stems. If they become extremely tall, pale, thin, and lean heavily toward the window, they’re probably stretching because they want more light.
Rotate the tray periodically so the plants don’t continually lean in one direction.
Natural light also changes considerably throughout the year. A window that works beautifully during spring may provide much less usable light during the middle of winter. Microgreens can still be grown during darker months, but growth may be slower. If necessary, a simple grow light can supplement natural light, although it isn’t required to try this method.
Keep the Soil Moist Without Drowning the Plants
Water management is probably the most important part of growing microgreens successfully. These plants have small root systems growing in a shallow amount of soil, so the tray can dry relatively quickly. At the same time, constantly saturated soil creates ideal conditions for mold and other problems.
Check the growing mix every day. If it is beginning to dry, add some water. Once the roots have developed, watering from the bottom is usually easier and cleaner than repeatedly spraying the plants from above.
Pour a small amount of water into the lower tray and allow the growing medium to absorb it. Don’t leave the container sitting in a large pool of water for hours. Once enough moisture has been absorbed, pour away anything remaining.
You also want some airflow around the plants. Avoid putting the tray into a closed, humid corner where everything remains wet all day.
Watch for Mold and Other Problems
A healthy microgreen tray should smell fresh and earthy. If the plants become slimy, develop an unpleasant odor, begin rotting, or develop obvious mold, something has gone wrong.
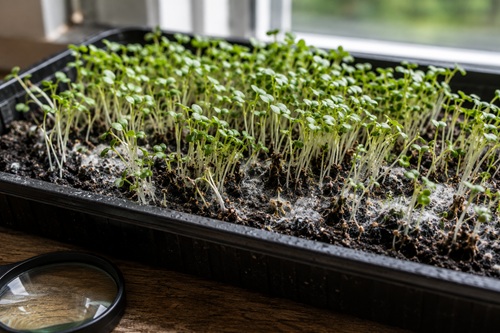
One thing that can confuse new growers is the appearance of root hairs. Some seedlings develop tiny white hairs around their young roots, and these can look like mold at first glance. Root hairs are normally concentrated directly around the roots, while mold may spread across seeds, soil, and dead plant material.
If you’re uncertain whether a tray is safe, don’t eat it. Microgreens aren’t difficult or expensive enough to justify taking unnecessary chances with questionable plants.
Too much water, poor airflow, dirty containers, contaminated growing mix, and severe overcrowding are common reasons problems develop. If an entire tray goes bad, discard the crop, clean the container thoroughly, and start again.
Harvest Your Microgreens
There isn’t one exact harvest day that applies to every variety. Some microgreens grow much faster than others. Instead of relying entirely on a calendar, watch the plants themselves.
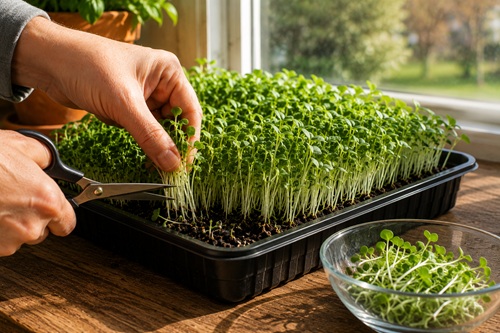
Once the young plants have developed their seed leaves and are beginning to produce their first true leaves, they’re usually approaching a good harvesting stage. You can taste a few along the way and decide what stage you prefer.
When you’re ready to harvest, use clean, sharp scissors. Gently hold a small group of plants near their tops and cut the stems just above the growing medium. Cutting rather than pulling keeps most of the roots and soil out of your harvested greens.
You can harvest the entire tray or cut only what you’re planning to use. Microgreens can be added to salads, sandwiches, wraps, eggs, potatoes, soups, tacos, and many other meals. They can be particularly nice alongside foods made primarily from stored ingredients because they provide something fresh.
Start Again After Harvest
Most microgreens shouldn’t be treated like a crop that will continue producing indefinitely after being cut. Some varieties may show limited regrowth, but you’re usually better off starting another tray.
Remove the remaining roots and stems and clean the container before planting again. Rather than continually growing new crops in soil filled with decomposing roots from previous crops, use fresh, clean growing mix.
The old growing material doesn’t necessarily have to be thrown away. It can be added to a compost pile or worm bin and eventually returned to the garden.
Keep a Continuous Supply Growing
If you enjoy growing microgreens, don’t plant everything at once. A better approach is to stagger your plantings.
Start one container and then plant another a week or two later. When the first tray is ready for harvest, the next one will already be growing. Once you know how quickly your preferred varieties develop under the conditions in your home, you can adjust the schedule.
This creates a simple rotation. Plant a tray, germinate it, move it into the light, harvest it, clean the container, and start again.
You can also save different varieties for different purposes. Radish and mustard can add some bite to meals, while broccoli, kale, cabbage, basil, and other varieties provide different flavors and textures.
Why Microgreens Are Useful for Preparedness
Microgreens should be looked at realistically. They’re not a major calorie source and shouldn’t be treated as a substitute for stored food or a productive vegetable garden.
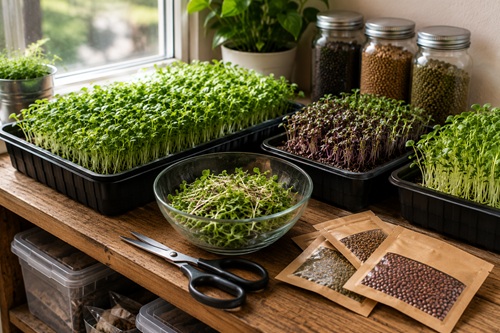
A household living on microgreens isn’t going to get very far.
Their real value is that they provide a simple way to produce fresh edible plants indoors using very little space. During winter, bad weather, temporary food shortages, or periods when an outdoor garden isn’t producing, that capability can be useful.
There is also value in learning the process itself. Growing microgreens teaches germination, moisture control, seed handling, lighting, sanitation, succession planting, and harvesting. Those same basic skills apply to much larger food-growing projects.
Seeds also take up very little storage space. Knowing how to turn stored seed into fresh food is considerably more useful than simply having packets of seed sitting on a shelf.
Start With One Small Tray
There’s no reason to turn your first attempt into a major indoor gardening project.
Find a shallow container, put drainage holes in the bottom if necessary, add about two inches of damp growing mix, scatter some radish, mustard, or broccoli seeds across the surface, and gently water them.
Keep the seeds moist while they germinate. Once they emerge, move them into good natural light and continue checking the moisture every day.
Before long, you’ll have a small crop of fresh greens growing right inside your home.
Then clean the tray and do it again.
That’s really the best way to learn. Start small, see what works in your house, make adjustments, and gradually build a simple indoor growing routine that you can repeat whenever you need it.
Key Takeaways
Growing microgreens indoors doesn’t require much space or equipment. A shallow container, fresh growing medium, suitable seed, water, and a bright window are enough to get started. The biggest things to pay attention to are moisture, cleanliness, airflow, and light.
Keep the growing medium damp without keeping it saturated, don’t overcrowd the seeds excessively, and never eat a crop that shows signs of mold, decay, or an unusual smell. Harvest the young plants with clean scissors and start another tray rather than expecting one planting to produce indefinitely.
Microgreens won’t replace your garden or your food storage, but they don’t need to. Their value is much simpler: they give you another way to produce fresh food yourself, even when the outdoor garden isn’t producing.
© Prepping Communities. This content is for informational purposes only and not professional advice. Use at your own risk.
Terms | Privacy | Guidelines