
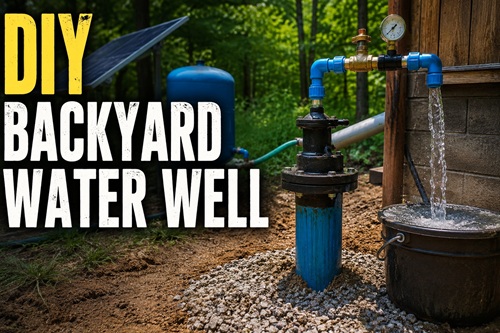
Creating Your Own Independent Water Source
A private well can be one of the most useful additions to a rural property, homestead, farm, cabin, or off-grid location. Having water available directly on your property can reduce dependence on municipal systems, delivered water, and stored supplies while providing water for gardens, livestock, cleaning, washing, and other everyday needs. When a well is properly constructed and the water is tested and found suitable, it may also provide household drinking water.
Drilling a well yourself is possible in some locations, but there is much more involved than simply drilling downward until water appears. Groundwater depth, soil conditions, contamination sources, drilling equipment, casing, well sealing, pumping, and water quality all need to be considered.
Every property is different. One neighbour might encounter usable groundwater relatively close to the surface while another property requires substantially deeper drilling. The ground itself might consist primarily of sand and gravel, heavy clay, rock, or several different layers. The better you understand these conditions before drilling, the better prepared you’ll be for what you encounter underground.
Research Your Property Before You Start
Before purchasing equipment or digging anything, find out what regulations apply to private wells in your area. Depending on where you live, there may be requirements covering permits, minimum distances from septic systems, approved casing materials, sanitary seals, water testing, well records, inspections, or who is legally permitted to construct the well.
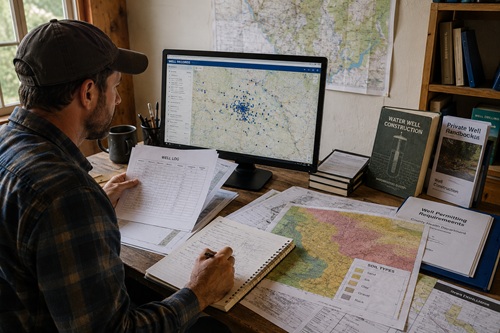
Next, investigate existing wells in your area. Government groundwater records, local authorities, agricultural offices, neighbours, and local drilling companies may have well logs showing approximately how deep surrounding wells are and what kinds of soil or rock were encountered.
A nearby well doesn’t guarantee you’ll find water at exactly the same depth, but several nearby well records can provide useful clues. If most surrounding wells reach productive groundwater within a similar depth range, you’ll at least have a reasonable starting point for estimating the equipment and materials your project could require.
Your soil conditions matter just as much. Loose sand and gravel can collapse into a borehole, clay can become sticky and difficult to drill, and rock can dramatically slow the process or require different equipment.
Choose the Well Location Carefully
Choosing where to drill shouldn’t be based entirely on convenience. One of the most important considerations is keeping contaminants away from the well.
The well should be separated from septic systems, manure storage, livestock areas, fuel tanks, chemical storage, drainage channels, and other possible contamination sources. Whenever the terrain allows, position the well so surface runoff naturally moves away from it instead of collecting around it.
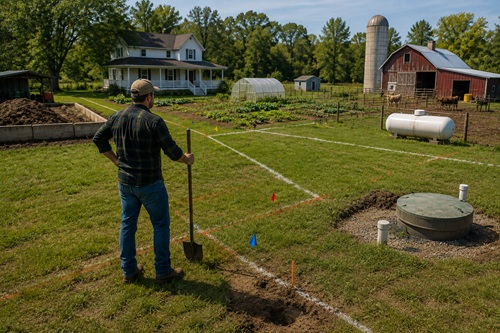
Think about where you’ll actually use the water as well. Locating the well reasonably close to the house, garden, greenhouse, barn, or livestock area can reduce the amount of plumbing, electrical cable, and pumping infrastructure needed later.
Before drilling, have underground utilities located. Never assume an apparently empty section of property doesn’t contain buried electrical cables, gas lines, water lines, communication cables, irrigation lines, or other infrastructure.
Decide Whether You Need a Shallow or Deeper Well
If groundwater is fairly close to the surface and your soil conditions are favorable, a shallow well may sometimes be possible using relatively simple equipment such as an extendable hand auger or another manual drilling system.
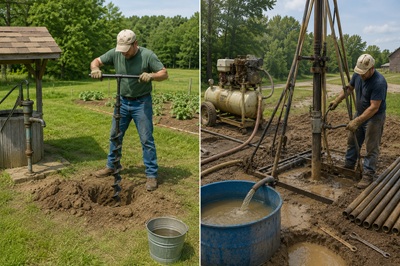
A shallow well can potentially provide useful water for irrigation, livestock, a remote cabin, or emergency purposes. However, shallow groundwater may fluctuate significantly throughout the year and can be more vulnerable to contamination from activities occurring at the surface.
Finding water also doesn’t necessarily mean you’ve found enough water. A small amount of groundwater slowly entering a borehole might be useful for occasional irrigation but completely inadequate for regular household use.
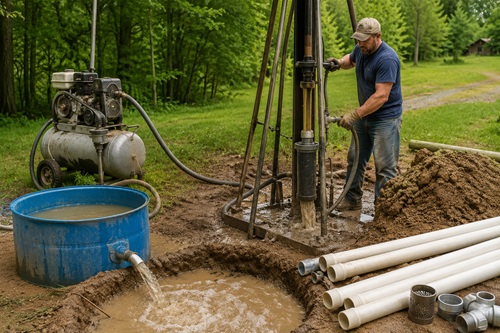
When groundwater lies considerably deeper, powered drilling equipment will normally be necessary. One DIY approach uses a pneumatic drilling tool powered by a large air compressor. Compressed air operates the drilling equipment while water helps carry loosened soil and drilling debris toward the surface.
This type of drilling is considerably more involved than making a shallow hole with a hand auger, but the basic concept remains understandable for someone researching whether a DIY well is realistic for their property.
What You’ll Need
The exact equipment and materials depend on how deep you’re drilling, the type of ground beneath your property, and the drilling system being used. Don’t purchase everything based entirely on an estimated depth. Some components, particularly the final pump and well-completion materials, may depend on what you actually discover during drilling.
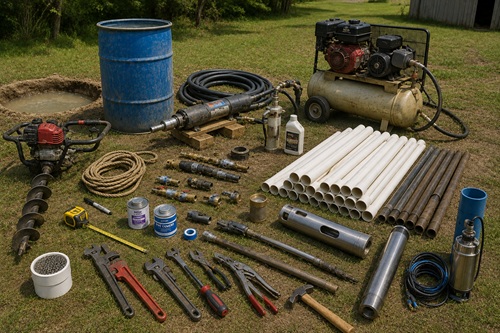
For a deeper pneumatic drilling setup, the major piece of equipment is a pneumatic well-drilling tool and an air compressor capable of supplying the airflow and pressure required by that particular drill. You’ll also need enough air hose to operate the equipment safely, compatible connectors, and any inline lubricator and air-tool oil required by the manufacturer.
You’ll need suitable drilling pipe in enough sections to reach your anticipated depth. The source example used 1-inch Schedule 40 PVC as part of its pneumatic drilling arrangement, but pipe size and material should always be matched to the actual drilling equipment being used rather than assuming one configuration works with every drill.
A water-assisted drilling setup also requires a dependable supply of water. A large open-top drum or similar container can be incorporated into a settling system so muddy water returning from the borehole has somewhere to deposit soil and debris before some of the water is circulated back toward the drilling hole.
You’ll also need an auger or post-hole digger for establishing the beginning of the borehole, measuring tape, permanent markers for marking drilling depth, strong rope, appropriate pipe fittings, suitable pipe cement where required by the drilling system, and ordinary hand tools.
For finishing the well, you’ll need proper well casing and potentially a well screen and gravel pack depending on the groundwater formation and well design. You’ll also need approved material for sealing the upper portion of the well, an appropriate sanitary well cap, and a pump capable of lifting water from the finished depth.
If the well will eventually supply a house, additional components may include underground water line, electrical cable, valves, fittings, a pressure tank, pressure switch, controls, and possibly water-treatment equipment depending on the laboratory results from the finished well.
Prepare the Drilling Area
Before turning on any equipment, organize the work area. Deep drilling involves increasingly long sections of pipe along with hoses, water, mud, tools, and compressed-air equipment. Leave enough open space around the borehole to safely handle the pipe.
If you’re using a water-assisted pneumatic system, establish the water circulation area before drilling.
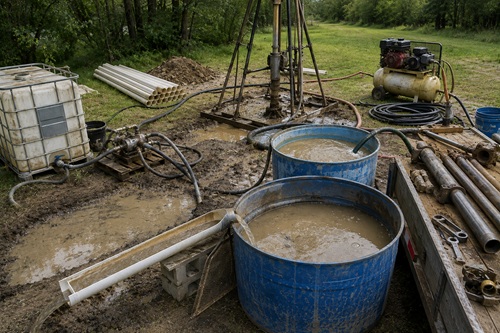
A simple settling arrangement can be created a short distance from the borehole. Muddy water and drilling debris coming from the well are directed into a drum or settling area where heavier material is allowed to drop out. Water can then flow toward the borehole and be reused.
The principle is simple. Water enters the borehole, the drill loosens underground material, compressed air and water bring that material back toward the surface, sediment settles out, and some of the water is returned to the drilling hole.
Reusing water in this way can substantially reduce the amount of fresh water needed during drilling.
Start the Borehole
Begin by digging the first several feet manually with an auger or post-hole digger. Starting the borehole manually establishes the location and helps keep the beginning reasonably straight before the powered drilling equipment is introduced.
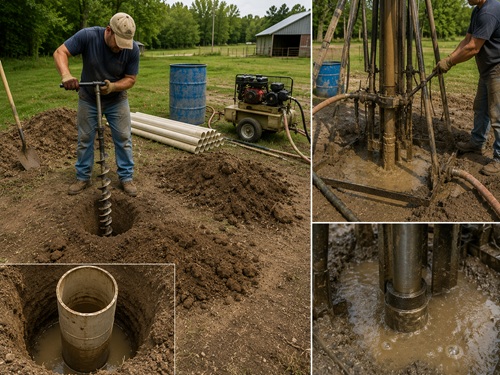
Depending on the soil, you may need temporary casing around the upper portion of the hole to prevent the sides from collapsing. Dense clay may remain reasonably stable, while loose sand and gravel can continually fall back into an unsupported hole.
Once the initial hole has been established, assemble the drilling equipment according to its manufacturer’s instructions. Introduce water if your drilling system requires it and begin drilling gradually.
Let the drill do the cutting rather than attempting to force it downward. Some soil layers may drill surprisingly quickly, while clay, compacted gravel, or rock may slow progress considerably.
Steady progress is more important than trying to drill as quickly as possible.
Keep Track of Your Depth
Mark the drilling pipe at regular intervals before you get very far. Marks every five or ten feet provide a simple visual reference showing approximately how deep you’ve drilled.
Keep a notebook nearby as well. Record noticeable changes in the material coming from the borehole and the approximate depth where they occur.
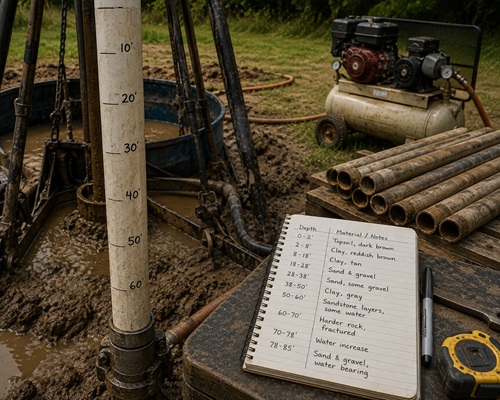
You might begin with ordinary topsoil, move into clay, encounter sand or gravel, and eventually reach harder material or a water-bearing formation. These observations create a basic record of what exists beneath your property.
As the borehole becomes deeper, additional sections of drilling pipe will need to be added. Follow the operating procedure for your particular drilling equipment carefully when doing this.
Pneumatic drilling equipment can have specific requirements about when the compressed air can safely be shut off. Some systems require the operating drill to be removed from the water before the air supply is stopped. Don’t assume every drilling tool operates the same way.
When You Reach Groundwater
Eventually you may notice indications that you’ve entered a water-bearing formation. The amount of water coming from the borehole may increase, and the material being brought to the surface may change.
This is an important point in the project, but don’t automatically stop drilling at the first sign of water.
The first groundwater you encounter may be seasonal or slow-producing. A small amount of water entering the borehole doesn’t necessarily mean the formation can supply enough water for your intended use.
Think about what you’re expecting from the finished well. A garden, greenhouse, or livestock watering system may have very different requirements from a well intended to supply a household.
A shallow water-bearing layer may also perform differently during a long dry period than it does during spring or following heavy rainfall.
The objective isn’t simply to find groundwater. It’s to reach a water-bearing formation capable of providing a useful and reasonably reliable supply.
Finish Drilling and Install the Well Casing
Once you’ve reached an appropriate depth and water-bearing formation, the borehole needs to be converted into an actual well.
This normally begins with installing suitable well casing. The casing creates a protected passage between the groundwater formation and the surface while helping prevent the sides of the borehole from collapsing.
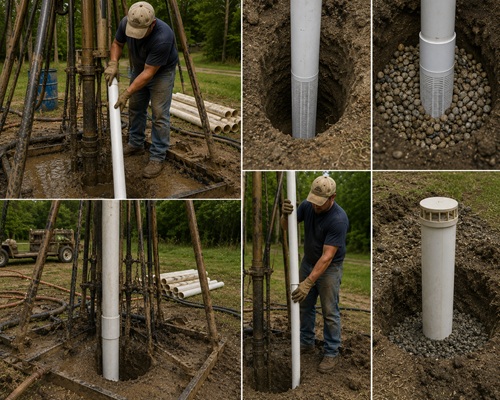
Depending on the formation, the lower section of the well may also require a properly designed well screen. The screen allows groundwater to enter while helping reduce the amount of sand and larger sediment entering the well.
In some installations, appropriately sized gravel is placed around the screened section. This creates a gravel pack that can help stabilize the surrounding formation while allowing groundwater to move toward the screen.
The casing is generally lowered into the borehole section by section until the required depth is reached. Connections need to remain secure as additional sections are installed.
Use materials intended for well construction, particularly when the water may eventually be used for drinking. The casing diameter, screen, gravel pack, and completion method should match the actual groundwater conditions and applicable well standards.
Seal the Well Against Surface Contamination
One of the most important parts of constructing a well happens near the surface.
Rain and melting snow can carry bacteria, animal waste, fertilizers, pesticides, fuel, chemicals, and other contaminants across the ground. If contaminated water can simply travel down the outside of the well casing, it can potentially enter the groundwater you’re trying to collect.
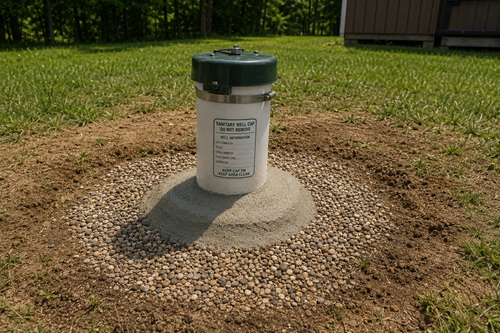
The upper portion of the well therefore needs an appropriate sanitary seal between the casing and surrounding ground. Follow local well-construction requirements for the type and depth of sealing material required.
The casing should extend above the surrounding ground rather than ending in a depression. Shape the ground around the well so rain and melting snow drain away from the casing instead of pooling beside it.
Finish the top of the casing with an appropriate sanitary well cap. Don’t leave the well as an open pipe. A properly installed cap helps prevent insects, rodents, debris, and surface contamination from entering.
The finished well should allow groundwater to enter where intended underground while preventing surface water from entering from above.
Install the Pump
Once the well itself has been completed, you need a way to bring the water to the surface.
The correct pump depends largely on the depth of the well and the actual water level inside the casing. A shallow installation may sometimes use a surface pump or suitable hand pump. Deeper wells commonly require a submersible pump lowered into the casing.
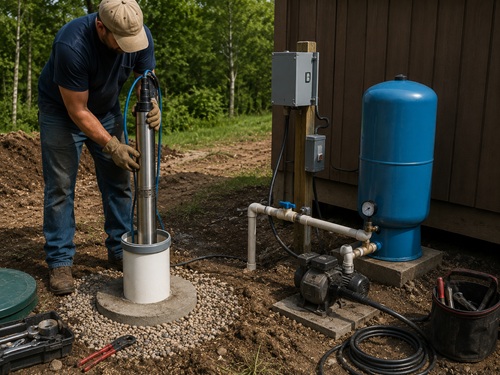
If the well will supply household plumbing, the pump may feed a pressure tank that stores pressurized water and reduces how frequently the pump needs to start and stop.
If you’re installing the well partly for self-reliance, think about what happens when electricity isn’t available. Depending on the well depth, possible backup options could include a generator, battery and inverter system, solar-powered pump, or a manual pumping system designed for the actual water depth.
Don’t assume an ordinary hand pump can draw water from any depth. Pumping limitations need to be considered when planning a backup system.
Flush and Develop the Well
A newly drilled well may initially produce cloudy or muddy water. Drilling disturbs sand, clay, sediment, and other material surrounding the borehole, and some of that material may remain inside the casing after construction.
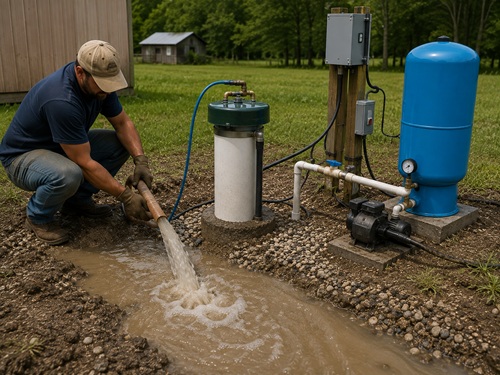
The well therefore needs to be properly developed and flushed.
Pumping helps remove loose sediment from inside and around the well while encouraging groundwater to flow through the surrounding formation and into the well screen.
During this process, watch the water carefully. Sediment should gradually decrease and the water should become more consistent.
Depending on the well and formation, development can take time. Don’t assume that a few minutes of clear-looking water means the process is complete.
Test the Water Before Drinking It
Clear water isn’t necessarily safe water.
Bacteria, nitrates, metals, minerals, and other contaminants can be present without producing an obvious smell, taste, or color. If you plan to drink the water, cook with it, or use it for food preparation, have the finished well tested by an appropriate laboratory.
The specific testing recommended can vary depending on local groundwater conditions. Follow the recommendations of your local health, environmental, or water authority.
Keep the first laboratory results. They provide a useful baseline for comparing future water tests.
Continue testing at the intervals recommended for private wells in your area and consider additional testing following flooding, major well repairs, suspected contamination, or significant changes in water color, smell, taste, or sediment.
Maintain the Well
A private well should become part of your normal property maintenance.
Periodically inspect the visible casing and well cap for cracks, damage, corrosion, or loose components. Make sure the surrounding ground still slopes away from the well and that rainwater isn’t collecting around the casing.
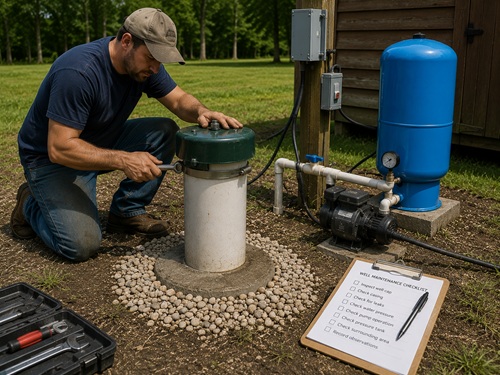
Keep fuel, chemicals, pesticides, fertilizer, manure, waste, and other possible contamination sources away from the wellhead.
Pay attention to how the pumping system behaves. Changes in water pressure, unusual pump cycling, increased sediment, cloudy water, or noticeably lower water production can indicate that something has changed.
Finding problems early can prevent a relatively small repair from becoming a much larger well problem.
Know What Your Well Can Produce
Once the well is operating, learn its limitations.
A well isn’t an unlimited underground reservoir. Groundwater flows through soil, gravel, fractures, and rock formations at different rates. Pumping water faster than the formation can replenish it can cause the water level inside the well to fall.
This is particularly important when using a smaller or shallow well.
If production is limited, a storage tank can sometimes be useful. Instead of demanding a large amount of water from the well at once, the pump can gradually fill a storage tank while the property draws water from that stored supply.
Understanding how quickly your well recovers after pumping helps you use the water source without continually pushing it beyond what it can reliably provide.
A Well Is More Than a Hole With Water
A DIY well can become one of the most valuable systems on a rural property. Even a modest well dedicated primarily to gardens or livestock can reduce dependence on stored, hauled, or municipal water. A properly constructed household well can provide something even more valuable: a dependable water source located directly on your own property.
The important thing to remember is that reaching groundwater is only one part of the project. The well still needs to produce enough water, remain structurally stable, keep surface contamination out, provide a practical way of bringing water to the surface, and deliver water suitable for its intended purpose.
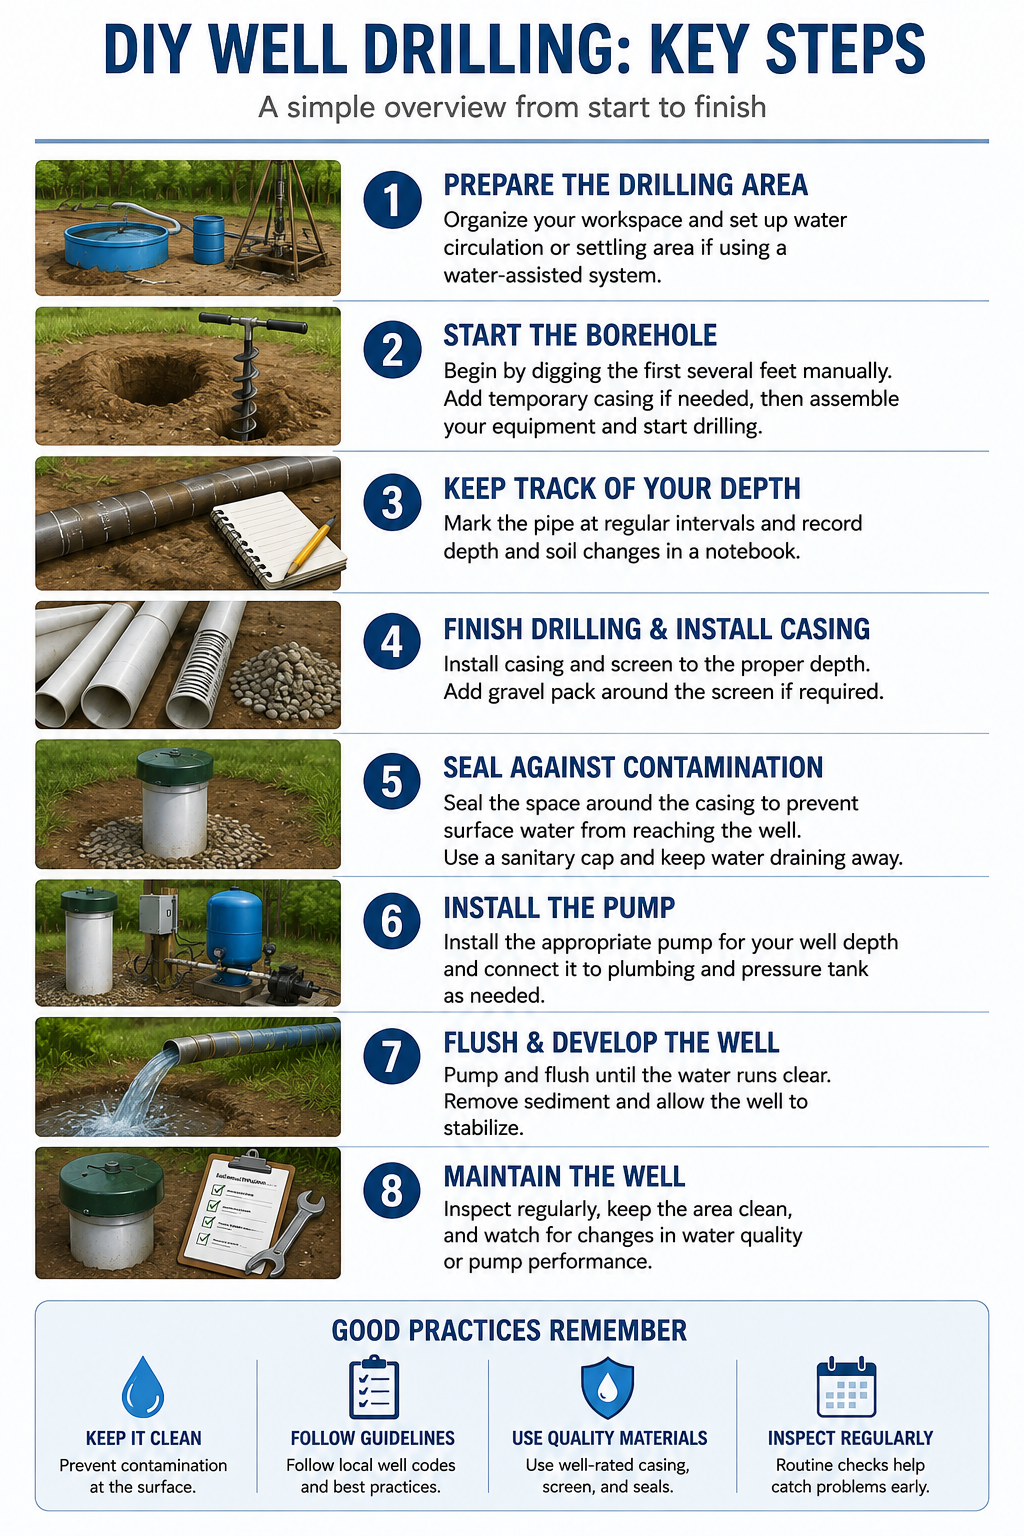
Research the groundwater conditions before drilling, choose the location carefully, gather the right equipment, keep track of what you encounter underground, properly case and seal the finished well, install an appropriate pump, flush the system, and test the water before drinking it.
Done correctly, a backyard well isn’t simply a hole in the ground. It becomes part of the property’s long-term water infrastructure and another practical source of water when other systems aren’t available.
© Prepping Communities. This content is for informational purposes only and not professional advice. Use at your own risk.
Terms | Privacy | Guidelines