
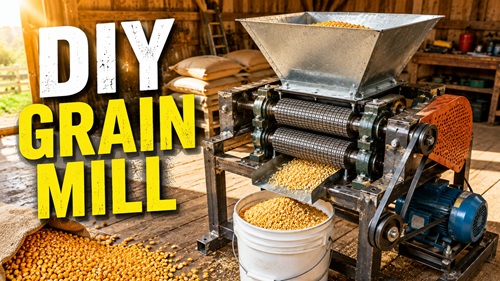
Build a Simple Roller Mill From Salvaged Parts
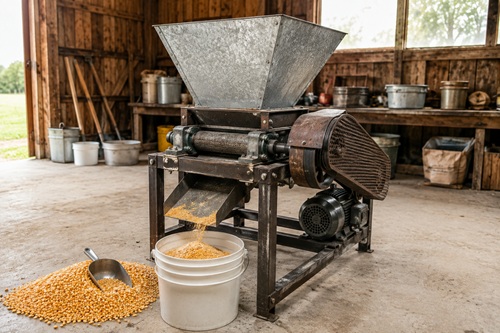
A grain mill can be an extremely useful piece of equipment on a homestead, particularly if you raise chickens, goats, pigs, or other livestock. Instead of depending entirely on commercially processed feed, a small roller mill allows you to crack whole corn, oats, barley, wheat, and other grains yourself. It also gives you the ability to buy whole grains in bulk, process homegrown grain, and make feed in smaller batches as you need it.
You don’t necessarily need an expensive commercial grain mill to do this. A practical roller mill can be built from an angle-iron frame, two steel rollers, pillow-block bearings, an electric motor, pulleys, a belt, sheet metal, and some basic hardware. Many of these parts can be salvaged from old machinery, automotive components, appliances, and farm equipment.
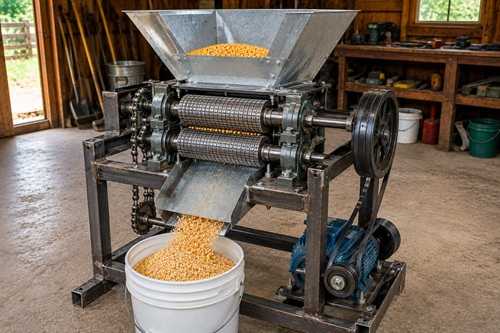
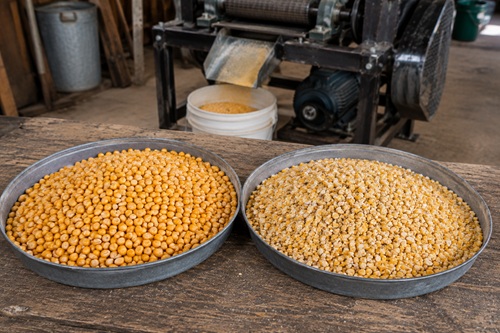
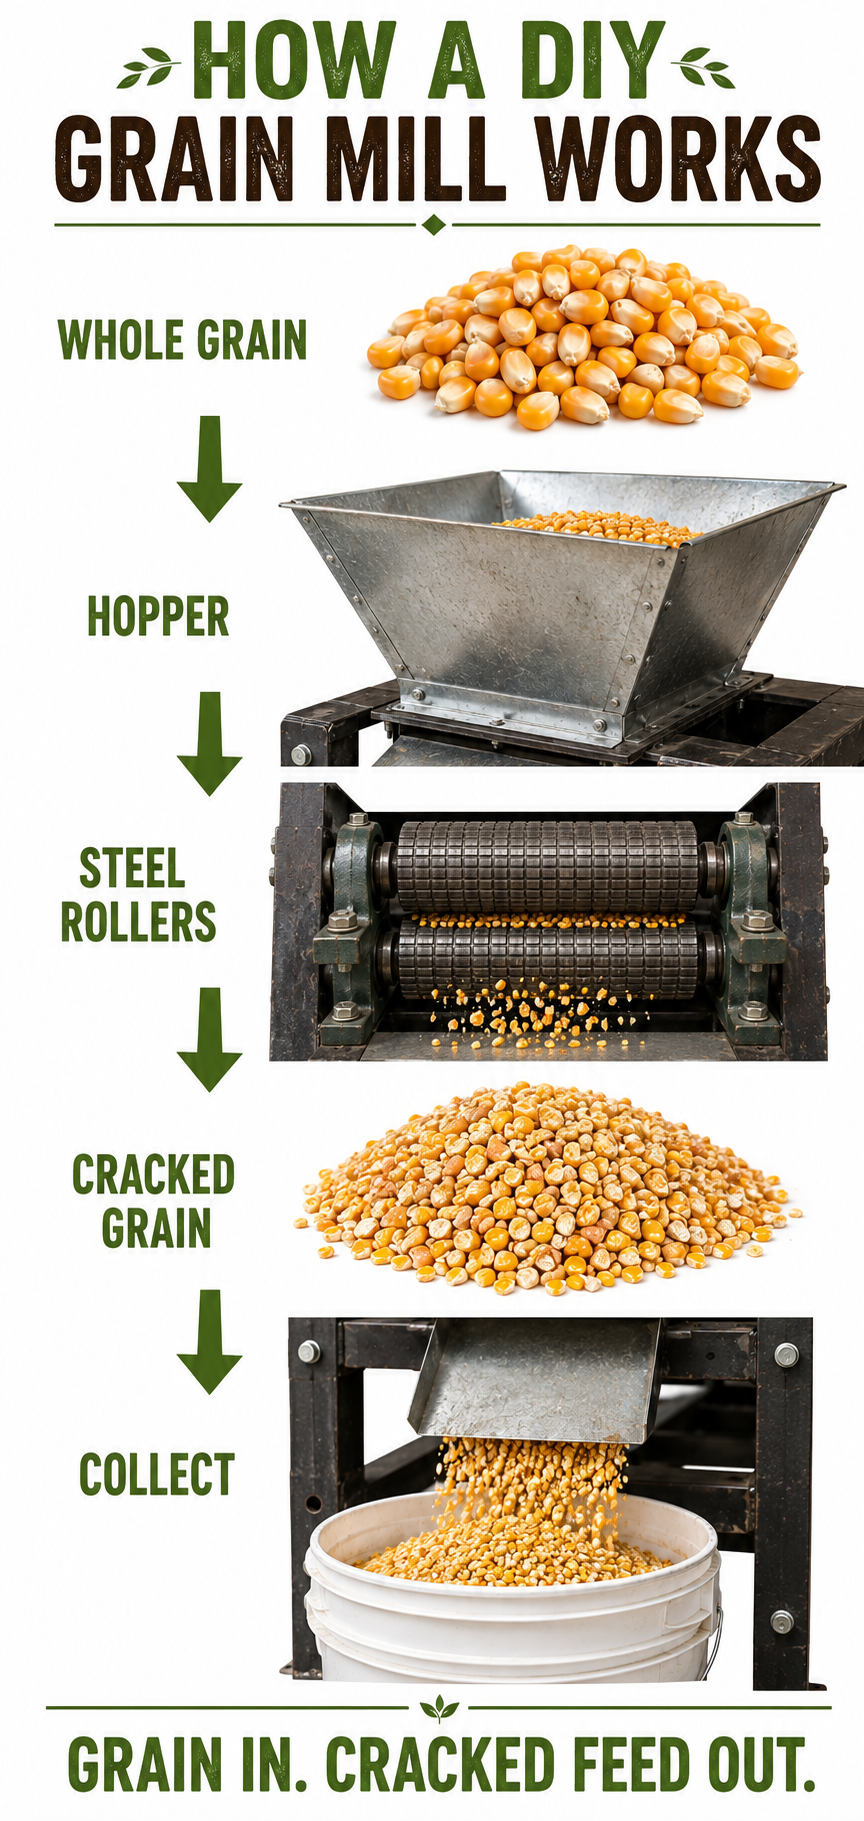
The basic design is straightforward. Grain is poured into a hopper above two horizontal steel rollers. The rollers rotate toward the center and grab the kernels, pulling them through a narrow gap where they are cracked or crushed. The processed grain then drops through the bottom of the mill into a bucket.
This project is primarily intended to make coarse livestock feed, not fine flour for human consumption. A mill intended for making flour requires different materials, tighter control over the finished particle size, and food-contact components appropriate for human food.
How the Mill Fits Together
Before cutting any metal, it helps to understand the complete machine.
Picture two steel rollers sitting horizontally beside each other inside an angle-iron frame. Bearings support both ends of each roller. A hopper sits directly above them and funnels grain toward the narrow opening between the rollers. An electric motor mounted beside or below the rollers drives one roller through a belt and pulley.
The second roller must either be driven mechanically or arranged so that the roller system reliably pulls grain downward. A chain-and-sprocket arrangement is one practical way to drive both rollers in opposite directions. Other homemade roller mills use gears or other mechanical arrangements.
Underneath the rollers is an open discharge area where the cracked grain falls into a five-gallon bucket.
That is essentially the entire machine.
The challenge isn’t the complexity of the design. The important part is getting the rollers straight, parallel, properly spaced, turning in the correct direction, and operating at a reasonable speed.
Gather the Main Components
For a small homestead mill, start by collecting two suitable steel rollers, four pillow-block bearings matched to the roller shafts, angle iron for the frame, a small electric motor, pulleys, a V-belt, sheet metal or plywood for the hopper, fasteners, electrical controls, and material for safety guards.
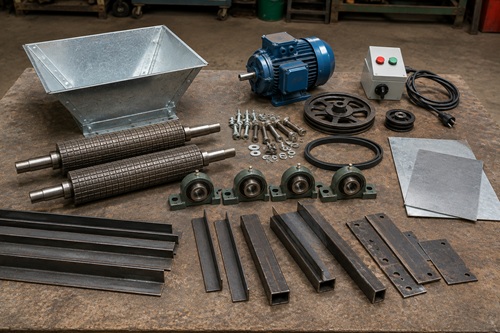
The original homemade mill that inspired this project used a ½-horsepower electric motor and two rollers made from automotive starter armatures approximately 5½ inches long and 3 inches in diameter. That provides a useful starting point for the size of a small mill, although your dimensions don’t have to be identical.
You’ll also need enough clearance underneath the frame for a bucket. Building the working portion of the mill approximately waist high can make loading grain and collecting feed more comfortable, but the exact height can be adapted to your workspace.
The frame dimensions should ultimately be determined by the rollers, bearings, motor, and pulleys you actually have rather than trying to force salvaged components into predetermined measurements.
Make the Rollers
The rollers are the heart of the mill.
Automotive starter armatures can work surprisingly well because they’re heavy, cylindrical, already have steel shafts, and often have surface features capable of grabbing grain.
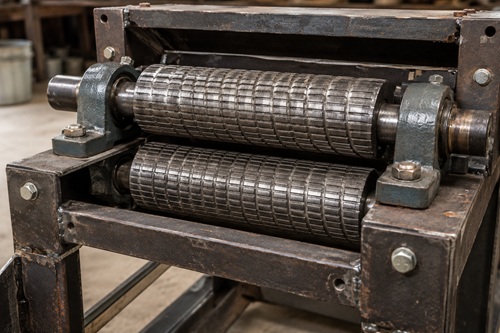
If you’re using starter armatures, remove the electrical windings, commutator material, and anything else that isn’t required for the mechanical roller. What you want to retain is a solid cylindrical steel roller mounted on a straight shaft.
Inspect each roller carefully before using it. The shaft should be straight, and the roller shouldn’t have large chunks missing or obvious damage. Roll it across a flat surface if possible and watch for severe wobbling.
The roller also needs some surface texture. A completely smooth steel cylinder may have difficulty grabbing kernels and pulling them into the gap.
Starter armatures already contain slots between their steel sections. These can provide additional grip. The original homemade design deepened those slots to improve the roller’s ability to grab grain.
If you’re fabricating rollers from steel pipe or another cylindrical material, shallow grooves can be machined across the surface for the same reason. They don’t need to resemble saw teeth. The goal is simply to give the grain something to catch against as the roller turns.
Any grinding or machining operation needs to be done with the roller securely supported. Wear proper eye and face protection and don’t attempt to hold a roller in your hand while cutting grooves into it.
Once finished, clean the rollers thoroughly. Salvaged automotive parts may contain grease, oil, metal debris, electrical insulation, or other contaminants that shouldn’t end up in livestock feed.
Build the Angle-Iron Frame
Once you have your rollers, build the frame around them.
A rectangular frame made from angle iron works well. For rollers approximately 5½ inches long, the upper frame might end up somewhere around 12 to 18 inches wide and roughly 18 to 24 inches long depending on the bearings, motor placement, and drive system.
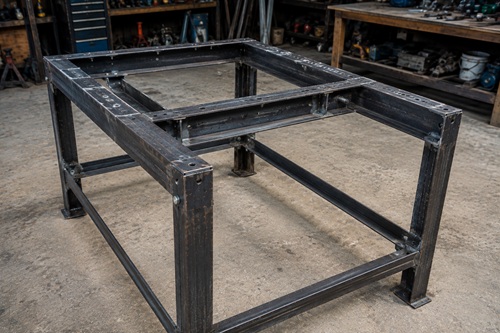
Those measurements aren’t critical. What matters is having enough room to mount the bearings securely without crowding the rollers, pulleys, or motor.
Cut two long pieces of angle iron for the sides and two shorter pieces for the ends. Weld or bolt them together into a rigid rectangle.
Add crossmembers wherever the pillow-block bearings will be mounted. The bearing surfaces need to remain rigid because any movement can change the roller gap.
Add four legs if you want the mill to stand independently. Make them long enough to allow a five-gallon bucket to slide underneath the rollers.
Install additional braces between the legs if the frame flexes or rocks.
A roller mill produces vibration and torque, so a flimsy frame will eventually cause alignment problems.
Mount the First Roller
Install the first roller before worrying about the adjustable second roller.
Slide a pillow-block bearing onto each end of the roller shaft and position the assembly across the frame. Mark the bearing mounting holes and drill the frame.
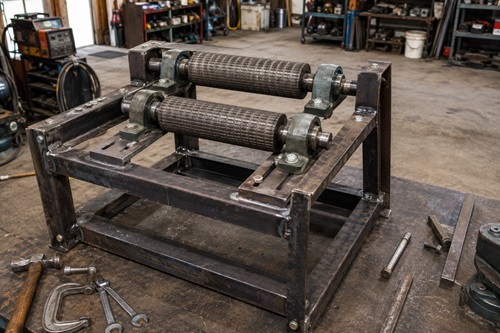
Bolt the bearings down loosely at first.
Use a straightedge or measurements from the frame to make sure the roller is square. Once you’re satisfied with its position, tighten the bearings.
Spin the roller by hand.
It should rotate freely without rubbing the frame or noticeably wobbling.
This roller will become your fixed reference point for positioning the second roller.
Make the Second Roller Adjustable
The second roller should ideally be adjustable so you can change the distance between the rollers.
Instead of drilling ordinary round mounting holes for its pillow-block bearings, create short slots running toward and away from the first roller. Another option is mounting the bearings on steel adjustment plates that can slide slightly before being bolted down.
You don’t need a huge amount of movement. Even a small change in roller spacing can significantly change the finished feed.
Install the second roller and bring it close to the first without allowing the two rollers to touch.
Check the gap at both ends.
The rollers need to be parallel. If one end has a noticeably larger opening than the other, the grain will be processed differently across the width of the mill.
Feeler gauges are useful here because they allow you to compare the spacing at both ends.
Don’t worry about finding one perfect measurement before you’ve processed any grain. The best setting depends on the grain and the result you’re trying to achieve.
Start wider than you think you need and gradually reduce the opening during testing.
Understand the Roller Gap
Roller spacing controls the finished feed.
A larger opening produces a coarser crack. A smaller opening crushes the grain more aggressively and creates more small particles and fines.
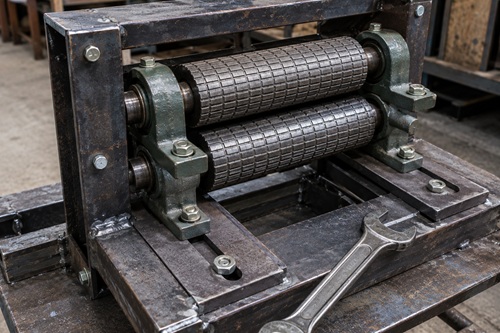
For livestock feed, extremely fine flour usually isn’t the goal. You generally want to break the kernel while retaining a relatively coarse texture.
Corn will normally require a larger opening than smaller grains.
This is why adjustable bearings are worth the extra work.
Instead of building a mill that works well for one grain, you can change the setting depending on what you’re processing.
Once you find settings that work well, record them. You might eventually have one setting for corn, another for wheat, and another for oats.
Build the Hopper
The hopper sits directly above the rollers and holds the whole grain.
The original homemade mill used a hopper approximately 16 by 20 inches at the top, made from salvaged sheet metal. A hopper around this size can hold a substantial amount of grain without making the machine unnecessarily large.
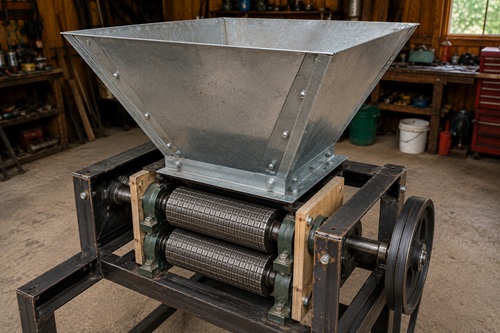
You can use clean sheet metal, plywood, or a combination of the two.
The hopper should be wide at the top and gradually narrow toward the rollers. Four sloping sides work well because gravity naturally directs the grain downward.
Don’t make the opening at the bottom excessively large.
You want grain distributed across the working portion of the rollers without dumping so much material into them that the motor stalls.
Wooden end plates can be installed immediately beside the ends of the rollers. These prevent grain from escaping around the roller ends instead of passing through the gap.
Leave only enough clearance that the rotating rollers don’t rub against the hopper or end plates.
Add a Feed-Control Gate
One improvement worth adding is a simple sliding gate at the bottom of the hopper.
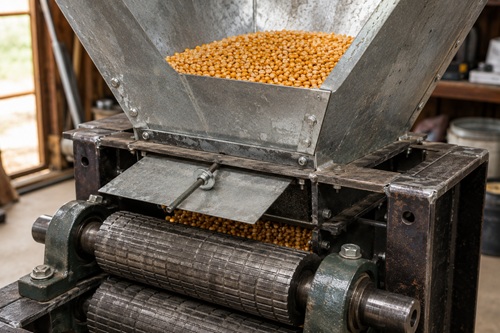
Cut a piece of sheet metal slightly wider than the hopper opening and mount it so it can slide horizontally. When completely closed, it stops grain from reaching the rollers. Pulling it outward gradually increases the opening.
This gives you direct control over how much grain reaches the mill.
That matters because feeding too much grain at once can overload the rollers and stall the motor. Agricultural roller-mill guidance also emphasizes controlling feed rate and distributing grain evenly across the rollers.
When starting the mill, keep the gate closed. Turn the motor on and allow the rollers to reach operating speed. Then gradually open the gate until grain begins flowing steadily.
Once you find a position that works well, mark it on the hopper.
Mount the Electric Motor
A small electric motor can provide enough power for a homestead-sized mill. The original starter-armature design successfully used a ½-horsepower motor.
Mount the motor securely to the frame using a steel plate or angle-iron brackets.
If possible, make the motor mount adjustable so the motor can slide slightly. Moving the motor allows you to tension the V-belt without needing a separate belt tensioner.
The motor should sit square with the driven roller. Misaligned pulleys cause belts to wander, wear prematurely, and sometimes jump off.
Before installing the belt, place a straightedge across the faces of the two pulleys and adjust the motor until they’re aligned.
Slow the Rollers Down
Most electric motors turn much faster than you want your grain rollers to turn.
This is where the pulley system becomes important.
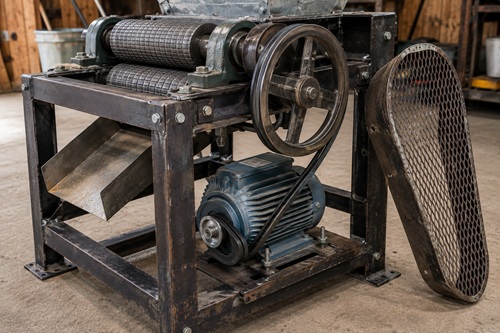
Installing a small pulley on the motor and a much larger pulley on the roller reduces roller speed while increasing available torque.
The relationship is straightforward. If the motor has a 2-inch pulley and the roller has an 8-inch pulley, the roller turns approximately one-quarter as fast as the motor.
For example, a 1,725-rpm motor with a 2-inch motor pulley and an 8-inch roller pulley would theoretically turn the roller at about 431 rpm:
1,725 × 2 ÷ 8 = approximately 431 rpm
Using a 10-inch roller pulley would reduce that to approximately 345 rpm.
These numbers are examples, not mandatory settings. Homemade mills vary considerably in roller diameter, surface texture, grain type, and desired finished product.
The important principle is to avoid simply connecting a high-speed motor directly to the rollers.
Start conservatively.
If the mill produces too much powder, reducing roller speed or opening the roller gap may help. If it struggles badly under load, look at feed rate, pulley reduction, available torque, and roller spacing before automatically installing a larger motor.
Make Both Rollers Work Together
The grain needs to be pulled downward between the rollers.
One approach is powering both rollers so their upper surfaces rotate toward each other. Imagine looking at the mill from the end. The top of the left roller should move toward the center while the top of the right roller also moves toward the center.
This creates the grabbing action that pulls grain downward.
A chain-and-sprocket system can accomplish this. Install a sprocket on each roller shaft and route the chain so the rollers rotate in opposite directions. An idler sprocket can help maintain chain tension and create the required direction change.
A gear system can accomplish the same thing.
The exact drive arrangement will depend heavily on what components you have available.
Whatever method you choose, turn everything manually before connecting electrical power. Make sure the rollers rotate freely and in the correct directions.
Build the Discharge Area
The processed grain needs somewhere to go.
The simplest arrangement is leaving the bottom of the frame open and positioning a five-gallon bucket directly underneath the rollers.
You can improve this by adding a small sheet-metal chute below the rollers. Angle the sides inward so the cracked grain is directed toward the bucket instead of scattering across the floor.
Make the chute removable if possible.
Grain fragments and dust will eventually accumulate around the rollers, and being able to remove the chute makes cleaning much easier.
Avoid enclosed pockets where old feed can collect. Forgotten grain attracts insects and rodents and can eventually become moldy.
Add Guards Before Testing
Before powering the machine, guard the dangerous moving parts.
The belt and pulleys should be completely covered with a solid guard made from sheet metal, expanded metal, or another sturdy material.
Chain and sprocket drives also need guards.
The roller opening itself is extremely dangerous. The hopper should be deep enough that a person can’t casually reach through the top and touch the rollers.
Don’t assume you’ll remember to keep your hands away. Design the machine so reaching the rollers is difficult in the first place.
Install the power switch where it can be reached immediately from the normal operating position.
If you’re not comfortable wiring the motor and switch correctly, have someone qualified handle the electrical portion of the build.
Run the Mill Empty First
Once everything is assembled and guarded, test the machine without grain.
Close the hopper gate and start the motor.
Watch the machine from a safe position.
The rollers should turn smoothly without severe vibration. The belt should remain centered on the pulleys. Bearings shouldn’t move. The frame shouldn’t shake excessively.
Listen carefully.
Grinding, knocking, squealing, or rhythmic banging usually means something is misaligned, rubbing, loose, or unbalanced.
Run the machine briefly, shut it down, disconnect the power, and check the bearings and fasteners again.
Only continue once the mill runs smoothly.
Test With a Small Amount of Grain
Don’t fill the hopper during the first grain test.
Put a small quantity of grain into the hopper, start the mill, and gradually open the feed gate.
Watch what happens.
The kernels should move toward the rollers, get pulled through the gap, and fall into the bucket below.
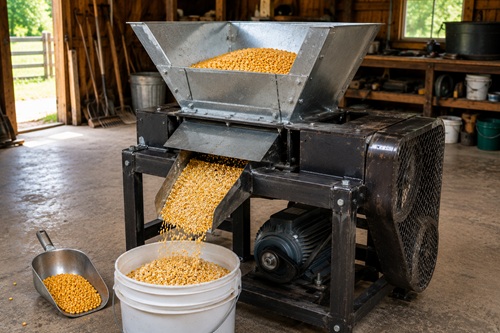
Collect a handful of the finished feed and examine it.
If most kernels remain whole, shut the mill down and reduce the roller gap slightly.
If you’re producing excessive powder, increase the gap.
If the motor slows dramatically or stalls, reduce the feed rate first. If that doesn’t solve the problem, examine the roller gap and drive reduction.
Continue making small changes until the machine produces a consistent cracked grain.
Never make adjustments while the rollers are turning.
Keep Foreign Material Out of the Mill
Before pouring grain into the hopper, inspect it for stones, bolts, nails, pieces of wire, and other debris.
Foreign material can damage rollers and bearings and may be thrown from the machine.
A screen placed over the hopper can help catch larger objects before they reach the rollers.
Magnets can also be incorporated into the grain path to catch ferrous metal.
This becomes increasingly important if you’re processing grain harvested or stored on your own property rather than commercially cleaned grain.
Keep Grain Dust Under Control
Grinding and cracking grain creates dust.
Operate the mill in a well-ventilated location and keep the surrounding area clean. Don’t allow thick layers of grain dust to accumulate on the motor, electrical equipment, floor, or nearby surfaces.
Keep the mill away from cigarettes, welding, grinding sparks, open flames, heaters, and other ignition sources while grain is being processed.
If the mill suddenly begins producing substantially more dust than normal, check the roller gap. You may be grinding the grain much finer than intended.
Mixing Your Own Livestock Feed
A grain mill gives you control over how ingredients are processed, but it doesn’t automatically create a balanced livestock ration.
Corn, wheat, oats, barley, soybeans, and other feed ingredients provide different amounts of energy, protein, fiber, minerals, and other nutrients.
Chickens have different requirements from goats. Growing animals have different requirements from mature animals. Laying hens, pregnant animals, and lactating animals have additional nutritional demands.
If you’re mixing your own feed, use a properly formulated ration appropriate for the species and stage of production.
Once the grain has been processed, thoroughly mix the ingredients.
Some homesteaders use dedicated feed mixers, while others adapt clean mechanical mixers. Whatever you use should be reserved for feed or thoroughly verified as uncontaminated. Don’t use equipment that has previously held cement, chemicals, petroleum products, pesticides, or other hazardous materials.
Maintain the Mill
A homemade grain mill doesn’t require complicated maintenance, but it does need regular inspection.
Before each use, check the belt tension, bearing mounts, roller gap, guards, motor mount, and electrical cord.
Spin the rollers manually with the power disconnected and listen for rough bearings.
Keep grain dust away from the motor.
Periodically check that the rollers remain parallel. Roller gap and roll speed are important factors controlling the particle size produced by roller mills, so alignment isn’t something to set once and forget forever.
Inspect the roller surfaces as well. After processing large amounts of grain, grooves can gradually wear smooth and reduce the rollers’ ability to grab kernels.
One advantage of building the machine yourself is that none of these repairs should be mysterious.
Why This Project Is Valuable for a Homestead
A homemade grain mill is useful because it turns stored or locally produced grain into something you can immediately use.
Whole grain can be purchased in bulk, grown on your property, obtained from neighboring farms, or stored until needed. Instead of relying entirely on commercially processed livestock feed, you gain another way to prepare part of your animals’ ration yourself.
The mill also teaches practical mechanical skills.
Building it involves salvaging materials, working with bearings and shafts, aligning rotating components, understanding pulley ratios, controlling feed flow, fabricating a hopper, working with electric motors, and maintaining simple machinery.
Perhaps most importantly, a homemade machine is understandable.
If a bearing fails, you know where it is and how it was installed. If the belt breaks, you can replace it. If the hopper rusts through, you can make another one. If the rollers stop grabbing grain effectively, you can inspect and repair them.
That’s considerably different from owning a piece of equipment you don’t understand and can’t repair.
Build Around What You Have
Don’t become too focused on duplicating someone else’s grain mill exactly.
The original homemade mill demonstrated that starter armatures, scrap angle iron, salvaged sheet metal, pillow-block bearings, and a small electric motor could be turned into a useful piece of farm equipment. Another successful homemade corn cracker used grooved steel rollers, an angle-iron frame, a pulley reduction system, and a chain arrangement that caused the rollers to turn against one another.
Your mill may look different because the materials available to you will be different.
What matters is understanding the function of each component.
The hopper stores and controls the grain. The rollers crack it. The adjustable gap controls particle size. The bearings support the rollers. The motor supplies power. The pulleys reduce speed and increase usable torque. The second roller needs to cooperate with the first to pull grain through. The chute directs the finished feed into a container. The guards keep the operator away from dangerous moving components.
Once you understand those relationships, you can adapt the design around the materials you can find.
That’s what makes this a particularly useful DIY project for a prepper or homesteader. You aren’t simply building another piece of equipment. You’re learning how to take raw materials, salvaged components, and basic mechanical principles and turn them into a machine that can continue producing something useful.
A homemade grain mill doesn’t have to be pretty.
It needs to be strong, adjustable, properly guarded, repairable, and capable of reliably cracking grain when you need it.
© Prepping Communities. This content is for informational purposes only and not professional advice. Use at your own risk.
Terms | Privacy | Guidelines