

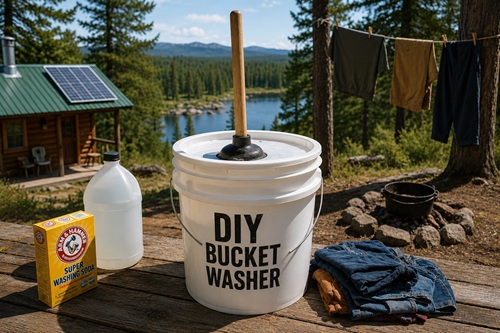
A power outage, broken washing machine, remote cabin, campsite, or off-grid property can turn an ordinary load of laundry into a real problem. Clothes can always be washed by hand, but repeatedly scrubbing, squeezing, and rinsing everything in a sink or basin takes a lot of time and effort. A simple bucket washing machine makes the job considerably easier and can be built from inexpensive supplies that are available almost anywhere.
The basic washer consists of a 5-gallon bucket and a new toilet plunger modified to work as an agitator. Instead of an electric motor moving clothing through the water, you manually pump the plunger up and down. The movement forces soapy water through the fabric, loosening dirt in much the same way agitation helps clean clothing in a conventional washer.
This isn’t intended to handle a week’s worth of laundry at once. It works best with small loads that have enough room to move freely in the bucket. For emergency use, camping, off-grid living, or simply having a backup method of washing clothes, however, it is surprisingly practical.
What You Need
The basic washer requires a clean 5-gallon bucket, a new rubber toilet plunger, a bucket lid, and a drill or utility knife for modifying the plunger and lid. A second bucket is extremely useful for rinsing but isn’t absolutely necessary. You’ll also need clean water, laundry soap, and a clothesline or another place to dry the finished clothing.
Always use a new plunger that has never been used for anything else. Once you’ve made the washer, keep the plunger with your laundry equipment so there is never any question about its purpose.
If you’re building this as part of an emergency laundry kit, the bucket itself becomes the storage container. The plunger, laundry soap, clothesline, clothespins, rubber gloves, and other supplies can all be kept inside when the equipment is clean and dry.
Building the Bucket Washing Machine
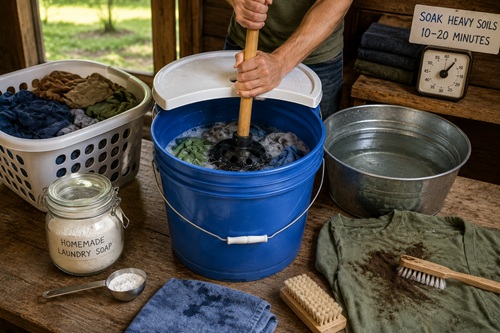
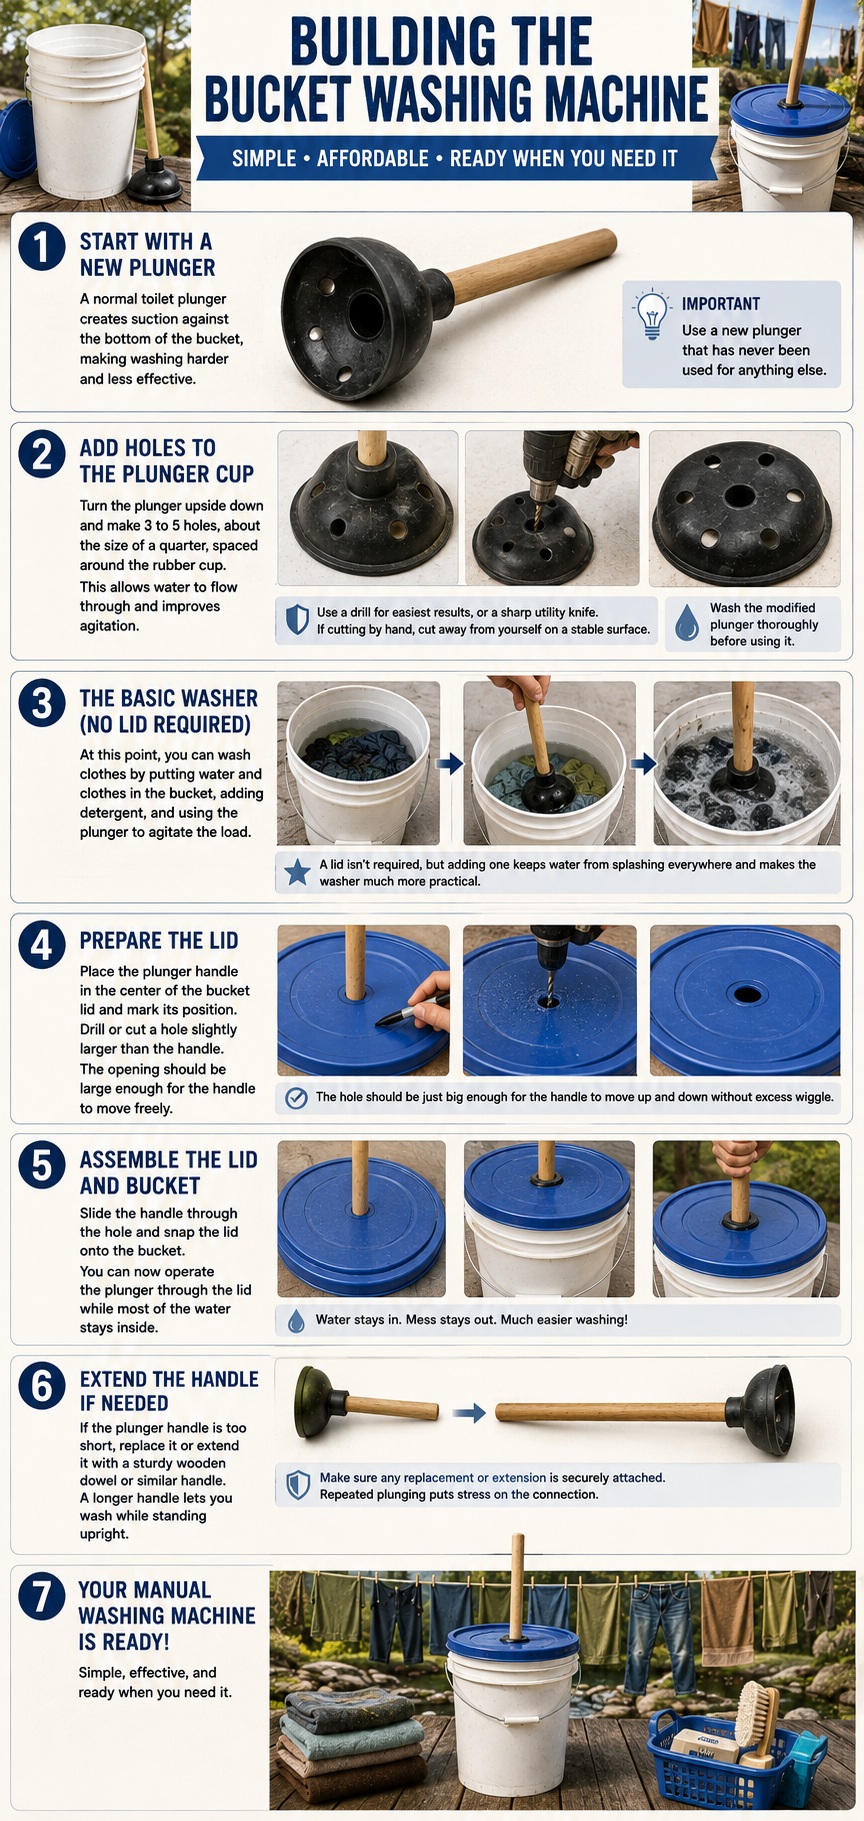
Start with the plunger. A normal toilet plunger isn’t quite right for washing clothes because the solid rubber cup creates suction every time it is pushed against the bottom of the bucket. That makes washing harder and doesn’t circulate the water as effectively as it could.
Turn the plunger upside down and make several holes through the rubber cup. About three to five openings roughly the size of a quarter provide a good starting point. Space the holes around the cup rather than concentrating them in one area.
A drill makes this fairly easy, although a sharp utility knife can also be used carefully. If cutting the holes by hand, place the plunger on a stable surface and always cut away from yourself.
These openings completely change how the plunger behaves. Instead of repeatedly sticking to the bottom of the bucket, water can pass through the rubber cup. Every upward and downward stroke then pushes and pulls water through the clothing.
Wash the modified plunger thoroughly before using it.
At this point, you technically have everything necessary to wash clothing. Put water and clothes into the bucket, add detergent, and use the plunger to agitate the load. A lid isn’t required, but adding one makes the washer considerably more practical because it keeps soapy water from splashing everywhere.
Place the plunger handle in the center of the bucket lid and mark its position. Drill or cut a hole slightly larger than the handle. The opening should be large enough for the handle to move freely but not unnecessarily large.
Slide the handle through the opening and snap the lid onto the bucket. You can now operate the plunger through the lid while most of the water remains contained inside.
If the plunger handle is too short to use comfortably, it can be replaced or extended with a sturdy wooden dowel or similar handle. A longer handle allows you to operate the washer while standing more upright rather than spending several minutes bent over a bucket.
Make sure any replacement handle is securely attached. Repeated plunging puts considerable stress on the connection.
With that modification complete, your manual washing machine is ready.
Homemade Laundry Soap Recipe
Commercial laundry detergent works perfectly well in a bucket washer, so homemade soap isn’t required. However, making a basic laundry mixture gives you another option when you want to keep inexpensive ingredients on hand.
For one batch, use:
1 bar of plain laundry or castile-style soap
1 cup washing soda
1 cup borax
Choose a relatively plain bar soap rather than one containing heavy moisturizers, conditioners, or oils. The soap provides the primary cleaning action, while washing soda helps deal with grease and hard water. Borax is traditionally used as a laundry booster.
Begin by grating the bar of soap as finely as possible. A regular cheese grater works well, although it’s sensible to dedicate a grater to household products rather than returning it to food preparation afterward.
Fine soap dissolves much more readily than large pieces, which becomes particularly important if you’re washing with cool water.
Once the entire bar has been grated, combine it with 1 cup of washing soda and 1 cup of borax. Mix everything thoroughly until the grated soap is distributed evenly throughout the powders and there are no large clumps.
Transfer the finished mixture to a clean, dry container with a tight-fitting lid. Keep the container clearly identified and away from children and pets. Try not to create or breathe unnecessary dust while mixing or measuring powdered cleaning products.
For a typical bucket-sized load, start with approximately 1 tablespoon of the finished laundry mixture.
That may not seem like much, but adding more detergent doesn’t automatically produce cleaner clothes. Too much soap creates another problem because everything you put into the wash eventually needs to be rinsed back out.
If you’re using cold water, dissolve the tablespoon of laundry soap in a cup or two of warm water first. Once the grated soap has dissolved, pour the solution into the wash bucket.
Washing Clothes With the Bucket Washer
Don’t pack the bucket full of clothing. This is probably the single most important thing to understand when using the system.
The clothes need room to move.
For ordinary clothing, filling approximately one-third to one-half of the bucket with dry clothes is a reasonable starting point. Heavy jeans, towels, sweatshirts, and other bulky items may require smaller loads.
Two small loads usually wash better than one bucket packed tightly with clothing.
Put the clothes loosely into the bucket and add enough water to completely saturate them. Once the clothes have absorbed the water and settled, you should still have enough liquid for the garments to move around.
Add approximately one tablespoon of your homemade laundry soap and use the plunger to move everything around until the detergent has been distributed through the water.
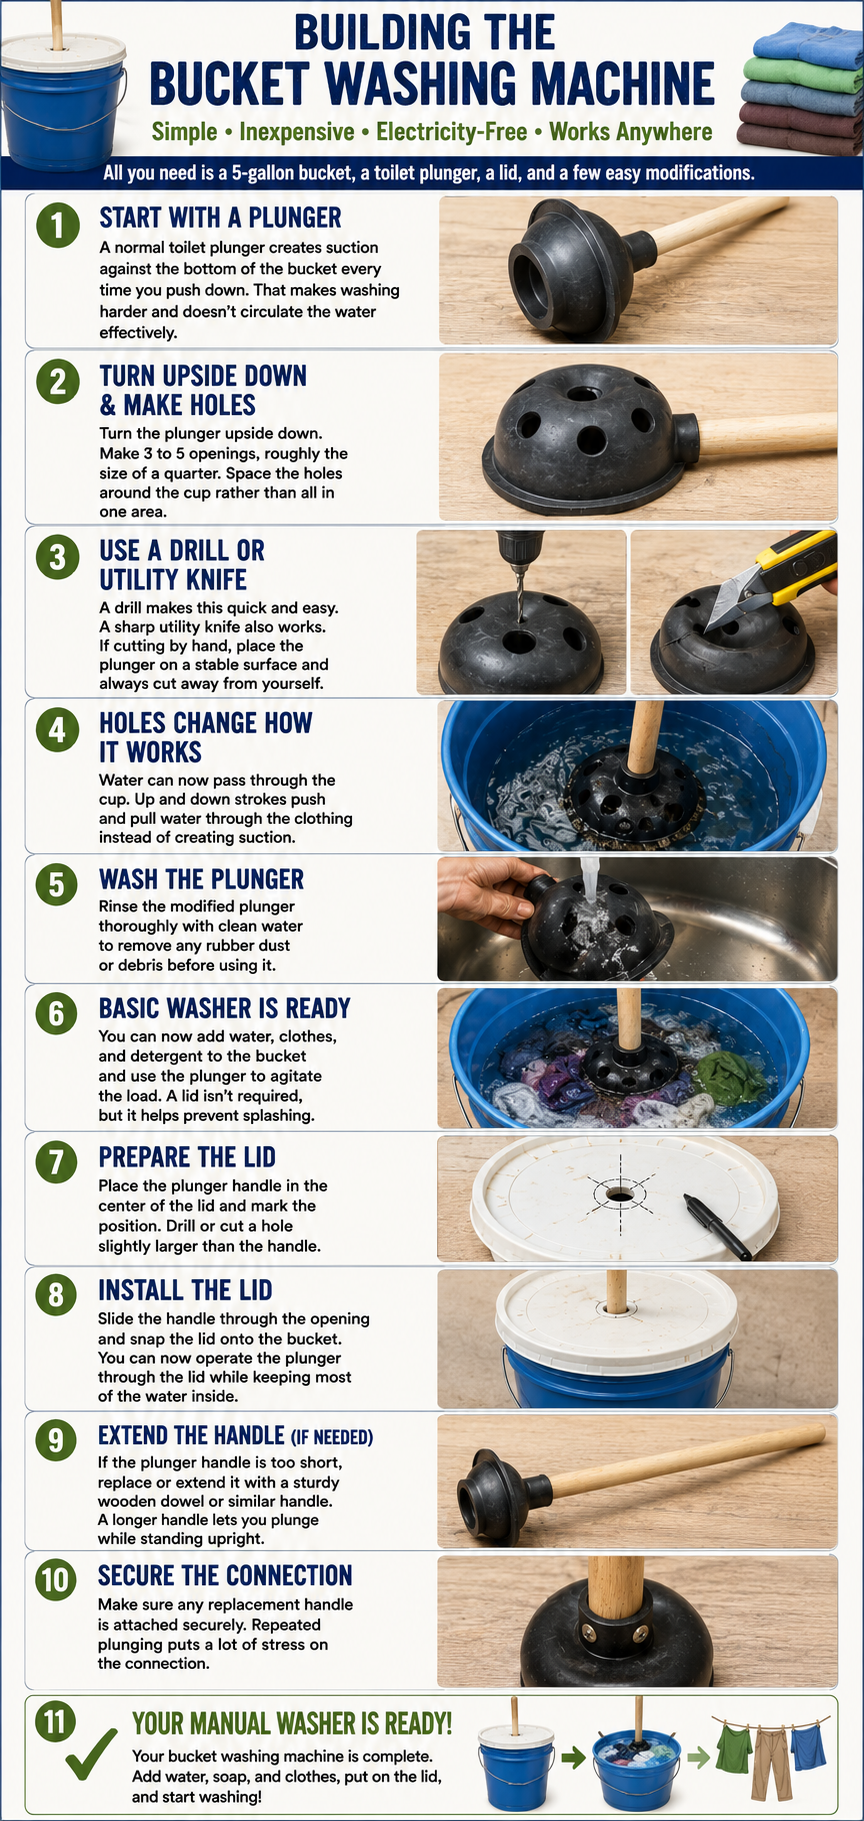
If the clothes are heavily soiled, don’t immediately start plunging as hard as possible. Let them soak for 10 to 20 minutes first. Soaking gives the detergent and water time to loosen dirt and body oils before you begin doing the physical work.
After soaking, put the lid in place and begin pumping the plunger steadily up and down.
You aren’t trying to pound the clothing against the bottom of the bucket. The cleaning action comes from repeatedly moving water through and around the fabric.
Use firm, consistent strokes for approximately 5 to 10 minutes.
Every so often, change the position of the plunger so clothing doesn’t remain trapped in one place. You want the entire load moving through the water rather than repeatedly agitating only the clothes directly underneath the plunger.
Lightly worn shirts, socks, and underwear may clean fairly quickly. Muddy work clothes will require more attention. If the wash water becomes extremely dirty, drain it and repeat the process with fresh water rather than continuing to wash clothing in what has essentially become muddy water.
Stains are also easier to handle before the main wash. Wet the stained area and rub a small amount of plain soap or diluted laundry mixture directly into the fabric. Gently work the fabric against itself or use a soft laundry brush.
Heavy mud is often best allowed to dry before washing. Brush away as much dried dirt as possible before putting the garment into the bucket. There is no reason to turn your wash water into mud when much of that dirt can simply be brushed off first.
Rinsing and Drying the Clothes
Once the washing is finished, remove the clothes and squeeze out as much dirty water as practical. Empty the bucket and rinse away any dirt remaining on the bottom or sides.
Refill the bucket with clean water and return the clothes.
Use the plunger exactly as you did during washing, except there is no detergent this time. Several minutes of plunging forces clean water through the fabric and removes soap trapped between the fibers.
Drain the rinse water and check the clothing.
If it still feels noticeably slippery or soapy, rinse it again.
A second rinse is often worthwhile when using homemade laundry soap. If you’re consistently needing three or four rinses, however, you’re probably using too much detergent during the wash.
If desired, approximately ¼ cup of white vinegar can be added to the final bucket of rinse water. Vinegar can help remove some alkaline laundry residue and may reduce stiffness in certain fabrics.
Keep the vinegar out of the actual wash mixture. Washing soda is alkaline and vinegar is acidic. Mixing them together causes them to react and partially neutralize one another. If you’re going to use vinegar, save it for the final rinse after the original wash water has been discarded.
Once the clothing is rinsed, you need to remove as much water as possible before hanging it up.
This is often the most physically demanding part of manual laundry.
Small garments can simply be squeezed firmly by hand. Larger pieces can be gently wrung, although repeatedly twisting fabric aggressively can stretch or damage some clothing.
A useful alternative is the towel method. Spread a clean dry towel on a flat surface, place the wet garment on top, and roll the towel tightly around it. Press firmly on the rolled towel. Much of the remaining water transfers from the clothing into the towel.
If you expect to use a bucket washer regularly, a manual clothes wringer can be a worthwhile addition. Even a suitable mop-bucket-style wringer can sometimes help with durable clothing. Removing more water before hanging clothes can dramatically reduce drying time.
Hang the clothes where air can circulate freely around them. A traditional clothesline works best, but rope, drying racks, hangers, and other improvised arrangements can work just as well.
Give each garment some space. Packing wet clothes tightly together slows evaporation and can leave them smelling musty, particularly in humid weather.
Sun and moving air can make drying considerably faster, but ordinary line drying should not be treated as a substitute for proper sanitation when clothing has been contaminated by sewage, bodily fluids, hazardous chemicals, or other potentially dangerous materials. Those situations may require different handling and disinfection procedures.
Making the System Work When Water Is Limited
The bucket washer becomes especially useful when electricity is unavailable, but water availability can become the bigger problem during a prolonged emergency.
A normal household washing routine assumes that clean water is inexpensive and readily available. If you’re carrying, pumping, filtering, or heating every gallon yourself, laundry suddenly consumes a valuable resource.
The first adjustment is simply washing clothes less frequently when appropriate. Outer layers that aren’t actually dirty may be aired out and worn again rather than automatically washed after every use.
When you do wash, start with the cleanest clothing and finish with the dirtiest. Relatively clean rinse water from one load may sometimes become wash water for the next load.
For example, you might wash lightly worn shirts first and muddy work clothes last. By the time the water reaches the dirtiest load, it has already done useful work.
Use judgment when reusing water. Laundry contaminated with feces, vomit, blood, chemicals, fuel, pesticides, or other potentially hazardous substances should be handled separately rather than being incorporated into a water-reuse system.
Also think carefully before dumping homemade laundry water onto the garden. Just because a detergent is homemade doesn’t automatically make the wastewater harmless to plants. Borax contains boron, and excessive boron can damage vegetation. Washing soda and other cleaning ingredients can also affect soil chemistry.
If graywater reuse is part of your long-term plan, choose cleaning products specifically with that use in mind rather than assuming every homemade laundry recipe is garden-safe.
Keep the Washer Ready for the Next Load
When the laundry is finished, rinse the bucket, plunger, lid, and any other equipment with clean water.
Let everything dry completely before putting it away.
Don’t store a wet plunger inside a sealed bucket. Damp equipment kept without airflow can develop mildew and unpleasant odors, which is the last thing you want from something intended to clean clothing.
Once everything is dry, place the equipment back inside the bucket. A complete emergency laundry bucket might contain the modified plunger, homemade laundry soap, rubber gloves, clothesline, clothespins, a small scrub brush, and perhaps a second collapsible container for rinsing.
That gives you an entire manual laundry system stored in roughly the same amount of space as the bucket itself.
A Simple Laundry System That Actually Works
The strength of a bucket washing machine is its simplicity. There is no motor, pump, control board, drain valve, or electrical connection to fail. The plunger supplies the agitation, the bucket holds the water, and you supply the energy.
The homemade soap is equally straightforward. Grate one plain bar of soap, mix it thoroughly with one cup of washing soda and one cup of borax, store it dry, and begin with approximately one tablespoon per bucket-sized load.
For the washer, put a small load of clothes into the bucket, add water and detergent, allow heavily soiled clothing to soak, plunge steadily for several minutes, drain the dirty water, rinse with clean water, remove as much water from the clothing as possible, and hang everything to dry.
You don’t need to give up a regular washing machine to make this worth knowing. Build the bucket washer, make a batch of laundry soap, and actually wash a small load with it once. That first test will show you how much clothing your bucket can comfortably handle, how much detergent you really need, how much physical effort washing requires, and how much water the complete wash-and-rinse process consumes.
Then put the equipment away.
If the washing machine eventually breaks, you’re camping somewhere without laundry facilities, or the power stays off much longer than expected, you won’t be trying to figure out how to wash clothes for the first time. You’ll already have a simple system that you’ve built, tested, and know how to use.
© Prepping Communities. This content is for informational purposes only and not professional advice. Use at your own risk.
Terms | Privacy | Guidelines