
Cold and flu season is much easier to prepare for before anyone in the household gets sick. Once someone develops a fever, cough, congestion, or sore throat, that is a poor time to discover the honey is gone, the thermometer doesn’t work, or the ingredients for a favorite home preparation aren’t available.
Preparedness means doing that work ahead of time.
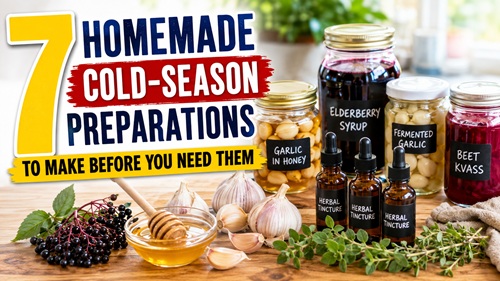
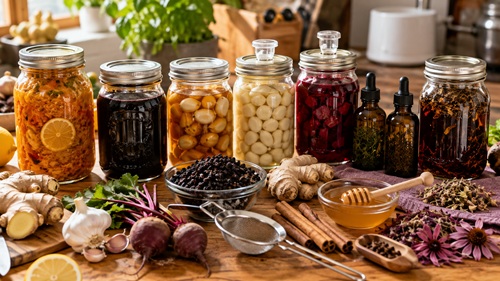
Traditional preparations such as fire cider, elderberry syrup, garlic and honey, fermented garlic, beet kvass, and herbal tinctures have been made in home kitchens for generations. Learning how to make them can add useful skills to a preparedness pantry while reducing dependence on having every comfort item immediately available from a store.
The important distinction is that traditional does not automatically mean medically proven. These preparations are best understood as foods, comfort measures, preservation skills, and complementary herbal preparations. They should not replace medical diagnosis, prescribed medication, vaccination, or antiviral treatment when those are appropriate.
The goal isn’t to create a cabinet filled with supposed miracle cures. It is to develop knowledge, supplies, skills, and options before illness arrives.
Before You Start: Build a Cold-Season Pantry
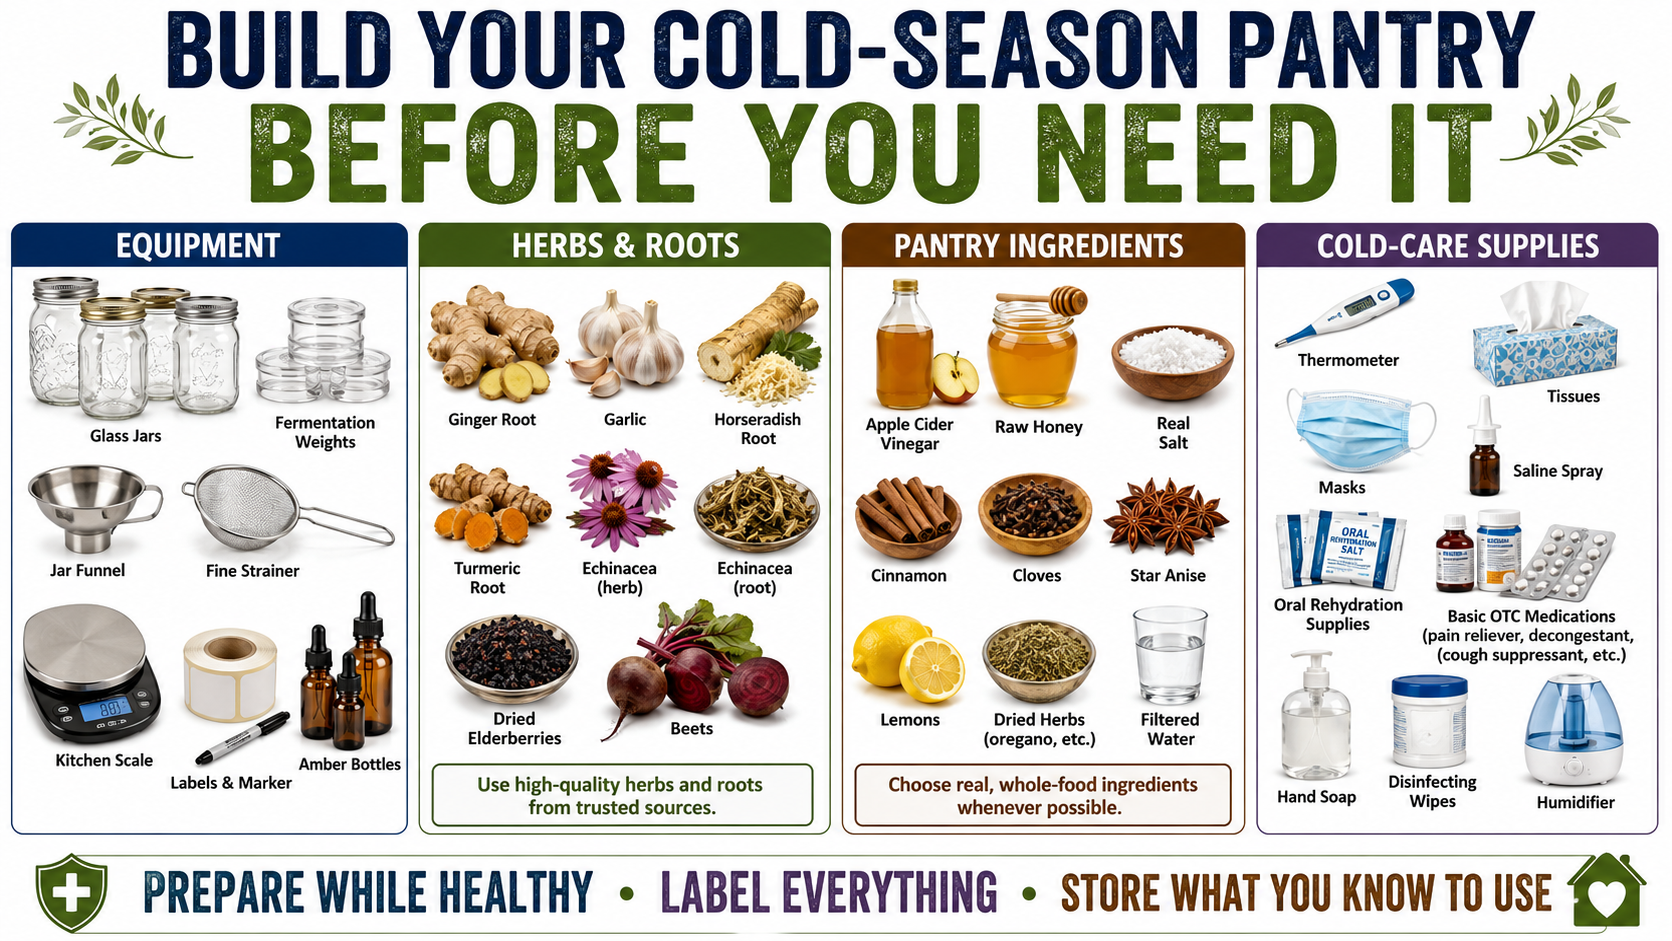
A good cold-season pantry needs more than ingredients. It needs the equipment required to prepare, label, preserve, and store those ingredients safely.
Useful equipment includes clean glass jars in several sizes, fermentation weights, a kitchen scale, measuring spoons and cups, jar funnel, fine-mesh strainer, labels, permanent marker, amber tincture bottles, and suitable lids.
Useful ingredients can include honey, apple cider vinegar, garlic, ginger, horseradish, turmeric, onions, lemons, hot peppers, dried ripe elderberries, echinacea, oregano, cinnamon, whole cloves, beets, fermentation salt, and food-grade drinking alcohol if tinctures are going to be made.
There is no need to purchase everything at once. Start with preparations the household will actually use and gradually develop the skills and supplies.
Label Everything
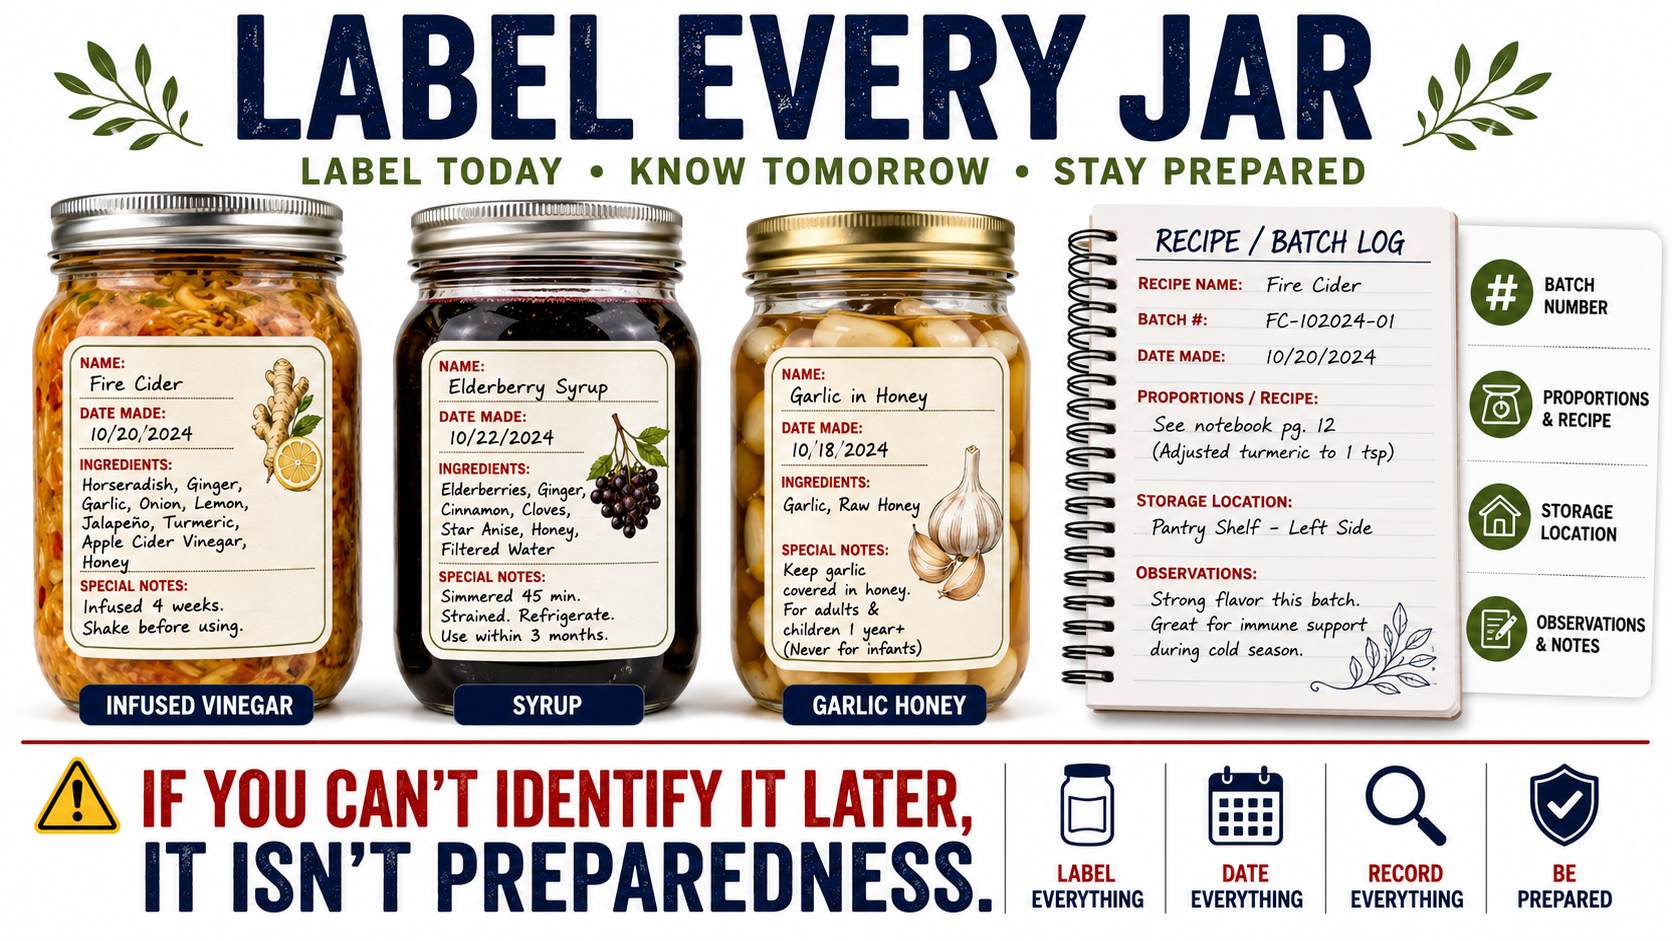
Every finished preparation should have a label.
At minimum, write down the name and preparation date.
For tinctures, fermented foods, and anything intended for longer storage, also record the ingredients, proportions when important, and any other information needed to reproduce the preparation later.
Consider keeping a small recipe notebook with the cold-season supplies.
A mystery jar discovered six months later isn’t preparedness.
1. Fire Cider
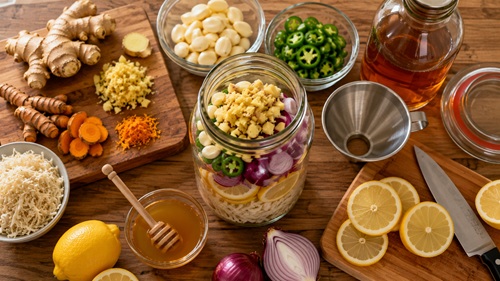
Fire cider is a strongly flavored infused vinegar traditionally made from pungent ingredients such as horseradish, ginger, garlic, hot peppers, citrus, onion, and turmeric.
It is better understood as a traditional food preparation than a medicine. The technique itself is useful because it teaches how vinegar can extract flavor from fresh ingredients and turn ordinary garden and pantry foods into a concentrated condiment.
Ingredients
- 1½ cups chopped or grated fresh horseradish
- 1 cup chopped or grated fresh ginger
- Several pieces of fresh turmeric, chopped or grated
- 3 jalapeño peppers, sliced
- ½ red onion, sliced
- 2 heads garlic, peeled and lightly crushed
- 1 whole lemon, sliced
- Juice of 1 additional lemon
- Apple cider vinegar sufficient to completely cover everything
- Honey to taste after straining
Step-by-Step Recipe
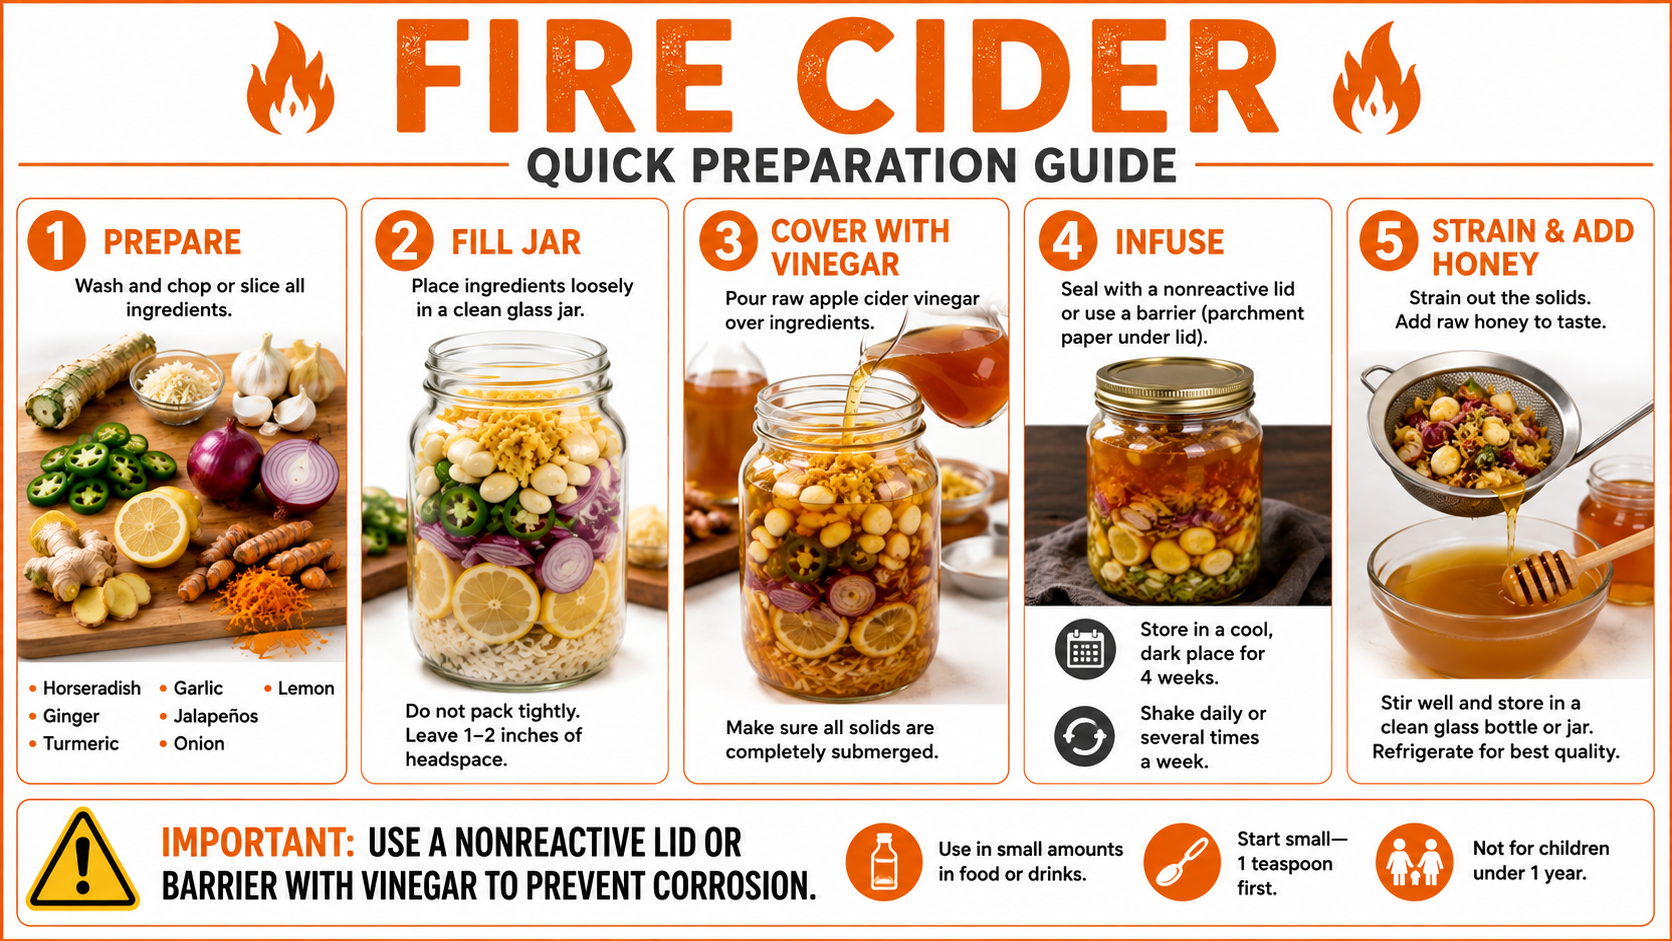
Step 1 – Prepare the ingredients. Wash the fresh ingredients thoroughly. Chop or grate the horseradish, ginger, and turmeric. Slice the peppers, onion, and lemon. Peel and lightly crush the garlic.
Step 2 – Fill the jar. Place the prepared vegetables, roots, garlic, and citrus into a clean large glass jar. Do not compress everything so tightly that vinegar cannot circulate between the ingredients.
Step 3 – Add the vinegar. Pour apple cider vinegar into the jar until all solid ingredients are completely covered. Leave approximately one or two inches of space at the top.
Step 4 – Close the jar. Because vinegar can react with some metal lids, use a suitable nonreactive lid or an appropriate barrier that prevents the vinegar from contacting reactive metal.
Step 5 – Infuse. Store the jar in a cool, dark location for approximately four weeks. Agitate it periodically so the ingredients remain thoroughly exposed to the vinegar.
Step 6 – Strain. Pour the mixture through a fine strainer into a clean container and remove the solids.
Step 7 – Add honey. Once strained, stir in honey according to taste.
Step 8 – Label and store. Write the preparation name and date on the container and store appropriately.
How to Use It
Fire cider can be used as a strongly flavored vinegar in salad dressings, marinades, sauces, soups, or diluted beverages.
Start with small culinary amounts. Vinegar, hot peppers, horseradish, ginger, and garlic can irritate the mouth or digestive system in some people.
More is not necessarily better.
2. Cooked Elderberry Syrup
Elderberry syrup is one of the best-known traditional cold-season preparations.
Some preliminary research has suggested that certain elderberry preparations may help with symptoms associated with respiratory infections, but the evidence remains limited. It should not be considered a proven treatment or preventive for influenza.
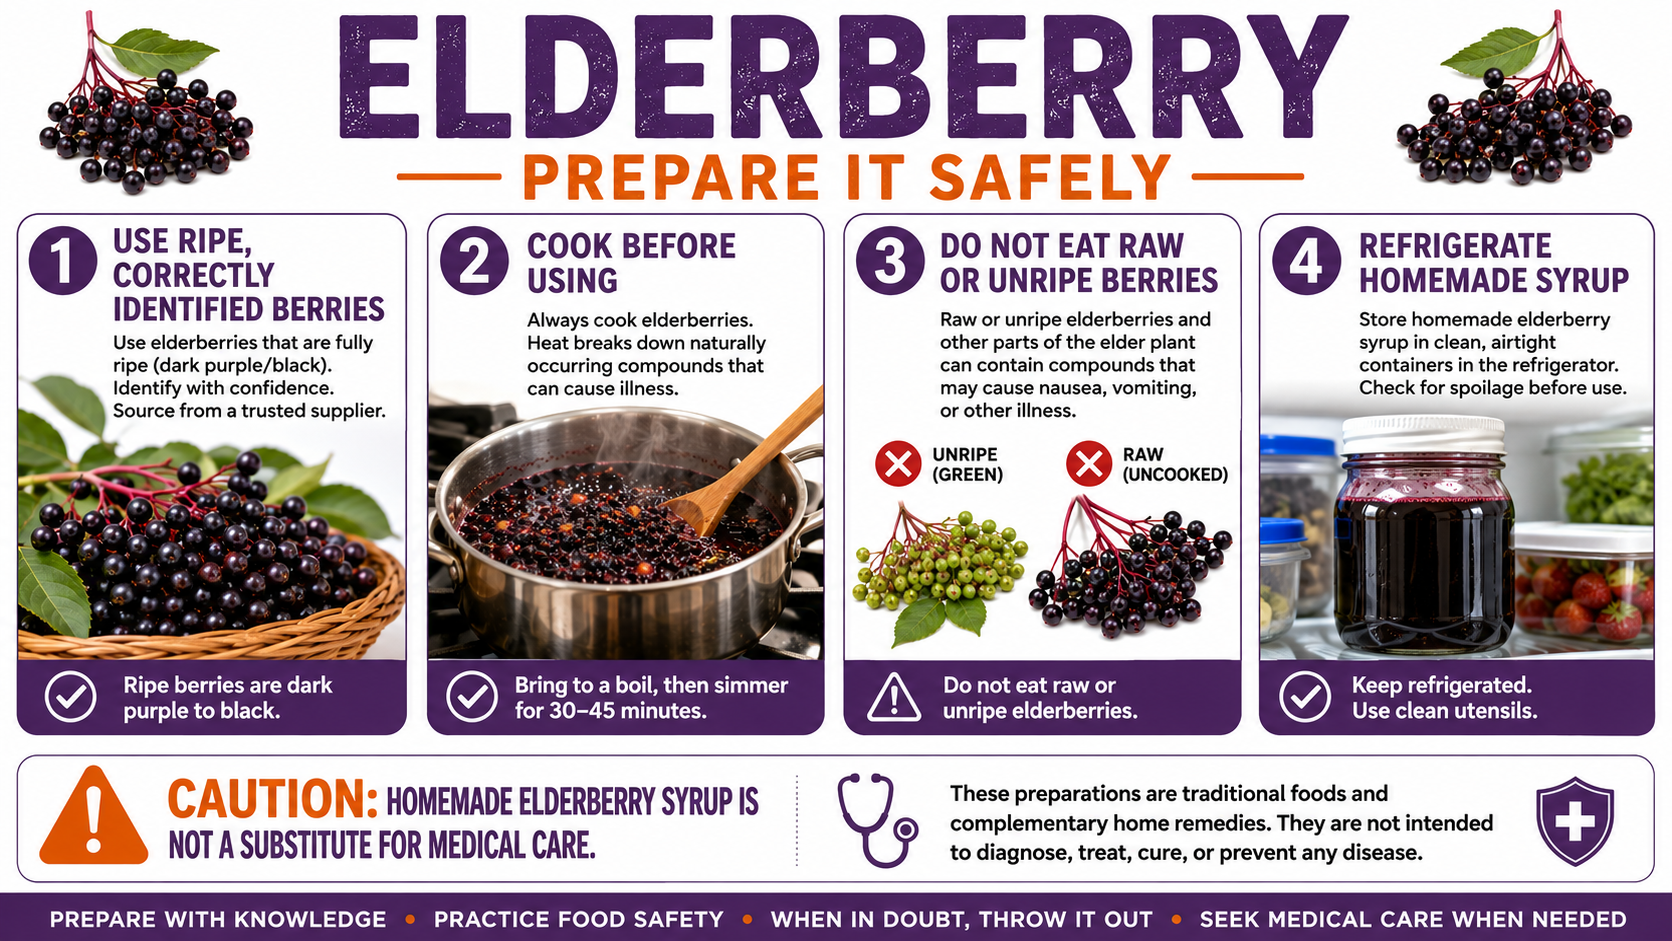
Elderberries also provide an important lesson in herbal safety. Raw or unripe elderberries and some other portions of the elder plant can contain compounds capable of producing cyanide. Correct identification and preparation are essential.
Ingredients
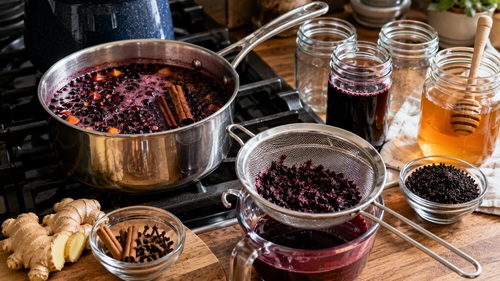
- 2 cups dried ripe elderberries
- Approximately 4½ cups filtered water
- 2½ tablespoons grated fresh ginger
- 2 cinnamon sticks
- ½ teaspoon whole cloves
- 1–2 star anise pods, optional
- Honey to taste
Step-by-Step Recipe
Step 1 – Inspect the berries. Use correctly identified dried ripe elderberries from a reliable source. Remove any obvious foreign material.
Step 2 – Combine the ingredients. Place the elderberries, water, ginger, cinnamon, cloves, and optional star anise into a saucepan.
Step 3 – Bring to a boil. Heat the mixture until it reaches a boil.
Step 4 – Simmer. Reduce the heat and allow the mixture to simmer gently for approximately 40–45 minutes, or until the liquid has substantially reduced.
Step 5 – Steep. Remove the saucepan from the heat and allow the mixture to steep for approximately another 20 minutes.
Step 6 – Strain. Pour the mixture through a fine strainer, removing the berries and spices.
Step 7 – Cool. Allow the strained liquid to cool before adding honey.
Step 8 – Add honey. Stir honey into the cooled or warm liquid according to taste.
Step 9 – Refrigerate. Transfer the finished syrup to clean glass containers, label them, and refrigerate.
Storage
Homemade elderberry syrup should be treated as a refrigerated perishable preparation rather than assumed to have a long shelf life.
Inspect it before use. Mold, unexpected fermentation, excessive pressure, unusual odors, or other signs of spoilage are reasons to discard it.
Important Elderberry Safety
Do not eat raw or unripe elderberries.
Use correctly identified elderberries from a reliable source.
Pregnant or breastfeeding people, children, people taking medications, and people with significant medical conditions should obtain appropriate guidance before using concentrated herbal preparations.
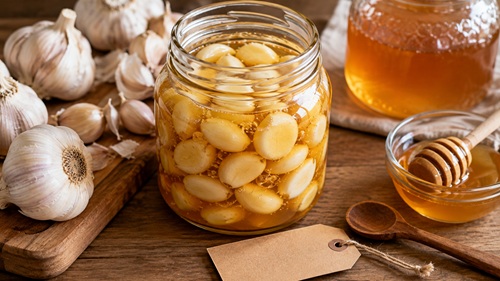
3. Garlic in Honey
Garlic and honey make one of the simplest traditional pantry preparations.
As the garlic sits in honey, moisture moves from the garlic into the surrounding honey and the flavor and consistency gradually change. Depending upon conditions and preparation method, bubbling and other fermentation activity may occur.
Honey itself has evidence supporting its use for soothing cough in adults and children who are old enough to consume it.
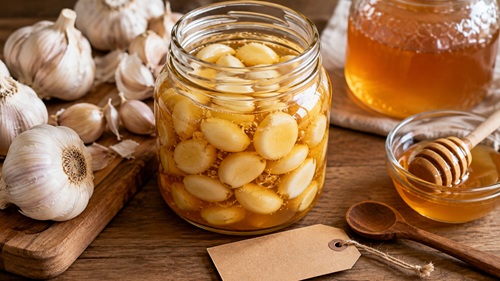
Ingredients
- Fresh garlic cloves
- Honey
- Clean glass jar
Step-by-Step Recipe
Step 1 – Inspect the garlic. Choose firm, healthy garlic. Discard cloves showing mold, rot, or significant damage.
Step 2 – Peel the cloves. Separate and peel enough garlic to partially fill the jar.
Step 3 – Fill the jar. Place the garlic into a clean glass jar while leaving enough room for movement and expansion.
Step 4 – Add honey. Pour honey over the garlic until the cloves are thoroughly coated.
Step 5 – Manage early activity safely. Follow a reliable food-safe fermentation method and account for potential gas production rather than tightly sealing an actively fermenting container and forgetting about it.
Step 6 – Keep the garlic coated. Turn, stir, or otherwise manage the mixture according to the fermentation method being followed so exposed garlic does not simply sit dry above the honey.
Step 7 – Monitor it. Watch the preparation closely during its early development and follow appropriate storage guidance for the method being used.
Step 8 – Label it. Record the ingredients and preparation date.
How to Use It
Garlic and honey can be incorporated into marinades, sauces, salad dressings, foods, or warm beverages.
The honey may also be used as a soothing food for coughing in people for whom honey is appropriate.
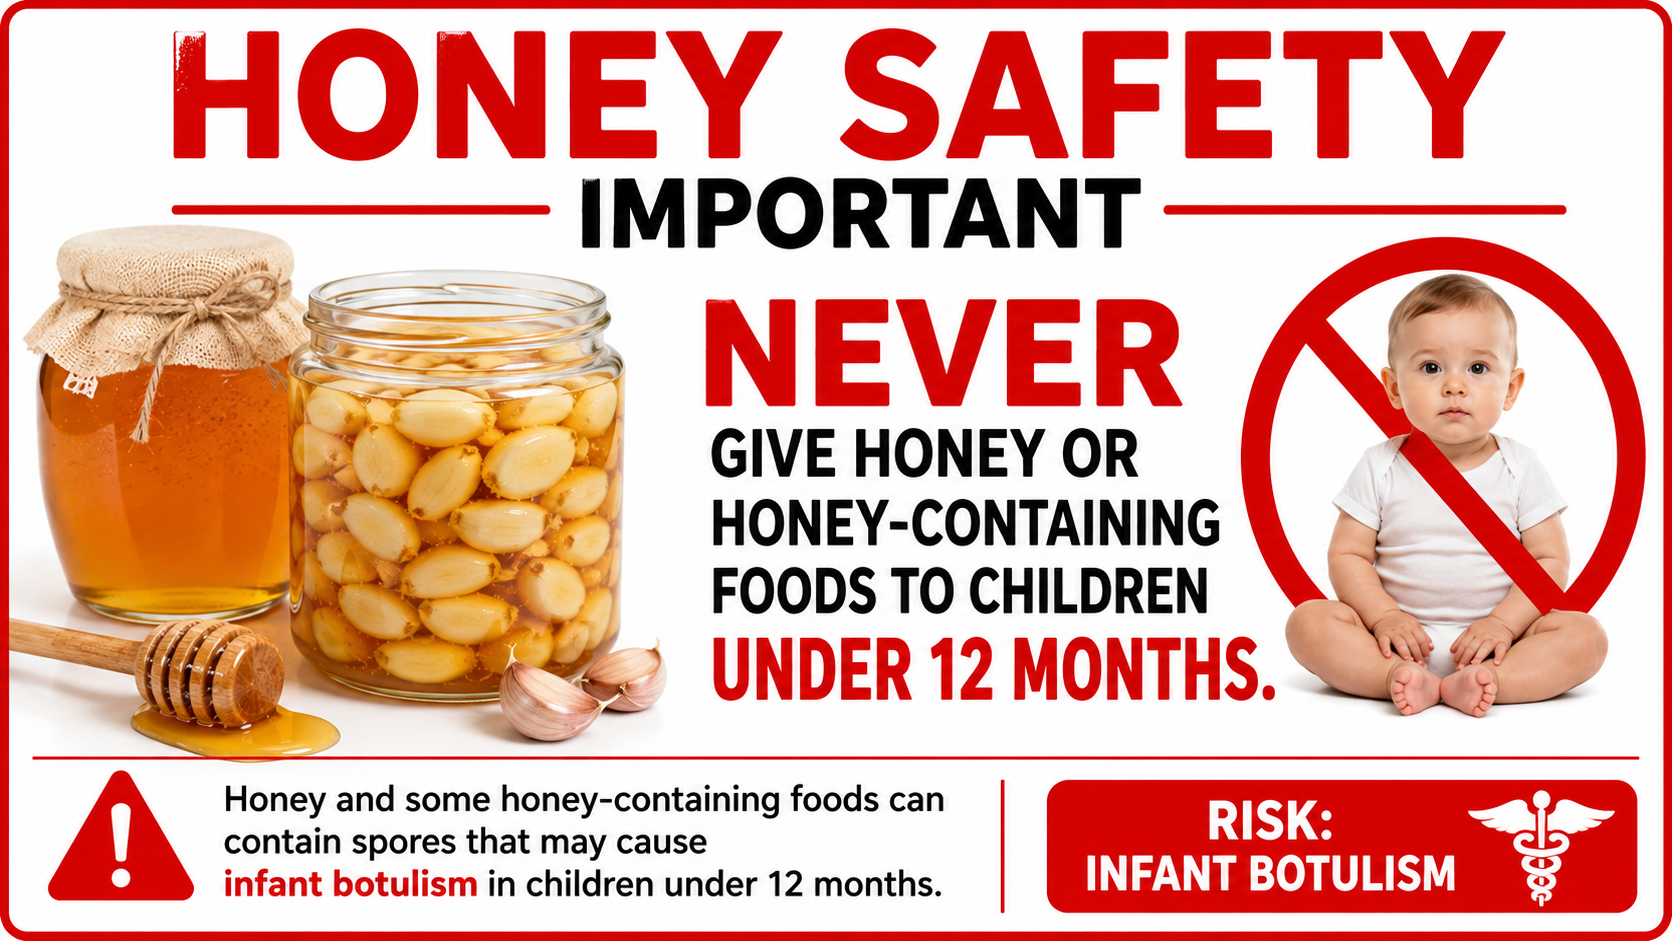
Critical Honey Warning
Never give honey – or anything containing honey – to an infant younger than 12 months.
Honey can contain spores associated with infant botulism.
If infants live in or regularly visit the household, consider placing NOT FOR CHILDREN UNDER 1 YEAR directly on the jar.
4. Brine-Fermented Garlic
Garlic can also be preserved using lactic-acid fermentation.
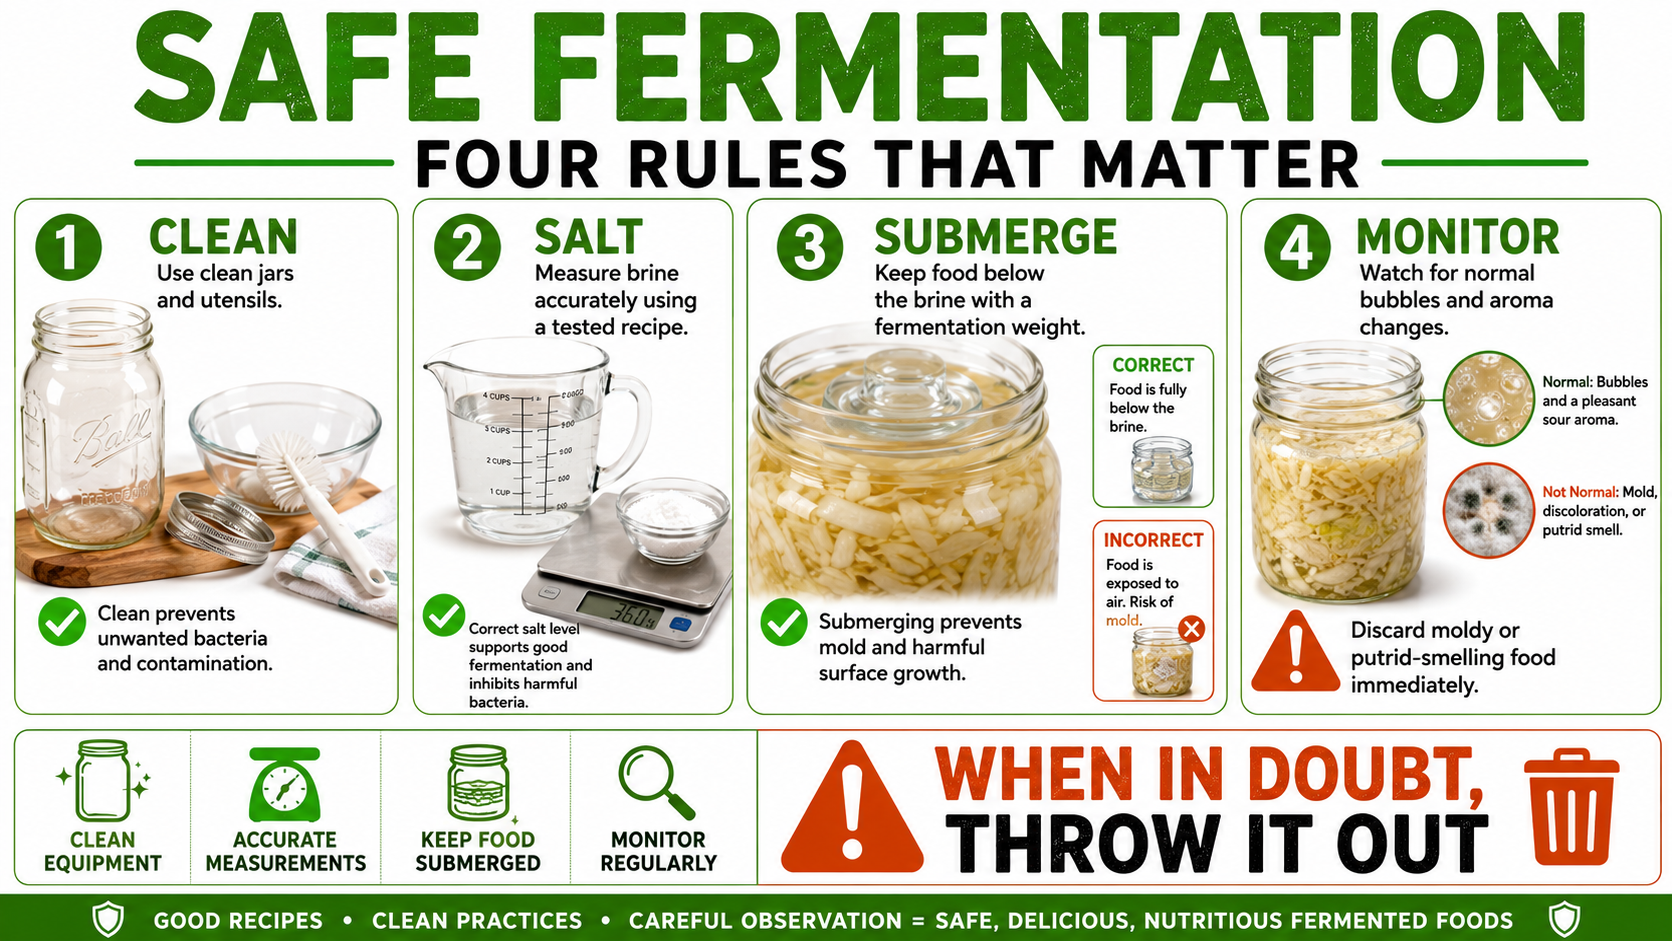
This is particularly useful from a preparedness standpoint because the lesson extends far beyond garlic. Understanding salt concentration, submersion, sanitation, temperature, and fermentation gives the household another method of processing and preserving fresh food.
Fermentation is not simply putting vegetables in water and waiting.
Conditions matter.
Ingredients
- Fresh peeled garlic cloves
- Properly prepared salt brine from a tested fermentation recipe
- Clean glass jar
- Fermentation weight
Step-by-Step Recipe
Step 1 – Inspect the garlic. Discard garlic showing mold, rot, or significant deterioration.
Step 2 – Peel the cloves. Remove the skins while leaving sound cloves intact.
Step 3 – Prepare the jar. Use a clean glass jar appropriate for fermentation.
Step 4 – Add the garlic. Pack the cloves loosely into the jar without crushing them tightly together.
Step 5 – Prepare the brine. Follow a tested fermentation formula. Measuring the salt and water by weight provides greater repeatability than estimating.
Step 6 – Add the brine. Pour enough prepared brine into the jar to completely cover the garlic.
Step 7 – Add a fermentation weight. Place the weight over the garlic so the cloves remain beneath the brine.
Step 8 – Ferment. Follow the temperature and fermentation time specified by the tested recipe being used.
Step 9 – Inspect regularly. Observe changes in aroma, bubbles, brine, and appearance.
Step 10 – Refrigerate. Once the desired fermentation has been achieved, refrigerate according to the storage instructions for the recipe.
Learn What Normal Fermentation Looks Like
Normal fermentation can produce bubbles, cloudiness, changes in aroma, and changes in texture.
Not every change is automatically safe.
Learn fermentation while food is plentiful and replacement ingredients are readily available. That gives you time to recognize normal fermentation before ever relying on the skill during an emergency.
Obvious mold, putrid odors, or other serious signs of spoilage are reasons to discard the food rather than taste it to determine whether something went wrong.
5. Beet Kvass
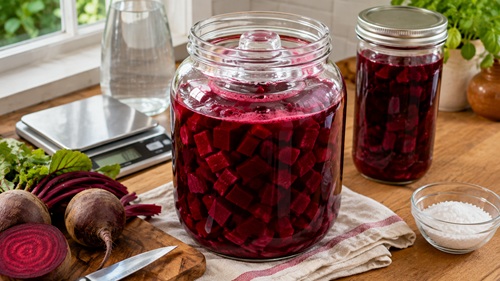
Beet kvass is a fermented beverage traditionally produced from beets, water, and salt.
It is sometimes described online as something that “detoxifies” the liver or dramatically increases immunity. Those claims go beyond what should reasonably be promised from a homemade fermented beverage.
There is still a very good preparedness reason to learn it.
Beets are productive root vegetables that can be grown, stored, cooked, canned using appropriate methods, and fermented. Beet kvass provides another opportunity to develop controlled-fermentation skills.
Ingredients
- 2–3 medium fresh beets
- Properly prepared fermentation brine from a tested recipe
- Clean glass jar
- Fermentation weight
Step-by-Step Recipe
Step 1 – Inspect the beets. Choose firm beets without rot or significant deterioration.
Step 2 – Wash thoroughly. Remove soil and debris from the surface.
Step 3 – Cut the beets. Cut them into approximately one-inch pieces.
Step 4 – Fill the jar. Place the beet pieces into a clean glass jar without packing them excessively tightly.
Step 5 – Prepare the brine. Follow a reliable tested fermentation recipe and measure the salt accurately.
Step 6 – Cover the beets. Pour the prepared brine over the beet pieces.
Step 7 – Keep everything submerged. Place a fermentation weight on top so the beets remain below the brine.
Step 8 – Ferment. Allow the mixture to ferment according to the tested recipe and temperature recommendations being followed.
Step 9 – Inspect. Monitor the preparation for normal fermentation and signs of spoilage.
Step 10 – Refrigerate. Once the desired fermentation is reached, refrigerate according to the recipe.
The finished beverage normally develops a tart, earthy character.
The important preparedness lesson isn’t “detoxification.”
It is learning controlled fermentation.
6. Garlic and Oregano Tincture
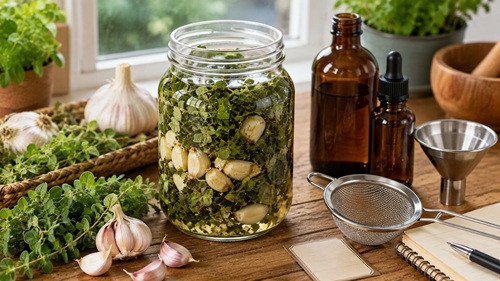
A tincture uses alcohol to extract soluble compounds from plant material.
From a preparedness perspective, this is a useful technique to understand because tinctures can preserve certain plant constituents in a compact form for much longer than the fresh herb itself.
However, concentrated does not mean medically proven.
Garlic and oregano have been studied for various biological properties, but a homemade garlic-and-oregano tincture should not be presented as a proven treatment for influenza or the common cold.
Ingredients
- Fresh oregano
- Several fresh garlic cloves
- Food-grade drinking alcohol appropriate for tincture making
- Clean glass jar
- Fine strainer
- Amber storage bottle
Step-by-Step Recipe
Step 1 – Inspect the ingredients. Use healthy oregano and sound garlic.
Step 2 – Prepare the garlic. Peel and lightly crush several cloves.
Step 3 – Prepare the oregano. Inspect and clean the oregano appropriately.
Step 4 – Fill the jar. Place the oregano and garlic loosely into a clean glass jar.
Step 5 – Add alcohol. Completely cover the plant material with food-grade drinking alcohol suitable for tincture preparation.
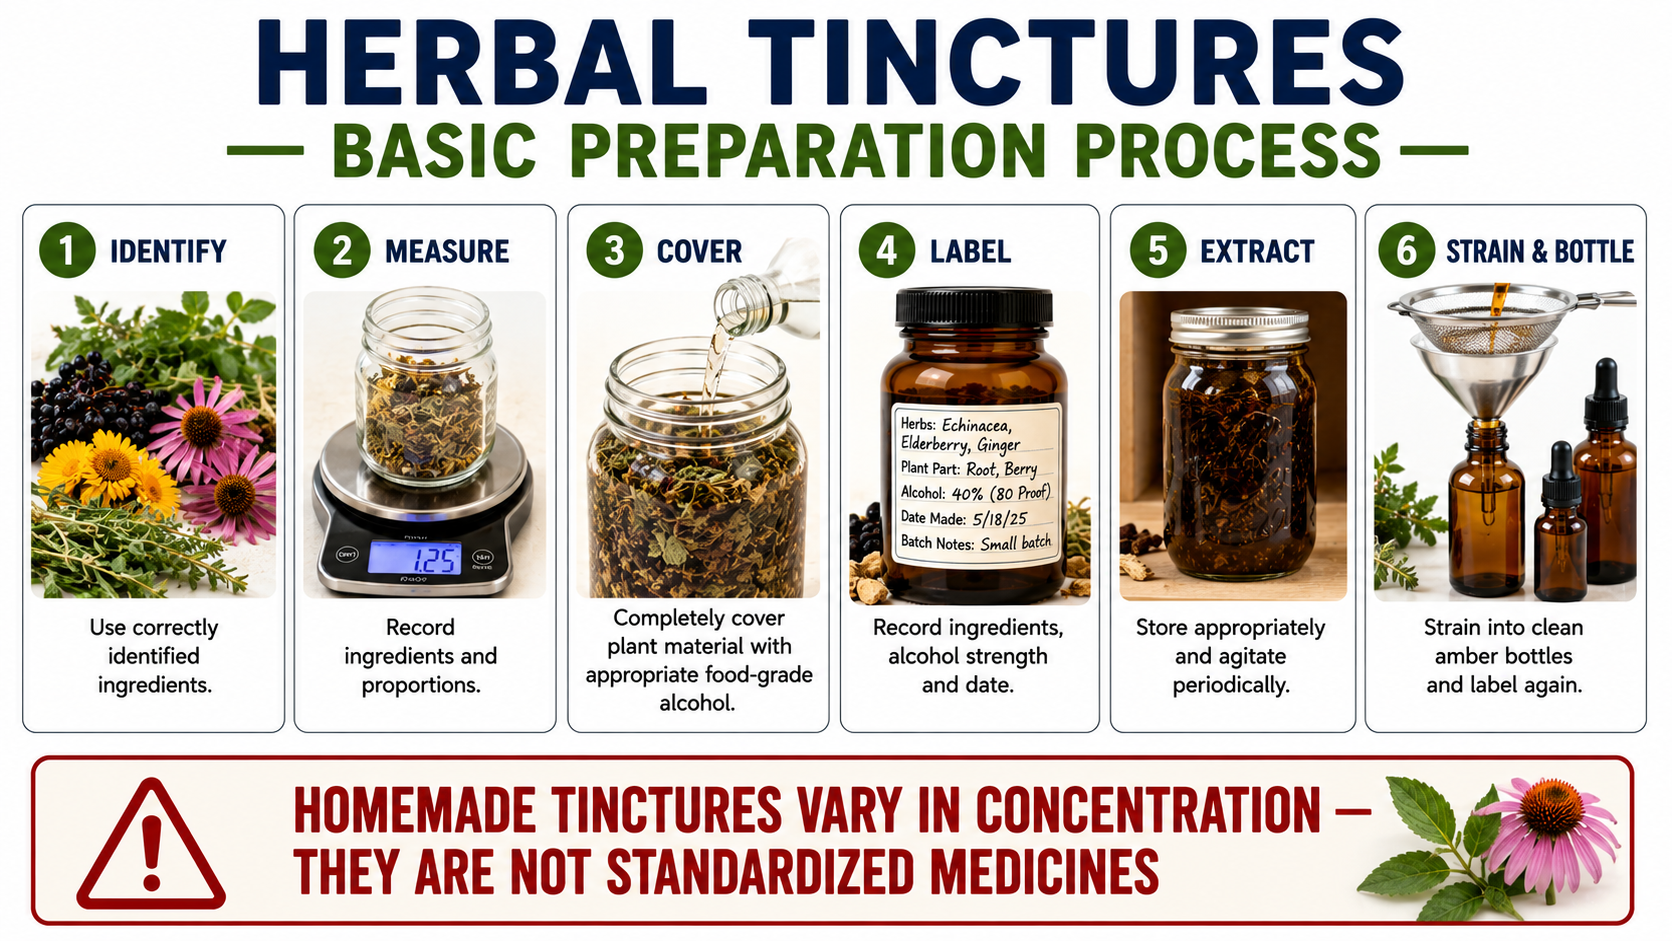
Step 6 – Label immediately. Record the ingredients, alcohol concentration, and preparation date.
Step 7 – Extract. Store the closed jar in a cool, dark location for several weeks.
Step 8 – Agitate periodically. Gently shake the jar from time to time during extraction.
Step 9 – Strain. Remove the plant material using a fine strainer.
Step 10 – Bottle. Transfer the finished tincture into a clean amber bottle.
Step 11 – Label again. Record exactly what is inside and when it was made.
Why There Is No Generic Dose Here
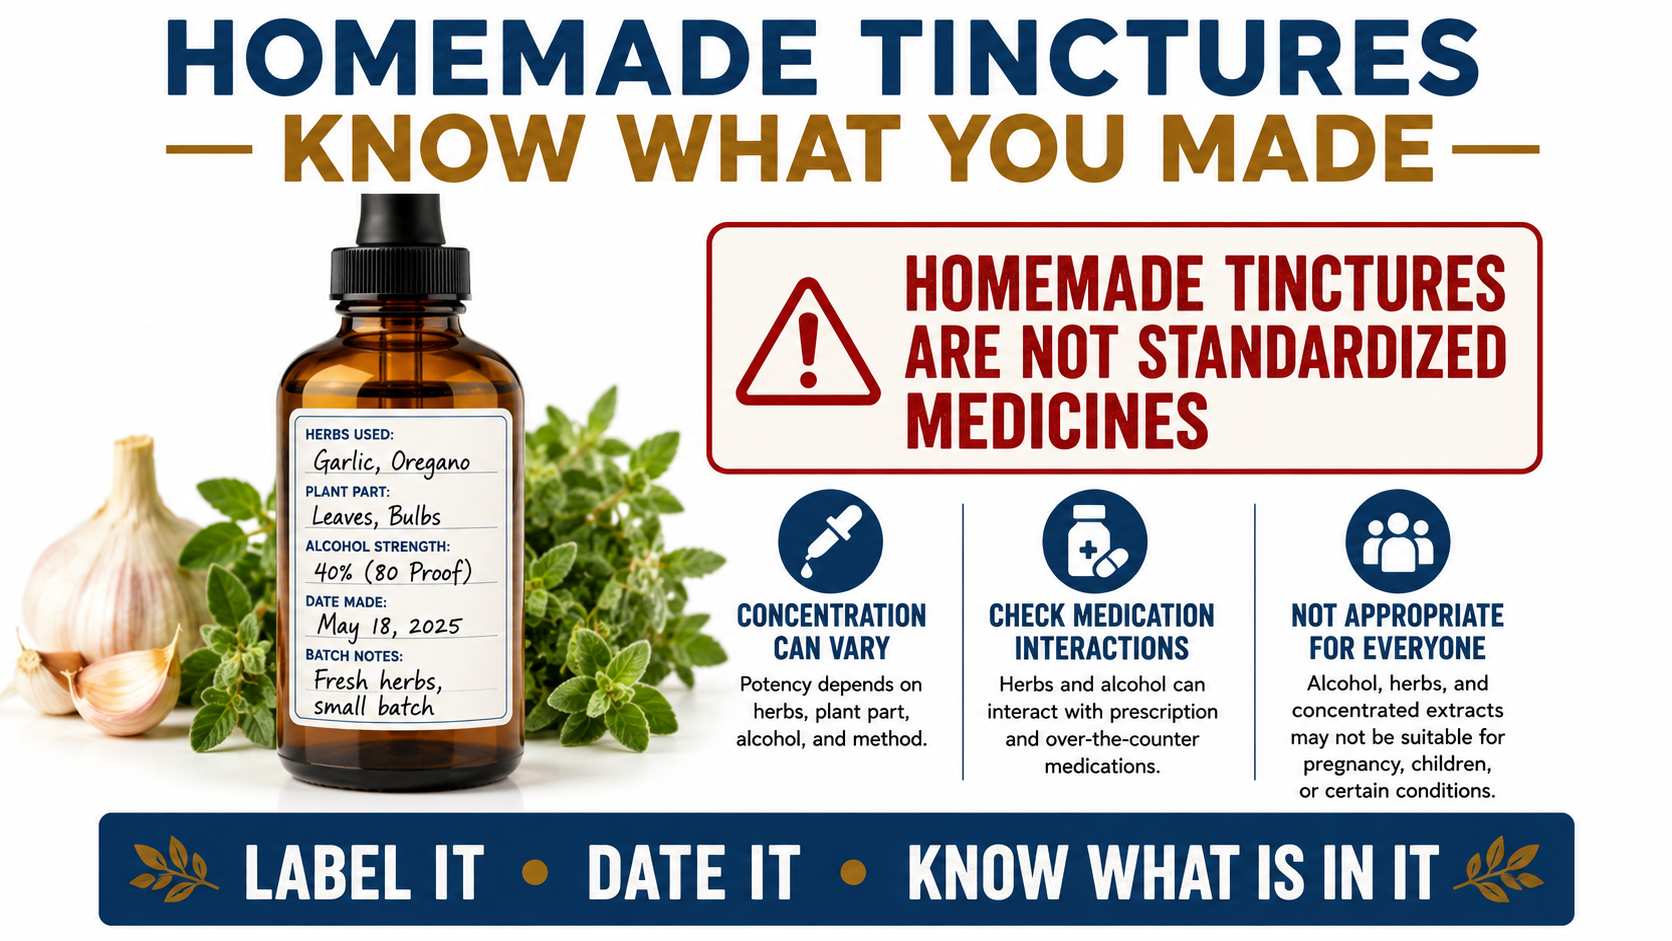
Homemade tinctures aren’t standardized pharmaceutical products.
Concentration can vary with the plant species, plant part, freshness, moisture content, amount of plant material, alcohol concentration, extraction time, and preparation method.
For that reason, saying that every homemade preparation should be taken as “one dropper three times per day” creates precision that doesn’t really exist.
Alcohol-based tinctures also aren’t appropriate for everyone and concentrated herbs can interact with medications.
Know exactly what you have before deciding how or whether it should be consumed.
7. Elderberry, Echinacea and Ginger Tincture
Elderberry, echinacea, and ginger are frequently found together in traditional cold-season herbal preparations.
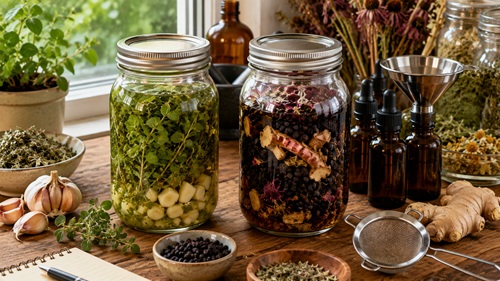
A tincture provides a way to extract and store those ingredients in a compact form. It also provides another opportunity to practice accurate labeling and record keeping.
Research into echinacea for colds has produced inconsistent results, and evidence surrounding elderberry remains limited. This preparation therefore should not be treated as a guaranteed way to prevent or treat influenza.
Ingredients
A basic proportion for learning the extraction technique can use approximately:
- 3 parts dried ripe elderberries
- 1 part appropriate dried echinacea material
- ½ part dried ginger
- Food-grade drinking alcohol appropriate for tincture making
- Clean glass jar
- Fine strainer
- Amber storage bottle
Step-by-Step Recipe
Step 1 – Measure the dried ingredients. Use the approximate 3:1:½ proportion so the recipe can be reproduced later.
Step 2 – Combine them. Place the dried elderberries, echinacea, and ginger into a clean glass jar.
Step 3 – Leave room. Do not pack the herbs tightly. Leave sufficient space for the alcohol to circulate through the plant material.
Step 4 – Add alcohol. Completely cover the dried ingredients with suitable food-grade drinking alcohol.
Step 5 – Label immediately. Record the ingredients, proportions, alcohol concentration, and date.
Step 6 – Store. Keep the closed jar in a cool, dark location.
Step 7 – Agitate periodically. Gently shake the jar periodically during extraction.
Step 8 – Allow several weeks for extraction. Follow a reliable herbal preparation reference for the particular ingredients being used.
Step 9 – Strain. Separate the plant material from the finished liquid.
Step 10 – Bottle. Transfer the tincture into clean amber bottles.
Step 11 – Label the finished preparation. Include the ingredients and date.
Understand the Limitations
Echinacea is one of the more extensively studied herbal products associated with the common cold, but research results are inconsistent. Differences between echinacea species, plant parts, extracts, and commercial preparations also make broad claims difficult.
Elderberry research remains preliminary.
Ginger is useful as a culinary ingredient and has evidence for some other applications, including certain forms of nausea, but combining these ingredients does not transform them into a proven influenza treatment.
Preparedness should improve decision-making rather than replace evidence with assumptions.
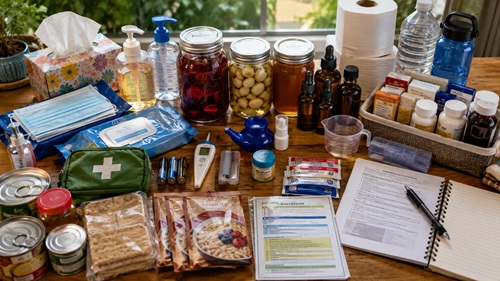
Build a Complete Cold-and-Flu Preparedness Kit
Homemade preparations should be one part of the household plan, not the entire plan.
Keep a dependable thermometer and spare batteries if needed. Maintain tissues, soap, appropriate masks, disinfecting supplies, clean drinking water, oral rehydration supplies, and foods that can be prepared easily when nobody feels like cooking.
Keep appropriate over-the-counter medications for members of the household while paying attention to expiration dates, age restrictions, contraindications, and duplicate active ingredients.
This last point is particularly important with combination cold and flu medications. Two products with different brand names can contain the same active ingredient.
Keep medical contact information available offline.
For household members with important allergies, medical conditions, or critical medications, maintain an up-to-date written record.
Preparedness becomes much more valuable when information remains available even if the person who normally remembers everything is the one who gets sick.
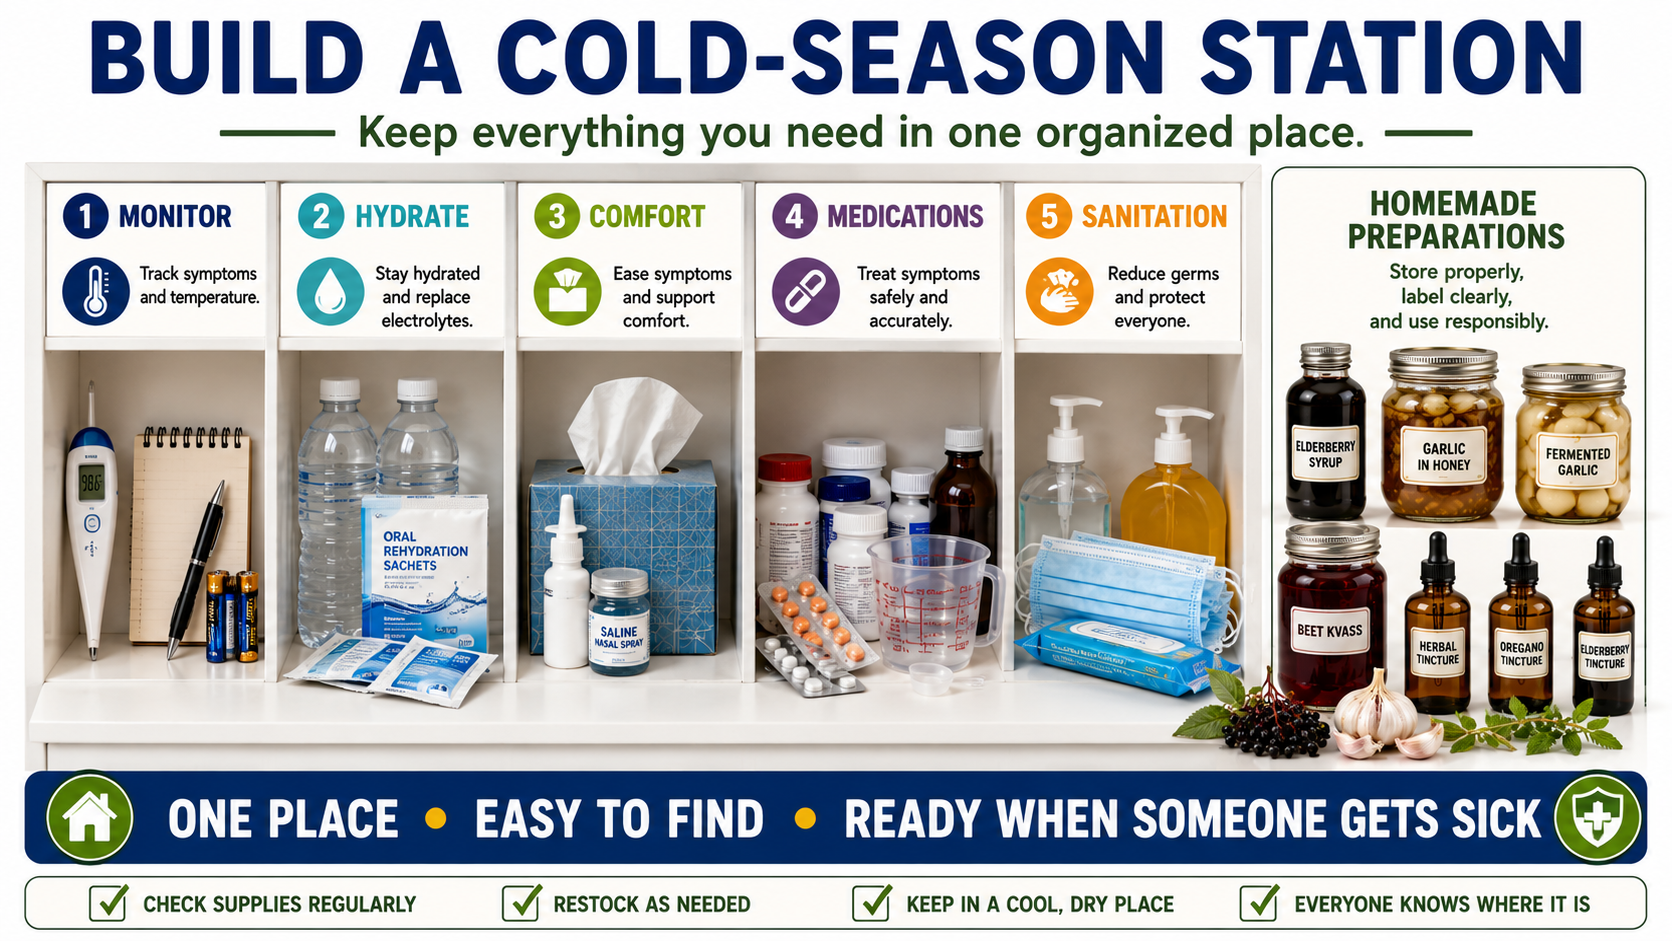
Create a Cold-Season Station
Instead of keeping the thermometer in one room, tissues somewhere else, medications throughout several cabinets, and homemade preparations in different locations, create a dedicated cold-season area.
It doesn’t need to be elaborate.
A storage bin, cabinet shelf, or small cupboard can hold the thermometer, tissues, masks, saline spray, medication measuring devices, oral rehydration supplies, commonly used over-the-counter products, disposable bags, cleaning supplies, and written information.
Keep appropriate homemade preparations nearby.
The objective is simple.
If someone becomes sick at two in the morning, nobody should have to search the house for basic supplies.
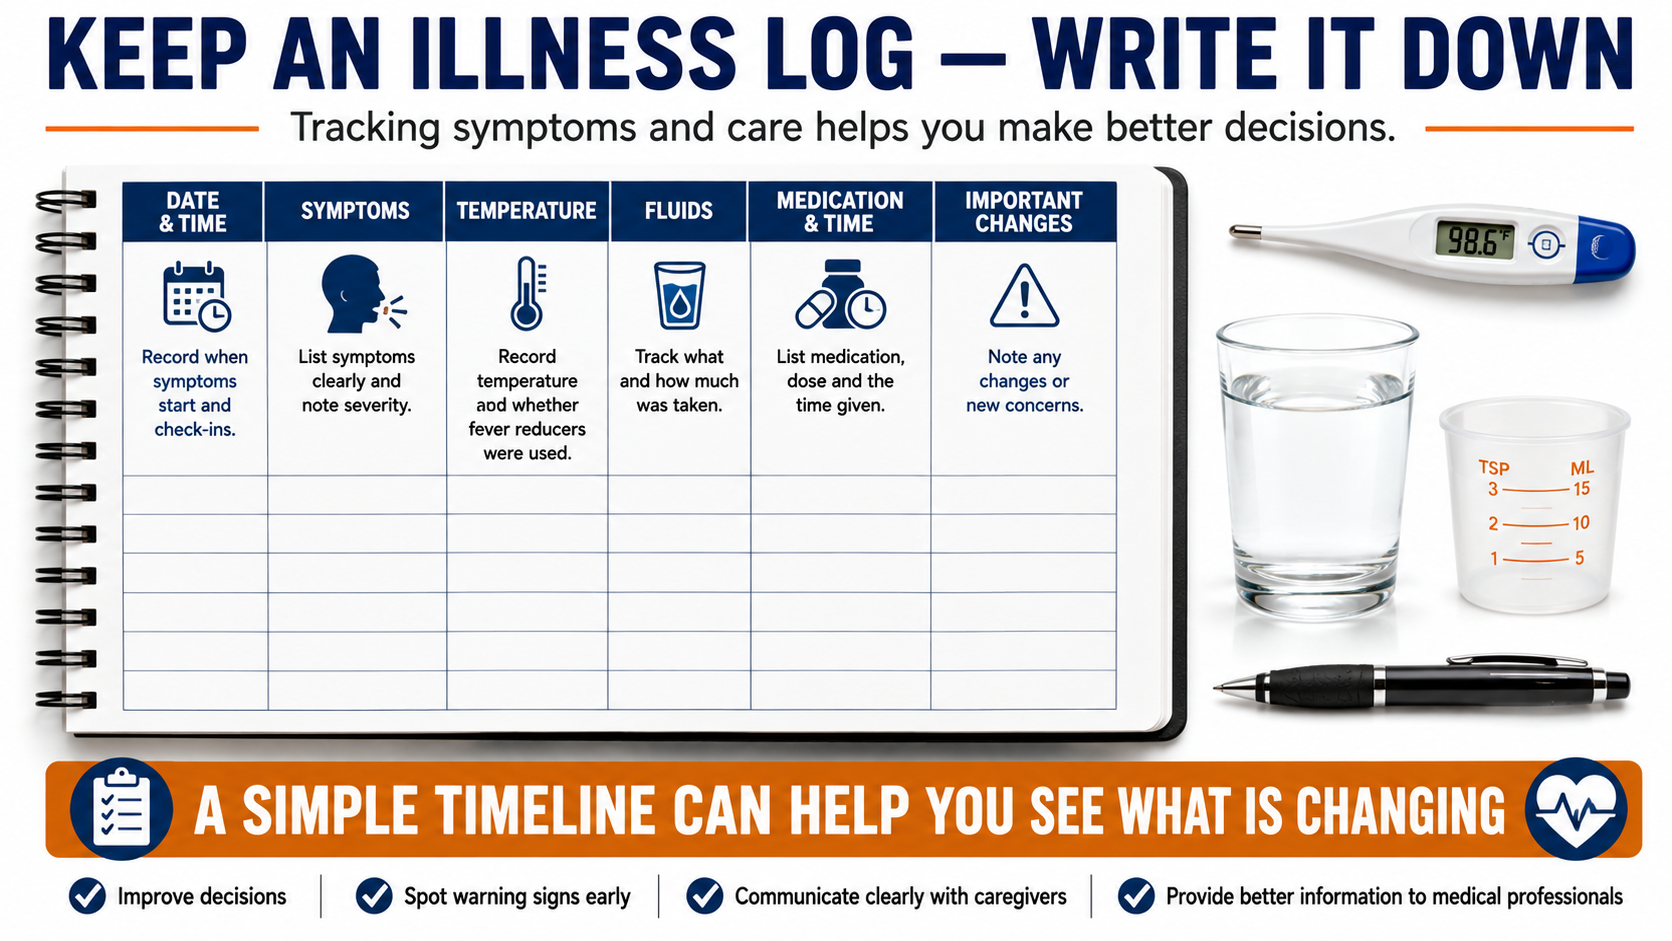
Keep an Illness Log
A notebook and pen can become surprisingly valuable when someone is sick for several days.
Record when symptoms first appeared.
Record temperature readings and their times.
If dehydration becomes a concern, keep track of fluids.
Record medications taken, including the product, amount, and time.
This is especially useful when more than one person is caring for someone or when combination medications are involved.
Record significant changes in symptoms as well.
If medical care becomes necessary, a simple written timeline can provide much better information than trying to remember everything that happened over the previous three days.
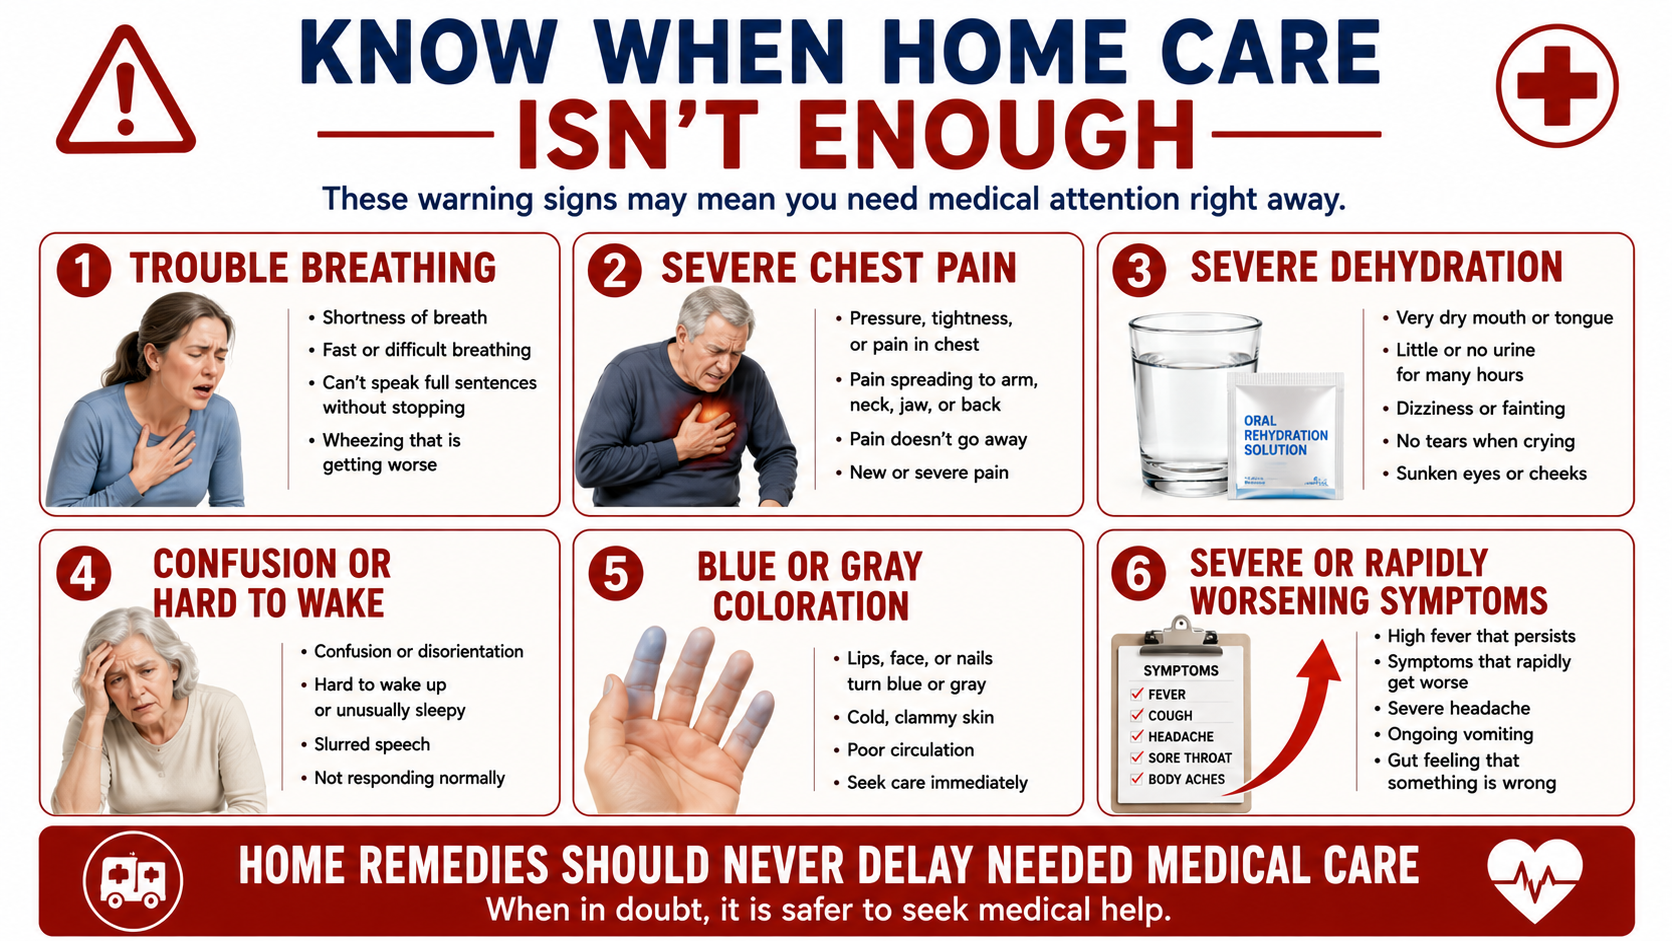
Know When Home Care Isn’t Enough
A home remedy should never become a reason to delay medical attention.
Difficulty breathing, significant chest pain, severe dehydration, confusion, inability to remain awake, bluish or gray coloration, or other severe or rapidly worsening symptoms require appropriate medical attention.
Symptoms that improve and then return substantially worse also deserve attention.
Infants, older adults, pregnant people, immunocompromised individuals, and people with significant chronic medical conditions can require additional precautions.
Influenza, COVID-19, and other respiratory illnesses can initially resemble an ordinary cold. For people at increased risk of severe illness, early medical advice can matter because antiviral treatments are available for some infections and generally work best when started early.
Traditional preparations and modern medicine don’t need to compete with each other.
Preparedness means understanding where each belongs.
Practice While Everyone Is Healthy
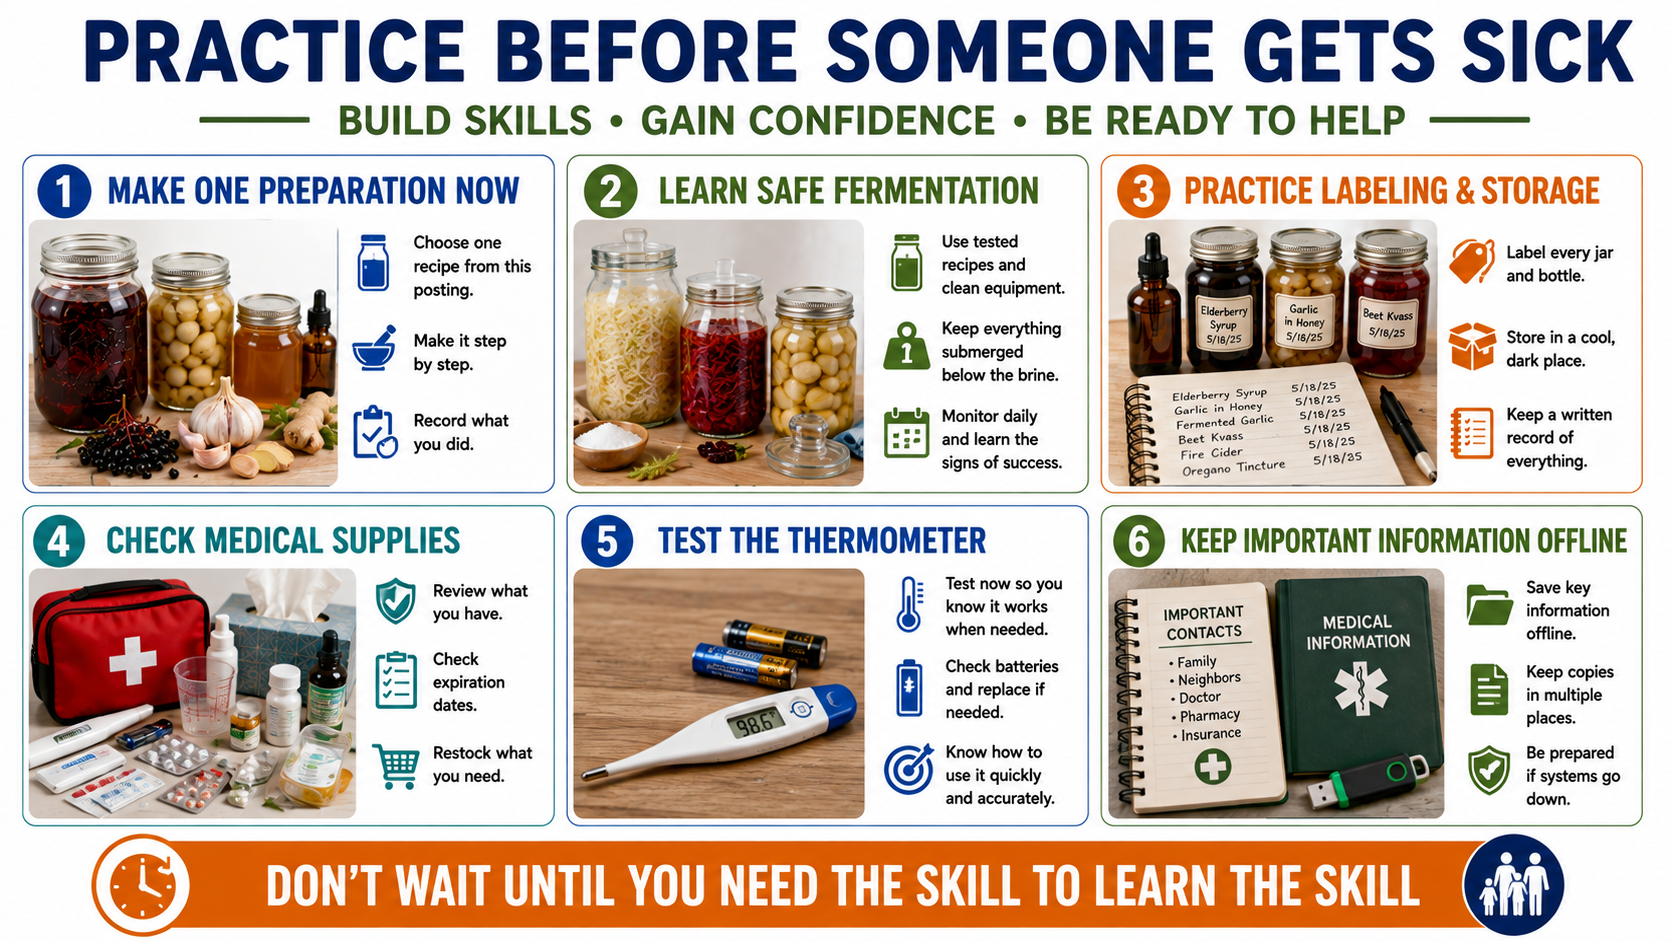
Don’t make the first batch of fermented garlic while caring for several sick people.
Don’t learn tincture extraction when the preparation is already needed.
Don’t wait until someone develops a fever to discover that the thermometer hasn’t worked since last winter.
Make one preparation now.
Learn what normal fermentation looks like.
Practice sanitation.
Learn how to label jars.
Check the medical supplies.
Replace expired products where appropriate.
Test the thermometer.
Make sure important medical information is available offline.
Then learn another preparation.
Skills become dependable through repetition.
Preparedness Action Plan
Begin with a dedicated cold-season storage area and inventory what the household already owns.
Add the conventional supplies that are genuinely useful: thermometer, hydration supplies, tissues, masks, sanitation supplies, appropriate medications, easy-to-prepare foods, and written medical information.
Then choose one recipe from this guide.
Make it carefully and document exactly what you did.
Once comfortable with that technique, choose another.
Learn vinegar infusion.
Learn safe herbal extraction.
Learn controlled fermentation.
Learn proper labeling and storage.
Maintain conventional medical resources alongside traditional preparations.
Finally, keep an illness log with the kit.
The objective isn’t to predict which respiratory illness will arrive next winter.
It is to make sure the household has enough supplies, knowledge, organization, and practical skills to respond intelligently when it does.
Key Takeaways
Traditional cold-season preparations can add useful skills to a preparedness pantry without being treated as miracle cures.
Fire cider teaches vinegar infusion. Elderberry syrup teaches extraction and safe preparation of a traditionally used plant. Garlic and honey provide another traditional food preparation. Brine-fermented garlic and beet kvass develop fermentation skills. Tinctures introduce alcohol extraction and longer-term storage of plant preparations.
Each technique teaches something that can remain useful beyond cold and flu season.
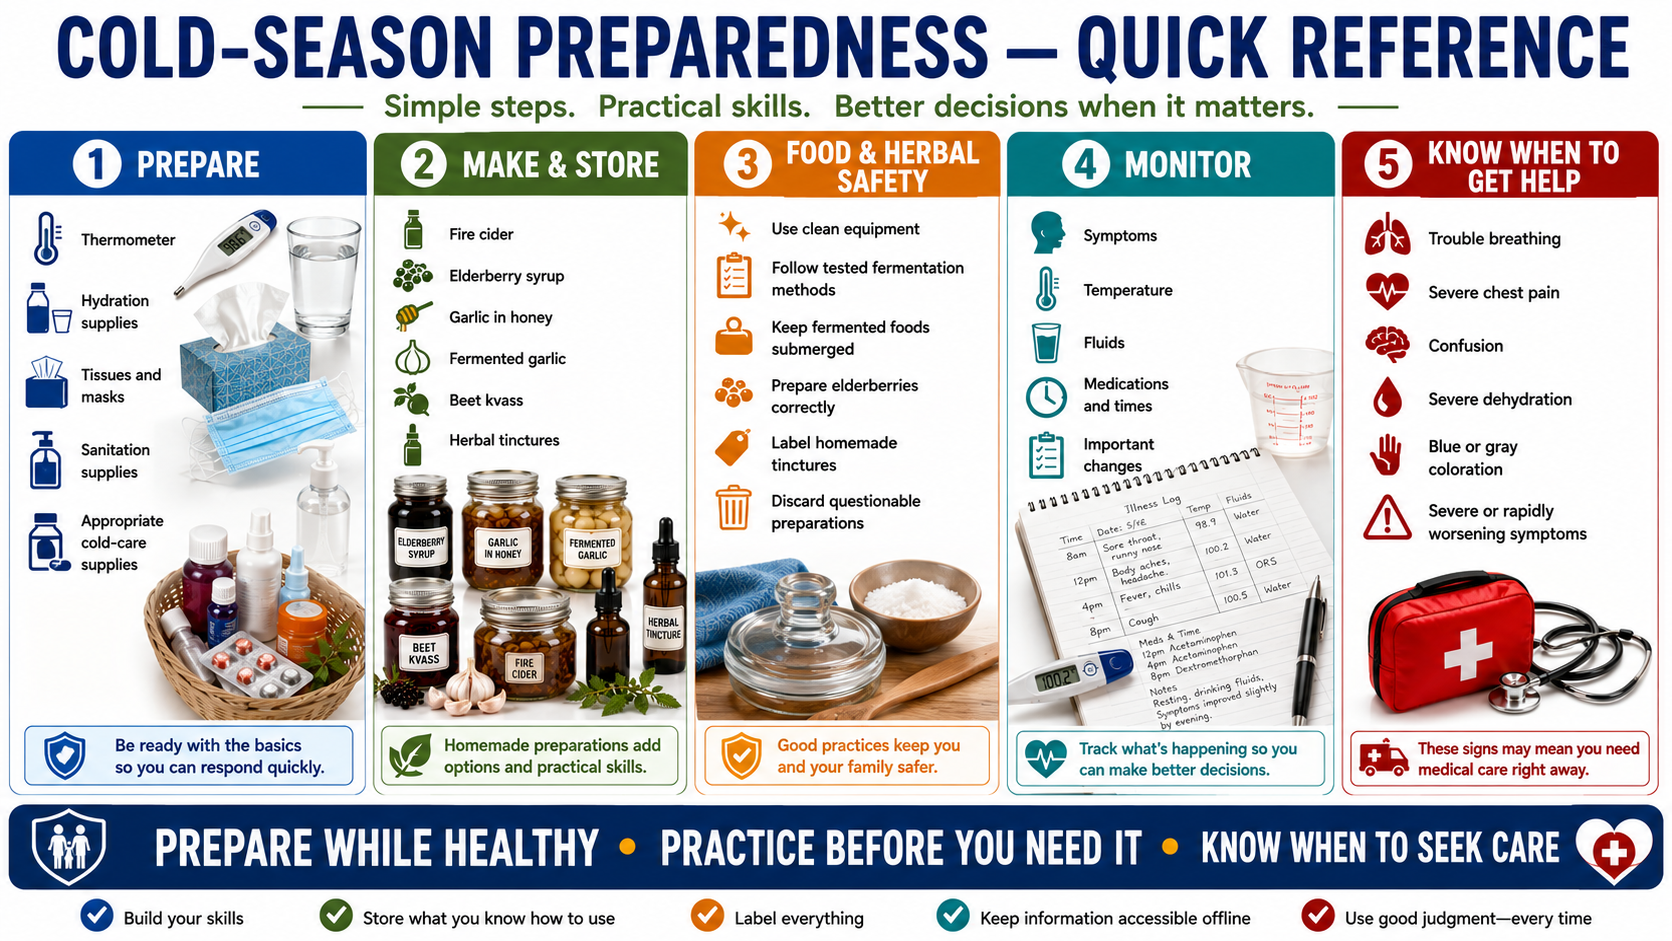
The strongest household plan combines those skills with ordinary medical preparedness: hydration, sanitation, appropriate medications, symptom monitoring, medical information, and knowing when home care is no longer enough.
The best time to learn any of these methods isn’t when someone is already sick.
Prepare while healthy. Practice before you need it. Label everything. Store what you know how to use. And know when it’s time to seek medical care.
Disclaimer
This information is for educational and preparedness purposes only and is not medical advice. Homemade remedies, herbal preparations, fermented foods, and tinctures can affect people differently and may interact with medications or medical conditions. Pregnant or breastfeeding people, children, older adults, and anyone with a significant health condition should speak with a qualified healthcare professional before using concentrated herbal preparations.
These recipes are not intended to diagnose, treat, cure, or prevent any disease, including colds, influenza, COVID-19, or other respiratory infections. Never delay appropriate medical care because of a home remedy. Seek medical attention for severe, worsening, or concerning symptoms.
Use proper food-safety practices when preparing, fermenting, storing, or consuming homemade products. If a preparation shows signs of spoilage, mold, unusual odor, unexpected pressure, or anything else that appears unsafe, discard it.
Never give honey or honey-containing preparations to children under 12 months of age.
© Prepping Communities. This content is for informational purposes only and not professional advice. Use at your own risk.
Terms | Privacy | Guidelines