
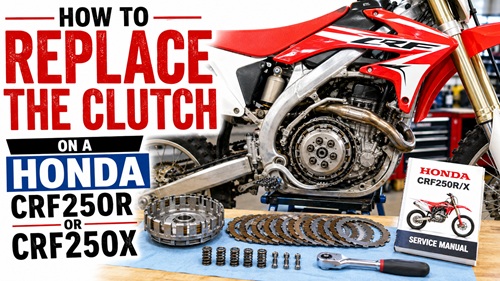
A slipping, dragging or sticking clutch can make an otherwise good dirt bike difficult to ride. The engine may rev without transferring power properly, the bike may creep forward even with the clutch lever pulled in, or the clutch plates may stick together after the bike has been sitting. On a Honda CRF250R or CRF250X, replacing the clutch pack is a job many mechanically capable owners can handle in a home garage with ordinary hand tools, a clean work area and a little patience.
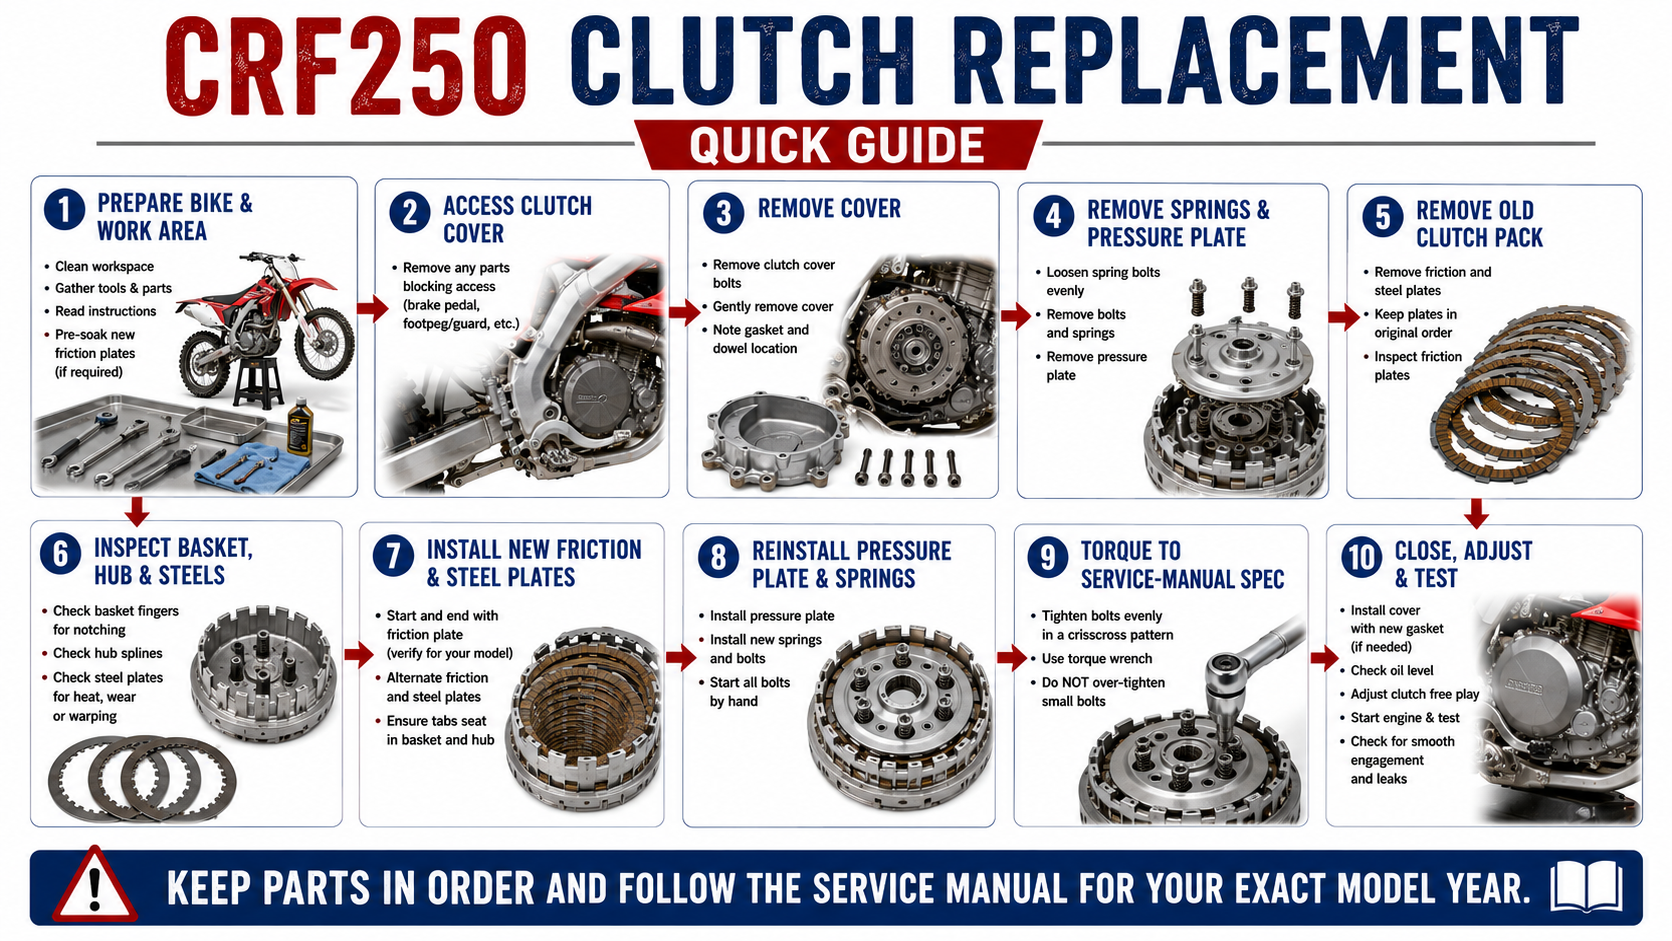
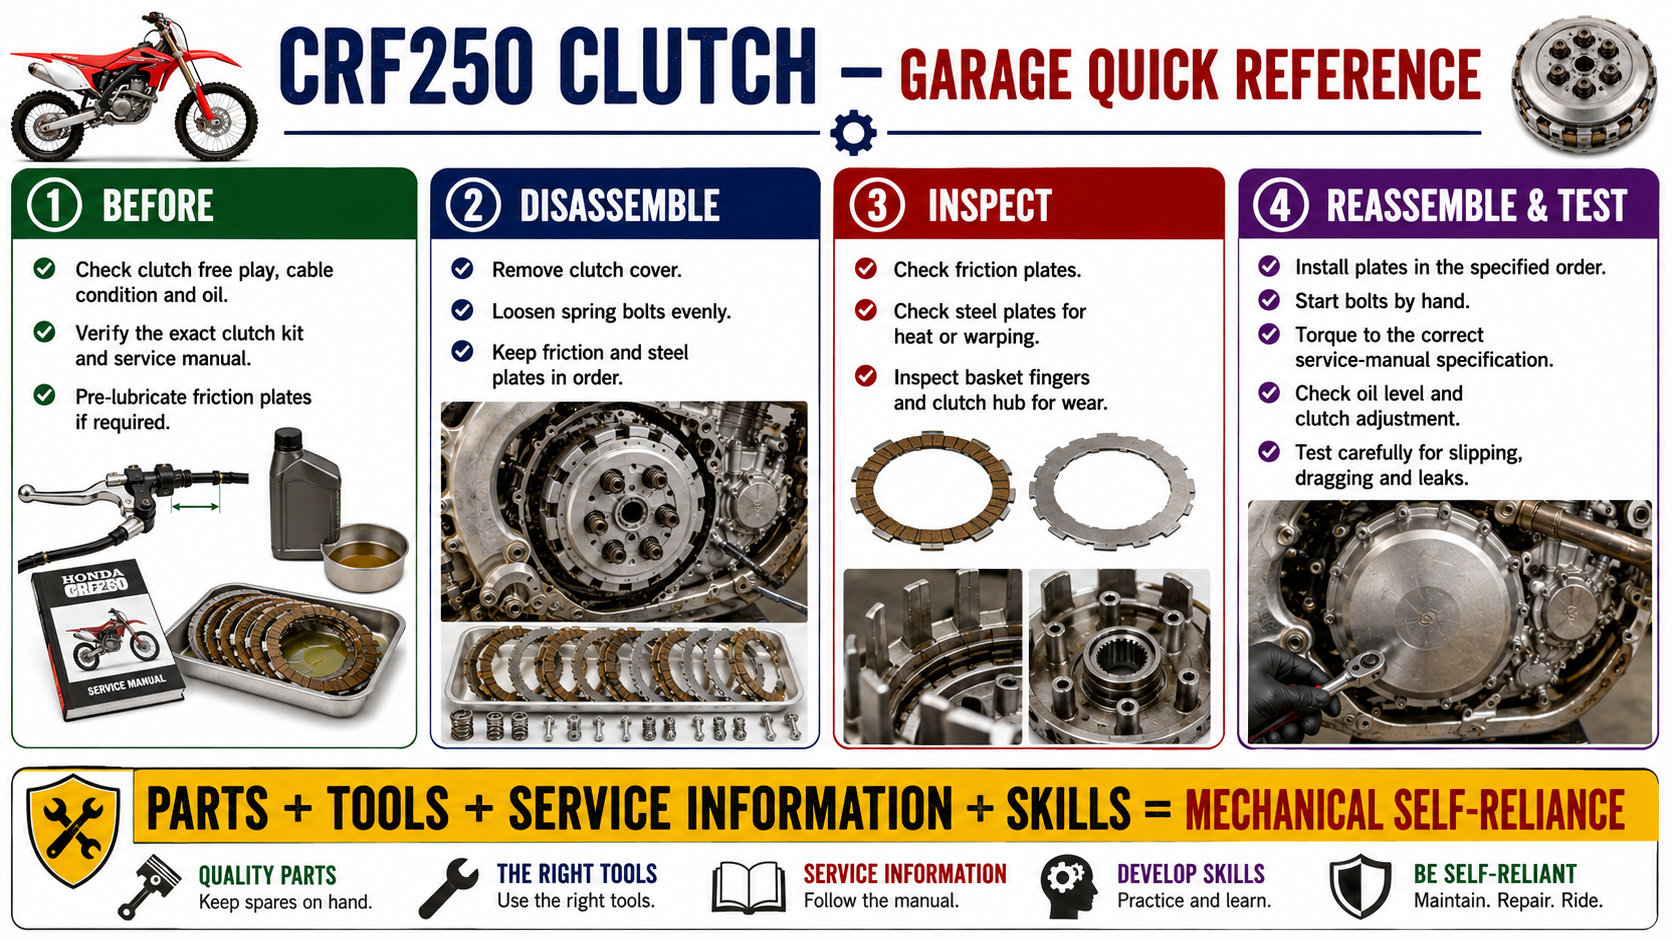
The basic job involves opening the clutch cover, removing the pressure plate and springs, taking out the old friction and steel plates, inspecting the clutch basket for wear, installing the new plates in the correct sequence and reassembling everything to the proper torque specifications. The exact plate arrangement, spring specification and torque values can vary by year and clutch kit, so the factory service manual and the instructions supplied with the replacement clutch should always take priority over a general guide.
For preparedness, this is more than a motorcycle repair. Small motorcycles and dirt bikes can provide useful transportation when fuel availability, road access or normal transportation systems become unreliable. Knowing how to maintain and repair the clutch means one more mechanical problem can potentially be handled at home instead of leaving the bike unusable while waiting for parts or a repair shop.
Know the Symptoms Before Replacing Parts
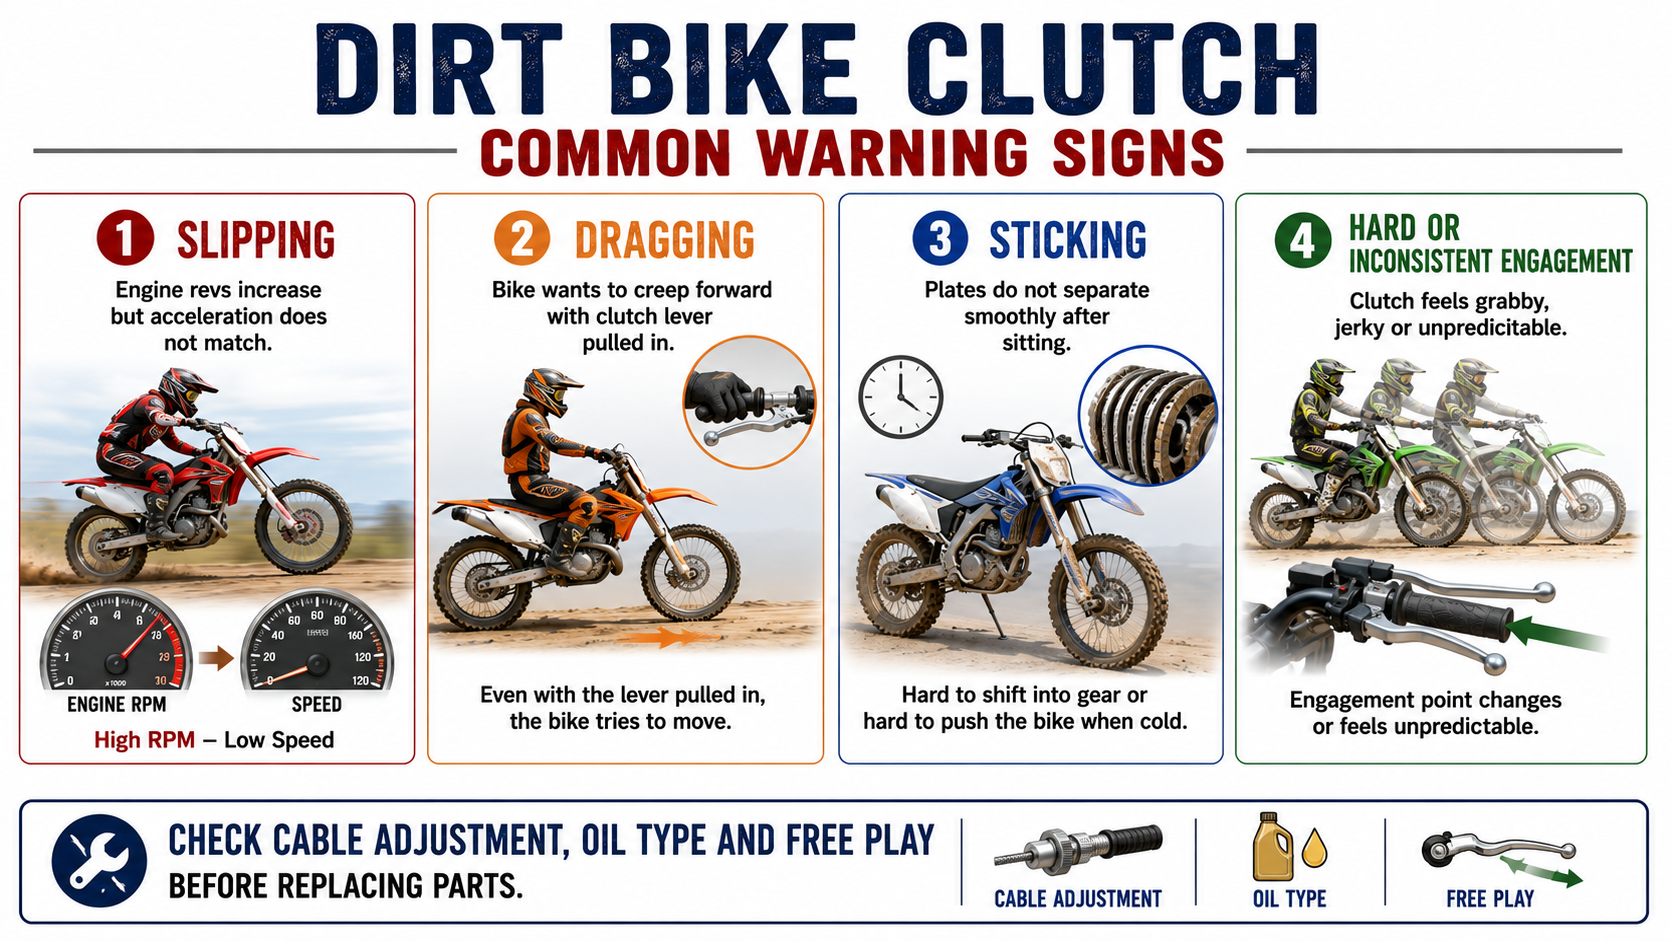
Not every clutch problem automatically means the entire clutch pack needs replacing. A clutch that slips under acceleration may have worn friction plates, weak springs, incorrect adjustment or contaminated oil. A clutch that drags may have warped steel plates, worn basket fingers, incorrect cable adjustment or plates that are sticking together. If the bike has been sitting for a long time, old oil can also contribute to clutch plates sticking.
Before opening the engine, check the simple things. Inspect clutch-lever free play, cable condition and adjustment. Make sure the correct motorcycle oil is being used. Wet motorcycle clutches share engine oil and can react poorly to lubricants containing friction modifiers intended for some automobile engines. If the clutch still slips, drags or refuses to disengage properly after basic checks, opening the clutch assembly becomes reasonable.
Parts and Tools
For the job, you will normally need the correct clutch kit for your exact CRF250 model and year, which may include friction plates, steel plates and replacement clutch springs. A new clutch-cover gasket may also be required depending on the engine design and condition of the existing sealing surface.
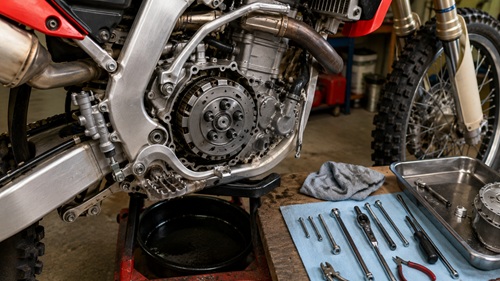
Basic hand tools normally include sockets, ratchet, extensions, suitable hex or Allen tools, screwdrivers, a small pick, torque wrench and a clean drain pan or work tray. Keep shop towels available because even when the motorcycle is positioned to reduce oil loss, some oil may escape.
A clean workbench is particularly important. Clutch plates need to go back into the engine in a specific order, and small washers, springs or special rings can easily become mixed up. Lay removed components out in the same sequence they came apart.
Prepare the New Clutch Plates
Many replacement friction plates are designed to operate saturated in engine oil. Before installation, check the clutch manufacturer’s instructions. If the manufacturer specifies pre-soaking, place the new friction plates in the same type of oil recommended for the motorcycle and allow them to become thoroughly coated before installation.
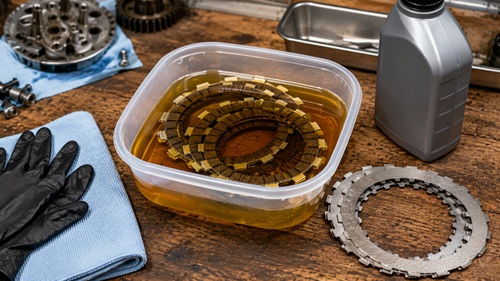
Do not assume every aftermarket clutch follows the same preparation procedure. Some manufacturers specify a particular soaking period while others may provide different instructions. Follow the documentation supplied with the clutch kit.
Pre-lubricating friction plates helps ensure that the clutch surfaces are not installed completely dry when the engine is first started.
Decide Whether to Drain the Oil
Depending on the motorcycle and how it is positioned, the clutch cover may sometimes be removed without draining all of the engine oil. Some owners carefully lean or position the motorcycle so the oil remains away from the clutch-cover opening.
That technique can save oil, but it also introduces another problem: fuel can leak from the tank or fuel system if the motorcycle is laid too far onto its side. The source video itself demonstrated this when fuel escaped after the motorcycle was tipped over.
For a controlled garage repair, draining the appropriate oil may be the cleaner and safer choice. If you decide to reposition the motorcycle instead, make sure it is stable, work in a well-ventilated area and watch carefully for fuel or oil leakage. Never work around gasoline with heaters, cigarettes, sparks or other ignition sources nearby.
Remove Anything Blocking the Clutch Cover
Before opening the clutch housing, remove any external component that prevents clean access to the clutch cover. Depending on the exact CRF250 model, year and installed accessories, this may include a brake pedal, guard or other nearby hardware.
Take a picture before removing parts if you are unfamiliar with the arrangement. Photos are extremely useful during reassembly, especially if the repair gets interrupted and the motorcycle remains apart for several days.
Place bolts in a tray in the order they are removed. Some engine covers use fasteners of different lengths, and installing a long bolt into the wrong hole can cause problems.
Remove the Clutch Cover
Remove the clutch-cover bolts carefully and keep track of where each fastener belongs. Once the bolts are removed, gently separate the cover from the engine.
Do not force a screwdriver deeply between machined sealing surfaces. Gouging an aluminum mating surface can create an oil leak that wasn’t there before the repair. If the cover is stuck, light tapping with an appropriate soft-faced tool can help release it.
Pay attention to the gasket and any locating dowels as the cover comes away. If the gasket tears, becomes damaged or is no longer suitable for reuse, replace it rather than trying to compensate with excessive sealant.
Once the cover is removed, the clutch pressure plate and spring bolts should be accessible.
Remove the Clutch Springs Evenly
The pressure plate is normally held in place by several clutch springs and bolts.
Loosen these bolts gradually and evenly rather than completely removing one while the others remain fully loaded. Working in a crossing pattern reduces uneven pressure on the plate.
Remove the bolts and springs and arrange them on the workbench. If the replacement clutch kit includes new springs, compare them with the originals. Heavy-duty replacement springs may be longer or stiffer and can result in a noticeably stronger clutch-lever pull.
That isn’t necessarily a problem, but it is something the rider should expect.
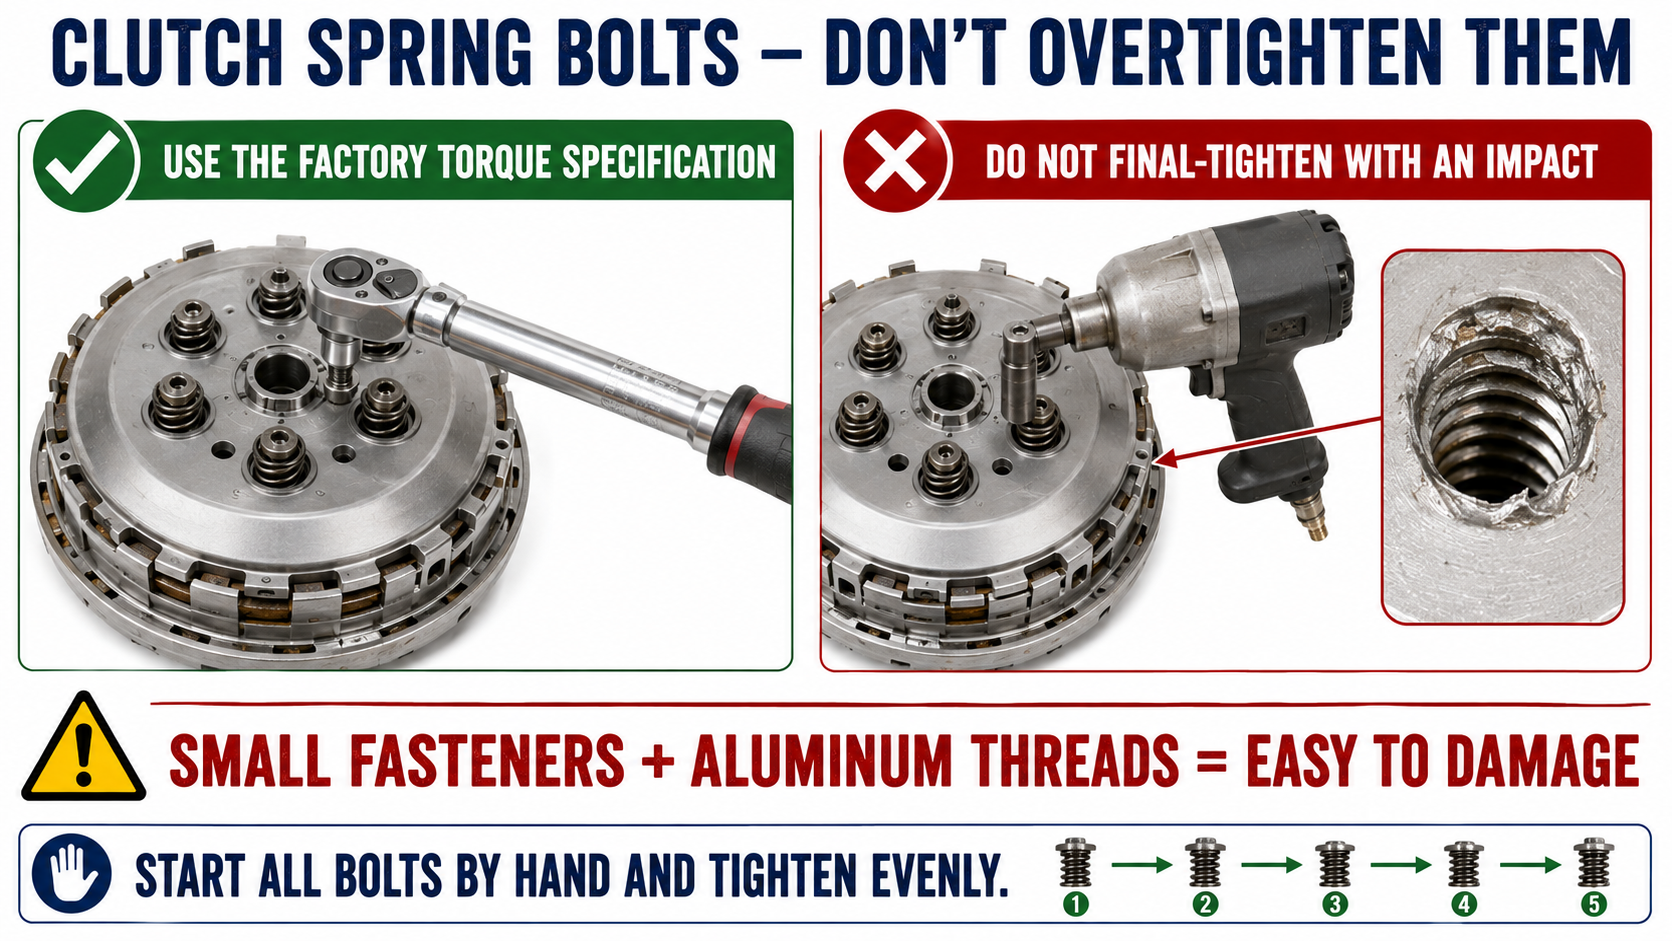
Never use an impact wrench to perform the final tightening of clutch spring bolts. These fasteners thread into relatively small engine components and can be damaged by excessive torque. Start them by hand and use a torque wrench for final assembly.
Remove the Pressure Plate
With the spring pressure removed, carefully lift away the clutch pressure plate.
Pay attention to how everything sits before removing additional parts. If this is your first clutch replacement, take another photograph.
The exposed clutch pack will normally consist of alternating friction plates and steel plates.
Remove them one at a time and maintain their original order on the bench. Even if the old plates are being discarded, seeing how they were arranged can help you understand the assembly.
If several plates come out stuck together, separate them and inspect their surfaces. Plates that remain heavily stuck together after sitting are one indication of the kind of clutch problem this repair is intended to correct.
Inspect the Friction Plates
Look closely at the old friction plates.
Excessive wear, glazing, burned areas, damaged friction material or obvious discoloration can indicate that the clutch has been slipping or overheating. Comparing the old friction material with the new replacement plates can also reveal how much material has been lost.
If you have the Honda service manual, measure the plate thickness and compare it with the service limit.
Measurements are better than guessing.
A clutch component that looks acceptable may already be beyond its usable specification, while another part that looks worn may still fall within allowable limits.
Inspect the Steel Plates
The steel clutch plates also deserve inspection.
Look for blue or dark discoloration, which can indicate excessive heat. Check for scoring, unusual wear and distortion. Warped steel plates can contribute to clutch drag because they prevent the clutch pack from separating evenly when the lever is pulled.
A common workshop method is to place a cleaned steel plate on a known-flat surface and check for rocking or visible distortion, but the service manual should be used for the proper inspection method and allowable warpage specification.
If your replacement clutch kit includes new steel plates, replacing the worn originals at the same time can prevent having to reopen the clutch shortly afterward.
Inspect the Clutch Basket Carefully
One of the most important inspections happens after the plates are removed.
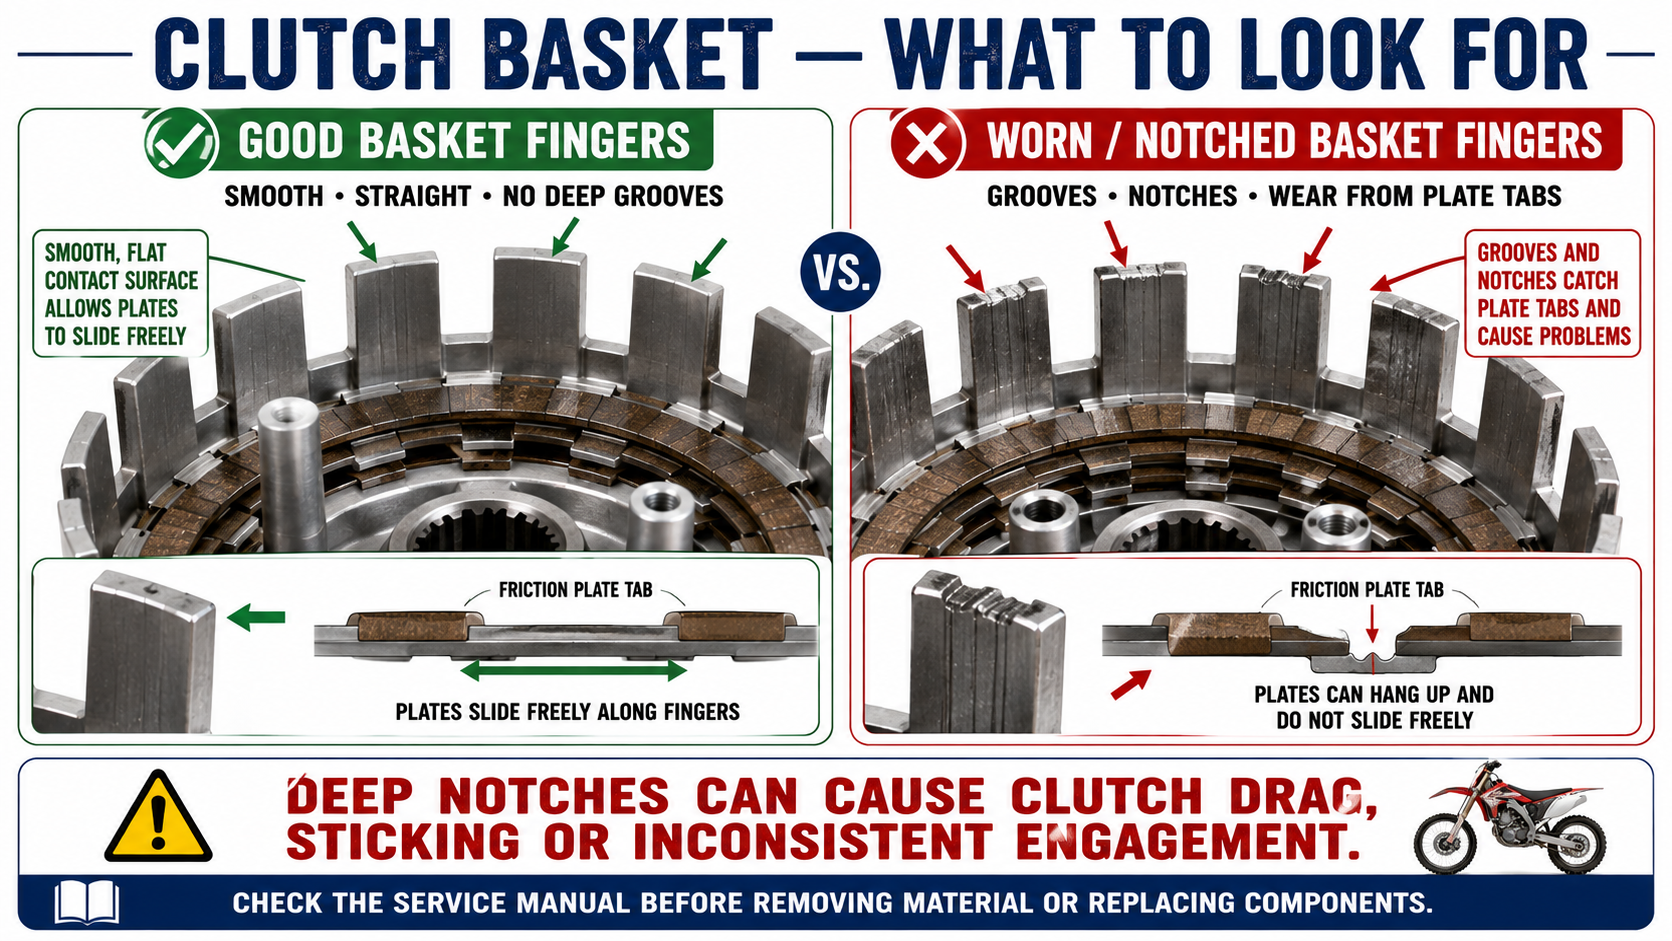
Look at the fingers of the clutch basket where the tabs of the friction plates contact the basket. Repeated engagement and disengagement can gradually hammer small grooves or notches into these surfaces.
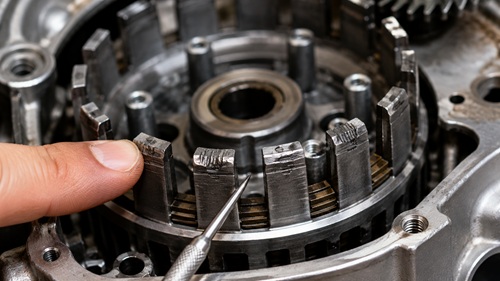
Run a fingernail carefully along the contact areas.
If noticeable grooves have developed, the friction plates can hang in those grooves instead of sliding smoothly. The result may feel like a dragging, sticking or inconsistent clutch even when the friction plates themselves are new.
Minor basket wear sometimes gets dressed carefully by experienced mechanics, but removing material changes the clearances between components. Heavy notching usually means replacement is the better repair. If you are uncertain about the amount of acceptable wear, compare the basket with the factory service limits rather than aggressively filing it.
A new clutch pack installed into a badly notched basket may still perform poorly.
Check for Special Rings or Judder Components
Some clutch assemblies use a special spring seat, judder spring, narrow friction plate or related components at the innermost part of the clutch pack.
This is one area where aftermarket clutch kits may differ from the factory arrangement.
The kit shown in the source material eliminated certain original inner rings as part of that particular clutch installation. That does not mean every CRF250 clutch replacement should automatically remove those components.
Follow the instructions supplied with your exact clutch kit.
If the new clutch is designed to retain the factory judder components, reinstall them correctly. If the manufacturer specifically instructs you to eliminate or replace them, follow that procedure.
Never remove clutch components simply because another bike or another aftermarket kit did so.
Install the New Clutch Plates
Once the basket and hub have been inspected and the replacement friction plates are properly lubricated, begin installing the new clutch pack.
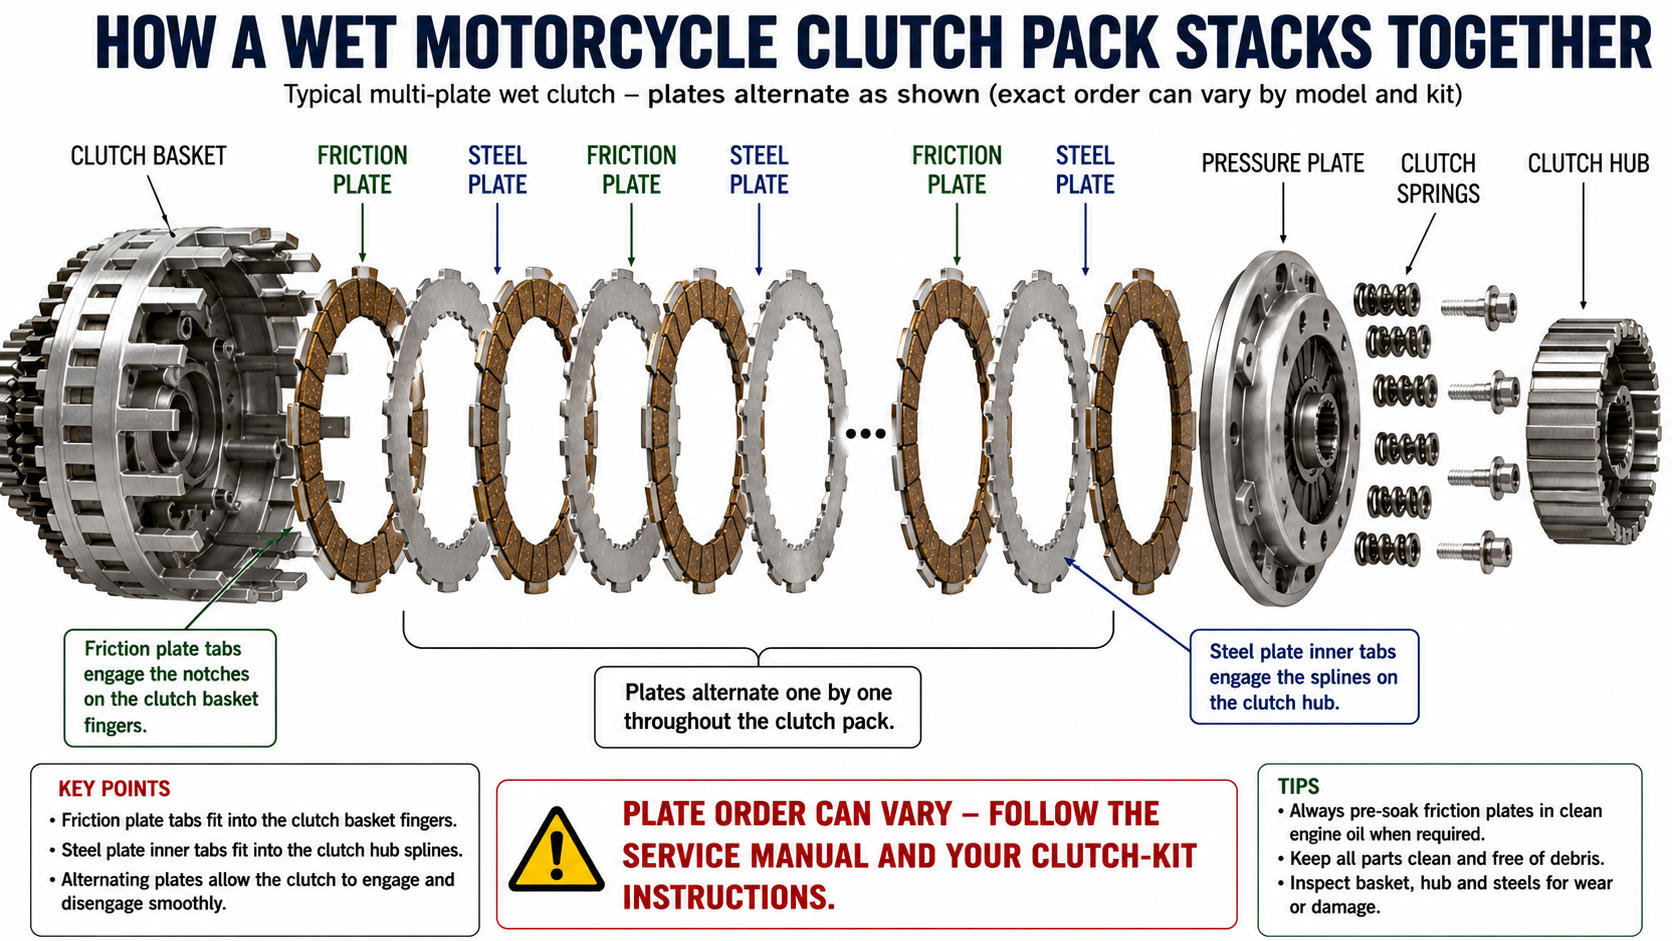
Most wet motorcycle clutches use alternating friction and steel plates. A friction plate is installed, followed by a steel plate, then another friction plate, continuing until the complete pack has been assembled.
However, the first plate, last plate, special plate location and orientation can differ between models and clutch kits.
This is why the manufacturer’s installation diagram matters.
Do not assume that every steel plate is identical either. Some may have a particular orientation or surface profile.
Install each plate carefully without forcing it. The friction-plate tabs should engage the basket correctly, while the steel plates engage the inner clutch hub.
If something will not seat properly, stop and determine why rather than forcing it into place.
Reinstall the Pressure Plate
After confirming that the complete clutch stack is installed correctly, reinstall the pressure plate.
Make sure it seats properly against the clutch pack.
Position the clutch springs and start each spring bolt by hand. If stronger aftermarket springs are being installed, slightly more hand pressure may be required to compress the spring enough for the bolt threads to engage.
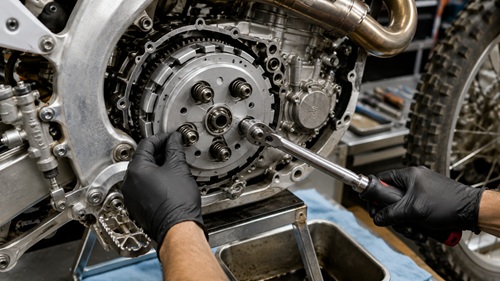
Start every bolt before tightening any of them fully.
Then tighten the bolts gradually in an even crossing pattern. This allows the pressure plate to settle uniformly rather than being pulled down hard on one side.
Use the exact torque specification listed in the Honda service manual or clutch manufacturer’s instructions for your motorcycle.
Do not guess.
Clutch spring bolts are relatively small, and overtightening can strip threads or damage the clutch assembly.
Check Clutch Operation Before Closing Everything
Before reinstalling the outer cover, visually confirm that nothing has been left inside the clutch housing.
Check that the pressure plate sits evenly, all spring bolts are installed, the plates are properly seated and any washers, special rings or other components are where they belong.
If the clutch mechanism can be operated safely by hand at this stage, confirm that the pressure plate responds normally.
Finding a mistake now is considerably easier than discovering it after the cover has been sealed and the motorcycle filled with oil.
Reinstall the Clutch Cover
Clean the sealing surfaces carefully without scratching them.
Install the proper gasket if required and make sure any locating dowels are correctly positioned.
Fit the cover gently into place. It should seat without excessive force.
Start every cover bolt by hand. Once all bolts have engaged their threads correctly, tighten them gradually and evenly using the torque specification appropriate to that engine.
If bolts of different lengths were removed, make certain each one returns to its correct location.
Reinstall any brake pedal, guard or other external components that were removed for access.
Restore the Oil Level
If the engine oil was drained, refill it with the correct quantity and specification of motorcycle oil before starting the engine.
If you performed the repair without draining the oil, stand the motorcycle upright and verify the level anyway. Some oil may have escaped while the cover was open.
Also inspect the area around the clutch cover carefully for leaks.
This is particularly important during the first few minutes after starting the engine.
Adjust the Clutch
A new clutch pack may change the amount of clutch-lever free play.
Check the cable adjustment and set the free play according to Honda’s specification.
Too little free play can leave the clutch partially disengaged and cause slipping. Too much free play may prevent complete disengagement and create dragging or difficult shifting.
Move the lever several times and make sure the cable moves smoothly.
Heavy-duty clutch springs can make the lever noticeably firmer than it was with the original springs. A stronger lever pull by itself does not necessarily indicate a problem.
Start the Motorcycle and Test Carefully
With the motorcycle upright, oil level correct and transmission in neutral, start the engine and allow it to warm normally.
Pull the clutch lever several times.
Listen for unusual sounds and check around the clutch cover for leakage.
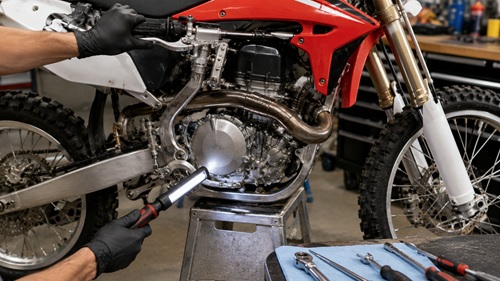
When it is safe to do so, select first gear while holding the clutch lever in. A small engagement sensation can be normal with a wet clutch, but the motorcycle should not aggressively pull forward with the clutch fully disengaged.
Then perform a cautious test ride.
Make sure the clutch engages progressively, the transmission shifts normally and the engine does not flare under acceleration as though the clutch is slipping.
Avoid immediately abusing a newly installed clutch. Follow any break-in recommendations provided by the clutch manufacturer.
If the New Clutch Still Drags
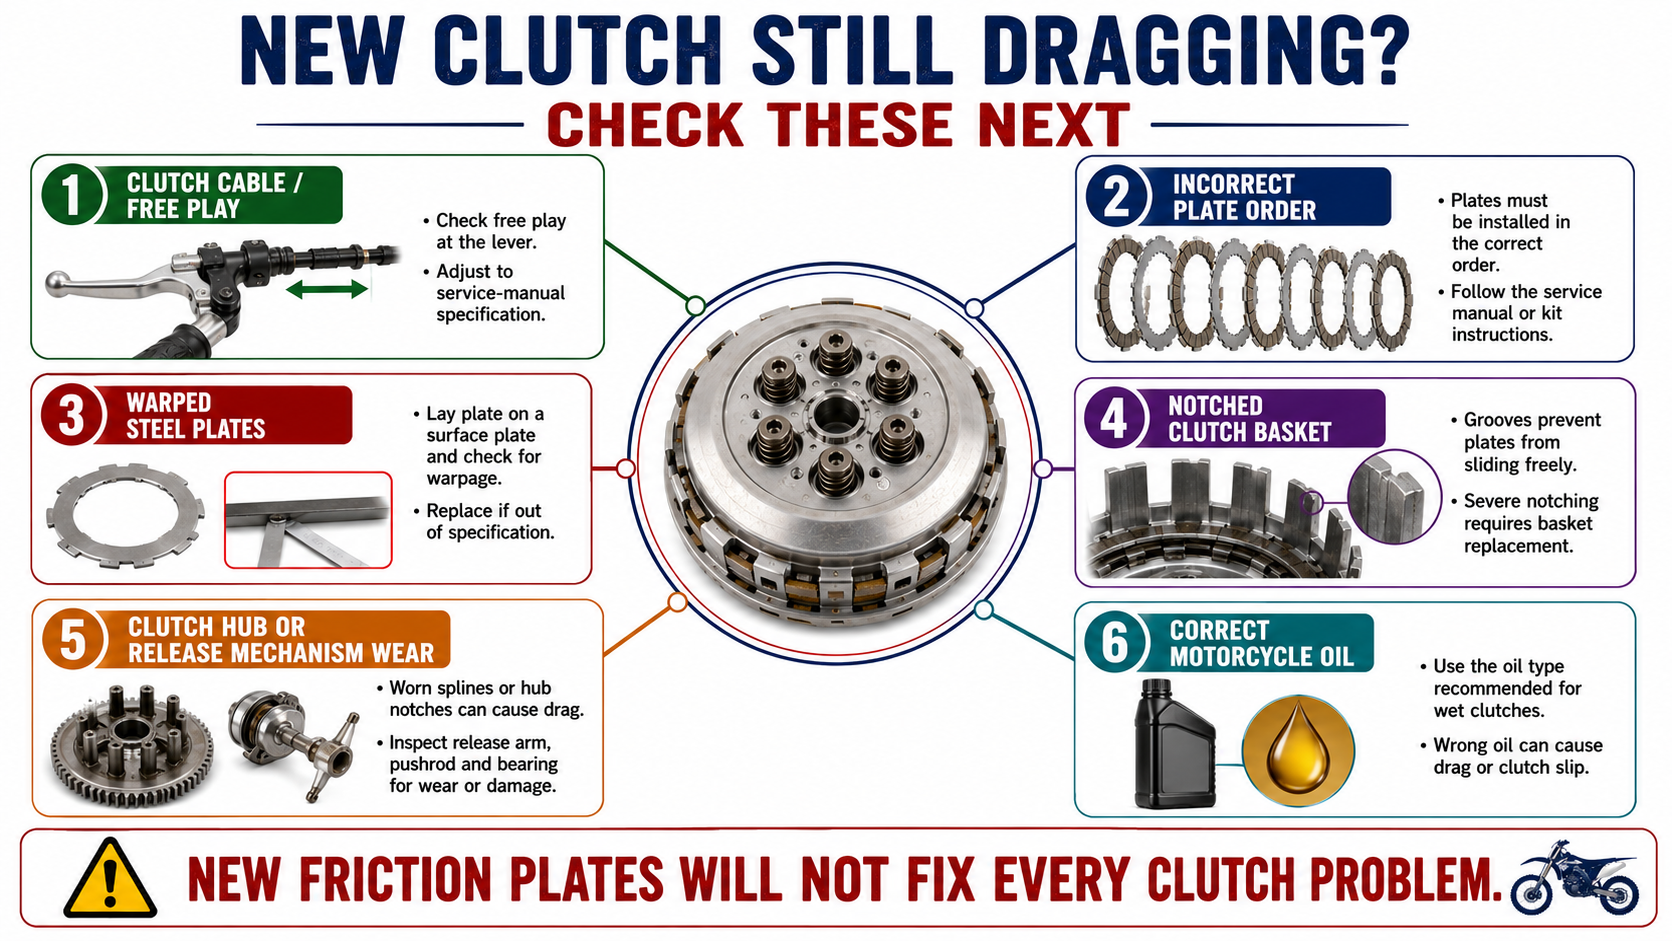
A new clutch pack will not repair every clutch problem.
If the clutch continues to drag, inspect the adjustment again first. If that is correct, possible causes can include basket notching, warped components, clutch-hub wear, release-mechanism problems, cable problems or incorrect plate installation.
The oil being used can also influence wet-clutch behavior.
This is why replacing the plates should be treated as part of a system repair rather than automatically assuming the plates are the only component that matters.
If the motorcycle was already showing significant basket wear before installation, continuing symptoms should not be surprising.
Build a Small Motorcycle Maintenance Kit
For anyone who considers a dirt bike or small motorcycle part of an emergency transportation plan, keeping a few replacement parts on hand can be valuable.
A spare clutch cable, levers, oil filters, air filters, spark plugs, chain master links, brake pads, wheel bearings, tubes, basic seals and commonly used fasteners can turn a disabling problem into an afternoon repair.
The same applies to knowledge.
Having a clutch kit on a shelf isn’t particularly useful if nobody knows how to install it. Perform maintenance while conditions are normal, learn where the components are located and keep the service manual available offline.
Mechanical independence comes from combining parts, tools, documentation and skills.
Preparedness Action Plan
Before a clutch problem develops, obtain the correct service information for your exact CRF250R or CRF250X model year and keep an offline copy with the motorcycle’s maintenance records. Record the correct fluids, capacities, torque specifications and replacement-part numbers you regularly use.
If the clutch is already slipping or dragging, begin with basic adjustment and oil checks before purchasing parts. When replacement becomes necessary, order the correct clutch kit and gasket, prepare a clean work area and organize the tools before opening the motorcycle.
During disassembly, photograph each stage and keep removed components in order. Inspect the friction plates, steels, basket and hub rather than blindly replacing the clutch pack. Pre-lubricate replacement friction plates when required, install every component according to the kit and service-manual instructions, and torque fasteners properly.
After reassembly, verify the oil level, clutch adjustment and cover seal before riding. Perform the first test cautiously and investigate any continued slipping, dragging, unusual noise or leakage before depending on the motorcycle.
Key Takeaways
Replacing the clutch on a Honda CRF250R or CRF250X is a manageable garage repair when approached methodically. The basic process is straightforward: gain access to the clutch, remove the pressure plate, take out the old plates, inspect the basket and related components, install the new clutch pack in the correct sequence and reassemble everything using the proper torque specifications.
The inspection is just as important as the replacement. Installing new friction plates into a badly notched clutch basket or alongside warped components may leave you with many of the same symptoms you had before the repair.
Most importantly, learn the job before the motorcycle becomes essential transportation. Keeping a machine running during an emergency is much easier when you already understand it, already own the common replacement parts and already have the repair information stored somewhere that doesn’t depend on internet access.
© Prepping Communities. This content is for informational purposes only and not professional advice. Use at your own risk.
Terms | Privacy | Guidelines