
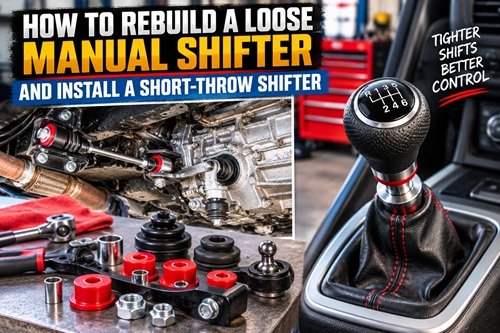
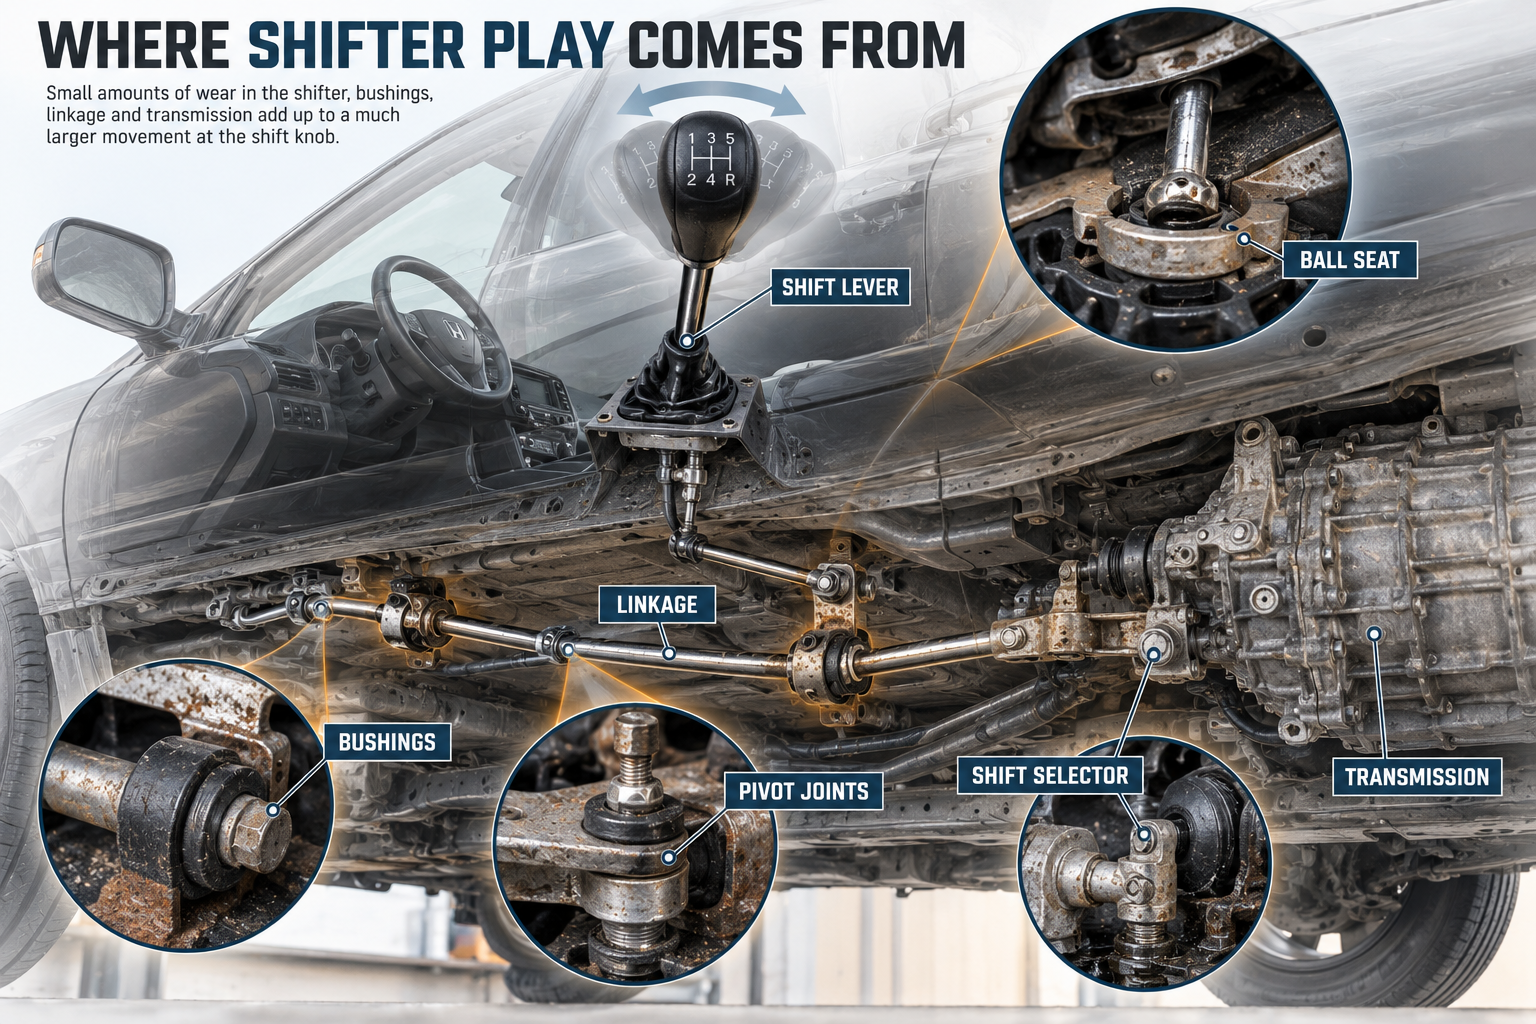
A manual transmission shifter should move deliberately into each gear without excessive side-to-side movement. As vehicles age, however, shifter bushings, ball seats, linkage components, rubber boots, and mounting hardware can deteriorate. The result can be a shifter that feels loose, vague, or difficult to place confidently into gear.
A worn shifter is more than an annoyance. Excessive movement can make it harder to identify gears, while deteriorated linkage components may eventually affect the ability to shift reliably. Oil around the transmission shift linkage can also indicate a leaking shift-shaft seal that should be repaired before transmission fluid is lost.
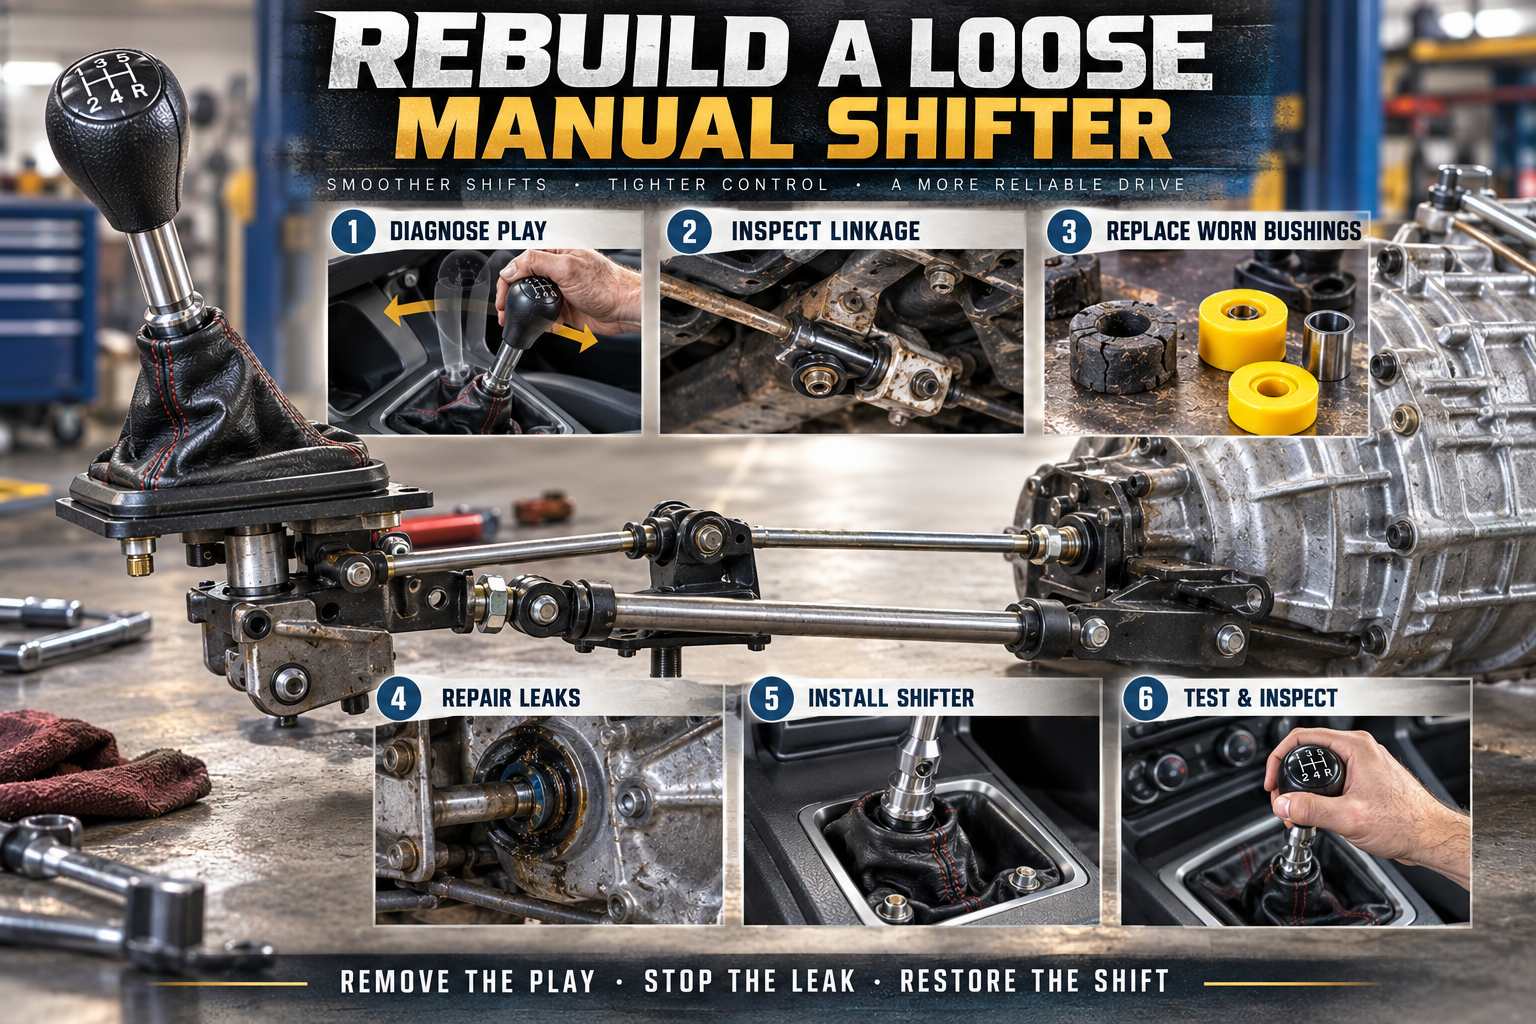
This project combines several useful vehicle-maintenance skills: diagnosing shifter play, removing the shift linkage, replacing worn bushings, repairing a leaking transmission shift-shaft seal, changing manual transmission fluid, installing a short-throw shifter, treating surface rust, and correctly reassembling the system.
Because shifter designs vary considerably between vehicles, the procedures below describe the general process. Always obtain the service information, fluid specification, torque values, replacement parts, and lifting points for the exact vehicle being repaired.
Tools and Supplies
A typical project will require a socket and ratchet set, combination wrenches, screwdrivers, pliers, small pry bars, hammer, appropriately sized punch, torque wrench, drain pan, funnel, jack and jack stands or ramps, wheel chocks, safety glasses, gloves, cleaning supplies, and silicone grease.
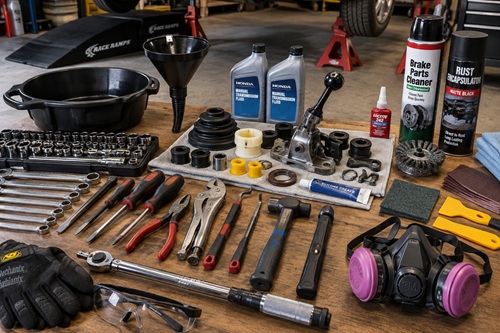
Depending on the condition of the vehicle, replacement parts may include a shift-shaft seal, shifter ball seat or socket, dust boots, linkage bushings, polyurethane bushings, mounting hardware, transmission fluid, and a properly designed short-throw shifter.
For corrosion repair, additional supplies may include scrapers, sandpaper, a wire brush or wire wheel, degreaser or appropriate surface cleaner, rust-encapsulating coating, eye protection, and suitable respiratory protection.
Step 1 – Measure the Existing Shifter Play
Before disassembling anything, establish a baseline.
With the vehicle parked securely and the engine off, move the shifter through the gears. Pay attention to excessive side-to-side movement, difficulty locating gears, unusual looseness, or movement that seems to occur without actually moving the transmission linkage.
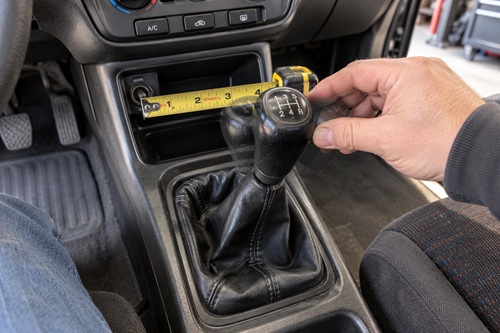
Select a gear and measure how far the shift knob can move sideways without leaving that gear. Record the measurement. You can repeat the same measurement after the repair to determine how much play was eliminated.
Do not automatically assume the shifter itself is the problem. Excessive play can originate at several locations between the driver’s hand and the transmission.
Step 2 – Inspect the Shift Linkage
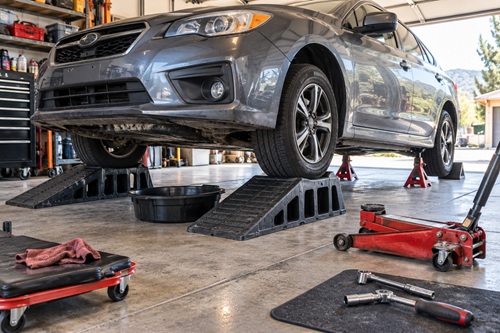
Safely raise the vehicle using the manufacturer’s approved lifting points. Support it with properly rated jack stands on a solid, level surface and chock the wheels that remain on the ground. Never work beneath a vehicle supported only by a hydraulic jack.
Locate the transmission and follow the shift linkage toward the shifter.
Have another person gently move the shifter while you observe the linkage from a safe position. Look for deteriorated rubber bushings, damaged brackets, loose mounting points, worn joints, missing hardware, excessive movement, torn boots, corrosion, and movement between components that should fit tightly together.
This inspection is extremely important. Replacing the shift lever alone will not repair a badly worn linkage.
Step 3 – Check for Transmission Fluid Leakage
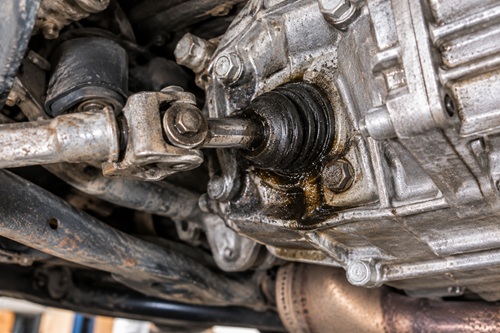
Inspect the area where the shift-selector shaft enters the transmission.
Oil collecting around this shaft or its dust boot may indicate a deteriorated shift-shaft seal. Clean the area first if necessary so the source of the leak can be identified instead of assuming that nearby oil is coming from the seal.
Also inspect the selector shaft itself. Corrosion, pitting, or roughness where the shaft passes through the seal can damage the sealing surface and cause a replacement seal to fail prematurely.
Step 4 – Remove the Interior Shifter Trim
Inside the vehicle, remove the shift knob and carefully disassemble the center-console or trim pieces surrounding the shifter.
Disconnect electrical connectors attached to the console where applicable rather than pulling on their wiring.
Remove the upper shifter boot and any secondary insulating boot. These boots help keep road noise, heat, cold air, dust, and fumes outside the passenger compartment, so damaged boots should be replaced rather than discarded.
Keep screws and small components organized as they are removed.
Step 5 – Disconnect the Shifter Assembly
Under the vehicle, identify the mounting points securing the shifter and linkage.
Older vehicles may have heavily corroded fasteners. Apply penetrating lubricant beforehand if appropriate and work stubborn fasteners carefully rather than applying enough force to snap them.
Support the linkage as its mounting bolts are removed.
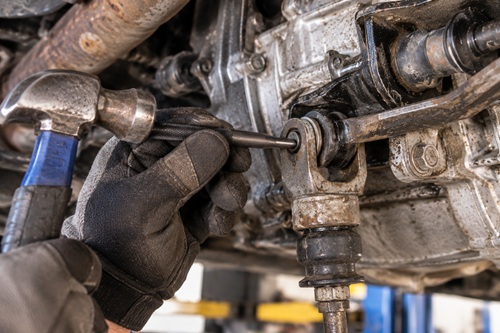
At the transmission end, remove the appropriate retaining hardware. Some designs use a spring pin secured by a retaining clip. Use the correctly sized punch for the vehicle rather than improvising with a screwdriver or undersized punch that can expand or damage the pin.
Remove the linkage assembly from the vehicle once all connections are free.
Step 6 – Drain the Manual Transmission Fluid if the Seal Is Being Replaced
If removing the shift-shaft seal will expose the transmission fluid, drain the transmission before removing the seal.
Locate both the fill and drain plugs.
Remove or loosen the fill plug first.
This simple sequence is important. You do not want to drain the transmission and then discover that the fill plug is seized and cannot be removed.
Position a drain pan underneath the transmission and remove the drain plug. Allow the old fluid to drain completely.
Inspect the fluid for unusual contamination or metallic debris. Clean the plug and reinstall it using the manufacturer’s specified washer or sealing method. Tighten it to the torque specified for the particular transmission.
Never assume a torque value taken from another vehicle applies to yours.
Step 7 – Remove the Old Shift-Shaft Seal
With the transmission drained and the linkage removed, expose the shift-selector shaft and seal.
Carefully remove the old seal without scratching the shaft or damaging the transmission housing. Depending on access and design, a small seal puller, pry tool, punch, or suitable pliers may be useful.
Once removed, examine the old seal and the shaft.
A worn seal may simply have hardened with age, but a rough or corroded shaft can also destroy the sealing lip.
Step 8 – Prepare the Selector Shaft
If light surface corrosion exists where the seal rides, clean the shaft carefully.
Very fine abrasive paper can be wrapped around the shaft and moved evenly around its circumference. Remove only enough corrosion to leave the surface smooth.
Do not aggressively grind or sand the shaft. Removing too much material can reduce its diameter and prevent the new seal from sealing correctly.
Deep grooves, heavy pitting, or significant material loss may require a more substantial repair or replacement component.
Clean all residue from the area before installing the new seal.
Step 9 – Install the New Transmission Seal
Confirm that the replacement seal is correct for the transmission.
Lubricate it as specified by the manufacturer and position it squarely over the selector shaft.
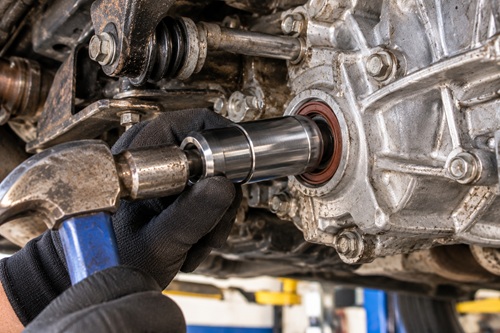
A socket or seal driver of the correct diameter can often be used to press or gently drive the seal into position. Apply force against the appropriate structural portion of the seal rather than crushing its flexible sealing surfaces.
Drive the seal evenly. Stop when it reaches the specified installation depth.
A seal installed crooked, damaged during installation, or driven too deeply may leak even though it is new.
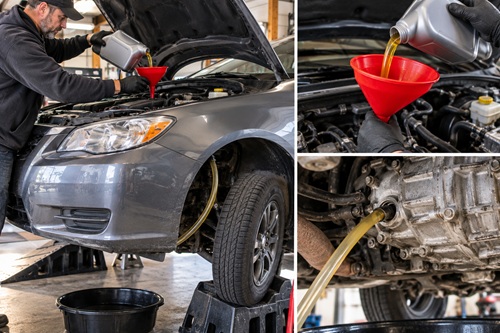
Step 10 – Refill the Transmission
Use only a transmission fluid meeting the vehicle manufacturer’s specification.
Some older manual transmissions may have originally specified fluids that differ from modern vehicles, so verify what is currently recommended for the exact transmission rather than selecting fluid by appearance or viscosity alone.
Fill the transmission using the manufacturer’s procedure and specified capacity. On many manual transmissions, the correct level is reached when fluid begins to reach or lightly flow from the fill opening while the vehicle is level.
Install the fill plug with the proper sealing washer if required and torque it to specification.
Clean residual fluid from around the transmission. A clean housing makes it much easier to detect whether the new seal continues to leak.
Step 11 – Disassemble the Shifter Linkage
Place the removed linkage on a clean workbench.
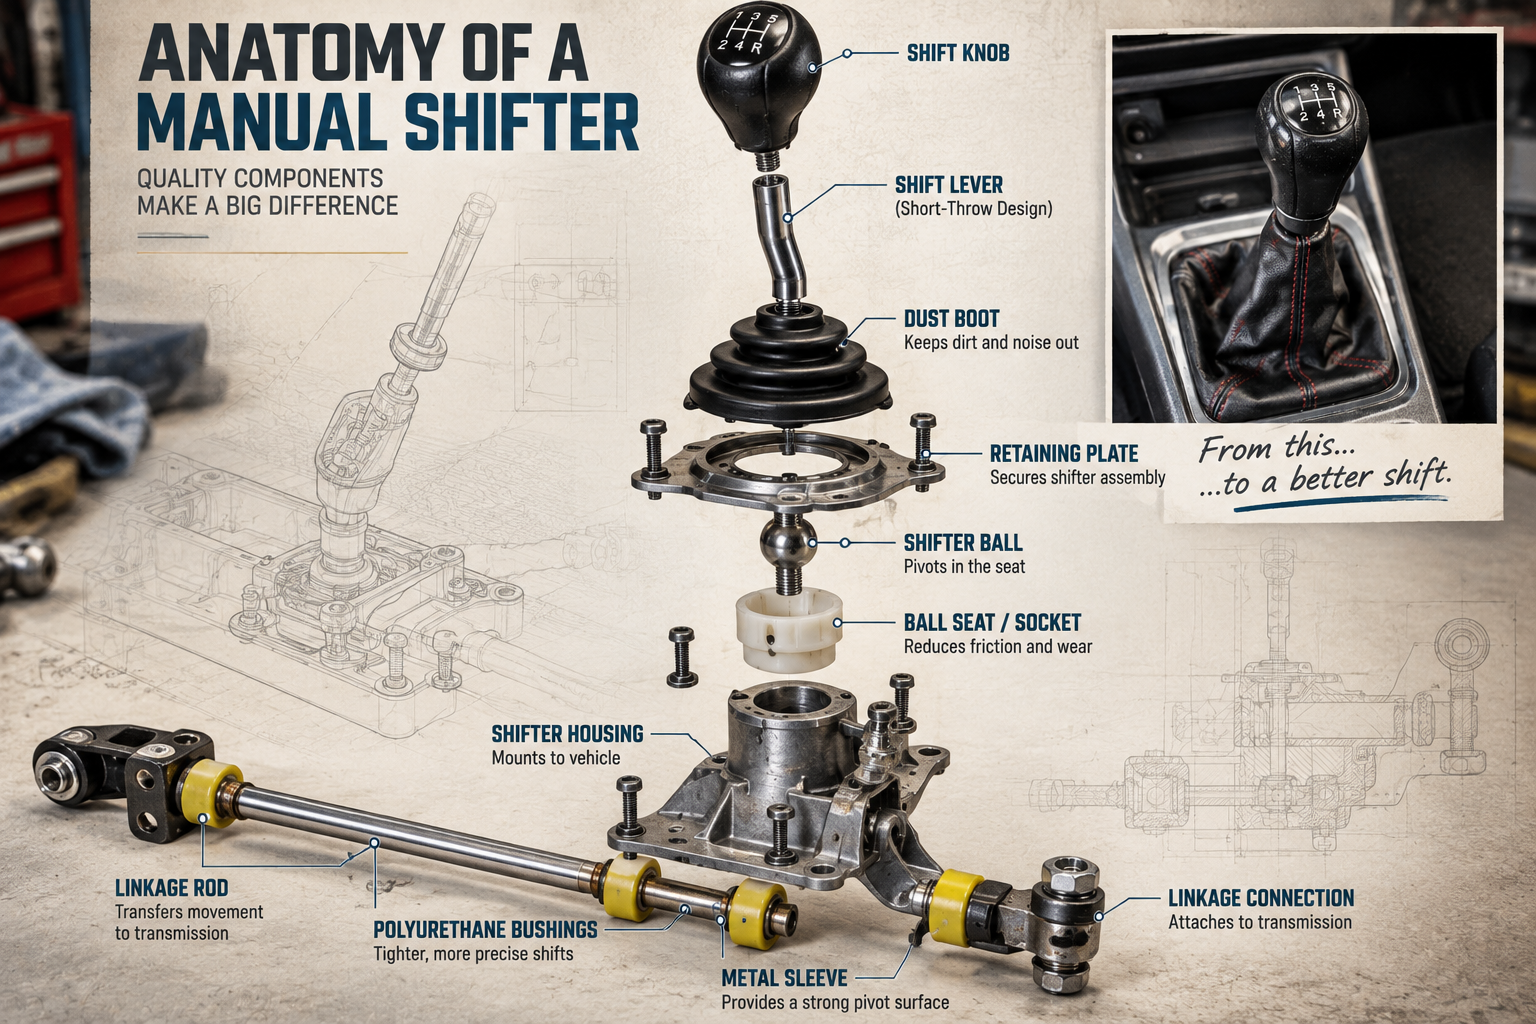
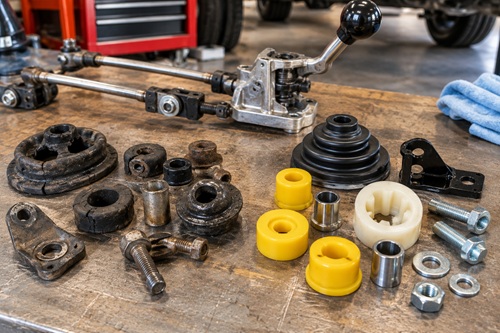
Remove the original shifter, ball seat or socket, worn rubber bushings, boots, and other replaceable components.
Inspect every pivot point and joint as it comes apart.
A small amount of looseness at one linkage joint may become substantial movement at the shift knob because the linkage multiplies that movement over its length.
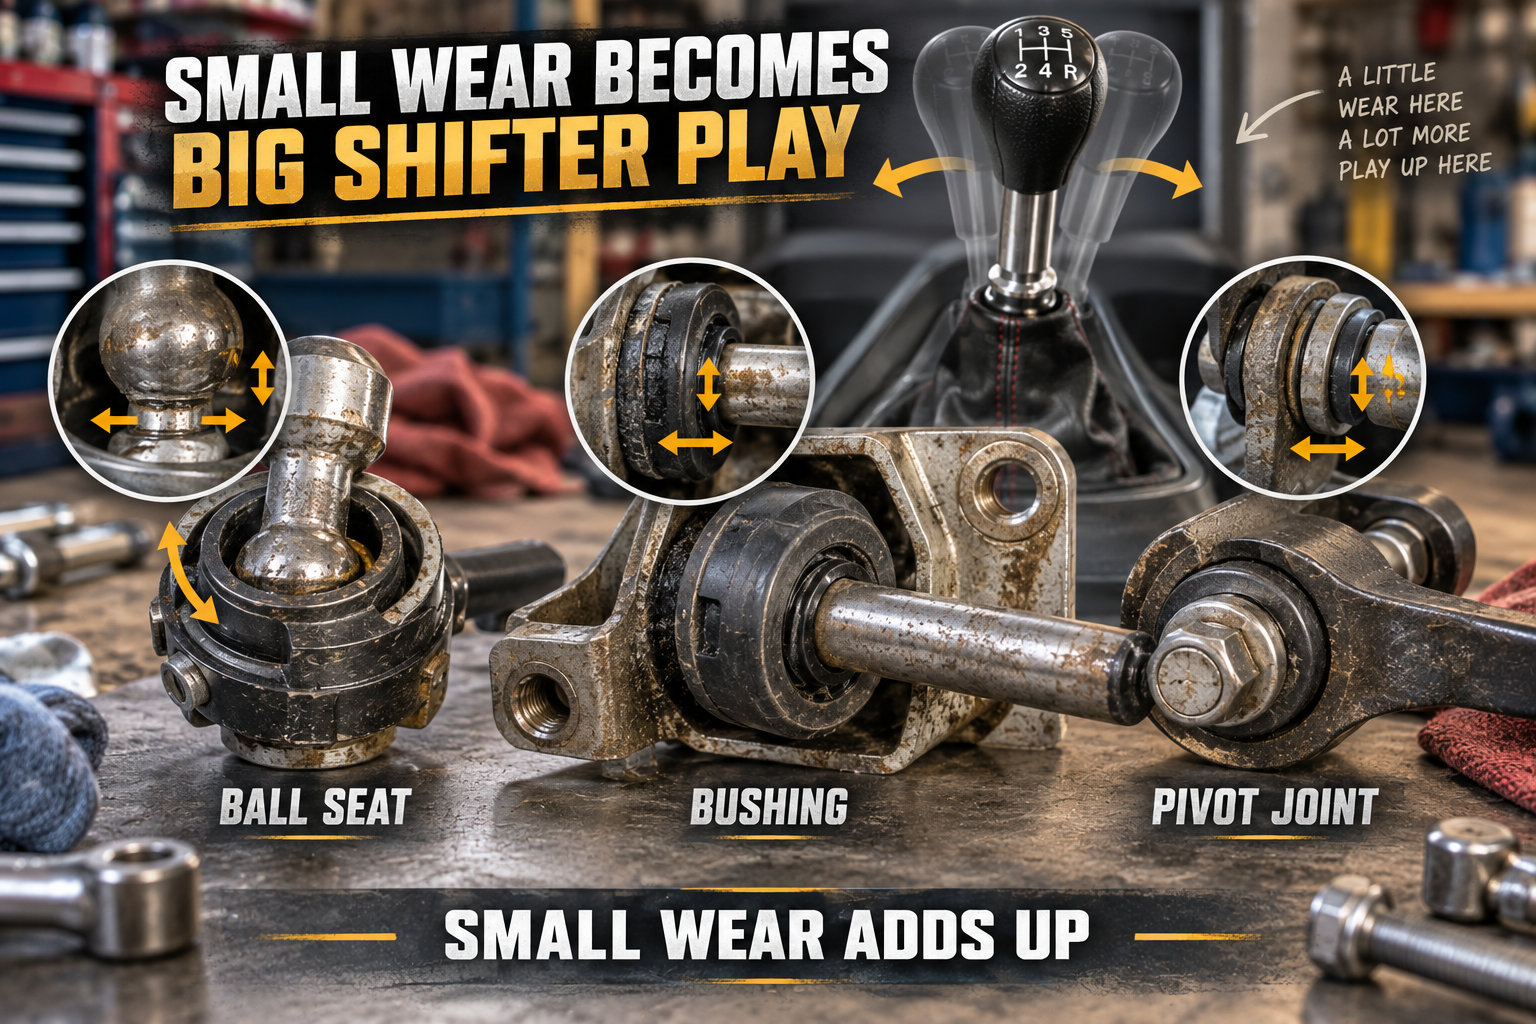
Look particularly closely for elongated holes, badly rusted shafts, worn riveted joints, deteriorated bushings, cracked brackets, missing material, and heavily corroded ball-and-socket components.
Components that have lost significant material to corrosion should generally be replaced rather than simply painted.
Step 12 – Verify the Short-Throw Shifter Fits Correctly
Do not assume every aftermarket shifter advertised for a vehicle has the same dimensions as the original.
Compare the replacement shifter with the factory unit. Check the diameter and dimensions of the pivot ball, pivot locations, mounting arrangement, linkage attachment, overall geometry, and clearance.
The pivot ball should fit correctly in its seat or socket without excessive movement.
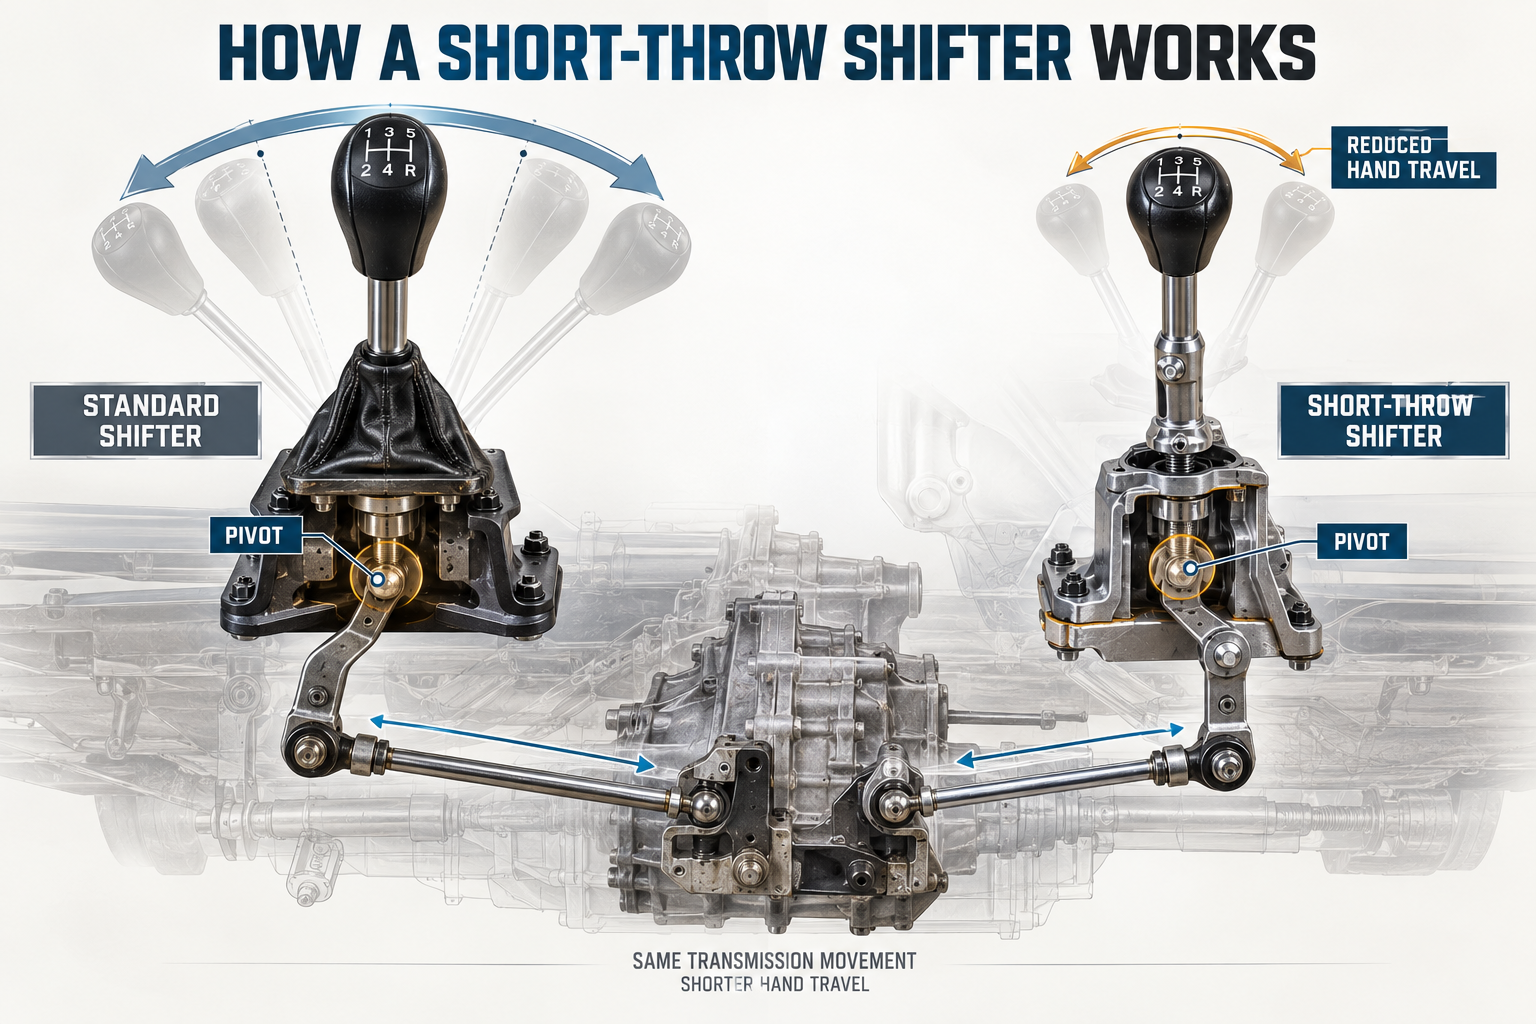
A poorly manufactured short-throw shifter can actually introduce additional play into the system. The objective is not simply to shorten the lever. The complete shifter and linkage should operate smoothly and precisely.
Step 13 – Install the New Ball Seat and Shifter
Install the new shifter ball seat, cage, socket, or equivalent component according to its design.
Use a lubricant compatible with the materials involved. Silicone-based grease is commonly appropriate around many rubber and plastic shifter components, but verify compatibility with the replacement parts.
Lubricate the pivot surfaces rather than filling the entire assembly with grease.
Insert the new shifter into its seat and make certain it moves freely through its intended range without binding.
Reinstall the retaining plate or cover and tighten its hardware appropriately.
Step 14 – Replace Worn Linkage Bushings
Remove deteriorated rubber bushings from the linkage.
Some bushings contain a metal inner sleeve that must be removed before the rubber portion can be extracted.
Clean the mounting surfaces and inspect the shaft or bore for excessive corrosion.
Lubricate the replacement bushing with compatible grease and press it squarely into position. Two-piece polyurethane bushings are often installed one half at a time before the center sleeve is inserted.
The finished joint should be tight but capable of moving through its required range.
Polyurethane bushings can reduce compliance compared with soft factory rubber and may produce a more direct shift feel, although they can also transmit more vibration.
Step 15 – Inspect and Repair Surface Rust
With the linkage removed, areas of the transmission tunnel and underbody that were previously inaccessible may be exposed.
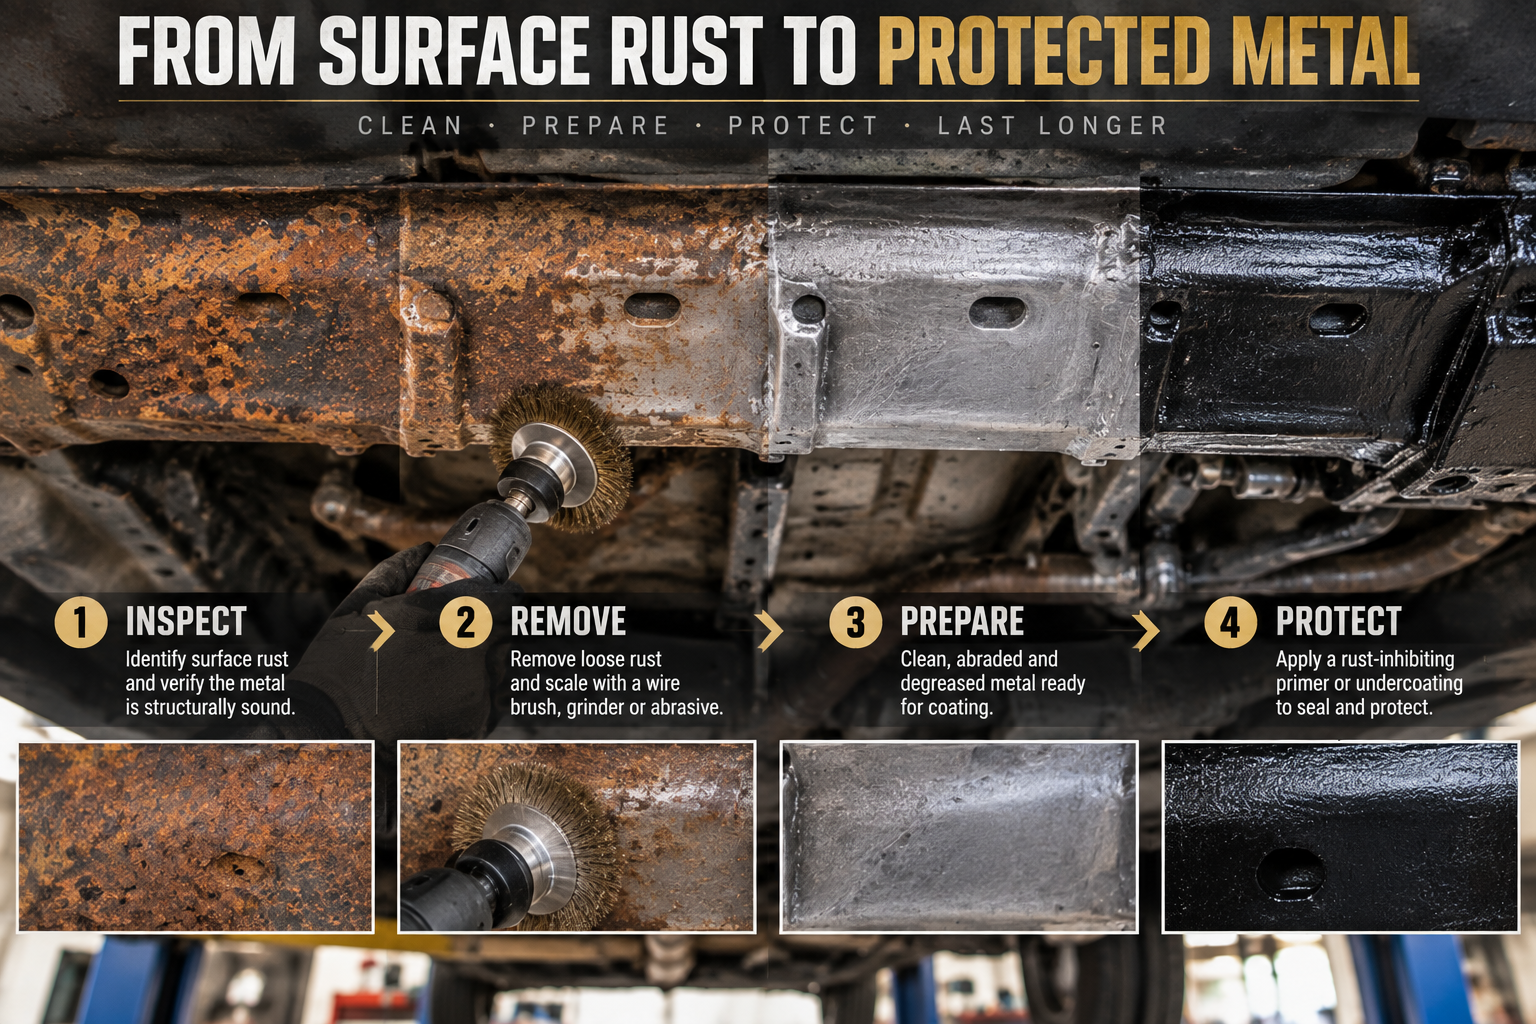
Before treating rust, determine whether it is merely surface corrosion or structural deterioration.
Probe questionable areas carefully. Metal that flakes heavily, has holes, or can be penetrated easily may require proper metal repair rather than a coating.
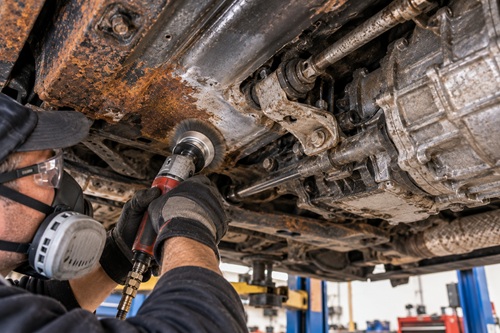
For sound metal with surface corrosion, scrape away loose material and remove as much rust as practical using a wire brush, wire wheel, or abrasive material.
Protect openings, rubber components, wiring, exhaust components, and other areas that should not be coated.
Step 16 – Prepare and Coat the Metal
After removing loose corrosion, abrade the remaining surface so the coating can adhere properly.
Clean away dust, grease, oil, and contamination using a product compatible with both the metal and the coating being applied.
Allow the surface to dry completely.
Apply a rust-control coating according to its manufacturer’s directions, including required film thickness, number of coats, drying intervals, temperature range, ventilation requirements, and curing time.
Do not treat paint as a substitute for structural rust repair. Rust encapsulation is intended for appropriately prepared, structurally sound metal.
Step 17 – Reinstall the Rebuilt Shift Linkage
After any protective coating has fully cured, carefully position the rebuilt linkage underneath the vehicle.
Install the shifter mounting bracket and fasteners.
Use new hardware where old bolts are badly corroded or damaged. Apply thread-locking compound only where appropriate for the application.
Connect the linkage to its transmission-side mounting points and torque all fasteners according to the vehicle service information.
Do not copy torque values from a different vehicle.
Step 18 – Reconnect the Transmission Selector
Lubricate the appropriate selector components and reinstall the dust boot.
Slide the linkage onto the selector shaft and align the retaining-pin holes.
Install the correct spring pin or retaining hardware. If the manufacturer specifies replacing a spring pin after removal, install a new one.
Reinstall its retaining clip and verify that it is completely seated.
Fit the dust boot correctly around the connection. This protects the selector area from road contamination, water, and corrosion.
Step 19 – Reassemble the Interior
Return to the passenger compartment and reinstall the lower sealing boot.
Make sure it is completely seated around its mounting surface so fumes, heat, and road noise cannot enter through the transmission tunnel.
Install the upper insulating boot, center console, electrical connectors, decorative shift boot, and shift knob.
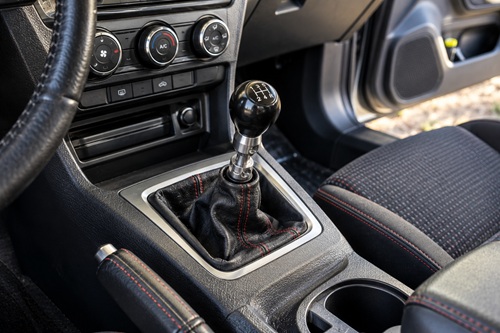
Check that the short-throw shifter does not contact the console or bind against either boot as it moves through every gear position.
Step 20 – Check the Shifter Before Driving
Before starting the vehicle, move the shifter through the complete shift pattern several times.
Every gear should be easy to locate. The shifter should move smoothly without binding, unusual resistance, or interference from the console.
Return the vehicle to the ground before performing the final driving test.
Start the engine, depress the clutch fully, and carefully confirm that each gear engages normally.
If something does not feel correct, stop and inspect the installation before driving.
Step 21 – Perform a Careful Test Drive
Begin with a short, low-speed test in a safe area.
Shift gently through the gears and pay attention to engagement, resistance, noise, vibration, and shifter movement.
A properly rebuilt linkage should generally feel more precise and predictable. A short-throw shifter also reduces the distance the driver’s hand must travel between gear positions.
Do not force a transmission into gear simply because a new shifter has been installed. Grinding, difficult engagement, or unexpected resistance can indicate another problem requiring diagnosis.
Step 22 – Inspect for Leaks
After the test drive, park the vehicle on a clean, level surface and inspect underneath.
Check the new shift-shaft seal, drain plug, fill plug, linkage attachment points, and surrounding transmission housing.
Look again after several additional drives.
A clean, dry transmission around the repaired area is the best confirmation that the leak has been corrected.
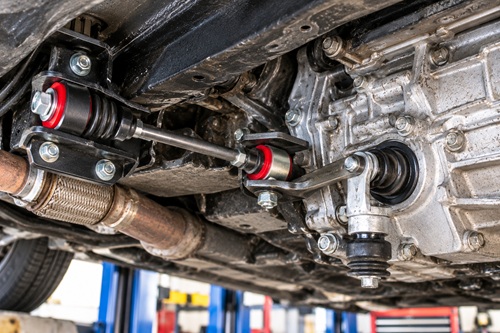
Step 23 – Compare the Before-and-After Shifter Play
Return the shifter to the same gear used for the original measurement.
Measure the side-to-side movement again using the same method.
The exact improvement will depend on the condition and design of the vehicle, but a successful rebuild should eliminate movement caused by worn bushings, damaged brackets, worn ball seats, and loose linkage joints.
This measurement provides something more useful than simply saying the shifter “feels better.” It provides a repeatable way to evaluate whether the repair actually reduced unwanted movement.
Why This Skill Matters for Preparedness
Vehicle preparedness is not limited to carrying jumper cables, tools, spare fluids, and emergency supplies. The ability to recognize mechanical deterioration before it becomes a breakdown can be just as valuable.
A manual transmission vehicle with deteriorating shift linkage may continue operating for a long time while gradually becoming harder to shift. A small transmission leak can likewise remain unnoticed until the fluid level becomes dangerously low.
Learning to inspect bushings, linkage, seals, boots, fasteners, fluids, and corrosion helps turn vehicle maintenance from a reaction to breakdowns into preventive maintenance.
That matters when a vehicle is expected to remain dependable during long-distance travel, severe weather, evacuations, remote travel, or periods when professional repair services may not be immediately available.
Preparedness Action Plan
Inspect the manual shifter in each vehicle you depend upon. With the engine off, check every gear for excessive movement and compare the amount of play between positions.
Look underneath for transmission-fluid leakage and inspect accessible shift-linkage bushings, boots, brackets, and mounting points.
Obtain the correct service information for the vehicle and record the transmission-fluid specification, fluid capacity, fill and drain locations, critical torque specifications, and replacement part numbers.
Keep these details with the vehicle’s offline maintenance records. In a situation where internet access is unavailable, having the correct technical information can be as important as having the tools and replacement parts.
Key Takeaways
A sloppy manual shifter is usually the result of accumulated wear somewhere in the shifter and linkage system rather than simply the shift lever itself. Bushings, ball seats, brackets, pivot joints, mounting hardware, and corrosion should therefore be inspected as a complete system.
A leaking shift-shaft seal should be investigated before significant transmission fluid is lost. When replacing the seal, the selector shaft must also be examined because corrosion or surface damage can quickly damage the replacement.
A short-throw shifter works best when the rest of the linkage is already tight. Installing one into a badly worn linkage does not solve the underlying problem.
Finally, use the vehicle manufacturer’s specifications whenever fluid type, torque, installation depth, or replacement procedures are involved. The objective is not merely to make the shifter feel better. It is to restore a reliable mechanical system that can continue functioning when the vehicle is needed most.
Disclaimer
This guide is provided for general educational and preparedness purposes only. Vehicle designs, transmission systems, shifter assemblies, fluids, parts, lifting points, procedures, and torque specifications vary by make, model, year, and transmission. Always consult the manufacturer’s service information for your specific vehicle before beginning repairs.
Working underneath a vehicle and servicing transmission components can result in serious injury, vehicle damage, or mechanical failure if performed incorrectly. Never work beneath a vehicle supported only by a hydraulic jack. Use properly rated ramps or jack stands on a solid, level surface, secure the vehicle against movement, and wear appropriate personal protective equipment.
Use only fluids, seals, bushings, fasteners, and replacement components that meet the specifications for your vehicle. If you are uncertain about a procedure, discover structural corrosion or significant mechanical damage, or do not have the proper tools and experience to perform the work safely, have the vehicle inspected or repaired by a qualified automotive technician.
Prepping Communities and Prepper Offline assume no responsibility for injury, damage, mechanical failure, or other losses resulting from the use or misuse of this information.
© Prepping Communities. This content is for informational purposes only and not professional advice. Use at your own risk.
Terms | Privacy | Guidelines