

Fresh fruit is valuable food, but it comes with an obvious preparedness problem: it does not remain fresh for very long. A basket of ripe peaches, berries, pears, plums, or apples can represent a considerable amount of food, yet much of that value can disappear within days if the fruit cannot be eaten, refrigerated, canned, frozen, or otherwise preserved.
Fruit leather provides another option. By turning fruit into a smooth puree and slowly removing most of its moisture, fresh produce can be transformed into a compact, lightweight food that is easy to carry, convenient to eat, and much easier to store than the original fruit. It can also be a practical way to preserve fruit that is becoming too ripe to store fresh but is still perfectly good to eat.
For preparedness, the real value goes beyond making a snack. Learning to make fruit leather adds another preservation method to the household skill set. A household that knows several ways to preserve food has more options when a garden produces heavily, fruit trees ripen all at once, seasonal produce becomes inexpensive, freezer space is limited, or electricity cannot be depended upon indefinitely.
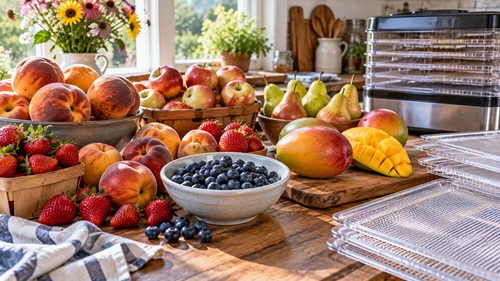
What Fruit Leather Actually Is
Fruit leather is essentially concentrated fruit puree. Fruit is cleaned and prepared, blended into a smooth puree, spread into a thin layer, and slowly dried until enough moisture has been removed that the puree becomes a flexible sheet. Once finished, it can be cut into strips, squares, or rolls and packaged for later use.
The transformation happens primarily because water is being removed. Fresh fruit contains a considerable amount of moisture, and that moisture is one of the reasons it deteriorates quickly. Dehydration reduces the available moisture while concentrating the fruit’s natural sugars, flavors, fiber, and other components. The finished food becomes smaller and lighter than the original fruit, which can make it particularly useful when storage space and weight matter.
Fruit leather should not, however, be confused with an indefinitely shelf-stable food. Enough moisture remains to give properly made fruit leather its flexible texture. That means drying, cooling, packaging, humidity, temperature, and storage time still matter.
Choosing Fruit
Many different fruits can be turned into fruit leather. Apples, peaches, nectarines, pears, mangoes, plums, strawberries, blueberries, and raspberries are all useful possibilities. Some naturally produce thick, smooth purees while others contain more water, seeds, or fibers and may work better when combined with another fruit.
Fruit leather is particularly useful when dealing with fruit that is becoming very ripe. Soft peaches or berries that need to be eaten immediately may still be excellent candidates for dehydration. Very ripe fruit is often naturally sweeter as well, reducing or eliminating the need for added sweetener.
There is an important difference between ripe fruit and spoiled fruit. Moldy, rotten, fermented, or otherwise questionable fruit should not be used simply because it will eventually be blended and dried. Food preservation begins with safe food. Dehydration should never be expected to make spoiled food safe again.
When first learning the process, start small. Different fruits contain different amounts of water, and every dehydrator behaves somewhat differently. Room humidity and the thickness of the puree also affect drying. A small batch allows you to learn what properly finished fruit leather looks and feels like without risking a large amount of food.
How to Make Homemade Fruit Leather
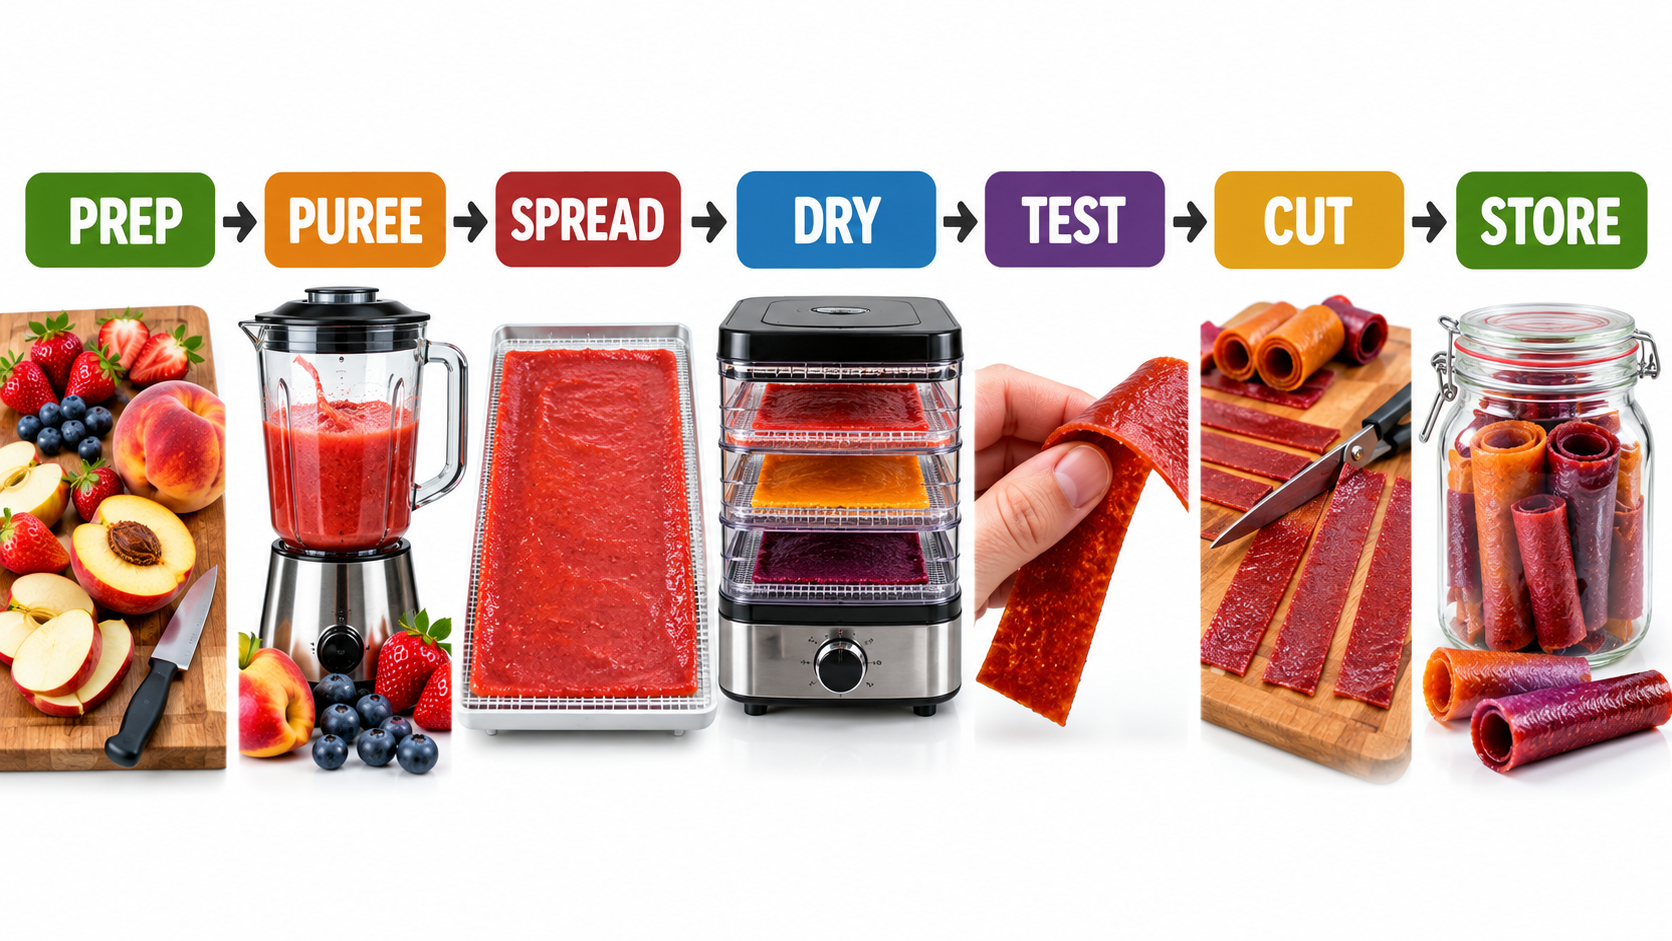
A good practice batch can begin with approximately 2 cups of prepared fruit. The amount of finished fruit leather will vary depending on the fruit, its moisture content, and how thickly the puree is spread.
Step 1 — Select and Prepare the Fruit
Choose ripe, good-quality fruit and inspect it carefully. Wash it thoroughly and remove stems, leaves, pits, stones, cores, and damaged portions. Depending on the fruit, peeling may also produce a smoother finished leather.
Cut larger fruit into manageable pieces. Apples and pears should be cored, while peaches, nectarines, plums, mangoes, and cherries need their pits or stones removed. Berries generally require less preparation beyond washing, removing stems, and discarding damaged fruit.
Step 2 — Soften Firm Fruit if Necessary
Some fruits benefit from being softened before blending. Firm apples and pears, for example, can be gently cooked with a small amount of water until tender enough to puree smoothly. This can also help reduce excess moisture before dehydration begins.
Soft berries, ripe peaches, mangoes, and similar fruits may not require cooking at all. The objective is not to cook every fruit. The goal is simply to produce a smooth puree that is thick enough to spread without behaving like watery juice.
Step 3 — Puree the Fruit
Place the prepared fruit into a blender or food processor and process it until smooth. Stop occasionally and inspect the consistency. The puree should pour and spread easily but should still have enough body to remain where it is placed on the drying tray.
If berries contain large or bothersome seeds, the puree can be strained for a smoother finished product. This is optional and depends largely on personal preference.
Taste the puree before drying it. Dehydration concentrates flavor because water is being removed, so a mixture that already tastes extremely sweet or very tart may become even more intense after drying.
Ripe fruit frequently needs no additional sweetener. If the mixture is unusually tart, a small amount of honey can be added, but use it sparingly. The objective is preserving fruit rather than turning it into candy.
Step 4 — Prepare the Drying Tray
Fruit puree requires a solid surface during dehydration. Use a fruit-leather tray designed for your dehydrator, a suitable reusable silicone drying sheet, or parchment paper appropriate for the equipment being used.
Do not use wax paper.
Make sure the tray is reasonably level before adding the puree. A tilted tray causes the mixture to collect on one side, producing thick and thin areas that will dry at different rates.
Step 5 — Spread the Puree
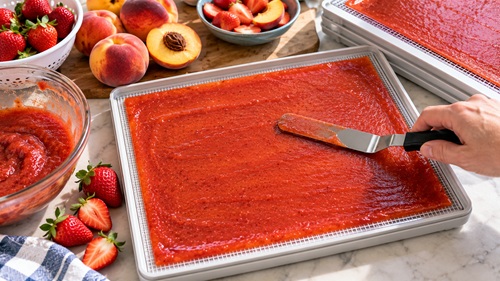
Pour the puree onto the prepared surface and spread it into a layer approximately 1/8 to 1/4 inch thick.
Take your time with this step. Uniform thickness is one of the most important factors in producing good fruit leather. If the center is much thicker than the edges, the outside can become dry and brittle while the middle remains wet and sticky.
A spatula makes spreading easier. Work the puree outward gradually and inspect the tray from several angles. Slightly thicker edges can sometimes help because the outside portions tend to dry faster.
Learning to spread the puree evenly will probably improve your results more than trying to calculate a perfect drying time.
Step 6 — Dehydrate
Set the dehydrator to approximately 135°F (57°C) and place the prepared trays inside.
Fruit leather commonly takes somewhere around 6 to 12 hours to dry, but this is only a working range. A particularly wet puree, thick layer, humid room, or heavily loaded dehydrator can increase drying time considerably.
Do not assume something has gone wrong simply because the leather is not finished when the estimated time has passed.
If the dehydrator dries some trays faster than others, rotate their positions during the process. Check the edges as well as the center because the center is commonly the last area to finish.
The condition of the fruit leather is ultimately more important than the clock.
Step 7 — Check for Doneness
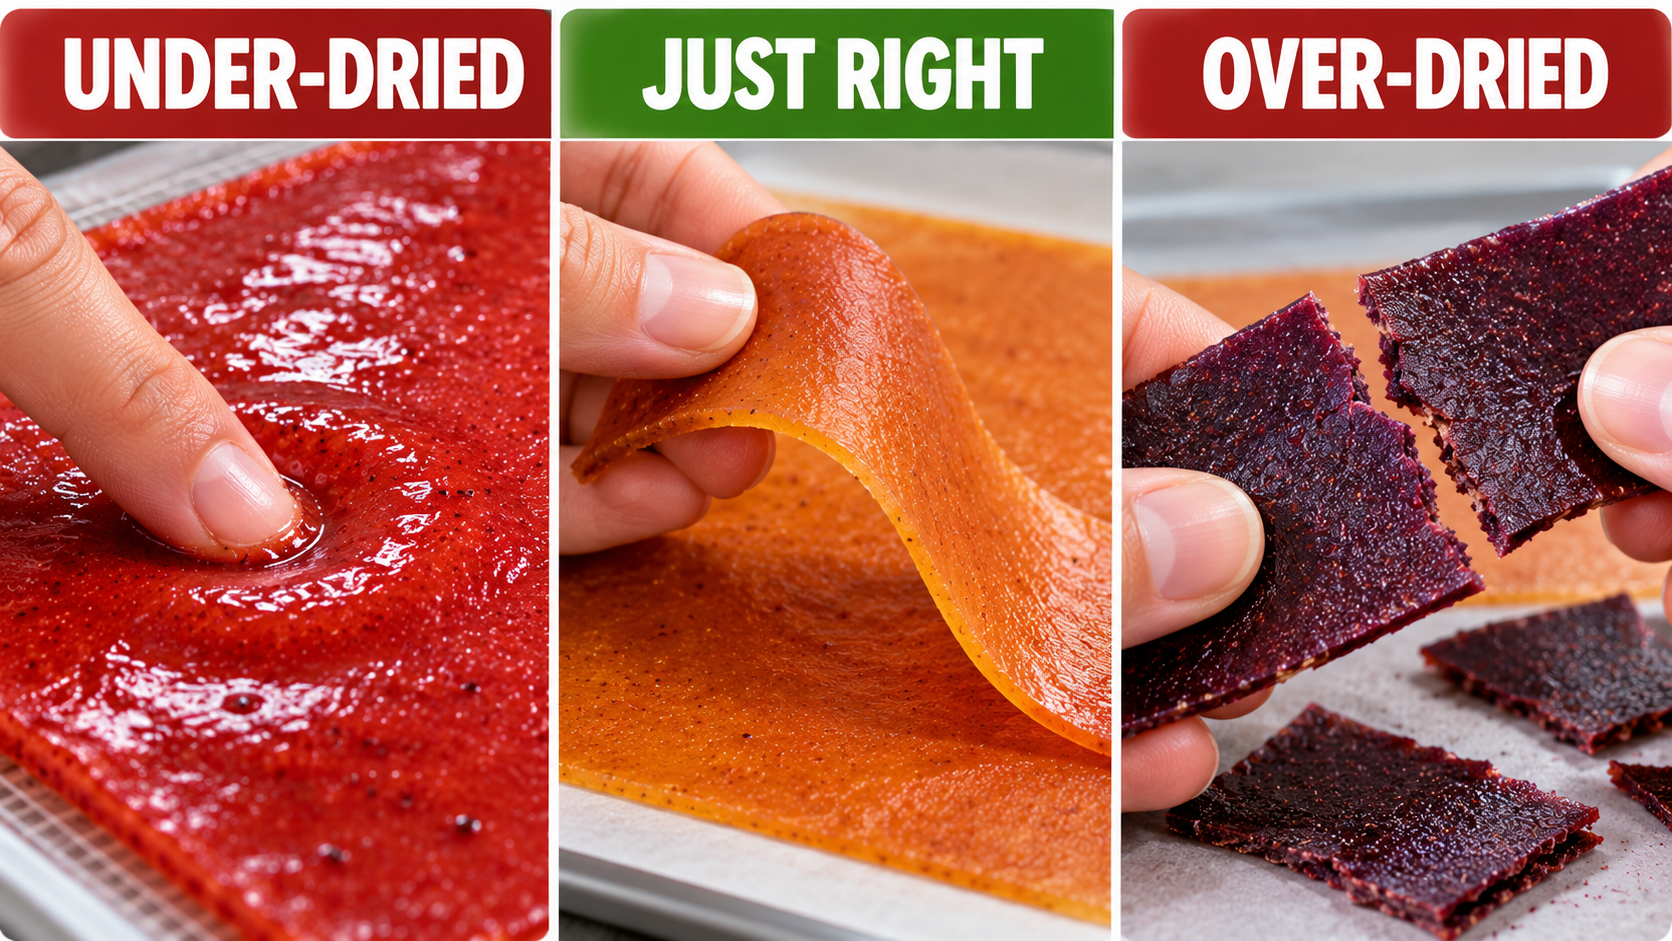
Properly dried fruit leather should feel dry rather than wet or tacky, but it should remain flexible. Touch several places, especially the center and any areas that appear darker or thicker.
Lift a corner carefully. Finished fruit leather should separate reasonably cleanly from the drying surface without leaving wet puree behind.
Then bend it.
Good fruit leather should flex without immediately cracking. If it is still sticky or wet, continue drying it. If it has become brittle and breaks easily, it has probably dried too long.
If you are uncertain, turn off the dehydrator and allow the leather to cool for several minutes before checking again. Warm fruit leather can sometimes feel softer than it does after cooling.
This ability to recognize doneness by touch is one of the most important skills to develop. Drying time can change from batch to batch, but the characteristics of properly dried fruit leather remain much more consistent.
Step 8 — Cool Completely
Remove the finished fruit leather and allow it to cool completely before packaging.
This step should not be skipped. Warm food placed inside an airtight container can produce condensation. That moisture is then trapped with the fruit leather and can shorten storage life or contribute to spoilage.
Cooling is part of the preservation process.
Step 9 — Cut and Roll
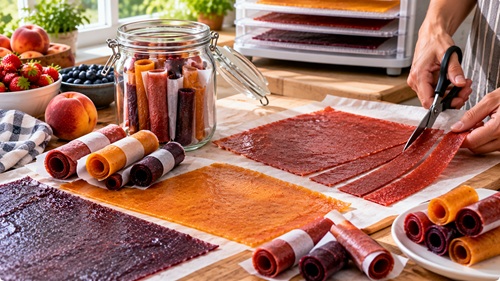
Once completely cool, peel the fruit leather from the drying sheet. It can be cut into squares, strips, or longer roll-ups depending on how it will be used.
One practical method is placing the finished leather on clean parchment paper and cutting the fruit leather and paper together into strips. Roll each strip with the paper still attached. The parchment helps keep the fruit leather from sticking to itself.
Smaller portions are particularly useful for preparedness storage because individual servings can be removed without repeatedly handling the entire batch.
Step 10 — Package and Store
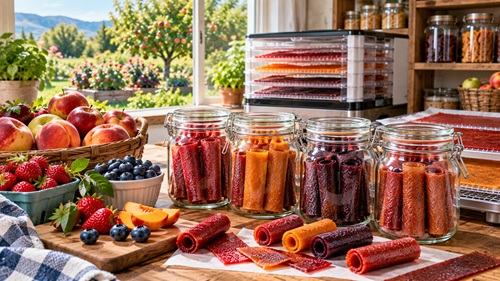
Place the finished fruit leather in a clean airtight container. Glass jars, appropriate food-storage containers, or well-sealed food-storage bags can work for shorter storage periods.
Keep the container somewhere cool, dry, and protected from direct light. Humidity is especially important because dried fruit can absorb moisture from the surrounding air.
For longer storage, refrigeration or freezing provides additional protection. Homemade fruit leather still contains some moisture and generally does not contain the preservatives used in commercial products, so it should not simply be placed on a pantry shelf and forgotten.
Label the container with the fruit used and the preparation date.
Making Fruit Leather Without a Dehydrator
A dehydrator provides good temperature and airflow control, but an oven can also be used. Prepare the fruit and spread the puree using the same method, then place it in an oven at the lowest practical temperature.
Many household ovens have a minimum setting somewhere around 150–170°F (65–77°C). Because that is warmer than a typical dehydrator setting, the fruit leather needs to be watched more carefully. An oven thermometer can be useful because the temperature selected on the control does not always match the actual temperature inside.
Moisture also needs somewhere to escape. Depending on the oven design and manufacturer guidance, ventilation may be necessary during dehydration. The objective is to slowly remove moisture rather than bake the fruit.
The same rule applies regardless of whether a dehydrator or oven is used: determine doneness primarily from the food rather than the clock.
Understanding What Went Wrong
One of the advantages of making small practice batches is that even an imperfect result teaches something.
If the center remains wet while the edges become brittle, the puree was probably spread too thickly or unevenly. The next batch should be made more uniform. If the entire sheet remains sticky, it may simply require additional drying, particularly when using very juicy fruit or working in humid conditions.
If the fruit leather cracks and breaks instead of bending, it has probably been overdried or exposed to excessive heat. It may still be edible, but it will no longer have the soft, flexible texture normally associated with fruit leather.
Fruit leather that refuses to peel cleanly from the liner may also need more drying. Do not immediately assume the liner is the problem. Test the center and other thick areas first.
These are not wasted batches if the food remains safe. They are opportunities to learn how puree thickness, airflow, temperature, humidity, and drying time interact.
Experimenting With Fruit Combinations
Once you understand the basic method, fruit leather becomes extremely adaptable. Strawberry and banana can work well because banana adds sweetness and body. Apple makes a useful base and combines easily with cinnamon or berries. Peach and raspberry balance sweetness and tartness, while mango can produce a naturally sweet, smooth leather.
There is no need to begin with complicated combinations. Using a single fruit or two familiar fruits makes it easier to understand how each ingredient affects the finished product.
Once you have a successful recipe, write it down. Record approximately how much fruit was used, whether it was cooked first, how thick the puree was spread, the dehydrator temperature, approximate drying time, and the final texture.
That information becomes your household recipe rather than something you have to rediscover every season.
Why Fruit Leather Matters for Preparedness
The value of fruit leather becomes clearer when considered as part of a larger food-preservation system.
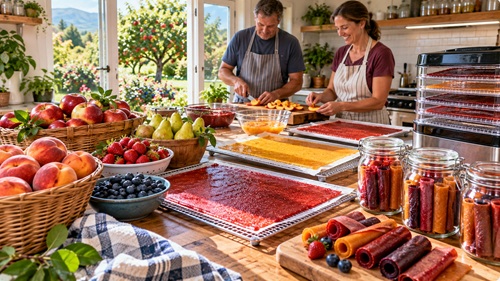
Fruit often becomes available in bursts. A backyard tree can produce far more apples, pears, peaches, or plums than a household can eat before they deteriorate. Berries may ripen over a short period. Farmers’ markets, roadside stands, neighbors, and grocery stores can suddenly provide large quantities of seasonal fruit at low cost.
Without preservation capability, abundance can quickly become waste.
Dehydration allows some of that food to be captured while it is available. Removing water reduces both weight and volume, which makes fruit leather convenient for emergency food kits, vehicle supplies, hiking, evacuation bags, lunches, and ordinary household snacks.
It also requires no cooking before eating. That becomes useful during circumstances where fuel, electricity, or time is limited.
Fruit leather should not replace other preservation methods. It should become one more option alongside canning, freezing, dehydrating whole fruit, fermenting, cool storage, and other techniques. Different preservation methods solve different problems, and having several options makes a household less dependent on any single system.
Storage Still Matters
Dehydrated food is sometimes treated as though removing moisture automatically makes it safe for years. Fruit leather is a good example of why that assumption can be misleading.
Properly made fruit leather intentionally retains enough moisture to remain flexible. That remaining moisture means storage conditions still matter.
Always allow the leather to cool completely before packaging it. Keep shorter-term supplies in airtight containers somewhere cool and dry. If the surrounding environment is humid, refrigeration becomes particularly useful.
For considerably longer storage, freezing properly packaged portions is a better option.
Stored fruit leather should also be inspected before eating. Unexpected moisture, condensation, visible mold, fermentation, unusual odors, or other signs of deterioration are reasons to discard it.
Do not taste questionable preserved food to decide whether it is safe.
Condition the Fruit Leather Before Longer Storage
When fruit leather is intended for storage rather than immediate eating, it can be useful to observe the finished batch before final packaging.
After the leather has cooled, place the pieces loosely in a clean container for a day or two and watch for signs of condensation or unexpected moisture.
If condensation appears, some portions probably still contain too much moisture. Return them to the dehydrator and continue drying.
This is especially useful with larger batches because different trays and different areas of the same sheet may not dry at precisely the same rate.
The extra observation period can catch a moisture problem before the food disappears into long-term storage.
Practice When Fruit Is Abundant
The best time to learn fruit leather is when fruit is plentiful and inexpensive rather than when preserving every piece suddenly matters.
Start with something simple. Applesauce, ripe peaches, strawberries, or mango can provide an easy practice batch.
Pay attention while it dries. Touch the puree at different stages. Notice how the surface changes. Compare a properly dried section with an under-dried center. Bend a finished piece and compare it with an edge that dried too far.
Those observations are how written instructions become practical skill.
Then make another batch.
The second batch will probably be better because you will already know more about the fruit, your equipment, and the drying process.
Eventually, making fruit leather stops being a recipe you have to look up and becomes another food-preservation technique you understand.
Preparedness Action Plan
Choose one fruit that is inexpensive, abundant, or commonly available where you live and make a small batch of fruit leather before attempting large-scale preservation. Begin with approximately two cups of prepared fruit so mistakes remain inexpensive and easy to correct.
Puree the fruit, spread it carefully, and pay particular attention to producing an even layer. Dry it slowly and learn to recognize doneness from texture instead of depending entirely on the timer. Record the fruit, approximate quantity, temperature, drying time, and final result.
Once you can consistently produce flexible, properly dried fruit leather, try another fruit and compare how its water content and texture change the process. Experiment with one or two simple combinations and record the recipes that work particularly well.
Finally, think about fruit leather as part of the household’s larger preservation strategy. When seasonal fruit becomes abundant, decide what should be eaten fresh, canned, frozen, dehydrated, or turned into fruit leather rather than waiting until ripe food is already beginning to spoil.
The objective is not simply learning how to make a snack.
The objective is developing another dependable way to preserve food while it is available.
Key Takeaways
Fruit leather turns ripe fruit into a compact, lightweight food by removing much of its moisture while leaving the finished product flexible enough to roll or cut into portions.
The basic method is straightforward: prepare the fruit, puree it, spread it evenly, dry it slowly, judge doneness by texture, cool it completely, portion it, and store it properly.
Even spreading is one of the most important parts of the process. Thick and thin areas dry at different rates, which is why one part of a batch can remain sticky while another becomes brittle.
Drying time should always be considered an estimate. Properly finished fruit leather should be dry to the touch, peel away reasonably cleanly, and bend without immediately cracking.
Storage remains important because fruit leather retains some moisture. Protect it from humidity, package it only after it has completely cooled, and use refrigeration or freezing when longer storage is required.
Most importantly, practice while fresh fruit is plentiful. The real preparedness asset is not a particular batch of fruit leather sitting on a shelf. It is knowing how to take fruit that is available today and preserve it for use later.
© Prepping Communities. This content is for informational purposes only and not professional advice. Use at your own risk.
Terms | Privacy | Guidelines