
A Practical Guide to Growing Fresh Herbs Indoors
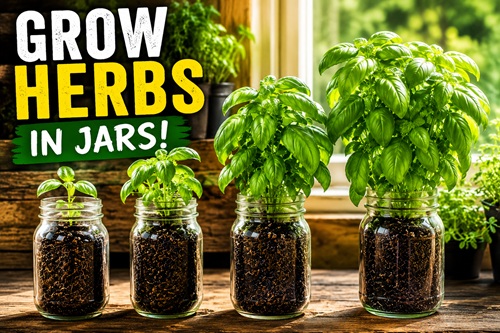
Fresh herbs are one of the easiest and most rewarding plants you can grow. They require very little space, are inexpensive to maintain, and provide fresh ingredients that can be harvested whenever you need them. Whether you live in an apartment, have limited outdoor space, or simply want fresh herbs within easy reach of your kitchen, growing them in jars is an excellent place to begin.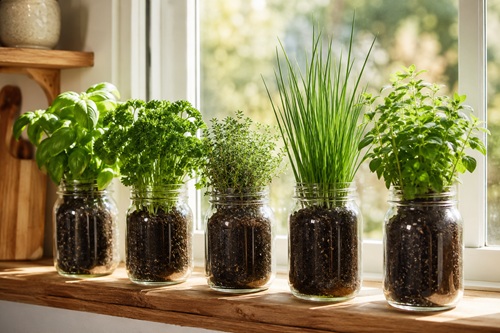
More importantly, growing herbs teaches skills that extend far beyond a windowsill garden. As you learn how to prepare soil, water correctly, recognize healthy growth, solve common problems, and harvest plants properly, you’ll be developing gardening techniques that can later be applied to container gardens, raised beds, greenhouses, and traditional vegetable gardens.
This handbook has been written as a practical training guide rather than a general gardening article. Instead of simply explaining what herbs need, it will show you how to build your own indoor herb garden, how to avoid common mistakes, and how to recognize when your plants are healthy or need attention. By the time you finish, you’ll have the knowledge and confidence to successfully grow fresh herbs throughout much of the year.
Choosing the Right Container
Every successful herb garden begins with choosing the right container. Although herbs are fairly forgiving plants, the container you select affects nearly every aspect of their growth, from how often you’ll need to water them to how large the plant can eventually become.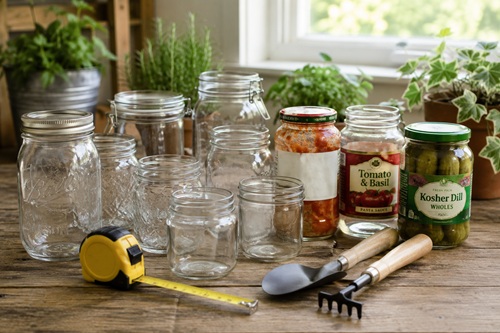
Glass jars are an excellent choice because they are inexpensive, reusable, easy to clean, and readily available in many different sizes. Mason jars are perhaps the most popular option, but clean pasta sauce jars, pickle jars, coffee jars, and other wide-mouth food jars work just as well. Before spending money on new containers, look around your kitchen—you may already have everything you need.
As you choose your jars, think about function before appearance. A decorative container may look attractive on a windowsill, but if it has a narrow opening it will make planting, pruning, and harvesting much more difficult. Wide-mouth jars provide easy access to the soil and allow the plant to develop naturally without being crowded.
Container size is equally important. Whenever possible, choose a jar that holds approximately one quart (one litre) of soil or more. Larger containers hold additional moisture, provide more nutrients, and allow roots to spread naturally. Smaller containers dry out much faster and often require frequent watering, especially during warm weather.
Before using any container, wash it thoroughly with warm water and dish soap. Remove food residue, labels, and any adhesive left behind. Rinse the jar well and inspect it carefully for cracks or chips. A damaged container may eventually break, especially if it is moved frequently or exposed to changing temperatures.
Once your jar is clean and undamaged, you’re ready to prepare it for planting.
Why Container Size Matters
Many beginners underestimate the importance of container size. While herbs may survive in very small jars, they rarely thrive.
Roots need room to expand. As they grow, they absorb water and nutrients from the surrounding soil. When space becomes limited, growth slows, watering becomes more frequent, and the plant may never reach its full potential.
Larger containers also provide a greater margin for error. If you accidentally miss a day of watering, the extra soil usually retains enough moisture to keep the plant healthy. Smaller containers can dry out surprisingly quickly, especially if they sit in a warm, sunny window.
If you’re deciding between two containers, the larger one is almost always the better choice.
Before You Continue
Before moving on to the next step, take a moment to inspect your container one last time.
Ask yourself:
- Is it completely clean?
- Does it have a wide opening?
- Is the glass free of cracks or chips?
- Is it large enough to support healthy root growth?
If you answered yes to each question, you’re ready to begin building the growing environment your herbs will depend on.
Common Beginner Mistakes
One of the most common mistakes is choosing a container because it looks attractive instead of because it is practical. Narrow jars may seem appealing, but they make almost every gardening task more difficult.
Another mistake is planting herbs in containers that still contain traces of food or soap. Always rinse containers thoroughly before adding soil.
Finally, resist the temptation to use the smallest jar available. Although herbs often survive in tiny containers, larger jars make gardening easier and produce healthier, more productive plants.
Understanding Drainage
Now that you’ve selected your container, it’s time to prepare it for planting. Before adding soil, however, it’s important to understand one of the biggest challenges of growing herbs in glass jars.
Unlike traditional flowerpots, jars have no drainage holes.
In a flowerpot, excess water drains through the bottom, carrying away excess moisture and allowing fresh air to reach the roots. Glass jars work differently. Once water enters the container, it has nowhere to escape except through evaporation or plant uptake.
This means the roots depend entirely on you to provide the correct amount of moisture.
Healthy roots require both water and oxygen. When soil remains saturated for long periods, oxygen is displaced and the roots begin to suffocate. Eventually, fungi and bacteria may begin attacking the weakened root system, leading to root rot.
Fortunately, this problem is easy to reduce with proper preparation.
Before adding soil, you’ll build a simple drainage layer inside the bottom of the jar. Although this layer doesn’t replace careful watering, it provides an area where small amounts of excess moisture can collect instead of remaining directly around the roots.
Understanding why drainage matters now will make the watering techniques you’ll learn later much easier to understand.
In the next section, you’ll build that drainage layer step by step.
Building the Drainage Layer
Now that you understand why drainage is important, it’s time to prepare your jar. This step only takes a few minutes, but it plays a major role in keeping your herbs healthy over the long term.
The goal is to create a simple drainage layer beneath the soil. This layer provides a place where small amounts of excess water can collect instead of remaining directly around the roots. While it doesn’t eliminate the possibility of overwatering, it gives you a greater margin for error and helps create a healthier growing environment.
Before you begin, gather everything you’ll need. Having all of your materials ready makes the process quick and prevents you from stopping halfway through the project.
What You’ll Need
- Coarse sand
- Small gravel, pea stone, or aquarium gravel
- Coffee filter or landscape fabric
- Quality potting soil
- Small scoop or measuring cup
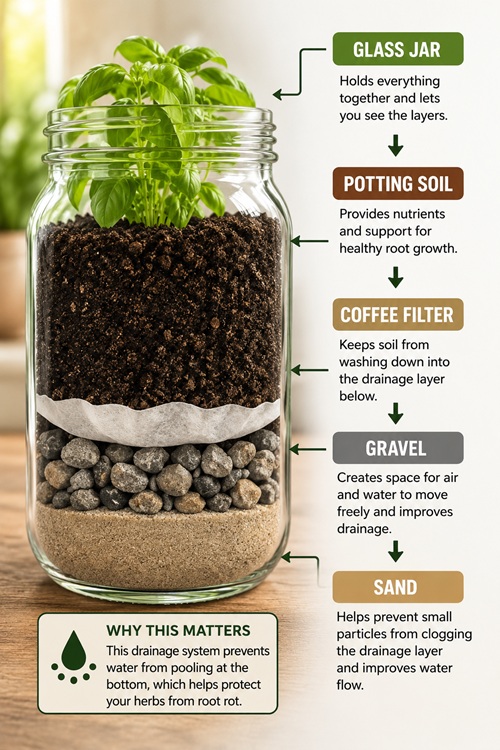
Building the Drainage Layer
Begin by pouring approximately half an inch (1 cm) of coarse sand into the bottom of the jar. Spread it evenly so it completely covers the base. The sand creates a stable foundation and helps distribute moisture beneath the gravel.
Next, add one to two inches (2.5 to 5 cm) of small gravel or pea stone. The exact amount depends on the size of your container. Smaller jars require less gravel, while larger jars benefit from a slightly deeper layer. Choose clean gravel that has been washed free of dust and dirt. Aquarium gravel works particularly well because it is already clean and available in convenient sizes.
Once the gravel is in place, cover it with a coffee filter or a circular piece of landscape fabric. This barrier prevents the potting soil from gradually working its way into the gravel while still allowing water to move freely between the two layers. Without this barrier, the drainage layer slowly becomes filled with soil and loses much of its effectiveness.
Your container is now ready to receive potting soil.
Check Your Work
Before continuing, hold the jar up and look through the side of the glass.
You should clearly see three separate layers:
- A thin layer of sand on the bottom.
- A layer of gravel above the sand.
- A coffee filter or landscape fabric covering the gravel.
If the filter has shifted or curled upward along the sides, flatten it before adding soil. It is much easier to correct now than after the container has been filled.
Taking a minute to inspect your work helps ensure everything is properly positioned before moving to the next step.
Why This Works
Plant roots require oxygen just as much as they require water. When the soil remains constantly saturated, oxygen cannot easily reach the roots. Over time, the roots weaken, making the plant more vulnerable to disease and root rot.
The drainage layer creates a small buffer beneath the soil where excess moisture can collect. While the roots remain in the soil above, the extra water settles below them instead of surrounding them.
Remember, this layer is not a replacement for proper watering. Even with a drainage layer, adding too much water repeatedly can still lead to unhealthy growing conditions. Think of it as an extra safety feature rather than a solution to overwatering.
Common Beginner Mistakes
One of the most common mistakes is adding too much gravel. Some beginners fill nearly one-third of the jar with stones, believing that more drainage is always better. Unfortunately, every inch of gravel reduces the amount of soil available for root growth. A shallow drainage layer is all that is needed.
Another common mistake is skipping the coffee filter. Over time, potting soil gradually settles into the gravel, reducing the open spaces that allow excess water to collect.
Finally, avoid using decorative stones collected outdoors unless they have been thoroughly cleaned. Dirt, insects, weed seeds, and contaminants can all be introduced into your container if the materials are not properly prepared.
Selecting the Right Potting Soil
With the drainage layer complete, you’re ready to add soil. Although this might seem like a simple step, the type of soil you choose has a tremendous influence on how well your herbs will grow.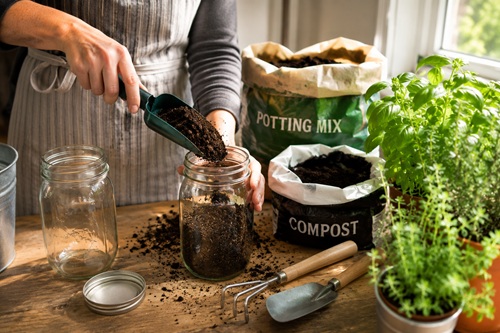
Many new gardeners assume that any soil will work. Unfortunately, that’s one of the fastest ways to create problems.
Garden soil taken directly from your yard is designed for outdoor growing conditions. Inside a container, it often becomes compacted, restricting airflow around the roots and preventing water from moving evenly through the soil. It may also contain insects, weed seeds, fungi, or plant diseases that you don’t want to introduce into your indoor garden.
Instead, choose a quality potting mix designed specifically for container gardening. Potting mixes are lighter than garden soil and are formulated to provide the ideal balance of moisture retention, drainage, and aeration. This allows roots to spread easily while still receiving the oxygen they need.
If you’d like to improve the soil even further, mix in a small amount of finished compost before filling the jar. Compost adds organic matter and slowly releases nutrients that support healthy growth throughout the growing season. Only use a modest amount, however. Too much compost can cause the soil to retain excessive moisture.
Fill the jar until the soil sits approximately one inch (2.5 cm) below the rim. This extra space makes watering much easier and prevents soil from washing over the edge each time you water.
Once the soil has been added, gently press it with your fingertips to remove large air pockets. The soil should feel firm enough to support the plant while remaining loose enough for roots to spread easily.
How to Tell if Your Soil Is Ready
A simple squeeze test can tell you a great deal about your potting mix.
Pick up a handful of slightly damp soil and gently squeeze it. Good potting soil should briefly hold its shape but fall apart easily when touched. If it forms a hard clump that stays together, it may contain too much clay or moisture. If it immediately falls apart into dust, it may dry out too quickly once planted.
Good potting soil should also smell fresh and earthy. If it has a sour, moldy, or unpleasant odor, choose a different bag.
Before You Continue
Your container should now be completely prepared for planting.
Before moving on, check the following:
- The drainage layer is still in place.
- The coffee filter completely covers the gravel.
- The soil sits about one inch below the rim.
- The soil feels loose rather than compacted.
Once everything looks correct, you’re ready to choose the herbs that will become your first indoor garden.
Common Beginner Mistakes
One of the biggest mistakes new gardeners make is reusing old potting soil year after year. Over time, nutrients become depleted, soil structure breaks down, and diseases may accumulate. Starting with fresh potting mix gives your herbs the best possible growing conditions.
Another common mistake is filling the container completely to the top with soil. Leaving a small space below the rim makes watering much easier and helps keep your windowsill clean.
Taking a few extra minutes to prepare the soil properly creates a strong foundation for every step that follows.
Choosing the Right Herbs
Now that your container has been prepared, it’s time to decide what you’re going to grow. This is one of the most enjoyable parts of the project, but it’s also where many beginners make unnecessary mistakes. Rather than trying to grow every herb you recognize, start with a few varieties that are easy to care for and that you’ll actually use.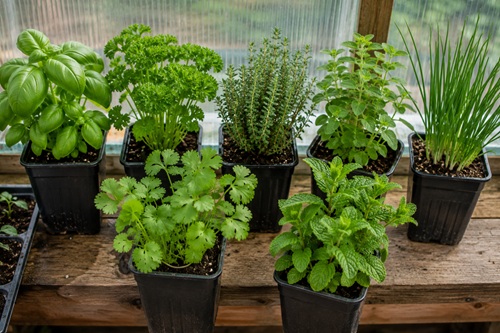
Herbs differ in how quickly they grow, how much sunlight they require, and how much water they prefer. Some thrive indoors, while others perform much better outside in a garden. Beginning with herbs that naturally adapt well to indoor conditions gives you the greatest chance of success.
Think about the meals you prepare most often. If you regularly make pasta, soups, or salads, herbs such as basil, parsley, oregano, and chives are excellent choices. If you enjoy herbal teas, you may eventually want to grow mint or lemon balm. Starting with herbs that become part of your everyday cooking makes the project much more rewarding because you’ll be harvesting them regularly instead of simply watching them grow.
For your first indoor herb garden, limit yourself to two or three different herbs. A smaller garden is easier to care for and allows you to learn how each plant grows before expanding your collection.
Excellent Herbs for Beginners
Some herbs are naturally more forgiving than others, making them ideal for first-time gardeners.
Basil is one of the easiest herbs to grow. It grows quickly, responds well to regular harvesting, and produces fresh leaves throughout much of the growing season.
Parsley grows more slowly during its first few weeks because it spends much of its energy developing a strong root system. Once established, however, it can provide fresh leaves for many months.
Chives require very little maintenance and quickly regrow after being harvested. Their upright growth also makes them well suited to smaller containers.
Oregano and thyme are hardy herbs that tolerate indoor growing conditions well. They generally require slightly less water than basil and continue producing flavorful leaves for long periods.
Mint grows vigorously and is one of the easiest herbs to maintain. However, it spreads aggressively through underground runners and should always be grown in its own container.
Cilantro grows rapidly but has a shorter lifespan than many other herbs. It is common to sow fresh cilantro seeds every few weeks if you want a continuous harvest.
Seeds or Seedlings?
One of the first decisions you’ll need to make is whether to grow your herbs from seed or purchase young plants from a garden center.
Growing herbs from seed is usually the least expensive option and gives you access to a much wider selection of varieties. It also allows you to experience the complete growing process, from germination through harvest. The trade-off is time. Some herbs germinate quickly, while others require several weeks before they produce usable leaves.
Young nursery plants, often called seedlings or transplants, provide an excellent head start. Because they already have established root systems, they settle into their new containers quickly and often produce a harvest within only a few weeks. Although they cost more than seed packets, they are usually the easiest choice for beginners.
Neither approach is better than the other. Many experienced gardeners use both, purchasing some herbs as seedlings while starting others from seed.
Choosing Healthy Plants
If you’re buying herbs from a garden center, spend a few minutes inspecting each plant before taking it home.
Healthy herbs should have rich green leaves, sturdy stems, and compact growth. Avoid plants that appear tall and spindly, as this often indicates they haven’t received enough light. Likewise, avoid plants with yellow leaves, brown spots, mold, or signs of insect damage.
Look carefully at both the tops and undersides of the leaves. Tiny insects such as aphids often hide underneath the foliage where they are difficult to notice at first glance. Bringing pests home with your new herbs can quickly spread problems to every plant in your indoor garden.
If possible, gently slide the plant partway out of its nursery pot and inspect the roots. Healthy roots should appear white or light tan and should smell fresh and earthy. Dark, mushy roots or a sour odor may indicate root rot.
Starting with healthy plants makes every step that follows much easier.
Before You Continue
Before moving on, make sure you’ve chosen herbs that fit your growing conditions.
Ask yourself:
- Will I actually use these herbs?
- Do they receive similar amounts of sunlight?
- Does each plant have its own container?
- Do all of the plants appear healthy?
If the answer to each question is yes, you’re ready for the most rewarding part of the project—planting your first herb.
Common Beginner Mistakes
One of the biggest mistakes beginners make is buying every herb that catches their eye. Caring for ten different herbs with different watering and lighting requirements can quickly become overwhelming.
Another common mistake is planting several herbs together in a single jar. While it may save space initially, the roots eventually compete for water and nutrients, making it much harder to care for each plant properly.
Starting small almost always produces better results. Once you’ve successfully grown a few herbs, expanding your collection becomes much easier.
Planting Your First Herb
Now that your jar has been prepared, you’re ready for the fun part – planting your first herb.
If you’re using a young plant from a garden center, water it about an hour before transplanting. Moist soil holds together better than dry soil, making it much easier to remove the plant without damaging its roots.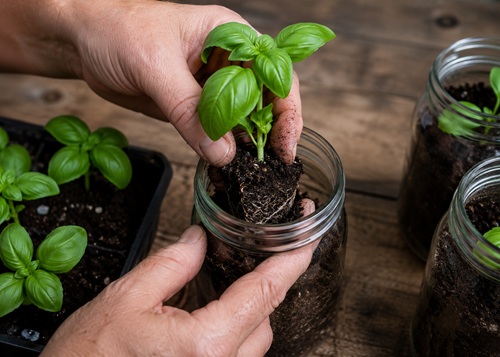
Turn the nursery pot upside down while supporting the base of the plant with your fingers. Gently squeeze the sides of the pot until the root ball slides free. If the plant refuses to come out, don’t pull on the stem. Instead, squeeze the container a little more or tap the bottom lightly against the palm of your hand.
Before placing the herb into its new container, take a close look at the roots. Healthy roots are usually white or light tan and should smell earthy rather than sour. If you notice roots wrapping tightly around the outside of the root ball, gently tease them apart with your fingers. This encourages them to grow outward into the fresh potting soil instead of continuing to circle inside the original root ball.
Dig a hole slightly wider than the root ball and just deep enough that the top of the roots will sit level with the surrounding soil. Place the herb into the hole and gently fill around the roots with fresh potting mix. Firm the soil lightly with your fingertips. You’re not trying to pack the soil tightly—only to remove large air pockets that could allow the roots to dry out.
When finished, water slowly around the base of the plant until the soil feels evenly moist. The goal is to settle the soil around the roots without leaving the container saturated.
Take one final look at your work. The plant should stand upright without leaning, the soil should sit about one inch (2.5 cm) below the rim of the jar, and no roots should be exposed above the surface.
Congratulations—you’ve just planted your first indoor herb.
What to Expect During the First Week
Don’t be concerned if your herb doesn’t immediately begin producing new leaves. During the first several days, most of the plant’s energy is directed toward establishing its root system rather than producing new growth. This adjustment period is completely normal.
Continue placing the jar in a bright location and check the soil daily. Keep it evenly moist but never saturated. Resist the urge to fertilize immediately after transplanting, as the roots need time to settle into their new environment.
By the end of the first week, the plant should still be standing upright with healthy green leaves. Within another week or two, you should begin to notice fresh growth appearing near the tips of the stems. That’s a good sign that the roots have become established and the plant is beginning to thrive.
In the next section, you’ll learn where to place your herb garden so your plants receive the light, temperature, and growing conditions they need to remain healthy throughout the year.
Positioning Your Herb Garden
Now that your herb has been planted, the next step is deciding where it will live. Choosing the right location is just as important as selecting the right container or using quality soil. Even a healthy plant can struggle if it doesn’t receive enough light or if it’s exposed to unsuitable temperatures.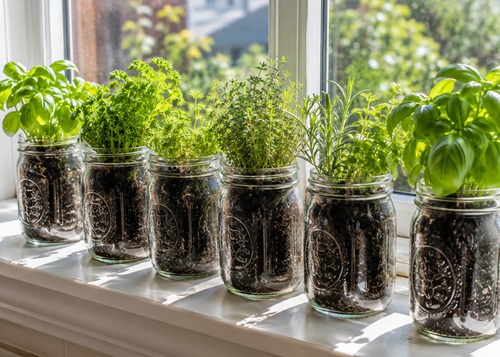
Before placing your jar on the nearest windowsill, spend a few minutes observing how sunlight moves through your home. The brightest location isn’t always the one that receives the most sunlight throughout the day.
Most culinary herbs grow best when they receive six to eight hours of bright light each day. In many homes, a south-facing window provides the longest period of sunlight and is usually the best location. East-facing windows are another excellent choice because they provide gentle morning sun without exposing plants to the hottest afternoon temperatures. West-facing windows can also work well, although herbs may require slightly more frequent watering during the summer because of the stronger afternoon heat.
North-facing windows generally receive the least amount of sunlight and are often unsuitable for herbs such as basil, oregano, thyme, and rosemary. If a north-facing window is your only option, don’t worry—you’ll learn how to supplement natural sunlight with grow lights in the next section.
As you choose a location, think about convenience as well. Herbs that are easy to reach are harvested more often, and regular harvesting actually encourages healthier, bushier growth. A sunny kitchen window is often the ideal location because the herbs are both visible and easily accessible while preparing meals.
Understanding Temperature
Most culinary herbs are happiest in the same temperatures that people find comfortable. A room temperature between 18°C and 24°C (65°F to 75°F) provides excellent growing conditions for the majority of indoor herbs.
Try to avoid placing your jars near heating vents, fireplaces, wood stoves, or air conditioning vents. These areas often experience rapid temperature changes that can dry the soil quickly and stress the plants.
During the winter, pay attention to cold windows. Although the room itself may be warm, leaves that rest directly against cold glass can become damaged overnight. Leave a small gap between the plant and the window whenever temperatures approach freezing.
Giving Your Herbs Room to Breathe
Plants need fresh air just as much as they need water and sunlight. Good air circulation helps reduce excess moisture around the leaves and lowers the risk of mold, mildew, and fungal diseases.
Avoid placing your jars so close together that the leaves touch each other. Leaving several inches of space between containers allows air to circulate freely and makes it easier to inspect each plant for insects or disease.
If you’re growing a larger indoor herb garden, occasionally opening a nearby window on mild days or running a small fan on its lowest setting can improve airflow significantly. The goal isn’t to create a strong breeze but simply to keep fresh air moving gently around the plants.
How to Tell if You’ve Chosen a Good Location
Over the next week or two, pay close attention to how your herbs respond to their new home.
Healthy herbs should remain upright and begin producing fresh growth. Their leaves should appear rich green, and the stems should remain sturdy rather than becoming long and thin.
If the stems begin leaning noticeably toward the window, the plant is reaching for additional light. Rotating the jar a quarter turn every three or four days helps encourage even growth, but if the plant continues stretching, it probably needs a brighter location.
If the leaves begin turning pale or growth slows dramatically, evaluate the amount of sunlight the plant is receiving before making any other changes.
Learning to observe your plants is one of the most valuable gardening skills you’ll develop. Your herbs often tell you what they need—you simply need to learn how to recognize the signs.
Common Beginner Mistakes
One of the most common mistakes is choosing a location because it looks attractive rather than because it provides good growing conditions. A decorative shelf across the room may complement your décor, but if it receives very little natural light, your herbs will gradually weaken.
Another common mistake is moving plants from room to room every few days in search of the “perfect” location. Herbs need time to adjust to their surroundings. Once you’ve found a bright location with stable temperatures, leave the plants there unless you notice clear signs that they need more light or a different environment.
Now that you’ve found the right location for your herbs, the next step is learning how light affects their growth and how to recognize when they need more of it. Understanding sunlight is one of the keys to producing healthy, productive plants year-round.
Understanding Sunlight
Light is the energy source that allows every herb to grow. Through a process called photosynthesis, plants use sunlight to produce the energy they need to develop roots, stems, leaves, and eventually flowers and seeds. Without enough light, even perfectly watered and fertilized herbs will struggle.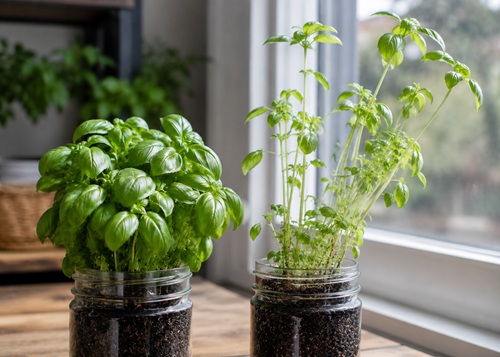
Fortunately, herbs are very good at telling you whether they’re receiving enough sunlight. Learning to recognize these signs is one of the most valuable gardening skills you can develop.
Healthy herbs usually have rich green leaves, short, sturdy stems, and compact growth. New leaves appear regularly, and the plant gradually becomes fuller over time. This is exactly what you want to see.
When herbs don’t receive enough light, they begin stretching toward the nearest light source. The stems become long and thin, the spaces between leaves become larger, and the plant often appears pale or weak. This stretching is called leggy growth, and it’s one of the clearest signs that your plant needs more light.
If you notice these symptoms, don’t panic. Move the plant to a brighter location or supplement natural sunlight with a grow light. Most herbs recover surprisingly well once their lighting conditions improve.
Following the Sun
One thing that surprises many new gardeners is that the amount of sunlight entering a window changes throughout the day and throughout the year.
A window that receives bright morning sunlight may be completely shaded by afternoon. Likewise, a sunny summer window may receive only a fraction of that light during the winter.
Spend a day observing how sunlight moves through the room. You don’t need to watch continuously—simply check every few hours. You’ll quickly discover which windows receive the longest periods of direct light.
Knowing this helps you choose the best permanent location for your herb garden.
Rotating Your Plants
Plants naturally grow toward the strongest source of light. If a jar remains in exactly the same position for several weeks, the stems often begin leaning noticeably toward the window.
To encourage even growth, rotate each container about one-quarter turn every three or four days. Many gardeners simply rotate their plants every time they check the soil or water them.
This small habit produces straighter stems, fuller plants, and a much more attractive herb garden.
Understanding Seasonal Changes
As the seasons change, so does the amount of natural sunlight available to your herbs.
During spring and summer, the days become longer and sunlight is generally more intense. Herbs often grow rapidly during this time, producing abundant new leaves and requiring more frequent watering.
Autumn brings gradually shorter days, and growth naturally begins to slow. This is completely normal and doesn’t necessarily indicate a problem.
Winter presents the greatest challenge for indoor gardeners. Short daylight hours and lower light intensity cause many herbs to grow much more slowly. Some may appear to stop growing almost entirely until spring returns.
Rather than trying to force rapid growth through additional watering or fertilizer, simply continue providing consistent care. Healthy plants naturally adjust their growth to match the available light.
How to Know Your Herb Is Receiving Enough Light
After several weeks, your herb should provide plenty of clues about whether its lighting conditions are suitable.
Your plant is probably receiving enough light if:
- The leaves are deep green.
- New growth appears regularly.
- The stems remain short and sturdy.
- The plant grows upright instead of leaning heavily.
- The overall shape becomes fuller over time.
If several of these signs are missing, evaluate the lighting before changing anything else.
Remember that light is often the limiting factor for indoor gardening. Many watering or fertilizer problems are actually lighting problems in disguise.
Common Beginner Mistakes
One of the biggest mistakes beginners make is assuming that a bright room provides enough light for herbs. Human eyes adjust remarkably well to low light, but plants cannot. A room that appears bright to you may still provide far less light than your herbs require.
Another mistake is overlooking seasonal changes. A location that works perfectly in June may not provide enough sunlight in December. As the seasons change, be prepared to move your herbs to a brighter window or supplement natural light with grow lights.
Fortunately, modern LED grow lights make this easy, and in the next section you’ll learn how to use them successfully to grow healthy herbs throughout the entire year.
Using Grow Lights
If your home doesn’t receive enough natural sunlight, don’t let that discourage you. Thousands of gardeners successfully grow herbs year-round using LED grow lights. In fact, many experienced indoor gardeners use grow lights even when they have sunny windows because artificial lighting provides consistent growing conditions regardless of the weather or season.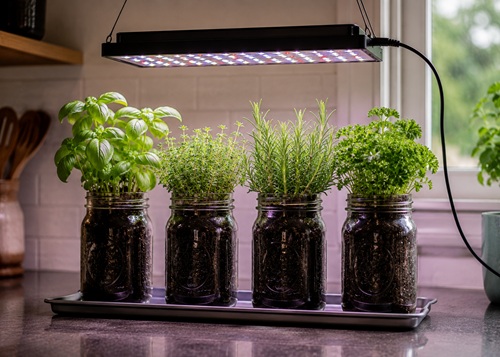
Modern LED grow lights are energy efficient, produce very little heat, and are specifically designed to provide the wavelengths of light that plants need for healthy growth. They are available in many sizes and price ranges, making them practical for everything from a single jar of basil to an entire indoor herb garden.
If you’re growing only a few herbs, a small LED grow light is usually all that’s required.
Positioning Your Grow Light
The distance between the light and your plants is just as important as the light itself.
If the light is positioned too high above the plants, much of its intensity is lost before reaching the leaves. If it is placed too close, some plants may experience unnecessary heat stress, even with cool-running LEDs.
Most LED grow lights perform best when positioned approximately 20 to 40 centimeters (8 to 16 inches) above the tops of the plants. As your herbs grow taller, continue adjusting the height of the light to maintain this distance.
The goal is to provide bright, even lighting across all of your plants.
How Long Should the Lights Stay On?
Unlike household lights, grow lights should follow a regular daily schedule.
Most culinary herbs perform well when they receive between 12 and 16 hours of light each day, followed by a period of darkness. Plants need this dark period to complete normal biological processes, so leaving the lights on continuously is not beneficial.
The easiest solution is to plug the grow light into an inexpensive timer. Once set, the timer automatically turns the light on and off at the same time every day, providing consistent growing conditions without requiring any daily attention.
Choosing the Right Grow Light
When shopping for a grow light, look for one that is labeled as full spectrum. Full-spectrum LED lights are designed to produce the range of wavelengths that plants use most effectively during photosynthesis.
Choose a fixture that provides enough coverage for all of your containers. If only part of your herb garden receives adequate light, you’ll notice uneven growth as some plants thrive while others struggle.
Fortunately, many compact grow lights designed for herbs and houseplants are affordable, energy efficient, and simple to install.
How to Tell if Your Grow Light Is Working
After several weeks under proper lighting, you should begin seeing noticeable improvements.
Healthy herbs grown under adequate artificial light typically develop:
- Compact, bushy growth.
- Rich green leaves.
- Strong stems.
- Regular new leaf production.
- Even growth across the entire plant.
If your herbs continue becoming tall and spindly despite using a grow light, the fixture may be too far above the plants or may not provide enough intensity.
Making small adjustments early usually produces much better long-term results.
Common Beginner Mistakes
One common mistake is hanging the grow light much higher than recommended. As the distance increases, light intensity decreases dramatically.
Another mistake is forgetting to adjust the light as the plants grow. What begins at the correct height may be too far away only a few weeks later.
Finally, avoid leaving the grow lights on twenty-four hours a day. Plants need a regular cycle of light and darkness to remain healthy.
Now that your herbs are receiving the proper amount of light, the next step is learning how to water them correctly. Surprisingly, watering is responsible for more indoor gardening failures than almost any other factor, but once you understand what your herbs need, it becomes one of the easiest skills to master.
Watering Your Herbs Properly
Now that your herbs have been planted and placed in a suitable location, the next skill to learn is watering. Although watering seems simple, it is responsible for more indoor gardening failures than almost any other factor. The good news is that once you understand what your herbs need, watering becomes one of the easiest parts of caring for your garden.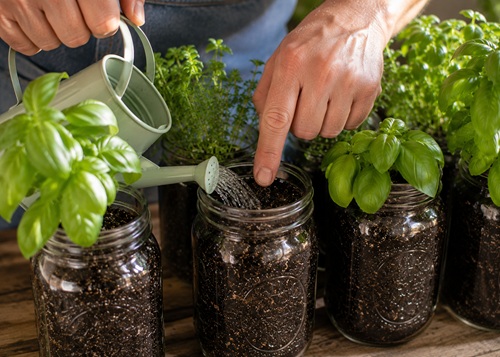
One of the biggest misconceptions among new gardeners is that plants should be watered on a fixed schedule. In reality, herbs don’t own calendars. They don’t know whether it’s Monday or Thursday—they simply respond to the amount of moisture available in the soil. Your job is to water when the plant needs it, not because a certain number of days has passed.
Before adding water, insert your finger about one inch (2.5 cm) into the soil. If the soil still feels slightly damp at that depth, wait another day before checking again. If it feels dry, it’s time to water.
When watering, pour slowly around the base of the plant instead of directly onto the leaves. Giving the soil time to absorb the water allows moisture to spread evenly throughout the container. Continue watering until the soil feels evenly moist, then stop. Because glass jars have no drainage hole, avoid adding so much water that it begins collecting above the drainage layer.
After watering, allow the plant several days before checking again. The surface of the soil often dries much faster than the root zone below, so don’t judge moisture by appearance alone.
Learning to Read Your Plants
As you gain experience, you’ll begin noticing that your herbs tell you when they need water.
Healthy herbs usually have firm stems, upright leaves, and rich green color. As the soil dries, some plants develop slightly drooping leaves or lose a little of their firmness. The container itself often becomes noticeably lighter because much of the moisture has been used by the plant or has evaporated.
The finger test remains the most reliable method, but these additional clues become helpful as your confidence grows.
One of the best habits you can develop is simply spending a minute observing your plants each day. Small changes are much easier to notice before they become serious problems.
Recognizing the Signs of Overwatering
Many beginners worry about underwatering when, in reality, overwatering is far more common.
Too much water prevents oxygen from reaching the roots. As the roots weaken, they lose their ability to absorb water and nutrients, even though the soil remains wet.
The first signs of overwatering often include yellowing leaves, slow growth, leaves dropping while still green, or a sour smell coming from the soil. In more severe cases, the lower stem may become soft, and the plant may begin collapsing.
If you suspect overwatering, don’t immediately add more water because the leaves appear wilted. Instead, check the soil carefully. If it still feels wet below the surface, allow it to dry before watering again. Improving airflow and increasing available light often help the soil dry more evenly.
The sooner you recognize these warning signs, the easier they are to correct.
Seasonal Watering
Your herbs won’t require the same amount of water throughout the year.
During the spring and summer, warmer temperatures and longer days encourage faster growth. Plants use more water during this active growing period and may need watering more frequently.
During autumn and winter, growth naturally slows as daylight decreases. Because the herbs are using less water, the soil remains moist longer. Continue checking the soil regularly, but don’t be surprised if you water much less often during the winter months.
Learning to adjust your watering routine with the seasons is one of the easiest ways to improve your success as an indoor gardener.
How to Know You’re Watering Correctly
After several weeks, your herbs should provide plenty of feedback.
You’re probably watering correctly if:
- The leaves remain firm and healthy.
- New growth appears regularly.
- The soil feels evenly moist below the surface.
- There is no sour smell coming from the container.
- The plant continues producing new leaves without yellowing.
If your herbs consistently meet these conditions, your watering routine is working well.
Common Beginner Mistakes
One of the biggest mistakes is watering every plant on the same day. Different herbs use water at different rates depending on their size, the amount of sunlight they receive, and the temperature of the room.
Another common mistake is giving plants a small splash of water every day. Frequent shallow watering encourages shallow root growth. It’s much better to water thoroughly when the soil needs it and then allow the upper portion of the soil to begin drying before watering again.
Finally, don’t assume a wilted plant always needs more water. Both underwatering and overwatering can cause leaves to droop. Always check the soil before deciding what to do.
Now that you’ve learned how to water your herbs properly, the next step is understanding how and when to provide nutrients. Fortunately, herbs require very little fertilizer, and learning to feed them correctly is much easier than many people expect.
Feeding Your Herbs
Unlike herbs growing outdoors, plants in containers have access to only the nutrients contained within the potting soil. As the herbs grow, those nutrients are gradually used up and eventually need to be replaced. Fortunately, most culinary herbs are light feeders and require only modest amounts of fertilizer to remain healthy.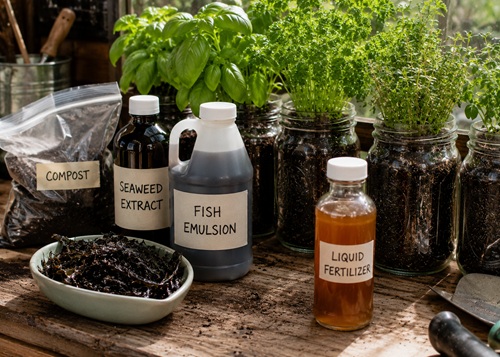
Many beginners assume that more fertilizer will produce larger, healthier plants. In reality, excessive fertilizer often encourages rapid leafy growth at the expense of flavor. Since most herbs are grown for their leaves, maintaining strong flavor is usually more important than producing the largest possible plant.
A balanced liquid fertilizer designed for herbs or houseplants is an excellent choice for indoor gardening. Always follow the manufacturer’s mixing directions carefully. Stronger solutions rarely produce better results and may damage the roots.
Most herbs benefit from feeding every three to four weeks during the spring and summer when they are actively growing. During autumn and winter, many herbs naturally slow their growth and require little or no fertilizer.
Organic Alternatives
If you prefer organic gardening methods, there are several excellent alternatives to commercial fertilizers.
Finished compost can be mixed into fresh potting soil before planting. Compost tea provides a gentle source of nutrients throughout the growing season, while fish emulsion and seaweed extracts are popular organic liquid fertilizers used by many gardeners.
These products release nutrients more gradually than many synthetic fertilizers and can also improve the overall health of the soil.
Regardless of which fertilizer you choose, remember that healthy soil, proper watering, and adequate light contribute far more to success than fertilizer alone.
How to Tell if Your Herb Needs Nutrients
Healthy herbs usually produce steady new growth throughout the active growing season.
If new leaves become unusually small, growth slows dramatically during spring or summer, or older leaves begin losing their rich green color despite proper watering and lighting, the plant may benefit from additional nutrients.
Before reaching for fertilizer, however, make sure the problem isn’t actually caused by insufficient light or improper watering. Those two issues are responsible for far more problems than nutrient deficiencies.
Common Beginner Mistakes
One of the most common mistakes is fertilizing immediately after planting. Fresh potting mix already contains nutrients, and newly transplanted herbs need time to establish their roots before additional fertilizer is necessary.
Another mistake is fertilizing every time the plant is watered. More fertilizer doesn’t always produce healthier plants and can actually reduce the quality and flavor of many culinary herbs.
A light, consistent feeding schedule almost always produces better long-term results than applying large amounts of fertilizer.
Now that your herbs are receiving the right amount of water and nutrients, you’re ready to learn one of the most rewarding parts of herb gardening—harvesting fresh herbs while encouraging your plants to become even fuller and more productive.
Pruning and Harvesting Your Herbs
One of the greatest rewards of growing herbs is harvesting fresh leaves whenever you need them. Unlike many vegetables that are harvested only once, most culinary herbs continue producing new growth throughout the season when harvested correctly. In fact, regular harvesting actually encourages many herbs to become fuller, healthier, and more productive.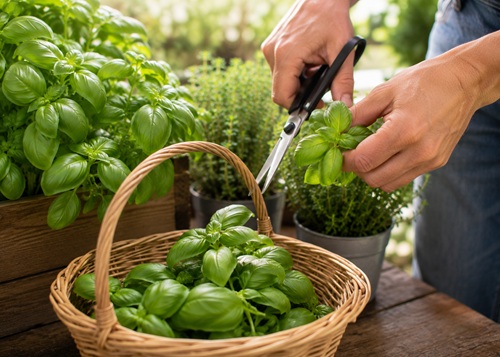
Many beginners are nervous about making the first cut because they’re afraid of damaging the plant. Fortunately, most herbs are remarkably resilient. As long as you harvest correctly and avoid removing too much at one time, your plants will usually respond by producing even more growth.
Before harvesting, make sure you have a clean pair of scissors, pruning snips, or herb shears. Although it’s tempting to pinch leaves off with your fingers, clean cuts heal more quickly and reduce the chance of damaging stems or introducing disease.
Knowing When to Harvest
Patience is important during the first few weeks after planting. Allow your herbs to become established before taking your first harvest.
Most herbs are ready once they have produced several sets of healthy leaves and have developed a sturdy root system. A small plant with only a few leaves should be allowed to continue growing before any harvesting begins.
As a general rule, harvest herbs shortly before you plan to use them. Freshly picked herbs usually contain the highest concentration of aromatic oils, giving them the strongest flavor and fragrance.
Morning is often the best time to harvest. The leaves are usually fully hydrated after the cooler nighttime temperatures but haven’t yet lost moisture during the heat of the day.
How to Harvest Different Herbs
Different herbs respond best to slightly different harvesting techniques.
Basil should be harvested by cutting the stem just above a pair of leaves. Within a short time, two new branches usually develop below the cut, creating a bushier, more productive plant.
Parsley is harvested differently. Rather than removing individual leaves, cut the older outer stems near the base of the plant while leaving the younger center growth untouched. This allows the plant to continue producing fresh leaves from the middle.
Chives are among the easiest herbs to harvest. Simply gather a small handful of leaves and trim them a few inches above the soil. Fresh leaves will quickly begin growing again.
Oregano and thyme can be harvested by clipping small sections of stem, always leaving plenty of healthy foliage behind so the plant can continue growing.
As you gain experience, you’ll become familiar with the natural growth habits of each herb and develop a harvesting routine that keeps your plants productive throughout the season.
How Much Should You Harvest?
A simple rule followed by many gardeners is never to remove more than one-third of the plant during a single harvest.
Leaving plenty of healthy leaves allows the plant to continue producing energy through photosynthesis while recovering quickly from pruning.
Frequent small harvests are much healthier than removing large amounts all at once. Not only does this reduce stress on the plant, but it also provides a steady supply of fresh herbs for your kitchen.
Encouraging Bushier Growth
Pruning is about more than collecting herbs—it’s also one of the best ways to shape your plants.
Every time you remove the growing tip from herbs such as basil, the plant responds by producing additional side branches. Over time, this creates a much fuller plant with many more leaves than one that has never been pruned.
If flower buds begin forming on basil or several other culinary herbs, pinch them off as soon as you notice them. Once many herbs begin flowering, they naturally shift much of their energy toward seed production instead of producing leaves.
Removing flower buds helps keep the plant focused on producing the flavorful leaves you’re growing it for.
After Harvesting
Once you’ve finished harvesting, take a few moments to inspect the plant.
Remove any yellow, damaged, or dead leaves that you notice. Look underneath the leaves for insects and check that the stems remain firm and healthy.
If the soil feels dry, water the plant as needed. Otherwise, simply return it to its growing location and allow it to continue developing.
Many herbs produce noticeable new growth within a week after being harvested.
Common Beginner Mistakes
One of the biggest mistakes is waiting too long before harvesting. Herbs that are never pruned often become tall, thin, and less productive than plants that are harvested regularly.
Another common mistake is removing too much growth at one time. Heavy harvesting can stress young plants and slow their recovery.
Finally, avoid tearing stems with your fingers whenever possible. Using clean scissors or herb snips produces cleaner cuts that heal more quickly and reduce unnecessary damage.
Now that you’ve learned how to harvest your herbs correctly, the next step is understanding how they naturally grow over time. Knowing what healthy growth looks like will help you recognize problems early and build confidence as your indoor garden continues to develop.
Understanding Herb Growth
One of the most encouraging things about growing herbs is watching them change from week to week. However, many beginners become concerned when one herb grows quickly while another seems to change very little. This is completely normal. Every herb has its own natural growth rate, and learning these differences will help you avoid unnecessary worry.
Basil is one of the fastest-growing culinary herbs. Under good growing conditions, it may produce several inches of new growth in only a few weeks. Parsley grows much more slowly during its early stages because it invests much of its energy into developing a strong root system. Once established, however, it often produces fresh leaves for many months.
Chives regrow rapidly after each harvest, making them one of the easiest herbs to maintain. Oregano and thyme generally grow more slowly but often remain productive for years with proper care. Mint grows vigorously and can quickly fill its container, which is one reason it should always be planted separately.
Rather than comparing different herbs to one another, compare each plant to how it looked last week. Small improvements add up quickly, and steady progress is a much better indicator of plant health than rapid growth.
Learning to Read Your Plants
Healthy herbs constantly provide clues about how they’re doing.
Rich green leaves, sturdy stems, and regular new growth usually indicate that a plant is healthy and receiving suitable care.
If growth suddenly slows, leaves begin turning yellow, or stems become weak and stretched, the plant is telling you that something has changed.
When this happens, avoid making several adjustments at once. Instead, ask yourself a few simple questions:
- Has the lighting changed?
- Is the soil staying too wet or becoming too dry?
- Has the plant outgrown its container?
- Has it been growing in the same soil for a long time?
Working through these questions one at a time usually helps identify the real cause of the problem.
Healthy Growth Takes Time
One of the hardest lessons for new gardeners is learning patience.
Plants don’t grow overnight, no matter how carefully they’re watered or fertilized. Most healthy herbs produce gradual, steady growth rather than dramatic changes from one day to the next.
Instead of checking for major differences every day, compare your herbs once each week. You may be surprised by how much they’ve grown over just a few days.
Gardening rewards consistency far more than constant attention.
Common Beginner Mistakes
One common mistake is assuming slow growth means something is wrong. In many cases, the herb is simply following its normal growth pattern.
Another mistake is trying to force faster growth by adding more fertilizer or water. Healthy plants grow at their own pace, and excessive watering or feeding often creates more problems than it solves.
Learning what normal growth looks like gives you confidence and helps you recognize genuine problems before they become serious.
In the next section, you’ll learn how your herbs respond to changing seasons and how to adjust your care routine throughout the year so they continue producing healthy growth regardless of the time of year.
Seasonal Care
Even though your herbs are growing indoors, they still respond to the changing seasons. The amount of daylight, the temperature inside your home, and even the humidity all change throughout the year. Understanding these seasonal changes helps you adjust your care routine and avoid problems before they develop.
Many beginners become concerned when their herbs grow more slowly during the winter months. This is completely normal. Plants naturally respond to shorter days by slowing their growth, even when they are kept indoors. Recognizing these seasonal patterns will help you provide the right care at the right time.
Spring: A Season of New Growth
As daylight hours increase during the spring, most herbs begin growing more rapidly. New leaves appear regularly, stems become stronger, and many plants recover quickly from winter’s slower growth.
Spring is an excellent time to start herbs from seed, transplant seedlings into larger containers, or replace older potting soil. It is also the time when many herbs begin requiring more frequent watering because they are actively producing new growth.
If you’ve been using grow lights throughout the winter, you may find that some plants can now rely more on natural sunlight as the days become longer.
Summer: Peak Growing Season
For many herbs, summer is the most productive time of the year.
Warm temperatures and long daylight hours encourage rapid growth, allowing you to harvest frequently while the plants continue producing new leaves. During this period, check the soil more often because containers may dry out much faster than they did during the spring.
If your herbs are growing in a sunny window, monitor them during periods of extreme heat. Glass can trap heat, causing temperatures near the window to rise significantly during the afternoon. If the leaves begin wilting despite adequate soil moisture, moving the jar slightly farther from the glass during the hottest part of the day may help.
Summer is also the best time to preserve extra herbs by drying or freezing them for future use.
Autumn: Preparing for Slower Growth
As autumn arrives, the days gradually become shorter, and many herbs naturally begin slowing their growth.
You may notice that your plants require less water than they did during the summer. Continue checking the soil regularly, but avoid watering simply because your summer routine says it’s time.
This is also a good opportunity to clean your indoor garden. Remove dead leaves, inspect the plants for insects, wipe dust from the jars, and make sure each herb still has enough room to grow.
If you’re planning to use grow lights during the winter, autumn is the ideal time to install them before natural light becomes limited.
Winter: Managing the Challenges
Winter is usually the most challenging season for indoor gardeners.
Short daylight hours, lower light intensity, and dry indoor air caused by heating systems all affect plant growth. Many herbs remain healthy during the winter but produce new leaves much more slowly.
During this season, resist the temptation to compensate by watering more frequently or applying additional fertilizer. Most herbs actually require less water during the winter because they are growing more slowly.
If possible, move your herbs to the brightest window in your home or supplement natural sunlight with a grow light. Also keep the plants away from heating vents, fireplaces, and cold drafts near exterior doors.
Although growth slows, healthy herbs often continue producing enough fresh leaves for occasional harvesting throughout the winter.
Adjusting Your Routine Throughout the Year
Successful gardeners don’t follow exactly the same routine every month of the year. Instead, they observe how their plants respond to changing conditions and adjust accordingly.
During periods of active growth, your herbs may require:
- More frequent watering.
- Occasional fertilizer.
- More regular harvesting.
During slower winter growth, they generally require:
- Less frequent watering.
- Little or no fertilizer.
- Less frequent pruning.
Learning to adjust your care routine with the seasons is one of the simplest ways to improve your success as an indoor gardener.
Common Beginner Mistakes
One of the biggest mistakes is assuming herbs grow at the same rate all year. Slower winter growth is completely natural and doesn’t necessarily indicate a problem.
Another common mistake is continuing a summer watering schedule throughout the winter. Because plants use less water during colder months, this often leads to overwatering.
Finally, don’t be discouraged if your herbs seem less productive during the winter. With proper care, they will usually respond quickly once the longer days of spring return.
Now that you understand how the seasons affect your herbs, it’s time to learn when a plant has outgrown its container and how to safely repot it into a larger home where it can continue thriving.
When to Repot Your Herbs
No matter how carefully you care for your herbs, they will eventually outgrow their containers. As the roots expand, they gradually fill the available space until there is very little soil left. At this stage, the plant becomes root-bound, meaning the roots have nowhere left to grow.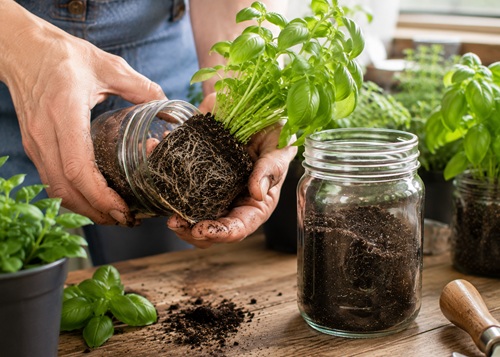
Repotting gives the roots additional space, provides fresh potting soil, and often results in a noticeable burst of new growth.
Fortunately, learning when and how to repot is easier than many people expect.
Signs That Your Herb Needs a Larger Container
Your herbs will usually tell you when they need more space.
One of the first signs is that the soil begins drying much more quickly than it did before. Because the roots occupy most of the container, there is less soil available to hold moisture.
You may also notice roots becoming visible near the surface of the soil or emerging through openings at the top of the root ball. Growth may slow even though the plant continues receiving adequate light, water, and fertilizer.
Another common sign is that the plant becomes top-heavy and tips easily because the root system has completely filled the container.
If you notice several of these signs together, it’s probably time to repot.
Choosing the Next Container
When selecting a new container, resist the temptation to move into a much larger jar.
A container that is only one or two inches (2.5 to 5 cm) wider than the current one is usually ideal. This provides enough room for new root growth without surrounding the plant with excessive amounts of wet soil.
Prepare the new container exactly as you prepared the first one. Build the drainage layer, add fresh potting soil, and leave about one inch of space below the rim for watering.
Repotting Step by Step
Water the herb lightly an hour before repotting. Moist soil holds together better and makes it easier to remove the plant.
Support the base of the plant with one hand while gently tipping the container upside down. Squeeze the sides of the nursery pot—or tap the bottom of a glass jar carefully if necessary—until the root ball slides free.
Inspect the roots carefully. Healthy roots should appear firm and light-colored. If the roots are tightly circling the outside of the root ball, gently loosen them with your fingers. This encourages them to spread into the fresh potting soil instead of continuing to grow in circles.
Place the herb into the new container so it sits at the same depth it was growing previously. Fill around the roots with fresh potting mix and gently firm the soil to remove large air pockets.
Finish by watering slowly until the soil is evenly moist.
What to Expect After Repotting
Don’t be surprised if your herb appears slightly stressed for a day or two after being moved. A brief adjustment period is completely normal.
Place the newly repotted plant back into its usual growing location and continue caring for it as you normally would. Avoid fertilizing immediately after repotting because the fresh potting soil already contains nutrients.
Within a week or two, most herbs begin producing fresh growth as their roots expand into the new soil.
Common Beginner Mistakes
One of the most common mistakes is waiting too long before repotting. Plants that remain root-bound for extended periods often become difficult to rehydrate and may stop growing altogether.
Another mistake is choosing a container that is much too large. While it may seem like you’re giving the plant plenty of room to grow, large amounts of unused soil often stay wet longer than necessary, increasing the risk of overwatering.
Choosing a slightly larger container almost always produces the best results.
In the next section, you’ll learn how to recognize and solve the most common problems that indoor gardeners encounter, allowing you to keep your herbs healthy throughout the year.
Troubleshooting Common Problems
Even the most experienced gardeners occasionally run into problems. The difference is that experienced gardeners recognize the warning signs early and make small adjustments before those problems become serious. The good news is that herbs are surprisingly resilient, and most problems can be corrected if they’re caught in time.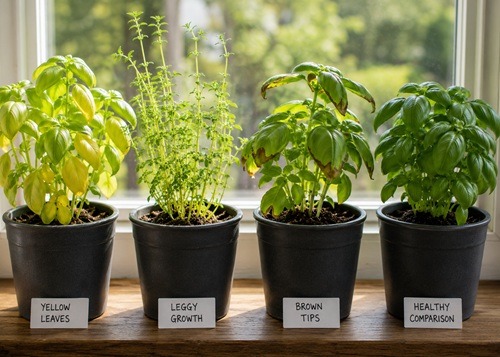
Whenever one of your herbs doesn’t look healthy, resist the temptation to change everything at once. Instead, take a few minutes to inspect the plant carefully and work through the possible causes one at a time. This methodical approach almost always leads to a quicker solution.
Yellow Leaves
Yellow leaves are one of the most common concerns among new gardeners. Although they can indicate several different problems, overwatering is usually the first thing to investigate.
Begin by checking the soil one inch (2.5 cm) below the surface. If it still feels wet, don’t water again until it has begun to dry. Healthy roots require oxygen as well as moisture, and constantly wet soil prevents oxygen from reaching them.
If the soil is dry, underwatering may be the cause. Give the plant a thorough watering and monitor its condition over the next several days.
Yellowing can also occur naturally as older leaves reach the end of their life. If only the oldest leaves near the bottom of the plant are yellowing while new growth remains healthy, there is usually no cause for concern. Simply remove the old leaves and allow the plant to continue growing.
Long, Thin Stems
If your herb begins producing long, weak stems with large spaces between the leaves, it isn’t receiving enough light.
This stretching, called leggy growth, occurs when the plant is trying to reach a stronger light source.
Move the plant to a brighter window or place it under a grow light. Continue rotating the container every few days so all sides receive even lighting.
Once new growth begins, you’ll notice shorter stems and a fuller, healthier appearance.
Brown Leaf Tips
Brown tips on otherwise healthy leaves are usually caused by inconsistent watering, dry indoor air, fertilizer buildup, or occasionally by minerals in hard water.
Start by reviewing your watering routine. If the soil repeatedly becomes extremely dry before watering, try checking moisture more often.
If you’ve been fertilizing regularly for several months, replacing the potting soil or flushing the soil with clean water may help remove excess fertilizer salts.
During winter, very dry indoor air can also contribute to brown leaf tips. Moving the plant away from heating vents often improves the situation.
Mold on the Soil
Occasionally you may notice a thin white layer of mold growing on the surface of the potting soil.
Although this usually isn’t harmful to the plant itself, it indicates that the soil is remaining wet for too long or that air circulation could be improved.
Carefully remove the affected surface layer and replace it with fresh potting soil. Allow the soil to dry slightly between waterings and increase airflow around the container by spacing plants farther apart or using a small fan on a low setting.
Insects
Indoor herbs occasionally attract insects such as aphids, spider mites, fungus gnats, or whiteflies.
Make it a habit to inspect both the tops and undersides of the leaves every time you water. Early detection makes insect problems much easier to solve.
Small numbers of insects can often be removed by rinsing the leaves with water or wiping them gently with a damp cloth. More serious infestations may require insecticidal soap or neem oil that is labeled for edible plants.
Whenever possible, isolate an affected plant from the rest of your indoor garden until the insects have been eliminated.
Slow Growth
Sometimes herbs simply seem to stop growing.
Before assuming something is wrong, consider the season. Slower growth during autumn and winter is perfectly normal.
If growth slows during spring or summer, ask yourself these questions:
- Is the plant receiving enough light?
- Has it outgrown its container?
- Has the potting soil become depleted?
- Is the soil staying too wet?
- Has the plant been harvested regularly?
Working through these questions one at a time usually reveals the cause.
Quick Troubleshooting Checklist
When a plant doesn’t look healthy, work through this checklist before making changes:
- Check the soil moisture.
- Inspect the leaves for insects.
- Look for signs of new growth.
- Confirm the plant is receiving enough light.
- Consider whether it needs a larger container.
- Review when it was last fertilized.
This systematic approach prevents unnecessary guesswork and makes problem-solving much easier.
Common Beginner Mistakes
One of the biggest mistakes new gardeners make is trying to fix every possible problem at once. Moving the plant, changing the watering schedule, adding fertilizer, and replacing the soil all on the same day makes it impossible to determine what actually solved the issue.
Make one adjustment, give the plant several days to respond, and then decide whether additional changes are necessary.
Healthy plants recover surprisingly well when given consistent care.
Harvesting and Preserving Extra Herbs
One of the rewards of growing herbs is eventually producing more than you can use fresh. Rather than allowing those extra leaves to go to waste, you can preserve them for future meals. Properly preserved herbs retain much of their flavor and allow you to enjoy your harvest long after the growing season has ended.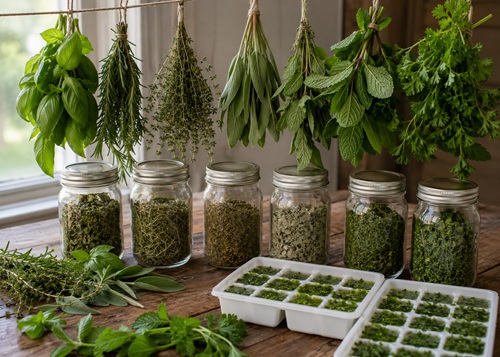
The three most common preservation methods are drying, freezing, and creating herb-infused products.
Drying Herbs
Drying is one of the oldest and simplest methods of preserving herbs.
Harvest healthy stems during the morning after any dew has evaporated but before the heat of the day begins. Gather several stems into small bundles and secure them loosely with string or an elastic band.
Hang the bundles upside down in a warm, dry location with good airflow and out of direct sunlight. Depending on the humidity, most herbs dry within one to three weeks.
Once the leaves become crisp, remove them from the stems and store them in airtight glass jars. Label each container with the herb name and the date it was dried.
For the best flavor, use dried herbs within one year.
Freezing Herbs
Freezing preserves much of the fresh flavor that drying sometimes reduces.
Wash the herbs gently and allow them to dry completely. Chop them if desired, then place them into freezer bags or ice cube trays.
Many gardeners cover chopped herbs with a small amount of water or olive oil before freezing. Once frozen, the cubes can be transferred to freezer bags and added directly to soups, sauces, or stews.
Herb-Infused Oils and Vinegars
Fresh herbs can also be used to flavor oils and vinegars.
Herb-infused vinegars are simple to prepare and store well. Infused oils require additional care because fresh herbs contain moisture that can encourage harmful bacterial growth if not prepared correctly.
If you choose to make infused oils, always follow current food safety recommendations from a trusted source.
Building Your Pantry
As your indoor garden becomes more productive, you’ll gradually begin building a small pantry of preserved herbs.
Store your dried herbs in airtight containers away from heat, moisture, and direct sunlight. Label everything clearly so older herbs can be used first.
Over time you’ll discover which preservation methods best suit the herbs you grow most often.
Common Beginner Mistakes
One common mistake is drying herbs that are already beginning to flower or decline. Harvesting while the plants are healthy generally produces much better flavor.
Another mistake is storing dried herbs in clear containers exposed to direct sunlight. Light gradually reduces flavor and aroma. A cool, dark cupboard is usually the best storage location.
Preserving your extra herbs ensures that very little of your hard work goes to waste and allows you to enjoy your harvest throughout the year.
In the final section, we’ll review the key lessons you’ve learned and discuss how these same gardening skills can become the foundation for larger container gardens, raised beds, and long-term food production.
Building a Year-Round Herb Garden
By now you’ve learned how to choose containers, prepare the soil, plant herbs, provide the right amount of light and water, harvest correctly, solve common problems, and preserve your harvest. Those are the same skills used by successful gardeners whether they’re growing a single jar of basil on a kitchen windowsill or maintaining a large vegetable garden.
The next step is continuing to build on what you’ve learned.
Rather than trying to grow twenty different herbs at once, expand your garden gradually. Add one or two new herbs every few weeks and learn how each one grows. Some herbs prefer slightly drier soil, while others appreciate more frequent watering. Some grow quickly and require regular pruning, while others develop more slowly. Learning these differences one plant at a time is far less overwhelming than trying to master them all at once.
As your confidence grows, you may decide to organize your herbs according to how you use them. One group might contain herbs used regularly in cooking, while another contains herbs commonly used for teas. A third group might be dedicated to herbs you intend to dry and store for future use.
Staggering your planting schedule is another excellent habit. Instead of planting every herb on the same day, start a new jar every few weeks. This creates a continuous cycle where young plants are becoming established while older plants are ready for harvesting. If one herb eventually reaches the end of its productive life, another is already growing to replace it.
Keeping a simple gardening journal is also worthwhile. Record when each herb was planted, how often it requires watering, how quickly it grows, and any problems you encounter. Over time, these notes become one of your most valuable gardening resources because they reflect the exact conditions inside your own home.
Perhaps the most important lesson is that successful gardening isn’t about perfection. Every gardener occasionally overwaters a plant, forgets to water another, or loses one to insects or disease. Each mistake becomes another learning opportunity, making you a better gardener the next time.
The more time you spend observing your plants, the easier it becomes to recognize healthy growth, identify small problems early, and respond with confidence.
Your indoor herb garden is more than a source of fresh ingredients. It is the beginning of practical gardening knowledge that can eventually be applied to larger container gardens, raised beds, greenhouses, and outdoor food production.
Key Takeaways
Growing herbs in jars is one of the simplest and most rewarding ways to learn practical gardening skills. With only a few inexpensive supplies and a small amount of space, you can produce fresh herbs throughout much of the year while building confidence as a gardener.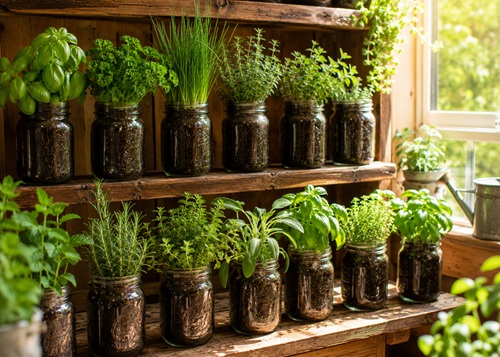
Success begins with choosing the right container, creating a proper drainage layer, and using a quality potting mix. From there, providing adequate light, watering only when the soil needs it, fertilizing sparingly, and harvesting regularly will encourage healthy, productive plants.
Just as important is learning to observe your herbs. Healthy plants provide constant feedback through their leaves, stems, and rate of growth. By learning to recognize the early signs of overwatering, insufficient light, nutrient deficiencies, or insect problems, you’ll be able to solve most issues before they become serious.
Remember that every herb grows at its own pace. Some varieties produce harvests within a few weeks, while others require more patience. Focus on providing consistent care rather than expecting rapid results.
As your experience grows, continue experimenting with new herbs, preservation methods, and growing techniques. Each new project builds on the skills you’ve learned here and increases your confidence as a gardener.
Most importantly, don’t be afraid to make mistakes. Every successful gardener has learned through experience, observation, and practice. The more time you spend caring for your herbs, the more natural these skills will become.
Whether your goal is fresh herbs for cooking, greater self-sufficiency, or simply learning a valuable new skill, you’ve taken an excellent first step.
Congratulations on completing your first indoor herb garden. Now it’s time to enjoy the harvest—and start planning your next gardening project.
© Prepping Communities. This content is for informational purposes only and not professional advice. Use at your own risk.
Terms | Privacy | Guidelines