
Introduction
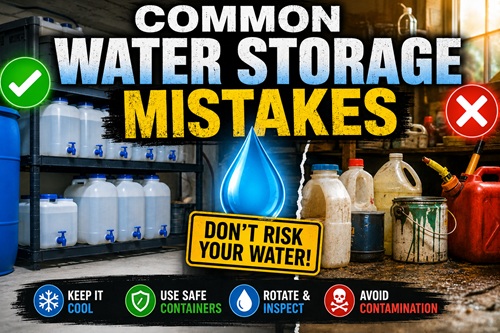
Storing emergency water is one of the most practical preparedness projects a household can undertake, but it is also one of the easiest to misunderstand. Many people believe that long-term water storage is simply a matter of filling several containers with tap water and placing them on a shelf until an emergency occurs. While the process appears straightforward, the long-term reliability of stored water depends on much more than the water itself. Container selection, sanitation, storage conditions, inspection routines, maintenance practices, and proper handling all determine whether the water remains safe months or even years after it was originally stored.
The good news is that most long-term water storage failures are preventable. Water rarely becomes unusable because it was stored too long. Instead, problems usually develop because containers were improperly prepared, unsuitable storage locations accelerated deterioration, maintenance was neglected, or contamination was introduced after the containers were opened. These mistakes often develop gradually and remain unnoticed until the water is needed during an emergency.
This lesson examines the most common mistakes made when storing emergency water and explains how to prevent them. Rather than simply identifying problems, each section teaches practical skills that allow you to evaluate your own water storage system, identify weaknesses, and improve its long-term reliability. By the end of this lesson, you should be able to confidently inspect, maintain, and expand a household water storage system that will continue providing safe drinking water whenever normal supplies become unavailable.
Understanding Your Water Storage System
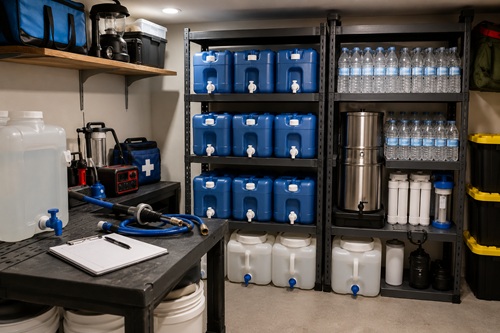
Before discussing individual mistakes, it is helpful to understand that long-term water storage is a complete system rather than a collection of containers. Every component performs a specific function. Safe drinking water is placed into a properly prepared food-grade container. That container is protected by an appropriate storage environment. Routine inspections identify deterioration before failure occurs. Supporting equipment allows the water to be safely transferred, filtered, or treated when necessary. Finally, household members understand how to access and use the water without contaminating it.
When viewed as a complete system, it becomes easier to understand why failures occur. A household may purchase excellent food-grade containers but store them beside gasoline in a hot garage. Another family may own high-quality filtration equipment but never test it until an emergency. Someone else may maintain perfectly clean containers yet underestimate how much water their household actually requires. In each case, only one part of the system failed, but that weakness reduced the reliability of the entire emergency water supply.
Successful preparedness is achieved by strengthening every part of the system rather than concentrating on only one area. Each improvement supports the others, creating multiple layers of reliability that continue functioning even when unexpected problems occur.
Components of a Reliable Water Storage System
                 Safe Drinking Water
                         │
                         ▼
             Reliable Water Source
                         │
                         ▼
          Properly Prepared Container
                         │
                         ▼
           Suitable Storage Environment
                         │
                         ▼
          Inspection and Maintenance
                         │
                         ▼
        Safe Access and Proper Handling
                         │
                         ▼
Backup Collection & TreatmentMistake 1 – Failing to Calculate Household Water Requirements
The most common mistake in long-term water storage occurs before the first container is ever purchased. Instead of determining how much water their household actually requires, many people simply buy several containers and assume that whatever volume they happen to store will be sufficient. This approach often produces a storage system that appears substantial but provides only a few days of practical use once an emergency begins.
The first step in designing a water storage system should always be calculating daily consumption. Most preparedness guides recommend storing at least one gallon (3.8 litres) of water per person per day. While this recommendation provides a useful emergency planning minimum, it assumes strict conservation and addresses only basic drinking and limited food preparation. Most households require considerably more water once cooking, hygiene, sanitation, medical needs, and pets are included.
Rather than relying entirely on published recommendations, spend several days measuring your own household’s essential water use. Record how much water is consumed for drinking, preparing meals, making beverages, brushing teeth, washing hands, taking medications, and caring for pets. Ignore activities such as lawn irrigation, long showers, or laundry, since these would normally be reduced during an emergency. The resulting estimate provides a realistic baseline that reflects your household rather than an average family described in a planning guide.
Environmental conditions should also influence storage planning. During periods of extreme heat, wildfire smoke, prolonged physical labour, or illness, water consumption increases significantly. Individuals working outdoors clearing fallen trees after a storm or protecting property during wildfire season will require considerably more drinking water than someone remaining indoors. Planning only for ideal conditions leaves little margin when actual emergencies demand greater water consumption.
Pets are frequently forgotten during preparedness planning. Dogs, cats, rabbits, chickens, and livestock all require clean drinking water every day regardless of the emergency. Their requirements should be included in household calculations from the beginning rather than added later after storage space has already been allocated.
Many experienced preparedness households build their water reserves gradually. Instead of attempting to purchase several hundred gallons of storage capacity immediately, they establish an initial goal such as two weeks of emergency water, then expand to one month, three months, or longer as budget and storage space permit. This gradual approach spreads costs over time while allowing the storage system to evolve as experience increases.
Common Mistake
Planning storage around the number of containers that fit on a shelf instead of calculating actual household water requirements almost always results in storing less water than the household truly needs.
Household Water Planning Worksheet
| Household Requirement | Daily Amount |
|---|---|
| Drinking | ______ |
| Food Preparation | ______ |
| Medications | ______ |
| Hygiene | ______ |
| Pets | ______ |
| Other Essential Needs | ______ |
| Total Per Day | ______ |
| 14-Day Supply | ______ |
| 30-Day Supply | ______ |
Example Calculation
| Household | Minimum (14 Days) | Practical Goal (30 Days) |
|---|---|---|
| 1 Adult | 14 gal | 45 gal |
| Couple | 28 gal | 90 gal |
| Family of Four | 56 gal | 180 gal |
| Family of Six | 84 gal | 270 gal |
Real-World Example
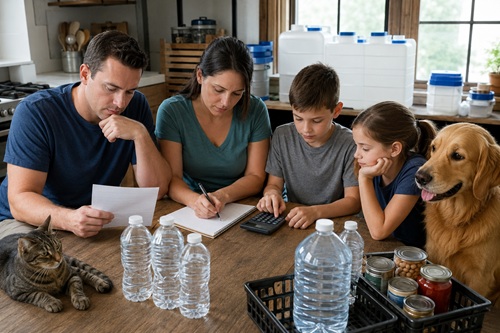
Following a major ice storm, municipal water service remained unavailable for six days. One family had prepared by storing approximately twenty gallons of bottled water, believing this would be more than sufficient. By the fourth day they discovered that nearly half of their supply had been used for cooking dehydrated meals, taking medications, washing hands before meal preparation, and providing drinking water for two large dogs. Although they had followed the common recommendation of storing emergency water, they had never calculated their own household’s actual daily consumption. The lesson was not that twenty gallons was an inadequate amount of water for every household, but that preparedness plans should always begin with realistic calculations rather than assumptions.
Mistake 2 – Choosing the Right Storage Containers
The quality of your emergency water is directly influenced by the quality of the container protecting it. Regardless of how clean the water is when it is placed into storage, an unsuitable container can introduce contamination, deteriorate prematurely, or fail under normal storage conditions. Choosing the proper container is therefore one of the most important decisions made when building a long-term water storage system.
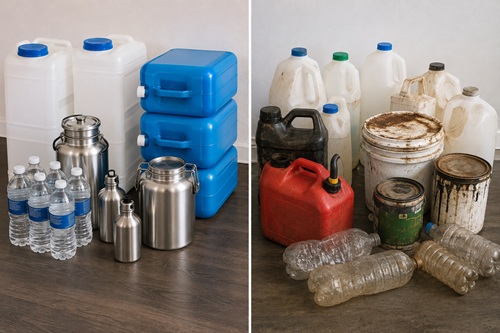
Many people assume that any container capable of holding water is suitable for emergency storage. While this may be acceptable for transporting water over short distances, long-term storage places much greater demands on the container. Over months and years, plastic is exposed to changing temperatures, moisture, physical stress, and repeated handling. Containers designed specifically for potable water are manufactured to withstand these conditions while protecting the water from outside contamination.
The safest choice for long-term storage is a food-grade container manufactured specifically for drinking water. These containers are commonly made from High-Density Polyethylene (HDPE), identified by the recycling symbol #2. HDPE has become the industry standard because it is durable, resistant to cracking, and suitable for repeated contact with potable water. When stored under proper conditions, HDPE containers provide many years of reliable service with only routine maintenance.
Not every plastic container is equally suitable for emergency water storage. Understanding the recycling symbols found on plastic containers helps you make informed purchasing decisions. While the recycling symbol identifies the type of plastic used, it does not automatically mean the container is appropriate for storing drinking water. Always confirm that the container is specifically rated as food grade or suitable for potable water before using it.
Common Plastic Types Used for Water Storage
| Plastic Code | Material | Suitable for Long-Term Water Storage | Comments |
|---|---|---|---|
| #1 | PET (Polyethylene Terephthalate) | △ Limited | Excellent for commercially bottled water but generally intended for single use. |
| #2 | HDPE (High-Density Polyethylene) | ✓ Excellent | Preferred material for reusable emergency water containers. |
| #4 | LDPE (Low-Density Polyethylene) | △ Limited | Flexible but less common for rigid storage containers. |
| #5 | Polypropylene (PP) | ✓ Good | Durable and food safe for many applications. |
| #3, #6, #7 | Various Plastics | ✗ Generally Not Recommended | Not commonly used for long-term potable water storage. |
The container’s previous use is equally important. A food-grade container that previously stored drinking water may often be reused after proper cleaning and sanitizing. However, containers that previously held gasoline, diesel fuel, pesticides, paint, solvents, automotive fluids, pool chemicals, or cleaning products should never be used for drinking water. Many chemicals penetrate microscopic pores within the plastic where they cannot be completely removed. Even after repeated washing, small amounts may gradually migrate back into stored water over time.
Disposable beverage containers deserve careful consideration as well. Milk jugs are frequently reused because they are readily available, but they are one of the poorest choices for long-term storage. The thin plastic becomes brittle relatively quickly, particularly when exposed to changing temperatures. More importantly, milk proteins and fats leave microscopic residues that are difficult to remove completely. These residues provide nutrients that encourage bacterial growth if sanitation is incomplete.
Juice bottles and sports drink containers perform somewhat better than milk jugs because they generally contain fewer fats and proteins, but they remain thin disposable containers designed primarily for short-term use. While they may serve as temporary storage during an emergency or while transporting water, they should not become the primary containers within a long-term preparedness system.
Commercial bottled water deserves separate consideration because it is packaged under carefully controlled conditions using containers specifically designed for potable water. Factory-sealed bottled water provides an excellent ready-to-use emergency supply. However, once the seal has been broken, the bottle should no longer be considered suitable for repeated long-term reuse. The thin plastic gradually weakens, and the bottle becomes increasingly difficult to sanitize after repeated use.
Container size influences much more than storage capacity. Larger containers maximize storage efficiency but reduce mobility. A fifty-five-gallon (208-litre) storage drum weighs approximately 460 pounds (209 kilograms) when full. Once filled, relocating it without specialized equipment becomes extremely difficult. Before purchasing large containers, determine exactly where they will remain because moving them after filling may not be practical.
Smaller containers provide greater flexibility. Five- to seven-gallon containers are generally light enough for one adult to carry safely while still providing meaningful storage capacity. Individual one-gallon containers and factory-sealed bottled water become especially valuable during evacuations because they can easily be transported in vehicles or distributed among family members.
Many experienced preparedness households intentionally combine several container sizes rather than relying on only one. Large drums provide economical long-term storage, medium containers simplify rotation and household use, while smaller bottles remain available for evacuation, vehicle kits, or individual family members. This layered approach improves flexibility without significantly increasing maintenance requirements.
Before filling any container, perform a careful inspection. Examine the outside for cracks, deep scratches, or ultraviolet damage. Inspect the threaded opening for damage that could prevent the lid from sealing correctly. If the container includes a gasket, confirm that it remains soft and flexible without visible cracks or flattening. Check dispensing spigots for smooth operation and signs of leakage. Reject any container that shows structural damage because small defects often become larger under the weight of stored water.
Container shape also deserves consideration. Round drums provide excellent structural strength because pressure is distributed evenly around the container walls. Rectangular containers make more efficient use of storage space because they stack neatly on shelving and against walls. The best choice depends upon available storage space and how the water will be accessed during an emergency.
Pro Tip
Purchase containers based on how you expect to use the water, not simply on how much water they hold. Large stationary containers and smaller portable containers each serve different purposes within a complete water storage system.
Selecting the Right Container
               Need Water Storage
                      │
                      ▼
        Is It Certified Food Grade?
              │               │
            Yes              No
              │               ▼
              │         Do Not Purchase
              ▼
     Appropriate Capacity?
      │                  │
    Yes                 No
      │                  ▼
      │          Choose Better Size
      ▼
 Inspect for Damage
      │
      ▼
 Prepare & Sanitize
      │
      ▼
 Fill with Potable Water
      │
      ▼
 Label & Store
Real-World Example
A preparedness group purchased several used food-grade barrels from a local food processing company at a substantial discount. The barrels had previously contained fruit concentrate and appeared to be in excellent condition. Before placing them into service, each barrel was carefully inspected. Although the plastic itself remained sound, several lid gaskets had become brittle after years of storage in a warehouse. Replacing the inexpensive gaskets before filling the barrels eliminated what would likely have become slow leaks during long-term storage. This inspection required less than an hour but prevented the possible loss of hundreds of gallons of emergency water.
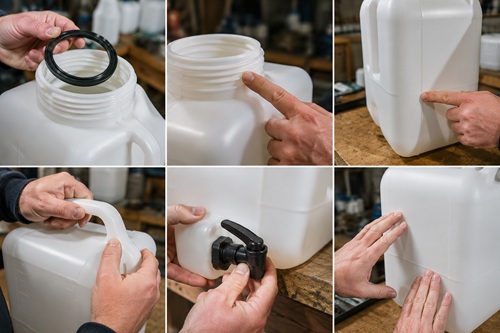
The lesson extends beyond purchasing quality containers. Every container should be evaluated as a complete assembly – including the lid, gasket, threads, and dispensing fittings – before it ever becomes part of your emergency water supply.
Cleaning and Sanitizing Water Storage Containers
Selecting a high-quality container is only the first step in protecting emergency drinking water. Before any water is placed into long-term storage, every reusable container should be thoroughly cleaned and sanitized. This preparation removes manufacturing residue, dust, oils, microorganisms, and other contaminants that may compromise water quality over time. Even containers that are brand new should never be assumed to be sterile. During manufacturing, shipping, and storage they may collect dust, plastic particles, packaging residue, or other contaminants that should be removed before the container is placed into service.
Many people use the terms cleaning and sanitizing interchangeably, but they perform two different functions. Cleaning removes visible dirt, grease, residue, and other foreign material from the container. Sanitizing destroys microorganisms that remain after cleaning. Both steps are necessary. Sanitizing a dirty container is ineffective because organic material protects bacteria from the disinfectant. Likewise, washing a container without sanitizing it leaves microorganisms that may multiply while the water remains in storage.
The preparation process should always begin with a careful inspection. Examine the inside and outside of every container under good lighting. Look for cracks, scratches, gouges, warped plastic, damaged threads, worn handles, and signs of ultraviolet damage. Small defects may appear insignificant when the container is empty but can become serious leaks after several hundred pounds of water have been added. Pay particular attention to molded seams because these areas experience the greatest stress during normal use.
The lid deserves the same attention as the container itself. Inspect the sealing surface for chips or cracks and confirm that the threads engage smoothly without cross-threading. Remove the gasket if possible and examine it for cuts, flattening, brittleness, or permanent deformation. Rubber seals gradually lose flexibility as they age, reducing their ability to maintain a watertight seal. Replacing an inexpensive gasket before filling the container is considerably easier than replacing contaminated water after the system has been placed into service.
After the inspection has been completed, wash the container using warm water and a mild dish detergent. Every interior surface should be cleaned thoroughly, including corners, handles, threaded openings, dispensing ports, and recessed areas where residue may accumulate. Containers that previously stored food products deserve additional attention because sugars, oils, and proteins often remain trapped in textured surfaces or molded seams that are difficult to reach.
Using the proper cleaning tools is just as important as selecting the correct detergent. Long-handled brushes designed specifically for water containers allow the bottom and sides of larger containers to be scrubbed effectively without introducing unnecessary contamination. Avoid using brushes that have previously been used for automotive work, household cleaning, or chemical storage because they may transfer oils or cleaning chemicals into the container. Keeping a dedicated set of cleaning tools exclusively for drinking water equipment helps maintain the sanitation of the entire storage system.
Once cleaning has been completed, rinse the container several times using clean potable water. Continue rinsing until all traces of detergent have been removed. Soap residue not only affects the taste of stored water but may also interfere with the effectiveness of some disinfectants. Taking an extra minute to rinse thoroughly is one of the simplest ways to improve long-term water quality.
Only after the container has been cleaned should sanitizing begin. A sanitizing solution prepared according to recognized emergency water storage recommendations should be poured into the container and rotated slowly so every interior surface comes into contact with the disinfectant. Do not forget the lid, gasket, dispensing spigot, vent cap, or any removable fittings because these components eventually contact the drinking water during normal use. Allow the disinfectant to remain inside the container for the recommended contact time before draining it completely. Rushing this step reduces the effectiveness of the sanitizing process.
After sanitizing, the container may either be filled immediately with potable drinking water or allowed to air dry naturally in a clean location. If air drying is chosen, place the container upside down where dust, insects, or debris cannot enter. Avoid drying the interior with towels or cloths because they frequently introduce lint and microorganisms back into the sanitized container. Air drying is slower but generally produces a cleaner result.
The quality of the water used for filling is just as important as the condition of the container. Water should come from a known potable source. Municipal drinking water is generally suitable because it has already been treated and disinfected before reaching the household. If the source is a private well, verify that recent water quality testing confirms it is safe for drinking. Water collected from rainwater systems, lakes, rivers, streams, or other natural sources should be properly treated before it is placed into long-term storage. Remember that storage preserves water quality – it does not improve poor-quality water.
Leave a small air space at the top of the container rather than filling it completely to the brim. This allows for slight expansion caused by temperature changes and reduces unnecessary pressure on the container walls and lid. Follow the manufacturer’s recommendations whenever available because different containers are designed with different expansion allowances.
Immediately after filling, tighten the lid securely and inspect the container for leaks. Wipe the exterior dry so that any future leaks can be identified easily during routine inspections. Finally, attach a waterproof label showing the fill date, water source, inspection date, and container identification number if you maintain a maintenance log. Proper labeling transforms a collection of containers into an organized water management system.
Common Mistake
Filling a new container without cleaning and sanitizing it first. New containers often contain manufacturing dust, packaging residue, or other contaminants that should be removed before storing drinking water.
Pro Tip
Develop a written filling procedure and use it every time a container is prepared. Following the same sequence for every container greatly reduces mistakes and ensures consistent water quality throughout the storage system.
Step-by-Step Container Preparation Checklist
| Step | Procedure | Verify Before Continuing |
|---|---|---|
| 1 | Inspect container and lid | No cracks, damage, or worn seals |
| 2 | Wash with warm water and mild detergent | All surfaces cleaned |
| 3 | Rinse thoroughly | No soap residue remains |
| 4 | Sanitize container and lid | All surfaces exposed to disinfectant |
| 5 | Allow proper contact time | Recommended sanitizing time completed |
| 6 | Drain completely | No standing disinfectant solution |
| 7 | Fill with potable water | Safe water source confirmed |
| 8 | Leave expansion space | Container not overfilled |
| 9 | Seal tightly | Lid secure and leak-free |
| 10 | Label container | Fill date and inspection date recorded |
Container Preparation Workflow
Inspect Container
       │
       ▼
Damage Found?
   ┌──────────────┐
YES│              │NO
   ▼              ▼
Replace      Wash Thoroughly
Container          │
                   ▼
             Rinse Completely
                   │
                   ▼
          Sanitize All Parts
                   │
                   ▼
         Fill with Potable Water
                   │
                   ▼
       Leave Expansion Space
                   │
                   ▼
          Seal and Leak Check
                   │
                   ▼
          Label and Record
                   │
                   ▼
        Move to Storage Area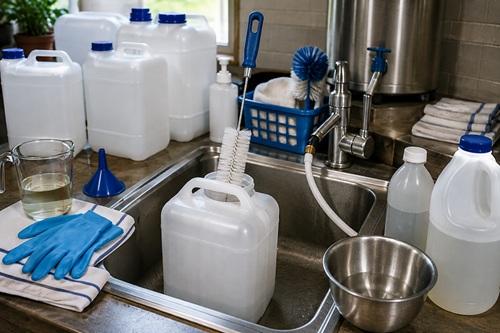
Troubleshooting Container Preparation
| Problem | Likely Cause | Recommended Action |
|---|---|---|
| Plastic odor after filling | Manufacturing residue not removed | Empty, clean, sanitize, and refill |
| Soap taste in water | Incomplete rinsing | Empty, rinse thoroughly, refill |
| Lid difficult to tighten | Damaged threads or cross-threading | Replace lid before use |
| Slow leak around lid | Worn gasket or improper seal | Replace gasket and inspect sealing surface |
| Sediment visible immediately after filling | Container not cleaned completely | Empty, clean, sanitize, and refill |
| Mold inside container | Stored while damp or improperly cleaned | Discard water, sanitize thoroughly, inspect storage practices |
Real-World Example
A preparedness club purchased twenty new seven-gallon food-grade water containers before conducting a community emergency preparedness workshop. Because the containers were factory sealed, several volunteers assumed they could be filled immediately. One experienced instructor stopped the process and opened a random container for inspection. Fine plastic shavings from the manufacturing process and small amounts of packaging dust were visible inside the container under bright light. Every container was subsequently cleaned, sanitized, and inspected before filling. Although the contamination was minor, the exercise demonstrated an important lesson: food-grade does not automatically mean ready for use. Proper preparation should be part of every filling procedure, regardless of whether the container is new or has been used many times before.
Selecting the Best Storage Location
After a container has been properly cleaned, sanitized, filled, and labeled, the next step is selecting a storage location that will protect both the water and the container throughout its service life. The environment surrounding the container has a significant influence on long-term reliability. Excessive heat, freezing temperatures, direct sunlight, high humidity, physical damage, and exposure to chemicals all shorten the life of storage containers and increase the likelihood of problems developing before the water is needed.
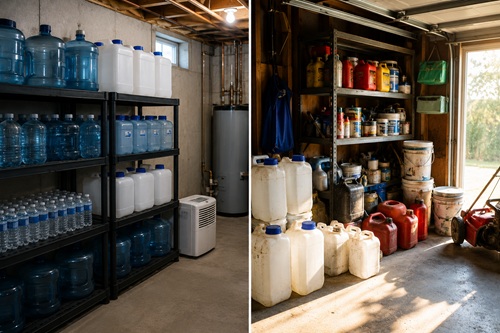
The ideal storage location maintains a relatively constant temperature throughout the year. Repeated heating and cooling causes plastic containers to expand and contract, gradually weakening the material and placing additional stress on seams, lids, and gaskets. Temperature fluctuations also accelerate the breakdown of chlorine residuals in treated municipal water. While the water may remain safe, maintaining stable temperatures helps preserve both water quality and container longevity.
Most homes contain several potential storage locations, each with different advantages and disadvantages. Basements are generally considered one of the best choices because they remain cool, receive little direct sunlight, and usually experience only minor seasonal temperature changes. Interior storage rooms, utility rooms, and climate-controlled pantries also provide excellent conditions because they are protected from weather and remain accessible throughout the year.
Garages require more careful evaluation. In cooler climates, an attached garage may provide acceptable conditions for storing emergency water. However, in regions where summer temperatures routinely exceed 35°C (95°F), garages can become significantly hotter than the living area of the home. Prolonged exposure to elevated temperatures accelerates plastic aging and increases stress on container seals. Before committing to garage storage, monitor seasonal temperatures over several weeks to determine whether the environment remains suitable for long-term storage.
Detached sheds present even greater challenges. These structures are typically uninsulated and experience the same temperature extremes as the outdoor environment. During summer they may become excessively hot, while winter temperatures often fall well below freezing. Unless no other option exists, detached sheds should generally be reserved for non-potable water or temporary storage rather than the household’s primary emergency drinking water supply.
Attics are among the least desirable locations for long-term water storage. Temperatures frequently exceed those found anywhere else in the home during summer months, while winter conditions may expose containers to repeated freezing and thawing. These extreme fluctuations shorten container life and increase the likelihood of seal failure. In addition, the structural loading created by large water reserves may exceed what many attic floors were designed to support.
Direct sunlight should always be avoided whenever possible. Ultraviolet radiation gradually weakens many plastics, making them brittle over time. Even opaque containers benefit from protection against continuous sunlight because prolonged ultraviolet exposure slowly degrades the container material. Sunlight also encourages algae growth if sufficient light reaches the stored water. Although food-grade containers reduce this risk considerably, storing water in dark locations provides additional protection with no additional cost.
Humidity is another environmental factor that deserves attention. While sealed containers prevent moisture from reaching the stored water, excessive humidity encourages mold growth on surrounding shelves, walls, and storage racks. Metal shelving may corrode more rapidly, cardboard boxes deteriorate, and maintenance records become damaged if they are not protected. A clean, dry storage environment simplifies inspections while preserving the equipment supporting the water storage system.
Chemical exposure is one of the most commonly overlooked hazards. Emergency drinking water should never be stored beside gasoline, diesel fuel, kerosene, pesticides, herbicides, paint, solvents, fertilizers, pool chemicals, or strong household cleaners. Although food-grade containers provide an effective barrier against contamination, many volatile chemicals release vapors that may affect certain plastics during prolonged storage. More importantly, accidental spills create unnecessary contamination risks and complicate emergency access to the water supply.
Accessibility should be considered before containers are filled rather than after. Ask yourself how the water will actually be used during an emergency. Can a full container be removed safely without moving heavy furniture? Is there sufficient room to operate a transfer pump or connect a hose? Can inspections be performed without emptying the entire storage area? A storage system that is difficult to access is less likely to be inspected regularly and may become impractical during an actual emergency.
The weight of stored water should never be underestimated. Water weighs approximately 8.34 pounds (3.8 kilograms) per gallon. A single fifty-five-gallon drum weighs approximately 460 pounds (209 kilograms) when full. Four drums positioned together exceed 1,800 pounds (817 kilograms) before accounting for shelving or equipment. Concrete basement floors generally provide excellent support for these loads, while elevated wooden floors may require additional evaluation. When storing large quantities of water, distribute the weight over a larger area whenever practical and follow local building recommendations.
Organizing the storage area improves both maintenance and emergency use. Arrange containers so labels remain visible without moving other equipment. Leave sufficient space between large containers to inspect every side for leaks or damage. Store pumps, hoses, filters, replacement parts, maintenance records, and treatment supplies together in clearly labeled containers. An organized storage area reduces inspection time while making emergency access faster and more efficient.
Pro Tip
When selecting a storage location, imagine inspecting every container six months from now using only a flashlight during a power outage. If you cannot easily see labels, inspect lids, or remove containers safely, the storage layout should be improved before the system is placed into service.
Safety Note
Never store large water containers where they could block emergency exits, electrical panels, furnace access, or water shutoff valves. Emergency supplies should improve household safety, not create additional hazards.
Comparing Common Storage Locations
| Storage Location | Temperature Stability | UV Protection | Chemical Risk | Accessibility | Overall Rating |
|---|---|---|---|---|---|
| Basement | Excellent | Excellent | Low | Excellent | ★★★★★ |
| Interior Storage Room | Excellent | Excellent | Low | Excellent | ★★★★★ |
| Pantry | Good | Excellent | Low | Excellent | ★★★★☆ |
| Climate-Controlled Garage | Good | Good | Moderate | Excellent | ★★★★☆ |
| Attached Garage | Fair | Good | Moderate | Good | ★★★☆☆ |
| Detached Shed | Poor | Fair | Moderate | Good | ★★☆☆☆ |
| Attic | Poor | Fair | Low | Poor | ★☆☆☆☆ |
| Vehicle | Very Poor | Poor | Low | Excellent | ★☆☆☆☆ |
Storage Location Evaluation
              Choose Storage Area
                      │
                      ▼
        Temperature Stable Year-Round?
              │                  │
            Yes                 No
              │                  ▼
              │          Select Better Location
              ▼
        Protected From Sunlight?
              │                  │
            Yes                 No
              │                  ▼
              │         Add UV Protection
              ▼
       Away From Chemicals?
              │                  │
            Yes                 No
              │                  ▼
              │        Separate Water Storage
              ▼
      Floor Strong Enough?
              │                  │
            Yes                 No
              │                  ▼
              │      Redistribute Weight
              ▼
      Easy to Inspect & Access?
              │                  │
            Yes                 No
              │                  ▼
              │      Improve Storage Layout
              ▼
          Ready for Long-Term Storage
Troubleshooting Storage Problems
| Problem Observed | Possible Cause | Recommended Solution |
|---|---|---|
| Plastic becoming chalky | UV exposure | Relocate containers away from sunlight |
| Container bulging | Excessive heat | Move to cooler location and inspect container |
| Small leak around lid | Worn gasket or heat damage | Replace gasket and inspect seal |
| Condensation around containers | High humidity | Improve ventilation or relocate storage |
| Rust on metal shelving | Moisture | Reduce humidity and inspect supports |
| Difficult to inspect containers | Poor organization | Rearrange storage layout and improve spacing |
Real-World Example
A homeowner stored approximately 300 gallons of emergency water along the back wall of an attached garage because the location was convenient and easily accessible. During a summer inspection, temperatures inside the garage measured nearly 43°C (110°F) in the late afternoon. Several containers located near a south-facing wall had become noticeably warmer than those stored elsewhere, and two labels had faded from prolonged exposure to indirect sunlight entering through a nearby window.
Rather than replacing the containers, the homeowner relocated the entire storage system to a cool basement utility room. The move required only a single afternoon of work but significantly improved storage conditions. New waterproof labels were applied, shelving was installed to improve organization, and the garage was reserved for non-potable water and outdoor equipment. The change demonstrated that improving the storage environment often provides greater long-term benefits than purchasing additional equipment.
Inspecting, Rotating, and Maintaining Stored Water
Once emergency water has been placed into storage, many households consider the project complete. The containers are moved to a storage area, the door is closed, and the water is forgotten until an emergency occurs. While this approach may seem reasonable, it is one of the most common reasons otherwise well-designed water storage systems fail. Water storage should be viewed as an ongoing maintenance program rather than a one-time project. Regular inspections identify developing problems before they affect the safety or availability of the stored water.
A systematic inspection begins with the storage environment rather than the containers themselves. Walk through the storage area and compare its current condition with the day the water was originally stored. Has the room become warmer because of a new furnace, hot water tank, or appliance? Have paints, fuels, pesticides, or household chemicals gradually accumulated nearby? Is there evidence of water leaks, excessive humidity, rodents, or insects? These environmental changes often occur gradually and may go unnoticed unless the entire storage area is reviewed during each inspection.
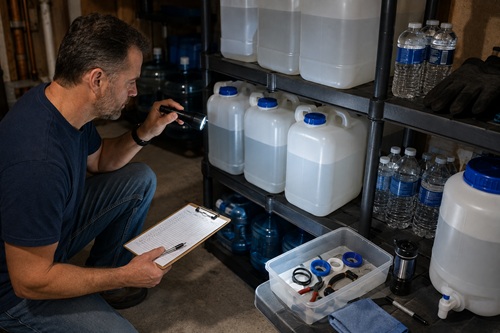
Once the storage environment has been evaluated, inspect every container individually. Start at the top and work downward so that nothing is overlooked. Examine the lid for cracks, damaged threads, or signs that it is no longer sealing tightly. Inspect the gasket for flattening, brittleness, or cuts that could allow contaminants to enter. Continue examining the container walls, paying particular attention to molded seams, handles, corners, and the base where stress is greatest. Look for discoloration, bulging, chalky surfaces, or deep scratches that could weaken the container over time.
Do not overlook the bottom of the container. Small leaks often develop where they are least visible, particularly if containers remain undisturbed for several years. If practical, gently rotate smaller containers during inspections so every surface can be examined. For larger drums that cannot be moved, inspect the floor beneath the container for mineral deposits, dampness, or staining that may indicate a slow leak. Discovering a small leak during a routine inspection is far preferable to finding an empty storage drum during an emergency.
Labels should be inspected just as carefully as the containers themselves. Every container should clearly display the fill date, water source, inspection date, and container identification number if a maintenance log is being used. Labels exposed to moisture or sunlight gradually fade until they become unreadable. Waterproof labels or laminated tags generally last much longer than ordinary paper labels. Replace damaged labels immediately rather than relying on memory to identify individual containers.
Supporting equipment should also be included in every inspection. Pumps should be assembled and operated to verify smooth performance. Dispensing valves should open and close without leaking. Flexible hoses should be inspected for cracking, mold, or deterioration, while replacement gaskets, O-rings, and spare parts should be inventoried to confirm they remain available. If the equipment required to access stored water fails, the value of the stored water itself is significantly reduced.
Many preparedness organizations recommend performing a complete inspection every six months. This schedule provides frequent opportunities to identify developing problems while remaining practical for most households. Some people choose to perform inspections when changing clocks for daylight saving time because those dates naturally occur twice each year and are easy to remember. Regardless of the schedule selected, consistency is more important than the exact inspection date.
One of the most frequently debated topics in water storage is rotation. Some people replace stored water every six months, while others leave properly stored water untouched for many years. The appropriate approach depends on the water source, storage conditions, and the household’s maintenance philosophy. Municipal drinking water stored in properly prepared food-grade containers under cool, dark conditions may remain safe for extended periods. However, many preparedness households still choose to rotate reusable water every twelve months because the process provides an opportunity to inspect containers, clean equipment, verify labels, and maintain confidence in the overall storage system.
If water is rotated, there is usually no reason to waste it. Water that remains suitable for household use can be used to irrigate gardens, water trees, wash vehicles, clean outdoor equipment, flush toilets, or perform other non-emergency tasks. This practice conserves water while ensuring that fresh drinking water replaces the older supply in storage.
During rotation, inspect the water itself before emptying the container. Properly stored drinking water should remain clear and free from unexpected sediment or floating debris. There should be no signs of algae growth or unusual discoloration. Smell the water immediately after opening the container. A musty, sour, or unusual chemical odor may indicate contamination or deterioration. If there is any doubt regarding water quality, do not attempt to save the water. Clean and sanitize the container thoroughly before refilling it with fresh potable water.
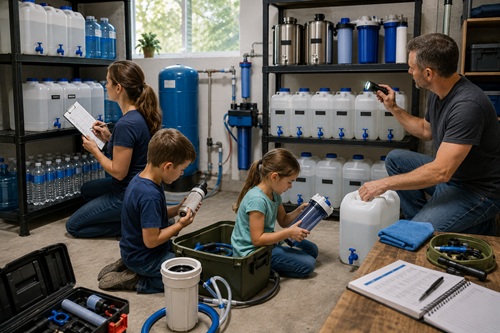
Record every inspection in a maintenance log. Include the inspection date, container identification number, observations, maintenance performed, replacement parts installed, and the date of the next scheduled inspection. Written records eliminate guesswork and provide a history of how the system has been maintained. As the number of containers increases, good documentation becomes one of the most valuable tools for managing the entire storage system.
Perhaps the greatest benefit of regular inspections is confidence. During an emergency there should be no uncertainty about whether a container is leaking, whether the pump still works, or whether replacement filters are available. Every inspection performed under normal conditions reduces uncertainty during abnormal conditions. Preparedness is not simply about owning emergency supplies—it is about knowing they are ready to perform when they are needed.
Common Mistake
Inspecting only the water while ignoring the storage system. Most long-term failures involve containers, lids, gaskets, pumps, or storage conditions rather than the water itself.
Pro Tip
Keep a flashlight, permanent marker, inspection checklist, and maintenance log in the storage area. Having everything needed for inspections in one place makes routine maintenance faster and more consistent.
Six-Month Water Storage Inspection Checklist
| Inspection Item | What to Inspect | Corrective Action |
|---|---|---|
| Storage Area | Heat, sunlight, humidity, chemicals | Correct environmental problems |
| Container Exterior | Cracks, scratches, UV damage | Replace damaged containers |
| Lid & Threads | Tight seal, damaged threads | Repair or replace lid |
| Gasket | Flexibility, cracks, deformation | Replace gasket |
| Labels | Fill date, inspection date, container ID | Replace faded labels |
| Water Condition* | Clarity, odor, sediment | Refill if contamination is suspected |
| Pumps & Hoses | Smooth operation, leaks | Repair or replace |
| Filters | Housing, cartridges, seals | Clean or replace components |
| Spare Parts | Inventory replacement items | Restock as necessary |
| Maintenance Log | Inspection records | Update immediately |
Inspect the water itself only when the container is intentionally opened.
Annual Water Maintenance Calendar
| Month | Recommended Tasks |
|---|---|
| January | Review household water requirements and inventory |
| March | Six-month inspection, equipment testing |
| June | Verify treatment supplies and replacement filters |
| September | Six-month inspection, update labels if needed |
| November | Test pumps, gravity filters, and backup collection equipment |
| December | Review maintenance records and plan improvements for next year |
Water Storage Inspection Process
Begin Inspection
        │
        ▼
Inspect Storage Area
        │
        ▼
Inspect Containers
        │
        ▼
Any Damage Found?
    │             │
   No            Yes
    │             ▼
    │      Repair or Replace
    ▼
Inspect Equipment
        │
        ▼
Test Pumps & Filters
        │
        ▼
Update Maintenance Log
        │
        ▼
Schedule Next Inspection
        │
        ▼
Inspection Complete
Real-World Example
A family stored approximately 250 gallons of emergency water in a basement utility room and followed a six-month inspection schedule. During one inspection, they noticed a small white mineral deposit beneath one of the storage containers. At first it appeared to be ordinary dust, but closer examination revealed that the dispensing spigot had developed a slow leak caused by a hardened rubber washer. Only a few litres of water had escaped over several months, yet the inspection prevented the gradual loss of the entire container. Replacing the washer took less than five minutes and cost only a few dollars. Had the inspection been skipped, the family might not have discovered the problem until they needed the water during an emergency.
This example illustrates an important principle of preventative maintenance: regular inspections rarely uncover major failures, but they consistently identify small problems before those problems become major failures.
Building Redundancy – Why One Water Source Is Never Enough
One of the defining characteristics of a well-designed emergency water plan is redundancy. Redundancy simply means having more than one way to accomplish an essential task. Every water source has limitations, and every system can fail. Municipal water systems depend on electrical power and functioning treatment plants. Private wells require pumps. Rainwater collection depends on weather conditions. Rivers and lakes may become contaminated. Even carefully maintained storage containers can be damaged by accidents or environmental conditions. A household that relies entirely on one source assumes that source will always remain available. A household with multiple independent sources can continue adapting even when one system fails.
The first layer of any emergency water strategy should normally be stored potable water. Stored water provides an immediate supply that requires little or no treatment before use. It allows the household to remain self-sufficient while assessing the situation rather than rushing to locate alternative water sources. Because it is immediately available, stored water buys valuable time during the critical first hours or days of an emergency.
However, stored water is a finite resource. Every gallon consumed reduces the remaining reserve. Regardless of whether a household stores fifty gallons or five hundred gallons, that supply will eventually be exhausted if it cannot be replenished. For this reason, long-term preparedness requires identifying additional sources that can replace or supplement stored reserves as the emergency continues.
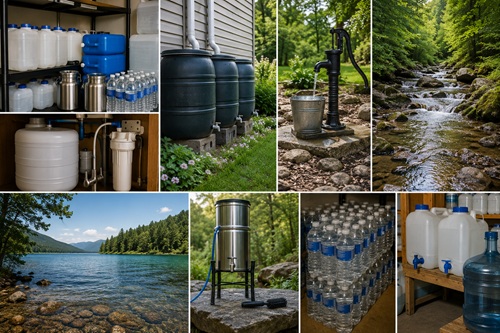
Rainwater harvesting provides one of the most practical renewable water sources available to many households. A properly designed collection system captures rainfall from roofs and directs it into storage containers where it can later be filtered and disinfected. While harvested rainwater should always be considered untreated until properly processed, it represents an excellent renewable resource that can significantly extend emergency water supplies. Even relatively small collection systems can produce surprisingly large volumes of water during moderate rainfall events.
The effectiveness of rainwater collection depends upon preparation before the emergency occurs. Gutters should be cleaned regularly, downspouts maintained, storage tanks inspected, and first-flush diverters serviced if they are installed. Waiting until a major storm arrives to assemble a collection system often results in missed opportunities and unnecessary contamination.
Private wells provide another valuable source of redundancy, but many homeowners mistakenly assume that owning a well guarantees unlimited emergency water. In reality, most modern wells depend entirely upon electric pumps. During an extended power outage, groundwater may still be available beneath the property, but it cannot be accessed without electricity unless a backup system has been planned in advance.
Households relying on wells should evaluate several backup options. Portable generators provide a temporary solution provided sufficient fuel is available. Permanent standby generators offer greater convenience but involve higher installation costs. Solar-powered pumping systems continue operating during daylight hours if properly designed, while manual hand pumps provide dependable access regardless of electrical availability. The best solution depends upon the well design, local climate, expected outage duration, and household budget.
Natural water sources become increasingly important during prolonged emergencies. Rivers, lakes, streams, ponds, springs, irrigation canals, and even snow may provide substantial quantities of water when managed properly. However, appearance alone should never be used to judge water quality. Clear mountain streams may contain harmful microorganisms, while muddy water from flooded rivers may contain industrial pollutants, sewage, or agricultural runoff. Every natural source should therefore be evaluated carefully and treated appropriately before consumption.
Understanding seasonal changes improves planning for natural water sources. Streams that flow strongly during spring snowmelt may become small trickles by late summer. Farm ponds may experience algae blooms during periods of hot weather. Lakes may remain accessible throughout the year while smaller creeks freeze completely during winter. Evaluating alternative sources during every season provides a much more realistic understanding of their long-term reliability.
Distance is another factor often overlooked during planning. A beautiful lake located fifteen kilometers away may appear to provide an unlimited emergency water supply, but transporting water over that distance requires considerable time, fuel, and physical effort. During widespread emergencies, damaged roads, fallen trees, wildfires, or flooding may make distant sources inaccessible. Whenever possible, identify several water sources located in different directions and at different distances from your home.
Water treatment equipment forms another critical layer of redundancy. Portable filters, gravity-fed filtration systems, ultraviolet purification devices, chemical disinfectants, boiling, and distillation all perform different functions. No single treatment method removes every possible hazard. Understanding the strengths and limitations of each allows multiple methods to be combined when necessary.
For example, muddy river water benefits from settling or pre-filtration before passing through a portable water filter. Chemical disinfection becomes more effective after suspended particles have been removed. Distillation provides excellent protection against many dissolved contaminants but requires considerable energy. Selecting the appropriate treatment method depends upon the source water and the contaminants likely to be present.
Redundancy should also exist within the treatment equipment itself. Owning only one portable filter assumes that filter will never fail. If it becomes damaged, clogged, or lost, the household immediately loses its primary treatment capability. Maintaining spare filter cartridges, replacement O-rings, backup chemical disinfectants, and additional treatment options greatly improves long-term reliability without requiring significant storage space.
Preparedness should also consider geographic redundancy. Storing every container, filter, and treatment supply in one building creates a single point of failure. Fire, flooding, structural collapse, or evacuation could make the entire system inaccessible. Some households choose to maintain smaller emergency water supplies at secondary locations such as cabins, workshops, recreational properties, or trusted family members’ homes. Others distribute portable filtration equipment among multiple emergency kits so treatment capability remains available regardless of where the emergency begins.
Perhaps the most valuable form of redundancy is knowledge. Equipment can break, containers can leak, and familiar water sources may become unavailable, but practical knowledge allows people to adapt. Someone who understands how to identify water sources, evaluate contamination risks, assemble filtration equipment, disinfect water correctly, and safely store treated water possesses a capability that cannot be lost through equipment failure alone.
Rather than asking, “Where will I get water?”, ask a different question:
“If my primary source fails today, what will my second, third, and fourth options be?”
If those answers already exist—and the equipment and skills have been practiced—you have developed true redundancy.
Common Mistake
Believing that one large water storage tank eliminates the need for alternative water sources. Stored water is only one layer of a complete emergency water strategy.
Pro Tip
Every primary water source should have at least one independent backup. Every backup should also have a method for treating the collected water before it is consumed.
Remember
Redundancy is not about owning more equipment. It is about ensuring that the failure of one component does not eliminate your ability to obtain safe drinking water.
Layered Household Water Strategy
| Layer | Water Source | Purpose | Advantages | Limitations |
|---|---|---|---|---|
| 1 | Stored Drinking Water | Immediate use | Ready immediately | Finite supply |
| 2 | Commercial Bottled Water | Portable reserve | Factory sealed | Limited quantity |
| 3 | Rainwater Collection | Renewable source | Sustainable during rainfall | Requires treatment |
| 4 | Private Well | Long-term supply | Large capacity | Often requires electricity |
| 5 | Lakes, Rivers & Streams | Emergency collection | Widely available | Always requires treatment |
| 6 | Snow & Ice | Seasonal backup | Readily available in winter | Low water yield when melted |
Water Source Decision Tree
              Need Drinking Water
                     │
                     ▼
      Stored Water Available?
            │               │
          Yes              No
            │               ▼
            │       Collect New Water
            ▼               │
 Use Stored Water           ▼
                     Select Water Source
                             │
        ┌─────────────┬───────────────┬─────────────┐
        ▼             ▼               ▼
    Rainwater      Private Well    Natural Source
        │             │               │
        └──────┬──────┴──────┬────────┘
               ▼             ▼
      Filter if Necessary
               │
               ▼
     Purify / Disinfect
               │
               ▼
      Safe Drinking Water
Comparing Backup Water Sources
| Source | Reliability | Collection Effort | Treatment Required | Best Use |
|---|---|---|---|---|
| Stored Water | Excellent | None | No | Immediate emergency use |
| Bottled Water | Excellent | None | No | Portable emergency supply |
| Rainwater | Good | Low | Yes | Long-term replenishment |
| Private Well | Excellent* | Low | Usually No | Primary household supply |
| River | Good | Moderate | Yes | Extended emergencies |
| Lake | Good | Moderate | Yes | Long-term backup |
| Spring | Very Good | Moderate | Recommended | Natural backup source |
| Snow | Fair | High | Yes | Winter emergencies |
*Dependent upon access to pump power.
Real-World Example
Following a severe windstorm, a rural community lost electrical service for nine days. Most homes relied on private wells, but without electricity their pumps could not operate. One family had prepared differently. They maintained two weeks of stored drinking water, a rainwater collection system connected to food-grade storage barrels, a gravity-fed water filter, and several bottles of chemical disinfectant. During the outage, stored water supplied immediate drinking needs while rainwater collected during several storms was filtered and disinfected to replenish the household reserve. Although their well remained unusable until electricity returned, the family maintained a continuous supply of safe drinking water because they had planned for multiple independent sources rather than relying solely on the well.
Preventing Cross-Contamination During Water Storage and Daily Use
A properly stored supply of emergency water can become contaminated within minutes if it is handled incorrectly after the container has been opened. Surprisingly, many cases of contaminated stored water are not caused by poor storage practices but by everyday handling mistakes made while dispensing, transferring, or using the water. Cross-contamination occurs whenever microorganisms, dirt, chemicals, or other foreign materials are transferred from one surface to another. Once introduced into stored water, these contaminants may multiply over time, reducing the safety of the remaining supply.
Unlike a sealed commercial bottle of water that is often consumed in a single sitting, emergency water containers may be opened repeatedly over days or weeks. Every time the lid is removed, the container is exposed to dust, insects, airborne microorganisms, and accidental contact with hands or equipment. The more frequently a container is opened, the greater the opportunity for contamination. For this reason, large storage containers should remain sealed whenever possible, and water should be dispensed through a dedicated spigot or transfer system rather than repeatedly removing the entire lid.
One of the most common mistakes is dipping cups, bowls, or measuring containers directly into stored water. Even when these items appear clean, they may contain bacteria, food residue, soap residue, or dirt that cannot be seen with the naked eye. Each time the container is submerged, contaminants are introduced into the remaining water. A better practice is to pour or pump water into a clean serving container rather than allowing anything except potable water to enter the storage container.
Hand hygiene is equally important. During emergencies, people often work quickly while handling firewood, repairing equipment, caring for livestock, or performing cleanup after storms. Touching the inside of a lid or the opening of a water container with dirty hands transfers microorganisms directly into the stored water. Before handling drinking water containers, wash your hands with soap and clean water whenever possible. If running water is unavailable, use an alcohol-based hand sanitizer and allow it to dry completely before touching dispensing equipment or lids.
Many households use funnels when filling smaller containers from larger storage drums. Funnels simplify the transfer process, but they can also become a major source of contamination if they are not properly cleaned. A funnel stored in a workshop or garage may collect dust, insects, sawdust, or chemical residue over time. Before using any transfer equipment, inspect it carefully, wash it if necessary, and sanitize it when practical. Store funnels, pumps, and hoses in sealed plastic containers or clean storage bags between uses to reduce contamination.
Dedicated equipment should always be used for potable water. A bucket used to collect stream water should never be used to transfer drinking water without first being thoroughly cleaned and sanitized. Likewise, ordinary garden hoses are not intended for potable water and may introduce unpleasant tastes or unwanted chemicals. Hoses specifically manufactured for drinking water are widely available and are typically identified as potable-water-safe. Keeping separate equipment for untreated and treated water greatly reduces the possibility of accidental cross-contamination.
The exterior of storage containers should not be ignored. Containers stored in garages, basements, sheds, or utility rooms gradually accumulate dust, cobwebs, pet hair, and other debris. Before opening a container, wipe the lid and surrounding area with a clean cloth. This prevents loose contaminants from falling into the water when the lid is removed. Although this step requires only a few seconds, it eliminates one of the simplest pathways by which contamination enters stored water.
Children require additional consideration because they naturally interact with water differently than adults. Young children may drink directly from storage containers, place cups back into the water after drinking, or touch the inside of lids without understanding the consequences. During extended emergencies, designate one adult to manage the primary water supply. This not only reduces contamination but also allows daily consumption to be monitored more accurately.
Water removed from long-term storage should be transferred into smaller daily-use containers whenever practical. These containers can be refilled as needed while the primary storage containers remain sealed. If contamination occurs within a smaller container, only a small portion of the water supply is affected rather than hundreds of litres stored in the primary reserve.
Treat untreated water and potable water as two completely separate systems. Collection buckets, hoses, pumps, and storage containers used for untreated water should be clearly identified and never confused with drinking water equipment. Waterproof labels, coloured tape, or permanent markings provide quick visual identification even under poor lighting conditions. Maintaining this separation significantly reduces the likelihood of untreated water being consumed accidentally.
Cross-contamination can also occur after water has been treated. For example, water filtered through a portable filter may immediately become contaminated again if it is poured into an unclean container. Similarly, purified water transferred through a dirty hose or stored in a contaminated bottle loses much of the benefit provided by the treatment process. Every stage of the process – from collection to treatment to storage – must remain clean if the final product is expected to remain safe.
Developing consistent procedures is the most effective defense against cross-contamination. Perform each task in the same order every time. Clean hands first, inspect equipment, prepare clean containers, transfer water carefully, seal the primary container immediately, and return all equipment to clean storage after use. Repetition builds habits, and good habits reduce mistakes during stressful emergencies.
Common Mistake
Opening a large storage container every time someone needs a glass of water. Repeated opening unnecessarily exposes the entire water supply to contamination. Instead, transfer water into a smaller daily-use container while keeping the primary reserve sealed.
Safety Note
Never place untreated water into a container that previously held treated drinking water unless the container has first been cleaned and sanitized. Cross-contamination works both directions.
Pro Tip
Keep a dedicated “water sanitation kit” beside your storage system. Include clean funnels, a potable-water-safe hose, food-grade gloves, clean cloths, replacement gaskets, sanitizer, waterproof labels, and permanent markers. Having everything together encourages proper handling every time water is transferred.
Common Sources of Cross-Contamination
| Source of Contamination | How It Happens | Prevention |
|---|---|---|
| Dirty hands | Touching lids, spigots, or container openings | Wash or sanitize hands before handling water |
| Cups dipped into containers | Introduces bacteria and food residue | Pour or pump water into cups instead |
| Dirty funnels | Transfers dust and microorganisms | Clean and sanitize before every use |
| Garden hoses | Non-potable materials contaminate water | Use potable-water-safe hoses only |
| Shared buckets | Untreated and treated water become mixed | Maintain dedicated equipment |
| Dirty container lids | Debris falls into stored water | Wipe lids before opening |
| Improper storage of equipment | Pumps and hoses collect dirt | Store equipment in sealed containers |
| Children accessing storage | Accidental contamination | Designate one person to manage water |
Safe Water Handling Procedure
            Need Drinking Water
                    │
                    ▼
         Wash or Sanitize Hands
                    │
                    ▼
         Inspect Transfer Equipment
                    │
                    ▼
          Clean Equipment?
             │             │
            Yes            No
             │             ▼
             │      Clean & Sanitize
             ▼
      Wipe Container Lid
             │
             ▼
   Dispense Water Through Spigot
             │
             ▼
 Transfer to Daily-Use Container
             │
             ▼
  Seal Primary Container Immediately
             │
             ▼
 Clean & Store Equipment
Troubleshooting Cross-Contamination Problems
| Observation | Possible Cause | Corrective Action |
|---|---|---|
| Water develops unusual odour after opening | Dirty transfer equipment | Clean, sanitize, and refill container |
| Sediment appears after repeated use | Dust entering during dispensing | Keep container sealed and wipe lid before opening |
| Green growth inside container | Sunlight and repeated contamination | Discard water, sanitize container, relocate storage |
| Water tastes unusual | Non-potable hose used | Replace hose with drinking-water-safe hose |
| Multiple family members become ill | Cross-contamination during dispensing | Review sanitation procedures and disinfect equipment |
Real-World Example
During a week-long power outage, one household relied on a fifty-five-gallon storage drum located in the basement. Each family member removed the lid several times each day and dipped a kitchen measuring cup directly into the water. After four days, the water developed a stale odour even though it had been perfectly clean when the outage began. The problem was not the storage container or the water itself—it was the repeated introduction of bacteria from hands, countertops, and kitchen utensils.
After the outage, the family modified their system by installing a food-grade dispensing spigot near the bottom of the drum and transferring several litres each morning into a smaller sanitized daily-use container kept in the refrigerator. The large storage drum remained sealed except during refilling. During later emergency exercises, the family found that this simple change not only preserved water quality but also reduced daily handling time and made it much easier to monitor consumption.
The lesson is straightforward: the safest emergency water is not only stored correctly – it is handled correctly every time it is used.
Maintaining Water Storage Equipment
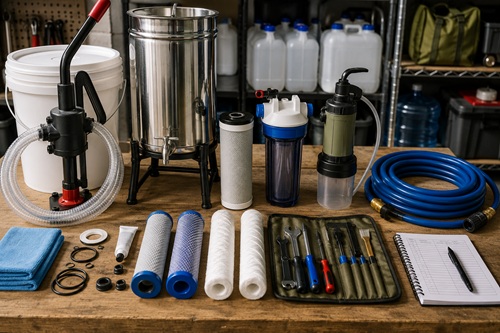
An emergency water storage system is much more than the containers holding the water. Every supporting component – including pumps, spigots, hoses, gravity filters, portable filters, replacement cartridges, treatment chemicals, storage racks, and maintenance tools – plays an important role in ensuring safe drinking water remains available throughout an emergency. A failure in any one of these components can make an otherwise excellent water storage system difficult or even impossible to use.
Many people spend considerable time selecting storage containers but give very little thought to the equipment required to access the water later. During a power outage, for example, a fifty-five-gallon (208-litre) drum may contain hundreds of pounds of perfectly safe drinking water, yet without a transfer pump or dispensing system, accessing that water becomes difficult and increases the risk of contamination. Equipment should therefore be viewed as an integral part of the water storage system rather than as optional accessories.
The first step in maintaining water storage equipment is creating a complete inventory. Walk through your storage area and list every item associated with water collection, storage, treatment, and distribution. Include transfer pumps, siphons, gravity filters, portable filters, replacement cartridges, hoses, funnels, treatment chemicals, spare gaskets, O-rings, dispensing valves, cleaning brushes, storage containers, and any specialized tools required for repairs. Having a written inventory makes inspections more systematic and reduces the likelihood of discovering missing equipment during an emergency.
Manual transfer pumps require surprisingly little maintenance, but they should never remain unused for years at a time. Rubber seals gradually dry out, internal valves may stick, and moving parts can become stiff if left idle. During routine inspections, assemble the pump and transfer several gallons of clean water from one container to another. This confirms that the pump continues operating correctly while allowing you to become familiar with its operation before an actual emergency.
Electric transfer pumps require additional attention because they depend on external power sources. Inspect power cords for cuts or worn insulation, verify battery condition where applicable, and confirm that backup power sources such as generators or portable power stations remain capable of operating the pump. Testing the complete system rather than the pump alone provides much greater confidence that water can be accessed when electrical service is unavailable.
Water filters should never be placed into long-term storage immediately after use unless they have been cleaned according to the manufacturer’s recommendations. Sediment left inside filter housings may harden over time, while moisture trapped within some filter elements encourages biological growth or damages the filter media. Always clean, dry, and prepare filters exactly as recommended by the manufacturer before returning them to storage.
Replacement filter cartridges deserve special attention because they represent one of the most common oversights in emergency planning. Every filter eventually reaches the end of its useful life. Waiting until an emergency to discover that replacement cartridges are unavailable significantly reduces the value of the filtration system. Keep replacement cartridges sealed in their original packaging and store them beside the primary filter rather than elsewhere in the home. During annual inspections, verify that replacement elements remain dry, undamaged, and within the manufacturer’s recommended storage period.
Dispensing valves and spigots should also be tested regularly. Open and close each valve several times while checking for leaks, excessive stiffness, or damaged threads. Remove and inspect rubber washers or O-rings if practical. These inexpensive components often fail long before the rest of the storage container and are among the easiest parts to replace before an emergency occurs.
Flexible hoses gradually deteriorate even when they are rarely used. Examine the entire length of every hose for cracks, discoloration, soft spots, mold, or loose fittings. If a hose is intended for drinking water, verify that it is specifically manufactured for potable water rather than ordinary garden irrigation. Drinking-water-safe hoses reduce the possibility of unpleasant tastes and chemical migration while improving long-term durability.
Treatment chemicals require periodic replacement regardless of whether they have been used. Household bleach gradually loses strength over time, particularly when exposed to heat and sunlight. Water purification tablets also have recommended storage lives that should be monitored carefully. Mark purchase dates directly on each container using a permanent marker and replace treatment chemicals before their effectiveness becomes questionable.
Supporting tools are frequently overlooked. Wrenches for tightening fittings, food-grade lubricants for O-rings, replacement screws, spare caps, cleaning brushes, measuring containers, and repair kits should remain stored with the water equipment rather than somewhere else in the workshop. During an emergency, searching for missing tools wastes valuable time and increases frustration.
Do not overlook printed documentation. Instruction manuals explain maintenance procedures, filter cleaning requirements, replacement intervals, and troubleshooting steps that are difficult to remember after equipment has remained unused for several months or years. Store manuals inside waterproof sleeves or plastic document protectors and keep them with the equipment rather than relying on electronic copies that may not be accessible during a power outage.
One of the best ways to verify that the entire system remains operational is to conduct a complete annual equipment exercise. Assemble the pumps, filters, hoses, storage containers, and treatment equipment exactly as they would be used during an emergency. Transfer water between containers, filter several litres, inspect for leaks, and disassemble everything for cleaning afterward. These practical exercises often reveal small issues that routine visual inspections fail to identify.
Finally, document every inspection and maintenance activity. Record the inspection date, equipment tested, replacement parts installed, chemicals replaced, repairs completed, and any observations requiring future attention. Over time, these records establish a maintenance history that helps identify recurring problems while ensuring no component is accidentally overlooked.
Common Mistake
Assuming that equipment stored on a shelf will work simply because it appears to be in good condition. Pumps, filters, and valves should be tested, not merely inspected.
Safety Note
Never lubricate water storage equipment with automotive grease or petroleum-based lubricants. Use only food-grade lubricants approved for potable water systems.
Pro Tip
Store all water-related equipment together in one clearly labelled container or cabinet. When every component is organized in one location, inspections become faster, maintenance is easier, and emergency setup takes only a few minutes.
Water Equipment Maintenance Schedule
| Equipment | Inspection Frequency | Maintenance Procedure | Replace When |
|---|---|---|---|
| Storage Containers | Every 6 months | Inspect for cracks, UV damage, leaks | Structural damage is found |
| Manual Transfer Pump | Every 6 months | Operate and inspect seals | Pump leaks or loses suction |
| Electric Pump | Every 6 months | Test with backup power | Motor or electrical components fail |
| Gravity Filter | Every 6 months | Clean housing and inspect elements | Housing cracks or filters expire |
| Portable Filter | After use / Every 6 months | Clean according to manufacturer | Filter reaches rated capacity |
| Drinking Water Hose | Every 6 months | Inspect for cracks and mold | Hose deteriorates or leaks |
| Dispensing Valve | Every 6 months | Test operation and inspect seals | Valve leaks or binds |
| Treatment Chemicals | Annually | Verify age and storage condition | Expired or effectiveness uncertain |
| Spare Gaskets & O-Rings | Annually | Inspect flexibility | Cracked, flattened, or brittle |
Equipment Maintenance Workflow
          Begin Equipment Inspection
                    │
                    ▼
          Inventory All Components
                    │
                    ▼
          Visually Inspect Equipment
                    │
                    ▼
           Test Equipment Operation
                    │
         ┌──────────┴──────────┐
         │                     │
         ▼                     ▼
    Working Properly?      Problem Found
         │                     │
        Yes                    ▼
         │          Repair or Replace Part
         │                     │
         └──────────┬──────────┘
                    ▼
          Clean Equipment
                    │
                    ▼
     Return to Clean Storage Area
                    │
                    ▼
Update Maintenance Records| Problem | Possible Cause | Corrective Action |
|---|---|---|
| Pump loses suction | Worn seal or check valve | Replace seals and inspect valves |
| Slow water flow | Dirty filter or clogged hose | Clean filter and inspect hose |
| Leaking spigot | Damaged washer or O-ring | Replace gasket or valve |
| Water tastes unusual | Hose not rated for potable water | Replace with drinking-water-safe hose |
| Filter difficult to assemble | Damaged threads or missing gasket | Inspect parts and replace as required |
| Bleach older than one year | Reduced disinfecting strength | Replace with fresh unscented bleach |
| Filter cartridge unavailable | Poor inventory management | Maintain spare cartridges in storage |
Real-World Example
A preparedness group maintained approximately 400 gallons of stored drinking water in several large storage drums. During an annual emergency exercise, they attempted to transfer water using a manual rotary pump that had not been used since the previous year’s training session. Although the pump appeared to be in excellent condition, it failed to draw water because the internal rubber check valve had dried and cracked during storage.
Fortunately, the failure occurred during a scheduled practice exercise rather than an actual emergency. The group replaced the inexpensive rubber components, purchased a complete spare repair kit, and modified their maintenance schedule to include operating every transfer pump during each six-month inspection. They also purchased a second manual pump to eliminate a single point of failure.
The experience demonstrated an important preparedness principle: equipment should never be trusted simply because it looks functional. Confidence comes from regular testing, routine maintenance, and having backup components available before they are needed.
© Prepping Communities. This content is for informational purposes only and not professional advice. Use at your own risk.
Terms | Privacy | Guidelines