
Learn how to grow, harvest, prepare, and preserve traditional herbs, care for minor injuries, and build the practical first-aid skills needed when medical assistance may be hours away.
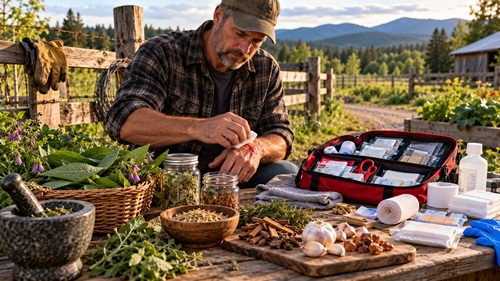
Imagine you’re repairing a fence when a piece of sharp wire catches your hand. There’s blood running down your fingers, dirt around the cut, and nobody else nearby. The nearest hospital is over an hour away, and the roads aren’t particularly good. You have a first-aid kit somewhere in the house, but you’re not sure whether the injury needs stitches or what you should do first. It’s the kind of situation that can make an ordinary afternoon suddenly feel overwhelming.
Now imagine the same situation, except this time you know exactly where your supplies are, how to control the bleeding, how to clean and protect the injury, and which warning signs mean you need professional medical help. You might still need to visit a hospital, but you’re no longer standing there wondering what to do. That difference is what practical medical preparedness is all about.
For generations, rural families grew medicinal plants, collected useful herbs, and preserved natural materials for times when commercial supplies or professional medical assistance were difficult to obtain. Much of this knowledge was passed down through families and communities. Some traditional practices eventually contributed to modern medical research, while others remain historical remedies whose safety and effectiveness have not been reliably established.
For preppers, learning about traditional herbs can still be worthwhile. Growing plants, identifying them correctly, harvesting at the appropriate time, drying them without spoilage, and storing them for future use are practical self-sufficiency skills. Understanding which plants contain potentially useful compounds, which have important safety limitations, and which should never be placed into an open wound is equally valuable.
Five plants frequently associated with traditional herbal preparations are comfrey, slippery elm, myrrh, bayberry, and garlic. They come from different environments, require different growing conditions, and have different preparation methods. Some can be cultivated in ordinary gardens, while others are better obtained from reputable botanical suppliers. Learning how to work with these plants provides a useful introduction to traditional herbal knowledge, but they should not be considered substitutes for sterile wound-care supplies or professional medical treatment.
By the time you’ve finished this lesson, you’ll know how to put together a practical wound-care kit, clean and protect minor injuries, recognize when an injury needs professional attention, and prepare for situations where medical help may be delayed. You’ll also learn how to obtain, grow, harvest, dry, and preserve five plants traditionally associated with herbal medicine, adapting the growing methods to your local climate. The goal isn’t to turn you into a medical professional or suggest that herbs can replace proper wound care. It’s to give you useful skills you can practise at home, so that when something happens, you have a plan and know what to do next.
Start With a Wound-Care Kit You Can Actually Use
Before learning about herbs, take a look at the medical supplies you already have. Many households own a first-aid kit, but that doesn’t necessarily mean they’re prepared to use it. Bandages may be scattered between bathroom cupboards, vehicles, workshops, and kitchen drawers. Some supplies may have expired, while others may have been used and never replaced. When someone gets hurt, searching through cupboards for gauze or discovering that the last dressing was used months ago creates unnecessary stress.
Choose a clean, dry location where your household can easily access its main first-aid supplies. A dedicated cabinet, portable medical bag, or sturdy storage container works well. Protect the contents from dust, moisture, insects, and excessive temperatures, and organize everything so that the most important items can be reached quickly.
Sterile gauze pads, non-stick dressings, adhesive bandages, medical tape, disposable gloves, sterile saline, and suitable pressure dressings should form the foundation of your wound-care supplies. A clean irrigation syringe can help rinse loose dirt from superficial wounds, while clean tweezers may be useful for removing small pieces of debris that are easily accessible. A battery-powered headlamp is also worth including, particularly if an injury occurs at night or during a power outage.
Keep sterile products in their original packaging until needed. Inspect the contents periodically for damaged wrappers, moisture, expired products, or deterioration. A small inventory sheet kept inside the kit can help identify missing supplies before an emergency occurs. When something gets used, replace it rather than waiting until the next time someone is injured.
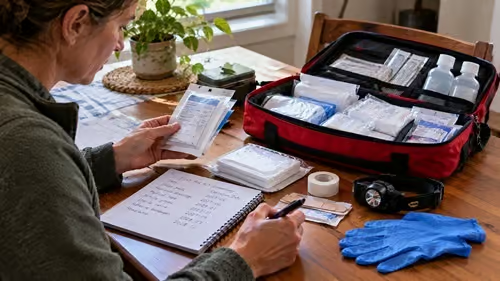
Think about the injuries most likely to occur around your home or property. Gardening may involve thorns, scrapes, and small cuts, while fencing work introduces the possibility of puncture wounds and contaminated lacerations. Woodworking, livestock handling, and machinery maintenance create different hazards. Your first-aid supplies should reflect the activities you actually perform rather than simply containing whatever came in a commercially packaged kit.
If you regularly work outdoors, consider keeping smaller kits in your vehicle, barn, workshop, or other frequently used locations. Someone who cuts their hand while repairing fencing shouldn’t have to walk across a large property to find basic first-aid supplies. The main household kit can contain a broader range of materials, while smaller portable kits provide immediate access to essential supplies.
Households using chainsaws, axes, tractors, or other equipment capable of causing severe injuries should also consider appropriate bleeding-control equipment and recognized training. Commercial tourniquets and hemostatic dressings can be lifesaving in certain emergencies, but they must be used according to their intended purpose and appropriate training. Serious bleeding requires a different response from an ordinary scrape, and those skills are best learned before they’re needed.
A clean working surface is another useful part of household wound-care preparation. This might be a washable countertop, a small table, or a portable surface that can be cleaned before use. The objective is to keep sterile dressings and other supplies away from dirt, animal hair, food waste, and other potential contaminants. Your home doesn’t need a medical treatment room, but you should have somewhere reasonably clean to organize supplies when caring for an injury.
Keep written emergency contact information with the kit, including the local emergency number, nearby medical facilities, and directions to your property if it may be difficult for emergency responders to locate. In remote areas, geographic coordinates or clear written directions can be particularly useful. A small notebook can also help record when an injury occurred, what first aid was provided, and whether symptoms changed before professional assessment. Store personal medical information securely.
Once your supplies are organized, become familiar with them. Practise opening a bandage package, positioning a dressing over uninjured skin, and securing it without wrapping too tightly. Ask another household member to locate the gauze, gloves, and sterile saline without assistance. If they have trouble finding anything, reorganize the kit until its contents are easy to understand.
A well-prepared first-aid kit is more than a collection of medical products. It’s a practical resource that household members can locate, understand, and use when something unexpected happens. The value comes from having suitable supplies available and knowing how to use them correctly.
Household First-Aid Kit Readiness Checklist
Check each item as you inspect your supplies.
Having a first-aid kit is a good start, but knowing exactly what’s inside it and when supplies need replacing is just as important. To make this easier, we’ve created a free three-page Household First-Aid Kit Inventory & Inspection Checklist that you can print and use to inspect your medical supplies.
The checklist includes separate pages for household, vehicle, and workshop first-aid kits, with space to record quantities, expiration dates, storage locations, missing supplies, and replacement priorities. It also helps you keep track of inspection dates and improvements that still need attention.
Print a copy, work through each kit, and keep the completed checklist with your preparedness records. Review it periodically and update it whenever supplies are used or replaced. It’s a simple way to make sure your medical equipment is ready when someone needs it.
How to Stop Bleeding and Clean a Minor Wound
Let’s return to the fencing injury. You’ve caught your hand on a sharp wire, and the cut is bleeding. The first thing to do is stop working and move away from the hazard. If you’re helping someone else, wash your hands if possible and put on disposable gloves before touching the injury.
Take a clean piece of gauze or a suitable cloth and apply firm, steady pressure directly over the bleeding area. Avoid repeatedly lifting the dressing to check whether the bleeding has stopped, because doing so can disturb the developing clot. Maintain pressure until minor bleeding is controlled. If blood soaks through, add another dressing over the first while maintaining pressure. If bleeding is heavy, spurting, or cannot be controlled, contact emergency services immediately.
Once the bleeding has stopped and the injury appears superficial, the next priority is cleaning it. Dirt, plant material, and other debris can introduce microorganisms into damaged skin. Rinse the wound thoroughly with clean running water or sterile saline, allowing the liquid to carry away loose contamination. A clean irrigation syringe can help direct a gentle stream of fluid across the surface. Use enough water to remove visible loose dirt rather than wiping the area once and assuming it’s clean.
Wash the surrounding skin with mild soap and water, taking care not to scrub deeply into the injury. Avoid pouring rubbing alcohol or hydrogen peroxide into the wound. Although these products are commonly associated with disinfecting, they can irritate or damage cells involved in healing. If loose debris remains near the surface, it may be possible to remove it carefully using clean tweezers. Material embedded deeply in the wound should not be dug out at home.
After cleaning a minor superficial wound, protect it with a suitable sterile dressing. A thin layer of plain petroleum jelly may help maintain an appropriate moist healing environment for some superficial injuries. The dressing should be secure enough to stay in place without restricting circulation. Change it according to the manufacturer’s instructions and whenever it becomes wet, dirty, or damaged.
Over the following days, examine the wound for increasing redness, warmth, swelling, pain, pus, or other signs of infection. Some tenderness may be expected during normal healing, but worsening symptoms deserve attention. Fever or red streaks spreading from the injury require prompt medical assessment. Dirty wounds also raise the question of tetanus protection, particularly when the person’s vaccination history is uncertain.
A cut that is deep, gaping, numb, difficult to move around, or caused by a puncture or animal bite should not be treated as an ordinary superficial injury. These wounds may require professional assessment even when bleeding appears controlled. Seeking medical care promptly is especially important when the wound is heavily contaminated or there may be damage beneath the skin.
Knowing how to perform basic wound care gives you a procedure to follow when a minor injury occurs. Just as importantly, understanding the limits of that procedure helps you recognize when the situation requires more than household first aid.
Preparing for Wound Care When Water or Power Is Unavailable
Most people don’t think much about running water until they turn on the tap and nothing happens. For households relying on private wells, a power outage can mean losing the water needed for drinking, cooking, washing, and cleaning injuries. In other locations, severe storms, earthquakes, droughts, flooding, infrastructure failures, or water contamination can create similar problems. If someone gets hurt during one of these disruptions, having a backup supply becomes more than a matter of convenience.
A practical solution is to keep several unopened containers of commercially prepared sterile saline with your first-aid supplies. Sterile saline provides a convenient option for rinsing minor wounds without depending on electricity or household plumbing. Safe drinking-quality water can also be used for routine cleaning of minor wounds when available.
Keep a separate reserve of potable water for handwashing and general hygiene. If you store water in reusable containers, make sure they’re food-grade, properly cleaned, and maintained according to safe water-storage practices. If the normal water supply becomes contaminated, use an appropriate treatment method to produce drinking-quality water rather than assuming that clear-looking water is safe.
Consider how you would manage an injury if the water supply failed while someone was working outside. Could you wash your hands, rinse a scrape, and apply a clean dressing using only what you have stored? If not, you’ve identified a preparedness gap that can be corrected before an actual emergency.
Electricity creates similar dependencies. A minor wound can be difficult to examine in poor light, especially when dirt or debris is present. Keep a battery-powered headlamp or lantern with your medical supplies so that both hands remain available while providing first aid. Check the batteries periodically and consider maintaining a backup power source for extended outages.
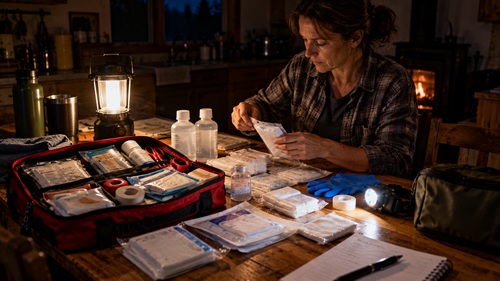
Temperature and weather also influence wound care. Someone who has been injured outdoors in cold conditions may need protection from hypothermia while waiting for assistance. In hot climates, shade and protection from excessive heat may be equally important. During heavy rain or flooding, keeping medical supplies dry and preventing contact with contaminated water may become a priority.
These preparations don’t require expensive equipment or a complicated medical setup. They require understanding which everyday services your household depends upon and making sure you have workable alternatives when those services are interrupted.
Choosing Herbs That Suit Your Climate
Before purchasing seeds, plants, or dried herbs, take a little time to understand what grows successfully in your region. A plant that thrives in a cool, temperate garden may struggle in a tropical climate, while one adapted to dry conditions may fail in soil that remains wet for much of the year. Growing seasons also differ between the Northern and Southern Hemispheres, so planting dates should be based on local temperatures, rainfall, and seasonal conditions rather than a calendar developed for another country.
Start by checking with local nurseries, agricultural extension services, botanical gardens, or experienced growers. These sources can help identify varieties suited to your climate and explain whether a plant is appropriate for outdoor cultivation, container growing, or greenhouse production. They can also advise on local restrictions involving imported plants, protected species, and potentially invasive varieties. If an herb cannot be grown reliably where you live, obtaining responsibly sourced dried material may be more practical than spending time and resources trying to cultivate it under unsuitable conditions.
This is something worth considering before investing in a large medicinal herb garden. A plant that requires constant watering, artificial heating, or specialized equipment may become more of a burden than a useful preparedness resource. If you’re trying to become more self-sufficient, it makes sense to concentrate on plants that can survive and produce reliably with the resources you already have.
Successful cultivation matters more than having a particular plant in your garden. Begin with species suited to your environment, learn how to grow and preserve them properly, and gradually expand your knowledge as your experience develops. Over time, you’ll have a better understanding of which plants are practical for your household and which are better obtained from reputable suppliers.
Growing, Harvesting, and Preparing Comfrey
Comfrey is one of those plants that can become a permanent feature of a homestead once it has been established. Its large, hairy leaves, thick roots, and clusters of bell-shaped flowers make it fairly recognizable, although several closely related species and hybrids exist. Common comfrey, Symphytum officinale, originated in Europe and parts of western Asia but is now cultivated in many temperate regions around the world. Gardeners have traditionally valued it for its vigorous growth, contribution to composting, and long history in external herbal preparations.
For someone interested in growing useful plants as part of a preparedness garden, comfrey offers an opportunity to learn about perennial cultivation. Unlike annual vegetables that must be replanted every season, an established comfrey plant can return year after year. In suitable conditions, it produces substantial amounts of foliage that can be harvested periodically without destroying the plant. This makes it useful for learning how to manage a renewable garden resource rather than depending on a new planting every spring.
Comfrey generally grows best in temperate climates with fertile soil and adequate moisture. It tolerates cold winters once established and can survive periods of summer dryness, although prolonged drought reduces leaf production. In warmer climates, some afternoon shade can help protect the foliage from excessive heat. In tropical regions with consistently high temperatures and humidity, comfrey may be more difficult to maintain, particularly where the plant cannot experience the seasonal conditions to which it is adapted.
The easiest way to establish comfrey is usually through a nursery-grown plant or root division. Seeds are available for some species, but certain commonly cultivated hybrids produce little or no viable seed. Before purchasing, check the botanical name rather than relying entirely on the word comfrey. This helps ensure that the plant matches the growing instructions and characteristics being described.
Choose the planting location carefully because comfrey develops a substantial root system and can be difficult to remove. A permanent bed near a composting area or along the edge of a garden is often more practical than planting it among vegetables that require annual cultivation. The soil should drain reasonably well while retaining enough moisture to support vigorous leaf growth. Incorporating finished compost before planting can improve soil structure and fertility, particularly in sandy or depleted soils.
Young plants should be watered regularly while their roots become established. Once mature, comfrey generally requires less attention, although supplemental water during prolonged dry periods can improve growth. Mulching around the plant helps conserve soil moisture, suppress weeds, and moderate soil temperature. In regions with very wet conditions, avoid locations where water remains standing around the roots for extended periods.
Once the plant has developed enough foliage to recover from cutting, harvesting can begin. Rather than removing every leaf, take a portion of the healthy outer leaves and allow the remaining growth to continue supporting the plant. In productive temperate gardens, multiple harvests may be possible during the growing season. However, young or stressed plants should be harvested lightly, and cutting should stop early enough for the plant to recover before cold weather or another period of environmental stress.
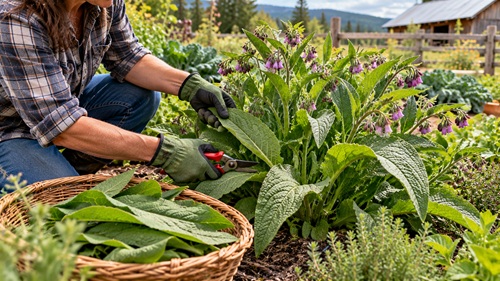
For botanical study and preservation, choose leaves that are healthy and free from visible disease. Avoid collecting material from roadsides, industrial sites, or areas treated with herbicides and pesticides. Inspect the harvested leaves carefully, removing insects, damaged portions, and visible debris before drying. Wearing gloves and long sleeves can also make harvesting more comfortable because the coarse hairs on comfrey leaves may irritate sensitive skin.
Comfrey leaves contain considerable moisture, so drying them properly requires patience. Spread the leaves in a single layer on clean mesh screens or drying racks in a sheltered, well-ventilated location. In humid climates, a dehydrator dedicated to non-food botanical materials may provide more consistent drying conditions. Avoid piling leaves together, because trapped moisture can encourage mould growth. The material should be completely dry and brittle before it is placed into storage.
Once dried, store the leaves whole in clean, airtight containers protected from moisture, excessive heat, and sunlight. Label each container with the botanical name, date of harvest, and intended use. Keeping the material whole makes it easier to identify later and reduces unnecessary exposure to fine plant dust. These simple records also help you compare harvests from different growing seasons and recognize whether your drying and storage methods are working.
Comfrey contains allantoin, a compound investigated for its relationship to skin conditioning and tissue repair. This helps explain its traditional medicinal reputation, but the plant also contains pyrrolizidine alkaloids, some of which can cause serious liver damage. Comfrey should not be consumed, and homemade preparations should not be applied to open wounds. Commercial products intended for external use should only be used according to their specific safety instructions.
A practical reason to grow comfrey is its usefulness in gardening. Healthy leaves can be added to compost piles, where they break down and contribute organic material. They can also be used as mulch around suitable garden plants. These applications allow a household to benefit from cultivating comfrey without relying on unverified medical treatments.
Comfrey is a good example of why traditional plant knowledge should include more than descriptions of historical remedies. Learning how to grow it, manage its roots, harvest without exhausting the plant, and preserve samples properly develops useful gardening skills. Just as importantly, understanding its safety limitations prevents a traditional reputation from being mistaken for proof that a homemade preparation is safe.
Growing and Preparing Slippery Elm
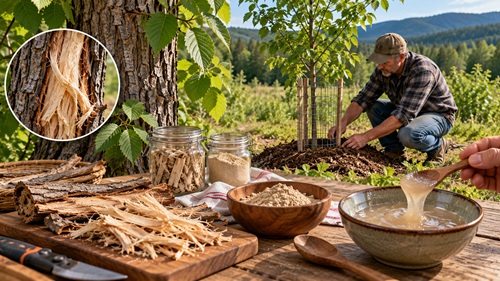
Slippery elm, Ulmus rubra, is a deciduous tree native to eastern and central North America. It is best known in traditional herbal medicine for the mucilage contained in its inner bark. When mixed with water, this material develops a slippery, gel-like consistency that explains its historical use in soothing preparations.
Unlike comfrey or garlic, slippery elm is not a plant that can be grown quickly in a small garden and harvested within a single season. It is a tree that requires suitable growing conditions, adequate space, and years of development. For people interested in long-term homesteading or establishing a diverse woodland property, growing native or locally suitable trees can be a valuable investment. However, slippery elm should not be viewed as a convenient source of emergency wound-care material.
Slippery elm grows naturally in temperate regions where winters are cold and summers provide sufficient warmth for growth. It generally prefers fertile, reasonably moist, well-drained soils and can grow in full sun or partial shade when young. Its natural distribution provides useful guidance for cultivation, but growing success depends on local temperature patterns, soil conditions, moisture availability, and disease pressure.
Readers living outside North America should first determine whether slippery elm can be legally and responsibly imported or cultivated in their region. Some countries restrict the movement of live plants and seeds to prevent the introduction of pests and diseases. In warmer tropical or arid climates, the tree may be poorly suited to outdoor cultivation. In those locations, obtaining responsibly sourced dried material from an established botanical supplier is generally more practical than attempting to grow the tree.
If suitable growing conditions are available, slippery elm can be established from nursery-grown saplings or, with greater patience and appropriate propagation knowledge, from fresh viable seed. A healthy nursery-grown tree is usually the easier starting point for a household planting project. Choose a location with enough room for the tree’s mature height and canopy rather than placing it close to buildings, underground services, or other structures.
Prepare the planting area by removing competing vegetation and loosening compacted soil where necessary. The planting hole should be wide enough to accommodate the roots without forcing them into a tight circle, but the tree should not be planted deeper than its original root level. After planting, water thoroughly and apply mulch around the surrounding soil, leaving a gap near the trunk to prevent excessive moisture accumulation against the bark.
Young trees require attention during establishment, particularly during prolonged dry periods. Watering should encourage the development of a healthy root system without leaving the soil continuously waterlogged. Protect the trunk from lawn equipment, grazing animals, and other physical damage. Slippery elm is also susceptible to Dutch elm disease and other health problems, so local forestry or horticultural guidance is useful when selecting and maintaining trees.
One of the most important things to understand about slippery elm is that harvesting its inner bark can seriously damage the tree. Stripping bark around the trunk interrupts the movement of nutrients and can eventually kill it. Even partial bark removal creates wounds that may expose the tree to disease and insect damage. A tree that has taken years to establish can be permanently harmed by careless harvesting.
For most preppers, purchasing responsibly sourced slippery elm inner bark is the better option. Look for suppliers that identify the botanical species, provide information about sourcing, and sell material intended for the appropriate educational or commercial use. Avoid products with unclear origins or unsupported medical claims. Responsible sourcing matters because demand for bark can encourage destructive harvesting of wild trees.
Dried slippery elm is commonly available as bark pieces or powder. Store it in a clean, airtight container in a cool, dry location, protected from insects and moisture. In humid regions, inspect the container regularly for condensation or signs of deterioration. Any material showing mould, unusual odours, or moisture damage should be discarded.
One useful way to understand slippery elm is to observe how its mucilage behaves. Place a small amount of food-grade powder in a clean bowl and gradually stir in water. As the material absorbs moisture, the mixture thickens and becomes more cohesive. This demonstrates the physical property that made slippery elm attractive in traditional preparations. The mixture should be discarded after the demonstration rather than stored or used on an injury.
Although slippery elm’s mucilage is an interesting natural substance, a homemade paste is not equivalent to a sterile wound dressing or approved medical adhesive. Its ability to form a gel does not establish that it can safely close wounds or prevent infection. This distinction matters because a substance that looks protective or forms a coating is not necessarily suitable for damaged tissue.
Slippery elm offers a useful lesson about long-term resource management. Some plants can be harvested several times during a growing season, while others require years of growth and may be permanently damaged by removing the material traditionally associated with them. Learning when to cultivate, when to harvest, and when to leave a resource undisturbed is an important part of sustainable preparedness.
Obtaining, Growing, and Storing Myrrh
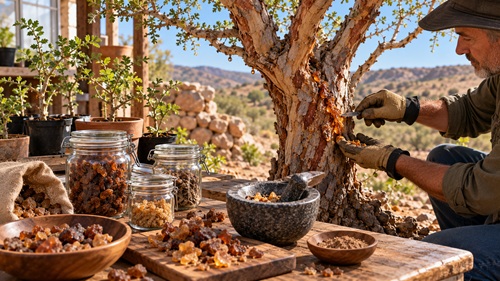
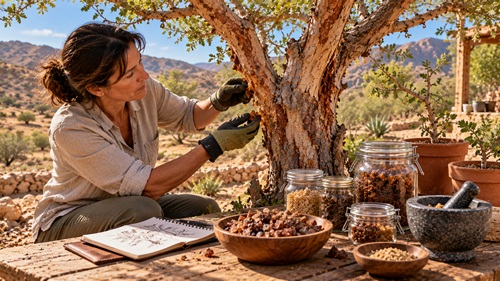
Myrrh is an aromatic resin obtained from certain trees belonging to the Commiphora genus, particularly Commiphora myrrha. These trees are naturally associated with dry regions of northeastern Africa and the Arabian Peninsula, where their resin has been collected and traded for thousands of years. Myrrh has a long history in traditional medicine, religious ceremonies, and the preparation of perfumes and aromatic materials. For someone interested in traditional herbal knowledge, it provides an opportunity to learn about a natural resource that comes from trees rather than the leaves or roots of ordinary garden plants.
Unlike common garden herbs, myrrh is not a practical outdoor crop for most households living in cool or wet climates. The trees are adapted to warm, relatively dry environments and generally require excellent drainage. Prolonged exposure to freezing temperatures or waterlogged soil can damage or kill them. This makes myrrh quite different from plants such as comfrey, which can survive cold winters and return each growing season.
For readers living in suitable arid or semi-arid tropical and subtropical regions, cultivating myrrh may be possible. However, success depends on obtaining correctly identified plant material and understanding the growing requirements of the particular species. The name myrrh is sometimes applied broadly to resins from related plants, so botanical identification is important. A tree producing an aromatic resin is not necessarily a source of genuine myrrh.
Finding suitable planting material may be more difficult than growing ordinary herbs. Myrrh trees are not commonly stocked by general garden centres outside their native or established cultivation regions. Specialist nurseries, botanical growers, and reputable suppliers of drought-adapted plants are more likely to offer correctly identified specimens. Before ordering seeds, cuttings, or live plants from another country, check local agricultural and biosecurity regulations. Many countries restrict the importation of plant material to prevent the introduction of pests, diseases, and potentially invasive species.
Where suitable planting material is available, choose a location that receives strong sunlight and has exceptionally good drainage. Myrrh trees are adapted to environments where rainfall may be limited or seasonal, and they generally perform poorly when their roots remain continuously wet. Heavy clay soil that holds water for extended periods is unsuitable unless drainage can be substantially improved. Raised planting areas or naturally rocky, free-draining soils may provide better conditions.
For container cultivation, use a deep pot with adequate drainage holes and a growing medium designed for drought-adapted plants. A mixture containing mineral components such as coarse sand, pumice, or other suitable drainage materials can help prevent excessive moisture retention. The exact composition should be adjusted to the species and local growing conditions rather than assuming that every succulent or drought-tolerant tree requires identical soil.
Young plants need more attention than established trees. Water carefully during establishment, allowing excess moisture to drain away. Avoid maintaining continuously damp soil, particularly during cooler periods when growth slows. Once established, the plant may tolerate extended dry periods, but its water requirements will still depend on temperature, container size, and growing conditions. Someone accustomed to growing vegetables in consistently moist soil may need to adjust their watering habits considerably when working with a drought-adapted tree.
In climates where temperatures occasionally fall below the plant’s tolerance, container cultivation may allow the tree to be moved into a protected greenhouse or warm indoor growing area. However, indoor cultivation requires sufficient sunlight, ventilation, and careful watering. A tree that survives indoors may not grow vigorously or produce useful quantities of resin. For most households outside suitable climates, growing myrrh should be considered a specialized botanical project rather than a dependable way to produce medicinal materials.
Myrrh resin is collected commercially after it emerges from openings in the bark and gradually hardens. In some traditional production systems, carefully controlled incisions are made to encourage resin production. The resin forms droplets or irregular masses that can be collected after sufficient hardening. This process requires knowledge of the tree’s condition and appropriate harvesting practices. Excessive tapping or poorly placed cuts can damage the tree, particularly in dry environments where recovery may be slow.
For households that do not have access to mature, suitable trees, purchasing dried resin is generally the most practical option. Look for suppliers that identify the botanical source and provide information about harvesting and processing. Whole resin pieces are preferable for a botanical reference collection because their appearance, texture, and aroma can be examined before further processing. Products sold simply as myrrh powder without clear identification may be more difficult to evaluate.
Good-quality dried myrrh commonly appears as irregular amber, reddish-brown, or darker pieces with a distinctive aromatic smell. Colour and appearance can vary, so these characteristics alone cannot confirm authenticity. Examine the resin for obvious foreign material, unusual moisture, or signs of deterioration before transferring it to a storage container.
A clean glass jar with a tightly fitting lid provides suitable storage for small household quantities. Keep the container away from direct sunlight, excessive heat, and damp conditions. Label it with the botanical name, supplier, purchase date, and intended purpose. In humid climates, inspect stored material periodically to ensure moisture has not entered the container.
If a small amount of powdered resin is needed for botanical examination, place a piece in a mortar and crush it gently with a pestle dedicated to non-food materials. Work in a well-ventilated area and avoid inhaling the dust. There is little advantage to grinding an entire supply into powder simply for storage. Whole resin is easier to identify and generally exposes less surface area to environmental conditions.
Myrrh contains compounds that have been investigated for potential antimicrobial and anti-inflammatory activity, which helps explain its historical medicinal reputation. However, laboratory findings do not establish that ordinary myrrh resin can safely disinfect or heal an open wound. Concentrated preparations may irritate sensitive skin or trigger allergic reactions, and homemade myrrh powders should not be placed into injuries.
For preppers, myrrh offers a useful lesson about the limits of local self-sufficiency. Not every useful plant can be cultivated in every climate, and attempting to grow an unsuitable species may consume resources better used elsewhere. Sometimes preparedness means knowing which materials can be produced locally, which are more practical to obtain from responsible suppliers, and how to preserve them properly. Understanding those differences helps households develop realistic plans rather than relying on resources they may never be able to produce themselves.
Growing, Harvesting, and Preparing Bayberry
Bayberry is a common name used for several related shrubs and small trees, and this can create confusion when researching traditional herbal preparations. Northern bayberry, Morella pensylvanica, is native to eastern North America and is particularly associated with coastal environments. Southern bayberry, Morella cerifera, is found in warmer regions. Other related plants occur elsewhere, but they should not automatically be treated as interchangeable medicinal species.
Bayberry has historically attracted attention because certain species contain tannins and other compounds associated with astringent properties. An astringent substance interacts with proteins and can produce a tightening or drying effect on some tissues. This explains part of bayberry’s traditional medicinal reputation, although it does not establish that homemade bark preparations can safely treat wounds or control significant bleeding.
For someone establishing a preparedness garden, bayberry may be useful as a landscape shrub, particularly where local conditions suit the species. Northern bayberry is relatively tolerant of cold, wind, and coastal exposure. Southern bayberry is generally better suited to warmer temperate and subtropical climates. Both can tolerate some challenging growing conditions, although their specific requirements differ.
Readers living outside the natural range of these plants should investigate whether a suitable species can be cultivated responsibly in their region. Some related shrubs may be available from local nurseries, but the common name alone is not enough to confirm their identity. Before purchasing, check the botanical name and determine whether the species is appropriate for the local climate and ecosystem. In some locations, introducing non-native shrubs may be restricted or discouraged because of their potential environmental effects.
The easiest way to establish bayberry is usually through a healthy nursery-grown shrub. Seeds can also be used, but germination may be slow or require species-specific treatment to overcome dormancy. For someone beginning a household planting project, purchasing an established young plant often provides more predictable results.
Choose a planting location with adequate sunlight and suitable drainage. Northern bayberry commonly performs well in sandy or relatively poor soils, while southern bayberry can tolerate a broader range of soil moisture conditions. Both benefit from careful watering during establishment, even though mature plants may become relatively tolerant of environmental stress.
Prepare the planting area by removing competing weeds and loosening compacted soil where necessary. Dig a hole wide enough to accommodate the roots without forcing them into a tight circle, and position the shrub at approximately the same depth it occupied in its nursery container. After planting, water thoroughly to settle the soil around the roots.
During the first growing season, monitor moisture levels carefully. Newly planted shrubs have limited root systems and may struggle during prolonged dry periods. Water deeply when needed, allowing the soil to drain rather than keeping it continuously saturated. A layer of mulch around the planting area can help conserve moisture and reduce weed competition, but leave a small gap around the stems to prevent excessive moisture accumulation.
Once established, suitable bayberry species can become relatively low-maintenance plants. Pruning may be used to remove damaged branches or maintain the desired shape, although excessive pruning can reduce flowering and berry production. Some bayberry species have separate male and female plants, so fruit production may depend on having compatible plants nearby. This is worth checking when purchasing shrubs, particularly if berry production is one of the reasons for including them in a preparedness garden.
Bayberry can also contribute to a more diverse homestead landscape. Depending on the species and location, its berries may provide food for wildlife, while the shrubs offer shelter and help stabilize suitable soils. Some species also have associations with nitrogen-fixing microorganisms, allowing them to grow in soils where other shrubs may struggle. These characteristics can make bayberry useful beyond its traditional herbal reputation, particularly on properties where improving soil conditions and supporting local wildlife are part of long-term land management.
The part most commonly associated with historical astringent preparations is the root bark. However, harvesting root bark is destructive because it involves disturbing or damaging the plant’s root system. Removing substantial amounts can weaken or kill a shrub, particularly when the plant is young or already stressed. A shrub that has taken several years to establish may provide far greater long-term value when left growing than when its roots are removed for a small quantity of bark.
For educational purposes, purchasing responsibly sourced dried root bark is generally preferable to digging up established plants. Look for suppliers that identify the botanical species and provide information about the material’s origin. Avoid collecting roots from protected areas, public lands without permission, or locations where harvesting may damage sensitive plant populations.
Dried bark should be inspected before storage. Healthy material should be dry and free from visible mould, insect infestation, or unusual deterioration. Keep the bark in larger pieces when possible because this makes identification easier and reduces unnecessary processing. Place it in a clean, airtight container and store it away from excessive humidity, sunlight, and heat.
In humid tropical or coastal environments, moisture control is especially important. Containers should be checked periodically for condensation, musty odours, or changes in the material’s condition. Any bark showing signs of mould or contamination should be discarded rather than attempting to dry it again for medicinal use.
Bayberry root bark contains compounds associated with astringent effects, but there is insufficient reliable clinical evidence that homemade bayberry powder can safely control bleeding or prevent infection in open wounds. Significant bleeding requires appropriate first aid, and unsterilized plant material should not be placed into damaged tissue.
For preppers, bayberry provides an opportunity to learn about plant identification, climate suitability, sustainable harvesting, and long-term landscape planning. Its usefulness as a shrub may be more dependable than its historical reputation as a medicinal preparation. Maintaining a healthy, established plant that supports the surrounding environment can provide lasting benefits without damaging it to obtain material for an unproven treatment.
Growing, Harvesting, and Preserving Garlic
Garlic, Allium sativum, is probably the most practical of the five plants for households interested in producing useful resources themselves. Unlike slippery elm or myrrh, which require specialized growing conditions or many years to develop, garlic can be grown in ordinary gardens, raised beds, and suitable containers. It provides a familiar food ingredient, can be preserved for future use, and offers an opportunity to learn several important self-sufficiency skills without needing a large property.
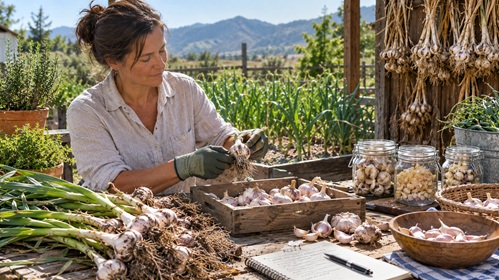
Garlic has been cultivated for thousands of years and has a long history in both cooking and traditional medicine. Its strong aroma and distinctive flavour come from sulfur-containing compounds that develop when the cloves are cut or crushed. Although some of these compounds have attracted scientific interest because of their biological activity, garlic’s most dependable role in a preparedness household is as a food crop that can be grown, harvested, stored, and replanted.
One of the advantages of growing garlic is that it doesn’t require much space. A small raised bed can produce enough bulbs to supply a household with fresh garlic for part of the year, while a larger planting may provide enough for cooking, preservation, and the following season’s crop. Even someone living in an urban environment may be able to grow a modest quantity in deep containers on a sunny patio or balcony, provided the plants receive suitable light, moisture, and growing conditions.
Garlic is cultivated around the world, but successful growing methods vary according to climate. In temperate regions with cold winters, garlic is commonly planted during autumn and harvested the following summer. In milder climates, planting may occur during the cooler part of the year. Tropical regions can present additional challenges because many garlic varieties require a period of cooler temperatures to develop properly. Planting schedules should therefore follow local seasonal conditions rather than assuming that methods used in northern climates will work everywhere.
Choosing the right variety is one of the most important decisions. Hardneck garlic generally performs well in regions with cold winters and produces a firm central stalk. Many hardneck varieties also develop edible flower stalks called scapes. Softneck garlic is often better suited to milder climates and can provide good storage characteristics when grown and cured properly. These are general tendencies rather than absolute rules, and local growing experience is often the best guide.
In warmer regions, selecting locally adapted varieties becomes particularly important. Some growers use garlic with lower chilling requirements, while others rely on carefully managed planting material and seasonal growing conditions. Local agricultural suppliers, experienced gardeners, and regional growing guides can usually provide more useful advice than instructions written for a completely different climate.
Garlic is typically grown from individual cloves rather than botanical seed. Purchase healthy planting garlic from a reputable seed or agricultural supplier whenever possible. Ordinary supermarket garlic may have been treated to discourage sprouting or may carry diseases that should not be introduced into a garden. Certified disease-free planting stock is particularly valuable when establishing a crop that you intend to reproduce over several growing seasons.
Choose a location with good sunlight and well-drained soil. Garlic does not perform well when its roots remain waterlogged for extended periods, so raised beds can be useful in regions with heavy rainfall or poorly draining soil. Incorporating finished compost before planting helps improve soil structure and provides nutrients for developing bulbs. If you’re growing garlic in containers, make sure they are deep enough to support root development and have drainage holes that allow excess water to escape.
Separate the cloves shortly before planting, keeping their protective skins intact. Select the largest healthy cloves from each bulb, since larger cloves often produce stronger plants. Place each clove with its pointed end facing upward and the flat root end downward. A common planting depth is approximately five to eight centimetres, with cloves spaced around ten to fifteen centimetres apart. These measurements may need adjustment depending on the variety, soil type, and local climate.
In cold regions, a layer of straw, shredded leaves, or other suitable mulch can help moderate soil temperatures during winter. In warmer climates, lighter mulching may be sufficient to conserve moisture and reduce weeds. Avoid applying excessively thick mulch in hot, humid conditions where it may encourage rot or create habitat for pests. The purpose is to protect the growing environment without creating conditions that damage the developing bulbs.
During active growth, garlic benefits from consistent moisture, particularly while leaves and bulbs are developing. Water deeply when necessary, but allow the soil to drain properly. Prolonged waterlogging can encourage fungal diseases and bulb deterioration. As the plants approach maturity, watering is often reduced to help the bulbs finish developing and prepare for harvest.
Garlic does not compete particularly well with weeds, especially during its early growth stages. Keeping the planting area reasonably clear allows the crop to make better use of available sunlight, water, and nutrients. Mulching and careful hand-weeding can reduce competition without disturbing the developing bulbs. It’s worth checking the plants regularly because weeds that seem harmless early in the season can become difficult to remove once their roots spread among the garlic.
Hardneck garlic often produces a curling flower stalk called a scape. These scapes can be harvested while still tender and used in cooking. Removing them may also help direct more of the plant’s energy toward bulb development. Scapes can be chopped into stir-fries, added to soups, or preserved through suitable food-storage methods. For a household trying to make good use of its garden, they provide an additional harvest before the bulbs themselves are ready.
Knowing when to harvest garlic takes a little experience. In many varieties, the lower leaves begin turning brown while several upper leaves remain green. This is often a useful indication that the bulbs are approaching maturity. However, the exact timing depends on the variety and growing conditions. Harvesting too early can produce undersized bulbs, while leaving mature garlic in the ground too long may cause the protective wrappers to deteriorate.
To harvest, loosen the soil around the bulbs using a garden fork or similar tool, taking care not to puncture or bruise them. Avoid pulling forcefully on the stems if the soil is compacted, because the stalks may break before the bulbs are released. Gently remove loose soil, but do not wash bulbs intended for dry curing unless there is a specific reason and an appropriate drying method.
Freshly harvested garlic usually requires curing before long-term storage. Spread or hang the bulbs in a shaded, dry, well-ventilated location where air can circulate freely. Avoid leaving them in direct intense sunlight, which may damage the bulbs. Depending on humidity, temperature, and airflow, curing may take several weeks. In humid environments, providing adequate ventilation is especially important because moisture trapped around the bulbs can encourage mould and deterioration.
Garlic is generally ready for storage when the necks have dried, the outer wrappers are papery, and the bulbs feel firm. Trim the roots and stems as appropriate for the variety and intended storage method. Store cured bulbs in a cool, dry, well-ventilated location rather than sealing them in airtight plastic bags, where trapped moisture can encourage deterioration.
In hot or humid climates, storing whole garlic for long periods may be more difficult. High temperatures can accelerate sprouting or spoilage, while excessive moisture encourages mould. Under these conditions, dehydrating part of the harvest may provide a more reliable preservation method. This is also useful for households with limited storage space because dried garlic occupies considerably less room than whole bulbs.
Making garlic powder is a practical project that can be completed using an ordinary food dehydrator. Begin by selecting healthy cloves that show no signs of mould, soft spots, or deterioration. Remove the papery skins and slice the cloves into thin, evenly sized pieces. Uniform slices dry more consistently than irregular chunks, reducing the chance that some pieces retain moisture while others are already brittle.
Arrange the slices in a single layer on clean dehydrator trays, leaving space for air to circulate. Follow the dehydrator manufacturer’s recommendations for drying garlic or vegetables. Drying time depends on temperature, humidity, equipment performance, and slice thickness. The pieces should be completely brittle before they are removed. If they remain flexible or feel damp in the centre, additional drying is necessary.
Once the dried garlic has cooled, grind it using clean food-processing equipment. A spice grinder, suitable blender, or mortar and pestle can be used depending on the quantity being prepared. Transfer the finished powder immediately to a clean, dry, airtight food-safe container and label it with the preparation date. Working in small batches can help preserve the remaining dried pieces until they are needed.
Store the powder somewhere cool, dark, and dry. Moisture is one of the greatest threats to preserved garlic powder because it can cause clumping, deterioration, and microbial growth. If the powder develops an unusual smell, becomes damp, or shows signs of mould, discard it. Properly dried and stored garlic powder can provide a convenient seasoning supply when fresh bulbs are unavailable, although storage life will vary with conditions and packaging.
Garlic can also be preserved in other forms, but each method has different safety requirements. Garlic stored in oil presents a particular concern because improper preparation and storage can create conditions suitable for Clostridium botulinum, the bacterium responsible for botulism. Homemade garlic-in-oil preparations should not be stored at room temperature unless prepared using a scientifically validated preservation method. Refrigeration alone does not make such preparations suitable for indefinite storage. For longer-term preparedness, drying garlic is generally a simpler option than attempting to preserve it in oil without an established, tested procedure.
For preppers interested in maintaining a renewable garlic supply, save some of the healthiest bulbs from each harvest for future planting. Select bulbs that are free from disease and representative of the variety’s desirable characteristics. Store planting garlic under suitable conditions until the next growing season, and periodically introduce healthy certified planting stock when needed to reduce the accumulation of disease.
Saving planting stock is particularly useful because it allows a household to gradually develop experience with varieties that perform well in its own growing conditions. Over several seasons, you may discover that certain varieties store longer, tolerate local weather better, or produce more reliable harvests. Keeping simple records of planting dates, harvest quantities, storage performance, and problems encountered can help improve future crops.
Garlic contains compounds that produce allicin when cloves are crushed or chopped. Allicin has demonstrated antimicrobial activity in laboratory studies, which helps explain garlic’s long history in traditional medicine. However, laboratory activity does not establish that homemade garlic preparations are safe or effective wound treatments. Raw garlic and concentrated preparations can cause significant skin irritation and chemical burns, particularly when applied to damaged tissue or trapped beneath a dressing. Garlic should not be placed directly into cuts, scrapes, or other open wounds.
For a preparedness household, garlic offers far more than an interesting historical medicinal reputation. It provides a useful food ingredient, an opportunity to practise planting-stock selection, a crop that can be grown in relatively limited space, and several practical preservation skills. A successful garlic harvest can reduce dependence on commercial food supplies while helping household members become more familiar with growing and storing their own food.
Perhaps the greatest advantage of garlic is that the skills learned from cultivating it can be applied to other crops. Understanding soil drainage, seasonal planting, moisture management, harvesting, curing, and long-term storage provides experience that carries over into onions, shallots, and many other garden plants. Even a small garlic bed can become a useful starting point for building broader food-production and preservation capabilities.
Why Homemade Herbal Powders Should Not Replace Proper Wound Care
Traditional herbal literature sometimes describes combining dried plants into powders, pastes, or other preparations intended for treating injuries. For someone interested in self-sufficiency, the idea can be appealing. Plants can be grown or collected locally, dried materials are relatively easy to store, and some herbs contain compounds that have attracted scientific interest because of their biological properties. When commercial medical supplies are difficult to obtain, it may seem reasonable to turn to materials that previous generations relied upon.
The problem is that traditional use does not necessarily establish that a preparation is safe or effective. There is a considerable difference between a plant containing potentially useful compounds and a medical product that has been tested for treating damaged tissue. Modern wound-care products are manufactured and evaluated for particular purposes, while homemade herbal preparations can vary considerably in composition, cleanliness, and concentration.
One of the greatest concerns is contamination. Plants grow in environments containing soil microorganisms, insects, fungal spores, and other naturally occurring materials. Even when an herb is grown organically, harvested carefully, and dried under clean conditions, that doesn’t mean it is sterile. Drying removes moisture, but it does not reliably eliminate microorganisms. Grinding dried leaves, bark, roots, or resin into powder does not sterilize them either.
This becomes especially important when dealing with cuts, punctures, or injuries contaminated with dirt. Intact skin provides a natural barrier against many environmental microorganisms, but an open wound creates an opportunity for contamination to reach damaged tissue. Introducing unsterilized plant material may increase the risk of infection or complicate the cleaning process.
A homemade powder might appear to protect an injury because it absorbs moisture or forms a crust over the surface. However, that appearance can be misleading. Fine particles may become embedded in damaged tissue, making the wound more difficult to clean. A thick paste may also conceal contamination or make it harder to examine the injury properly. Something that looks like a protective covering is not necessarily helping the wound heal.
There is also the question of how different herbs interact when combined. Each plant contains numerous naturally occurring compounds, and their concentrations can vary according to species, growing conditions, harvesting time, and preparation methods. Two batches of the same herb may not contain identical amounts of the substances associated with its traditional use.
Combining several herbs into one mixture introduces additional uncertainty. A preparation containing multiple plants may expose damaged skin to several potential irritants or allergens at the same time. If a reaction occurs, it may be difficult to determine which ingredient caused the problem. Adding more ingredients does not automatically make a preparation more effective, and a mixture that has been used traditionally is not necessarily supported by reliable clinical evidence.
Another concern is that a homemade preparation may delay appropriate treatment. Someone who believes an herbal powder can stop bleeding or prevent infection may continue using it when the injury actually requires professional medical attention. Deep cuts, puncture wounds, animal bites, heavily contaminated injuries, and wounds involving possible nerve or tendon damage can present complications that are not always obvious from their appearance.
For someone preparing to manage injuries when medical assistance is delayed, the safer approach is to maintain an adequate reserve of suitable first-aid materials. Sterile dressings, appropriate wound-cleaning supplies, and established bleeding-control techniques provide a more dependable foundation than experimenting with unfamiliar plant mixtures. Recognized first-aid training is equally important because having supplies available is only useful when household members understand how to use them.
This doesn’t mean traditional herbal knowledge has no place in preparedness. Learning how plants grow, how they were historically used, and why certain compounds attracted medical interest can still be worthwhile. It also provides an opportunity to understand the difference between traditional observations, laboratory findings, and treatments whose safety and effectiveness have been demonstrated through clinical research.
A useful way to preserve this knowledge is to maintain a botanical reference collection separate from household medical supplies. Dried samples can be stored in clearly labelled containers, accompanied by notes describing their identification, growing conditions, harvesting methods, traditional uses, and known safety concerns. This allows household members to study the materials without confusing them with products intended for treating injuries.
The important lesson is that preparedness involves knowing the limitations of available resources as well as their potential benefits. Understanding how to grow and preserve traditional herbs can strengthen self-sufficiency, but it should not create a false sense of medical capability. When someone is injured, knowing what not to place into a wound can be just as valuable as knowing how to clean and protect it properly.
Herbal Safety Reference: Understanding the Limitations of Traditional Remedies
The five plants discussed in this lesson have different growing requirements, harvesting methods, and traditional uses. They also have different safety concerns. Some contain compounds that can be harmful, while others have physical or chemical properties that may sound medically useful but have not been shown to make homemade preparations safe for treating open wounds.
The following comparison provides a quick reference to the botanical materials traditionally associated with each plant and the main precautions to understand when studying them.
| Plant | Reference material |
Important safety limitation |
|---|---|---|
| Comfrey | Dried leaves | Contains potentially toxic pyrrolizidine alkaloids. Do not ingest or apply homemade preparations to open wounds. |
| Slippery elm | Inner bark | Forms a gel-like mucilage, but this does not make it a sterile wound adhesive or suitable substitute for medical dressings. |
| Myrrh | Dried resin | May irritate sensitive tissue or cause allergic reactions. Homemade preparations are not proven safe wound disinfectants. |
| Bayberry | Root bark | Traditionally valued for its astringent properties, but these do not establish that it can safely control bleeding or prevent infection. |
| Garlic | Dried cloves | Raw garlic and concentrated preparations can cause significant skin irritation and chemical burns, especially when applied to damaged skin. |
Important: These materials are included for botanical education and traditional herbal reference purposes. None should be placed into open wounds as a substitute for proper cleaning, sterile dressings, established bleeding-control methods, or professional medical treatment.
Understanding these differences helps separate useful botanical knowledge from assumptions about medical effectiveness. A plant may be valuable for gardening, food preservation, historical study, or other household purposes without being appropriate for treating an injury.
For preppers, the objective is to preserve traditional knowledge while developing the judgment to recognize when established first-aid methods are necessary. That combination of practical skills and informed decision-making is far more useful than relying on a remedy simply because it has been used for generations.
Caring for Someone When Medical Help Is Hours Away
Imagine someone working on a rural property suffers a deep cut to the hand while repairing equipment. The bleeding has slowed after direct pressure, but the wound is gaping, and there may be damage beneath the skin. The nearest medical facility is several hours away, and heavy rain has made some of the roads difficult to travel. The injured person is conscious and talking, but it’s clear that this is more serious than an ordinary cut.
Situations like this are where medical preparedness becomes particularly important. Knowing how to clean and dress a minor wound is useful, but a serious injury requires a different level of judgment. The immediate priority is to recognize what may be wrong, provide appropriate first aid, and arrange professional medical assistance as quickly as the circumstances allow. Distance from a hospital doesn’t make an injury less serious, and waiting too long to seek help can turn a manageable situation into something much more dangerous.
A deep hand injury may involve tendons, nerves, blood vessels, or other structures that cannot be properly assessed simply by looking at the surface. Someone may be able to move their fingers despite having a significant injury, while numbness, weakness, severe pain, or difficulty moving part of the hand can indicate damage beneath the skin. Even when bleeding appears controlled, a deep or gaping wound deserves prompt medical assessment.
If bleeding is severe, apply firm direct pressure using suitable gauze or a clean cloth and contact emergency services immediately. Life-threatening bleeding from an arm or leg may require a properly applied commercial tourniquet, particularly when direct pressure cannot control the bleeding or cannot be maintained safely. These techniques should be learned through recognized first-aid and bleeding-control training before an emergency occurs. Improvising unfamiliar procedures during a serious injury can create additional risks.
Once immediate bleeding threats have been addressed, protect the injury from further contamination using an appropriate sterile dressing. Avoid repeatedly removing the dressing simply to examine the wound. Deep or contaminated injuries should not be closed with household adhesives, herbal pastes, powders, or improvised stitching. Closing an injury without properly assessing the damage and contamination can create serious complications.
If a large object is embedded in the wound, do not pull it out. Removing it may cause additional tissue damage or worsen bleeding, particularly if the object is affecting a blood vessel. Instead, stabilize the object without pushing it deeper, apply pressure around it if necessary, and arrange emergency medical assistance. Small surface splinters are different from deeply embedded objects, and knowing that distinction can prevent an injured person from making the situation worse.
While waiting for assistance, pay attention to the person’s overall condition rather than concentrating entirely on the visible injury. Increasing weakness, faintness, confusion, pale or clammy skin, rapid breathing, or unusual drowsiness may indicate shock or significant blood loss. These symptoms require urgent medical attention even if the external bleeding appears to have slowed. Keep the person as comfortable as possible, protect them from excessive cold or heat, avoid unnecessary movement, and follow instructions from emergency medical personnel whenever communication is available.
Weather can complicate the situation considerably. Someone injured outdoors during winter may become dangerously cold while waiting for help, particularly if their clothing is wet or they are lying on cold ground. In hot climates, direct sunlight and high temperatures can create additional stress. Moving the person to a safer environment may be appropriate when it can be done without worsening their injuries, but someone with a suspected spinal injury or other serious trauma should not be moved unnecessarily unless remaining in place presents an immediate danger.
One issue that is sometimes overlooked is the possibility of additional injuries. A person who falls from a ladder, is struck by machinery, or is involved in a vehicle accident may have injuries that are not immediately visible. Pain in the neck or back, difficulty breathing, altered consciousness, or unusual weakness can indicate a problem that requires urgent assessment. The most obvious injury is not always the most serious one.
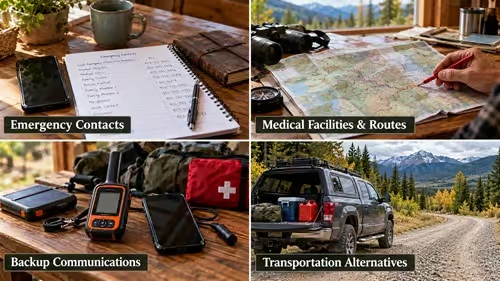
In remote locations, communication can become as important as the medical supplies themselves. A mobile phone may work perfectly near the house but lose reception in a valley, forest, mountain area, or isolated agricultural field. Anyone regularly working beyond reliable cellular coverage should understand those limitations before an emergency occurs.
Depending on the region, a satellite communication device, satellite-capable emergency messaging service, or another suitable emergency communication system may provide an alternative. These devices should be tested according to the manufacturer’s instructions, and household members should know how to activate an emergency request. Equipment that has never been configured or tested may be of little use when someone is injured and unable to explain how it works.
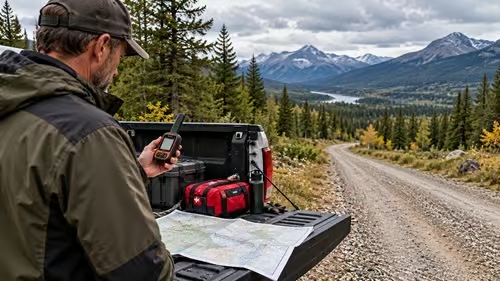
A written emergency contact plan is also valuable. Include the appropriate emergency telephone number for your country or region, the location of nearby medical facilities, and clear directions to your property. In areas without conventional street addresses, geographic coordinates or descriptions of recognizable landmarks may help emergency responders find the location. If access requires passing through a locked gate or travelling along a private road, make sure there is a practical way for responders to enter.
Transportation deserves similar attention. Knowing where the nearest hospital is located doesn’t necessarily mean it can be reached quickly. Roads may become impassable during flooding, snowstorms, landslides, wildfires, or other disruptions. Remote communities may also depend on ferries, aircraft, seasonal roads, or other transportation services that cannot always operate.
For potentially life-threatening injuries, emergency services should guide transportation decisions whenever possible. Attempting to move a seriously injured person without appropriate assistance can create additional risks, particularly when there may be spinal injuries, significant blood loss, or breathing difficulties. In some regions, emergency dispatchers may be able to coordinate specialized transport or provide instructions while help is on the way.
Households in isolated locations should become familiar with the emergency response capabilities available in their area. Some communities have volunteer rescue organizations, remote medical services, or regional emergency transportation arrangements. Others may have very limited resources, particularly during widespread disasters. Understanding these limitations ahead of time helps households develop realistic emergency plans rather than assuming that assistance will always arrive within a predictable period.
There may also be situations where professional medical advice is available by telephone or another communication system even though immediate transportation is impossible. When this option exists, follow the guidance provided by qualified medical personnel rather than attempting unfamiliar procedures. A medical professional may be able to help assess the urgency of the injury, identify warning signs, and explain what should be monitored while assistance is arranged.
The period after an injury can be just as important as the initial response. A person who appears stable may develop worsening pain, swelling, weakness, or other concerning symptoms. If their condition changes, emergency services or medical personnel should be updated promptly. Do not assume that an injury is improving simply because the bleeding has stopped or the person says they feel better.
It can also help to keep a simple written record of what happened. Note the approximate time of the injury, how it occurred, any significant symptoms, and the first aid provided. If a tourniquet was applied, record the application time and communicate it to emergency responders; do not loosen or remove it unless directed by qualified medical personnel. These details can be useful when the injured person eventually receives professional care, especially if several people have been involved in providing assistance.
One of the most useful preparedness skills is recognizing the difference between stabilizing someone and attempting to provide treatment that requires professional expertise. A household may be capable of controlling bleeding, protecting an injury, keeping someone warm, monitoring their condition, and arranging transportation. That doesn’t mean household members should attempt surgery, deep wound closure, or other procedures requiring specialized training and equipment.
For people living far from medical services, recognized first-aid training is one of the most valuable investments they can make. Where available, wilderness or remote first-aid courses can provide additional instruction for situations where professional help may be delayed. These courses often emphasize patient assessment, recognizing serious conditions, communication, and managing an emergency over an extended period. Practical instruction and supervised exercises help develop skills that reading alone cannot provide.
Being self-reliant doesn’t mean refusing professional help or believing every injury can be treated at home. It means understanding what can safely be done during the time before medical assistance becomes available. When someone is seriously injured, the ability to remain organized, provide appropriate immediate care, recognize deterioration, and communicate effectively with emergency responders can make a meaningful difference.
Free Download: Remote Medical Emergency & Communication Planning Worksheet
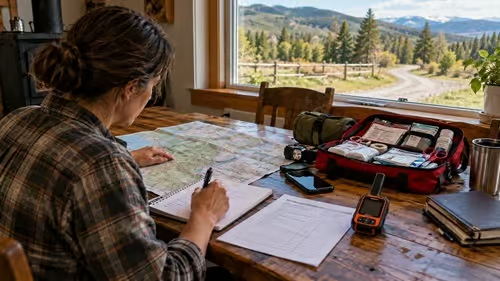
When medical help is hours away, having a plan for contacting emergency services and reaching medical facilities can be just as important as having the right first-aid supplies. We’ve created a free four-page Remote Medical Emergency & Communication Planning Worksheet to help households prepare for situations where distance, weather, or damaged infrastructure may delay assistance.
The worksheet provides space to record emergency contacts, nearby medical facilities, directions to your property, backup communication options, and alternative transportation arrangements. It also includes a practical checklist for testing your emergency plan and identifying problems before someone is injured.
Print a copy, complete it with your household, and keep it somewhere accessible without electricity or internet service. Review it periodically, particularly when contact information, transportation routes, or communication equipment changes.
Practising Wound-Care Skills Before an Emergency
One of the best ways to become more confident with first aid is to practise when nobody is injured. Reading about wound care provides useful knowledge, but actually handling the equipment and working through realistic situations helps turn that knowledge into practical ability. It’s one thing to know that a wound should be covered with a sterile dressing. It’s another to open the packaging, position the dressing correctly, and secure it while someone is uncomfortable or frightened.
Many people purchase first-aid kits and put them away without ever examining the contents. Months or even years may pass before the kit is needed, and by then they may have forgotten what is inside or how certain supplies are supposed to be used. A little practice can reveal problems that wouldn’t otherwise become obvious until an emergency occurs. Something as simple as discovering that medical tape is difficult to tear or that a dressing package is awkward to open can make a difference when time matters.
Begin with a simple exercise at home. Place a clean towel on a table and gather a roll of gauze, a non-stick dressing, medical tape, and disposable gloves. Imagine that someone has sustained a minor cut to the forearm. Practise putting on the gloves, opening the dressing package, positioning the dressing over uninjured skin, and securing it without wrapping too tightly. The purpose isn’t to treat an actual injury but to become comfortable handling the materials and following the basic procedure.
Pay attention to how the dressing fits and whether it stays in place when the person moves their arm. A bandage that is too loose may slip, while one wrapped too tightly can restrict circulation. Practising on uninjured skin gives you an opportunity to recognize these problems without causing unnecessary discomfort to someone who is already hurt.
Once you’re comfortable with the basic exercise, try completing it using only one hand. Imagine that your dominant hand has been injured and you need to apply a temporary dressing to yourself. You may discover that opening sterile packaging, tearing medical tape, or securing a bandage is much more difficult than expected. This is a useful reason to keep supplies organized and to consider packaging that can be opened without excessive effort.
The exercise can also reveal whether your first-aid supplies are suitable for the people who may need to use them. Someone with limited hand strength, reduced vision, or restricted mobility may struggle with equipment that another household member finds easy to handle. Practising together provides an opportunity to identify these difficulties and make reasonable adjustments before an injury occurs.
Next, consider what would happen if someone needed first aid during a power outage. Turn off the room lights and use the battery-powered headlamp or lantern stored with your medical supplies. Ask another household member to locate the gauze, gloves, and sterile saline without assistance. Then repeat the dressing exercise using only the available emergency lighting.
You may find that a flashlight is awkward because one hand must hold it while the other tries to work. A headlamp can be more practical because it leaves both hands available. You might also discover that supplies stored in dark containers are difficult to distinguish or that the first-aid kit has been placed somewhere inconvenient. These are small problems when nobody is injured, but they can become frustrating during a real emergency.
Practising first aid should also involve learning to recognize when an injury is beyond what can reasonably be managed at home. Imagine someone has fallen in the garden and scraped their knee. Talk through how you would make sure the area is safe, assess the injury, control minor bleeding, rinse away loose dirt, and protect the wound. Then consider how the response would change if the injury were deep, heavily contaminated, or bleeding severely.
These discussions help household members understand that not every injury should be treated the same way. A superficial scrape may be manageable with ordinary first aid, while uncontrolled bleeding, loss of sensation, difficulty moving an injured area, or signs of infection require medical assessment. The ability to recognize those differences is just as important as knowing how to apply a dressing.
For serious bleeding, practical training should come from qualified instructors using appropriate training equipment. Commercial tourniquets and specialized bleeding-control dressings have specific applications, and incorrect use can cause harm or fail to control life-threatening bleeding. A recognized first-aid or bleeding-control course provides an opportunity to practise suitable techniques, receive feedback, and understand when particular equipment is necessary.
Households should also become familiar with their emergency communication arrangements. Everyone who may need to request assistance should know the appropriate emergency telephone number, how to describe the location of the property, and where written contact information is kept. In remote areas, geographic coordinates or clearly written directions may be useful when conventional street addresses are insufficient.
If your household uses satellite communication equipment or another backup emergency system, practise operating it according to the manufacturer’s instructions. Check that the device is charged, properly configured, and capable of connecting to its intended service. A communication device is only useful when someone knows how to activate it and provide the information emergency responders need.
These exercises don’t have to become complicated or take up an entire afternoon. Even a short practice session every few months can help household members become more familiar with their equipment and identify weaknesses in their arrangements. The goal is not to make everyone believe they can handle every medical emergency. It’s to develop enough practical competence that common minor injuries can be managed appropriately and serious situations can be recognized quickly.
A Simple Wound-Care Practice Exercise
A useful way to bring these skills together is to organize a twenty-minute household wound-care exercise. This can be done around a kitchen table, in a workshop, or wherever your household normally keeps its first-aid supplies. Choose a time when everyone can participate without being rushed. The exercise should involve an imaginary injury, with all dressing practice performed on uninjured skin.
Begin by placing your first-aid kit on a table along with a clean towel and a battery-powered light. Have one person act as the injured household member while another practises providing assistance. Explain that the imaginary injury is a small cut to the forearm caused by working outdoors. The person providing first aid should begin by checking that the surrounding area is safe and locating the necessary supplies.
Practise putting on disposable gloves and describing how firm direct pressure would be applied to control minor bleeding. There is no need to simulate actual bleeding or apply painful pressure during the exercise. Instead, concentrate on understanding where the gauze should be placed and how the injured area would be protected while the bleeding is controlled.
Next, explain how the wound would be rinsed with clean running water or sterile saline to remove loose contamination. Discuss why the surrounding skin should be cleaned and why substances such as rubbing alcohol, hydrogen peroxide, or homemade herbal powders should not be poured into an open wound. This part of the exercise is intended to reinforce the correct procedure rather than encourage unnecessary use of sterile supplies.
Once the imaginary wound has been cleaned, practise positioning a non-stick dressing over the uninjured forearm and securing it with medical tape or an appropriate bandage. Check that the dressing remains in place without restricting circulation. Have the person move their arm gently to see whether the bandage stays secure and feels comfortable.
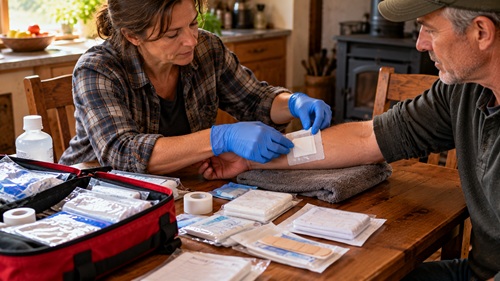
After completing the dressing, talk through what would happen next. Consider where used materials would be discarded, when the dressing should be changed, and which symptoms would require medical assessment. Increasing redness, swelling, pain, warmth, pus, fever, or other signs of infection should not be ignored. A deep wound, uncontrolled bleeding, or suspected damage beneath the skin would require a different response from the beginning.
Now repeat the exercise under less convenient conditions. Use only your emergency lighting, or have the person providing assistance work with their non-dominant hand. These variations can reveal difficulties with equipment, packaging, or organization that were not apparent during the first attempt.
Before finishing, ask another household member to locate the first-aid supplies without assistance. Have them identify where the sterile saline, pressure dressings, gloves, and emergency contact information are stored. If something is difficult to find, make the necessary changes while the problem is fresh in everyone’s mind.
The exercise should end with a brief discussion of what worked and what needs improvement. Perhaps the kit needs additional dressings, the headlamp batteries need replacing, or the emergency contact information is out of date. Write down any problems and correct them before the next practice session.
There is no need to perform every step perfectly the first time. The purpose is to become familiar with the process while nobody is injured. With occasional practice, household members can develop the confidence to respond more calmly to minor injuries while recognizing situations that require professional medical assistance.
Free Download: Emergency Wound-Care Practice & Skills Assessment Worksheet
Practising first aid is one thing, but keeping track of what you’ve learned and where you still need improvement can make those practice sessions much more useful. We’ve created a free three-page Emergency Wound-Care Practice & Skills Assessment Worksheet to help your household work through realistic first-aid exercises.
The worksheet covers dressing practice, one-handed exercises, working with emergency lighting, recognizing serious injuries, and practising emergency communication. It also provides space to record practice dates, observations, difficulties encountered, and improvements that need attention.
Print a copy before your next household practice session and complete it as you work through the exercises. Keep the finished worksheet with your preparedness records so you can review your progress and identify skills that would benefit from additional training.
Free Download: Emergency Wound-Care Quick Reference
When someone gets injured, the last thing you want to do is search through pages of instructions trying to remember what comes next. A printed wound-care reference can provide a useful reminder of the basic steps, particularly when someone is nervous, working in poor lighting, or unable to access the internet.
The free two-page Emergency Wound-Care Quick Reference is designed to be kept with your household first-aid supplies. The first page provides a reminder of how to respond to minor wounds, control bleeding, clean and protect an injury, and recognize warning signs that require professional medical attention.
The second page provides space to record important emergency contacts, directions to your property, nearby medical facilities, and backup communication information. These details can be especially useful for households in rural or isolated locations where emergency responders may need additional directions.
Print a copy and keep it in your first-aid kit, vehicle, workshop, or preparedness binder. Review the information periodically and update emergency contacts whenever necessary. The reference is intended to support basic first aid and reinforce practical training, not replace professional medical care or recognized first-aid instruction.
Maintaining a Household Herbal Reference Collection
For anyone interested in traditional herbal knowledge, maintaining a small botanical reference collection can be a worthwhile long-term preparedness project. The purpose isn’t to build a collection of homemade medicines or replace the supplies in your first-aid kit. It’s to preserve useful information about plants, understand how they were traditionally prepared, and develop the ability to identify, grow, harvest, and store botanical materials responsibly.
Many people grow herbs without keeping much information about them. They may remember where a plant came from or when it was harvested, but those details can easily be forgotten over time. A few years later, they may have containers of dried leaves, roots, or bark without knowing the exact species, when the material was collected, or whether it was stored properly. That makes the collection less useful and can create safety concerns if someone mistakes one plant for another.
A botanical reference collection helps prevent these problems by keeping the plant material and its identifying information together. It doesn’t need to be expensive or complicated. A few clean containers, a notebook, suitable labels, and a place to store everything safely are enough to get started. What matters is that someone else in your household could examine the collection and understand what each sample is, where it came from, and why it was preserved.
The five plants discussed in this lesson provide a useful starting point. Comfrey leaves, slippery elm inner bark, myrrh resin, bayberry root bark, and dried garlic represent different types of botanical materials. Some can be grown in an ordinary garden, while others may need to be purchased from reputable suppliers. Studying these differences helps build a broader understanding of how plants are cultivated, harvested, and preserved.
Begin with materials that have been correctly identified. If you’re growing a plant yourself, record its common and botanical names, where the planting material was obtained, and the conditions in which it grows. If you purchase dried herbs or resins, retain the supplier’s information and any available details about the species and origin. Common names can refer to several different plants, so botanical identification is particularly important when studying traditional remedies.
It’s also worth recording how the plant performs in your local environment. Someone growing comfrey in a temperate climate may find that it produces several harvests during the growing season, while another person in a hotter or drier region may struggle to keep it productive. Garlic varieties can behave differently depending on winter temperatures, rainfall, and soil conditions. Keeping notes about these observations can help you make better decisions about what to grow in future seasons.
Photographs can make the collection considerably more useful. Take pictures of the living plant before harvesting, including its leaves, stems, flowers, and overall growth habit. Where appropriate, photograph distinguishing features such as bark, roots, or resin. Once botanical materials have been dried or ground into powder, some of the characteristics needed for identification may no longer be obvious.
For example, a container of dried comfrey leaves may be recognizable to someone familiar with the plant, but it can be much harder to identify confidently several years later. A photograph of the original plant, together with its botanical name and harvest information, provides a more useful record than a handwritten label that simply says comfrey. Photographs should support reliable identification rather than replace it, particularly when plants have similar appearances.
When collecting botanical samples, avoid taking more material than you need. A reference collection usually requires only a small quantity to demonstrate the appearance, texture, and other identifying characteristics of a plant. There is little reason to damage a healthy shrub or tree simply to fill a storage container. For materials such as slippery elm inner bark or bayberry root bark, responsibly sourced commercial samples are generally preferable to destructive harvesting.
Once the material has been properly dried, place it in a suitable container and label it clearly. Include the botanical name, the part of the plant collected, the date of harvest or purchase, and its intended educational purpose. If the material came from a supplier, record the source so that its origin can be traced later. Samples should remain in their original form when practical, since whole leaves, bark pieces, and resin are generally easier to examine and identify than finely ground powders.
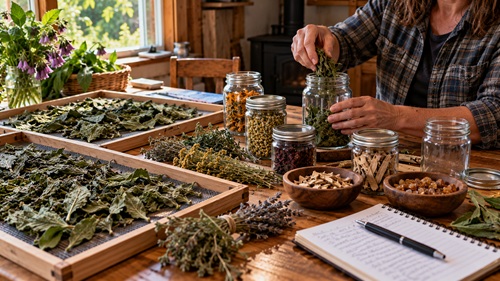
A notebook or printed worksheet can accompany the collection. For each plant, record where it was obtained, how its identity was established, when it was harvested, and how it was processed. You can also include observations about growing conditions, drying time, storage performance, and any problems encountered. These records become more valuable over time because they allow you to compare results from different seasons rather than relying entirely on memory.
Consider someone who harvests garlic every year but never records which varieties were planted or how long the bulbs remained usable in storage. They may notice that some harvests perform better than others without understanding why. Recording the variety, planting date, harvest conditions, curing method, and storage results makes it easier to identify what worked. The same principle applies to other useful plants, even when they are being preserved primarily for botanical study.
Storage conditions should be reviewed periodically. Dried botanical materials need protection from moisture, insects, excessive heat, and direct sunlight. Containers should be inspected for condensation, unusual odours, mould, or other signs of deterioration. Material that appears contaminated should be discarded rather than kept simply because it took time and effort to collect.
In humid tropical or coastal environments, these inspections may need to be more frequent because moisture can enter containers or accumulate when storage conditions change. In very hot regions, a shaded interior storage area may be preferable to a shed or outbuilding that experiences extreme daytime temperatures. The objective is to maintain a stable environment that protects the samples and their identifying characteristics.
Safety information should be kept with the botanical records rather than stored somewhere else. Include known toxicity concerns, possible skin reactions, and limitations associated with traditional medicinal claims. Clearly distinguish historical uses from treatments supported by reliable medical evidence. This is especially important when preserving plants that have reputations as wound remedies but may cause harm when used improperly.
The collection should also remain physically separate from household first-aid supplies. Someone responding to an injury should be able to reach sterile gauze, dressings, and wound-cleaning materials without sorting through containers of dried herbs. Labelling botanical samples for educational use helps prevent them from being mistaken for products intended to treat injuries.
Over time, the collection can expand to include other locally appropriate plants. A household in a temperate region may study different species from one in a tropical, arid, or coastal environment. The important thing is to choose plants that can be identified reliably and obtained responsibly. Local botanical gardens, agricultural extension services, and knowledgeable growers can provide valuable guidance when learning about unfamiliar species.
There is also value in sharing this knowledge with other household members. A collection that only one person understands may become difficult to maintain if that person is unavailable. Showing family members how to read the labels, locate the records, recognize storage problems, and understand the safety warnings makes the information more useful over the long term.
For preppers, a botanical reference collection develops skills that extend well beyond traditional herbal medicine. Plant identification, recordkeeping, sustainable harvesting, storage management, and evaluating the reliability of information are all useful capabilities. These same practices can be applied to seed saving, food preservation, gardening, and other areas of household self-sufficiency.
The collection doesn’t need to contain dozens of plants to be worthwhile. A few well-documented samples that you understand are more valuable than shelves of unidentified materials. Begin with what you can reliably obtain, maintain accurate records, and expand the collection as your knowledge develops. The objective is to preserve practical knowledge that remains understandable and useful to the people who may need it in the future.
Free Download: Herbal Remedies and Wound Care Preparedness Worksheet
Reading about preparedness is useful, but applying that knowledge to your own household is what makes the difference. It’s easy to finish a lesson with a better understanding of what should be done, only to discover several months later that the first-aid kit still needs organizing or the plants you intended to grow were never added to the garden.
The Herbal Remedies and Wound Care Preparedness Worksheet is designed to help turn the information in this lesson into a practical household reference. Rather than trying to remember everything, you can use the worksheet to document your existing supplies, identify gaps in your preparations, and keep track of the skills you’re developing.
The five-page printable worksheet provides space to record the herbs you’re growing or studying, their botanical names, where they were obtained, and how they are being preserved. It also helps you document storage conditions and safety considerations so that traditional plant knowledge remains separate from established medical practices.
Another part of the worksheet focuses on household wound-care readiness. You can use it to inspect your first-aid supplies, identify missing or damaged materials, and review whether the equipment is accessible in the places where injuries are most likely to occur. This provides a practical way to identify weaknesses before an emergency rather than discovering them when someone needs help.
The worksheet also encourages you to review your basic wound-care skills and emergency arrangements. Recording important contact information, considering how medical assistance would be requested, and identifying skills that require additional training can help strengthen your household’s ability to respond when professional care is delayed.
You don’t need to complete everything in one sitting. Begin with the sections that apply to your household, make a few practical improvements, and return to the worksheet as your preparations develop. Keep the completed copy in your preparedness binder or another accessible location so the information remains available even when electricity or internet service is interrupted.
Preparedness Action Plan
Preparing to care for minor injuries when medical help may be delayed begins with understanding what your household can already manage and where improvements are needed. You don’t need to purchase every piece of medical equipment available or establish an extensive medicinal herb garden. A better approach is to examine your existing supplies, learn a few dependable skills, and gradually strengthen your ability to respond when someone gets hurt.
Begin by examining the first-aid supplies currently available in your household. Open each kit and check whether it contains suitable materials for controlling minor bleeding, cleaning superficial wounds, and protecting injuries. Look for damaged packaging, expired products, or supplies that have been used without being replaced. Make sure the equipment is accessible in the locations where injuries are most likely to occur, whether that’s inside the house, in a workshop, or somewhere else on the property.
Think about the activities that create the greatest injury risks around your home. Gardening, fencing, woodworking, livestock care, and operating machinery all present different hazards. Someone who regularly uses chainsaws or heavy equipment should place particular emphasis on recognized bleeding-control training and suitable emergency supplies. A household with young children may need to concentrate more on common cuts, scrapes, and other everyday injuries. The objective is to prepare for situations you’re reasonably likely to encounter rather than trying to anticipate every possible medical emergency.
Once your supplies are organized, spend some time developing practical wound-care skills. Practise opening sterile dressing packages, applying a bandage to uninjured skin, and securing it without restricting circulation. Learn how to apply direct pressure to control bleeding and how to recognize injuries that require professional assessment. If you’re uncertain about a procedure, consider taking a recognized first-aid course. Practical instruction can help you develop confidence while correcting mistakes that might otherwise go unnoticed.
Review your backup water and lighting arrangements. Determine whether you could safely clean a minor wound if the power failed or your normal water supply became unavailable. Keep suitable wound-irrigation supplies accessible, along with safe drinking-quality water for general hygiene. A battery-powered headlamp or lantern can make wound care considerably easier during nighttime emergencies or extended power outages.
If you live in a rural or isolated area, examine your emergency communication and transportation plans. Identify nearby medical facilities, consider alternate travel routes, and make sure household members know how to request assistance. Where cellular coverage is unreliable, investigate suitable backup communication options and learn how to operate them. Keep emergency contact information and property directions somewhere accessible without electricity or internet service.
For those interested in traditional herbal knowledge, begin with one plant that can be grown successfully in your region. Garlic is a practical starting point for many households because it provides an everyday food ingredient while teaching useful cultivation and preservation skills. Learn when to plant it, how to recognize maturity, and how to cure and store the harvested bulbs. Once you’re comfortable with one crop, you can gradually explore other suitable plants.
If you decide to establish a botanical reference collection, keep the project manageable. Start with a few correctly identified samples and record their sources, growing conditions, harvesting dates, and storage methods. Include information about known safety concerns and keep the collection separate from medical supplies. The purpose is to preserve useful knowledge, not to create homemade wound treatments that haven’t been shown to be safe or effective.
Involve other household members in these preparations. Show them where the first-aid supplies are stored, explain how to contact emergency services, and practise a simple injury scenario together. Someone who has never opened the medical kit may have difficulty locating what they need, even when the supplies are properly organized. A short practice session can reveal these problems and provide an opportunity to correct them.
Use the downloadable preparedness worksheet to record your progress. Note which supplies need replacing, which skills you’ve practised, and what improvements remain unfinished. Review the information periodically, particularly after using medical supplies, changing emergency contact details, or making significant changes to your household arrangements.
By the end of your first week, aim to have an organized first-aid kit, a dependable backup wound-cleaning supply, accessible emergency contact information, and at least one basic first-aid skill you’ve practised. These are realistic accomplishments that provide immediate value. From there, continue improving your equipment, developing your knowledge, and learning which resources are most useful for your particular circumstances.
Preparedness develops through consistent, practical improvements. A household that knows how to manage minor injuries, recognizes when professional medical care is necessary, and has a workable emergency plan is better prepared than one that simply collects equipment without learning how to use it.
Key Takeaways
Being prepared to care for minor injuries doesn’t require a room full of medical equipment or an extensive collection of herbal remedies. It begins with understanding how to control bleeding, clean a superficial wound, protect damaged skin, and recognize when an injury requires professional attention. Having appropriate supplies is important, but knowing how to use them correctly is what makes those supplies valuable when someone gets hurt.
Traditional herbal knowledge can contribute to household self-sufficiency through growing useful plants, identifying natural materials, and learning how to harvest, dry, and preserve them. Comfrey, slippery elm, myrrh, bayberry, and garlic each provide opportunities to develop these skills. However, their traditional medicinal reputations do not automatically establish that homemade preparations are safe or effective for treating injuries. Preserving traditional knowledge should go hand in hand with understanding its limitations and maintaining reliable first-aid practices.
Growing conditions also matter. A plant that thrives in a temperate garden may struggle in a tropical climate, while a tree adapted to dry environments may be unsuitable for regions with heavy rainfall or freezing winters. Learning which plants grow successfully in your area, which can be cultivated responsibly, and which are better obtained from reputable suppliers makes herbal preparedness more practical. A dependable resource is one that can realistically be maintained under the conditions where you live.
Medical preparedness also involves recognizing the limits of household first aid. Deep wounds, uncontrolled bleeding, suspected damage beneath the skin, and signs of serious infection require professional assessment. When help is hours away, knowing how to protect an injured person, monitor their condition, communicate with emergency responders, and avoid potentially harmful improvised treatments becomes especially important.
One of the most useful lessons is that confidence comes from practice rather than simply owning equipment. Someone who has handled their first-aid supplies, worked through a realistic injury scenario, and learned how to request emergency assistance is better prepared to respond than someone who has never opened their medical kit. Even occasional practice can help identify weaknesses and make unfamiliar procedures easier to understand.
Self-sufficiency doesn’t mean becoming completely independent of healthcare professionals. It means developing the knowledge and practical ability to look after yourself and others appropriately until additional help is available. The same principle applies to traditional herbal knowledge. Understanding how to grow, preserve, and responsibly manage useful plants can strengthen household resilience without assuming that every natural material should be used as medicine.
You don’t need to become an expert overnight. Start with the basics, practise what you’ve learned, and build your skills over time. Every useful skill, properly maintained supply, and realistic emergency plan adds another layer of preparedness. The objective isn’t to eliminate every risk, but to become more capable of responding when ordinary circumstances suddenly become difficult.
Preparedness isn’t about believing you’ll never need help. It’s about knowing what you can safely do until help is available.
Medical and Herbal Safety Disclaimer
This posting is intended for educational and emergency preparedness purposes only. It does not constitute medical advice and is not intended to diagnose, treat, cure, or prevent any disease or injury.
Traditional herbal uses and laboratory findings do not establish the safety or effectiveness of homemade herbal preparations for treating wounds. Some plants may cause allergic reactions, skin irritation, chemical burns, toxicity, or interactions with medications. Homemade herbal powders, pastes, and unsterilized botanical materials should not be placed into open wounds.
Comfrey contains potentially harmful pyrrolizidine alkaloids and should not be consumed or applied to broken skin. Garlic and certain concentrated herbal preparations can cause significant skin irritation or burns. Always consult a qualified healthcare professional before using herbal products for medicinal purposes.
Serious injuries, uncontrolled bleeding, deep cuts, puncture wounds, animal bites, and signs of infection require prompt medical assessment. For life-threatening emergencies, contact emergency services immediately.
© Prepping Communities. This content is for informational purposes only and not professional advice. Use at your own risk.
Terms | Privacy | Guidelines