
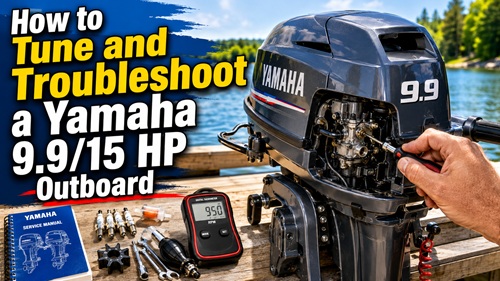
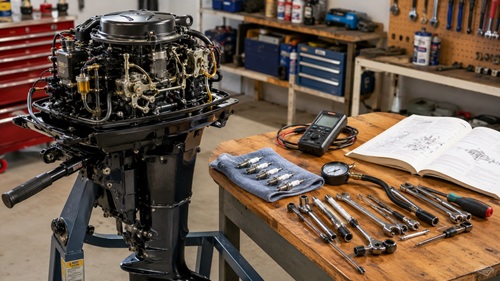
A Yamaha 9.9 or 15 HP outboard that starts and runs is not necessarily properly tuned. It may idle reasonably well but lack power, hesitate when the throttle opens, stall when returning to idle, run roughly at low speed, or refuse to reach normal RPM on the water. These problems often lead owners directly to the carburetor, but the carburetor is only one part of the system. Good tuning starts by establishing that the engine itself is healthy. Compression, ignition timing, throttle linkage, fuel delivery, carburetor adjustment, cooling, spark plugs, and throttle-cable adjustment can all affect how the engine runs. Adjusting one component to compensate for a problem somewhere else may make the motor appear better temporarily while making the actual problem harder to diagnose.
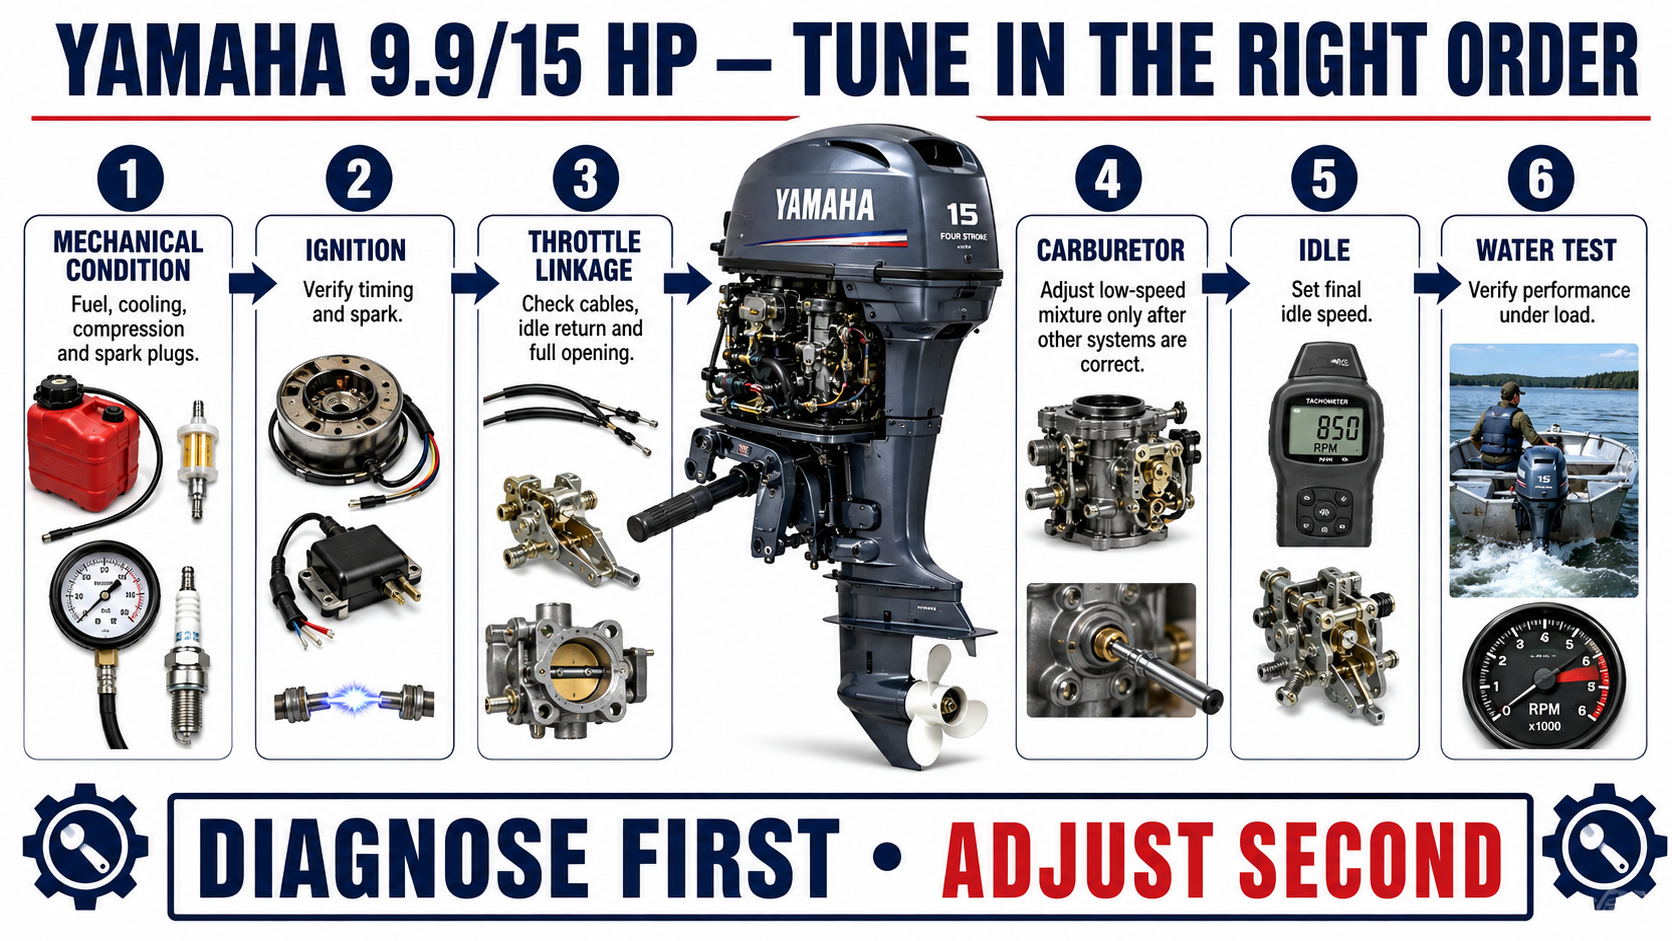
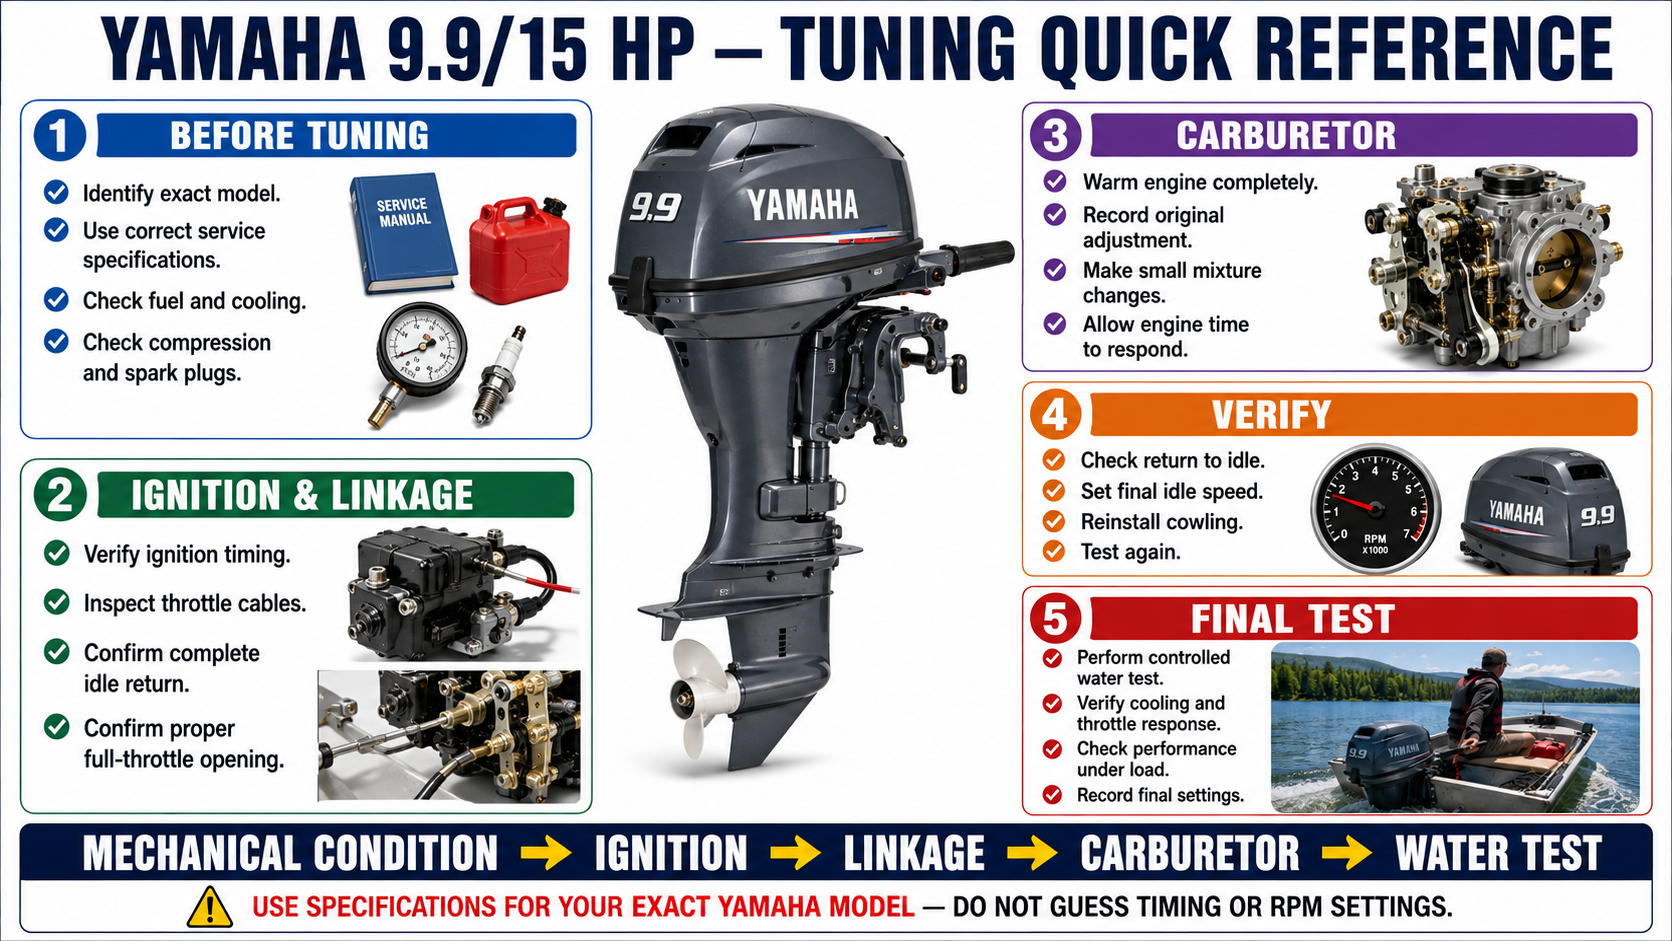
The best approach is to work through the engine in a deliberate order: mechanical condition first, ignition and linkage second, carburetor and idle adjustment third, and an on-water test last. This is particularly important with an older outboard because several small problems can exist at the same time. A little cable slack, a slightly dirty carburetor and worn spark plugs may combine to produce symptoms that look like one major problem.
Identify the Exact Engine Before You Start
Before making adjustments, locate the Yamaha identification plate and record the complete model and serial number. Yamaha has produced several versions of its 9.9 and 15 HP engines, including different two-stroke and four-stroke designs. Carburetors, ignition systems, timing procedures, idle specifications and linkage arrangements can differ, so a specification from one Yamaha 9.9 or 15 should never automatically be applied to another.
Keep the service information for the exact engine available offline. At minimum, record the correct spark plug and gap, idle RPM, ignition-timing specifications, carburetor baseline settings, fuel and oil requirements, throttle-linkage procedure, recommended wide-open-throttle RPM range and important torque specifications. These numbers provide the reference points for everything that follows and are much more reliable than trying to remember them years later.
Establish a Mechanical Baseline
When an engine runs badly, there is a strong temptation to immediately turn the mixture or idle screw. Resist that temptation. Carburetor adjustment cannot repair weak compression, incorrect ignition timing, restricted fuel delivery, stale fuel, damaged ignition components, an improperly opening throttle plate or a partially blocked carburetor passage.
Start with a basic inspection. Look at the fuel tank, fuel line, primer bulb, connectors, fuel filter, spark plugs, wiring and visible throttle components. Check for cracked hoses, leaking connectors, loose fasteners, corrosion, damaged wiring and linkages that are binding or obviously loose. If the motor has been stored with old fuel, consider the possibility of carburetor contamination before attempting precise adjustments. A partially restricted low-speed passage can make an otherwise healthy engine almost impossible to tune correctly.
The cooling system also needs to be functioning properly before extended testing begins. Never run the outboard without an adequate cooling-water supply. If the engine is being operated outside the water, use an appropriate test tank or the cooling-water method specified for that engine. Confirm normal cooling-water circulation and watch for overheating. The motor should be allowed to reach normal operating temperature before final running adjustments because a cold engine often requires enrichment and behaves differently from a fully warmed engine.
Check Compression and Spark Plugs
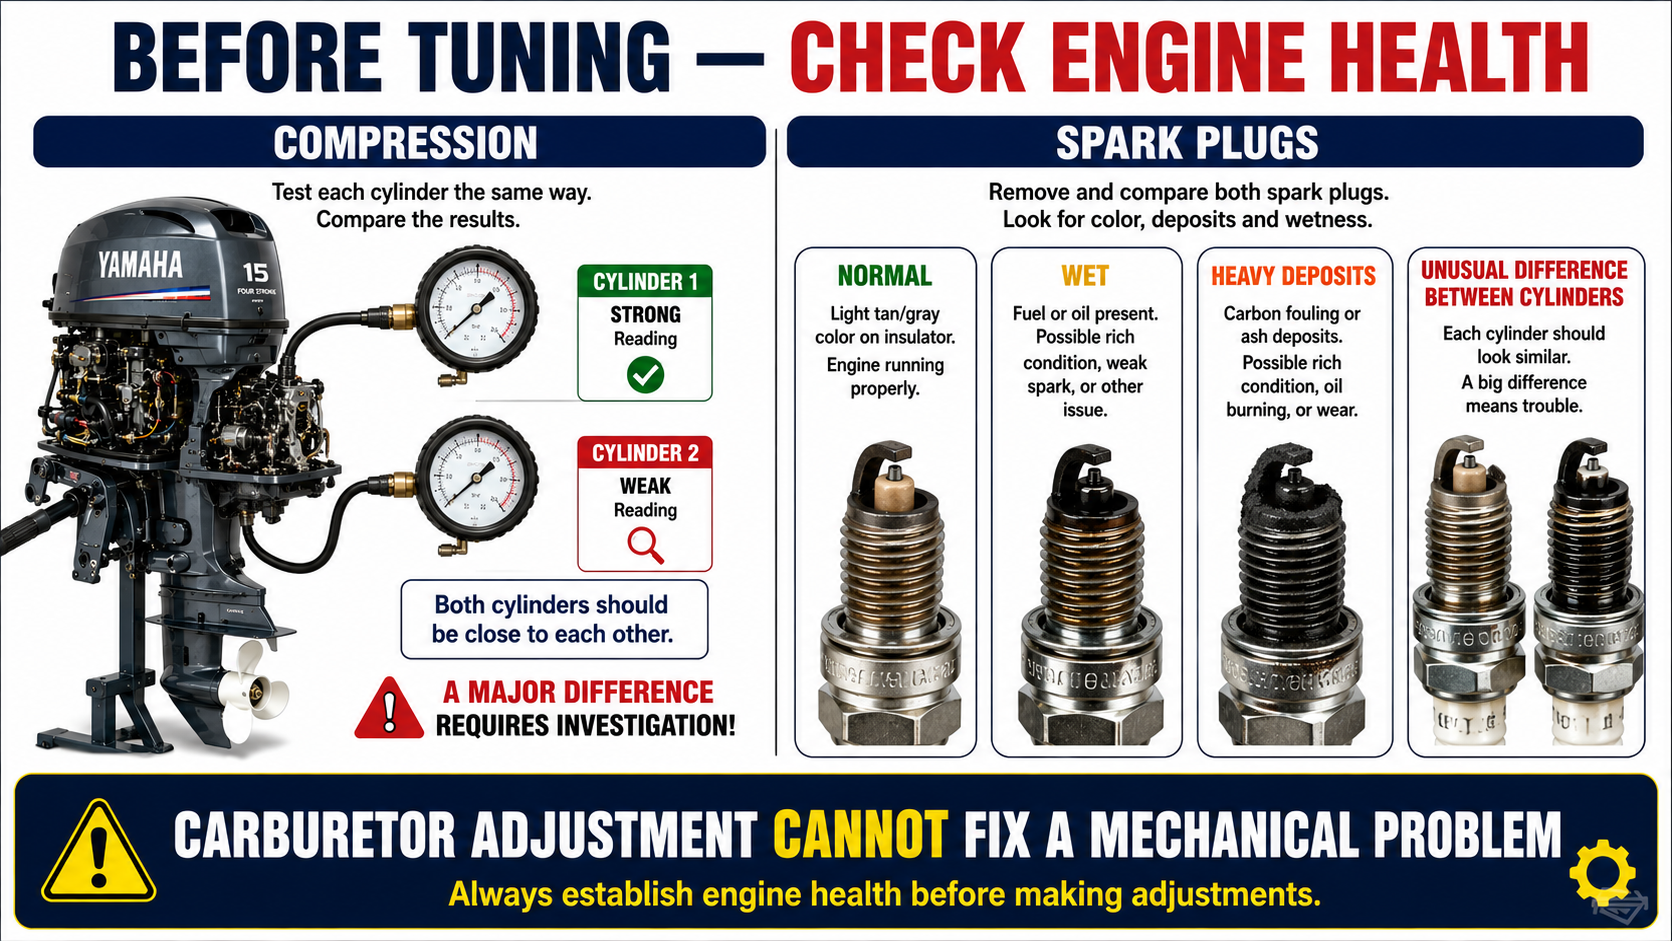
Compression is one of the most useful baseline measurements when an older outboard is difficult to tune. Remove both spark plugs and test each cylinder using the same procedure. Pull or crank the engine consistently so the readings can be meaningfully compared. The exact reading can vary with the gauge, cranking speed and testing method, so the relationship between the cylinders is often particularly useful. If one cylinder is substantially weaker than the other, investigate the mechanical condition of the engine before spending hours adjusting the carburetor.
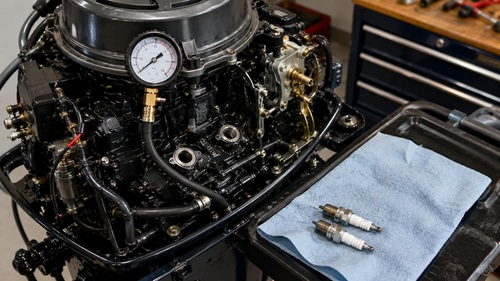
Record the compression readings in the engine’s maintenance notes. Even if everything is healthy today, those readings provide a useful comparison for future troubleshooting. A gradual decline over several years can tell you considerably more than a single measurement taken after a problem develops.
While the plugs are removed, compare them. Spark plugs can provide useful clues about what has been happening inside the engine. If one is noticeably wetter, darker, cleaner or more heavily fouled than the other, determine why. Differences between cylinders can point toward ignition, compression, fuel or combustion problems. Replace worn or damaged plugs with the exact type specified for the engine and set the correct gap. Starting the tuning process with known-good plugs eliminates another variable.
Verify Ignition Timing
Once the basic mechanical condition looks good, move to the ignition system. On many older Yamaha 9.9/15 HP outboards, throttle movement and ignition advance are mechanically related. As the throttle is advanced, the timing mechanism moves with it. This relationship is important because incorrect timing can make a perfectly clean carburetor appear to be badly adjusted.
With the engine stopped, inspect the timing mechanism and linkage as the throttle is moved through its operating range. The components should move smoothly and reach their intended positions without binding. If the timing marks or linkage do not agree with the factory procedure, do not simply reposition components until they look approximately correct. Some Yamaha procedures require precise measurements or service tools. Incorrect ignition timing can cause poor starting, loss of power, excessive heat and potentially engine damage, so this is one adjustment that should always be based on the correct specifications for the exact motor.
Check the Throttle Cables and Linkage
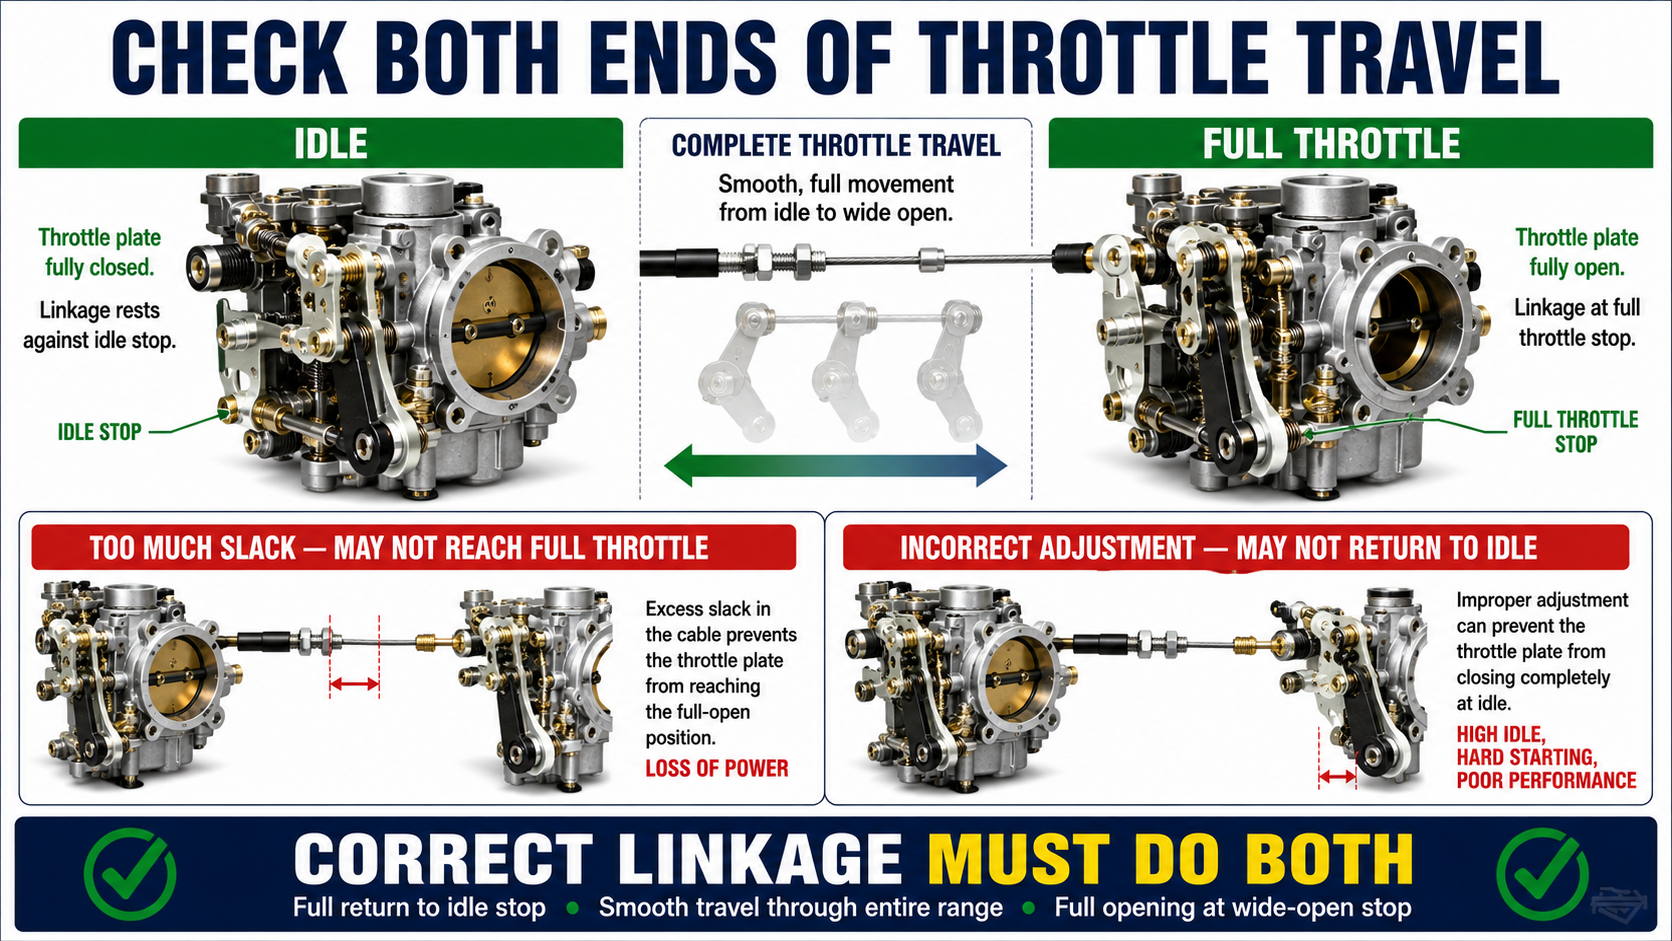
Throttle-cable adjustment is easy to overlook because the motor may continue running even when the cables are badly adjusted. Move the throttle control slowly while watching the mechanism under the cowling. Movement at the control should produce predictable movement at the engine without a large dead area before the carburetor begins responding. Excessive slack can prevent the carburetor from reaching full throttle, while incorrect adjustment in the opposite direction can prevent the mechanism from returning completely to idle.
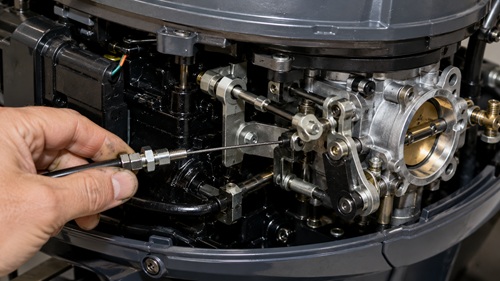
This can create a confusing situation where the motor is adjusted to idle perfectly but cannot reach full throttle, or reaches full throttle but idles too high. The objective is not simply to make the cables tight. The entire mechanism needs to move correctly from one end of its operating range to the other.
Pay particular attention to the carburetor throttle plate. With the engine OFF, operate the throttle according to the applicable Yamaha procedure and verify that the throttle plate reaches its specified full-open position. A motor can start easily, idle smoothly and accelerate reasonably well while still producing disappointing performance simply because the carburetor never opens completely. Before rebuilding the carburetor or replacing ignition components because the engine will not reach expected RPM, make sure the throttle is actually reaching full opening.
Then check the opposite end of the range. Return the throttle to idle and make sure the mechanism returns completely to its proper idle position without hanging partially open. Correct linkage adjustment must accomplish both objectives: full opening when commanded and complete return to idle.
Adjust the Idle and Low-Speed Mixture
Only after the mechanical condition, timing and throttle linkage have been checked does carburetor fine-tuning become meaningful. It is important to understand the difference between idle speed and idle mixture. The idle-speed adjustment establishes the mechanical position required to maintain the specified engine speed, while the low-speed mixture adjustment changes the fuel-air relationship in the carburetor’s low-speed circuit. Because changing mixture can affect engine speed, the two adjustments may need to be revisited as the tune progresses.
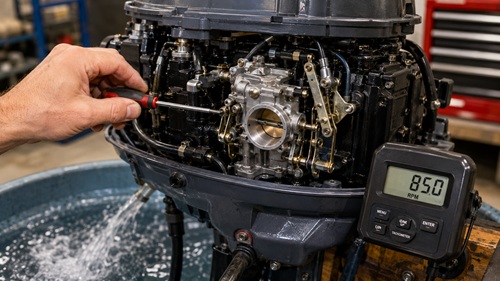
Before changing a mixture screw, document its original position. If appropriate for the particular carburetor, this can be done by carefully counting the turns required to reach the lightly seated position. Never force the screw against its seat because the tip or carburetor can be damaged. Return the screw to its original position or the Yamaha baseline before beginning the actual adjustment.
Start the engine in neutral and allow it to warm thoroughly. The choke or enrichment system should no longer be required. Before touching anything, listen to how the motor behaves. Notice whether the idle remains consistently high, gradually slows, rises and falls, shakes periodically, sounds heavily loaded or threatens to stall. These behaviors are diagnostic information, so avoid immediately changing several adjustments and erasing the clues.
Make low-speed mixture adjustments in small increments and give the engine time to react after each change. Work toward the setting that produces the best stable idle and throttle response while remaining within the manufacturer’s procedure. A mixture that is too lean can sometimes produce a hanging idle where RPM remains elevated before slowly returning. It may also cause hesitation or unstable running. An excessively rich condition may produce a heavy or uneven idle, fouling or poor response. These symptoms are clues rather than absolute diagnoses because ignition faults, air leaks, fuel restrictions, dirty carburetor passages and compression problems can produce similar behavior.
If a small adjustment improves the idle, make another small change and listen again. Eventually the engine will either stop improving or begin running worse. Return toward the better setting rather than continuing farther. The objective is not simply to find a position where the motor continues running; it is to find a stable operating point with clean response.
Watch How the Engine Returns to Idle
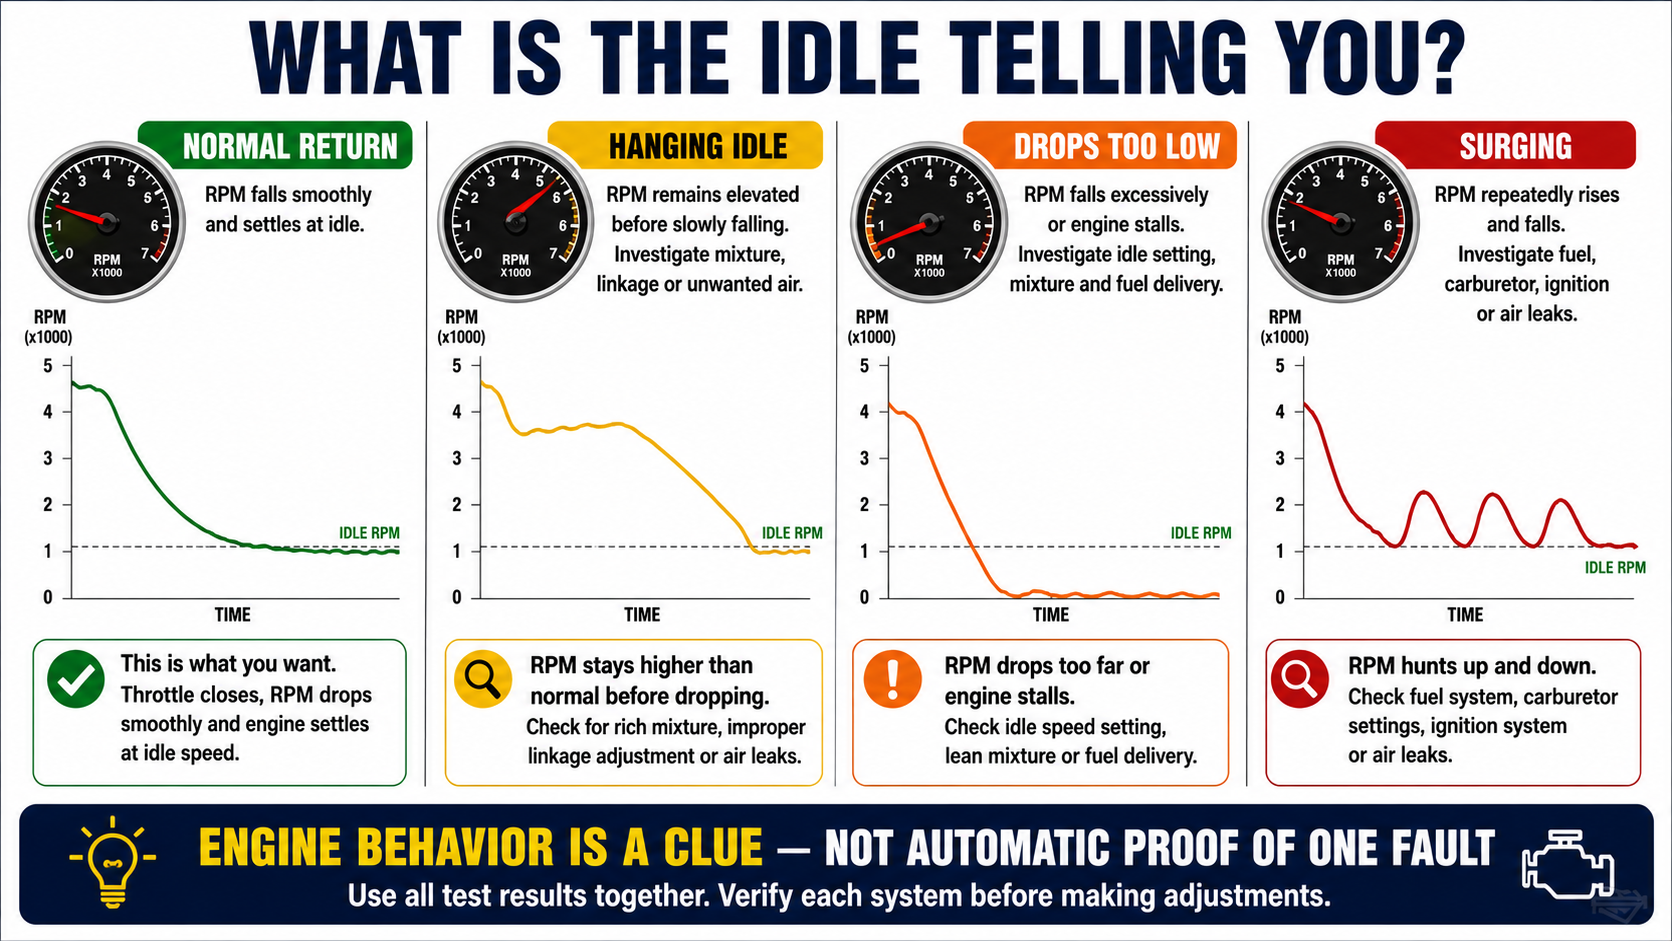
How the engine behaves after increasing RPM can reveal problems that are difficult to detect while it simply sits at idle. After obtaining a reasonable idle, briefly increase engine speed only as permitted by the Yamaha service procedure and your testing setup, then allow it to return to idle. A healthy, correctly adjusted motor should return predictably and settle rather than remaining unusually high, dropping excessively low, surging or stalling.
If RPM remains high before slowly falling, investigate the mixture, throttle linkage and possibility of unwanted air entering the engine. If RPM drops so far that the motor nearly stalls, the idle setting or low-speed mixture may require attention. If the engine behaves correctly one time and poorly the next, consider inconsistent fuel delivery, sticking linkage, carburetor contamination or ignition problems rather than continuing to turn adjustment screws.
Once the mixture is satisfactory, check idle speed again. Mixture changes can alter RPM, so the idle-speed adjustment may require a final correction. Whenever possible, use a tachometer and set the motor according to the specification for the exact Yamaha model rather than relying entirely on sound.
Know When to Stop Adjusting
One of the most valuable troubleshooting skills is recognizing when an adjustment is not solving the problem. If the low-speed mixture screw can be moved substantially without producing much change in engine behavior, stop adjusting. The carburetor’s low-speed circuit may be dirty or restricted, there may be an air leak, fuel delivery may be inconsistent, ignition may be weak, or the timing or linkage may still be incorrect.
The same principle applies to the idle-speed adjustment. If the throttle stop must be moved far beyond its expected position simply to prevent the engine from stalling, something else probably needs attention. A carburetor that needs cleaning cannot be properly repaired with a screwdriver, and a mechanical fault should not be disguised with an abnormal adjustment.
Reinstall the Cowling and Test Again
Once the engine appears to run properly with the cowling removed, reinstall it and test again. The motor normally operates with the cover installed, and airflow, temperature and the environment around the intake change when the cowling goes back on. A substantial change in engine behavior with the cowling installed deserves investigation rather than another blind carburetor adjustment.
If the engine suddenly runs poorly with the cover installed, inspect for intake restrictions, exhaust leakage beneath the cowling, damaged seals, excessive heat or another condition affecting how the engine breathes. The final tune needs to work with the motor completely assembled.
Troubleshooting Common Running Problems
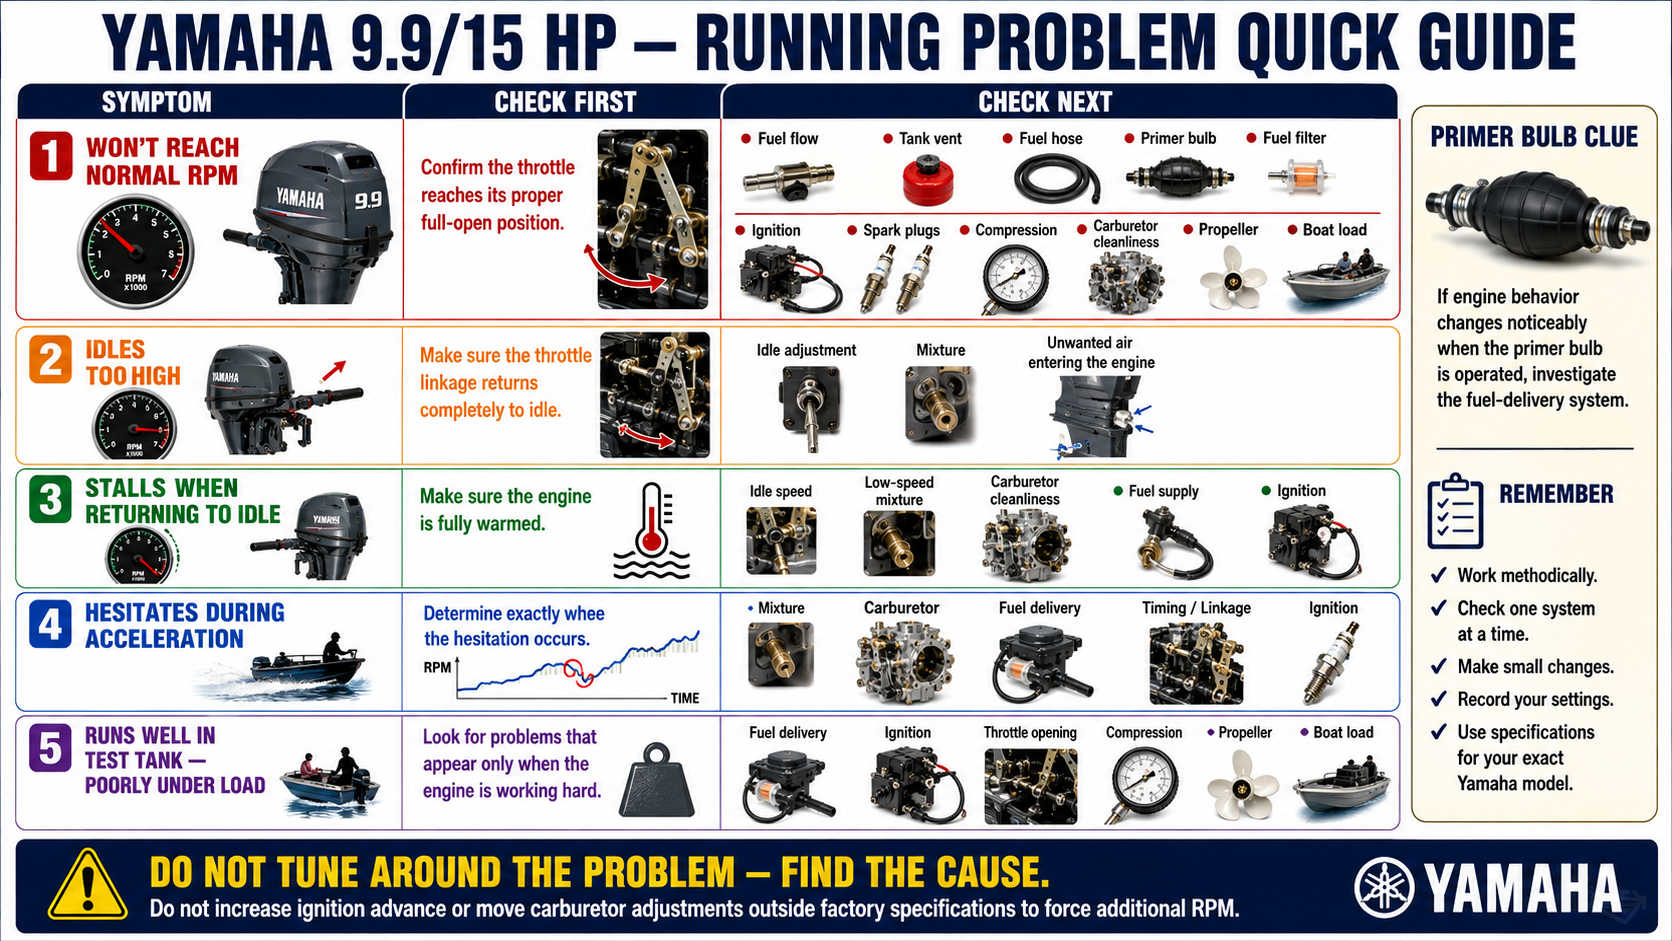
A Yamaha that starts easily and idles well but refuses to reach normal RPM should first be checked for complete throttle opening. If the throttle is reaching its proper position, move on to fuel flow, tank venting, fuel hoses, primer bulb, filters, ignition performance, spark plugs, compression, carburetor cleanliness, propeller selection and boat load. Do not increase ignition advance or move carburetor adjustments outside factory limits in an attempt to force additional RPM.
If the motor idles too high, make sure the throttle linkage is returning completely before changing the idle screw. If it stalls when returning to idle, make sure the engine is fully warm and then investigate idle speed, mixture, carburetor cleanliness, fuel supply and ignition condition. If it hesitates during acceleration, pay attention to exactly when the hesitation occurs. A problem appearing immediately as the throttle begins moving can have different causes from one that appears only after several seconds under load.
A useful fuel-delivery clue can sometimes be obtained by observing what happens when the primer bulb is operated while the problem occurs. If engine behavior changes significantly, fuel delivery deserves closer investigation. Likewise, a problem that appears only under load may not be noticeable in a test tank.
The Final Test Happens on the Water
An outboard running in a test tank or other service setup is not experiencing the same load it encounters while pushing a boat through the water. An engine can sound excellent during stationary testing yet perform poorly once the propeller is loaded. Fuel starvation, weak ignition, incorrect propeller selection, incomplete throttle opening, low compression, excessive boat load and engine installation can all become much more obvious on the water.

Choose safe conditions for the first test. Begin at low speed and confirm cooling-water flow, shifting, idle quality and throttle response. Increase power progressively while listening for hesitation, surging, abnormal vibration or unusual sounds. Once everything appears normal, evaluate the motor through its operating range and, where safe and appropriate, compare maximum engine speed with Yamaha’s specified wide-open-throttle RPM range for that exact model.
If maximum RPM is incorrect, remember that the carburetor is not automatically responsible. Propeller pitch and diameter, hull condition, engine mounting, boat weight, passenger and equipment load and general engine condition can all affect maximum RPM. Diagnose the cause rather than trying to tune around it.
Build an Outboard Maintenance Kit
For preparedness purposes, maintaining the engine is only half the job. The ability to repair it when parts and professional service are unavailable is what turns an outboard into a resilient transportation asset. Keep a dedicated maintenance kit containing model-appropriate spare spark plugs, fuel hose and clamps, fuel connectors, primer bulb, fuel filter, pull-start components where applicable, propeller hardware, cotter pins, lubricants and the basic tools needed to service the engine.
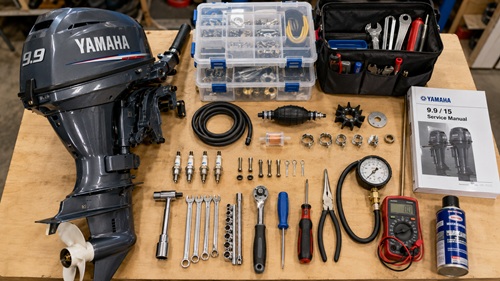
Depending on the motor and how important it is to your preparedness plans, additional spares such as a water-pump impeller, thermostat, carburetor service components and selected ignition parts may be worthwhile. Label parts with their numbers and intended use rather than simply putting unidentified components into a box.
Keep the knowledge with the equipment as well. Store an offline copy of the correct service manual and maintain an engine record containing the model and serial number, spark plug type and gap, fuel requirements, oil requirements, carburetor baseline, idle specification, timing specification, recommended wide-open-throttle RPM range, propeller information and commonly needed replacement-part numbers. Record compression readings, repairs and important adjustments so future troubleshooting begins with known information rather than guesswork.
The Most Important Tuning Principle
A correctly tuned engine should not require one adjustment to compensate for another problem. The mixture screw should not compensate for a dirty carburetor. The idle-speed screw should not compensate for incorrect linkage. The linkage should not compensate for incorrect ignition timing, and ignition timing cannot compensate for low compression. None of these adjustments can repair inadequate fuel delivery or an overheating engine.
When an adjustment has to be moved unusually far from its expected position just to make the motor run, stop and determine why. Proper tuning brings a mechanically healthy engine back to its intended operating condition. It does not disguise faults.
Preparedness Action Plan
Identify the exact Yamaha 9.9 or 15 HP model and obtain the correct service information before making critical adjustments. Record the important specifications offline, then establish the engine’s mechanical baseline by checking fuel condition, cooling, compression, spark plugs, ignition and visible components. Verify ignition timing and throttle linkage before making final carburetor adjustments, and make sure the throttle can return completely to idle while still achieving its proper full-open position.
Warm the engine thoroughly, adjust the low-speed circuit gradually according to the applicable service procedure, and reset idle speed as necessary. Reinstall the cowling and repeat the test before performing a controlled water test under actual load. Once the motor is running correctly, document the settings and compression readings and assemble the spare parts, tools, lubricants and offline service information needed to maintain the engine without depending on immediate access to a repair shop or the internet.
Key Takeaways
A Yamaha 9.9/15 HP outboard should be tuned as a complete system rather than by simply adjusting the carburetor until the engine sounds better. Start by proving that the engine is mechanically healthy, then verify ignition timing and throttle linkage before making final mixture and idle adjustments. Pay particular attention to throttle travel because an engine can start easily and idle beautifully while still producing disappointing performance because the carburetor never reaches full opening.
Make one adjustment at a time, give the engine time to respond and keep track of where each setting started. When an adjustment needs to be moved unusually far to make the motor run, look for another problem instead of continuing to compensate. For preparedness, the final objective is not simply a smooth-running outboard today. It is having the knowledge, specifications, tools, spare parts and maintenance records needed to keep that motor operational when outside help may not be readily available.
Disclaimer
This guide is provided for general educational and preparedness purposes only. Yamaha 9.9 and 15 HP outboards have been produced in different models, years and configurations, and specifications can vary between engines. Always identify your exact model and serial number and consult the correct Yamaha service manual before making adjustments or repairs.
Do not rely on generic settings for ignition timing, carburetor adjustment, idle speed, spark-plug gap, throttle linkage, torque values or wide-open-throttle RPM. Use the specifications for your exact engine. Never run a water-cooled outboard without an adequate cooling-water supply, and use appropriate tools, protective equipment and safe working practices.
If you are unsure about a procedure, adjustment or diagnosis, stop and seek assistance from a qualified marine technician. Prepping Communities and Prepper Offline provide this information as a general learning resource. Anyone performing maintenance, troubleshooting or repairs is responsible for determining whether the information is appropriate for their particular outboard and for performing the work safely.
© Prepping Communities. This content is for informational purposes only and not professional advice. Use at your own risk.
Terms | Privacy | Guidelines