
Introduction
Commercial baker’s yeast has made bread baking faster and more predictable, but it is not the only way to make bread rise. For thousands of years, people baked using naturally occurring wild yeast that was cultivated from flour, water, and the environment around them. Long before grocery stores and packaged yeast existed, families maintained living yeast cultures that were used repeatedly to bake bread, prepare other fermented foods, and pass valuable baking knowledge from one generation to the next.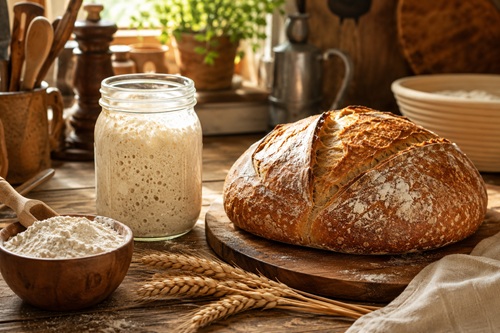
Learning how to cultivate wild yeast remains a practical skill today. Whether your goal is to become more self-sufficient, reduce dependence on commercial products, explore traditional baking methods, or prepare for temporary supply disruptions, understanding how to create and maintain a healthy yeast culture gives you the ability to produce leavened bread using simple ingredients that are widely available.
Unlike commercial yeast, which is manufactured under controlled conditions, a wild yeast starter is a living culture made up of naturally occurring yeast and beneficial bacteria. Once established, this culture can be maintained indefinitely through regular feeding with fresh flour and water. Many professional bakeries and home bakers have maintained the same starter for years, and in some cases, for generations.
Although the process is straightforward, success depends on understanding what is happening inside the jar each day. Wild yeast grows more slowly than commercial yeast, and the appearance, smell, and activity of the culture change as it develops. Knowing what to expect—and recognizing the difference between normal fermentation and potential problems—greatly increases your chances of producing a healthy, active starter.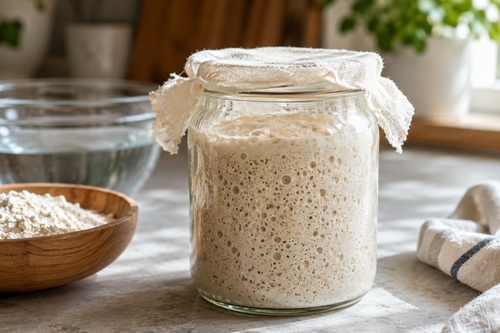
This guide explains every stage of the process, from selecting ingredients and creating your first starter to recognizing healthy fermentation, troubleshooting common problems, maintaining a culture for years, and using it successfully for baking. By the end, you’ll understand not only how to cultivate wild yeast, but also why each step is important and how to confidently maintain your own starter without relying on commercial yeast.
Understanding Wild Yeast
Before creating your first starter, it’s helpful to understand what wild yeast is and how it differs from the commercial yeast found in grocery stores. Knowing what is happening during fermentation makes it much easier to recognize a healthy starter, identify potential problems, and understand why each step in the process is important.
What Is Wild Yeast?
Yeast is a single-celled microorganism that occurs naturally throughout the environment. It can be found on cereal grains, fruit skins, plant leaves, and even in the air around us. Although invisible to the naked eye, these microscopic organisms have been used for thousands of years to make bread, beer, wine, and other fermented foods.
When flour and water are mixed together, naturally occurring yeast already present in the flour begins to multiply. At the same time, beneficial bacteria—primarily lactic acid bacteria—also begin growing. Together, these microorganisms form what bakers call a starter, a living culture capable of producing the gas needed to make bread rise.
A starter is not simply yeast suspended in water. It is a balanced ecosystem of yeast and beneficial bacteria that work together. The yeast produces carbon dioxide, while the bacteria create mild organic acids that contribute to flavor, improve dough structure, and help discourage the growth of undesirable microorganisms.
How Does Bread Rise?
As yeast consumes the natural carbohydrates found in flour, it produces two primary by-products:
- Carbon dioxide gas
- Small amounts of alcohol
The carbon dioxide becomes trapped within the dough as gluten develops during mixing and kneading. Thousands of tiny gas bubbles expand throughout the dough, causing it to increase in volume. During baking, these gas bubbles enlarge even further before the heat kills the yeast, leaving behind the light, airy structure associated with well-made bread.
Without yeast—or another leavening agent such as baking powder or baking soda—bread remains dense and flat because there is very little gas available to create this internal structure.
The Role of Beneficial Bacteria
Many people think a sourdough starter contains only yeast, but beneficial bacteria play an equally important role.
These naturally occurring bacteria:
- Produce the mild acidity associated with traditional sourdough.
- Improve the flavor and aroma of bread.
- Help strengthen the dough during fermentation.
- Create an environment that discourages harmful microorganisms.
The balance between yeast and bacteria develops naturally over several days as the starter matures. This is why a newly mixed flour-and-water mixture does not immediately behave like an established starter.
Wild Yeast vs. Commercial Yeast
Both wild yeast and commercial baker’s yeast perform the same basic function—they produce carbon dioxide that causes bread to rise. The difference lies in how they are cultivated and how they behave.
Commercial yeast is a carefully selected strain that has been bred for fast, predictable fermentation. It allows dough to rise quickly and consistently, making it ideal for commercial bakeries and everyday home baking.
A wild starter develops more slowly because it relies on naturally occurring microorganisms. Although fermentation takes longer, many bakers prefer the complex flavor, improved texture, and versatility that a mature starter provides.
Comparing Wild and Commercial Yeast
| Feature | Wild Yeast Starter | Commercial Baker’s Yeast |
|---|---|---|
| Source | Naturally cultivated | Commercially produced |
| Fermentation Speed | Slow to moderate | Fast |
| Flavor | Complex, mildly tangy | Mild and neutral |
| Maintenance | Requires regular feeding | None |
| Shelf Life | Can be maintained indefinitely | Limited by expiration date |
| Availability | Can be created almost anywhere | Must be purchased |
Neither method is inherently better. Commercial yeast offers speed and convenience, while wild yeast provides long-term sustainability and the ability to cultivate a renewable leavening culture using simple ingredients.
Why Wild Yeast Matters for Preparedness
For preparedness-minded households, learning to cultivate wild yeast is about developing another practical food-production skill rather than replacing commercial products.
A healthy starter allows you to continue baking even if commercial yeast is temporarily unavailable. When combined with stored flour or home-milled grains, a maintained starter provides an ongoing method of producing leavened bread using renewable ingredients.
More importantly, understanding how fermentation works helps build confidence in other traditional food preservation skills, including yogurt making, cultured dairy products, fermented vegetables, and naturally fermented beverages. Many of these techniques rely on the same basic principles: creating the right conditions for beneficial microorganisms to thrive.
Did You Know?
Some sourdough starters have been maintained continuously for more than 100 years. As long as the culture is fed regularly and cared for properly, there is no fixed lifespan. Many bakers pass healthy starters from one generation to the next.
Quick Tip
Don’t judge a new starter by the first day or two of activity. Wild fermentation develops gradually, and it is completely normal for the culture to change in appearance, smell, and growth rate several times before becoming fully established.
Choosing the Right Equipment and Ingredients
One of the reasons wild yeast has remained popular for centuries is its simplicity. Unlike many baking techniques, creating a healthy starter requires very little specialized equipment. However, choosing the right materials can improve your chances of success and make the process easier to manage.
The following section explains not only what you’ll need, but also why each item is recommended and how it contributes to a healthy fermentation process.
Choosing the Right Equipment and Ingredients
One of the advantages of cultivating wild yeast is that it requires very little equipment. Most households already have everything needed to begin. Success depends less on specialized tools and more on using clean equipment, quality ingredients, and maintaining consistent conditions during fermentation.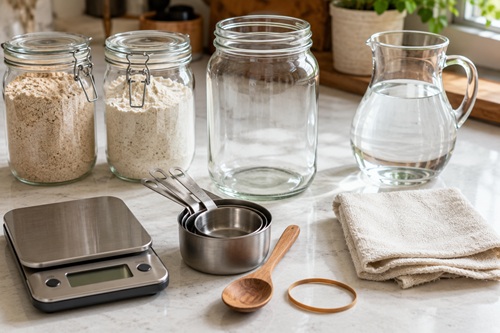
Although experienced bakers often develop personal preferences, beginners generally achieve the best results by following a few simple guidelines when selecting containers, flour, water, and a location for the starter.
Selecting the Right Container
The container serves as the home for your starter throughout the fermentation process. It should be large enough to allow the culture to expand while remaining easy to clean between feedings.
A clear glass jar is usually the best choice because it allows you to observe the starter without disturbing it. Being able to see bubbles forming along the sides of the jar, monitor the rise of the starter, and check for separation makes it much easier to judge the culture’s progress.
Choose a container that holds at least one litre (one quart). During active fermentation, many starters double or even triple in volume. A larger jar provides enough headroom to prevent the starter from overflowing.
Recommended Containers
| Container | Recommended | Notes |
|---|---|---|
| Glass jar | Excellent | Easy to clean and observe fermentation |
| Food-grade plastic container | Good | Lightweight and non-reactive |
| Ceramic crock | Good | Traditional option if food-safe glazed |
| Stainless steel bowl | Acceptable | Suitable for mixing but less convenient for long-term observation |
| Reactive metal container (aluminum or copper) | Not recommended | May react with the acidic starter over time |
If possible, avoid containers with narrow openings. Wide-mouth jars make stirring, feeding, and cleaning much easier.
Choosing the Best Flour
The flour you select has a significant effect on how quickly your starter develops. Different flours naturally contain different amounts of wild yeast, beneficial bacteria, minerals, and nutrients.
Whole grain flours generally produce faster, more reliable starters because they contain more of the grain’s outer layers, where naturally occurring microorganisms are most abundant.
Comparing Common Flours
| Flour Type | Success Rate | Comments |
| Rye Flour | Excellent | Often produces the fastest fermentation |
| Whole Wheat Flour | Excellent | Reliable and widely available |
| Unbleached Bread Flour | Good | Useful once the starter is established |
| Unbleached All-Purpose Flour | Good | Works well but may develop more slowly |
| Bleached Flour | Fair | Lower microbial activity may slow fermentation |
Many bakers begin with rye or whole wheat flour for the first several days before gradually transitioning to bread flour or all-purpose flour once the starter is active. This approach combines rapid initial growth with the convenience of maintaining the starter using commonly available flour.
If changing flour types, make the transition gradually over several feedings rather than all at once.
Water Quality Matters
Water provides the moisture needed for yeast and beneficial bacteria to become active. While this sounds simple, the quality of the water can influence how quickly fermentation begins.
Filtered water is generally the best option because it removes many contaminants while preserving the minerals that naturally support microbial growth.
Tap water is often suitable, but heavily chlorinated water may slow fermentation because chlorine is designed to reduce microbial activity. If your tap water has a strong chlorine smell, fill a container and allow it to sit uncovered overnight before using it. Much of the chlorine will dissipate naturally.
Avoid distilled water whenever possible. Although it is perfectly clean, it contains very few dissolved minerals, which can make fermentation less vigorous.
Water Comparison
| Water Type | Suitable? | Notes |
| Filtered Water | Excellent | Ideal for most starters |
| Spring Water | Excellent | Naturally contains minerals |
| Tap Water | Usually suitable | Best if chlorine levels are low |
| Dechlorinated Tap Water | Very Good | Good alternative if chlorine is present |
| Distilled Water | Acceptable | Lacks naturally occurring minerals |
What Temperature Is Best?
Wild yeast develops most consistently when kept at normal room temperatures.
An ideal temperature range is approximately 70°F to 78°F (21°C to 26°C).
Within this range, yeast and beneficial bacteria reproduce steadily without becoming overly active.
If temperatures fall much below this range, fermentation slows considerably. A starter kept in a cool basement may require several extra days before becoming active.
Higher temperatures speed fermentation but may also encourage undesirable bacteria or produce excessive acidity if maintained for long periods.
Temperature Guide
| Temperature | Expected Activity |
| Below 65°F (18°C) | Slow fermentation |
| 70–78°F (21–26°C) | Ideal growth |
| Above 82°F (28°C) | Rapid fermentation requiring closer monitoring |
Maintaining a consistent temperature is usually more important than achieving a perfectly exact temperature.
Covering the Starter
A developing starter should not be sealed inside an airtight container.
As fermentation progresses, carbon dioxide is produced continuously. An airtight lid can trap this gas and create unnecessary pressure inside the container.
Instead, loosely cover the jar with:
- A clean cloth
- Paper towel
- Coffee filter
- Loose-fitting lid
Secure cloth or paper covers with a rubber band to prevent insects or dust from entering while still allowing gas to escape naturally.
Keeping Everything Clean
Creating a starter does not require sterile laboratory conditions, but good sanitation greatly improves the chances of success.
Wash containers, utensils, and measuring equipment thoroughly before each use. Clean hands before handling ingredients, and avoid introducing food residue or dirty utensils into the starter.
A healthy starter naturally becomes resistant to many undesirable microorganisms as acidity increases. During the first several days, however, the culture is still developing and benefits from clean handling practices.
Equipment Tip
Use a rubber band around the outside of the jar to mark the starter’s level immediately after each feeding. This simple visual reference makes it easy to see how much the culture has risen during fermentation.
Quick Tip
Gather all of your equipment before mixing your starter. Having everything prepared makes the daily feeding routine faster and helps maintain consistency throughout the first week.
Creating Your First Wild Yeast Starter
Now that you understand how wild yeast works and have gathered the necessary equipment and ingredients, you’re ready to create your first starter. 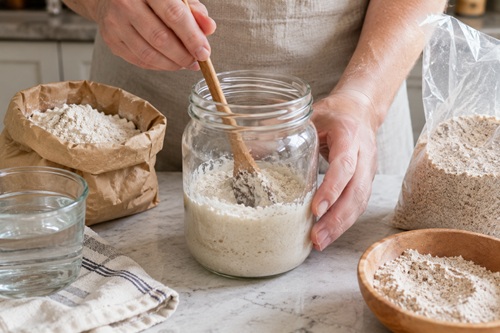 The process itself is simple, but paying attention to consistency, measurements, and daily observations during the first week will greatly improve your chances of developing a strong, healthy culture.
Creating Your First Wild Yeast Starter
Creating a wild yeast starter is a gradual process rather than a single event. During the first week, naturally occurring yeast and beneficial bacteria establish themselves, multiply, and develop into a stable culture capable of raising bread. While the process requires only flour, water, and time, understanding what should happen each day makes it much easier to recognize healthy fermentation and avoid unnecessary mistakes.
Patience is one of the most important ingredients. Every starter develops at its own pace depending on the flour, water, temperature, and naturally occurring microorganisms present in your environment. Some starters become active in five days, while others may require a week or slightly longer before they are ready for baking.
Step 1: Mix the Initial Starter
Begin by measuring:
- 1 cup (120 g) whole wheat or rye flour
- 1 cup (240 mL) lukewarm filtered water
Place both ingredients into your clean jar and stir until no dry flour remains. The mixture should resemble a thick pancake batter. It should pour slowly from a spoon but still be thick enough to hold its shape briefly before settling.
If the mixture is too thick, add a small amount of water. If it is overly runny, add a small amount of flour until the desired consistency is reached.
Once mixed, scrape down the sides of the jar with a spatula to remove excess batter. This makes it much easier to observe new growth over the next several days.
Loosely cover the container with a clean cloth, paper towel, coffee filter, or loose-fitting lid and place it in a location where the temperature remains between 70°F and 78°F (21°C–26°C).
Step 2: Let Nature Begin
For the first 24 hours, there is very little to do other than leave the starter undisturbed.
Although it may appear inactive, microscopic changes are already taking place. Wild yeast and beneficial bacteria begin consuming nutrients found naturally in the flour while multiplying rapidly.
Do not be concerned if nothing appears to happen during the first day. Some starters remain completely unchanged for the first 24 to 48 hours.
Step 3: Feed the Starter
After approximately 24 hours, it’s time for the first feeding.
Discard approximately half of the starter before adding fresh ingredients.
Then add:
- ½ cup (60 g) flour
- ½ cup (120 mL) water
Mix thoroughly until the starter once again reaches the consistency of thick pancake batter.
Discarding part of the starter may seem wasteful, but it serves several important purposes. It keeps the culture at a manageable size, provides fresh nutrients for the microorganisms, and prevents the starter from becoming overly acidic during its early development.
As the starter matures, many bakers save discarded starter for pancakes, crackers, muffins, and other recipes, reducing waste.
Why Is Starter Discarded?
One of the most common questions beginners ask is why part of the starter is thrown away.
Imagine continually feeding a fish without ever cleaning the aquarium. Eventually, waste products build up faster than fresh food can be added.
A starter behaves similarly.
Without discarding a portion before each feeding:
- The starter becomes excessively large.
- Fresh nutrients become diluted.
- Acidity increases rapidly.
- Fermentation becomes less predictable.
Discarding a portion allows the healthiest microorganisms to continue multiplying while maintaining a balanced environment.
Step 4: Repeat the Process Daily
Continue feeding the starter every 24 hours.
Each day:
- Observe the starter.
- Discard approximately half.
- Feed with fresh flour and water.
- Stir thoroughly.
- Replace the cover.
- Return it to the same location.
Consistency is more important than exact timing. Feeding the starter at approximately the same time each day helps establish a predictable fermentation cycle.
What Should Happen During the First Week?
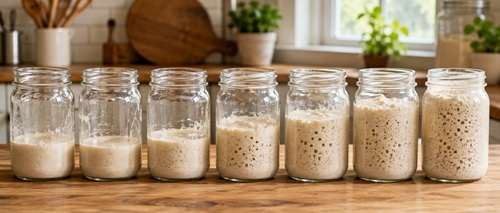
One of the biggest reasons beginners become discouraged is that they expect their starter to behave the same way every day.
It won’t.
Wild yeast cultures develop in stages, and some stages can actually appear to be setbacks even though everything is progressing normally.
Typical Starter Development
| Day | What You May Observe |
|---|---|
| Day 1 | Thick flour-and-water mixture with little visible activity. |
| Day 2 | Small bubbles may begin appearing. A mild grain aroma develops. |
| Day 3 | Rapid bubbling or a noticeable rise may occur. This is often called the “false rise.” |
| Day 4 | Activity frequently slows or almost disappears. This is completely normal. |
| Day 5 | Bubbles begin returning as yeast populations stabilize. Aroma becomes pleasantly tangy. |
| Day 6 | Starter begins rising more consistently after feeding. |
| Day 7 | Many starters double in size within 4 to 8 hours after feeding and are ready for baking. |
Every starter develops differently. Some become active sooner, while others require ten days or longer before reaching full strength.
Understanding the “False Rise”
Many new bakers become excited when their starter suddenly doubles in size during the second or third day, only to become concerned when the activity almost completely disappears the following day.
This temporary surge is known as the false rise.
During the first few days, many different microorganisms begin growing inside the starter. Some produce large amounts of gas before gradually declining as the environment becomes more acidic.
As acidity increases, these early microorganisms are replaced by the wild yeast and beneficial bacteria that eventually form a stable starter.
In other words, a sudden decrease in activity after an early rise is usually a sign that the culture is progressing normally—not failing.
Common Mistake
Many beginners throw away their starter during Days 3 or 4 because they believe it has stopped working. In reality, this temporary slowdown is one of the most normal stages of the entire process.
Quick Tip
Take a photograph of your starter at the same time each day. Comparing daily photos makes it much easier to see gradual progress that might otherwise go unnoticed.
Recognizing a Healthy Starter
As your starter matures, you’ll begin noticing consistent signs that fermentation is becoming established. 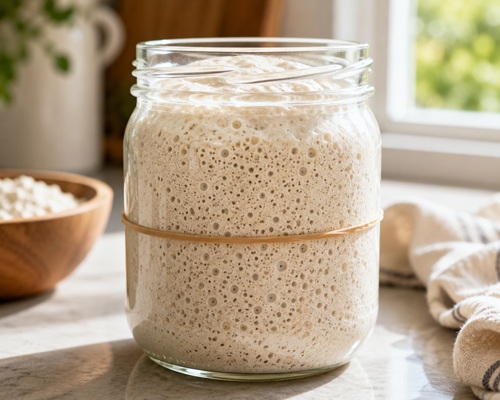 Learning to recognize these signs is far more reliable than simply counting the number of days that have passed. A healthy starter announces its readiness through its appearance, aroma, texture, and growth, and understanding these characteristics will help you decide when it is ready for baking and when it may need additional care.
Recognizing a Healthy Starter
A mature wild yeast starter develops predictable characteristics that indicate the fermentation process is progressing normally. Rather than relying on the calendar alone, evaluate your starter by observing its appearance, smell, texture, and how it responds after feeding. These indicators provide a much better measure of readiness than simply waiting a certain number of days.
Most healthy starters share the same basic traits, although each culture develops its own unique personality over time.
What Should a Healthy Starter Look Like?
As fermentation becomes established, the starter should begin producing bubbles throughout the mixture. Some bubbles may be very small, while others become large enough to see easily through the sides of the jar.
After feeding, the starter should gradually expand as carbon dioxide is produced. A mature starter typically doubles in volume within 4 to 8 hours, although cooler temperatures may slow this process.
The texture should also change. Instead of appearing like a dense paste, the starter develops a lighter, airy structure filled with tiny pockets of gas.
Signs of a Healthy Starter
| Characteristic | What You Should See |
|---|---|
| Bubbles | Visible throughout the starter |
| Rise | Doubles in volume after feeding |
| Texture | Light, airy, slightly elastic |
| Surface | Slightly domed before collapsing naturally |
| Color | Cream, tan, or light brown depending on flour used |
A starter does not need to look exactly the same every day. Temperature, flour type, hydration, and feeding schedule all influence its appearance.
What Should It Smell Like?
The aroma of a healthy starter changes as it matures.
During the first few days, the smell may resemble wet flour, cereal, or fresh dough. As fermentation develops, the aroma gradually becomes mildly tangy, fruity, slightly yeasty, or similar to yogurt.
These pleasant sour aromas indicate that both yeast and beneficial bacteria are becoming established.
Many first-time bakers worry that the starter smells “different.” This is completely normal. Fermentation naturally produces a variety of organic compounds responsible for the characteristic aroma of sourdough.
Normal Starter Aromas
- Fresh bread dough
- Yogurt
- Mild vinegar
- Apples or fruit
- Beer
- Slight sourness
All of these are considered normal during different stages of development.
What Smells Are Not Normal?
Certain odors may indicate contamination or an unhealthy culture.
If your starter develops any of the following odors, inspect it carefully before continuing.
| Odor | Possible Cause |
| Rotten meat | Contamination |
| Putrid garbage | Contamination |
| Moldy basement | Mold growth |
| Strong chemical smell | Starter under stress or neglected |
| Rancid odor | Contamination |
A slight acetone or nail-polish remover smell is usually not contamination. Instead, it often indicates that the starter has become very hungry and simply needs feeding.
What Colors Are Normal?
The color of your starter depends largely on the flour you’re using.
Whole wheat starters usually appear tan or light brown.
Rye starters often appear darker gray or brown.
White flour starters are typically cream or off-white.
These natural color differences are completely normal.
Signs of Contamination
While contamination is relatively uncommon when clean equipment and proper feeding practices are followed, it can occur.
Discard the starter immediately if you observe:
- Pink streaks
- Orange discoloration
- Green mold
- Blue mold
- Black mold
- Fuzzy growth of any kind
These indicate unwanted microorganisms that cannot be corrected by feeding.
Healthy vs. Unsafe Starter
| Healthy | Unsafe |
| Cream or tan color | Pink, orange, green, blue, or black growth |
| Pleasant sour aroma | Rotten or putrid odor |
| Bubbles throughout | Mold or fuzzy growth |
| Doubles after feeding | No activity after extended troubleshooting |
If mold develops, do not attempt to remove only the affected area. Discard the entire starter, thoroughly clean the container, and begin again with fresh ingredients.
Understanding Hooch
As a starter matures, you may occasionally notice a layer of gray or brown liquid forming on the surface.
This liquid is commonly called hooch.
Hooch forms when the starter has exhausted much of its available food and fermentation begins slowing. It is simply a by-product of fermentation and does not necessarily indicate that anything is wrong.
You have two options:
- Stir the hooch back into the starter before feeding.
- Pour it off before feeding if you prefer a milder flavor.
Either approach is acceptable.
Frequent hooch formation usually means the starter should be fed more often.
Is My Starter Ready to Bake?
Rather than relying on the number of days since you started, use these practical indicators.
A starter is generally ready when it:
- Doubles in size within 4 to 8 hours after feeding.
- Contains bubbles throughout the culture.
- Has a pleasant yeasty or mildly sour aroma.
- Returns to this pattern consistently for several consecutive feedings.
If these conditions are present, your starter is usually mature enough to begin baking.
The Float Test — Is It Reliable?
Some baking books recommend placing a spoonful of starter into water. If it floats, they suggest it is ready for baking.
Although this test is popular, it is not completely reliable.
A starter may sink simply because it was stirred recently, even though it is perfectly healthy. Likewise, some starters float while still lacking enough strength to produce consistently good bread.
Instead of relying on the float test, evaluate the starter using the indicators described above. Consistent growth after feeding is a much more dependable measure of strength.
Common Mistake
Many beginners assume a starter is unhealthy simply because it smells sour. In reality, a pleasant sour aroma is one of the best indicators that fermentation is progressing normally.
Quick Tip
Use a rubber band around the jar to mark the starter’s level immediately after feeding. This makes it easy to see exactly how much it has risen and helps you recognize when it reaches its peak activity.
Feeding and Maintaining Your Starter
Once your starter is active, regular feeding keeps the yeast and beneficial bacteria healthy. A well-maintained starter can remain productive for many years, providing a continuous source of natural leavening whenever you want to bake. Understanding when to feed your starter, how much to feed it, and how to store it properly is the key to long-term success.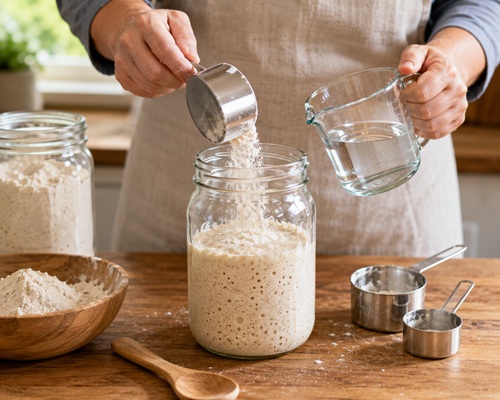
Fortunately, maintaining a starter is much easier than creating one. Once the culture has become established, it develops a stable population of yeast and beneficial bacteria that requires only routine care.
Why Does a Starter Need Feeding?
Wild yeast and beneficial bacteria feed on the carbohydrates found in flour. As they consume these nutrients, they produce carbon dioxide, organic acids, and small amounts of alcohol. Over time, the available food is exhausted, fermentation slows, and the starter becomes less active.
Adding fresh flour and water provides new nutrients that allow the microorganisms to continue reproducing.
Think of feeding as replenishing the starter’s food supply. Without regular feedings, the microorganisms eventually become weak, fermentation slows dramatically, and undesirable by-products begin accumulating.
How Often Should You Feed It?
The feeding schedule depends primarily on where the starter is stored.
Starter Stored at Room Temperature
If your starter remains on the kitchen counter, it should generally be fed every 24 hours. In warmer homes, very active starters may benefit from feeding every 12 hours, especially if you bake frequently.
Counter storage is ideal for people who bake several times each week because the starter remains active and ready to use.
Starter Stored in the Refrigerator
Most home bakers keep their starter refrigerated between baking sessions.
Cool temperatures slow fermentation considerably, allowing the starter to remain healthy with much less frequent feeding.
A refrigerated starter generally needs feeding about once each week.
Although refrigeration slows activity, it does not stop fermentation completely. The yeast remains alive and simply becomes less active until it is warmed and fed again.
Recommended Feeding Schedule
| Storage Location | Typical Feeding Schedule |
|---|---|
| Room Temperature | Every 24 hours |
| Warm Kitchen | Every 12–24 hours if highly active |
| Refrigerator | About once each week |
| Long-Term Storage | Dry or freeze the starter |
How to Feed an Established Starter
Feeding follows the same basic process used during the first week.
- Remove the starter from storage.
- Stir the starter thoroughly.
- Discard approximately half of the culture.
- Add fresh flour.
- Add fresh water.
- Mix until smooth.
- Allow the starter to begin fermenting before returning it to storage.
Many bakers prefer feeding equal weights of starter, flour, and water because it provides consistent results. Others use simple volume measurements. Either approach works as long as the consistency remains similar from one feeding to the next.
When Is the Best Time to Bake?
The strongest fermentation occurs shortly after the starter reaches its peak growth.
For most mature starters, this occurs 4 to 8 hours after feeding, depending on room temperature.
At this point the yeast population is highly active, making it the ideal time to mix bread dough.
If the starter has already risen and completely collapsed, it can still be used, but fermentation may be slower. Feeding it again and allowing it to peak before baking generally produces better results.
What If You Forget to Feed It?
Missing a feeding does not usually ruin a healthy starter.
A starter left unfed for several days may:
- Develop a stronger sour aroma.
- Produce a layer of hooch.
- Rise more slowly.
- Become thinner in consistency.
In most cases, simply resume the normal feeding schedule. After one or two feedings, the starter usually returns to normal activity.
Even starters neglected for several weeks can often be revived with repeated feedings, provided no mold or contamination has developed.
Can a Starter Live Forever?
One of the most fascinating aspects of sourdough is its longevity.
Unlike commercial yeast packets, which eventually expire, a healthy starter has no fixed lifespan. As long as it is fed regularly and protected from contamination, the yeast and beneficial bacteria continue reproducing indefinitely.
Some bakeries maintain starters that have been continuously propagated for decades, while historical records describe cultures passed down through multiple generations.
Although the individual yeast cells are constantly being replaced, the living culture continues because each new generation grows from the previous one.
Preparing a Starter for Long Absences
If you plan to be away from home for several weeks, there are several ways to preserve your starter.
The simplest method is refrigeration immediately after feeding. For longer periods, many bakers dry part of the starter for storage. Drying greatly slows biological activity while allowing the culture to be revived later with water and fresh flour.
We’ll cover the drying process in detail later in this guide.
Maintenance Tip
Keep a small notebook or label on the jar recording the date of each feeding. This simple habit makes it easy to remember when the starter was last maintained and helps identify changes in fermentation over time.
Quick Tip
If your starter consistently doubles within a few hours after feeding, you’re doing everything right. Consistent growth is one of the best indicators of a healthy, well-maintained culture.
Troubleshooting Common Starter Problems
Even experienced bakers occasionally encounter problems while maintaining a starter. Fortunately, most issues are easy to diagnose and correct once you understand their causes.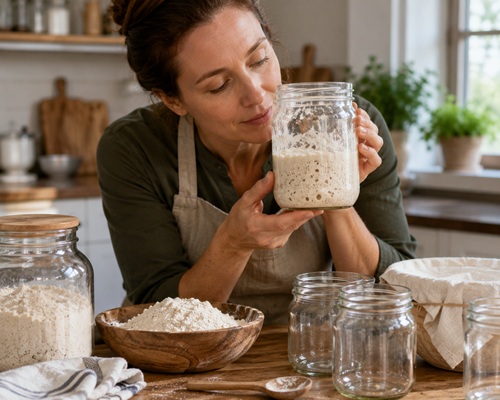
The next section explains the most common problems beginners encounter, what causes them, and the practical steps you can take to restore a healthy, active starter without starting over.
Troubleshooting Common Starter Problems
Nearly every new baker encounters a problem while developing their first starter. Fortunately, most issues are caused by temperature, feeding schedules, hydration, or flour selection rather than a failed culture. Learning how to recognize these problems—and understanding how to correct them—can save both time and frustration.
Before throwing away a starter, remember that wild yeast is remarkably resilient. In many cases, a starter that appears inactive simply needs additional time or a few consistent feedings to recover.
Problem: My Starter Isn’t Bubbling
A lack of bubbles is one of the most common concerns during the first week.
Several factors can slow fermentation:
- Room temperature is too low.
- Bleached flour is being used.
- Chlorinated water is slowing microbial growth.
- The starter is still very young.
- Feedings have been inconsistent.
How to Fix It
Move the starter to a warmer location between 70°F and 78°F (21°C–26°C).
If you’re using bleached flour, switch to whole wheat or rye flour for several feedings. Continue feeding every 24 hours and give the culture additional time. Many starters require seven to ten days before becoming consistently active.
Problem: My Starter Rose Yesterday but Stopped Today
This often worries beginners, but it is usually completely normal.
Many starters experience a period of rapid activity around the second or third day, followed by a noticeable slowdown. This is part of the natural succession of microorganisms as the starter develops into a stable culture.
How to Fix It
Continue feeding the starter on schedule.
Do not increase feeding frequency or add extra ingredients in an attempt to force activity. In most cases, normal fermentation resumes within several days.
Patience is usually the correct solution.
Problem: A Layer of Liquid Formed on Top
A gray or brown liquid on the surface is commonly called hooch.
Hooch develops when the microorganisms have consumed most of their available food and fermentation begins slowing.
Although it may look unusual, hooch is generally harmless.
How to Fix It
Either:
- Stir the liquid back into the starter before feeding, or
- Pour it off if you prefer a milder flavor.
Feed the starter normally afterward.
If hooch appears repeatedly, the starter likely needs more frequent feedings.
Problem: My Starter Smells Like Nail Polish
A strong acetone or nail-polish remover smell usually indicates that the yeast has exhausted its food supply.
The culture is hungry—not contaminated.
How to Fix It
Discard part of the starter and feed it with fresh flour and water.
After one or two regular feedings, the unpleasant odor usually disappears.
Problem: My Starter Smells Very Sour
A pleasantly sour smell is actually a sign of a healthy fermentation.
As beneficial bacteria become established, they naturally produce mild organic acids that give traditional sourdough its characteristic aroma.
Only discard a starter if the odor becomes rotten, putrid, or moldy.
Problem: My Starter Isn’t Rising Very Much
If bubbles are present but the starter doesn’t rise significantly, the yeast may still be developing.
Other possible causes include:
- Cool room temperatures.
- Weak flour.
- Starter is too wet.
- Starter is too young.
How to Fix It
Continue feeding consistently and maintain an appropriate room temperature.
Switching temporarily to rye or whole wheat flour often provides additional nutrients that encourage stronger fermentation.
Problem: Mold Is Growing
Mold is one problem that cannot be corrected.
Signs include:
- Green growth
- Blue growth
- Black growth
- Pink or orange discoloration
- Fuzzy patches
What Should You Do?
Discard the entire starter immediately.
Wash the container thoroughly with hot, soapy water before starting over.
Do not attempt to remove only the affected portion.
Problem: My Starter Is Too Thick or Too Thin
Consistency affects fermentation.
A starter that is too thick may not expand easily because gas cannot move through the mixture.
A starter that is too thin often rises poorly because bubbles escape too quickly.
How to Fix It
Aim for the consistency of thick pancake batter.
It should stir easily while still holding its shape briefly before slowly settling.
Adjust future feedings by adding slightly more flour or water as needed.
Problem: I’ve Forgotten to Feed It
Life happens.
Missing a feeding—or even several feedings—doesn’t necessarily mean the starter has died.
Most mature starters recover surprisingly well.
Recovery Steps
- Stir the starter.
- Discard approximately half.
- Feed with fresh flour and water.
- Wait 24 hours.
- Repeat if necessary.
After two or three feedings, most healthy starters regain their normal activity.
Troubleshooting Quick Reference
| Problem | Most Likely Cause | Recommended Solution |
|---|---|---|
| No bubbles | Cool temperatures or young starter | Continue feeding and keep warm |
| Activity stopped | Normal development | Keep feeding consistently |
| Gray liquid (hooch) | Starter is hungry | Feed more frequently |
| Nail-polish smell | Needs food | Feed immediately |
| Very sour smell | Normal fermentation | Continue normal care |
| Mold | Contamination | Discard and restart |
| Thin starter | Too much water | Add slightly more flour |
| Thick starter | Too little water | Add slightly more water |
Most problems can be corrected without starting over. Unless mold or obvious contamination is present, giving the starter additional time and maintaining a consistent feeding schedule usually produces the best results.
Common Mistake
One of the biggest mistakes beginners make is changing several variables at once. Switching flour, changing water, moving the starter, and feeding more often all at the same time makes it difficult to determine what actually solved—or caused—the problem.
Quick Tip
If your starter appears healthy but isn’t progressing as quickly as expected, resist the urge to experiment with multiple changes. Continue using the same flour, water, feeding schedule, and temperature for several more days before making adjustments. Consistency is one of the most important ingredients in successful sourdough fermentation.
Drying and Storing a Starter for Long-Term Preparedness
One of the greatest advantages of a wild yeast starter is that it can be preserved for future use. 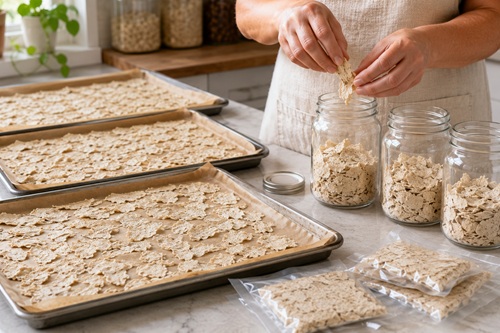 Drying a portion of an active starter creates a lightweight, shelf-stable backup that can be stored for months and reactivated whenever needed.
In the next section, you’ll learn how to dry a starter properly, store it safely, and successfully bring it back to life after long-term storage.
Drying and Storing a Starter for Long-Term Preparedness
One of the greatest advantages of a wild yeast starter is that it can be preserved for future use. Unlike many fresh foods that spoil quickly, a healthy starter can be dried, stored, and later reactivated with surprisingly little effort. For preparedness-minded households, this provides an excellent backup in case an active starter is accidentally lost, contaminated, or neglected.
Drying a starter does not permanently stop the yeast and beneficial bacteria from living. Instead, it places them into a dormant state. Once moisture and fresh flour are reintroduced, many of these microorganisms become active again and begin rebuilding the culture.
For anyone interested in long-term food security, maintaining both an active starter and a dried backup is a practical strategy. If one culture is lost, another can often be restored within a few days.
When Should You Dry a Starter?
Only dry a starter that is healthy and fully mature.
A good candidate should:
- Double in size within 4 to 8 hours after feeding.
- Contain bubbles throughout the culture.
- Have a pleasant sour or yeasty aroma.
- Show consistent activity over several feedings.
Drying a weak or unhealthy starter simply preserves its problems rather than creating a reliable backup.
How to Dry a Starter
Begin by feeding your starter and allowing it to reach peak activity. This is when the yeast population is strongest and most likely to survive the drying process.
Next, gather:
- Parchment paper or a silicone baking mat
- Offset spatula or butter knife
- Baking tray or cutting board
- Clean, dry storage container
Spread a very thin layer of starter over the parchment paper. Aim for a thickness similar to a sheet of paper or slightly thicker. Thin layers dry more evenly and are easier to break into flakes later.
Place the tray in a clean, dry location out of direct sunlight. Good air circulation helps speed the drying process.
Do not use excessive heat. High temperatures can damage or kill the microorganisms you are trying to preserve.
Depending on humidity, complete drying usually takes 24 to 72 hours.
How Do You Know It’s Dry?
A properly dried starter should become:
- Completely dry
- Brittle
- Easy to break into flakes
- Free of soft or sticky areas
If any portion remains flexible or damp, allow additional drying time before storage.
Moisture trapped inside the starter can encourage mold during storage.
Storing Dried Starter
Once fully dry, break the starter into small flakes or crumble it into coarse pieces.
Store the flakes in:
- Glass jars with tight-fitting lids
- Vacuum-sealed bags
- Mylar bags with oxygen absorbers
- Airtight food-storage containers
Clearly label the container with:
- Date dried
- Flour type
- Starter name (if desired)
Store the container in a cool, dark, dry location.
Storage Comparison
| Storage Method | Expected Storage Life |
|---|---|
| Airtight glass jar | Several months to 1 year |
| Vacuum-sealed bag | 1–2 years or longer |
| Mylar bag with oxygen absorber | Long-term storage under proper conditions |
| Refrigerator | Extends storage life |
| Freezer | Can provide additional long-term protection if well sealed |
Actual storage life depends on temperature, humidity, and how well the starter was dried before packaging.
Reactivating a Dried Starter
Reviving a dried starter is much easier than creating one from scratch because the beneficial microorganisms are already present.
Place several flakes into a clean jar and add a small amount of lukewarm water.
Allow the flakes to soften for about an hour before stirring.
Add a small amount of flour and mix thoroughly.
Continue feeding every 24 hours using the same process described earlier in this guide.
Most dried starters begin showing activity within one to three days, although older cultures may require several additional feedings before returning to full strength.
Maintaining Multiple Backups
Many experienced bakers never rely on a single starter.
Instead, they maintain:
- One active starter for everyday baking.
- One refrigerated backup.
- One dried backup for long-term storage.
This approach greatly reduces the chance of permanently losing a valuable culture due to contamination, neglect, equipment failure, or accidental disposal.
For preparedness planning, redundancy is just as valuable with food-production skills as it is with water purification, communications, or emergency power.
Equipment Tip
Prepare several small containers of dried starter instead of one large container. Opening one container repeatedly exposes the remaining starter to moisture and air. Smaller portions preserve the rest of your backup if one container becomes contaminated.
Quick Tip
Test your dried backup once each year by rehydrating a small portion. Confirming that it can still be revived gives you confidence that your long-term backup remains viable.
Baking with Your Wild Yeast Starter
Once your starter consistently doubles after feeding and passes the signs of a healthy culture described earlier, it’s ready to use for baking.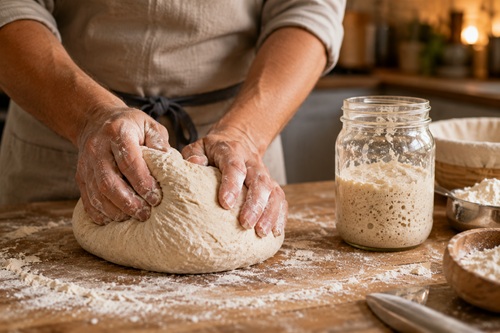
The final step is learning how to incorporate the starter into bread dough, understand the slower fermentation process, and recognize when your dough has developed enough strength to produce a well-risen loaf. Although baking with wild yeast requires more patience than using commercial yeast, the process quickly becomes familiar with practice and opens the door to producing traditional naturally leavened bread whenever you choose.
Baking with Your Wild Yeast Starter
Creating a healthy starter is only the first step. To produce good bread consistently, it’s important to understand how wild yeast behaves differently from commercial baker’s yeast. Although the basic principles of bread making remain the same, naturally fermented dough develops more slowly and responds more noticeably to changes in temperature, hydration, and fermentation time.
The slower pace of wild yeast fermentation is often viewed as a disadvantage by beginners, but it actually offers several benefits. Longer fermentation develops more complex flavors, improves dough structure, and gives the baker more time to monitor and adjust the process.
When Is the Starter Ready to Use?
A mature starter should be used when it reaches its peak activity.
This usually occurs 4 to 8 hours after feeding, depending on room temperature and the strength of the culture.
At its peak, the starter should:
- Double in volume.
- Contain bubbles throughout.
- Have a rounded or domed surface.
- Smell pleasantly yeasty or mildly sour.
- Feel light and airy when stirred.
Using the starter at this stage provides the largest population of active yeast cells, resulting in stronger fermentation and more consistent bread.
How Much Starter Should You Use?
The amount of starter depends on the recipe you’re following, but many naturally leavened breads use between 15% and 30% of the flour weight as active starter.
For example:
| Flour Used | Typical Starter Amount |
|---|---|
| 500 g flour | 75–150 g starter |
| 750 g flour | 110–225 g starter |
| 1000 g flour | 150–300 g starter |
Using more starter generally speeds fermentation, while using less produces a slower rise and often a slightly more pronounced sour flavor.
Always follow the measurements provided in the specific recipe you’re using.
Why Wild Yeast Takes Longer
Commercial yeast has been selected for rapid and predictable fermentation.
Wild yeast develops more gradually because it contains a natural balance of yeast and beneficial bacteria rather than a single highly active strain.
Depending on room temperature, dough made with a wild starter may require:
- 3 to 6 hours for the first rise.
- Overnight fermentation.
- Several additional hours for final proofing.
Longer fermentation is completely normal and often produces superior flavor.
Trying to rush the process by placing dough in excessive heat can reduce bread quality and interfere with proper gluten development.
Understanding Bulk Fermentation
After mixing the dough, the first rising period is called bulk fermentation.
During this stage:
- Yeast produces carbon dioxide.
- Gluten develops strength.
- Flavor compounds continue forming.
- Dough becomes smoother and more elastic.
Rather than watching the clock, observe the dough itself.
Signs that bulk fermentation is progressing well include:
- Noticeable increase in volume.
- Smooth surface.
- Increased elasticity.
- Visible gas bubbles near the sides of the container.
Most doughs are ready to shape after increasing approximately 50 to 75 percent in volume rather than doubling completely.
Final Proofing
After shaping the loaf, allow the dough to rise a second time.
This stage is known as proofing.
Proper proofing allows the loaf to develop additional volume before baking.
An under-proofed loaf may split unpredictably in the oven.
An over-proofed loaf may spread outward instead of rising upward.
The Finger Test
A simple way to judge proofing is the finger test.
Lightly press the dough with a floured fingertip.
| Dough Response | Interpretation |
| Springs back immediately | Needs more proofing |
| Springs back slowly | Ready to bake |
| Leaves a deep indentation | May be over-proofed |
Although not perfect, this simple test provides a useful guide for beginners.
Baking the Bread
Most artisan sourdough loaves are baked in a very hot oven.
Typical baking temperatures range between 425°F and 475°F (220°C–245°C) depending on the recipe.
Many bakers use a Dutch oven because the enclosed environment traps steam during the early part of baking.
Steam helps:
- Delay crust formation.
- Improve oven spring.
- Produce a crisp crust.
- Create a more open crumb structure.
If you do not own a Dutch oven, many excellent loaves can still be baked on a baking stone or baking sheet using other methods of introducing steam.
Evaluating Your Results
Every loaf teaches something.
After each bake, evaluate:
- Height of the loaf.
- Crust color.
- Crumb texture.
- Flavor.
- Moisture.
- Rise.
- Ease of slicing.
Keeping simple notes helps identify patterns and gradually improve your baking.
Many experienced bakers maintain a notebook recording:
- Flour used
- Hydration
- Room temperature
- Fermentation times
- Baking temperature
- Final observations
These records become increasingly valuable as your experience grows.
Baking Tip
Avoid making several recipe changes at once. If you adjust flour, hydration, fermentation time, and baking temperature simultaneously, it becomes difficult to determine which change affected the final loaf.
Quick Tip
Your first loaf does not need to be perfect. Focus on producing a healthy, active starter first. As your understanding of fermentation improves, bread quality naturally improves as well.
Using Wild Yeast in a Preparedness Plan
For preparedness-minded households, a wild yeast starter is more than simply a way to bake bread. It is a renewable food-production tool that can remain productive for years with only basic care. When combined with stored grains, hand grain mills, and alternative cooking methods, a healthy starter allows you to continue producing leavened bread even if commercial yeast becomes temporarily unavailable.
Understanding how to maintain a living culture also builds confidence in other traditional food skills that rely on fermentation. The principles learned while maintaining a sourdough starter apply to yogurt, fermented vegetables, cultured dairy products, and many other preservation techniques.
A wild yeast starter should not replace good food storage planning, but it complements it exceptionally well. Stored flour eventually becomes bread, and bread becomes much more enjoyable and versatile when reliable natural leavening is available.
Many experienced preppers maintain both commercial yeast and an active sourdough starter. Commercial yeast provides speed and convenience, while a maintained wild starter offers a long-term, renewable option that requires only flour, water, and routine care.
By learning this traditional skill before it is needed, you gain more than the ability to bake bread. You gain a practical understanding of fermentation, greater confidence in producing food from basic ingredients, and another layer of self-reliance that can serve your household for many years.
Key Takeaways
Wild yeast is a naturally occurring microorganism that can be cultivated using only flour, water, and time. Although developing a healthy starter requires patience, the process is straightforward once you understand the principles of fermentation and recognize the signs of a healthy culture.
The most successful starters begin with quality ingredients, clean equipment, and consistent daily care. During the first week, regular feedings allow naturally occurring yeast and beneficial bacteria to establish a stable culture capable of producing the carbon dioxide needed to raise bread. Learning to evaluate your starter by its appearance, aroma, texture, and growth is more reliable than simply counting the number of days since it was created.
Once established, a starter can be maintained for years through routine feeding and proper storage. Keeping both an active starter and a dried backup provides an additional layer of resilience and helps ensure that natural leavening remains available whenever you choose to bake.
Like any practical preparedness skill, success comes through practice. Each starter develops a little differently, and each loaf provides another opportunity to improve your understanding of fermentation. With patience and consistent care, a simple mixture of flour and water can become a dependable tool for producing wholesome bread for years to come.
Frequently Asked Questions
Even experienced bakers occasionally have questions about maintaining a wild yeast starter. The following answers address many of the situations that beginners encounter while learning this traditional skill.
Can I Use All-Purpose Flour?
Yes. Unbleached all-purpose flour works well for maintaining an established starter and is commonly used by home bakers.
However, whole wheat and rye flour usually produce faster and more vigorous fermentation during the first week because they contain higher levels of naturally occurring yeast, beneficial bacteria, and nutrients. If you’re creating your first starter, beginning with rye or whole wheat often improves your chances of success.
Does the Type of Water Matter?
In many cases, yes.
Filtered or spring water generally produces the most consistent results because it contains minerals that support fermentation while avoiding high levels of chlorine.
Tap water is often suitable, but if it has a noticeable chlorine smell, allow it to sit uncovered overnight or use a water filter before mixing your starter.
Distilled water is not harmful, but it contains very few naturally occurring minerals and may not support fermentation as effectively as filtered or spring water.
My House Is Cold. Can I Still Make a Starter?
Absolutely.
Fermentation simply occurs more slowly at cooler temperatures.
If your home remains below 70°F (21°C), your starter may require several additional days before becoming fully active.
Placing the starter in a warmer part of the home, such as on top of the refrigerator or inside an unheated oven with only the oven light turned on, often provides a more stable environment.
Avoid placing the starter directly on heating vents or using excessive heat, as temperatures above about 85°F (29°C) can stress the microorganisms.
Can I Leave My Starter Unfed for Several Weeks?
A healthy refrigerated starter can often survive several weeks without feeding, although activity will gradually decline.
If you expect to be away for an extended period, drying a portion of the starter before leaving provides an excellent backup. Once you return, the refrigerated starter can usually be revived through several regular feedings.
Can I Freeze My Starter?
Yes.
Many bakers successfully freeze active starters for several months.
However, freezing depends on continuous electrical power. For long-term preparedness, drying a starter is generally considered the more reliable preservation method because it requires no electricity and is less vulnerable to extended power outages.
Why Do Recipes Tell Me to Discard Half the Starter?
Discarding part of the starter keeps the culture balanced.
Without discarding, the starter would become increasingly large while fresh flour and water would be diluted by older, exhausted material. Regularly removing part of the starter provides fresh nutrients, maintains consistent acidity, and keeps the culture at a manageable size.
Once your starter is mature, the discarded portion can often be used in pancakes, waffles, crackers, pizza dough, muffins, and other baked goods rather than being thrown away.
Can I Share My Starter?
Yes.
Sharing starters has been a tradition among bakers for centuries.
Simply remove a portion of your healthy starter, place it in a clean container, and provide the recipient with feeding instructions. Once fed regularly, the new culture becomes an independent starter capable of being maintained indefinitely.
How Long Can a Starter Live?
A properly maintained starter has no known expiration date.
Because the yeast and beneficial bacteria continually reproduce, the culture effectively renews itself with every feeding. Historical records describe starters that have been maintained continuously for many decades, and some are believed to be over one hundred years old.
With routine care, your starter can become a long-term household resource that is passed from one generation to the next.
Glossary of Common Terms
Learning a few basic baking terms makes understanding fermentation much easier.
Bulk Fermentation
The first rising period after the dough has been mixed. During this stage, yeast produces carbon dioxide while gluten develops strength and flavor compounds continue forming.
Culture
A living community of microorganisms. In sourdough baking, the culture consists primarily of wild yeast and beneficial lactic acid bacteria.
Discard
The portion of starter removed before feeding. Discarding keeps the starter at a manageable size while allowing fresh flour and water to nourish the remaining microorganisms.
Feeding
Adding fresh flour and water to the starter to provide nutrients for continued growth.
Fermentation
The natural process in which yeast and beneficial bacteria consume carbohydrates and produce carbon dioxide, organic acids, and small amounts of alcohol.
Gluten
A network of proteins that develops when flour and water are mixed. Gluten traps the carbon dioxide produced during fermentation, allowing bread to rise.
Hooch
A gray or brown liquid that may form on the surface of a hungry starter. Hooch is a normal by-product of fermentation and usually indicates that the starter needs feeding.
Hydration
The ratio of water to flour in a dough or starter. Hydration affects consistency, fermentation speed, and the final texture of bread.
Proofing
The final rise that occurs after the dough has been shaped and before it is baked.
Starter
A living mixture of flour, water, wild yeast, and beneficial bacteria used to naturally leaven bread.
Wild Yeast
Naturally occurring yeast found on grains, flour, plants, fruit, and throughout the environment. Wild yeast forms the foundation of traditional sourdough fermentation.
Continue Building Your Food Self-Sufficiency Skills
Learning to cultivate wild yeast is only one part of developing long-term food resilience. The same principles of observation, patience, and practice apply to many other traditional food-production and preservation skills.
As your confidence grows, consider expanding your knowledge in related areas such as long-term grain storage, milling wheat into fresh flour, baking with Dutch ovens, cooking on rocket stoves, solar oven baking, food preservation, vegetable fermentation, cultured dairy products, vinegar production, and growing cereal grains. Each of these skills complements wild yeast baking and contributes to a more complete understanding of traditional food preparation.
The greatest value of learning these techniques is not simply producing bread without commercial yeast. It is developing practical knowledge that can be applied using basic ingredients and simple equipment. Skills that rely on understanding rather than convenience tend to remain useful regardless of changing technology, supply chains, or available products.
Whether you bake every week or only occasionally, maintaining a healthy wild yeast starter provides an opportunity to practice a time-tested skill that has sustained households for thousands of years. Like many preparedness skills, the confidence comes not from owning specialized equipment, but from knowing that you can successfully perform the task whenever the need—or the desire – arises.
Wild Yeast Starter Quick Reference
Keep this page with your baking supplies for a quick reminder of the most important steps in creating and maintaining a healthy wild yeast starter.
Starter Recipe
Ingredients
- 1 cup (120 g) whole wheat or rye flour
- 1 cup (240 mL) filtered or dechlorinated lukewarm water
Instructions
✓ Mix until smooth (thick pancake batter consistency)
✓ Scrape down the sides of the jar
✓ Cover loosely with a cloth, coffee filter, or loose-fitting lid
✓ Store at room temperature
Daily Feeding Routine
Every 24 hours:
✓ Stir the starter
✓ Discard approximately half
✓ Add ½ cup (60 g) flour
✓ Add ½ cup (120 mL) water
✓ Mix thoroughly
✓ Cover loosely
✓ Return to the same location
Repeat daily until the starter consistently doubles after feeding.
Ideal Growing Conditions
| Item | Recommendation |
|---|---|
| Temperature | 70–78°F (21–26°C) |
| Container | Wide-mouth glass jar |
| Water | Filtered or dechlorinated |
| Flour | Whole wheat or rye (best for starting) |
| Cover | Cloth, paper towel, coffee filter, or loose lid |
| Feeding | Every 24 hours |
What to Expect During the First Week
| Day | Typical Activity |
| Day 1 | Thick mixture with little activity |
| Day 2 | Small bubbles may appear |
| Day 3 | Possible rapid rise (“false rise”) |
| Day 4 | Activity often slows |
| Day 5 | Bubbles become more consistent |
| Day 6 | Starter begins rising regularly |
| Day 7 | Many starters are ready for baking |
Every starter develops at its own pace.
Healthy Starter Signs
✓ Bubbles throughout the starter
✓ Pleasant sour or yeasty aroma
✓ Light, airy texture
✓ Doubles in size within 4–8 hours after feeding
✓ Consistent rise after several feedings
Feed Immediately If You Notice
• Gray or brown liquid (hooch)
• Strong acetone or nail-polish smell
• Starter no longer rises well
These usually indicate the starter has exhausted its food supply and needs fresh flour and water.
Discard the Starter Immediately If You See
✗ Green mold
✗ Blue mold
✗ Black mold
✗ Pink or orange discoloration
✗ Fuzzy growth
✗ Rotten or putrid odor
Do not attempt to remove only the affected portion. Discard the entire starter, thoroughly clean the container, and begin again.
Ready for Baking
Your starter is generally ready when it:
✓ Doubles within 4–8 hours after feeding
✓ Contains bubbles throughout
✓ Has a pleasant yeasty or mildly sour aroma
✓ Repeats this pattern consistently over several feedings
Long-Term Maintenance
Counter Storage
Feed every 24 hours.
Refrigerator Storage
Feed approximately once each week.
Long-Term Backup
Dry a portion of your starter and store it in an airtight container in a cool, dry location.
Remember
Wild yeast develops naturally. Some starters become active in five days, while others require seven to ten days or longer. Consistent feeding, clean equipment, quality ingredients, and patience are the keys to success.
© Prepping Communities. This content is for informational purposes only and not professional advice. Use at your own risk.
Terms | Privacy | Guidelines