
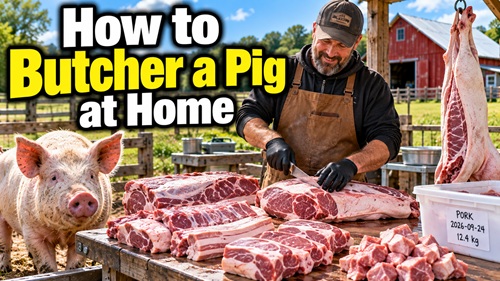
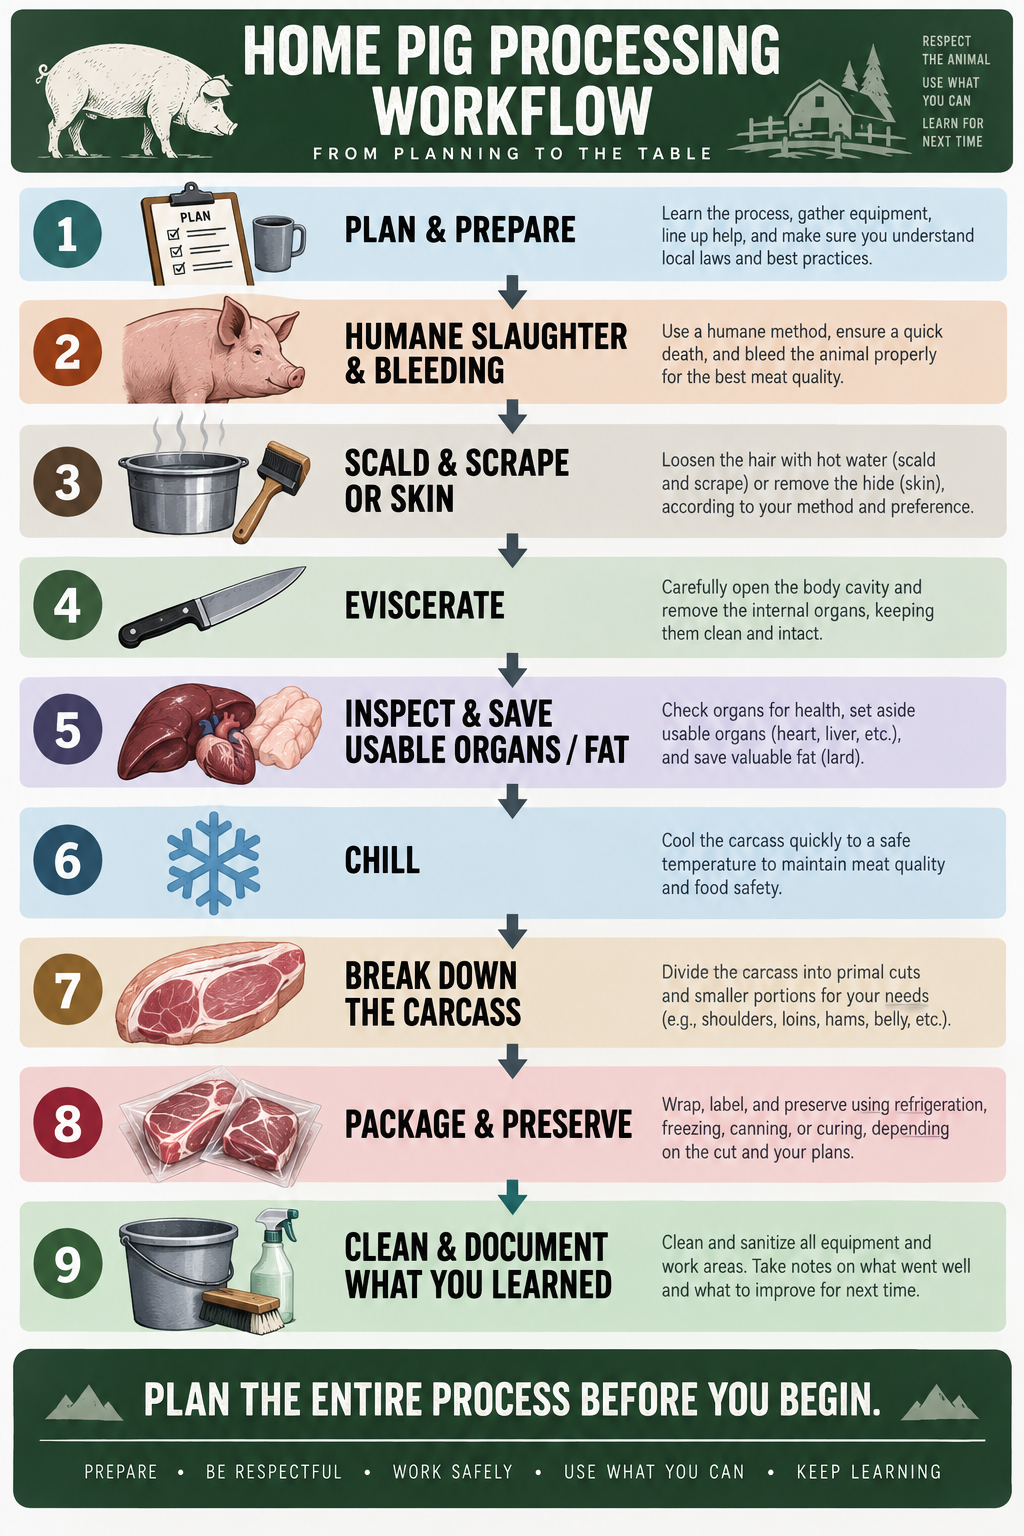
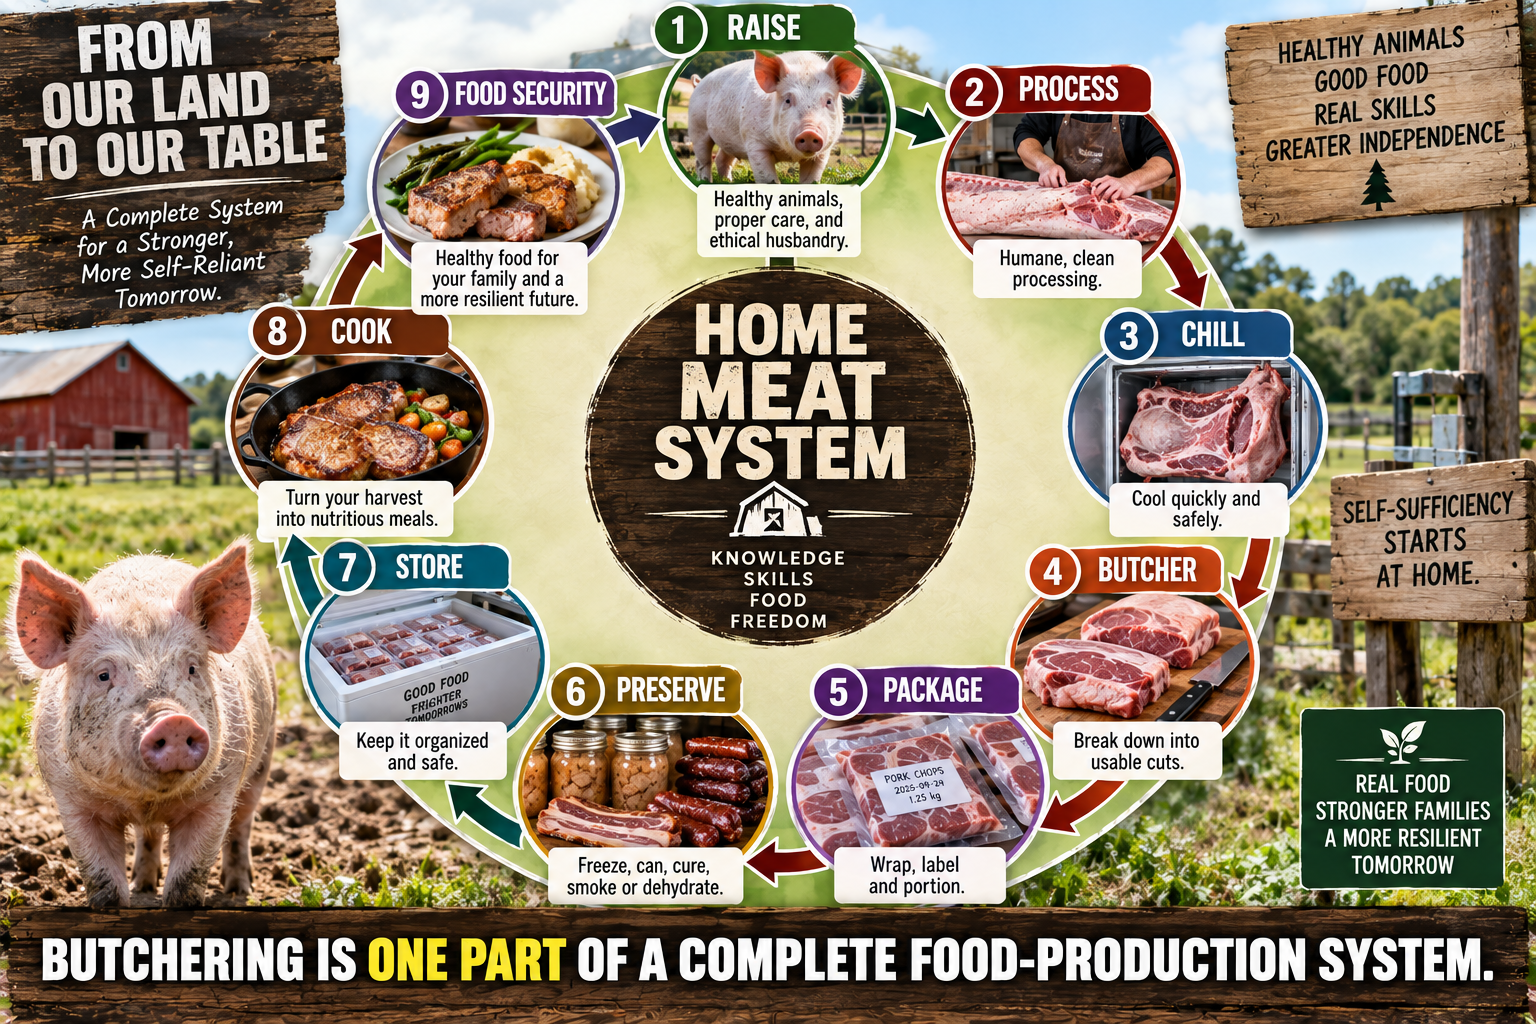
Butchering a pig at home is one of the more advanced skills a homesteader can learn. It connects raising livestock directly to the food that eventually reaches the table, but it also requires far more preparation than simply knowing how to cut meat. A successful processing day depends on humane animal handling, sanitation, temperature control, carcass handling, basic anatomy, preservation, and having enough people and equipment to safely manage a large animal.
For someone learning the skill for the first time, the objective should not be speed. It should be understanding the complete process and learning how each stage affects the next. Having an experienced butcher, livestock producer, farmer, or other knowledgeable person present for the first processing is extremely valuable. Slaughter and carcass inspection in particular are skills that benefit from hands-on instruction, and local animal-welfare, slaughter, and food-safety requirements should always be followed.
Butchering Day Starts Before the Pig Is Processed
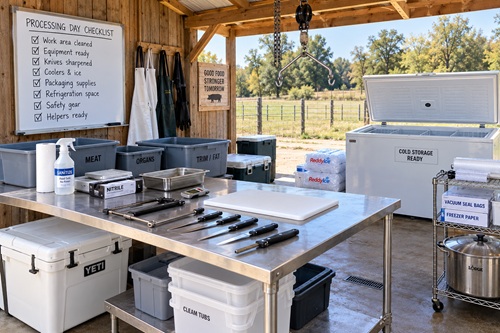
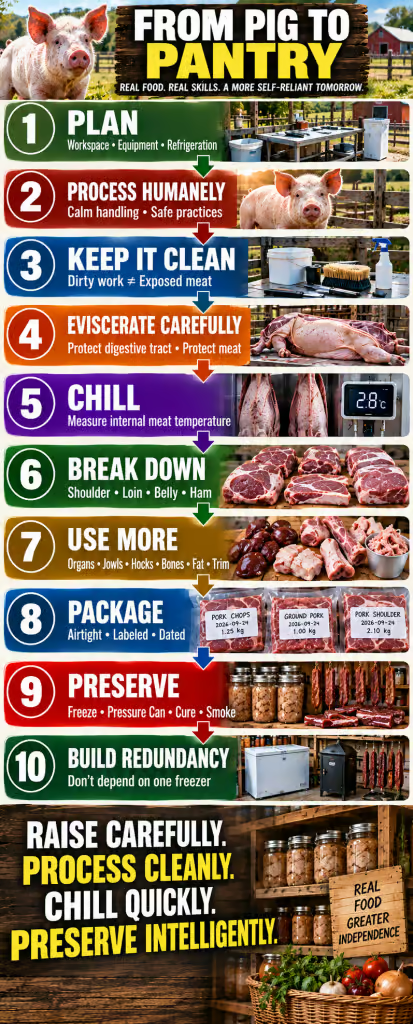
A successful butchering day really begins before the animal enters the processing area. One of the biggest mistakes a beginner can make is concentrating on knives and meat cuts while forgetting about refrigeration, lifting equipment, sanitation, workspace, packaging, and the sheer amount of meat that will need to be handled.
Start by thinking about the finished pork. A mature hog can produce a very large quantity of meat, fat, bones, and organs. Make room in refrigerators and freezers beforehand. Have coolers and ice available as backup. Clean and sanitize the cutting surfaces. Prepare separate food-safe containers for meat, organs, fat, bones, and material that will be discarded. If the carcass will be suspended, make certain the gambrel, pulley, hoist, tractor, or other lifting equipment is capable of safely handling the load.
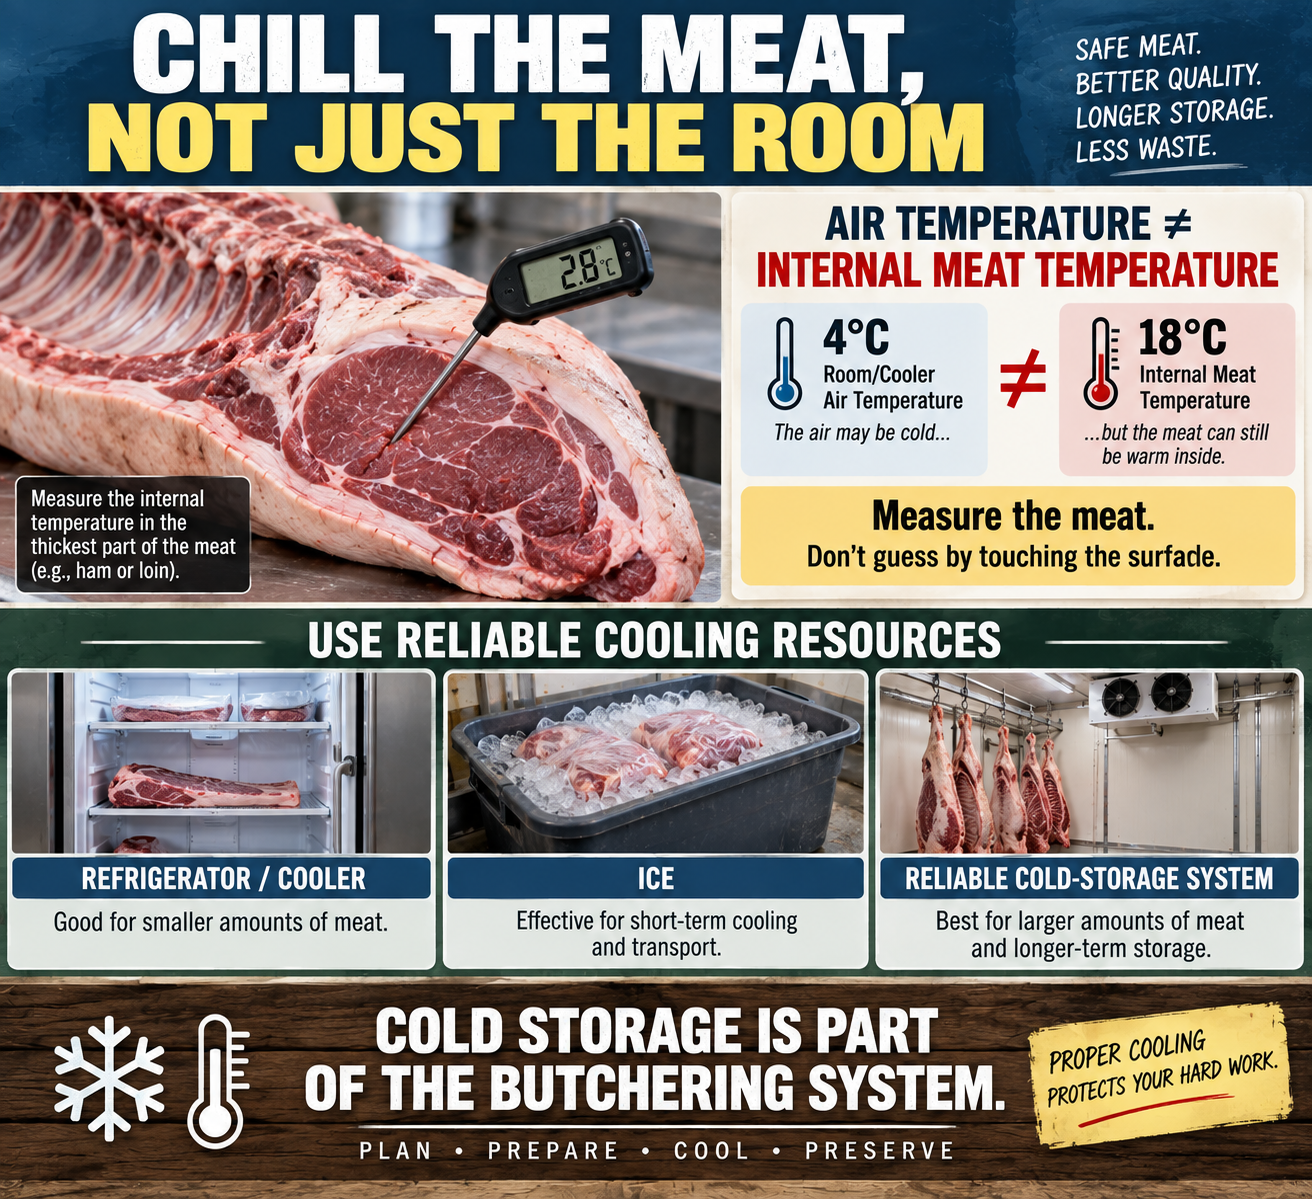
Weather can help, particularly when processing during colder months, but cold weather should support your refrigeration system rather than replace it. The outside of a carcass can feel cold while considerable heat remains deep inside the muscles. That means meat temperature needs to be controlled and measured rather than guessed.
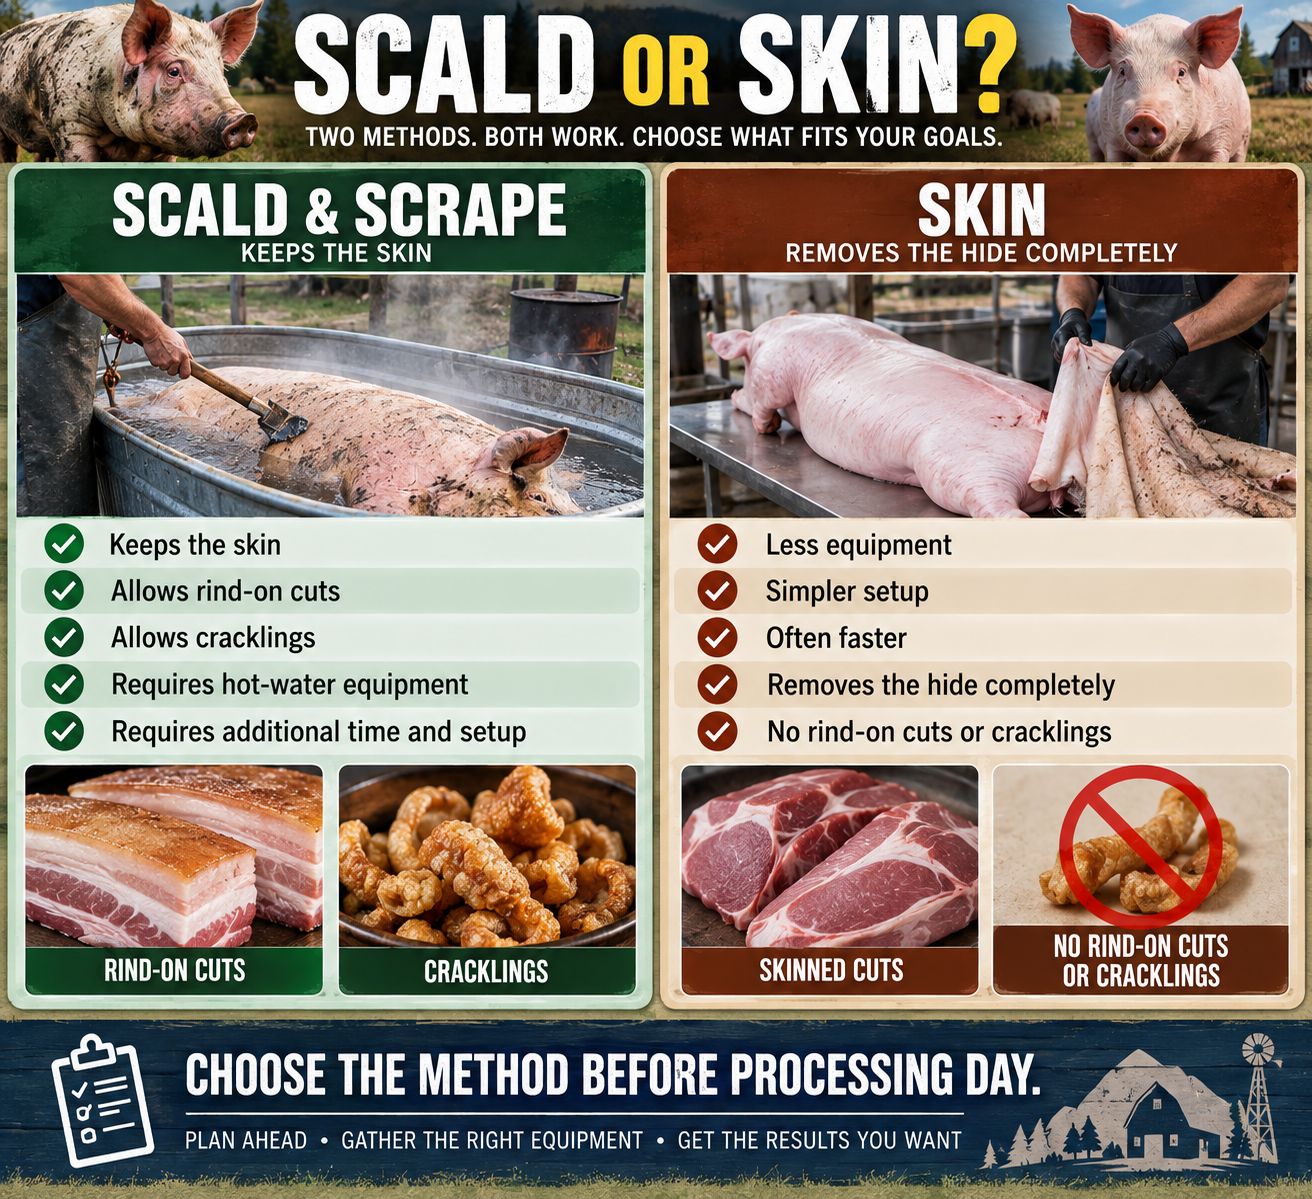
It is also worth deciding what you want from the animal before processing begins. If you want skin-on hams, rind-on bacon, or cracklings, you will probably want to preserve the skin. If those products do not matter, skinning may simplify the job. Decide whether you want large hams, smaller roasts, pork chops, sausage, ground pork, bacon, stock, rendered lard, or some combination of these. Decisions made before processing reduce waste later.
Prepare the Work Area
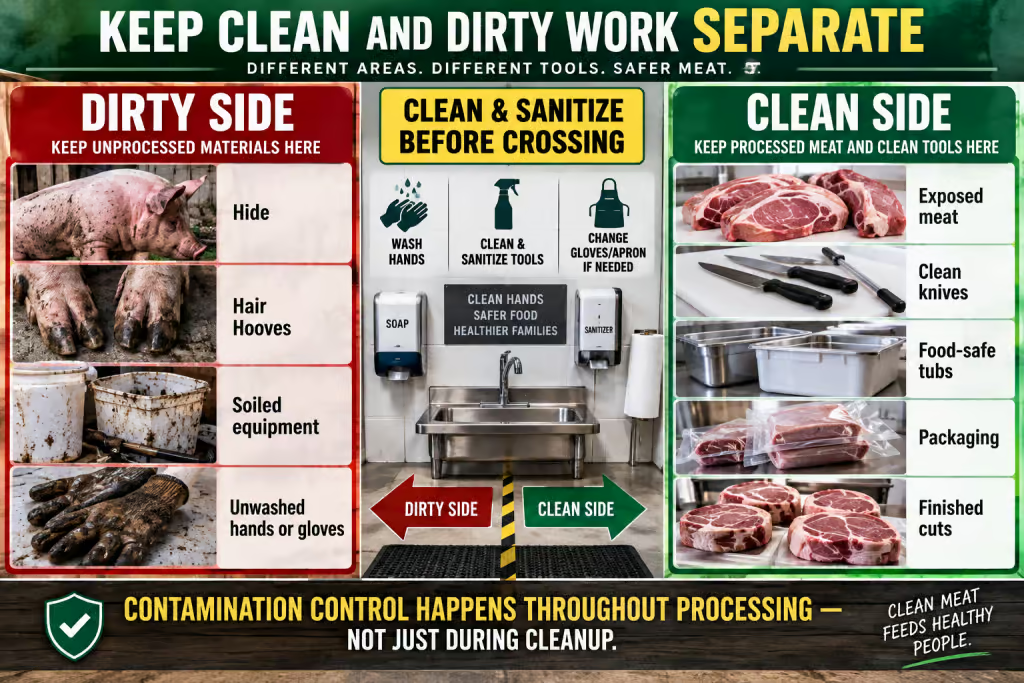
Think of the processing area as a small food-processing facility. Everything does not need to be stainless steel or commercially equipped, but surfaces should be cleanable and the workflow should prevent contamination from moving from dirty areas to clean meat.
The exterior of the animal can carry dirt, hair, manure, and other contaminants. Once meat is exposed, those materials need to remain away from it. Tools used on the hide should therefore be cleaned and sanitized before being used on meat. The same applies to hands, gloves, cutting surfaces, and containers.
Sharp knives are essential. A dull knife requires more force, makes accurate cuts harder, and can actually increase the chance of injury. Have a sharpening steel or another sharpening system nearby because even a good knife will lose some of its edge during a long processing day. A suitable meat or bone saw will also be useful when dividing portions of the skeleton that cannot reasonably be separated with a knife.
Prepare packaging materials before beginning. Freezer paper, vacuum-sealing bags, freezer tape, permanent markers, and labels should already be available. Discovering at the end of the day that there are not enough freezer bags is an unnecessary problem.
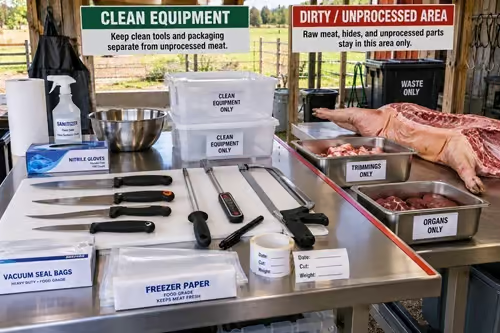
Humane Slaughter Comes First
Slaughter should be treated as a skill of its own rather than simply the first step in cutting meat. The animal should remain as calm as possible and an appropriate humane method should produce immediate unconsciousness, followed promptly by bleeding.
This portion of the process is best learned directly from an experienced livestock producer, butcher, veterinarian, slaughter professional, or agricultural authority. Appropriate methods and legal requirements vary between jurisdictions, and written instructions are not a good substitute for practical instruction when someone has never slaughtered livestock before.
There is also no requirement that a beginner perform the slaughter. Having the animal professionally slaughtered and learning to process the resulting carcass is an excellent way to begin. It allows the learner to concentrate on sanitation, anatomy, carcass breakdown, refrigeration, packaging, and preservation before adding another demanding skill.
Bleeding and Initial Carcass Handling
Once the animal has been rendered unconscious, bleeding needs to occur promptly. From this point onward, keeping the carcass clean becomes increasingly important.
Avoid allowing the carcass to contact soil, manure, dirty equipment, or other contaminated surfaces. This is where advance planning becomes valuable. If the lifting equipment and processing area are already prepared, the carcass can move directly into the next stage rather than being dragged, repeatedly repositioned, or placed somewhere unsuitable while equipment is assembled.
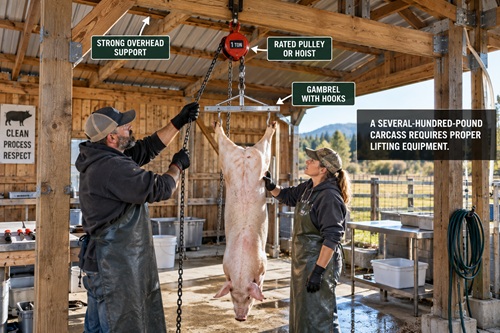
The carcass is heavy even after bleeding and later evisceration. Do not underestimate the physical demands involved. Trying to control several hundred pounds of weight without adequate help or properly rated equipment creates unnecessary risk.
Decide Whether to Scald or Skin
After slaughter and bleeding, the processor must decide how the exterior of the carcass will be handled. Scalding and scraping removes the hair while leaving the skin attached. This makes it possible to produce skin-on hams, rind-on bacon, cracklings, and other products where the skin is useful.
Scalding requires more preparation because water must be heated and managed properly and the loosened hair must then be thoroughly removed. It can be worthwhile when the household intends to use the skin, but it adds another substantial operation to processing day.
Skinning eliminates the need for a scalding setup. The hide is separated from the carcass while trying to leave as much usable fat and meat behind as possible. Pulling the hide away while making controlled cuts through connective tissue generally works better than trying to cut the hide completely free with deep knife strokes.
Whichever method is used, cleanliness remains the objective. The dirty exterior of the animal should not be allowed to fold against exposed meat. Taking a little extra time here can prevent contamination that becomes much more difficult to correct later.
Opening the Carcass
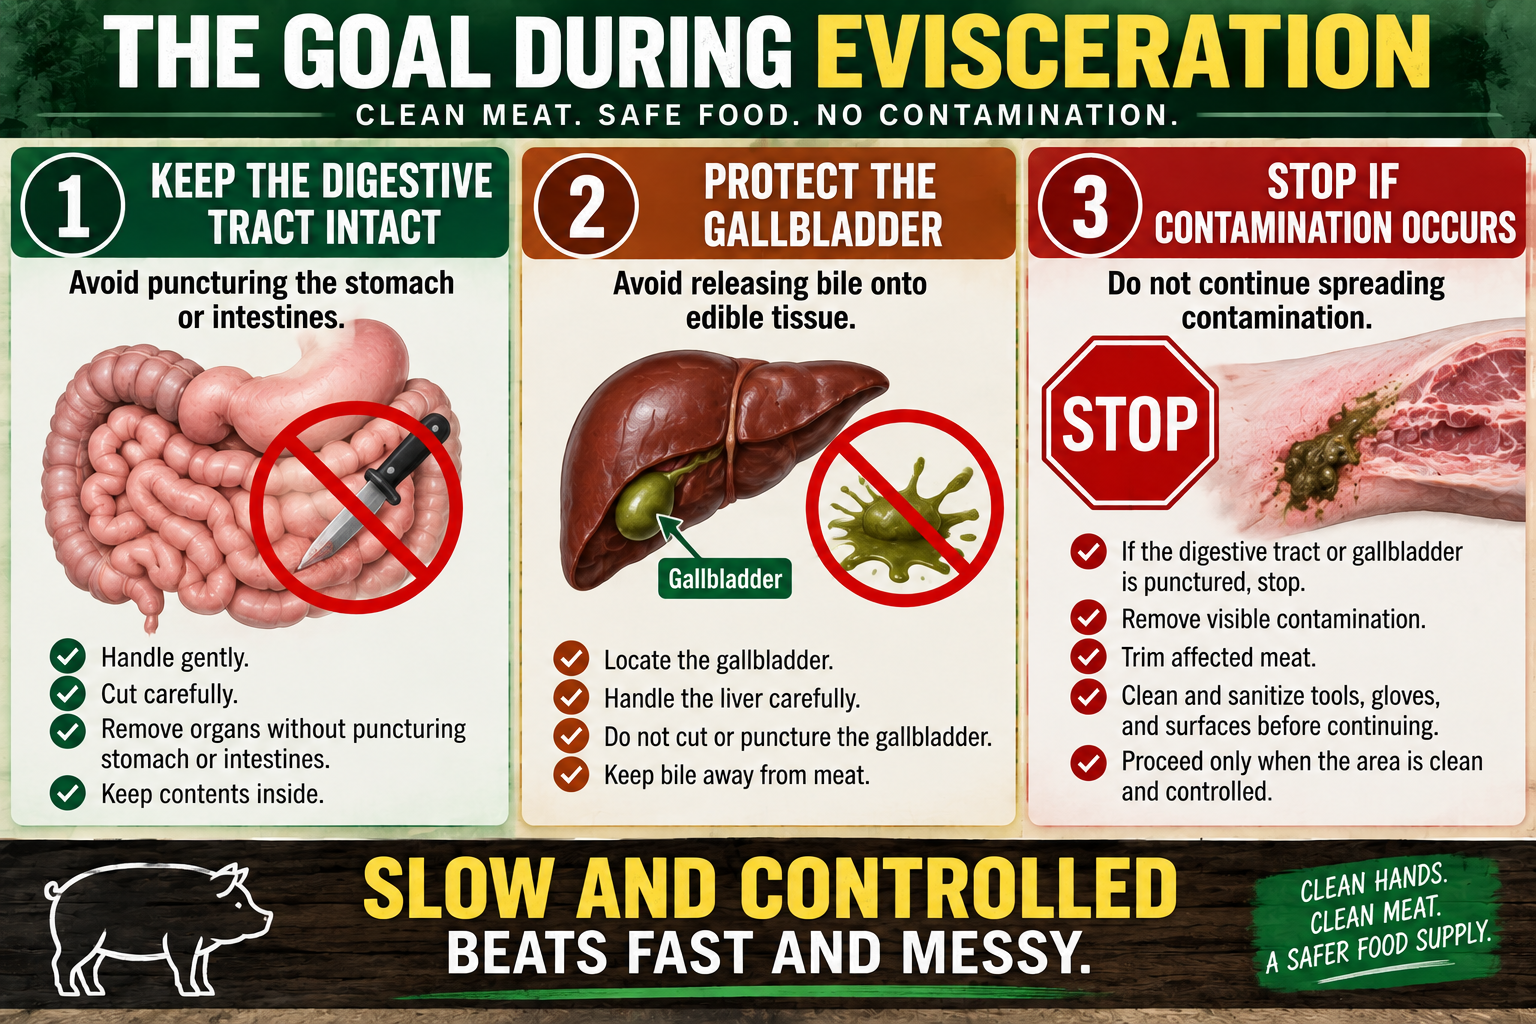
Evisceration is one of the stages where patience matters most. The digestive tract contains material that should never be spread across exposed meat, so the objective is to open the abdominal cavity and remove the organs without puncturing the stomach or intestines.
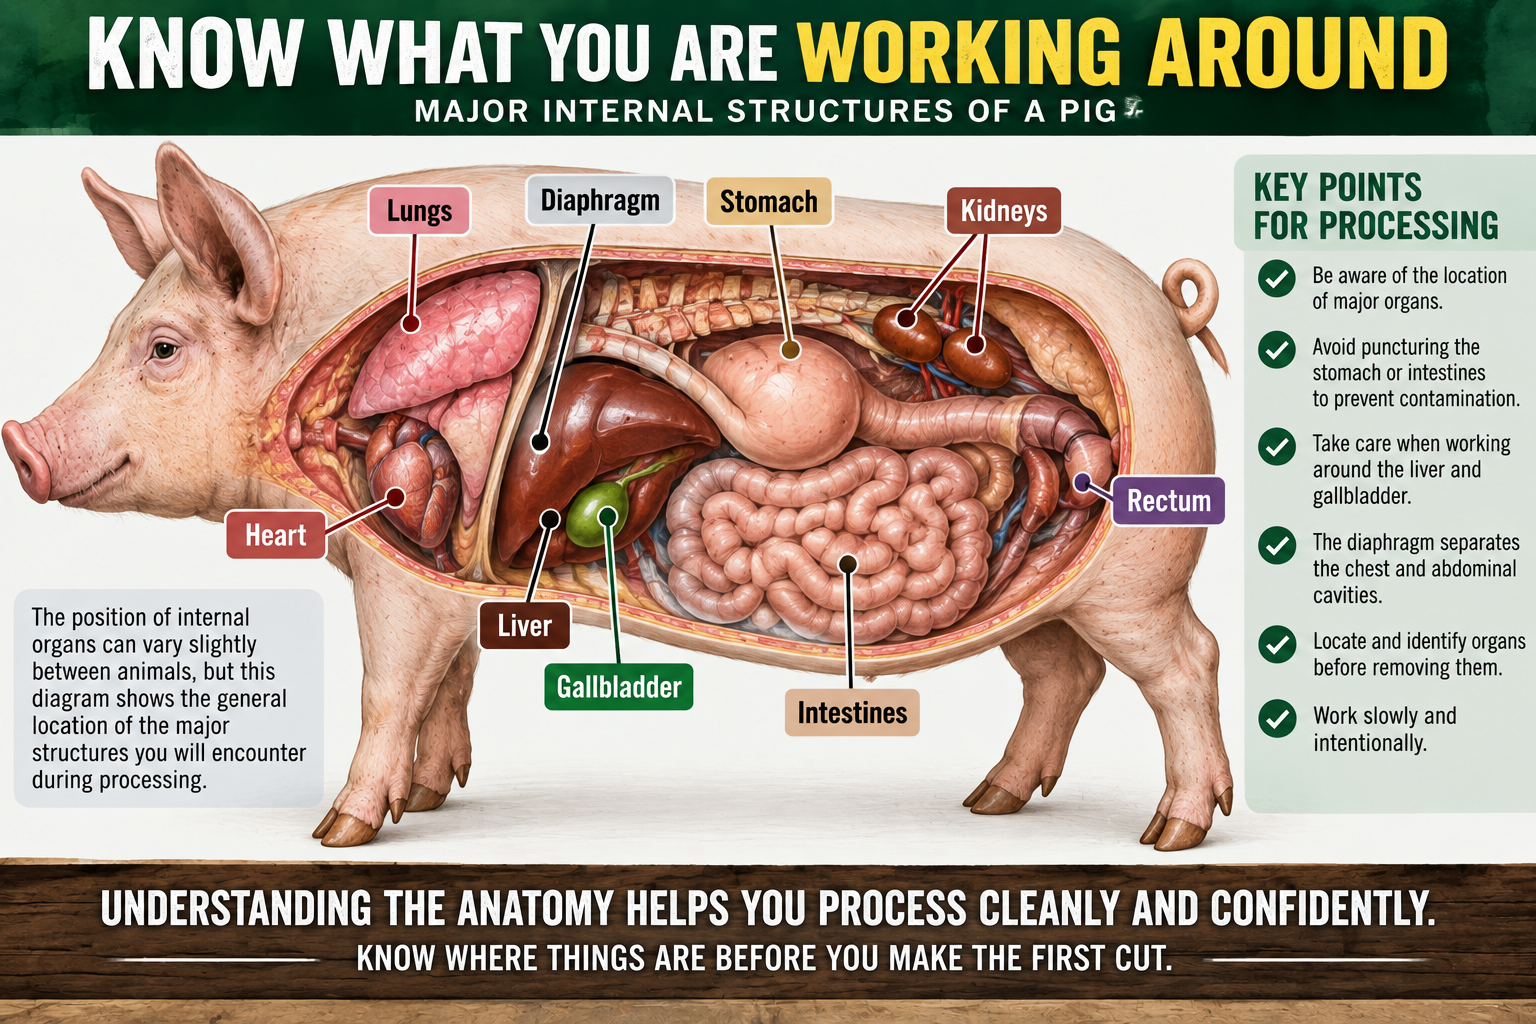
Before the digestive tract is removed, its lower end needs to be isolated so intestinal contents remain contained. The abdominal wall can then be opened carefully. This is not a job for deep, aggressive knife strokes. The cutting edge should be kept away from the internal organs whenever practical while the free hand helps maintain separation between the blade and digestive tract.
Think of the process as opening the abdominal wall rather than cutting downward into the animal. As the cavity opens, gravity begins helping move the internal organs outward. Connective tissue can then be released gradually rather than trying to pull everything free at once.
If the stomach or intestine is accidentally punctured, stop. Continuing to work can spread contamination over a much larger area. The affected area needs to be dealt with immediately according to proper meat-processing sanitation practices.
Removing the Internal Organs
Once the digestive tract has been freed, it can be carefully removed. Behind it is the diaphragm, the muscular wall separating the abdominal cavity from the chest. Releasing the diaphragm provides access to the heart, lungs, windpipe, and associated tissues.
Work slowly enough that you can see what is being cut. Blind cutting saves very little time and increases the possibility of damaging organs or contaminating the carcass.
The liver deserves particular attention because the gallbladder is attached to it. The gallbladder contains bile, and rupturing it can contaminate surrounding tissue with an extremely bitter fluid. Identify it before aggressively trimming around the liver and work carefully when separating the structures around it.
Once the organs are removed, inspect the body cavity before moving on. Look for contamination, remaining tissue that needs attention, or anything unusual. This is also a good point to clean tools and work surfaces as the process begins transitioning from animal processing toward meat cutting.
Decide Which Organs to Keep
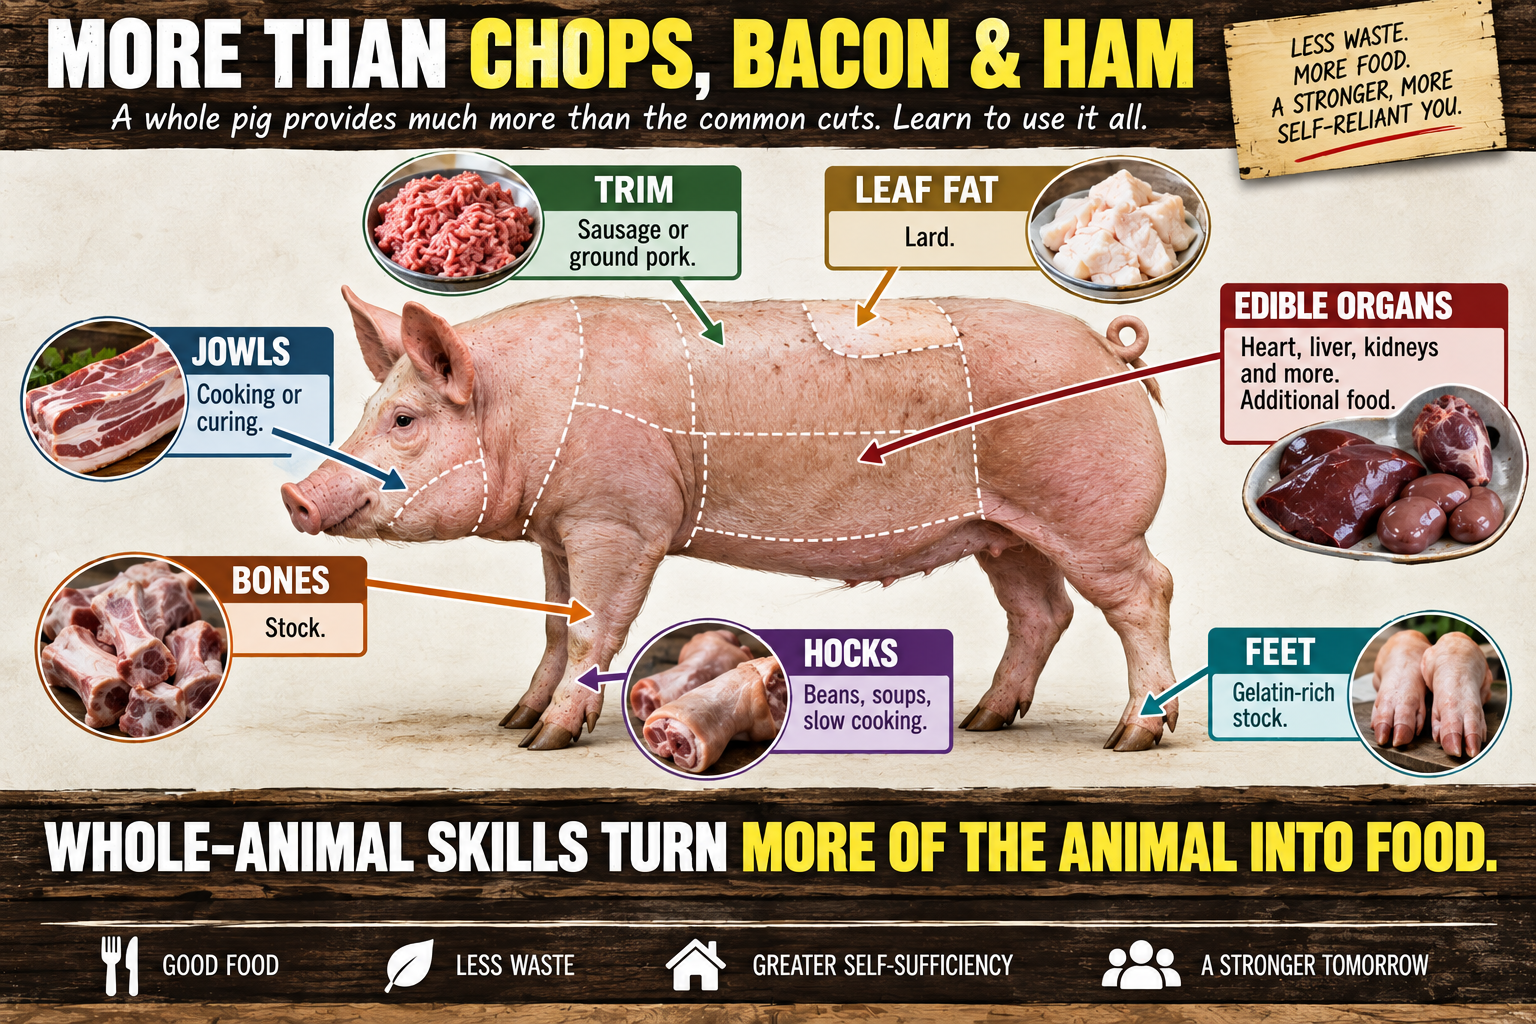
The heart, liver, kidneys, and other edible organs can substantially increase the amount of food obtained from the animal. They should be handled separately and chilled quickly because organ meats are highly perishable.
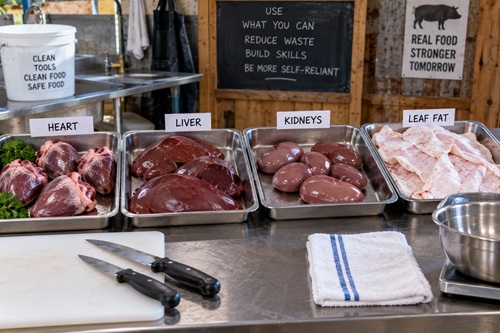
Inspection matters. Look for unusual discoloration, lesions, abscesses, parasites, abnormal texture, or anything else that does not appear normal. When something looks questionable and you cannot confidently identify the cause, do not guess about whether it is safe to eat. Seek veterinary or meat-inspection guidance.
This is one of the areas where having an experienced person present during the first processing can be especially useful. Experience helps distinguish normal anatomical differences from findings that deserve concern.
Save the Leaf Fat
While working around the kidneys, you will find a soft layer of white fat. This is commonly known as leaf fat, and it is particularly desirable for rendering into lard because properly rendered leaf lard can have a relatively mild flavor.
Remove it cleanly and keep it separate if you want to render it independently. Other clean pork fat can also be saved for rendering.
A pig is not simply a source of meat. It is also capable of providing cooking fat. For a household interested in self-sufficiency, that is important. Producing meat while remaining completely dependent on stores for cooking fats replaces only one portion of the food system.
Splitting and Chilling the Carcass
After evisceration, the carcass can be divided into sides or into smaller primary sections depending on the equipment and refrigeration available. When splitting a carcass, a proper saw and adequate assistance make the work considerably easier.
Try to maintain control of the carcass throughout the process. The two sides can shift or close together while sawing, and heavy sections can become difficult to manage once separated. A helper can stabilize the carcass while another person works.
Once the initial breakdown is complete, chilling becomes the priority.
Warm meat is soft and difficult to cut cleanly. Warm fat smears rather than cutting neatly. Chilling firms both the muscle and fat, making later processing considerably easier. More importantly, reducing meat temperature slows bacterial growth.
Use a reliable food thermometer rather than judging temperature by touch. Large sections of pork can remain warm internally even when the surface feels cold. Follow current meat-processing guidance for safe carcass chilling rather than relying on a particular number of hours.
If the entire carcass cannot fit into available refrigeration, divide it into manageable sections that can be safely cooled. Whatever method is used, refrigeration needs to be planned before slaughter, not after the meat is already waiting.
Learn to See the Pig as Four Major Sections
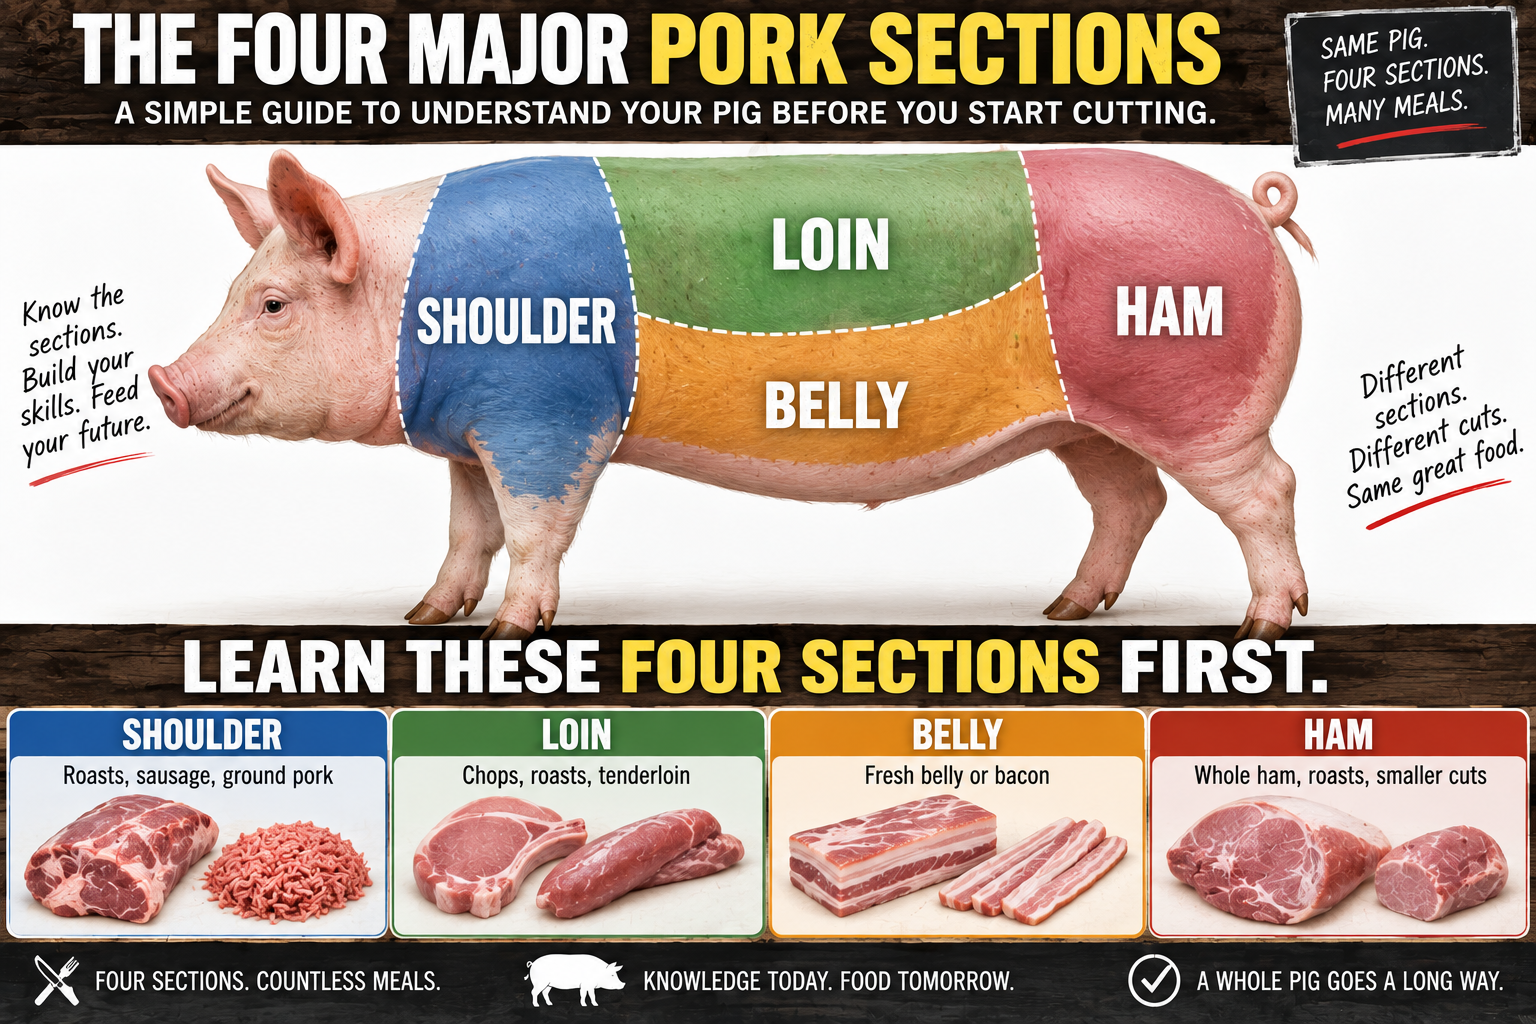
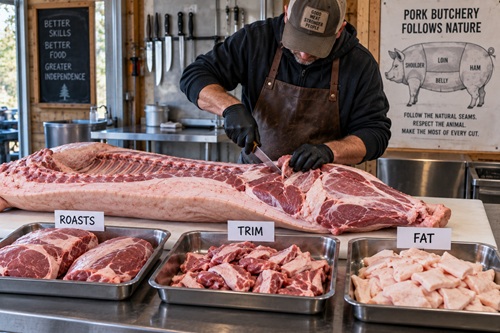
Once the carcass is properly chilled, understanding the anatomy becomes much easier if you stop thinking about an entire pig and begin seeing four primary sections: the shoulder, loin, belly, and ham.
The shoulder occupies the front portion of the carcass. The loin runs along the upper back. The belly lies below the loin, and the large rear leg becomes the ham.
These four sections provide the basic roadmap for breaking down the animal. Once they can be identified confidently, the carcass stops looking like one enormous complicated piece of meat and starts becoming a series of manageable decisions.
Breaking Down the Ham
The ham comes from the rear leg and surrounding muscles. Before separating it, identify the hip structure and the natural transition between the rear leg and the loin.
How the ham is cut depends partly on what you intend to do with it. A ham intended for curing may remain large and retain an appropriate covering of fat. A household that does not want a whole ham can instead divide the section into smaller fresh roasts or other usable portions.
This is why planning before cutting matters. Once a large muscle has been divided, it cannot be put back together. Decide what you want the final product to become before making the major cuts.
Working With the Loin
The loin contains many of the cuts people immediately associate with pork, including chops, loin roasts, and tenderloin.
Do not assume the entire loin needs to become pork chops. A portion can be sliced into chops while another remains intact as a roast. Cut the meat according to the way your household actually cooks rather than trying to reproduce a supermarket meat counter.
The tenderloin is a separate smaller muscle located along the inside of the backbone. Remove it carefully and package it separately rather than allowing it to disappear into the general trim pile.
The ability to customize cuts is one of the advantages of home processing. A family feeding several people may prefer larger roasts, while a smaller household may get more practical use from smaller packages.
Working With the Belly
The belly is most commonly associated with bacon, but it does not have to be cured. Fresh pork belly can be prepared in many ways.
If bacon is the goal, keep the belly as even and square as practical during trimming. This makes later curing and slicing easier. Curing itself should be treated as a separate preservation skill and performed using a tested procedure with accurately measured curing ingredients.
Irregular pieces removed while squaring the belly do not need to become waste. Clean meat trim can be added to the material being saved for sausage or grinding, while usable fat can be added to the rendering pile.
Breaking Down the Shoulder
The shoulder is one of the most versatile parts of the pig. It can become large roasts, smaller cooking cuts, stew meat, ground pork, or sausage.
This makes the shoulder particularly useful to a preparedness household because it allows the processor to adjust the final products according to what is already stored. If the freezer contains plenty of roasts, more shoulder can become sausage or ground meat. If large slow-cooked meals are common, keeping larger portions intact may make more sense.
As butchering skills improve, learn to follow the natural seams between muscle groups. Separating muscles along those seams often produces cleaner cuts and requires less force than simply sawing through everything.
Don’t Throw Away the Jowls
The cheek and jowl contain useful meat and fat that beginners sometimes overlook because they do not resemble familiar supermarket cuts.
Jowl can be cooked fresh or preserved using an appropriate curing process. Even if the household does not normally eat it, learning what it is and how it can be used prevents an edible part of the animal from automatically entering the waste pile.
Whole-animal processing requires changing the way the animal is viewed. The question becomes less about whether something resembles a pork chop and more about whether it can safely become useful food.
Keep the Hocks
The hocks are the joints located above the feet. They contain bone, connective tissue, skin, and relatively tough meat, which makes them excellent for long, slow cooking.
Hocks can add considerable flavor and body to beans, soups, stews, and greens. The connective tissue gradually breaks down during cooking and contributes gelatin to the finished dish.
They can also be smoked or otherwise preserved using appropriate tested methods. What initially appears to be a low-value part of the carcass can therefore contribute to several meals.
Consider Using the Feet
Pig feet are another example of a part that is easily overlooked. They contain large amounts of connective tissue and collagen. Long cooking converts much of that collagen into gelatin, producing exceptionally rich stock.
This demonstrates one of the major advantages of learning whole-animal butchering. Parts routinely removed before meat reaches the supermarket become available for use.
Bones can also be saved for stock, provided they are handled and stored safely. Using these secondary products increases the amount of food produced from the same animal without requiring additional feed, land, or livestock.
Collect Good Meat Trim
Keep a clean container nearby while breaking down the carcass specifically for usable meat trim. Small pieces accumulate quickly when an entire pig is processed.
That trim can become ground pork, sausage, stew meat, or ingredients for other meat preparations.
Be selective about what goes into the trim container. Grinding something does not improve its quality. Questionable material, glands, heavily contaminated pieces, or excessive connective tissue should not be mixed into otherwise good meat simply because everything will eventually pass through a grinder.
Good sausage begins with good meat.
Render the Fat
Pork fat is a valuable food product and should not automatically be discarded.
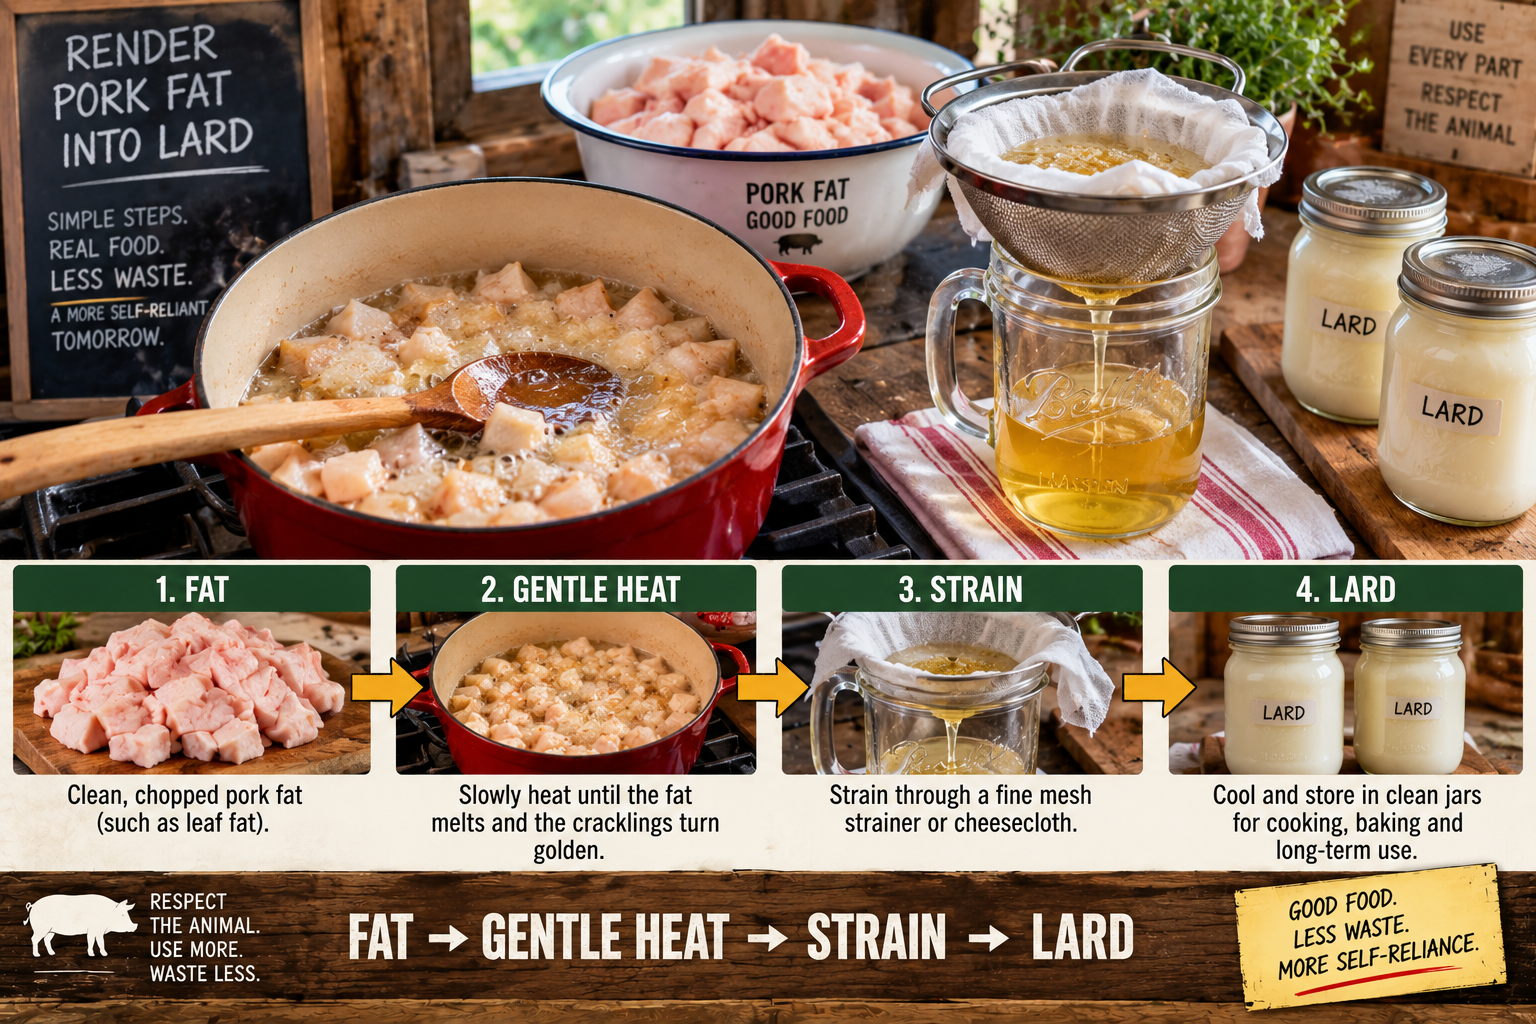
Separate clean fat from meat trim during processing. Leaf fat can be rendered separately when a particularly mild lard is desired, while other clean body fat can be rendered for general cooking purposes.
Cutting fat into smaller, relatively uniform pieces helps it render evenly. Apply gentle, controlled heat so the fat gradually liquefies rather than scorching. Once rendered, the liquid fat can be separated from the remaining solids and stored using an appropriate food-safe method.
From a preparedness perspective, this is significant. A single pig can provide both protein and cooking fat, increasing the amount of useful food produced from the animal.
Package the Meat Properly
Packaging may seem like the easy part after a long processing day, but poor packaging can slowly destroy the quality of otherwise excellent pork.
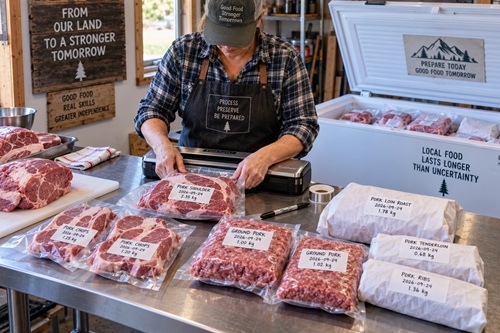
Meat should be properly chilled before final packaging. Freezer paper can work well when wrapped tightly and sealed correctly. Vacuum sealing is another useful option because it removes much of the air surrounding the meat.
The objective is to minimize air contact and eliminate unnecessary empty space around the cut.
Label everything. At minimum, write the cut and processing date on each package. Adding weight or portion size makes freezer management even easier.
A package that is perfectly recognizable on butchering day may become a mystery six months later when it is frozen solid beside dozens of similar packages.
When placing a large quantity of fresh pork into the freezer, avoid immediately packing unfrozen packages tightly together. Cold air needs room to circulate so the meat freezes efficiently. Once everything is frozen solid, the packages can be reorganized and stacked.
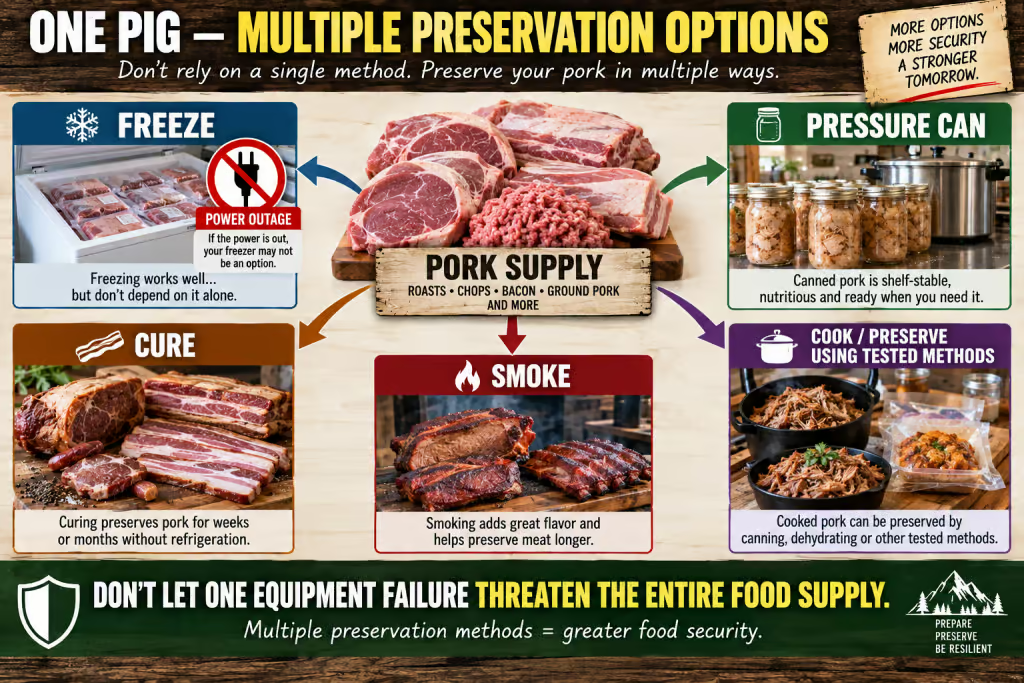
Don’t Make the Freezer Your Only Plan
A freezer full of pork represents a major food reserve, but it also creates a major dependency.
If every pound of meat relies on one freezer, a failed compressor, electrical problem, or extended power outage can threaten months of work.
A preparedness-oriented household should consider developing more than one preservation capability. Some meat can remain frozen while other portions may eventually be pressure canned, cured, smoked, or preserved using another tested method appropriate to meat.
Each of these methods requires separate training. Pressure-canning times and pressures should come from current tested recommendations. Curing agents need to be measured accurately. Smoking alone should not automatically be assumed to make meat shelf stable.
The preparedness objective is not to improvise preservation. It is to become competent in several proven methods so the household has alternatives when one system becomes unavailable.
Clean Up Immediately
Processing is not finished when the final package enters the freezer.
Knives, saws, tables, tubs, gambrels, and other equipment should be thoroughly cleaned and sanitized. Fat and meat residue become increasingly difficult to remove after they dry.
Dispose of unusable animal material according to local requirements and in a way that does not attract wildlife, rodents, or roaming animals.
Clean and dry equipment before storing it. Inspect knives and saws for damage, sharpen anything that needs attention, and replace consumable supplies while you still remember what was used.
That preparation makes the next processing day easier.
© Prepping Communities. This content is for informational purposes only and not professional advice. Use at your own risk.
Terms | Privacy | Guidelines