
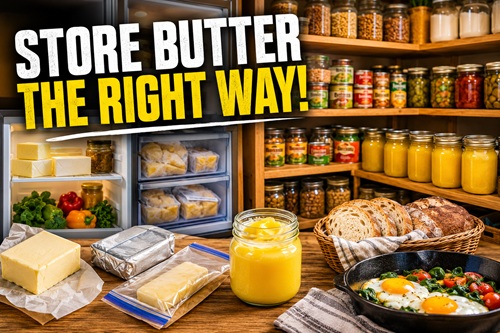
A Practical Guide to Selecting, Storing, Preserving, and Using Butter
Introduction
Butter has been a staple food for thousands of years. It adds flavor, provides concentrated calories, improves baking, and turns simple ingredients into satisfying meals. Whether you’re spreading it on fresh bread, cooking vegetables, making soups, or baking from scratch, butter remains one of the most useful ingredients in any kitchen.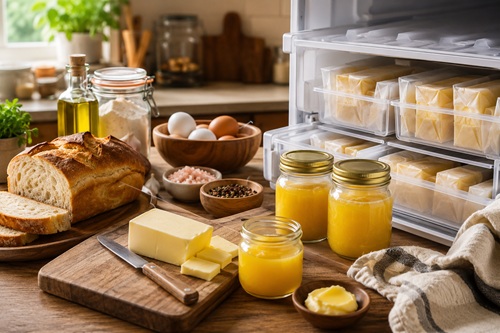
For preppers, however, butter offers something even more important.
It is an energy-dense food that can greatly improve the taste and nutritional value of long-term food storage. During emergencies, when meals often become repetitive and comfort foods are limited, a small amount of butter can make a significant difference. It can improve morale, increase calories, and make stored foods far more enjoyable to eat.
The challenge is that butter doesn’t store like rice, beans, or flour. Left at room temperature, it has a limited shelf life. Refrigeration extends that life, but prolonged power outages, supply disruptions, and off-grid living require additional planning.
Fortunately, butter can be stored in several different ways. Freezing, preparing clarified butter (ghee), maintaining a rotating inventory, and understanding alternative preservation methods all allow you to keep butter available much longer than many people realize.
The goal of this handbook isn’t simply to tell you how to store butter.
Its purpose is to teach you the practical skills needed to confidently select, preserve, rotate, and use butter as part of a well-planned preparedness pantry. Along the way you’ll learn how to compare products before buying them, calculate how much your household should store, recognize spoilage before it becomes a problem, and choose the storage methods that best fit your preparedness goals.
By the end of this handbook, you’ll have the knowledge to make butter a dependable part of your long-term food storage plan instead of just another item in your refrigerator.
Understanding Butter
Before learning how to store butter, it’s important to understand exactly what you’re buying.
At first glance, most packages of butter appear nearly identical. They may all come in similar boxes, occupy the same section of the grocery store, and even cost about the same. But once you begin reading the labels, you’ll quickly discover important differences that affect flavor, cooking performance, storage life, and overall value.
For everyday grocery shopping, these differences may not seem very important.
For preparedness, they matter.
Choosing the right butter today can make storage easier tomorrow, improve the quality of your cooking months from now, and save money by helping you purchase products that match your family’s actual needs.
Learning to compare butter isn’t complicated. In fact, it only takes a few minutes and becomes second nature after you’ve done it a few times.
Before You Shop
The next time you’re in the dairy section, resist the temptation to grab your usual brand without looking.
Instead, spend a few minutes comparing several different products. Pick up each package, read the label, compare the ingredients, and notice the differences between brands.
You’re not shopping only for tonight’s dinner.
You’re selecting food that may remain in your preparedness pantry for months before it’s used.
Those few extra minutes at the grocery store can pay dividends later.
What to Look For
Begin by determining whether the butter is salted or unsalted. Salted butter generally maintains its quality slightly longer because salt acts as a mild preservative. For this reason, it’s the preferred choice for most long-term preparedness plans. Unsalted butter, however, remains the better choice for many baking recipes because it allows complete control over the amount of salt added to the finished product.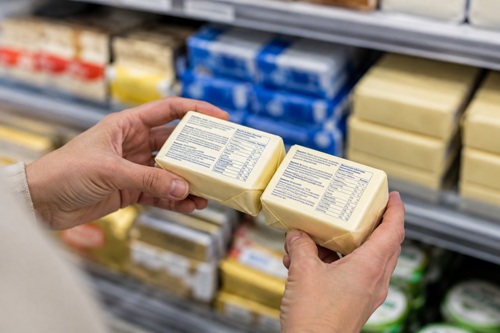
Next, examine the ingredient list. High-quality butter usually contains only cream and, if applicable, salt. Products with unnecessary additives or lengthy ingredient lists generally provide no advantage for long-term storage.
If the butterfat percentage is listed, compare it between brands. Higher butterfat products often provide a richer flavor and may perform better in certain baking and cooking applications.
Finally, compare the best-before dates. Although proper rotation is always more important than a printed date, selecting the freshest packages gives you greater flexibility as you build your pantry.
Prepper Tip
Butter goes on sale several times throughout the year.
Instead of buying a single package whenever you run out, purchase several packages during sales and freeze them immediately. Over time, this simple habit reduces grocery costs, creates a rotating reserve, and allows your emergency supply to grow almost effortlessly.
Common Beginner Mistakes
Many people assume all butter is essentially the same. While every package may look similar, differences in salt content, butterfat percentage, ingredients, and packaging can affect both quality and storage.
Another common mistake is buying butter only when it’s needed. A preparedness pantry works best when it’s built gradually. Purchasing extra butter during sales and rotating it through normal household use is usually far more economical than attempting to build a large supply all at once.
Before You Continue
Now that you know how to compare butter and identify the characteristics that matter most, the next step is deciding which varieties deserve a place in your preparedness pantry. Not every type of butter offers the same advantages, and understanding those differences will help you make better purchasing decisions for both everyday cooking and long-term storage.
Choosing the Right Butter
Now that you know how to compare butter labels, the next step is deciding which products deserve a place in your preparedness pantry. Grocery stores offer dozens of choices, but from a preparedness perspective, only a few differences truly matter.
Your goal isn’t to buy the most expensive butter or the one with the fanciest packaging. Instead, choose products that store well, fit the way your family cooks, and can be rotated through your pantry without waste.
For most households, keeping both salted and unsalted butter provides the greatest flexibility. Salted butter handles most everyday cooking and long-term freezer storage extremely well, while unsalted butter is the preferred choice for baking and recipes where precise control over salt is important.
Salted Butter
If you could store only one type of butter, salted butter would be the best choice for most preparedness plans.
The added salt helps preserve quality slightly longer than unsalted butter and makes it an excellent all-purpose ingredient for everyday cooking. It performs well when frying eggs, sautéing vegetables, making sauces, spreading on bread, or adding flavor to rice, potatoes, and pasta.
Salted butter also freezes exceptionally well, making it ideal for building a long-term rotating supply.
For many preppers, salted butter will make up the majority of their stored inventory.
Unsalted Butter
Unsalted butter contains only cream and is favored by bakers because it allows complete control over the amount of salt added to a recipe.
Although it generally has a slightly shorter storage life than salted butter, it freezes just as well and performs beautifully in breads, pastries, cookies, cakes, and pie crusts.
If baking is a regular part of your preparedness plan, keeping a modest supply of unsalted butter is well worth the freezer space.
Specialty Butters
You may also encounter grass-fed, European-style, cultured, and other specialty butters.
These products often differ in flavor, texture, butterfat content, or production methods, but they provide few significant advantages for long-term preparedness. If you already enjoy one of these varieties and regularly cook with it, there’s no reason not to include it in your food storage.
However, don’t feel obligated to purchase premium butter simply because it costs more. Standard butter usually provides everything most preparedness plans require.
Whipped Butter
Whipped butter contains air that has been incorporated during processing, making it softer and easier to spread directly from the refrigerator.
While convenient for everyday breakfasts and sandwiches, it contains less butter by volume than traditional block butter. For long-term storage, block butter offers better value, stores more efficiently, and is easier to rotate.
Butter Substitutes
You’ll also find margarine and plant-based spreads beside the butter in most grocery stores.
Although they may look similar, they are different products with different ingredients, cooking characteristics, and storage requirements. Because this handbook focuses on real butter, any recommendations for freezing, clarifying, or preserving butter should not automatically be applied to substitutes.
If you regularly use these products, always follow the storage recommendations provided by the manufacturer.
Prepper Tip
Store what you already eat.
One of the easiest ways to reduce food waste is to build your preparedness pantry around ingredients your family uses every week. Foods that are regularly used are naturally rotated, while unfamiliar products often remain forgotten until they’ve passed their best quality.
Common Beginner Mistakes
A common mistake is assuming that premium butter automatically makes the best preparedness choice. While high-end butters often have richer flavor, standard salted butter usually provides the best balance of quality, versatility, storage life, and affordability.
Another mistake is buying a large quantity of an unfamiliar brand simply because it’s on sale. Before filling your freezer, purchase one package and use it in your normal cooking. If your family likes the flavor and it performs well in your favorite recipes, then consider buying more during future sales.
Finally, avoid relying on only one variety. Keeping both salted and unsalted butter provides flexibility for everyday cooking, baking, and long-term food storage.
Butter Storage Comparison
Now that you’ve selected the type of butter you’d like to store, the next step is deciding how to store it.
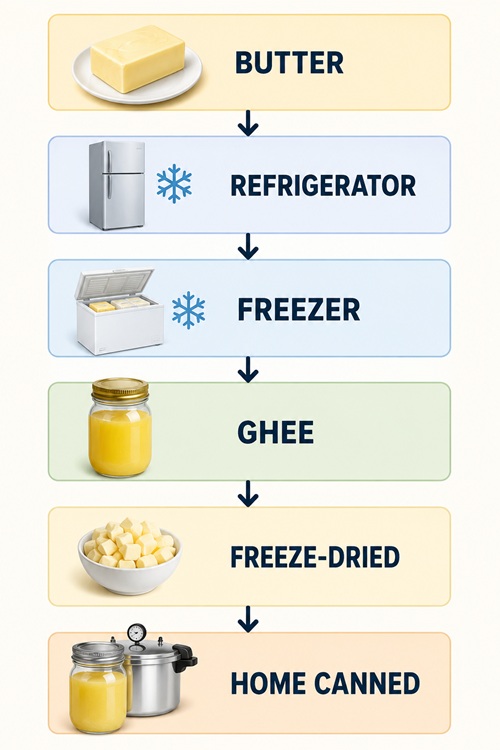
No single storage method is ideal for every situation. Some methods are perfect for everyday household use, while others are better suited for long-term preparedness, off-grid living, or emergency food storage.
The following comparison provides a quick overview of the most common storage methods before we examine each one in detail.
(Table remains here exactly as you already have it.)
Prepper Tip
Rather than relying on a single storage method, consider using several.
Many experienced preppers keep one package in the refrigerator for daily cooking, additional butter in the freezer for long-term rotation, homemade ghee for situations where refrigeration may not be available, and other shelf-stable cooking fats such as olive oil, coconut oil, lard, or tallow.
Diversifying your food storage provides flexibility if one method becomes unavailable.
Before You Continue
Now that you’ve compared the strengths and limitations of the most common storage methods, it’s time to determine how much butter your household should actually store. The next section will help you calculate a realistic inventory based on your family’s cooking habits and show you how to build a rotating supply that stays fresh year after year.
Planning Your Butter Supply
One of the first questions most people ask when they begin storing butter is, “How much should I keep on hand?” Unfortunately, there isn’t a single answer that works for everyone.
A retired couple who cooks a few simple meals each week will use far less butter than a family that bakes bread regularly, cooks from scratch, or preserves large amounts of food. Rather than following someone else’s recommendation, the best approach is to calculate your own needs based on how your household actually cooks.
Your goal isn’t to fill the freezer with as much butter as possible. It’s to build a dependable supply that supports your everyday cooking while providing enough reserve to help you through temporary shortages, extended power outages, or other emergencies.
The best preparedness pantry is one that reflects your family’s normal lifestyle.
Track Your Current Usage
Before deciding how much butter to store, find out how much your household already uses.
For the next month, simply pay attention.
Each time you open a new package of butter, write the date on the wrapper or keep a small notebook in the kitchen. When the package is empty, record the finishing date as well. After several weeks you’ll have a surprisingly accurate picture of your normal butter consumption.
If you already know approximately how many pounds of butter you purchase each month, you can use that information instead.
The important thing is to base your preparedness plan on real numbers rather than estimates.
Calculate Your Goal
Once you know your average monthly usage, deciding how much to store becomes straightforward.
For example:
| Monthly Use | Six-Month Supply | One-Year Supply |
|---|---|---|
| 2 pounds | 12 pounds | 24 pounds |
| 4 pounds | 24 pounds | 48 pounds |
| 6 pounds | 36 pounds | 72 pounds |
These numbers aren’t rules.
They’re simply starting points.
Remember that emergencies often change the way people cook. If you’re baking more bread, preparing meals from basic ingredients, or cooking for extended family members, your butter usage may increase. Conversely, if replacement butter becomes difficult to obtain, you may decide to conserve it while relying more heavily on other stored cooking fats.
Preparedness is about flexibility, not perfection.
Example: Building a Six-Month Butter Supply
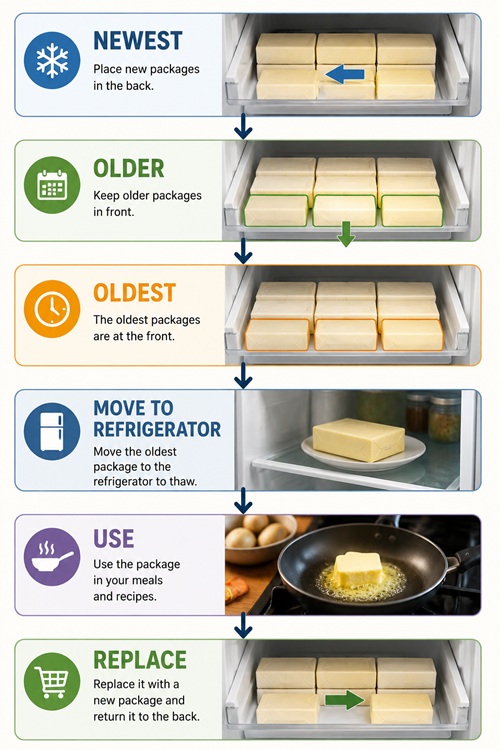
Many people assume they need to buy six months’ worth of butter all at once.
You don’t.
The easiest approach is to build your inventory gradually while rotating it through your normal cooking.
The following example shows how a household using approximately one pound (454 g) of butter each month can establish and maintain a six-month reserve.
| Month | Purchase | Freeze | Refrigerator | Use |
|---|---|---|---|---|
| January | 6 pounds | 5 pounds | 1 pound | Begin using refrigerated butter |
| February | 1 pound | Freeze new purchase | Move oldest frozen package to refrigerator | Use oldest package |
| March | 1 pound | Freeze new purchase | Rotate oldest package | Continue rotation |
| April and Beyond | 1 pound each month | Freeze new purchase | Rotate oldest package | Maintain six-month supply |
Once this system is established, maintaining your butter supply requires very little effort. Every grocery trip simply replaces what you’ve already used.
Instead of thinking about emergency food storage as a separate project, it becomes part of your normal shopping routine.
Build a Balanced Fat Pantry
Although butter is extremely versatile, it shouldn’t be your only stored cooking fat.
Every fat has strengths and weaknesses. Olive oil works well for salads and many everyday meals. Coconut oil stores well for long periods. Lard and tallow excel at frying and roasting. Clarified butter (ghee) provides another excellent option when refrigeration may not always be available.
Rather than depending on one product, build a pantry that gives you choices.
That flexibility becomes especially valuable if one product becomes difficult to replace.
Prepper Tip
Take advantage of grocery store sales.
Instead of trying to build a year’s supply in one shopping trip, purchase a few extra packages whenever butter is discounted. Freeze them immediately, label them with the purchase date, and rotate them into your everyday cooking.
Over time, you’ll build a substantial reserve without placing unnecessary strain on your grocery budget.
Common Beginner Mistakes
One of the biggest mistakes is copying someone else’s storage goals without considering your own household. Your pantry should reflect your family’s cooking habits, not someone else’s recommendations.
Another common mistake is building a large freezer inventory without any rotation plan. Every package should be dated, and the oldest butter should always be used first.
Finally, don’t think of preparedness as something separate from daily life. The strongest food storage systems are simply well-managed kitchens that always contain a little more than today’s needs.
Before You Continue
Now that you’ve determined how much butter your household should store and developed a simple rotation plan, the next step is learning how to preserve that investment. Proper refrigeration techniques can significantly extend freshness, reduce waste, and make rotation much easier.
Although refrigeration is intended for short-term storage, learning to store butter correctly will improve its flavor, reduce waste, and make it much easier to rotate your long-term supply.
Start with a Quick Inspection
Before placing new butter in the refrigerator, take a moment to inspect each package.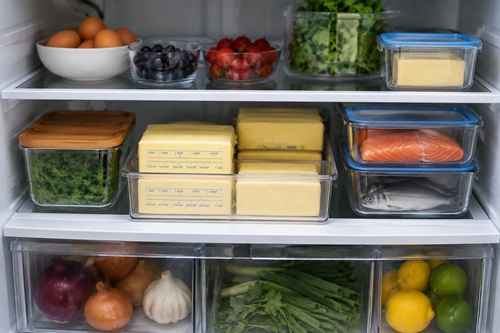
Make sure the wrapper is completely sealed and hasn’t been punctured or torn during transport. Damaged packaging allows air and moisture to reach the butter, reducing both freshness and storage life.
If a wrapper has been damaged, place the butter in an airtight container or rewrap it before storing it.
This simple habit prevents many common storage problems before they begin.
Choose the Best Location
Many refrigerators include a small compartment in the door labeled specifically for butter.
Although convenient, it isn’t always the best place for long-term storage.
Every time the refrigerator door opens, butter stored there is exposed to warmer air. These repeated temperature changes gradually reduce quality and shorten freshness.
Instead, keep unopened packages on an interior shelf where the temperature remains more stable.
Reserve the butter compartment or countertop butter dish for the package you’re currently using.
Protect Butter from Food Odors
Butter readily absorbs surrounding odors.
If it’s stored beside onions, garlic, fish, strong cheeses, or heavily seasoned leftovers, those flavors can slowly transfer into the butter.
For best results, leave unopened butter in its original wrapper until needed. Once opened, keep it in a covered butter dish or an airtight container.
This not only preserves flavor but also prevents the butter from drying out.
Organize for Easy Rotation
Organization is one of the simplest preparedness skills you can develop.
Whenever you buy new butter, place it behind your existing supply. The oldest packages should always remain at the front so they’re used first.
This first-in, first-out system takes only a few seconds each time you shop, yet it almost completely eliminates forgotten packages that sit in the refrigerator too long.
If you’ve built a freezer reserve, keep only one package in the refrigerator at a time. As it begins to run low, transfer the oldest frozen package to the refrigerator to thaw naturally.
Before long, this rotation becomes second nature.
Label Your Butter
Most butter already includes a best-before date, but adding your own purchase date with a permanent marker makes rotation even easier.
If you’ve divided larger packages into smaller portions, label each one before storing it.
As your preparedness pantry grows, good labeling habits become increasingly valuable.
The goal isn’t simply to know when butter expires.
The goal is to know which package should be used next.
Keep Only What You’ll Use
Many people like to leave butter on the kitchen counter because it’s soft and easy to spread.
That’s perfectly reasonable, but only keep out the amount you’ll use within a few days.
The remainder of your supply should stay refrigerated or frozen until it’s needed.
This minimizes spoilage while still providing the convenience of soft butter for everyday meals.
Prepper Tip
Think of your refrigerator as your working pantry.
It should contain only the butter you’ll use over the next week or two.
Everything else belongs in your rotating freezer inventory, where it remains protected until it’s needed.
Common Beginner Mistakes
One of the most common mistakes is storing every package in the refrigerator simply because there’s space available. Refrigeration is intended for short-term storage, while your freezer should hold the majority of your preparedness supply.
Another mistake is removing butter from its original wrapper too early. The wrapper provides valuable protection against air, moisture, and unwanted food odors.
Finally, don’t ignore organization. A few extra seconds spent arranging your butter each time you shop will save you money and greatly reduce food waste over time.
Before You Continue
Refrigeration works extremely well for butter you’ll use in the near future, but it isn’t designed for building a long-term emergency reserve.
Fortunately, butter freezes exceptionally well. With proper packaging, labeling, and rotation, frozen butter can maintain excellent quality for many months while remaining ready whenever you need it.
In the next section, you’ll learn how to freeze butter correctly, prevent freezer burn, and organize your freezer for long-term preparedness.
Freezing Butter for Long-Term Storage
For most households, freezing is the easiest and most effective way to build a long-term butter supply. Unlike many foods that lose their texture or flavor after freezing, butter holds up remarkably well. When properly packaged and stored at a consistent freezer temperature, it can maintain excellent quality for many months.
For preppers, this makes freezing the foundation of a dependable butter storage plan. It requires no special equipment beyond a household freezer, preserves butter in its original form, and allows you to build a rotating inventory that is always ready to use.
The key isn’t simply placing butter in the freezer. It’s protecting it from air, moisture, temperature fluctuations, and poor organization.
Inspect Every Package
Before placing butter into the freezer, inspect each package carefully.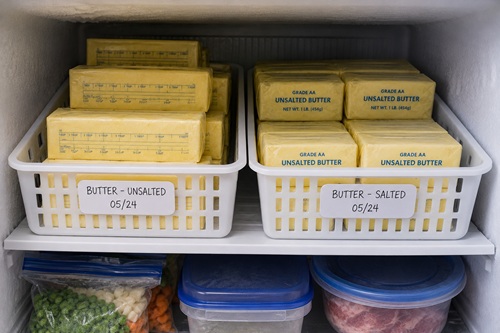
Look for torn wrappers, crushed corners, broken seals, or any signs that the packaging has been damaged during transport or storage. Even small openings allow air to reach the butter, increasing the risk of freezer burn and reducing overall quality.
If a package has been damaged, don’t throw it away. Simply wrap it tightly in freezer paper or heavy-duty aluminum foil, or place the entire package inside a freezer-safe bag before freezing.
A few extra seconds spent protecting the package now can preserve its quality for months.
Organize Before You Freeze
Good organization begins before the first package enters the freezer.
Choose one location specifically for butter and other dairy products. Keeping similar foods together makes inventory easier to manage and reduces the amount of time the freezer door remains open while searching for items.
Arrange your butter so the oldest packages remain at the front and newly purchased butter is placed behind them.
This simple first-in, first-out rotation system ensures older butter is always used first while newer packages remain in reserve.
Organization is one of the easiest preparedness habits to maintain and one of the most valuable over the long term.
Label Every Package
Although commercial butter already includes a best-before date, adding your own information makes rotation much easier.
Use a permanent marker to record:
- Purchase date
- Date frozen
- Salted or unsalted (if not obvious)
If you’ve divided larger blocks into smaller portions, label every package before placing it in the freezer.
Weeks or months from now, you’ll know exactly which package should be used next without reading every wrapper.
Protect Against Freezer Burn
Freezer burn occurs when moisture slowly escapes from frozen food and is replaced by dry air inside the freezer.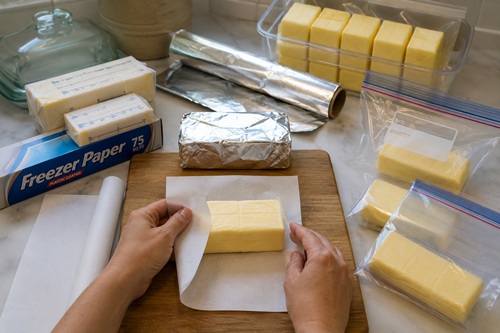
Although freezer-burned butter is usually still safe to eat, it often develops dry areas, off flavors, or changes in texture that make it less enjoyable to use.
The easiest way to prevent freezer burn is to keep air away from the butter.
Whenever possible, leave butter in its original wrapper and add a second layer of protection if it will remain frozen for an extended period. Vacuum sealing provides even greater protection but isn’t necessary for most households.
Just as important, avoid repeatedly opening the freezer or allowing the temperature to fluctuate unnecessarily.
Thaw Butter Properly
When you’re ready to use frozen butter, move it to the refrigerator and allow it to thaw slowly.
Most packages thaw overnight or within about 24 hours.
Slow thawing helps preserve texture, minimizes condensation, and makes the butter much easier to use.
Avoid thawing butter on the kitchen counter for extended periods, and never repeatedly thaw and refreeze the same package. Instead, remove only the amount you expect to use over the coming week.
Build a Continuous Rotation
The easiest way to maintain a freezer inventory is to treat every grocery trip as a replacement rather than a stockpiling event.
Each time you purchase fresh butter, place the new packages behind the existing supply.
Each time a refrigerated package is finished, move the oldest frozen package into the refrigerator.
That’s it.
Within a few months, this becomes an automatic routine that keeps your emergency supply fresh without requiring complicated tracking systems.
Preparedness works best when it becomes part of your everyday habits.
Prepper Tip
If you purchase butter in bulk during a sale, avoid stacking all the packages into one large pile.
Instead, arrange them in rows or small groups with the oldest packages easiest to reach. Future rotation becomes much simpler, and you’ll avoid digging through frozen packages every time you need one.
Common Beginner Mistakes
One of the biggest mistakes is assuming frozen butter lasts forever. While freezing greatly extends storage life, quality gradually declines over time. Consistent rotation ensures you’re always using butter while it’s still at its best.
Another common mistake is freezing damaged packages without adding extra protection. Even a tiny tear in the wrapper can allow air to enter, leading to freezer burn months later.
Finally, don’t overfill your freezer. Cold air needs room to circulate in order to maintain a stable temperature. An organized freezer not only preserves butter better but also benefits every other frozen food you store.
Before You Continue
Freezing is an outstanding long-term storage method whenever electricity is available. However, many preppers also want a way to store butter that doesn’t depend entirely on a freezer.
One of the oldest and most reliable solutions is clarified butter, commonly known as ghee. By removing the water and milk solids, ghee stores significantly longer than ordinary butter and performs exceptionally well in high-temperature cooking.
In the next section, you’ll learn how to make ghee step by step, recognize when it’s finished, store it properly, and incorporate it into your long-term preparedness pantry.
Making Clarified Butter (Ghee)
If freezing is the easiest way to preserve butter, making clarified butter—commonly known as ghee—is one of the oldest and most reliable preservation methods ever developed.
Ghee is produced by slowly heating butter until the water evaporates and the milk solids separate from the pure butterfat. Once those milk solids are removed, the remaining butterfat becomes far more stable than ordinary butter.
For preparedness, this offers several important advantages.
Properly prepared ghee stores much longer than fresh butter, has a much higher smoke point for cooking, and doesn’t depend as heavily on refrigeration as ordinary butter. It’s equally at home in an everyday kitchen, an off-grid cabin, or an emergency pantry.
Best of all, making ghee requires no special equipment and only a little patience.
Gather Your Equipment
Before turning on the stove, assemble everything you’ll need.
You’ll need:
- Butter (salted or unsalted)
- A heavy-bottom saucepan
- A large spoon
- A fine-mesh strainer
- Cheesecloth or an unbleached coffee filter
- Clean glass jars with tight-fitting lids
- Oven mitts
Choosing a heavy saucepan is important because it distributes heat more evenly and greatly reduces the chance of scorching the milk solids.
The quality of your finished ghee will always reflect the quality of the butter you begin with.
Step 1 — Melt the Butter Slowly
Place the butter into the saucepan over low heat.
Resist the temptation to increase the heat.
As the butter melts, it naturally separates into three distinct layers.
A light foam develops on the surface.
Clear butterfat forms the middle layer.
Milk solids gradually settle on the bottom.
This separation is exactly what you’re trying to achieve.
Don’t stir the butter during this stage. Allow nature to do the work.
Step 2 — Allow the Water to Evaporate
As the butter continues to simmer gently, the bubbling you’re seeing is mostly water escaping as steam.
Continue heating slowly.
Over time the bubbling becomes less vigorous.
The butterfat becomes increasingly clear.
The foam begins to disappear.
This stage cannot be rushed.
Patience produces cleaner ghee with better flavor and longer storage life.
Step 3 — Watch Carefully
This is the stage where most beginners make mistakes.
Watch the milk solids on the bottom of the pan.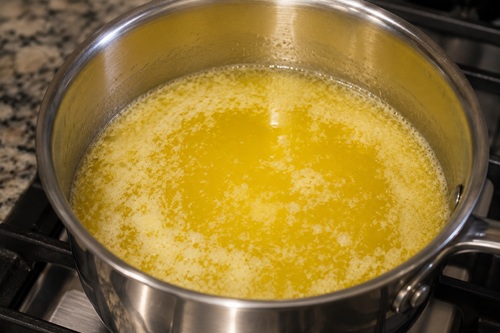
They should gradually turn a light golden color while releasing a pleasant buttery, slightly nutty aroma.
If they become dark brown or black, they’ve begun to burn.
Burned milk solids can quickly affect the flavor of the finished ghee.
When the butterfat appears clear and the bubbling has nearly stopped, remove the saucepan from the heat.
Step 4 — Strain the Butterfat
Allow the pan to cool for several minutes.
Line your strainer with cheesecloth or a clean coffee filter and slowly pour the butterfat into a clean glass jar.
Leave the milk solids behind.
Only the clear golden butterfat should enter the storage jar.
If necessary, strain the butter a second time.
A second filtering removes tiny particles that may have escaped during the first pass.
Step 5 — Cool Before Sealing
Allow the ghee to cool naturally.
As it cools, the clear golden liquid gradually becomes a smooth, creamy solid.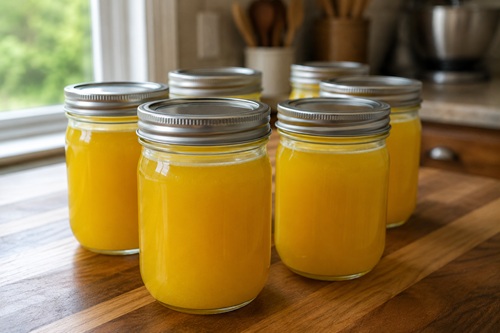
Once completely cooled, tighten the lid and label the jar with the preparation date.
Store it according to your preferred storage method.
Properly prepared ghee should have a rich golden color, a pleasant buttery aroma, and a smooth texture.
Troubleshooting
Even experienced cooks occasionally make mistakes.
Fortunately, most problems are easy to correct.
My Ghee Looks Cloudy
Small amounts of milk solids probably remained after straining.
Warm the ghee gently and strain it again through fresh cheesecloth.
It Smells Burnt
The heat was probably too high.
Unfortunately, burnt flavors cannot be removed.
Lower the heat next time and watch the milk solids more closely.
There Is Sediment in the Bottom of the Jar
A small amount of milk solids settled after pouring.
This is common.
If desired, gently warm the ghee again and strain it one more time.
My Ghee Isn’t Solid
Don’t worry.
The texture of ghee changes naturally with temperature.
In a warm room it may remain liquid.
In a cool pantry it may become completely solid.
Both are perfectly normal.
Prepper Tip
Prepare several small jars instead of one large container.
Each time a jar is opened, it is exposed to air, moisture, and repeated handling.
Using smaller jars keeps the unopened supply protected while making rotation much easier.
Common Beginner Mistakes
The most common mistake is rushing the process by increasing the heat.
Clarifying butter is not difficult, but it cannot be hurried.
Another mistake is stirring the butter repeatedly. Allowing the butter to separate naturally produces a much cleaner finished product.
Finally, avoid sealing jars while the ghee is still warm. Allowing it to cool first helps reduce condensation, which can introduce unwanted moisture into the finished product.
Before You Continue
Ghee is one of the safest and most practical ways to extend the usefulness of butter, but it isn’t the only preservation method discussed in preparedness circles.
Some preppers also preserve butter through home canning. Although this practice has been shared for many years, it also raises important food safety questions.
The next section examines home-canned butter objectively, explaining both the reasons some people use it and why recognized food safety organizations have not published an approved home-canning process. Understanding both perspectives will help you make an informed decision for your own preparedness plan.
Understanding Home-Canned Butter
If you’ve spent any time in preparedness or homesteading communities, you’ve almost certainly encountered articles or videos showing how to can butter at home. Some people have been using this method for years and report excellent results. Others avoid it entirely because recognized food safety organizations have not published an approved home-canning process for butter.
For someone new to preparedness, these conflicting opinions can be confusing.
The purpose of this chapter isn’t to tell you what decision to make. Instead, it’s to explain why home-canned butter remains a controversial topic, summarize the arguments from both perspectives, and help you make an informed decision based on reliable information rather than internet claims alone.
Preparedness is built on knowledge, not assumptions.
Why Some People Can Butter
The popularity of home-canned butter is easy to understand.
A shelf-stable source of butter could provide significant advantages during prolonged power outages, extended supply shortages, or off-grid living where freezer space may be limited.
People who preserve butter this way often describe several perceived benefits.
Home-canned butter doesn’t occupy valuable freezer space, remains readily available during electrical outages, is easy to organize on pantry shelves, and can simplify food rotation because it doesn’t require thawing before use.
Many people who practice home canning also appreciate having another preservation method available rather than depending entirely on refrigeration or freezing.
These are practical preparedness goals, which explains why the method continues to receive attention.
Why Food Safety Experts Advise Against It
Butter presents unique challenges that differ from most foods commonly preserved through home canning.
Its high fat content, relatively low moisture content, and composition make it difficult to evaluate using the same testing procedures developed for fruits, vegetables, meats, or soups.
For this reason, recognized food safety organizations have not published a scientifically tested home-canning procedure for butter.
This point is often misunderstood.
It does not automatically mean that every jar of home-canned butter will spoil.
It means there is currently no validated home-canning process that has undergone the scientific testing required to demonstrate consistent safety under a wide range of household conditions.
Understanding that distinction is important.
Weighing Benefits and Risks
Preparedness often involves balancing advantages against potential risks.
Every household must decide which preservation methods fit its own circumstances, equipment, experience, and comfort level.
Some preppers decide the uncertainty surrounding home-canned butter isn’t acceptable and instead rely entirely on frozen butter, homemade ghee, or commercially produced shelf-stable products.
Others study the available information, understand both viewpoints, and decide to include home-canned butter as one part of a diversified food storage plan.
Whatever conclusion you reach, it should be based on careful research rather than popularity or social media trends.
Continue Learning
If you’re considering home-canned butter, take time to read information from multiple sources.
Compare the experiences shared within the preparedness community with guidance published by food safety organizations.
Pay attention to both the reported successes and the reasons some experts recommend caution.
The goal isn’t to find information that supports a decision you’ve already made.
The goal is to understand the strengths and limitations of every preservation method before deciding which ones belong in your preparedness plan.
Knowledge is one of the most valuable preparedness tools you’ll ever develop.
Prepper Tip
Redundancy is one of the foundations of preparedness.
Rather than depending on a single preservation method, many experienced preppers combine several approaches. Butter for everyday use remains in the refrigerator. Long-term supplies stay in the freezer. Homemade ghee provides another option for situations where refrigeration may be limited. Other cooking fats, such as olive oil, coconut oil, lard, and tallow, further diversify the pantry.
Building multiple layers of food storage reduces dependence on any one product or preservation method.
Common Beginner Mistakes
One of the most common mistakes is assuming that widespread use automatically proves a preservation method is scientifically validated. Popularity and scientific testing are not the same thing.
Another mistake is relying exclusively on a single source of information. Preparedness is strongest when decisions are based on multiple reliable sources, practical experience, and an understanding of both the advantages and the limitations of each method.
Finally, avoid building your entire preparedness plan around a single type of cooking fat. A diverse pantry provides flexibility and resilience when circumstances change.
Before You Continue
No matter which storage method you choose, every prepper should know how to recognize butter that is no longer safe or suitable to use.
In the next chapter, you’ll learn how to inspect butter using your senses of sight, smell, and touch, recognize the early signs of spoilage, distinguish quality problems from true contamination, and decide when it’s time to discard a package rather than risk using it.
Recognizing Butter Spoilage
No matter how carefully you store butter, it won’t remain fresh forever. Fortunately, butter usually provides several warning signs before it becomes unsuitable for use. Learning to recognize those signs is one of the most valuable food storage skills you can develop.
A quick inspection takes less than a minute and can help you avoid unnecessary waste while reducing the risk of eating food that has deteriorated.
Whenever you remove butter from storage—whether it has been refrigerated, frozen, or prepared as ghee—get into the habit of performing the same simple inspection every time.
With practice, this routine becomes second nature.
Step 1 — Inspect the Packaging
Begin by examining the package before opening it.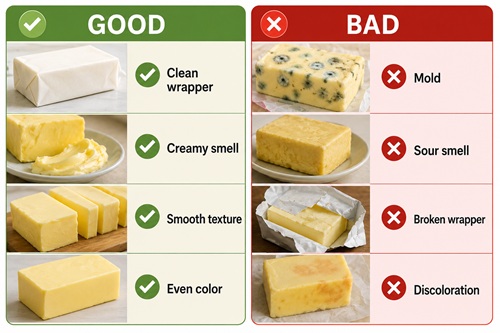
Look for torn wrappers, broken seals, punctures, moisture inside the package, or anything else that suggests air or contaminants may have entered during storage.
If frozen butter has accumulated large amounts of frost or ice crystals inside the wrapper, it may have experienced temperature fluctuations. While this doesn’t automatically make the butter unsafe, it can affect texture and flavor.
A clean, undamaged package is always a good first sign.
Step 2 — Look at the Butter
Once opened, examine the butter carefully.
Fresh butter typically ranges from pale yellow to a deeper golden color depending on the season, the cow’s diet, and the type of butter.
A slightly darker outer layer is often the result of harmless oxidation caused by exposure to air. In many cases, this thin layer can simply be trimmed away if the remainder of the butter appears normal.
However, butter should never display green, blue, black, pink, or fuzzy patches. These may indicate mold or contamination, and the butter should be discarded immediately.
Step 3 — Smell the Butter
Your nose is one of the most reliable tools you have.
Fresh butter has a clean, rich, creamy aroma.
If you notice sour, rancid, moldy, or otherwise unpleasant odors, the butter has likely deteriorated.
Never assume cooking will improve spoiled butter. Heat cannot restore quality or make spoiled food safe.
If the smell seems wrong, don’t use it.
Step 4 — Feel the Texture
Butter should feel smooth and consistent.
If it appears unusually slimy, sticky, excessively dry, or has developed an unusual grainy texture that wasn’t present before storage, examine it more closely.
Frozen butter that has developed mild freezer burn may simply have a dry outer surface. While this often affects quality rather than safety, severe freezer burn can leave the butter with an unpleasant taste.
Step 5 — Taste Only When Everything Else Looks Normal
If the packaging, appearance, smell, and texture all seem normal but you’re still uncertain, a very small taste may help confirm its quality.
Fresh butter should taste clean, rich, and slightly creamy.
If it tastes bitter, sour, metallic, or otherwise unusual, discard it.
Never taste butter that already shows obvious signs of mold, spoilage, or contamination.
Develop an Inspection Routine
Rather than relying on a single sign, train yourself to inspect butter the same way every time.
A simple five-step routine works well:
- Inspect the package.
- Look at the color.
- Smell the butter.
- Check the texture.
- Taste only if everything else appears normal.
Following the same routine every time makes it much less likely that you’ll overlook an important warning sign.
Prepper Tip
Labeling and rotating your butter properly is one of the easiest ways to prevent spoilage.
Packages that are purchased first should always be used first. A simple purchase or freezing date written on the wrapper with a permanent marker makes rotation almost effortless.
Good organization prevents most spoilage problems before they ever occur.
Common Beginner Mistakes
One of the most common mistakes is relying entirely on the printed best-before date. While these dates provide useful guidance, they don’t replace proper inspection. Storage conditions often have a much greater impact on quality than the calendar.
Another mistake is assuming frozen butter never changes. Although freezing greatly extends storage life, quality gradually declines over time. Rotation remains just as important in the freezer as it is in the refrigerator.
Finally, avoid using questionable butter simply because you don’t want to waste it. Replacing one package of butter is far less expensive than dealing with foodborne illness.
Before You Continue
Knowing how to recognize spoiled butter is only part of the picture.
The next step is learning how to make the most of the butter you’ve stored. Whether you’re cooking with fresh butter, thawed butter, or homemade ghee, understanding how each performs in the kitchen will help you get the greatest value from your preparedness pantry.
Cooking with Stored Butter
One of the best ways to maintain a dependable butter supply is to make it part of your everyday cooking. Butter that sits untouched in the freezer for years is far more likely to be forgotten than butter that’s regularly rotated through normal meal preparation.
Using your stored butter regularly allows you to become familiar with how refrigerated butter, frozen butter, and homemade ghee perform in different recipes. You’ll also discover which storage methods work best for your household long before you need to rely on them during an emergency.
Preparedness is most effective when your emergency pantry becomes an extension of your everyday kitchen.
Cook with What You Store
One of the most common mistakes new preppers make is storing foods they rarely use.
Butter shouldn’t become a “special occasion” ingredient that’s only used during emergencies. Instead, make it part of your weekly meal planning.
Each time you prepare breakfast, bake bread, sauté vegetables, or make soup, you’re also practicing your food rotation system.
The more often you use your stored foods, the easier it becomes to maintain your preparedness pantry.
Using Refrigerated Butter
Refrigerated butter is ideal for everyday cooking.
Use it for spreading on bread, scrambling eggs, cooking vegetables, making sauces, baking cookies, preparing mashed potatoes, or adding flavor to rice and pasta.
Whenever your refrigerator supply begins to run low, move the oldest frozen package into the refrigerator to thaw.
This simple routine keeps your rotation moving without requiring extra effort.
Using Frozen Butter
Frozen butter behaves almost exactly like fresh butter once it has thawed.
For best results, transfer the package to the refrigerator about 24 hours before you expect to use it. Slow thawing helps preserve texture while making the butter easier to slice, spread, and measure.
If you’ve forgotten to thaw butter before baking, don’t panic.
Frozen butter can often be grated directly into flour using a box grater. This technique works particularly well for biscuits, pie crusts, scones, and pastries because the small pieces of cold butter remain evenly distributed throughout the dough.
Avoid thawing and refreezing the same package repeatedly. Instead, thaw only the amount you expect to use during the coming week.
Cooking with Ghee
Clarified butter, or ghee, behaves differently than ordinary butter because the water and milk solids have been removed.
Its greatest advantage is its high smoke point, allowing it to be used for frying, sautéing, roasting, and other high-temperature cooking methods without burning as easily as regular butter.
Many people also enjoy its rich, slightly nutty flavor.
Ghee works exceptionally well in soups, stews, vegetables, rice dishes, curries, and skillet meals.
The more frequently you cook with it today, the more comfortable you’ll become using it when fresh butter may not be available.
Stretch Your Butter Supply
Preparedness isn’t only about storing more food.
It’s also about learning to use your food efficiently.
Many recipes require surprisingly little butter to produce excellent flavor.
For example, vegetables can be sautéed primarily in olive oil with a small amount of butter added near the end of cooking for taste. Rice, potatoes, oatmeal, and pasta often need only a small amount of butter to improve flavor significantly.
Learning to combine butter with other cooking fats helps your stored supply last much longer without sacrificing meal quality.
Practice Pantry Cooking
Every few weeks, challenge yourself to prepare an entire meal using only ingredients from your preparedness pantry.
Cook with frozen butter.
Use homemade ghee.
Bake using flour, grains, beans, and other long-term storage foods.
These practice meals accomplish several things at once.
They rotate your inventory.
They improve your cooking skills.
They reveal weaknesses in your food storage plan before an emergency occurs.
Most importantly, they build confidence.
Preparedness skills improve through practice.
Prepper Tip
Choose one meal each month and prepare it entirely from your stored food supply.
This simple habit keeps your inventory rotating, helps identify foods that need replenishing, and ensures you’re familiar with the ingredients you’ve chosen to store.
Small practice sessions today build confidence for tomorrow.
Common Beginner Mistakes
One of the most common mistakes is saving stored butter exclusively for emergencies. Food that is never used becomes difficult to rotate and is more likely to be forgotten.
Another mistake is using much more butter than necessary. In many recipes, a small amount provides excellent flavor while allowing your stored supply to last considerably longer.
Finally, don’t assume refrigerated butter, frozen butter, and ghee behave exactly the same in every recipe. Spend time experimenting with each so you’ll know which works best for different cooking methods.
Before You Continue
Butter is only one part of a well-planned preparedness pantry.
The next chapter looks at other long-lasting cooking fats, explaining how each one complements butter and helping you build a pantry that’s more versatile, more resilient, and better prepared for both everyday life and long-term emergencies.
Building a Long-Term Fat Pantry
Butter is one of the most versatile foods you can store, but it shouldn’t be the only cooking fat in your preparedness pantry. Every cooking fat has strengths and limitations, and relying entirely on one product leaves you vulnerable if supplies become limited or storage conditions change.
A resilient pantry contains a variety of cooking fats that complement one another. Some excel in everyday cooking, others are better suited for baking, and some offer exceptional shelf life or high-temperature performance.
Rather than searching for the “perfect” cooking fat, build a pantry that gives you options.
Preparedness is about flexibility.
Butter
Butter remains the foundation of many preparedness kitchens.
It adds flavor to vegetables, potatoes, pasta, rice, soups, sauces, baked goods, and countless everyday meals. It also provides concentrated calories and can make simple pantry foods much more enjoyable.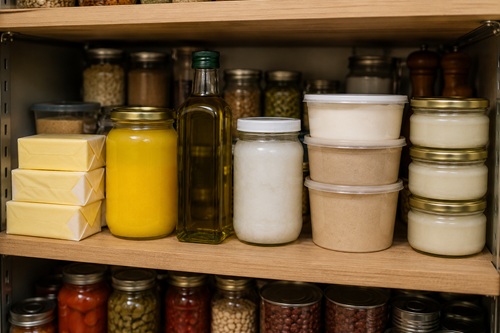
Its primary limitation is storage. Fresh butter requires refrigeration, while long-term storage usually depends on freezing or converting it into clarified butter (ghee).
For most households, butter should remain the primary everyday cooking fat.
Clarified Butter (Ghee)
Ghee solves one of butter’s biggest challenges.
By removing the water and milk solids, clarified butter stores much longer than ordinary butter and performs exceptionally well at high cooking temperatures.
It’s ideal for frying, sautéing, roasting, and situations where refrigeration may be limited or unavailable.
Many experienced preppers keep both butter and ghee because each serves a different purpose.
Olive Oil
Olive oil deserves a permanent place in almost every preparedness pantry.
It’s excellent for vegetables, salads, bread, pasta, and many everyday recipes. Extra-virgin olive oil is especially valued for flavor, while lighter olive oils are often preferred for general cooking.
Store olive oil in a cool, dark place and rotate it regularly to maintain quality.
Coconut Oil
Coconut oil has become increasingly popular because of its versatility and relatively long shelf life.
It works well in baking, frying, and many everyday recipes while remaining stable when stored correctly.
Even if you don’t normally cook with coconut oil, consider experimenting with it before deciding whether it belongs in your preparedness pantry.
Lard
Rendered pork fat has been used in kitchens for generations.
Properly prepared lard produces tender pastries, flaky pie crusts, excellent biscuits, and flavorful fried foods.
If you raise livestock or purchase quality rendered lard, it can become a valuable addition to a long-term food storage program.
Tallow
Rendered beef fat is another traditional cooking fat that deserves consideration.
Tallow performs exceptionally well when frying or roasting because it tolerates high temperatures without breaking down easily.
Homesteaders who process their own cattle often include tallow as part of their annual food preservation routine.
Commercial Freeze-Dried Butter
Commercial freeze-dried butter offers one of the longest storage lives available.
When stored according to the manufacturer’s recommendations, many products remain usable for decades.
The tradeoff is cost.
Because freeze-dried butter is significantly more expensive than ordinary butter, many preppers reserve it for long-term emergency storage rather than everyday cooking.
Build a Pantry That Matches Your Lifestyle
No two preparedness pantries should look exactly alike.
A family living in an apartment may rely primarily on butter, olive oil, coconut oil, and a small supply of ghee because freezer and pantry space are limited.
A rural homesteader who renders animal fats may also store lard and tallow alongside homemade ghee.
Neither approach is better.
The right pantry is the one that matches the foods your family enjoys, your available storage space, your budget, and your preparedness goals.
The more familiar you become with every cooking fat you store, the easier it will be to adapt if circumstances change.
Example: A Balanced Preparedness Pantry
The following example shows how one household might organize its cooking fats.
| Cooking Fat | Primary Purpose |
|---|---|
| Butter | Everyday cooking and baking |
| Frozen Butter | Long-term rotating reserve |
| Homemade Ghee | High-temperature cooking and emergency storage |
| Olive Oil | Salads, vegetables, and general cooking |
| Coconut Oil | Baking, frying, and extended storage |
| Lard or Tallow | Frying, roasting, and traditional cooking |
This is only one example.
Your own pantry should reflect the foods your household prepares most often.
Prepper Tip
Every time you introduce a new cooking fat into your pantry, cook with it several times before buying larger quantities.
Preparedness foods should never be unfamiliar.
The best emergency pantry is simply an extension of the meals your family already enjoys.
Common Beginner Mistakes
One of the most common mistakes is relying entirely on one cooking fat.
If your freezer fails, frozen butter may be lost. If olive oil becomes difficult to replace, your cooking options become more limited.
Maintaining several different cooking fats provides flexibility and greatly improves resilience.
Another mistake is buying large quantities without considering shelf life or rotation. Every cooking fat eventually declines in quality, so regular use and replacement remain essential.
Finally, avoid storing foods simply because someone else recommends them. Your pantry should always reflect your family’s eating habits rather than someone else’s preferences.
Before You Continue
You’ve now learned how to select quality butter, compare storage methods, calculate realistic storage goals, preserve butter using several techniques, recognize spoilage, cook with stored butter, and build a balanced long-term fat pantry.
The final chapter brings these lessons together, reviews the most important preparedness principles, and provides a simple action plan you can use to begin building or improving your own butter storage program today.
Key Takeaways
Butter is far more than a simple spread for bread.
It is a versatile cooking ingredient, an excellent source of concentrated calories, and one of the easiest foods to incorporate into a long-term preparedness pantry. Whether you’re baking bread, preparing everyday meals, or building an emergency food reserve, learning to store butter properly gives you greater flexibility and confidence.
Throughout this handbook, you’ve learned that successful butter storage isn’t based on a single technique. It begins by selecting quality butter, understanding the differences between products, and choosing storage methods that fit your family’s needs. From there, success comes from developing good habits—rotating your inventory, labeling packages, protecting butter from damage, and using your stored food as part of your everyday routine.
You’ve also explored several preservation methods, including refrigeration, freezing, and preparing clarified butter (ghee), while gaining a balanced understanding of the ongoing discussion surrounding home-canned butter. Just as importantly, you’ve learned how to recognize spoilage before it becomes a problem and how to build a pantry that includes a variety of cooking fats rather than depending on a single product.
Your Next Steps
Knowledge becomes preparedness only when it is put into practice.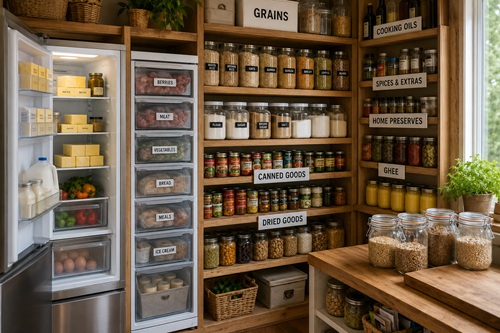
This week, choose one or two simple tasks from the list below and begin building your own butter storage system.
- Compare several brands of butter at your local grocery store.
- Label every package currently in your refrigerator or freezer.
- Begin tracking how much butter your household uses each month.
- Build a simple first-in, first-out rotation system.
- Freeze several extra packages during the next grocery sale.
- Make your first batch of homemade ghee.
- Cook a meal using only foods from your preparedness pantry.
- Review your stored cooking fats and identify any gaps.
You don’t need to complete everything at once.
Preparedness is built one small step at a time. Every improvement you make today strengthens your pantry for tomorrow.
The goal isn’t perfection.
The goal is confidence.
When butter becomes part of a well-managed, regularly rotated preparedness pantry, it changes from an ordinary grocery item into a dependable food resource that can continue supporting your family through everyday life and unexpected emergencies alike.
© Prepping Communities. This content is for informational purposes only and not professional advice. Use at your own risk.
Terms | Privacy | Guidelines