
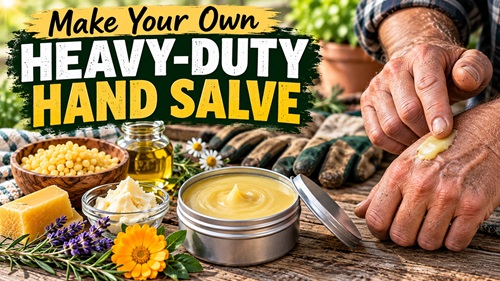
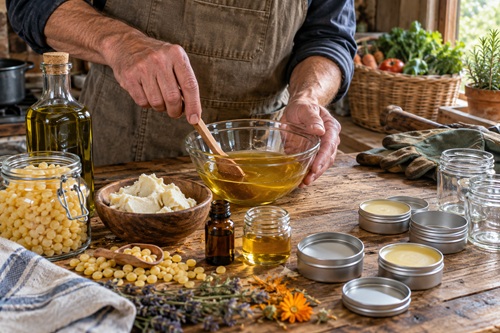
Working with your hands every day can be surprisingly hard on your skin. Gardening, splitting and stacking firewood, repairing equipment, caring for livestock, washing tools, handling soil, and working outdoors in cold or windy weather can gradually strip away the natural oils that protect your hands. Frequent handwashing adds to the problem, and before long the skin around the fingertips and knuckles can become rough, dry, and cracked.
A homemade heavy-duty hand salve is one simple way to protect and condition hardworking skin. Unlike a typical lotion, which usually contains a significant amount of water, a salve is primarily made from oils, butter, and wax. This creates a concentrated product that remains on the skin longer and helps reduce moisture loss.
Making hand salve is also a useful homesteading and self-sufficiency skill. The process is simple enough to learn in one session, the basic ingredients can be kept on hand, and the recipe can be adjusted to create anything from a relatively soft everyday balm to a much firmer salve for outdoor work.
Understanding How a Hand Salve Works
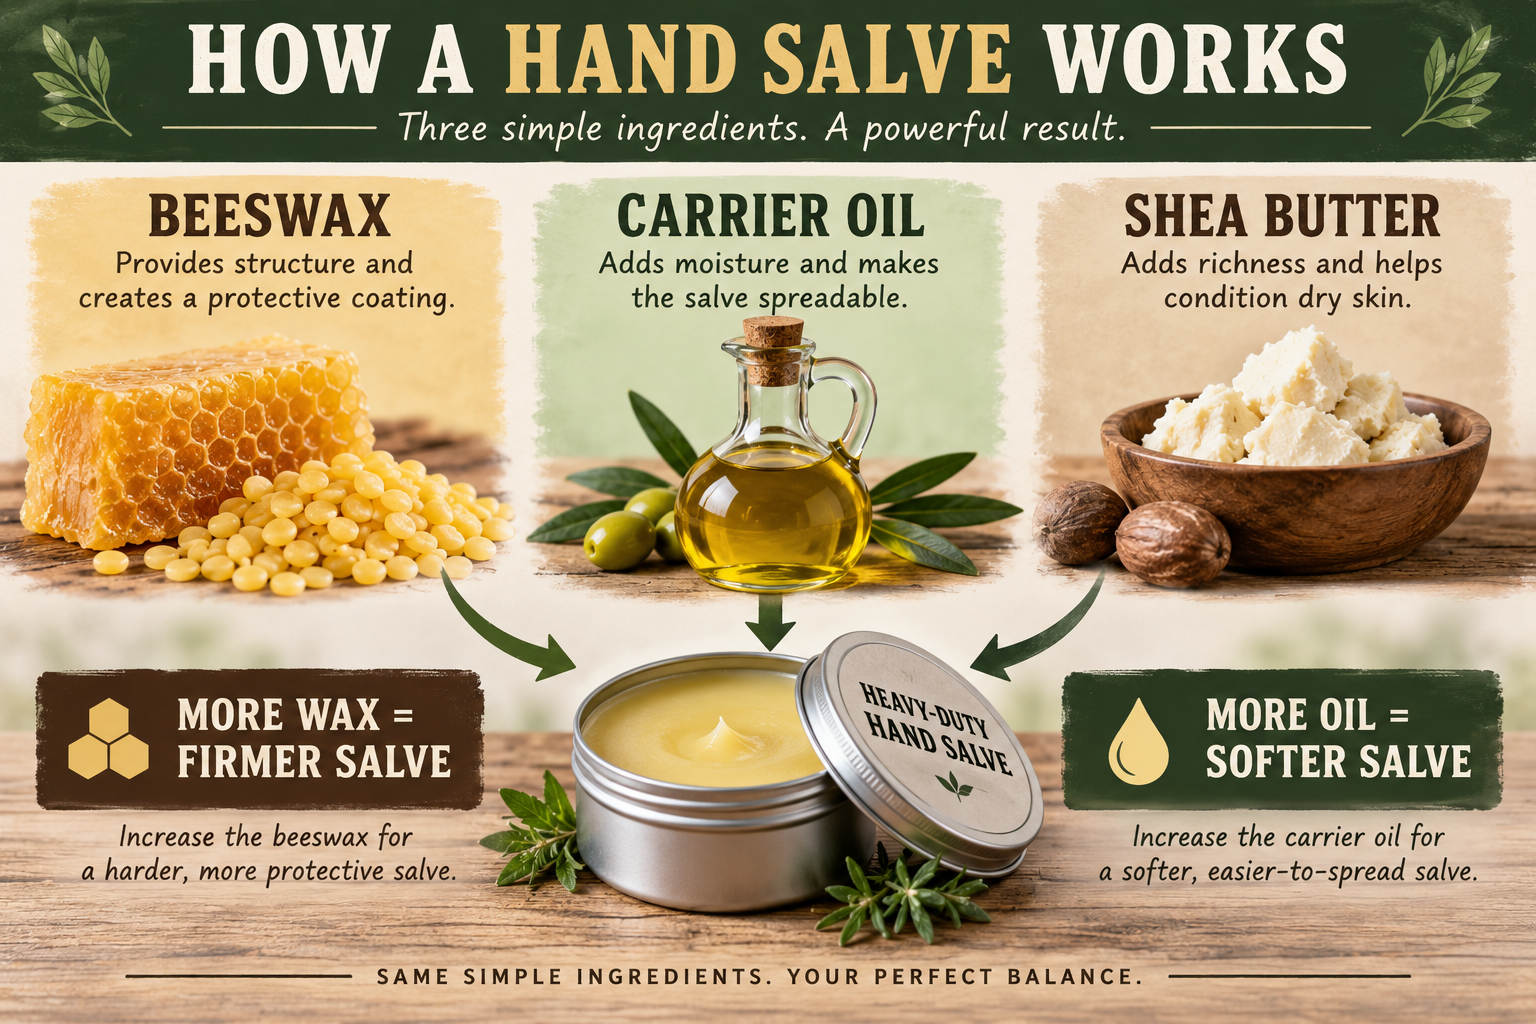
The basic principle behind hand salve is surprisingly simple. Liquid oil conditions the skin and makes the salve spreadable. Butter adds richness and body, while wax gives the mixture structure and leaves a protective coating on the skin.
Beeswax is particularly useful because it turns the liquid oils into a semi-solid product once everything cools. Increasing the amount of beeswax makes the finished salve harder, while reducing it produces a softer product.
Olive oil is an inexpensive carrier oil that many households already have available. Jojoba oil is another option, and coconut oil can also be used, although coconut oil changes consistency significantly with temperature. Shea butter works well for creating a rich salve, while cocoa butter can be incorporated when a somewhat firmer product is desired.
Understanding these relationships is more valuable than memorizing one exact recipe. Once you know what the wax, oil, and butter are doing, you can adjust future batches to suit your climate and personal preference.
What You Need
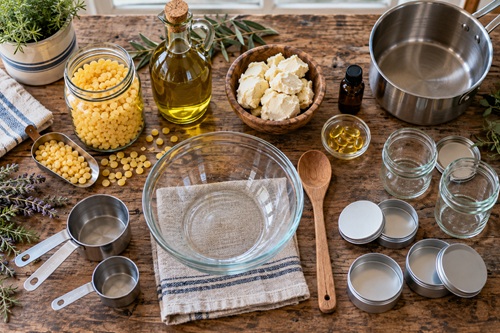
A good starting batch can be made with approximately 1/4 cup of beeswax pellets or finely grated beeswax, 1/2 cup of olive oil or another skin-safe carrier oil, 1/4 cup of shea butter, and about 1 teaspoon of vitamin E oil. This follows the general wax, oil, and butter approach used in the supplied source while allowing the finished salve to be adjusted according to its consistency.
Essential oil can be added for fragrance if desired, but it is not necessary. In fact, making the first batch without fragrance is a good way to determine how your skin responds to the basic ingredients before anything else is introduced.
You will also need a small saucepan, a heat-safe glass or metal bowl, a heat-resistant spoon, measuring cups, and several small jars or metal tins with lids. A true double boiler can be used if you have one, but a saucepan and heat-safe bowl work just as well.
Prepare Everything Before You Begin
Wash the jars or tins and their lids thoroughly before making the salve, then allow them to dry completely. The containers should contain no visible moisture when the salve is poured into them.
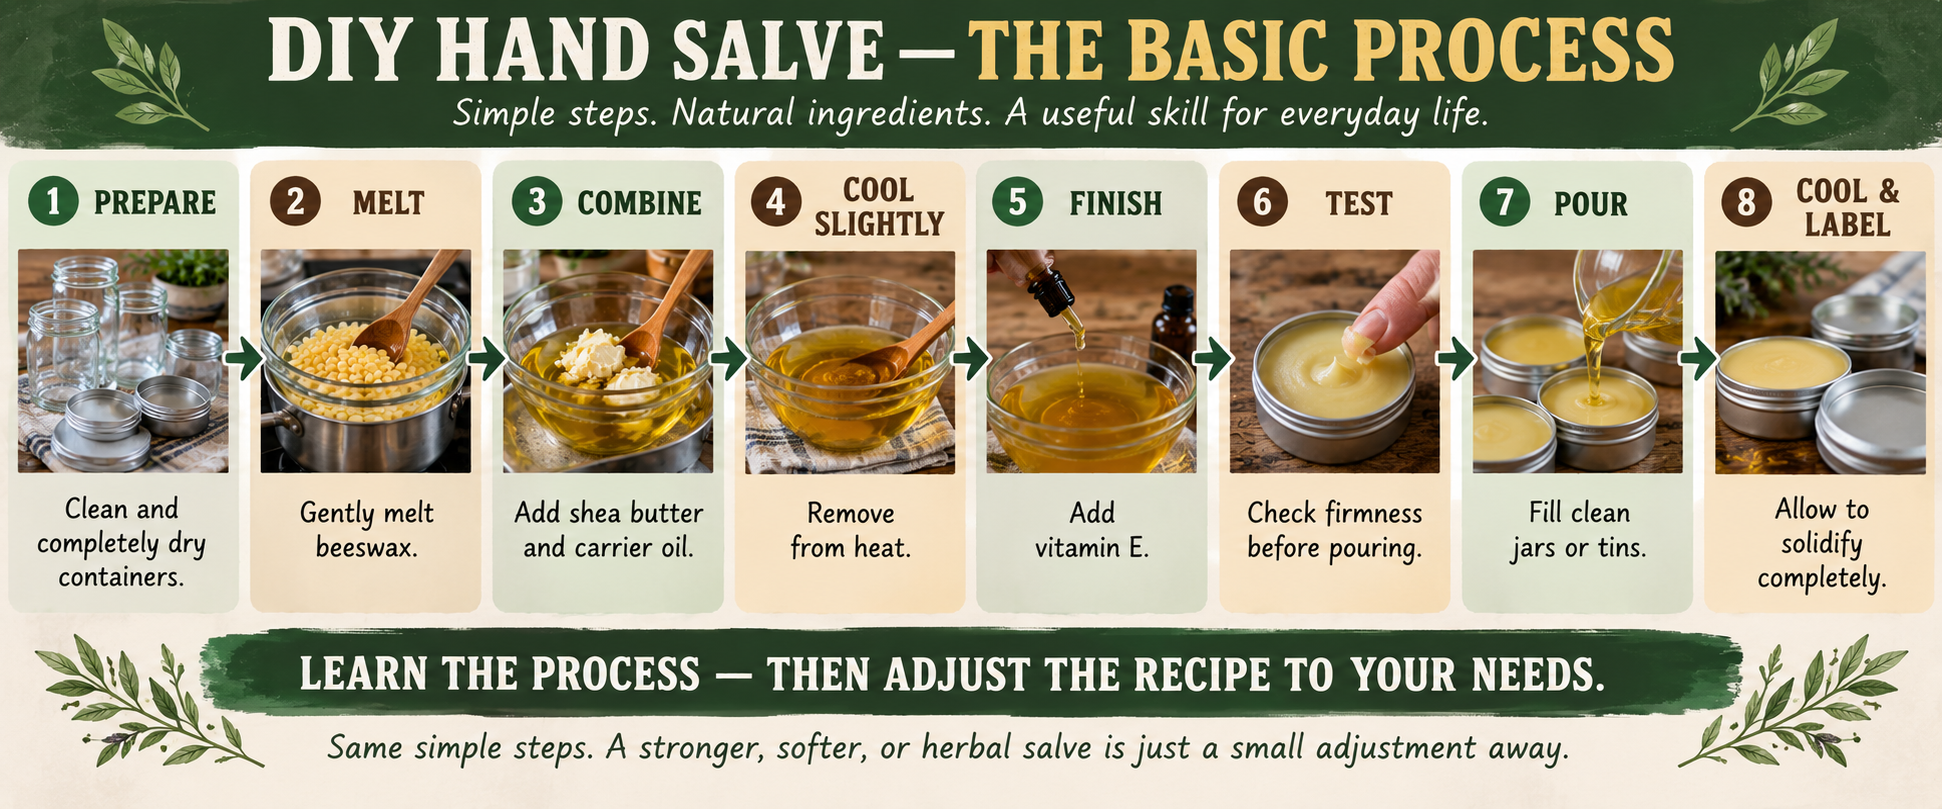
Preparing the containers beforehand is important because the salve begins thickening as soon as it starts cooling. Once the mixture is ready, you do not want to be searching for jars or trying to dry containers while the salve is beginning to solidify.
Place the clean containers on a level, protected work surface and remove their lids. They should be ready to fill before you begin melting the ingredients.
Set Up a Double Boiler
The ingredients should be heated gently rather than placed directly over a burner. A simple double boiler provides much better temperature control.
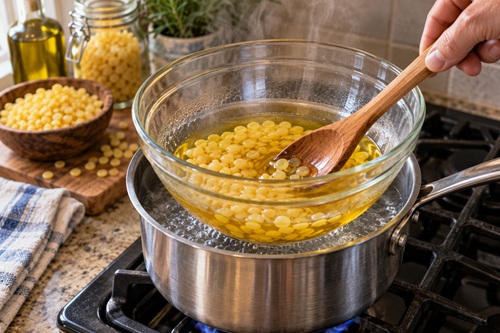
Place a few centimetres of water in a saucepan and bring it to a gentle simmer. Position a heat-safe bowl over the saucepan so that the steam and hot water warm the bowl indirectly.
The water does not need to boil aggressively. You only need enough heat to gradually melt the wax and butter. Gentle heating also makes the mixture easier to control.
Melt the Beeswax
Place the measured beeswax into the heat-safe bowl and allow it to melt slowly. Stir occasionally as the wax becomes liquid.
Beeswax pellets are convenient because their small size allows them to melt relatively evenly. If you are using a block of beeswax, grate or chop it into smaller pieces before measuring it.
Allow all of the wax to become liquid before adding the remaining ingredients. Small pieces of unmelted wax can create an uneven texture in the finished salve.
Add the Shea Butter
Once the beeswax has completely melted, add the shea butter.
Stir gently while the butter melts into the wax. It should not take very long. Once the mixture becomes smooth and completely liquid again, you can add the carrier oil.
There is no need to continue heating the mixture longer than necessary. The goal is simply to melt and combine the ingredients.
Add the Carrier Oil
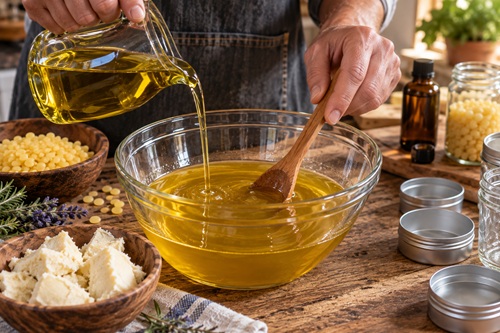
Slowly pour the olive oil or other carrier oil into the melted wax and butter while stirring.
Because the oil is cooler than the melted wax, the mixture may briefly become cloudy or begin thickening around the edges. Keep stirring over the gentle heat and everything should quickly return to a smooth liquid.
Continue stirring until the mixture has a completely uniform appearance. At this point, the three ingredients that provide most of the salve’s structure are fully combined.
Remove the Mixture From the Heat
Carefully remove the bowl from the double boiler and place it on a heat-resistant surface.
Allow the mixture to cool briefly while it is still completely liquid, then stir in the vitamin E oil.
If you decide to use a skin-safe essential oil for fragrance, add it after removing the mixture from the heat. Use essential oils conservatively because concentrated fragrance ingredients can irritate some people’s skin. An unscented salve remains perfectly useful and may actually be preferable for sensitive or frequently cracked hands.
Test the Salve Before Pouring It
Before filling all of your containers, test a small amount of the mixture. Place a few drops on a cool spoon or plate and allow them to solidify.
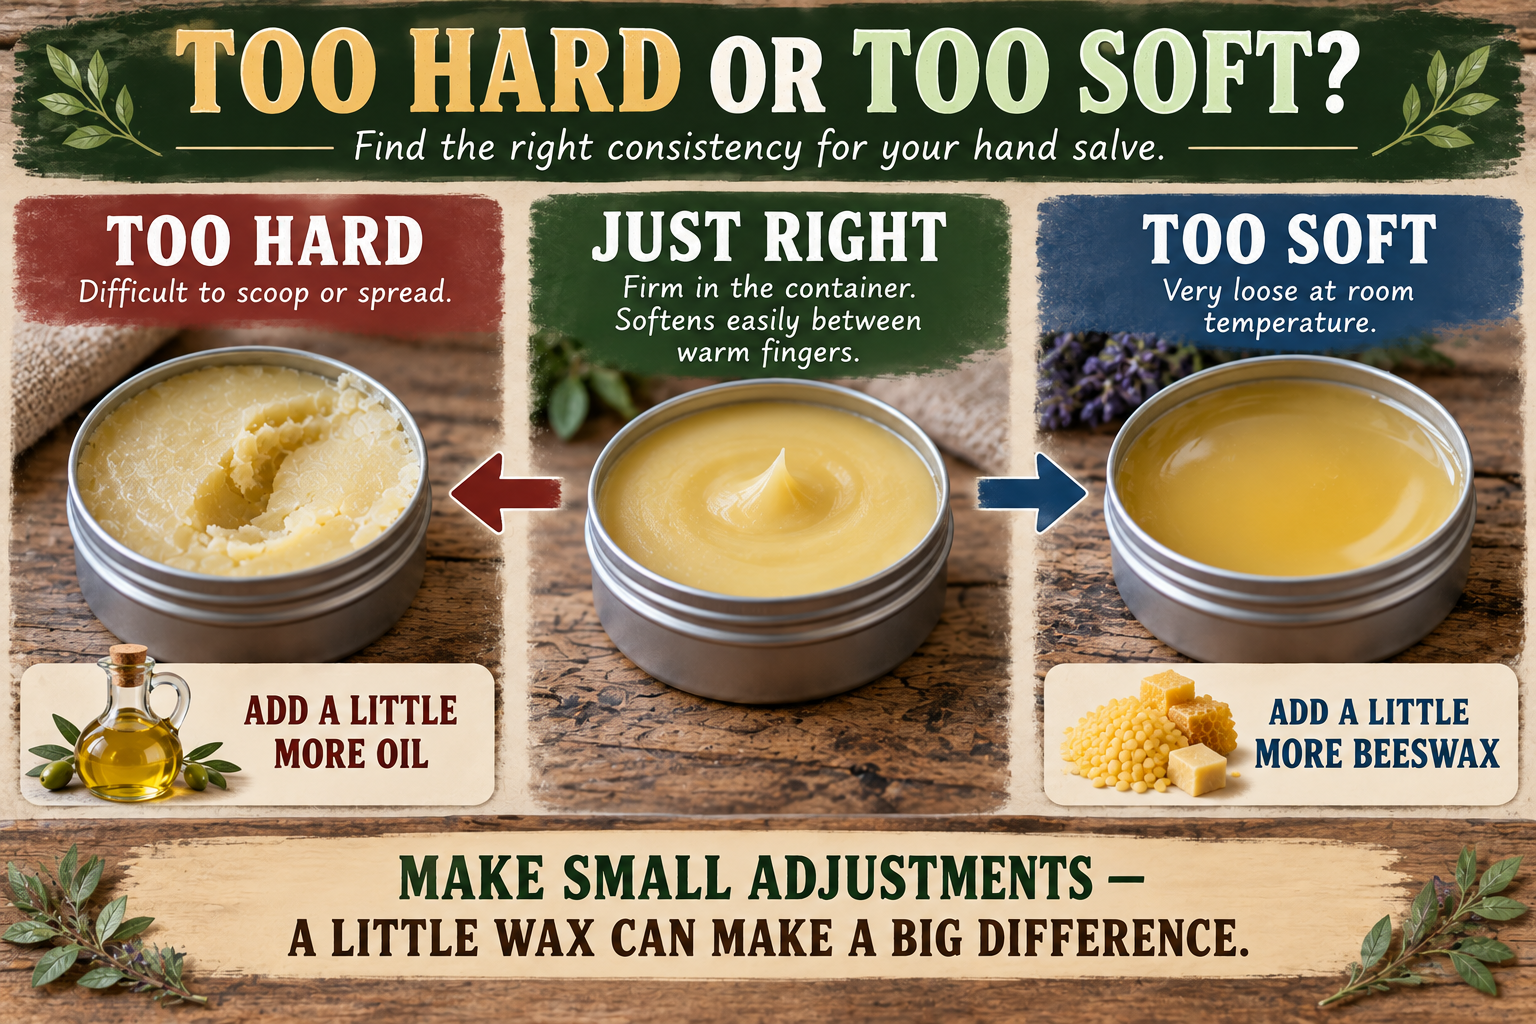
Rub the cooled sample between your fingers. It should be firm enough to remain solid at room temperature but soft enough to melt and spread when rubbed against warm skin.
If the sample seems extremely hard, return the mixture to gentle heat and add a small amount of carrier oil. If it seems much softer than you want, melt a little additional beeswax into the mixture.
Make these adjustments gradually. Small changes in the amount of beeswax can noticeably change the finished product.
Pour the Salve Into Containers
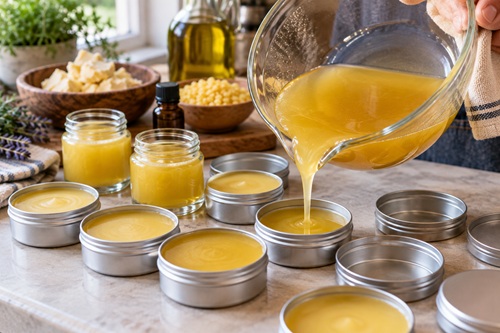
Once you are satisfied with the consistency, carefully pour the warm liquid into your prepared jars or tins.
Leave a small amount of space at the top of each container rather than filling it completely to the rim. Work steadily because the mixture will begin setting as it loses heat.
Once the containers have been filled, leave them in place rather than moving them repeatedly. The surface will gradually become cloudy and then solid as the salve cools.
Let the Salve Cool Completely
Allow the containers to remain uncovered until the salve has completely cooled and solidified.
Do not judge the final consistency while the mixture is still warm. Even when the surface appears solid, the salve underneath may still be soft and warm.
Once everything has reached room temperature, put the lids on the containers and label them with the product name and the date they were made. Dating homemade products is a simple habit that makes storage and rotation much easier.
Adjusting the Texture
One of the advantages of homemade salve is that there is no requirement for every batch to have exactly the same consistency.
If the finished salve is harder than you like, use slightly less beeswax or slightly more carrier oil in the next batch. If it is too soft, increase the beeswax slightly.
Climate and storage location should also be considered. A salve kept in a warm workshop or vehicle may need to be firmer than one stored in a cool house. Coconut oil can make temperature differences even more noticeable because it changes between solid and liquid states relatively easily.
Rather than treating the first recipe as permanent, use it as your baseline and adjust from there.
Making an Herbal-Infused Salve
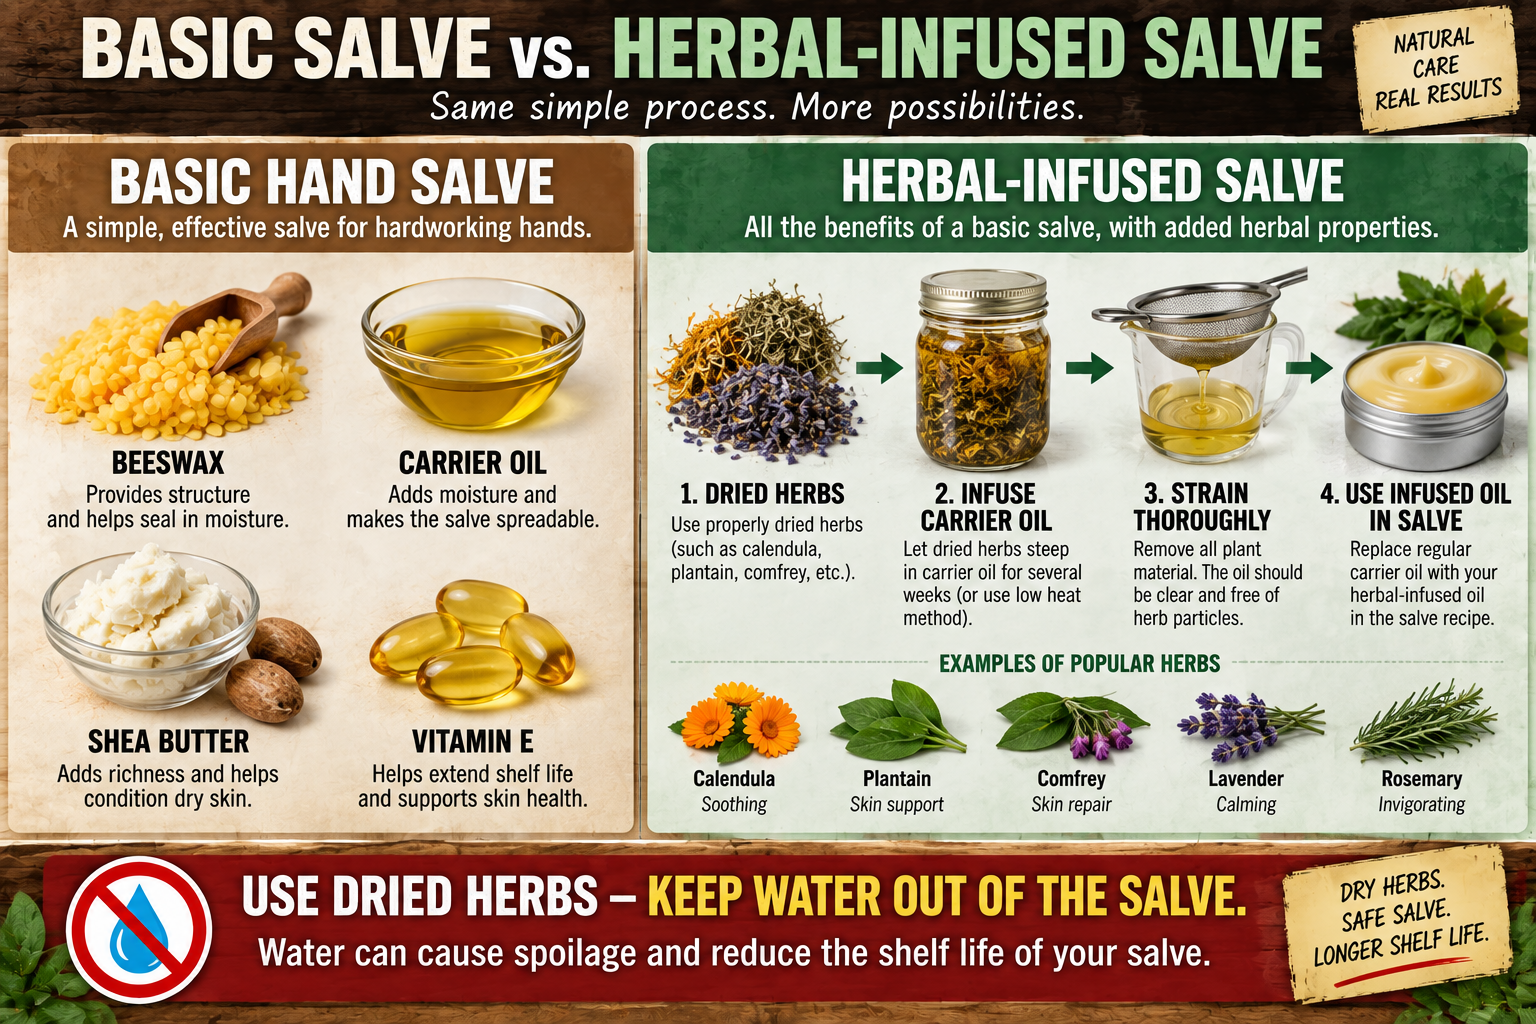
Once you are comfortable making the basic version, the carrier oil can also be infused with suitable dried herbs before being used in the salve.
Calendula is commonly used in traditional topical preparations and can be infused into the carrier oil before the salve is made. The supplied source also describes preparing herbal-infused oil before incorporating it into the basic salve.
When experimenting with herbal salves, use properly dried plant material rather than freshly harvested herbs. Fresh plants contain considerable moisture, and introducing water into an oil-and-wax product can create storage and contamination problems.
After the dried herbs have infused into the carrier oil, strain the oil thoroughly so that plant material does not remain in the finished product. The infused oil can then replace the ordinary carrier oil when preparing the salve.
If you have never used a particular herb or ingredient on your skin before, test a small amount first. Natural ingredients can still cause irritation or allergic reactions.
Storing Your Hand Salve
Store the finished containers somewhere cool, dry, and protected from direct sunlight. Excessive heat can soften or completely melt the salve, while prolonged exposure to light and heat can shorten the useful life of the oils.
Always use clean, dry fingers when taking salve from the container. Keeping moisture and contamination out of the jar helps the product remain usable longer.
Homemade salve should also be inspected occasionally rather than being assumed to last indefinitely. If it develops an unusual or rancid odor, visible mold, unexpected moisture, or another obvious sign of deterioration, discard it and make a fresh batch.
Using Heavy-Duty Hand Salve
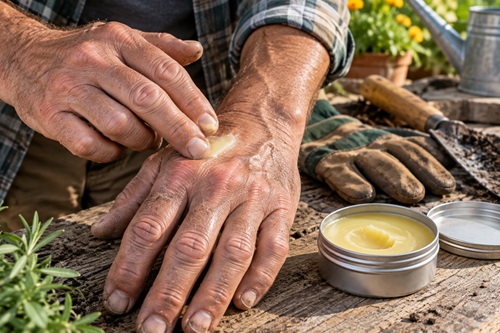
You only need a small amount of salve at a time. Scoop out a little with a clean finger and rub it between your fingertips until it begins to soften. Massage it into dry areas of the hands, paying particular attention to the knuckles, fingertips, cuticles, and other areas that tend to become rough.
Because salve is much more concentrated than ordinary lotion, using too much can leave your hands unnecessarily greasy. Start with a very small amount and add more only when necessary.
After the day’s chores can be a particularly useful time to apply it. Wash and dry your hands thoroughly, apply a thin coating, and allow the salve to remain on the skin rather than immediately washing it away again.
The same basic salve can also be applied to intact dry skin on areas such as elbows, knees, or heels.
Understand the Limits of Homemade Salve
Hand salve is intended to condition and protect dry skin. It should not be treated as a replacement for proper first aid or medical treatment.
Deep cuts, puncture wounds, serious burns, animal bites, infected areas, and other significant injuries require appropriate wound care. Increasing redness, warmth, swelling, drainage, worsening pain, fever, red streaking, or a wound that refuses to heal should not simply be covered with homemade salve and ignored.
This distinction is especially important around a homestead because damaged hands may be exposed to soil, manure, dirty water, animals, machinery, and tools. Protecting dry skin can help keep hands comfortable, but actual injuries need to be treated as injuries.
Why This Is a Useful DIY Skill
Learning to make hand salve teaches more than how to produce one homemade skin-care product. It demonstrates the basic relationship between liquid oils, solid fats, and waxes.
Once that principle is understood, you no longer have to depend completely on a precise recipe. You can recognize why a batch became too hard, understand why another one remained too soft, and know which ingredient needs to be adjusted.
It is also a practical example of turning a small group of stored materials into something useful. Beeswax, carrier oil, and shea butter can be stored separately and combined when needed rather than requiring a constant supply of commercially manufactured hand products.
That is where a simple DIY project becomes a self-sufficiency skill. The real objective is not merely having a jar of homemade salve. It is understanding the process well enough to make it again without depending on someone else to provide the finished product.
Preparedness Action Plan
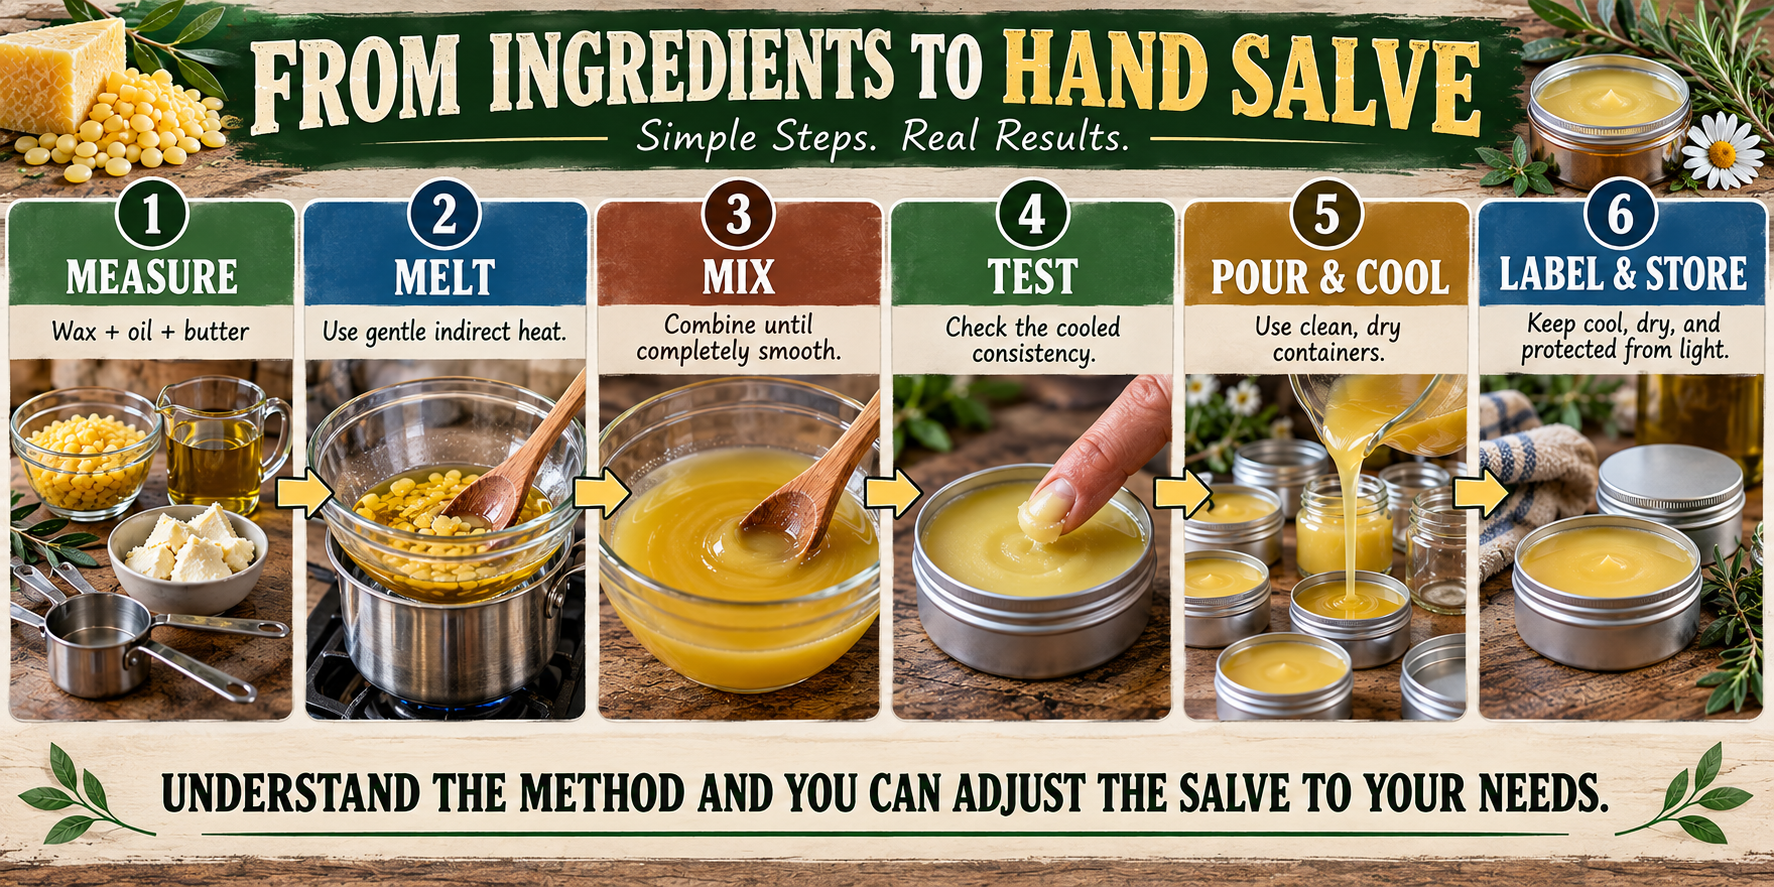
Start with the basic unscented salve before experimenting with herbs, fragrances, or additional ingredients. Prepare clean, completely dry containers before heating anything, then gently melt the beeswax, add the shea butter, mix in the carrier oil, remove the mixture from the heat, and add the vitamin E.
Test a small cooled sample before pouring the entire batch. Adjust the wax or oil if necessary, then fill the containers, allow them to cool completely, label them, and store them somewhere cool and protected from light.
Use the salve during your normal routine and pay attention to how it performs. If it is too hard, too soft, too greasy, or difficult to spread, make a note of the problem. Adjust the next batch rather than assuming the original recipe must remain unchanged.
The most important part of the exercise is learning how the ingredients behave. Once you understand that, you can reproduce the salve and adapt it to different conditions without being dependent on a single recipe.
Key Takeaways
A heavy-duty hand salve does not require complicated equipment or a long list of ingredients. At its simplest, it is a carefully balanced combination of wax, carrier oil, and butter.
The wax determines much of the firmness, while the oils and butter influence softness and spreadability. Changing those proportions allows the finished product to be adapted to different climates, storage locations, and personal preferences.
Keep water out of the mixture, work with clean and completely dry equipment, use additional ingredients cautiously, and store the finished product away from excessive heat and light.
Most importantly, learn the method rather than simply memorizing the measurements. Understanding how to melt, combine, test, adjust, pour, and store a salve turns a simple homemade product into a repeatable practical skill.
© Prepping Communities. This content is for informational purposes only and not professional advice. Use at your own risk.
Terms | Privacy | Guidelines