
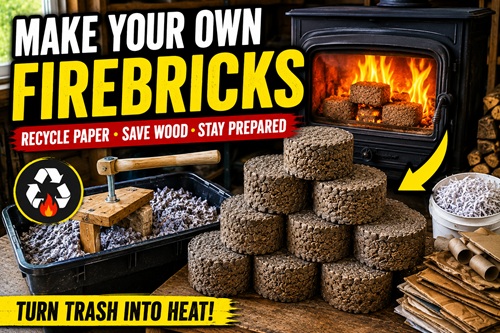
How to Make Firebricks and Wood Stove Logs from Recycled Household Materials
Introduction
Heating fuel is one of the most valuable resources to have during a power outage, severe winter weather, or any emergency that limits access to traditional fuel sources. Every week, most households throw away paper, cardboard, leaves, and other natural materials that can be turned into useful supplemental fuel. By learning how to make homemade firebricks, you can reduce waste while creating an emergency fuel supply that can help extend your firewood when it matters most.
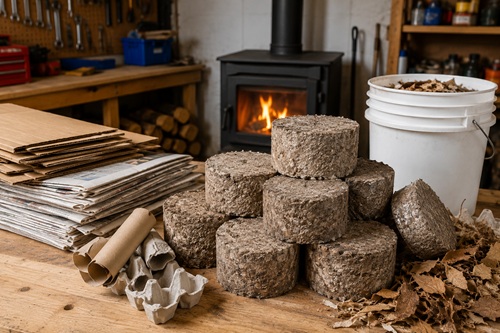
Homemade firebricks are not intended to replace seasoned firewood, but they are an excellent way to make use of materials that would otherwise end up in the trash. They burn longer than loose paper, are easier to store, and can be used in wood stoves, fireplaces, outdoor fire pits, and campfires. This simple project requires very few tools, costs almost nothing, and teaches another practical preparedness skill that can be useful during both everyday living and emergency situations.
How Firebricks Work
Paper, cardboard, dried leaves, and other untreated plant materials all contain cellulose, the same natural fiber found in wood.
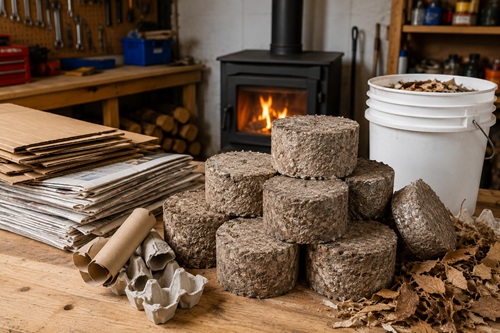
When these materials are soaked in water, broken down into pulp, compressed under pressure, and allowed to dry completely, they become dense fuel blocks that burn much longer than loose paper. The goal is to remove as much water as possible while packing the fibers tightly together. The denser and drier the finished brick becomes, the longer it will generally burn.
Gathering Your Materials
One of the advantages of this project is that almost everything can be found around the home or obtained for free. Two five-gallon buckets are needed, with one serving as a drainage bucket. A drill or another tool is used to make drainage holes, while a heavy-duty drill fitted with a paint mixer, homemade mixing paddle, or even a sturdy stick can be used to break the soaked paper into pulp. A flat wooden board or homemade press that fits inside the bucket is needed to squeeze out excess water, along with something heavy such as concrete blocks, weights, or another bucket filled with water to apply pressure.
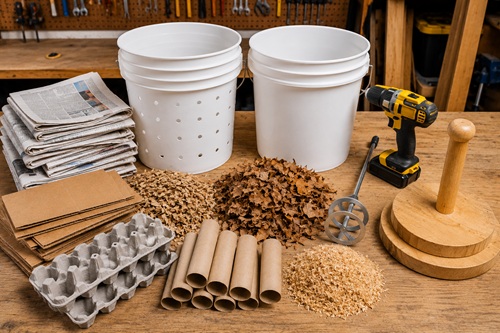
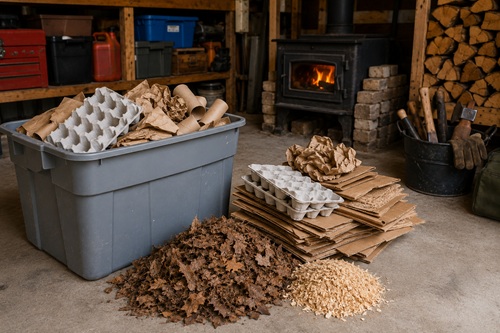
The fuel itself can come from many common household items. Newspapers, junk mail, brown paper bags, cardboard, paper towel tubes, toilet paper rolls, paper egg cartons, untreated sawdust, wood shavings, dried leaves, dried grass, and similar natural materials all work well. Avoid using glossy magazines, wax-coated cardboard, plastic-coated paper, treated wood, plastics, or any material that could release harmful chemicals when burned.
Preparing the Bucket
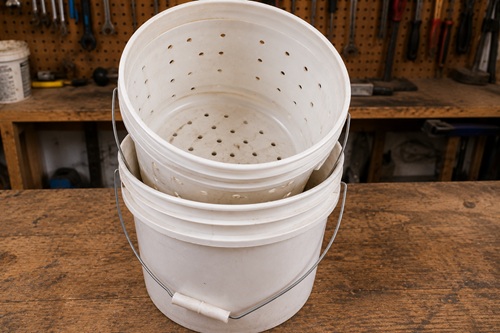
Begin by creating a drainage bucket. Drill numerous holes around the sides and across the bottom of one bucket. These holes allow water to drain away while holding the paper pulp inside during the pressing stage. Place the perforated bucket inside the second bucket, which will collect the water that drains from the mixture. This simple setup creates an inexpensive press that works surprisingly well without requiring specialized equipment.
Making the Paper Pulp
Fill the drainage bucket with your collection of paper products, cardboard, leaves, and other suitable plant materials. Tearing larger pieces into smaller sections helps speed up the process, although perfect shredding is not necessary. Once the bucket is mostly full, add enough water to completely cover the material. Allow everything to soak for several hours or overnight so the fibers soften and become easier to break apart.
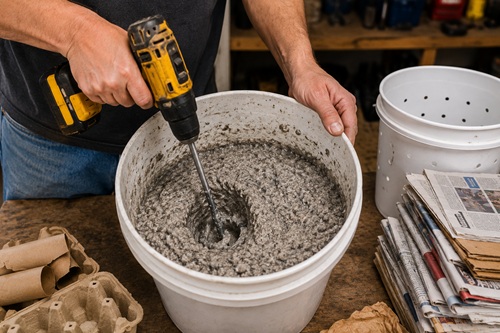
After soaking, use your drill with a paint mixer attachment or another sturdy stirring tool to blend the mixture into a thick pulp. Continue mixing until most of the paper fibers have broken down into a uniform consistency that resembles wet oatmeal. The finer the pulp becomes, the better the finished firebrick will usually hold together.
Draining and Pressing
Lift the drainage bucket from the outer bucket and allow as much water as possible to drain away. Rather than discarding the water, save it for future batches since it can be reused several times.
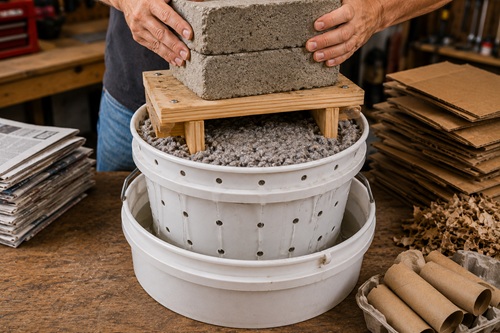
Once most of the free water has drained, place your wooden press directly on top of the pulp and apply firm, even pressure. Standing on the press, stacking heavy objects on top, or using concrete blocks all work well. The objective is to remove as much remaining moisture as possible because less water means faster drying and a better-quality firebrick.
Drying the Firebricks
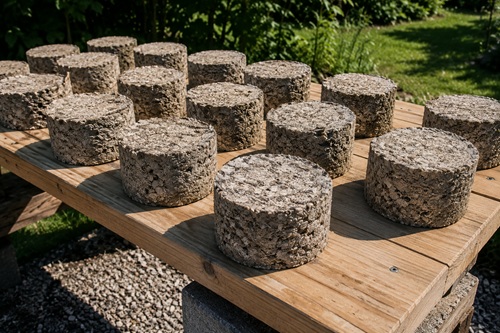
After pressing, carefully turn the bucket upside down and gently tap it until the compressed firebrick slides free. Place the firebrick in a warm, dry location where air can circulate freely around it.
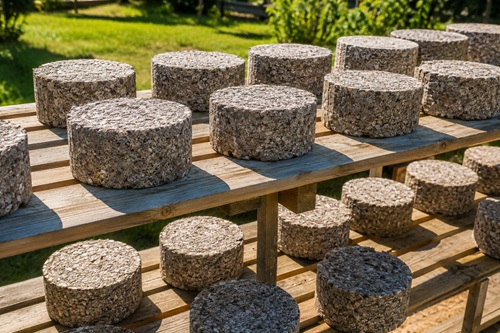
Turning the brick every few days helps it dry evenly on all sides. Depending on your climate, drying may take anywhere from several days to several weeks. The firebrick must be completely dry before it is burned. Even small amounts of trapped moisture can reduce heat output and create excessive smoke.
Improving Your Results
Different material combinations produce different results, so experimenting with your available materials is worthwhile. Mixing newspaper with cardboard often creates a stronger, denser brick, while adding a small amount of untreated sawdust can increase burn time. Large bricks can also be cut into smaller sections before they have fully dried, allowing them to cure more quickly while producing fuel pieces that are easier to handle and store.
Storing Homemade Firebricks
Once fully dry, homemade firebricks should be stored the same way as firewood. Keep them in a dry, well-ventilated location where they are protected from rain and ground moisture. Properly stored firebricks can remain usable for years, making them an excellent addition to an emergency heating and cooking fuel supply.
Safety Considerations
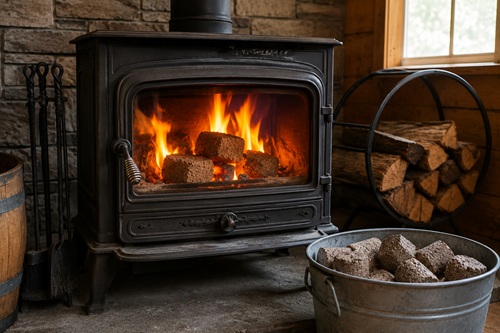
Only burn homemade firebricks in appliances designed for solid fuels, such as wood stoves, fireplaces, campfires, or outdoor fire pits. Never include plastics, glossy paper, treated wood, or chemically coated materials in your fuel mixture, as these can produce toxic smoke. Keep chimneys clean, ensure adequate ventilation, and remember that homemade firebricks are intended to supplement traditional firewood rather than replace it completely.
Preparedness Action Plan
Use the following action plan to develop this skill one step at a time. Completing each task will help you build both experience and an emergency fuel reserve.
| Task | Completed |
|---|---|
| ☐ Set aside a dedicated container for collecting clean paper, cardboard, egg cartons, paper towel rolls, brown paper bags, and other untreated biomass materials. | |
| ☐ Identify a dry location where recyclable materials can be stored until enough has accumulated for a batch of firebricks. | |
| ☐ Gather the basic equipment needed, including two 5-gallon buckets, a drill, mixing tool, wooden press, and drying area. | |
| ☐ Build or assemble a simple bucket press using inexpensive or recycled materials. | |
| ☐ Produce your first small batch of homemade firebricks to become familiar with the process. | |
| ☐ Allow the firebricks to dry completely before testing them in a wood stove, fireplace, campfire, or fire pit. | |
| ☐ Test different mixtures of paper, cardboard, leaves, and untreated sawdust to determine which combination provides the best burn time and heat output. | |
| ☐ Record which material combinations and drying times produce the highest-quality firebricks for future batches. | |
| ☐ Establish a routine of making small batches throughout the warmer months instead of waiting until winter. | |
| ☐ Store fully dried firebricks in a clean, dry, well-ventilated location alongside your emergency firewood supply. | |
| ☐ Rotate older firebricks into regular use and replace them with newly made batches to maintain a fresh emergency fuel reserve. | |
| ☐ Review your fuel reserve annually and estimate how many days of supplemental heating or cooking fuel it provides. |
Preparedness Goal
The objective is not to replace traditional firewood but to develop another reliable source of supplemental fuel using materials that would otherwise be discarded. By practicing this skill regularly, you build experience, reduce household waste, extend your firewood supply, and increase your ability to remain self-reliant during emergencies when fuel may become scarce or expensive.
Skills Learned
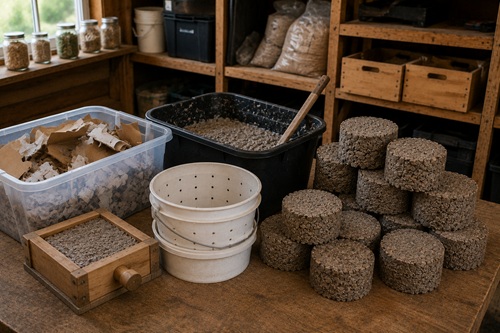
After completing this lesson, you should understand how homemade firebricks work, which recycled materials are safe to use, how to create and compress paper pulp, how to properly dry and store finished firebricks, and how to safely use them as a supplemental emergency heating and cooking fuel. This is another practical preparedness skill that transforms common household waste into a valuable resource for future emergencies.
Additional Preparedness Tips
One of the advantages of making homemade firebricks is that the materials are available year-round. Instead of collecting large amounts of paper all at once, consider placing a dedicated container in your garage, workshop, or storage area for clean recyclable paper products. Cardboard, paper towel rolls, egg cartons, brown paper bags, and dried yard waste can be added throughout the year until enough material has accumulated for a batch. By making firebricks as part of a regular routine, you gradually build an emergency fuel reserve without spending additional money.
Keep in mind that homemade firebricks are best used as a supplemental fuel rather than the primary heat source. They work well for starting fires, maintaining a steady bed of coals, or extending the burn time of seasoned firewood. Many people alternate between firewood and firebricks to make their wood supply last longer, especially during extended cold weather or when replacement firewood may be difficult to obtain.
The amount of heat produced depends largely on the materials used and how well the bricks are compressed and dried. A tightly compressed brick made from mostly cardboard and paper will generally burn longer than one that contains large amounts of loose leaves or grass. The best approach is to experiment with small batches using different mixtures until you find a combination that performs well in your particular stove or fireplace.
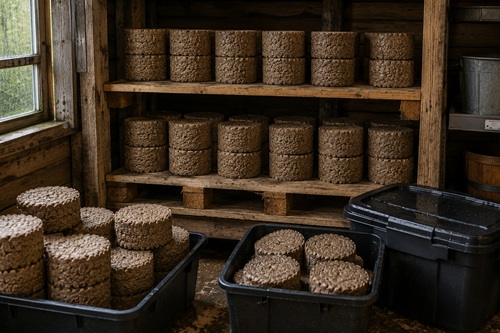
Moisture is the greatest enemy of stored firebricks. Even after they have dried completely, they readily absorb humidity if stored improperly. Keep them on shelves, pallets, or other raised surfaces in a dry building with good ventilation. Waterproof containers can provide additional protection in damp climates, but the bricks should always be thoroughly dry before being sealed to prevent mold from developing.
This same process can also be adapted for different molds. Instead of creating large round firebricks, some people press the pulp into smaller rectangular molds, loaf pans, or custom wooden forms. Smaller bricks dry faster, are easier to handle, and allow you to control how much fuel is added to a fire. Regardless of the shape, the key principles remain the same: remove as much water as possible, compress the fibers firmly, and allow sufficient drying time before use.
Making homemade firebricks is about more than creating free fuel. It encourages resourcefulness by teaching how everyday waste can become a useful preparedness asset. During emergencies, the ability to produce additional heating and cooking fuel from common household materials can reduce dependence on purchased firewood while helping stretch limited resources. Like many preparedness skills, the knowledge becomes most valuable when it has been practiced long before it is actually needed.
Common Mistakes to Avoid
The most common reason homemade firebricks perform poorly is that they are burned before they have completely dried. Although the outside may feel dry after a few days, the center can still contain a significant amount of moisture. Burning a damp firebrick produces less heat, creates more smoke, and wastes much of the energy stored in the material. Depending on the weather and humidity, drying can take several weeks. Patience during the drying process results in a much better fuel source.
Another frequent mistake is using the wrong materials. Glossy magazines, plastic-coated paper, waxed cardboard, treated wood, and other manufactured products may contain inks, adhesives, or chemicals that release harmful fumes when burned. Sticking with clean paper products, untreated cardboard, dried leaves, sawdust, and other natural plant materials produces a cleaner-burning firebrick and reduces unnecessary health risks.
Some people also underestimate the importance of compression. A loosely packed brick contains more air pockets, burns faster, and often falls apart during handling. Applying firm pressure to remove as much water and trapped air as possible creates a denser fuel block that burns more evenly and is less likely to crumble during storage.
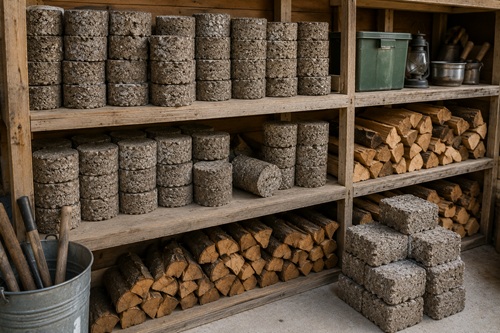
Storage conditions also make a significant difference. Firebricks that absorb moisture from damp garages, sheds, or basements can quickly lose their effectiveness. Store them in a dry location with good airflow, and inspect them periodically for signs of moisture or mold. Rotating older firebricks into regular use while replacing them with newly made batches helps keep your emergency fuel supply fresh and ready for use.
Finally, avoid relying on homemade firebricks as your only heating fuel. They work best as part of a larger preparedness plan that includes seasoned firewood, fire starters, kindling, and multiple methods of cooking and heating. A diversified fuel supply provides greater flexibility and allows you to adapt to changing conditions during an emergency.
Why This Skill Matters
Preparedness is often about finding practical ways to reduce dependence on outside resources. Making firebricks from recycled materials is a good example of this mindset. Instead of viewing paper waste as garbage, it becomes another resource that can be converted into something useful. Over the course of a year, a household can produce a surprising number of firebricks simply by recycling materials that would otherwise be thrown away.
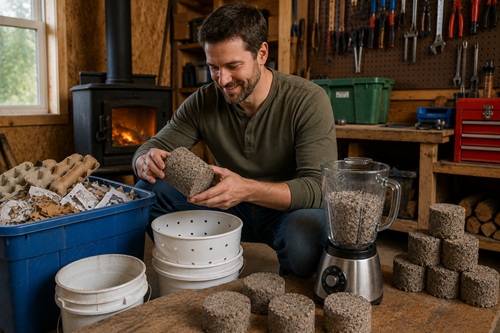
This skill also demonstrates an important preparedness principle: many valuable resources already exist around us if we know how to use them. Developing the habit of recognizing useful materials, repurposing waste, and practicing simple manufacturing skills increases resilience and self-sufficiency. Even if homemade firebricks are rarely needed, knowing how to produce them provides another option during times when traditional fuels become expensive, difficult to obtain, or unavailable.
The value of this project is not measured only by the fuel it produces, but by the experience gained. Each batch teaches better techniques, improves efficiency, and builds confidence in the ability to create practical solutions from everyday materials. Those are the kinds of skills that strengthen preparedness long before an emergency ever occurs.
Frequently Asked Questions
Many people have questions before making their first batch of homemade firebricks. Understanding a few basic principles will help produce better results and avoid common problems.
One of the most common questions is whether shredded paper is required. It is not. While smaller pieces break down more quickly, whole sheets of newspaper, junk mail, cardboard, and paper bags will soften after soaking and can usually be broken apart with a mixer or sturdy stirring tool.
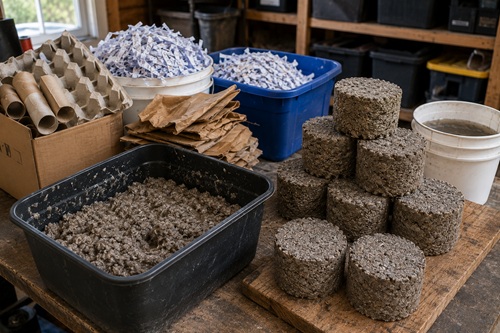
Another common question is how long the bricks need to dry. There is no single answer because drying time depends on temperature, humidity, airflow, and the size of the bricks. In hot, dry climates, they may be ready within a week. In cooler or more humid areas, several weeks may be required. The center should feel completely dry before the bricks are placed into storage or burned.
People also wonder if glue or binders are necessary. The answer is generally no. The natural cellulose fibers found in paper act as their own binder once they have been pulped and compressed. As the brick dries, these fibers lock together and create a surprisingly strong fuel block.
Some ask whether these firebricks burn as hot as hardwood. In most cases, no. Hardwood contains more energy by weight and generally burns longer with greater heat output. Homemade firebricks are best viewed as a supplemental fuel that helps stretch firewood supplies rather than replacing them entirely.
Finally, many people ask whether the water used during the process can be reused. It can. The drained water still contains suspended paper fibers and can be used for multiple batches, reducing waste and conserving water.
Key Takeaways
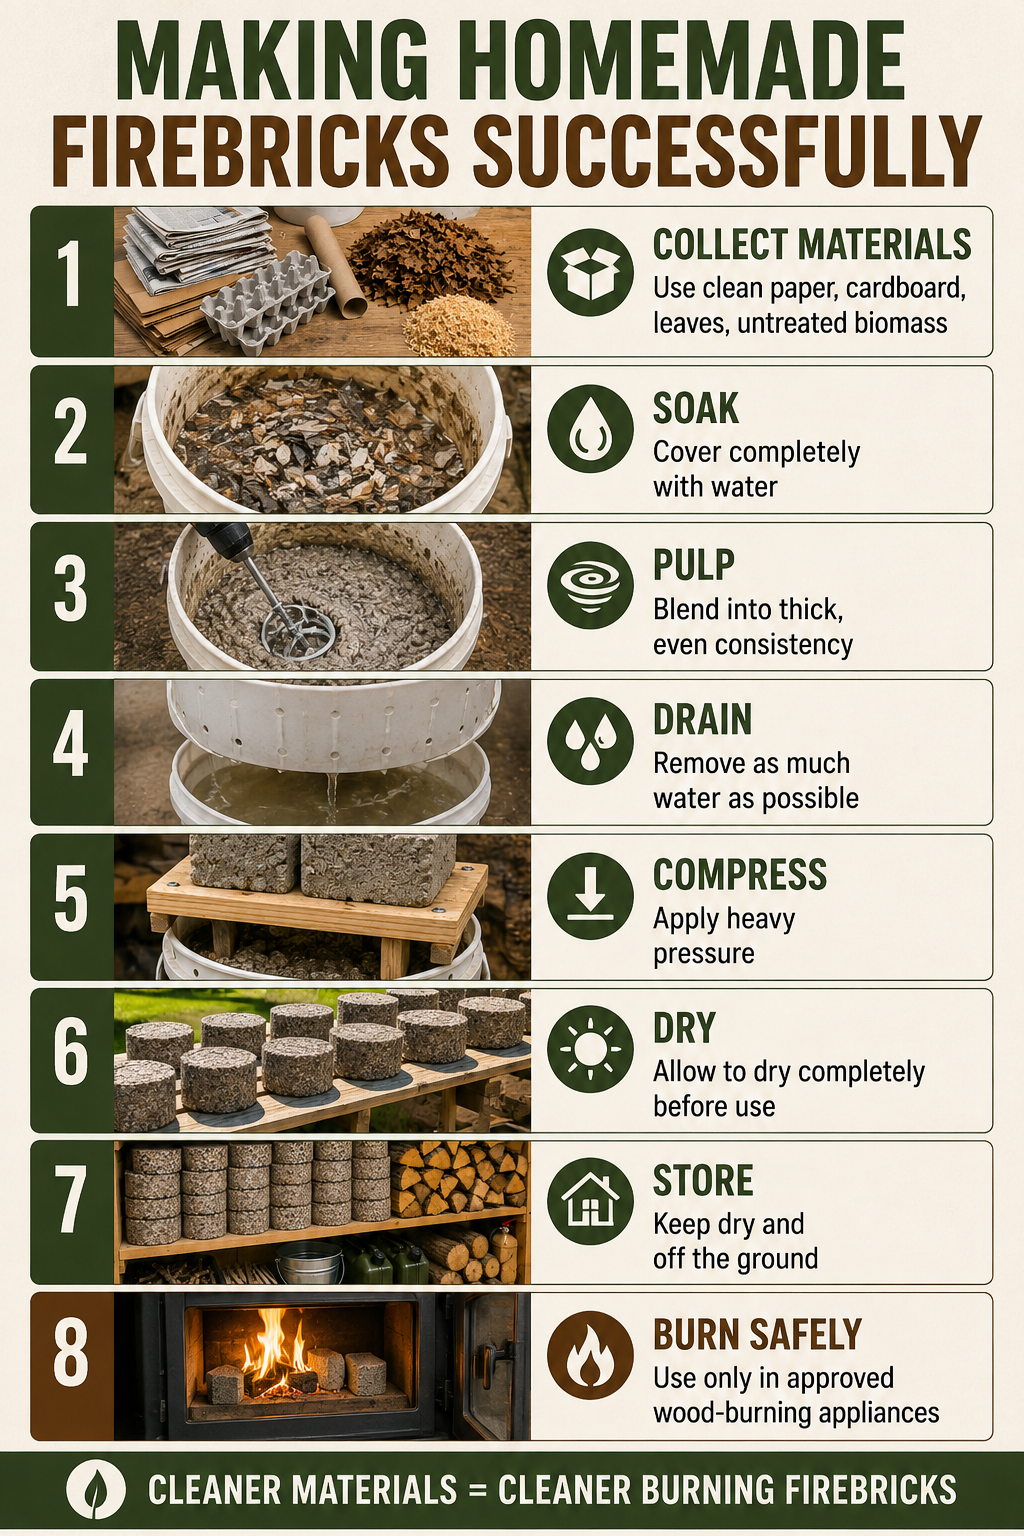
Homemade firebricks are an inexpensive way to transform common household paper and untreated plant materials into a useful supplemental fuel source. The process is simple: soak the materials, break them into pulp, remove as much water as possible, compress them firmly, and allow them to dry completely. Success depends more on thorough drying and good compression than on specialized equipment.
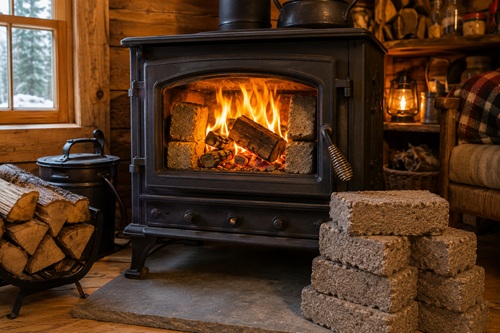
While these firebricks will not replace quality firewood, they can help extend wood supplies, reduce household waste, and provide another option for emergency heating and cooking. More importantly, learning this skill reinforces an important preparedness principle: valuable resources are often hiding in plain sight. Developing the ability to recognize those resources and convert them into something useful increases self-reliance, reduces dependence on outside supplies, and adds another practical capability to any preparedness plan.
© Prepping Communities. This content is for informational purposes only and not professional advice. Use at your own risk.
Terms | Privacy | Guidelines