Homemade Luncheon Meat

General Information

A Practical Guide to Making Your Own Canned-Style Sandwich Meat at Home

96659baf-cae1-4fdc-9e3d-25fc8db0fd42

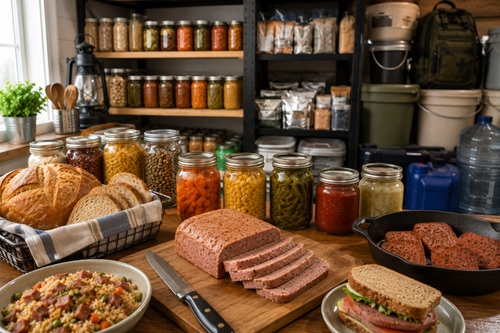
For decades, canned luncheon meat has been a staple in emergency food supplies, camping trips, military rations, and household pantries. Its long shelf life, versatility, and convenience have made it one of the world’s most recognized preserved meats.

While commercially produced luncheon meat is widely available, many preparedness-minded individuals prefer making their own at home. Homemade versions allow you to control the quality of the ingredients, adjust the seasoning to your taste, and avoid unnecessary fillers or preservatives often found in processed foods.

Whether you’re building a more self-sufficient kitchen, learning traditional food preparation skills, or simply enjoy making food from scratch, homemade luncheon meat is an excellent addition to your preparedness knowledge.

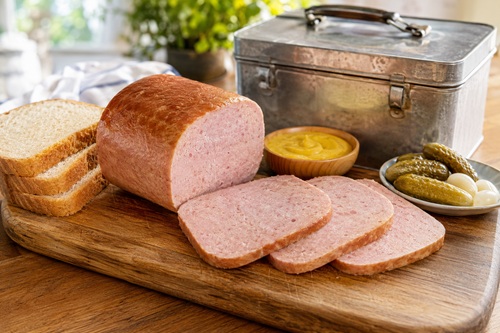
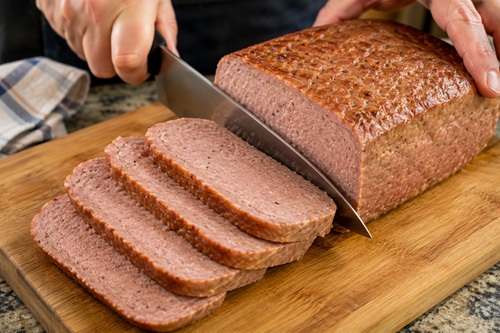
Unlike fresh sausage or ground meat, homemade luncheon meat is designed to slice cleanly, hold its shape, and remain moist after cooking. It works well for sandwiches, breakfasts, casseroles, soups, camping meals, and quick emergency meals when refrigeration and cooking time may be limited.

This guide explains the process, the equipment you’ll need, food safety considerations, and several ways to enjoy homemade luncheon meat.


Why Make Homemade Luncheon Meat?

Making your own luncheon meat isn’t just about recreating a familiar product—it’s about gaining greater control over your food supply.093d1e82-adb0-4805-9f4c-dfb5fa9bca69

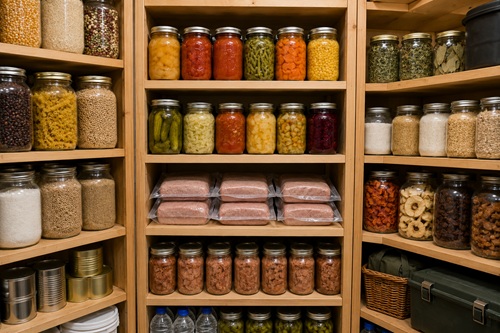
When you prepare it yourself, you choose the cuts of meat, the amount of salt, the seasoning blend, and the overall texture. Many people appreciate knowing exactly what goes into the finished product.

For preparedness, homemade luncheon meat offers several advantages:

  • Uses readily available ingredients.
  • Can be customized with your favorite seasonings.
  • Provides a high-protein food option.
  • Slices easily for quick meals.
  • Helps develop valuable food preparation skills.
  • Reduces dependence on commercially processed foods.

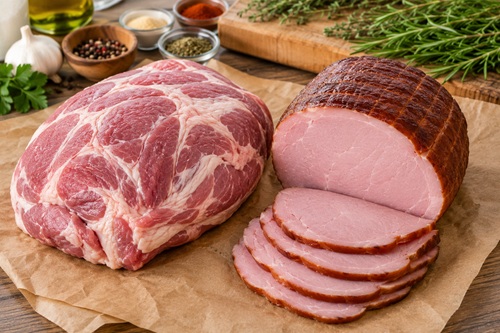
It’s also an excellent way to use pork shoulder, ham, or other cuts when purchased in bulk.

Back To Top


Understanding What Makes Luncheon Meat Different

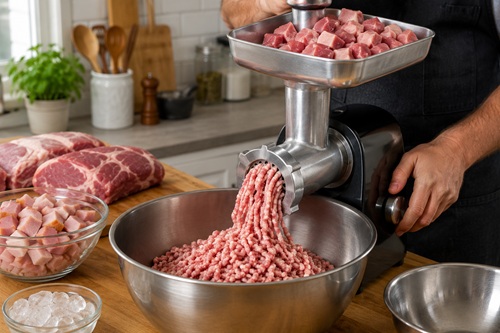
Traditional luncheon meat differs from ordinary ground meat in both texture and preparation.

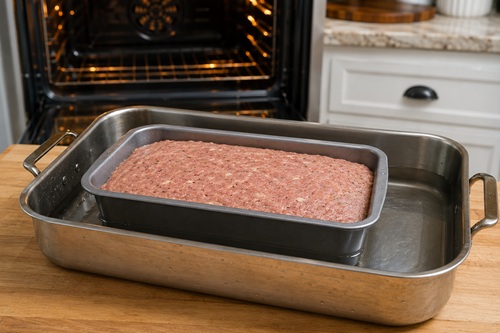
Rather than remaining loose like hamburger, the meat is finely ground, thoroughly mixed with seasonings, and cooked slowly until it forms a firm, sliceable loaf.5aaae9ad-269e-4887-94e5-477b226f176b

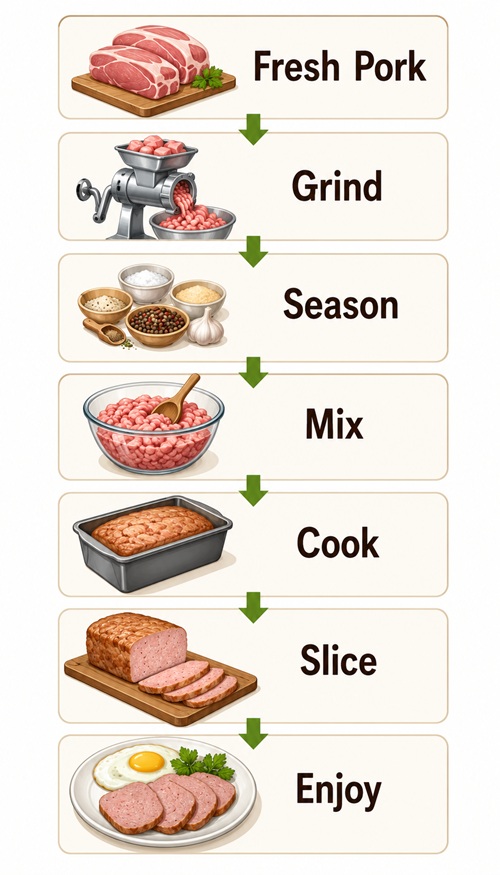
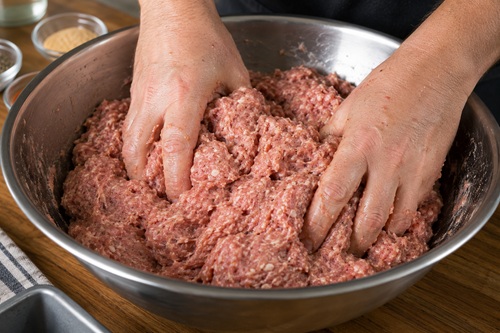
The mixing process develops proteins within the meat that help bind everything together naturally. This produces the familiar smooth texture associated with luncheon meats.

Fat also plays an important role.

A moderate amount of fat helps keep the finished loaf moist and flavorful. Meat that is too lean often produces a dry, crumbly texture.

The result is a versatile product that can be enjoyed cold, pan-fried until crispy, diced into soups, or added to countless recipes.


Preparedness Perspective

Knowing how to prepare simple preserved-style foods from basic ingredients is a valuable self-sufficiency skill. Even if commercial products become unavailable, the techniques involved in making homemade luncheon meat can be adapted using locally available meats and seasonings.
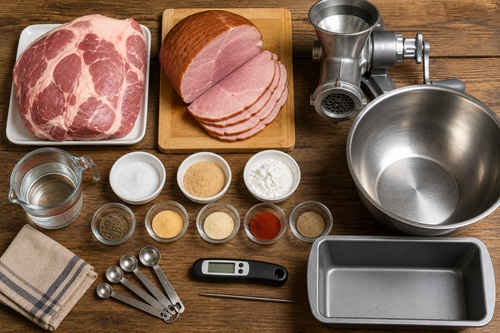

Before You Continue

The next section covers the equipment and ingredients needed to produce a flavorful, well-textured homemade luncheon meat while emphasizing proper food safety throughout the process.


Equipment and Ingredients

One of the advantages of making homemade luncheon meat is that it doesn’t require a commercial kitchen. Most of the equipment is commonly found in well-equipped home kitchens, and the ingredients are readily available at most grocery stores or butcher shops.942a4e7d-73f7-415c-a726-9e88f1e2b518

The quality of the finished product depends largely on using fresh meat, maintaining proper temperatures throughout preparation, and mixing the ingredients thoroughly. Taking your time during each step will produce a smoother texture and better flavor.

Basic Equipment

You’ll need:

  • Large mixing bowl
  • Sharp boning or chef’s knife
  • Cutting board
  • Meat grinder or heavy-duty food processor
  • Digital kitchen scale
  • Measuring cups and spoons
  • Meat thermometer
  • Loaf pan or bread pan
  • Aluminum foil or oven-safe lid
  • Large roasting pan for a water bath
  • Plastic wrap or parchment paper for storage

If you plan to make homemade luncheon meat regularly, a dedicated meat grinder provides the best consistency, although many food processors can produce excellent results when used in small batches.

Back To Top


Ingredients

This recipe produces approximately two medium-sized loaves.

Meat

  • 5 pounds (2.3 kg) pork shoulder
  • 1 pound (450 g) fully cooked ham

Pork shoulder provides the ideal balance of lean meat and fat, while the ham contributes flavor, color, and the familiar cured taste associated with luncheon meats.

Seasonings

  • 1 tablespoon kosher salt
  • 2 tablespoons sugar
  • 1 teaspoon ground black pepper
  • 1 teaspoon garlic powder
  • 1 teaspoon onion powder
  • ½ teaspoon paprika
  • ¼ teaspoon ground white pepper (optional)

Binder

  • 3 tablespoons potato starch or cornstarch

The starch helps retain moisture and contributes to the firm, sliceable texture.

Liquid

  • 1 cup ice-cold water

Keeping everything cold during mixing helps produce a better texture and allows the proteins to bind more effectively.

Back To Top


Selecting the Right Meat

Fresh, high-quality meat is one of the most important factors in producing excellent homemade luncheon meat.6b88b59b-23f7-4db6-8bf3-47b7ae90aba8

Choose pork shoulder that has good marbling without excessive hard fat. Soft white fat contributes moisture and flavor, while overly tough connective tissue should be trimmed away.

For the ham, select a fully cooked ham rather than highly processed deli meat. Using quality ham provides a richer flavor and improves the finished texture.

Whenever possible:

  • Purchase meat from a reputable butcher or grocery store.
  • Keep the meat refrigerated until you’re ready to prepare it.
  • Avoid meat with unusual odors or discoloration.
  • Work with cold ingredients throughout the entire process.

Cold meat grinds more cleanly and produces a better final product.


Food Safety Begins Before You Cook

Safe food handling is every bit as important as the recipe itself.

Before preparing any meat:

  • Wash your hands thoroughly.
  • Sanitize work surfaces.
  • Use clean cutting boards and utensils.
  • Keep raw meat separate from ready-to-eat foods.
  • Refrigerate meat whenever preparation is interrupted.

Maintaining proper sanitation throughout the process reduces the risk of contamination and helps ensure a safe, high-quality finished product.


Preparedness Tip

Consider purchasing pork shoulder in bulk when it’s on sale. Dividing larger cuts into meal-sized portions allows you to make sausage, ground pork, pulled pork, and homemade luncheon meat from a single purchase, helping stretch your food budget while expanding your preparedness pantry.


Before You Continue

With your equipment assembled and ingredients prepared, the next step is preparing and grinding the meat. Proper grinding and mixing are what transform ordinary pork into a smooth, sliceable loaf with the texture that makes homemade luncheon meat so versatile.


Preparing and Mixing the Meat

The texture of homemade luncheon meat is created long before it goes into the oven.00675af2-732f-45cf-82ad-dec996f2601b

Proper preparation, grinding, and mixing allow the proteins in the meat to bind together, creating the firm, smooth slices associated with traditional luncheon meat.

Taking your time during this stage will have a greater impact on the finished product than almost any seasoning adjustment.

Back To Top


Step 1: Trim and Cube the Meat

Begin by cutting the pork shoulder and ham into uniform cubes approximately 1 to 2 inches (2.5 to 5 cm) in size.

Remove large pieces of gristle or tough connective tissue, but leave most of the soft fat attached.

The fat contributes moisture, flavor, and tenderness after cooking.

Keeping the pieces a similar size also helps them grind evenly.


Step 2: Chill the Meat

After cubing the meat, spread it on a tray and place it in the freezer for 30 to 45 minutes.

The goal isn’t to freeze the meat solid.

Instead, you’re looking for firm, very cold meat that is easier to grind cleanly.

Cold meat produces:

  • Better texture
  • Cleaner grinding
  • Less smearing of fat
  • Improved protein binding

Professional sausage makers often say:

“Cold meat makes good sausage.”

The same principle applies to luncheon meat.


Step 3: Grind the Meat

Grind both the pork shoulder and ham using a medium grinding plate.

If using a food processor, process only small batches at a time to avoid overheating the meat.

The mixture should have a fine but slightly textured consistency.

Avoid turning it into a paste during this stage.

That texture develops later during mixing.


Step 4: Prepare the Seasoning Mixture

While the meat remains cold, combine:187cd290-7f1a-4dea-afd3-292045ea3adf

  • Salt
  • Sugar
  • Potato starch or cornstarch
  • Pepper
  • Garlic powder
  • Onion powder
  • Paprika
  • Ice-cold water

Mix until the dry ingredients dissolve completely.

Adding the seasoning mixture evenly helps distribute both flavor and moisture throughout the loaf.


Step 5: Mix Thoroughly

Pour the seasoning mixture over the ground meat.

Now comes the most important part.

Mix the meat thoroughly using clean hands or a sturdy stand mixer with a paddle attachment.

Continue mixing until the meat becomes noticeably sticky and begins holding together.

This stickiness indicates that the proteins have begun binding together.

That natural binding gives luncheon meat its characteristic sliceable texture without falling apart.

Back To Top


Don’t Overlook Temperature

Throughout the entire mixing process, keep the meat as cold as possible.

If the mixture begins warming significantly, place it back into the refrigerator for a short time before continuing.

Warm meat is harder to work with and can negatively affect the finished texture.


Test the Seasoning

Before committing the entire batch to cooking, many experienced home cooks prepare a small test patty.

Simply cook a spoonful of the mixture in a frying pan until fully cooked.

Taste it.

This allows you to adjust the seasoning before the full loaf is baked.

Making small adjustments now is much easier than wishing you had after everything is finished.


Preparing the Loaf

Lightly grease a loaf pan or line it with parchment paper if desired.

Transfer the meat mixture into the pan.

Press it firmly into every corner while removing as many air pockets as possible.

A tightly packed loaf cooks more evenly and slices much better after cooling.

Smooth the top before covering the pan tightly with aluminum foil or an oven-safe lid.


Preparedness Tip

Prepare two loaves at the same time. One can be enjoyed immediately while the second can be refrigerated or frozen for future meals. Cooking in batches saves time and makes better use of your oven.


Common Beginner Mistakes

One of the most common mistakes is working with warm meat. Warm meat doesn’t grind or mix as cleanly, often resulting in a softer, less uniform texture.

Another mistake is under-mixing the meat. If the proteins aren’t allowed to bind properly, the finished loaf may crumble when sliced.

Finally, avoid packing the loaf loosely. Removing air pockets helps produce a more consistent texture and improves the appearance of each slice.


Before You Continue

With the loaf prepared, the final stage is gentle cooking. The next section explains how slow, even cooking helps produce a moist, tender luncheon meat while maintaining food safety and achieving the firm texture needed for clean slicing.

Back To Top


Cooking and Cooling the Loaf

Once the meat has been mixed and packed firmly into the loaf pan, it’s time to cook it slowly and evenly.1a559667-68fa-4711-b0da-8375d02bf4f4

Unlike roasting a piece of pork, homemade luncheon meat benefits from gentle cooking. Slow, controlled heat helps the proteins set gradually, producing a firm yet tender texture while reducing the amount of moisture lost during cooking.

Cooking too quickly or at excessively high temperatures can cause the loaf to shrink, become dry, or develop an uneven texture.

Patience is rewarded.


Use a Water Bath

One of the simplest ways to achieve even cooking is by placing the loaf pan inside a larger baking dish filled with hot water.

This technique, often called a water bath, surrounds the loaf with gentle heat and helps prevent the outer portions from cooking much faster than the center.

The water should come roughly halfway to three-quarters of the way up the sides of the loaf pan.

This extra step helps produce a smoother texture and a more consistent finished product.


Monitor the Internal Temperature

The most reliable way to determine when the loaf is fully cooked is by using a digital meat thermometer.

Insert the thermometer into the thickest part of the loaf without touching the pan.

Rather than relying solely on cooking time, verify that the meat has reached a safe internal temperature appropriate for ground pork products.

Cooking by temperature—not by the clock—produces safer and more consistent results.


Allow the Loaf to Rest

After removing the loaf from the oven, resist the temptation to slice it immediately.

Resting allows the juices to redistribute throughout the meat and gives the proteins time to firm up.

If sliced too soon, the loaf may lose moisture and fall apart more easily.

A short resting period greatly improves both texture and appearance.


Chill Before Slicing

For the cleanest slices, refrigerate the loaf after it has cooled.

Cold luncheon meat slices much more neatly than warm meat.574bd552-4435-440d-ae6c-8333f664f6b8

Once thoroughly chilled, use a sharp knife to cut slices of whatever thickness best suits your intended use.

Thin slices work well for sandwiches, while thicker slices are excellent for pan-frying at breakfast or serving alongside eggs and potatoes.

Back To Top


Storing Homemade Luncheon Meat

Once prepared, homemade luncheon meat should be stored safely to maintain its quality.7bf54d07-d8ab-4457-b793-c7b480f09ed7

Refrigerated, it is best enjoyed within several days.

For longer storage, slice the loaf, separate the slices with parchment paper, and freeze them in airtight freezer bags or containers.

Freezing individual portions makes it easy to remove only what you need without thawing the entire loaf.

Always label frozen packages with the preparation date.

Good labeling is one of the simplest preparedness habits you can develop.


Serving Ideas

Homemade luncheon meat is remarkably versatile.

Some popular ways to enjoy it include:a7c1502c-9fa9-48b7-846e-e3eab49fe8a3

  • Cold sandwiches
  • Fried breakfast slices with eggs
  • Grilled sandwiches
  • Diced into fried rice
  • Added to omelets
  • Mixed into pasta dishes
  • Cubed into soups or stews
  • Served with potatoes and vegetables

Because it is fully cooked, it can also make a quick meal when time is limited.


Preparedness Perspective

Homemade luncheon meat provides a convenient source of protein that can be prepared ahead of time and incorporated into many different meals. Making foods with multiple uses helps reduce waste, simplifies meal planning, and increases flexibility during busy weeks or short-term emergencies.


Common Beginner Mistakes

One of the most common mistakes is slicing the loaf while it’s still warm. Warm meat is softer and often tears instead of producing clean slices.

Another mistake is relying entirely on cooking time instead of checking the internal temperature. Every oven cooks differently, so using a thermometer provides much more reliable results.

Finally, avoid freezing the entire loaf as one solid block. Portioning it into meal-sized packages before freezing makes it much easier to thaw only what you need.

Back To Top


Key Takeaways

Making homemade luncheon meat is less complicated than many people expect. By starting with quality ingredients, keeping the meat cold during preparation, mixing thoroughly, cooking gently, and storing it properly, you can create a flavorful, versatile meat that’s useful for sandwiches, breakfasts, and quick meals.f9b24128-9288-41a3-baeb-98e6fd6d7b70

Whether your goal is greater self-sufficiency, reducing processed foods, or simply learning traditional kitchen skills, homemade luncheon meat is a rewarding project that adds another practical recipe to your preparedness kitchen.

Back To Top

© Prepping Communities. This content is for informational purposes only and not professional advice. Use at your own risk.
Terms | Privacy | Guidelines

Leave a Reply

top