
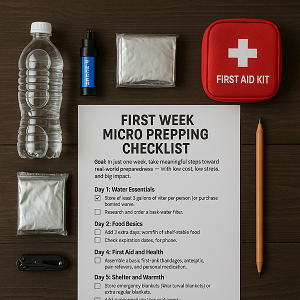
First Week Micro Prepping Checklist
Goal: In just one week, take meaningful steps toward real-world preparedness — with low cost, low stress, and big impact.
 Day 1: Water Essentials
- Store at least 2 gallons of water per person (or purchase bottled water).
- Research and order a basic water filter (like Sawyer Mini, LifeStraw, or Grayl).
Tip: Refill clean juice or soda bottles with tap water if buying bottled water is too costly!
Day 2: Food Basics
- Add 3 extra days’ worth of shelf-stable food (soups, beans, rice, canned meat, peanut butter, etc.).
- Check expiration dates — focus on foods you already eat.
Tip: Choose foods that require little or no cooking in case of a power outage.
Day 3: Light, Power, and Communication
- Buy or locate a battery-powered flashlight.
- Buy extra batteries.
- Find a small battery bank for your phone.
Bonus: A cheap hand-crank flashlight/radio combo is a great micro prepping upgrade.
Day 4: First Aid and Health
- Assemble a basic first aid kit (bandages, antiseptic, pain relievers, any personal meds).
- Add soap, sanitizer, wet wipes, and face masks for sanitation.
Tip: Dollar stores often sell decent first aid basics for a few dollars!
Day 5: Important Documents
- Gather copies (paper and/or digital backup) of key documents:
- ID and driver’s license
- Passport
- Health insurance cards
- Emergency contacts
- Bank account info
Tip: Save secure copies on a USB flash drive or encrypted cloud storage.
Day 6: Shelter and Warmth
- Store emergency blankets (Mylar survival blankets) or extra regular blankets.
- Add emergency ponchos or raincoats.
Bonus: Look for portable tarps (great for emergency shelters).
Day 7: Personal Protection and Tools
- Add a multi-tool (pocket knife, pliers, screwdriver combo) to your kit.
- Create a small cash reserve ($20-50 in small bills).
- Review simple home safety measures (working smoke detectors, fire extinguisher).
Tip: Know where your home’s water, gas, and power shutoffs are located.
Progress Tracker:
| Task | Completed |
| Water stored |  |
| Food added | |
| Light and power ready | |
| First aid kit prepared | |
| Documents copied | |
| Shelter materials stored | |
| Tools and protection ready | |
Congratulations! 
By the end of one week, you’ll have:
- Emergency food and water
- Power and light backup
- Basic first aid
- Access to critical documents
- Shelter options
- Simple tools for survival
You’re now more prepared than 90% of the population — and you’ve done it without stress or breaking your budget!
Next 30 Days Micro Prepping Challenge
Goal: Expand your micro prepping foundation to cover one full month of everyday emergencies — step-by-step, at your own pace.
Week 2: Food, Cooking, and Everyday Comforts
Day 8:
-
Add a small camping stove or alternative cooking method (butane stove, propane grill, Sterno cans).
Day 9:
-
Stock up extra fuel (butane, propane, alcohol fuel) safely.
Day 10:
-
Expand your pantry: Add an additional 7 days’ worth of shelf-stable food.
Day 11:
-
Learn 2 no-cook meals you could make with your emergency supplies.
Day 12:
-
Buy basic spices, instant coffee/tea, and comfort snacks for morale.
Day 13:
-
Prepare a simple manual coffee or tea-making setup (optional luxury, big morale boost!).
Day 14:
-
Practice cooking one meal using only your emergency gear.
Week 3: Water, Sanitation, and Hygiene
Day 15:
-
Practice using your water filter (test it with tap water or a clean source).
Day 16:
-
Add water purification tablets or extra filters to your kit.
Day 17:
-
Assemble a simple sanitation kit:
-
Trash bags
-
Toilet paper
-
Hand sanitizer
-
Wet wipes
-
Day 18:
-
Create a “no running water” bathroom plan (bucket toilet kit, or know nearby facilities).
Day 19:
-
Store extra soap, dish detergent, and laundry soap sheets.
Day 20:
-
Stock 5–10 gallons of extra water (if you have space).
Day 21:
-
Simulate 1 full day without tap water to find any weak spots.
Week 4: Safety, Security, and Energy Independence
Day 22:
-
Install or check smoke detectors, CO2 detectors, and fire extinguishers.
Day 23:
-
Set up a basic emergency communications plan with friends/family (text first, calling tree).
Day 24:
-
Add motion lights or simple door reinforcement for home security.
Day 25:
-
Stock a solar charger or hand crank charger for small devices.
Day 26:
-
Learn basic first aid skills (bandaging, CPR basics) — YouTube and Red Cross apps are great free resources.
Day 27:
-
Practice a 5-minute “grab-and-go” drill — pack your emergency bag quickly.
Day 28:
-
Review and update your important documents and emergency contacts.
Bonus Final Two Days: Emergency Living Drill
Day 29:
-
Simulate a 24-hour emergency:
-
No tap water
-
No power
-
No internet
-
Use only your micro prepping supplies
-
Day 30:
-
Reflect:
-
What worked?
-
What was harder than expected?
-
What will you improve next month?
-
Progress Tracker:
| Task | Completed |
|---|---|
| Emergency cooking method | |
| Extra food stocked | |
| Water purification set | |
| Sanitation kit ready | |
| Home safety upgrades | |
| Alternative energy source | |
| Emergency living drill completed | |
Congratulations: You’re Micro Prepping Certified! 
After these 30 days, you’ll have:
30+ days of food and water Basic shelter, light, and cooking options Emergency communications ability Practical first aid and sanitation readiness Confidence that you can handle real-world disruptions
Small steps = massive resilience.
You’ve proven that prepping doesn’t require thousands of dollars, a cabin in the woods, or a complete lifestyle overhaul. It just takes consistent, practical action.
Optional: What’s Next After 30 Days?
-
Expand to a 3-month supply (food, water, medicine).
-
Learn gardening, home repairs, and self-defense basics.
-
Connect with a local or online prepping community (like PreppingCommunities.com).
-
Develop a bug-out plan if evacuation becomes necessary.