
Introduction to Micro Homesteading
Micro homesteading is the art of self-sufficiency on a small scale—often in an urban or suburban environment. Unlike traditional homesteads that require acres of land, micro homesteads thrive on a fraction of an acre, a backyard, or even a balcony. It’s a lifestyle that prioritizes sustainability, food independence, and minimalist living, perfect for modern preppers, environmentally conscious families, or anyone yearning to reconnect with nature and their food.
Micro homesteading isn’t about producing everything you consume, but rather producing something meaningful in a way that reduces reliance on external systems. Whether it’s growing fresh herbs, harvesting eggs, or capturing rainwater, each small step adds up. It fosters a deep sense of accomplishment, provides cleaner food, and promotes a healthier lifestyle. And best of all, it’s adaptable to your space, skills, and schedule.
Key Principles:
- Sustainability: Reducing dependence on commercial systems.
- Self-Reliance: Growing and producing what you need.
- Efficiency: Maximizing limited space.
- Low-Waste Living: Composting, reusing, and repurposing.
Planning Your Micro Homestead
Before you turn the first shovel of dirt or assemble your first chicken coop, thoughtful and strategic planning is the foundation for success on a micro homestead. Unlike sprawling rural homesteads, your limited space demands efficient use, adaptability, and clarity about your objectives. Proper planning helps avoid costly mistakes, maximizes yields, and ensures your micro homestead supports your lifestyle and long-term resilience.
Begin with observation. Spend several days or even weeks paying attention to your environment. Where does the sunlight fall in the morning versus the afternoon? Which parts of your space collect water or stay dry? Are there strong winds or potential frost pockets? Observe how pets, pests, or even nosy neighbors might affect your space. This close attention will give you insights into what’s possible in your environment.
Next, assess your available resources honestly—both physical and personal. This includes land, time, energy, money, and skills. Don’t overextend yourself by trying to grow everything at once or raising more animals than you can handle. Start small, and scale up as your confidence and systems grow.
Define Your Goals
Every micro homestead is unique because every homesteader has different motivations. What are your goals? Do you want to replace 50–80% of your vegetable intake with homegrown produce? Is your primary aim self-sufficiency, cutting food costs, reducing reliance on the grid, or simply living closer to nature? Are you passionate about herbs and natural remedies? Would a beehive or mushroom growing area excite you more than a goat pen?
Setting clear goals will shape everything from your layout to your budget. Avoid the trap of copying someone else’s setup. Success in micro homesteading isn’t about doing everything—it’s about doing the right things for you.
Create a Layout and Seasonal Plan
Once you’ve defined your goals, it’s time to translate your ideas into a practical plan. Sketch your layout on graph paper or use a digital garden planner to map out beds, pathways, compost bins, animal housing, and vertical growing areas. Consider microclimates in your space—perhaps your compost pile can act as a windbreak or your south-facing wall can support heat-loving crops.
Build a seasonal calendar that breaks your year into manageable chunks. Include planting times, harvest periods, pruning schedules, chicken molting cycles, or soap-making sessions. Use this to stagger your work and avoid burnout.
Also, make space for trial and error—not everything will go according to plan. Keep detailed journals to track what works and what doesn’t, and adjust next season accordingly.
Key Factors to Consider
- Available Space: Whether you have a balcony, backyard, or small plot, accurately measure and map it. This helps avoid overcrowding and allows for proper crop spacing and airflow.
- Sunlight & Shade: Use a sun map to determine the hours of direct sunlight each part of your space receives. South-facing areas are prime real estate for high-yield crops.
- Water Source: Efficient watering is critical. Is there a spigot nearby? Could you harvest rainwater? Drip irrigation systems and watering schedules should be part of the plan.
- Zoning & Local Laws: Research what your municipality allows. Are chickens legal? Can you compost? Are there noise or fence height restrictions? Understanding the rules helps you stay compliant and avoids conflicts.
- Security: Protecting your investment is key. Fencing may deter pests, pets, and even theft. Consider lighting, locks on gates, or motion sensors if necessary.
- Your Lifestyle & Energy: Do you travel frequently? Work long hours? Be realistic about how much daily care your homestead can require, and choose systems accordingly.
Planning Tools
- Graph Paper or Digital Planners: Use tools like Google Sheets, SmartDraw, or gardening-specific apps (like GrowVeg or Garden Planner) to visually organize your homestead.
- Homesteading Journals: Keep a notebook to log weather patterns, planting dates, harvest yields, and lessons learned. Over time, this becomes one of your most valuable tools.
- Permaculture Zone Mapping: This can help you place high-maintenance plants or livestock closer to your home and lower-maintenance elements further away, optimizing your daily movements.
Final Tip: Don’t aim for perfection—aim for progress. Your micro homestead will evolve over time, and that’s part of the beauty. Planning isn’t about creating a fixed blueprint—it’s about setting a strong foundation for learning, adapting, and thriving.
Soil Health & Composting
Healthy, living soil is the heart of a thriving micro homestead. You can have the best seeds, perfect sunlight, and a reliable watering system—but without fertile soil, your efforts will fall flat. Investing time and energy into your soil early on pays off season after season with stronger plants, better yields, and fewer pest problems.
Know Your Soil
Start by understanding what you’re working with. Use an affordable soil test kit or contact your local agricultural extension office for a full analysis. These tests help you identify pH levels, organic matter content, and key nutrients like nitrogen, phosphorus, and potassium. Most vegetables thrive in slightly acidic soil (pH 6.0–6.8), but every plant has its preference.
If your soil is too acidic or alkaline, amending it with natural materials like lime, sulfur, or compost can balance it over time. If it’s heavily compacted, sandy, or contaminated (especially in urban areas), consider using raised beds filled with a custom blend of soil and compost.
Build Living Soil
Soil is not just dirt—it’s an ecosystem. Microorganisms like bacteria, fungi, nematodes, and beneficial insects form the underground food web that makes nutrients available to plants. To support this web:
- Avoid synthetic fertilizers and pesticides that harm soil life.
- Add organic matter regularly—this can include compost, aged manure, leaf mold, or cover crops.
- Mulch with straw, wood chips, or dried leaves to prevent erosion, retain moisture, and feed soil life.
Creating healthy soil doesn’t happen overnight. Think of it as a long-term relationship—you feed it, and it will feed you.
Composting on a Micro Homestead
Composting is the art of turning food scraps, yard clippings, and natural materials into rich, earthy humus. It’s nature’s recycling system, and for a micro homestead, it’s essential. Not only does compost reduce your household waste, it improves soil texture, moisture retention, and nutrient density.
Types of Composting Systems
- Bin Composting
Perfect for backyards and larger patios. This method involves creating layers of green (nitrogen-rich) and brown (carbon-rich) materials, turning them periodically to maintain airflow. It’s tidy, manageable, and scalable. - Vermicomposting (Worm Bins)
Red wigglers digest your food scraps and produce castings—nutrient-rich waste that’s ideal for container gardens. Worm bins can be kept indoors or outdoors and require minimal space. - Bokashi Composting
A fermentation-based system that works even in apartments. Add food scraps to a sealed bucket with bokashi bran to speed up decomposition. This pre-compost can be buried or added to a compost bin for final breakdown.
Other Options:
- Trench composting (bury scraps directly in the soil).
- Compost tumblers for odor control and easy turning.
Soil & Compost Tips for Micro Spaces
- Use raised beds or large containers if your ground soil is polluted or heavy clay.
- Incorporate kitchen scrap composting by keeping a small bucket under the sink.
- Add eggshells, coffee grounds, banana peels, and shredded paper to compost or worm bins.
- Rotate what you grow to avoid depleting specific nutrients from the soil.
- Include herbs and flowers like marigolds and comfrey to support pollinators and add organic matter when chopped and dropped.
Benefits of Composting
- Reduces waste: Up to 40% of your household waste can be composted.
- Improves soil fertility: Rich compost acts as a slow-release fertilizer.
- Enhances soil structure: Leads to better aeration and water retention.
- Saves money: Less need for store-bought fertilizers, soil conditioners, or garbage bags.
- Increases resilience: Healthy soil equals healthy plants, which are more resistant to pests and disease.
Tools & Supplies
- Soil test kit
- Compost bin or worm farm
- Bokashi starter kit
- Pitchfork or compost aerator
- Mulch (leaves, straw, or wood chips)
- Notebook or app to track your compost and soil inputs over time
Pro Tip: Healthy soil takes years to build—but you’ll notice improvements within a single season. The sooner you start composting and feeding your soil, the sooner your garden will reward you.
Raised Beds & Vertical Gardening
When you’re working with limited space on a micro homestead, every square foot matters. That’s where strategic design becomes essential—and raised beds and vertical gardening offer some of the best returns on investment for small-scale growers.
Raised Beds are foundational for managing soil health in compact areas. They offer superior control over soil composition, making it easier to tailor nutrients to specific crops. Whether you’re dealing with urban soil contamination or clay-heavy native soil, raised beds let you bypass the issue entirely. Build them at a comfortable height (12–24 inches) to improve accessibility—perfect for older homesteaders or those with limited mobility. The structure also promotes better drainage, which prevents root rot and allows earlier planting in spring when ground soil is still too wet.
Repurposing materials—such as untreated pallet wood, corrugated steel, or reclaimed bricks—not only saves money but also adds rustic charm. Consider companion planting in your beds to maximize space and pest control. For example, interplant carrots with onions to deter root maggots.
Vertical Gardening takes your homestead upward, turning walls, fences, and railings into productive growing zones. Vining crops like peas, beans, and cucumbers thrive on trellises, while strawberries and leafy greens flourish in stackable pots. Modular vertical systems also let you rotate crops and adjust for light exposure, helping you grow more with less.
Urban micro homesteaders can get creative with vertical options. Use shoe organizers or hanging canvas pockets for herbs. Mount rain gutters along a fence to grow shallow-rooted plants like radishes and arugula. Even old ladders can be repurposed to hold rows of pots, maximizing vertical yield and ease of access.
Raised Bed Benefits:
- Enhanced drainage and root development.
- Defined borders limit weed encroachment.
- Better ergonomic access—no more crouching in hard soil.
Vertical Gardening Ideas:
- Trellises & Arbors: Perfect for beans, peas, cucumbers, and melons.
- Stackable Planters: Ideal for strawberries, kale, basil, and chard.
- Wall-mounted Baskets & Pots: Great for fence lines and balcony railings.
Smart Tip:
Group your vertical garden near sunny walls or railings that retain warmth. This creates a microclimate that can extend your growing season and boost yields.
Together, raised beds and vertical gardening transform even the smallest yard or patio into a thriving micro-ecosystem—making self-sufficiency a reality in urban, suburban, and rural settings alike.
Container Gardening
Container gardening is one of the most flexible and accessible ways to grow food, especially if you’re dealing with limited space, poor soil, or a rental property where permanent garden installations aren’t allowed. Whether you’re working with a balcony, a rooftop, a patio, or a sunny windowsill, containers let you grow a surprising amount of food in small, manageable spaces. The key is choosing the right container, the right soil mix, and the right plants for your growing conditions.
Almost anything can be a container—as long as it holds soil and has drainage. Think beyond the standard plastic pot. Repurposed buckets, fabric grow bags, wooden crates, ceramic pots, and even old bathtubs can become thriving mini-gardens. However, it’s essential to ensure your containers are food-safe and don’t leach harmful chemicals. Avoid using containers made with plastic #3 (PVC), #6 (polystyrene), or #7 (various resins), as they can degrade over time and contaminate the soil. Always add drainage holes if the container doesn’t already have them to prevent root rot and soil compaction.
Container gardening also gives you mobility and control. You can move plants throughout the day to optimize sun exposure, bring them indoors during storms or frosts, or rearrange your growing area as seasons change. Grouping containers together can create a microclimate—a pocket of warmth and humidity that helps delicate plants thrive and reduces how often you need to water.
Choosing Containers:
- Use food-safe materials like terracotta, glazed ceramic, untreated wood, or BPA-free plastics.
- Make sure containers are appropriately sized for the root system—shallow for herbs, deeper for tomatoes and peppers.
- Prioritize good drainage to avoid soggy roots. Drill extra holes if necessary.
What Grows Well in Containers:
- Herbs (basil, mint, thyme, parsley) thrive in small pots and can be placed near your kitchen for convenience.
- Leafy greens like lettuce, spinach, and arugula grow fast and are perfect for shallow trays.
- Peppers and bush beans do well in medium-sized pots with full sun.
- Tomatoes (dwarf or determinate varieties) need deeper containers and sturdy support but reward with excellent yields.
- Strawberries, radishes, and even dwarf fruit trees (like fig or Meyer lemon) can succeed in the right-sized containers with consistent care.
Soil Tip:
Use a blend of potting soil, compost, and perlite or coconut coir. This mix stays light and fluffy, retains moisture while draining excess water, and supports strong root development. Avoid using garden soil alone—it’s often too heavy and prone to compacting in containers.
Smart Tip:
Try vertical stacking containers or multi-tiered plant stands to maximize your growing space. You can cascade herbs on the top shelf, greens in the middle, and trailing strawberries below—all in one compact footprint.
Watering Note:
Container plants dry out faster than those in the ground. In hot weather, you may need to water once or even twice a day. Consider using self-watering containers or placing a shallow tray beneath pots to retain some moisture and reduce evaporation.
Intensive Planting Techniques
When working with limited space, every inch of soil must work harder—and that’s where intensive planting techniques come in. This approach is about strategic density, layering, and smart timing to make small plots highly productive. Unlike traditional row gardening, which often leaves unused soil between crops, intensive planting reduces wasted space while improving microclimate conditions for your plants.
By carefully selecting compatible crops and staggering plantings throughout the season, you can turn even a modest garden bed into a food-producing powerhouse. This not only increases yield but also reduces weeding and watering by shading the soil and promoting a healthier ecosystem underground.
Key Methods:
- Square Foot Gardening:
A method pioneered by Mel Bartholomew, this technique divides garden beds into 1-foot squares, each hosting a specific number of plants based on their mature size. It simplifies planning and makes crop rotation easy. For example, a square might hold 16 carrots, 9 beets, or just 1 tomato depending on the spacing needs. It’s ideal for beginners and maximizes efficiency in raised beds. - Succession Planting:
This is all about keeping your beds active. As soon as one crop is harvested, another goes in. For example, after pulling spring lettuce, you might plant bush beans, and then follow those with fall radishes. Careful timing and a planting calendar can help you squeeze in multiple harvests per bed, per season. - Companion Planting:
Certain plant pairings enhance growth, deter pests, or improve soil health. For instance, basil planted near tomatoes can enhance flavor and repel pests like aphids. Carrots and onions deter each other’s pests, while beans and corn form a classic “Three Sisters” combination when squash is added. This technique not only increases yield but also supports a balanced garden ecosystem.
Popular Companion Plant Combinations:
- Basil + Tomato: Improves tomato flavor and repels whiteflies and hornworms.
- Carrots + Onions: Each repels pests that commonly attack the other.
- Beans + Corn: Beans fix nitrogen in the soil, feeding corn; corn supports climbing bean vines.
Pro Tip:
Use vertical elements like trellises or cages within square foot plots to grow climbing plants like peas, beans, or cucumbers. This expands your growing area upward and allows more room at the base for smaller crops.
By combining these techniques, even a small micro homestead garden can deliver a continuous, diverse, and high-yield harvest. With thoughtful planning, your compact growing space can outperform larger, less efficiently managed plots.
Year-Round Gardening
One of the most empowering aspects of micro homesteading is breaking free from the traditional “growing season” mindset. With strategic planning, you can enjoy fresh produce 12 months a year—even in colder climates. The key lies in understanding your local USDA hardiness zone and frost dates, then pairing that knowledge with tools like season extenders, indoor setups, and crop rotation.
Cool-season crops such as kale, spinach, mache, and arugula thrive in the shoulder seasons—fall and early spring. By planting them late in the summer or early autumn, and protecting them with cold frames, row covers, or low tunnels, you can continue harvesting well into the winter. Mulching heavily around root crops like carrots and parsnips can even preserve them in the ground through light freezes.
Indoors, windowsills, shelves, and spare corners become productive growing zones when equipped with LED grow lights. Microgreens, sprouts, herbs like basil or cilantro, and even compact lettuces can flourish inside. This not only boosts your food supply in colder months but also brings greenery and vitality to your indoor space.
Spring seed-starting indoors gives your crops a head start. By the time outdoor conditions are favorable, your seedlings are robust and ready to transplant, saving weeks in the growing cycle and helping you get multiple harvests out of each bed.
Year-round gardening does require trial and error—what works one winter may need adjusting the next—but over time, it dramatically increases food security and self-reliance.
Strategies for Year-Round Growing:
- Cold-Weather Crops: Grow hardy greens like kale, spinach, mustard, and arugula in fall and winter.
- Seed Starting: Start seeds indoors in late winter to transplant early spring.
- Indoor Production: Grow microgreens, herbs, and small veggies indoors all year using grow lights and trays.
- Succession Planting: Continuously replant fast-growing crops like lettuce, radishes, and turnips in rotation.
Season Extenders to Consider:
- Cold Frames: Mini greenhouses made from old windows or polycarbonate sheets to trap warmth and protect from frost.
- Row Covers: Lightweight fabric laid over crops to insulate while allowing light and rain through.
- Hoop Tunnels: Larger setups using PVC or metal hoops covered with plastic to protect raised beds.
- Mulching: Straw, leaves, or wood chips can keep soil temperatures stable and extend root crop viability.
- Indoor Grow Systems: Use LED or full-spectrum grow lights, especially during short daylight months.
Pro Tip:
Keep a garden journal. Track what varieties thrive in each season, when your frost dates hit, and which season extenders worked best. Over time, your micro homestead becomes a finely tuned, year-round food engine tailored to your environment.
Small-Scale Livestock
You don’t need acres of pasture to enjoy the benefits of raising livestock. With thoughtful planning and a little creativity, even a small suburban backyard or urban lot can sustain a productive micro-flock or herd. Animals like chickens, quail, rabbits, and bees are well-suited for compact environments and contribute significantly to a self-sufficient lifestyle. They turn kitchen scraps into food, enrich your soil with natural fertilizer, and help manage garden pests.
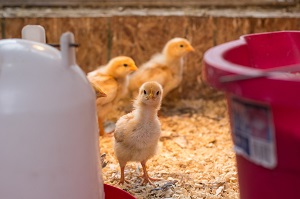
Chickens remain the favorite choice for most micro homesteaders. They’re relatively low-maintenance, friendly, and provide a steady supply of fresh eggs—about 3 to 5 per week per hen. They also help scratch up garden beds and reduce insect populations. Coops can be compact and portable, fitting easily into tight yards or even patios.
Quail are a fantastic alternative where space is extremely limited. These tiny birds can be housed in stacked cages or hutches, and they’re much quieter than chickens—making them ideal for discreet urban homesteading. Despite their size, they lay almost daily and mature quickly, making them one of the most efficient birds to raise for both eggs and meat.
Rabbits are another excellent choice. They reproduce quickly and provide lean, high-protein meat with a relatively small footprint. Their manure is one of the best fertilizers you can get—it’s nitrogen-rich, doesn’t need composting before use, and can be applied directly to garden beds. Some homesteaders also use rabbit fur for crafting or trade. However, it’s critical to check your local zoning laws, as rabbits are regulated in some municipalities.
Beekeeping, once considered a rural hobby, is gaining traction in urban settings. A single hive can pollinate your garden, improve the health of local plant life, and provide a sweet harvest of honey. Bees are surprisingly low-maintenance, but they do require proper setup and knowledge. Local beekeeping groups or cooperatives can help you get started and navigate any local legal requirements.
Top Options for Small Yards:
- Chickens: Reliable egg layers, great for composting scraps, and natural bug control.
- Quail: Compact, quiet, and productive—perfect for balconies and small sheds.
- Rabbits: Quick breeders, efficient feed-to-meat ratio, and their manure is garden gold.
- Bees: Boost garden yields with pollination and harvest your own honey.
Considerations Before You Start:
- Noise and Smell: Even small animals can be noisy or smelly if not maintained properly. Use odor-absorbing bedding and clean housing regularly.
- Predators: Urban predators like raccoons, hawks, and neighborhood dogs can pose a threat. Secure enclosures with hardware cloth, not chicken wire.
- Zoning Laws and HOA Rules: Always research your local bylaws. Some cities allow hens but not roosters; others may ban livestock altogether or require permits.
- Ethical Care: Practice humane and sustainable animal husbandry. Healthy animals mean better production and a more harmonious homestead.
Pro Tip: Start small and scale up. It’s easier to manage a few hens or a single rabbit hutch well than to take on too much too quickly. Focus on creating a clean, comfortable environment for your animals, and they’ll reward you many times over.
Food Preservation Techniques
What you grow should last through the seasons—not just a few weeks. Food preservation is a cornerstone of micro homesteading, allowing you to make the most of every harvest. Whether you’re growing herbs on a balcony or pulling vegetables from raised beds, preserving your bounty helps reduce food waste, increase self-sufficiency, and build long-term food security.
Canning is one of the most time-tested methods. Water bath canning is ideal for high-acid foods like fruits, pickles, and tomatoes (with added acid), while pressure canning is necessary for low-acid items such as beans, carrots, or meat to prevent botulism. Even in small spaces, a basic canning setup and a few shelves can yield a pantry full of preserved goods.
Dehydration is great for lightweight, space-saving storage. Use a countertop electric dehydrator or even a DIY solar dryer to preserve fruits, vegetables, herbs, and even jerky. Dried foods store compactly and make excellent snacks or ingredients for soups and stews.
Fermentation is another low-tech, high-reward preservation method. With just salt and vegetables, you can make gut-healthy fermented foods like sauerkraut, kimchi, or fermented hot sauce. These don’t require refrigeration initially and develop deep, complex flavors over time.
Freezing, while dependent on consistent grid power, is convenient for fast preservation. Freeze excess berries, blanched greens, or cooked meals for quick access. If you’re off-grid, solar freezers or community cold storage options may be viable.
For long-term dry storage, vacuum sealing removes air from bags and jars, preserving freshness and preventing freezer burn. Mylar bags with oxygen absorbers are ideal for bulk dry goods like rice, beans, and oats—especially if stored in cool, dark places.
Smart Storage Solutions include:
- Building a pantry shelf in a closet or basement.
- Converting crawlspaces or under-bed areas into mini root cellars.
- Labeling everything with dates and practicing first-in, first-out (FIFO) rotation to avoid spoilage.
- Adding temperature and humidity control with thermometers and desiccants in storage areas.
Bonus Tip: Keep a preservation logbook with recipes, notes on storage duration, and success/failure tracking—it helps you refine your system each season.
By mastering multiple food preservation techniques, you ensure that nothing goes to waste and that your micro homestead supports you not just today, but through winter and times of need.
Rainwater Collection & Irrigation
Water is one of the most critical yet often overlooked resources on a micro homestead. Efficient water use can mean the difference between a thriving garden and a struggling one—especially during dry spells or in areas with water restrictions. Rainwater collection and smart irrigation systems offer a practical and sustainable way to ensure your plants always get what they need without relying heavily on municipal supplies.
Rainwater Collection:
Capturing rainwater is a smart move for sustainability, cost savings, and emergency preparedness. It starts with a simple system: your roof acts as the catchment area, and gutters channel rain into storage containers like rain barrels or larger cisterns. Installing a first-flush diverter helps remove debris and contaminants from the initial flow, ensuring cleaner water for your plants. Be sure to use opaque barrels with tight-fitting lids to block sunlight and keep mosquitoes and algae at bay.
Some homesteaders install multiple barrels and connect them in a daisy chain for greater capacity. If your region allows it, a well-designed rainwater harvesting system can supply much of your garden’s needs. It’s also a great backup water source during emergencies when tap water might be compromised.
Irrigation Systems:
Once you have stored water, it’s time to put it to good use. Traditional sprinklers waste a lot of water through evaporation and runoff. Instead, drip irrigation and soaker hoses provide a slow, steady flow right at the root zone, where it matters most. This not only conserves water but also reduces plant stress and helps prevent fungal diseases caused by wet foliage.
For raised beds or containers, a drip system can be easily customized with emitters and tubing tailored to your layout. In-ground beds do well with buried soaker hoses, which keep the surface dry and the roots moist. Add a timer—manual or battery-powered—to automate watering early in the morning or at night, reducing evaporation even more.
Whether you’re watering herbs on a balcony or managing several raised beds, a thoughtful combination of rainwater harvesting and targeted irrigation turns water from a liability into an asset. It’s a win for both your plants and the planet.
Collection Setup:
- Gutters and downspouts direct rain into collection barrels.
- First-flush diverters improve water quality by removing debris.
- Secure lids or screens on barrels to deter mosquitoes and algae growth.
- Consider food-grade barrels or repurposed totes for safe storage.
Irrigation Tips:
- Use drip systems or soaker hoses for efficiency and targeted watering.
- Mulch your beds to retain soil moisture and reduce watering frequency.
- Incorporate timers for hassle-free, consistent watering schedules.
- Elevate barrels slightly to improve gravity-fed flow in irrigation systems.
Natural Pest Control
Skip the chemicals and support a healthy ecosystem with natural pest control methods. On a micro homestead, every square foot matters, and using eco-friendly practices helps ensure long-term soil health, pollinator safety, and food integrity. Natural pest control is not about eradicating every insect—it’s about creating balance. The goal is to build resilience into your garden so that pests rarely reach damaging levels.
Prevention is the first and most important line of defense. Healthy soil supports strong plants, which are naturally more resistant to disease and pests. Make sure you’re rotating crops, spacing plants properly for airflow, and selecting pest-resistant varieties suited to your local climate. Mulching can also deter soil-borne pests while conserving moisture.
When intervention is needed, turn to low-impact solutions. Neem oil, insecticidal soaps, and diatomaceous earth are effective yet safe for the garden ecosystem. These options target soft-bodied insects like aphids and mites without harming pollinators when applied responsibly.
Encourage beneficial predators by turning your space into a wildlife haven. Ladybugs, lacewings, and hoverflies feed on aphids and other pests. Add birdhouses to invite bug-eating birds like wrens or chickadees. Frog ponds, bat boxes, and even small brush piles can host creatures that keep pest populations in check.
Physical barriers like floating row covers, mesh netting, and copper tape can keep pests out before they become a problem. Copper, for example, deters slugs and snails without the need for toxic bait.
Strategic companion planting also plays a big role—marigolds repel nematodes, basil confuses tomato hornworms, and nasturtiums trap aphids away from more valuable crops.
Natural Pest Control Options:
- Companion Planting: Marigolds, basil, and nasturtiums deter or confuse common pests.
- Neem Oil & Insecticidal Soaps: Ideal for aphids, spider mites, and scale insects.
- Diatomaceous Earth: Natural abrasive powder that kills soft-bodied pests without chemicals.
- Encourage Predators: Ladybugs, lacewings, frogs, toads, birds, and bats.
- Physical Barriers: Row covers, netting, cardboard collars, copper tape, and mulch.
Key Tip:
Start with your soil. A well-fed, well-watered plant grown in nutrient-rich soil will naturally resist pests far better than one struggling in compacted or depleted dirt. Pest pressure is often a symptom, not the root problem.
Would you like an illustration showing companion planting layouts or predator-friendly garden setups?
Herbal & Medicinal Plants
Grow your own natural remedies and reduce reliance on pharmaceuticals by cultivating a medicinal herb garden. Many herbs are dual-purpose—offering both healing properties and flavor in your kitchen. This is an ancient practice that fits perfectly into a modern micro homestead, giving you a compact yet powerful home pharmacy right outside your door.
Start with easy-to-grow perennials and commonly used herbs like calendula, chamomile, yarrow, and mint. Calendula is prized for its antibacterial and antifungal qualities—perfect for skin salves. Chamomile, beyond its relaxing effect, supports the digestive system and soothes inflammation. Yarrow is a wilderness first-aid essential; it stops bleeding and promotes healing. Mint settles stomachs and makes refreshing tea, but it’s also effective in topical preparations.
Planning and Harvesting
Designate a sunny bed or containers for your herb garden. Herbs often thrive in poor soil and require minimal attention once established. Be sure to harvest herbs at their medicinal peak—typically just before or during flowering—and dry them thoroughly to preserve potency. Hang them in bundles, use a dehydrator, or place them in a well-ventilated area out of direct sunlight.
Preserving and Using
Once dried, store herbs in airtight glass jars labeled with the name and harvest date. You can infuse dried or fresh herbs into oils (like olive or coconut) for making salves and balms. Use vodka or vinegar to create tinctures for long-lasting extracts. Herbal teas, poultices, compresses, and homemade syrups are all practical ways to use your herbal harvest.
Build Your Home Apothecary:
Keep a well-organized space with: • Amber or cobalt blue glass jars (to protect contents from light)
• Droppers and tincture bottles
• Labels with dates and instructions
• Basic tools: cheesecloth, mortar and pestle, funnel, small strainer
Recommended Starter Herbs:
• Calendula – Skin irritations, wounds, antifungal
• Chamomile – Anxiety, sleep, gut health
• Yarrow – Cuts, nosebleeds, anti-inflammatory
• Mint – Nausea, headaches, energy booster
• Lemon Balm – Stress relief, antiviral
• Echinacea – Immune system support
• Thyme & Oregano – Natural antibiotics, sore throats
• Comfrey – Bone and tissue repair (use with caution)
Pro Tip: Keep a seasonal harvesting and preparation journal. Note what worked, when each plant thrived, and how each preparation performed. This living record becomes an invaluable guide over time and builds your confidence in herbal medicine.
Herbal medicine empowers micro homesteaders to care for their families with fewer trips to the pharmacy and more connection to the land. It’s sustainable, personal, and deeply rooted in tradition.
DIY Projects & Sustainable Hacks
A micro homestead thrives on ingenuity. With a bit of creativity, you can turn everyday items into practical solutions that support self-sufficiency and environmental stewardship. DIY projects not only cut costs but also give you greater control over the tools and systems that keep your homestead running smoothly. From building your own equipment to repurposing discarded items, every project adds value and personal character to your space.
One popular project is the solar dehydrator—a simple structure made from wood, glass, and mesh that harnesses the sun’s energy to preserve fruits, herbs, and vegetables. These can be built to fit small patios or balconies, allowing even urban homesteaders to dry their harvest without electricity. Another impactful build is a composting toilet, which can save water and generate nutrient-rich compost for non-edible plants. It’s ideal for off-grid setups and helps close the waste cycle sustainably.
For animal care, a chicken tractor—a mobile coop—lets you move your flock around your yard or garden. This not only gives chickens fresh forage daily but also fertilizes the ground and reduces the risk of overgrazing. It’s a win-win system for both soil and poultry health.
Upcycling is another hallmark of sustainable homesteading. Wooden pallets, often free from local businesses, can be turned into raised beds, shelves, or garden furniture with a bit of sanding and a few screws. Old drawers become quirky planters. Even broken buckets can find new life as herb gardens or worm bins.
Incorporating graywater reuse—like redirecting water from your sink or bathtub (with biodegradable soaps)—into your irrigation system can dramatically reduce water waste. Pair it with drip irrigation or gravity-fed barrels for maximum efficiency.
Community involvement can amplify these efforts. Seed swaps with neighbors not only expand your plant variety but also build local resilience. Sharing tools, exchanging cuttings, and trading surplus produce are all low-cost, high-impact hacks that strengthen both sustainability and connection.
DIY Ideas:
• Build a solar dehydrator from salvaged windows and mesh.
• Construct a composting toilet for off-grid use.
• Create a chicken tractor to fertilize and rotate grazing areas.
• Upcycle pallets into raised beds, trellises, or storage shelves.
Sustainable Tips:
• Reuse graywater from sinks or showers for garden irrigation.
• Turn old bathtubs or barrels into rain catchment systems.
• Convert discarded furniture into unique garden planters.
• Organize or join seed swaps and tool-sharing circles.
These small projects add up to big impacts. They reduce waste, cut expenses, and build the kind of self-reliant spirit that defines micro homesteading. With the right mindset, nearly every item and every challenge becomes an opportunity.
Community & Bartering
Micro homesteading often conjures up images of self-reliance, quiet independence, and do-it-yourself innovation. And while it’s true that a micro homesteader strives to produce as much as possible within their limited space, the journey is far from a solo endeavor. In fact, some of the greatest strength in small-scale sustainability comes not from what you can do alone—but from what you can do together.
A resilient micro homestead doesn’t exist in a vacuum. It thrives within a network of neighbors, friends, and fellow growers who each bring different skills, resources, and perspectives. Community connection, mutual aid, and bartering aren’t just useful—they’re foundational to long-term success and adaptability. Especially during times of crisis, supply chain disruptions, or economic instability, a strong local network can mean the difference between struggle and sustainability.
Building a Local Homesteading Community
You don’t have to live in a rural town to benefit from community support. Whether you’re in a small town, suburban neighborhood, or even an urban setting, micro homesteading thrives when people connect. Begin by reaching out through shared interests—look for gardening meetups, permaculture groups, seed swaps, or community garden plots. These are often hubs of knowledge, surplus resources, and collaborative energy.
Joining or forming a community-supported agriculture (CSA) group can be a powerful way to pool resources. Even an informal neighborhood co-op—where families rotate responsibilities like planting, harvesting, preserving, or caring for chickens—can lighten the load and improve efficiency. Collaboration doesn’t have to be complicated. It could be as simple as sharing a greenhouse with a neighbor or combining orders on bulk compost to save on delivery.
Don’t overlook online communities either. Digital spaces like local Facebook groups, Discord servers, or forums focused on prepping, homesteading, or off-grid living can help you connect with likeminded individuals in your region. These platforms are rich with advice, troubleshooting, and barter opportunities that extend your reach beyond your immediate neighbors.
Ways to Build Community:
- Start or join a seed swap. Exchanging seeds not only diversifies your crops but also builds connections.
- Volunteer at community gardens. These projects often welcome extra hands and give you access to new techniques and surplus produce.
- Host or attend workshops. Topics like composting, canning, or herbal medicine can bring homesteaders together while spreading valuable skills.
- Share harvests with neighbors. If you have a bumper crop of tomatoes, offer some up in exchange for zucchini or canned pickles.
- Create a tool-sharing library. Not everyone needs to own a tiller, cider press, or pressure canner. Rotating gear through a trusted group saves space and money.
A strong community creates a support network in emergencies too. If your rain catchment fails, your neighbor might have extra water. If your chickens are sick, someone nearby may know what to do. And in the event of a broader crisis—be it an economic downturn or a natural disaster—those relationships could be lifesaving.
Bartering: Building an Alternative Economy
Bartering is one of the most natural extensions of a micro homesteading lifestyle. When you produce your own food, preserve it, repair things yourself, and develop practical skills, you’re generating tangible value that can be exchanged without involving cash. That value becomes the backbone of a localized, sustainable micro-economy.
At its core, bartering is simple: trade what you have for what you need. But it goes deeper than just an economic exchange. Bartering fosters trust, reciprocity, and shared investment in each other’s well-being. In a world where the global economy can be fragile, localized barter systems build strength from the ground up.
Here’s what bartering might look like on a micro homestead:
- Eggs for honey. If you keep chickens but don’t have bees, a trade with a local beekeeper can sweeten the deal.
- Herbs for tools. Got extra dried oregano, basil, and lavender? Offer them to a neighbor in exchange for a shovel or pruning shears.
- Compost for produce. If you create rich, finished compost, trade it with someone whose tomatoes could use the boost.
- Canning jars for salves. Your extra mason jars could be just what an herbalist needs—and they might offer healing salves or tinctures in return.
- Manual labor for equipment access. Help someone build a greenhouse in exchange for a week using their cider press.
The beauty of bartering is that it recognizes value in everything, including time and labor. Can you babysit, repair fences, or cook meals? These services can be exchanged for food, firewood, seeds, or use of tools. Over time, barter arrangements can grow into informal yet dependable trade partnerships.
Practical Bartering Tips:
- Track your trades. Keep a barter journal or app to remember who owes what.
- Be clear on value. While bartering avoids currency, it still helps to agree on roughly equal worth.
- Be honest. Don’t trade sick animals or low-quality goods. Trust is key.
- Offer skill trades. Think of what you can do as valuable as what you have.
Local markets, community swaps, and seasonal gatherings are great venues for bartering. You may also consider creating a neighborhood “barter board”—a bulletin board, shared spreadsheet, or group chat where people can post what they have and what they need. These small systems are powerful, especially when food prices rise or supply chains stall.
Community Resilience: More Than the Sum of Its Parts
At its best, a micro homestead isn’t just about growing food or raising chickens. It’s about building resilience that goes beyond your property line. The interconnectedness of your local community—through bartering, knowledge sharing, and mutual support—is where real strength lies.
In a system driven by convenience and consumption, bartering and community participation are revolutionary acts. They remind us that human-scale exchange, rooted in trust and respect, is not only possible—it’s deeply fulfilling.
When times get tough, your best resource may not be what’s stored in your pantry, but the people on your street.
A resilient micro homesteader understands this. They plant extra so they can share. They learn new skills so they can teach. And they build networks—not just fences.
Takeaway: Whether you’re swapping seeds at a community fair, bartering homegrown herbs for fresh eggs, or helping a neighbor build a raised bed, you’re doing more than sustaining your homestead. You’re strengthening your community’s ability to withstand whatever comes next. And that may be the most important crop you ever grow.
Final Thoughts & Resources
Micro homesteading is a journey, not a destination. Whether you’re in a tiny backyard, on a rooftop, or in a rental unit, you can take powerful steps toward self-reliance. The key is consistency, creativity, and community. It’s not about perfection, but progress.
Even small actions like planting herbs, composting scraps, or raising a few hens contribute to a more sustainable future. Micro homesteading empowers you to take control of your food, health, and lifestyle. Start small, dream big, and grow from there.
Recommended Books:
- The Backyard Homestead by Carleen Madigan
- Mini Farming by Brett L. Markham
- The Resilient Gardener by Carol Deppe
Online Communities:
- Reddit: r/homestead
- Permies.com
- PreppingCommunities.com (for prepper-focused homesteading)