
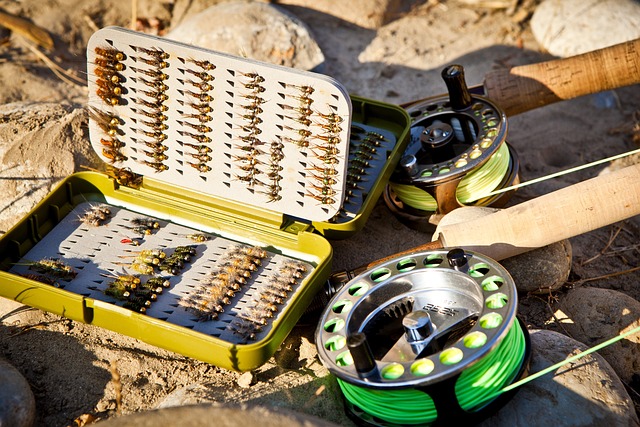
Fly tying is a rewarding and creative aspect of fly fishing that allows anglers to craft their own flies tailored to specific fishing conditions and personal preferences. This guide will walk you through the basics of fly tying, including the essential tools and materials, step-by-step instructions for tying a basic fly, and tips for success.
Table of Contents
- Introduction to Fly Tying
- Essential Tools and Materials
- Step-by-Step Fly Tying Instructions
- The Basic Fly: Woolly Bugger
- Tips for Successful Fly Tying
- Advanced Techniques and Patterns
- Conclusion
1. Introduction to Fly Tying
Fly tying is the process of creating artificial flies used in fly fishing. These flies imitate insects, baitfish, or other prey that fish feed on. Tying your own flies allows you to customize patterns, experiment with different materials, and enhance your fly fishing experience.
2. Essential Tools and Materials
To get started with fly tying, you’ll need the following tools and materials:
Tools:
- Fly Tying Vise: Holds the hook securely in place while you tie the fly.
- Bobbin: Holds and dispenses the thread.
- Scissors: Fine-point scissors for precise cutting.
- Hackle Pliers: Small pliers used to grip and wrap hackle feathers.
- Bodkin: A needle-like tool for applying head cement and picking out fibers.
- Whip Finisher: A tool for finishing the fly with a secure knot.
Materials:
- Hooks: Various sizes and shapes for different fly patterns.
- Thread: Available in different colors and thicknesses.
- Feathers and Hackle: Used for creating wings, tails, and bodies.
- Dubbing: Fine fibers used to create fuzzy bodies.
- Tinsel and Flash: Adds sparkle and attractiveness to flies.
- Beads and Eyes: Adds weight and realism to the fly.
3. Step-by-Step Fly Tying Instructions
The Basic Fly: Woolly Bugger
The Woolly Bugger is a versatile and effective fly that mimics a variety of prey, including baitfish, leeches, and aquatic insects. Here’s how to tie one:
Materials Needed:
- Hook: Size 6-10 streamer hook
- Thread: Black or olive
- Tail: Marabou feather (black or olive)
- Body: Chenille (black or olive)
- Hackle: Saddle hackle feather (black or olive)
- Head: Bead (optional)
Instructions:
- Secure the Hook in the Vise: Place the hook in the vise and tighten it so the hook is secure and the shank is accessible.
- Attach the Thread: Start the thread behind the hook eye and wrap it back to the bend of the hook, creating a thread base.
- Tie in the Tail: Select a marabou feather and pinch off a clump. Tie it in at the bend of the hook, making sure the tail is about the length of the hook shank.
- Tie in the Chenille: Attach the chenille to the base of the tail and wrap the thread forward to the hook eye.
- Wrap the Chenille: Wrap the chenille forward in tight, even turns to create the body of the fly. Secure it with thread near the hook eye and trim any excess.
- Prepare and Tie in the Hackle: Select a saddle hackle feather, trim the base, and tie it in at the base of the chenille. Wrap the hackle forward in even turns, spacing the wraps slightly apart. Secure the hackle with thread near the hook eye.
- Finish the Fly: Build a small thread head, whip finish the thread, and trim it. Apply a drop of head cement to secure the thread wraps.
4. Tips for Successful Fly Tying
- Practice Patience: Fly tying requires patience and practice. Start with simple patterns and gradually work your way up to more complex flies.
- Keep Materials Organized: Organize your materials and tools for easy access and a clutter-free workspace.
- Watch Tutorials: Online videos and tutorials can provide valuable insights and techniques.
- Experiment: Don’t be afraid to experiment with different materials and patterns. Fly tying is a creative process.
5. Advanced Techniques and Patterns
Once you’re comfortable with basic patterns like the Woolly Bugger, you can explore more advanced techniques and flies, such as:
- Dry Flies: Imitate adult insects on the water surface.
- Nymphs: Mimic immature insects underwater.
- Streamers: Represent baitfish and other larger prey.
- Terrestrials: Imitate land insects that fall into the water.
6. Conclusion
Tying your own flies is a rewarding and enjoyable part of fly fishing. It allows you to create custom flies tailored to your local fishing conditions and personal preferences. With practice and patience, you’ll improve your skills and expand your repertoire of fly patterns.