Business, Product, Event, Book, Website, YouTube Channel, Social Media, etc.
Creating a Posting is easy in Prepping Communities. Use this Posting to create a posting to promote something like your Business, a Product, an Event, a Book, a Website, a YouTube Channel, your Social Media link(s), or anything else.
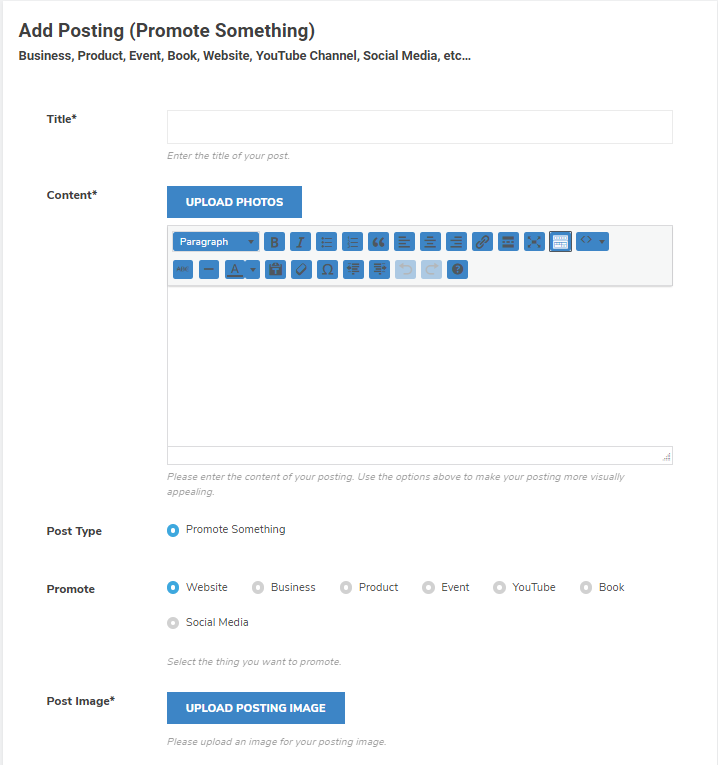
To create a Promote Something Posting, select the Promote Something Posting option from the main menu Postings->Add New Posting->Promote Something Posting. You will be presented with the following page.


Top of Page / Return to How To
Title: enter the name or title of your Posting. This is a required field.
Content: The content area is the main body of the Posting. Don’t be intimidated by the number of buttons and other options for this area. This area is provided to allow everyone from novice to expert HTML editors to add content to your Posting.
To start, just add some text in the Content Area. That’s all that’s required. When people search for Postings they can find your Posting by entering in text in the Find Posting Search box which finds that text in this Content area. Make sure you add enough content for people to find your Posting by entering in keywords in this area.
For advanced users, use the WYSIWYG (what you see is what you get) to add other media and content formatting make your Posting look more professional.
Posting Type: select the type of thing you want to promote:
- Website: promote your website. Make sure to add in the website address below.
- Business: promote your business. Make sure to add in your contact information such as website, physical address and location, email address, phone number, etc. For business postings, we recommend making your Description fancy using the HTML editor.
- Product: promote a product and provide a link back yo your website or online store.
- Event: promote an event you are holding. Make sure to put the start/end date and times in the posting as well as the location and contact information in the Description box. You can also use the Add Community and Social Event type posting.
- Book: promote a book or article you have written or read. Provide a link on where to purchase or get a copy of the book, article or publication, and make sure you recognize the author and publisher.
- Social Media: promote your social media link. Let people know what platforms to find you on.
Posting Image: every Posting must have a Posting Image. Click on the button to upload an image for your Posting. For best results, use an image that is 300px by 300px. A smaller image loads faster and allows people to see your Content area without first seeing a large image.
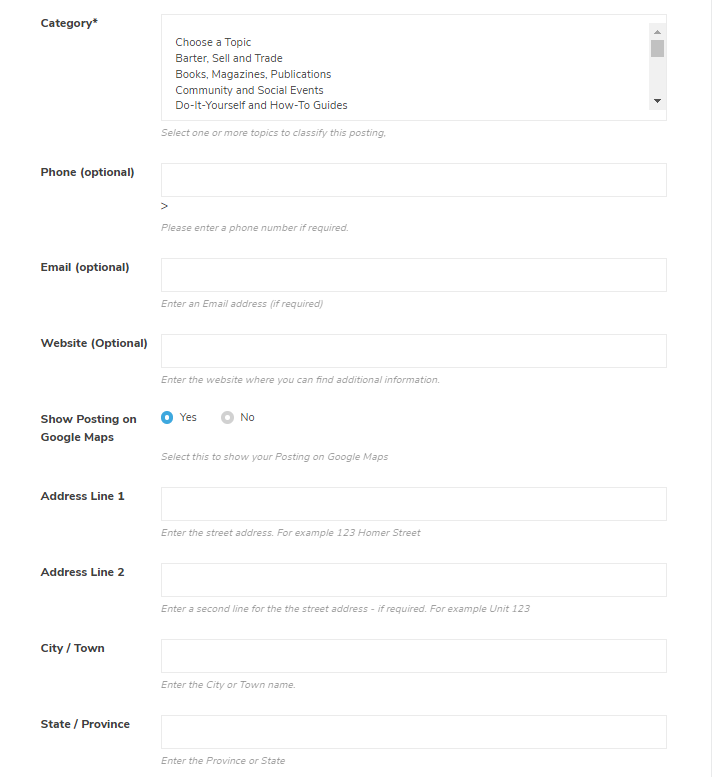
Category: Select a Category for this Posting. When people search for Postings they can find your Posting by entering in text in the Find Posting Search box, or by selecting a Posting Category. You must select one Category.
Phone (optional): This field is optional but if you like, you can enter a phone number so that people can contact you about this Posting. For privacy concerns, remember that people can link any phone numbers in your Postings to your User Profile so be careful on how you use phone numbers in your Postings.
Email (optional): This field is optional but if you like, you can enter an email address where people can contact you. For privacy concerns, remember that people can link any email address in your Postings to your User Profile so be careful on how you use email addresses in your Postings.
Show Posting on Google Maps: You can select whether or not you want this Postings shown on Google Maps. Select Yes or No. If you select the default Yes, enter a location for this posting. For example, the location of your business, event, etc.
Address Line 1: Enter the unit, number and street name for this address. For example, #10, 123 Homer St.
Address Line 2: Enter any additional information for the address if required. Leave empty if none.
City / Town: Enter the name of the City or Town for this event.
State / Province: Enter the name of the State, Province or Prefecture for this event.
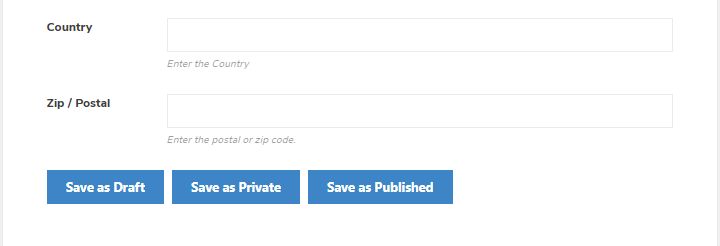
Country: Enter the Country for this event.
Postal / Zip Code: Enter the postal or zip code for this event.
Save as Draft, Save as Private and Save as Public: Click on one of these buttons to complete adding your Posting:
- Save as Draft: Saves the Posting so only you can see it and it does not show up in Find Postings. You can always edit this Posting later and save it as Draft, Private or Public. Use this option to play around and see how you can do some nifty things in your Content area.
- Save as Private. Saves the Posting so only you can see it, although you can use Find Postings to find your Posting. For Private Postings, you will see a ‘Private:’ label before your Posting Title. You can always edit this Posting later and save it as Draft, Private or Public.
- Save as Public: Saves the Posting as Public which means everyone can now see your Posting. You can always edit this Posting later and save it as Draft, Private or Public.
Top of Page / Return to How To
(Other Contact Methods)
Using your email and phone number is often the best way for people to contact you. However, some people try to minimize the ways in which they can be contacted because they know that the more information there is about contacting you, the less privacy you have.
For these people concerned about privacy (and most preppers are), place a message in your Posting to let them know of other ways to contact you. For example, ‘to contact me, click on my profile and send me a text message, or send me a message on private chat’. You can even direct them to other email addresses or websites by placing those links in your Posting.
We will continue to identify other ways to allow Members to privately contact and send information to one another and place these in your Postings.
That’s all there is to adding your own Posting. Make sure to check out adding other types of Postings such as creating a Community & Social Event Posting, a News & Current Event Posting, a Sell, Barter or Trade Posting (like a classified ad), and an Alert or Warning Posting (like shortages of food, prescriptions).
Top of Page / Return to How To
